Attaching the door frame to the wall is an important task. Its reliable performance should not be neglected. It should be done as well and efficiently as possible.
Please note that if you install the door correctly, you will forget about many problems. It will open and close freely. The effect will last not for a couple of months, but for several years.
The most important thing is the correct adjustment of the gaps that are located between the door frame and the leaf itself. They should be the same both on top and on the side.
You may say: “What’s the big deal if the box bends a couple of millimeters? It will be completely unnoticeable!” Yes, we agree with you. The appearance will not deteriorate. But after a while the door will stop closing. And if he doesn’t stop, then it will be very difficult to do so. That is why fastenings must be made at the highest level.
Neglecting our advice means subsequently changing the entire unit. And this is both troublesome and expensive. And in general – it’s not necessary.
Why jambs bend: all the reasons
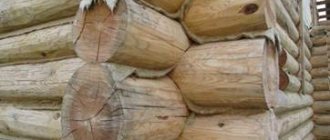
You know that door frames are made of wood. And, as you know, wood perfectly absorbs moisture. Of course, the outside of the jambs is varnished. And this, in theory, should protect the material from water. But the fact is that the varnish perfectly allows moisture to pass through.
The result is the following diagram. By absorbing moisture, the tree increases in size. And when it gives it away, its size decreases. The process is natural - but unpleasant.
Installation of jambs
Since wood has a non-uniform structure, it both increases and decreases non-uniformly. As a result, the jambs bend.
This is the main, only and main cause of the problem. How to solve it? Yes Easy! The jambs should be properly secured. Then they will remain in their place in any case, even when exposed to external factors.
Required Tools
For self-installation you will need a certain set of tools:
- screwdriver;
- hammer;
- nail puller;
- nails (including furniture nails);
- milling cutter;
- slats;
- chisel;
- level;
- bars;
- polyurethane foam.
In each individual case, this set may change. It all depends on the type of door, size and purpose. For example, to install frames under sliding door systems, only foam is now used.
How to securely fasten a jamb? Tips for everyone
Experts offer a number of tips:
- first step: insert the frame into the opening. It must be made of metal. And then foam it;
- Mechanical fastening of the jamb must be done at five points. If you neglect at least one of them, then the door will subsequently become difficult to close. Or other, not the best consequences will arise;
- if the door is double-leaf, then it should be secured at six points;
- if flexible plates are inserted into the opening, they should grip the wall.
How to install an interior door with your own hands?
If you know how to use the tool, you can install the doors yourself. It is important to initially take all accurate measurements to avoid distortions. In general terms, the procedure for installing an interior door consists of the following processes:
- If the frame is sold disassembled, it will have to be assembled. This work increases the installation time of the interior door and also complicates the process.
- All elements of the door block are equipped with fittings: handles, locks, latches. A system consisting of rollers and guide rails is installed on the sliding sash. When installing a swing door, the door leaf is secured to the door with hinges.
- After assembling the structure, the installation of doors in the apartment begins with the installation of the frame. In the opening, the frame is fixed with anchors or hangers, and the gaps are filled with foam.
- The sash is hung on the installed canopy, adjustments are made, and trims with extensions are installed.
To perform the correct installation of an interior door with your own hands, even before purchasing the door block, accurately measure the opening. The dimensions of the frame must be smaller than the passage, otherwise it will have to be expanded. It is optimal to maintain gaps when installing an interior door between the door and the wall - from 10 to 40 mm.
Platbands are required, but extensions are needed if the depth of the opening exceeds the size of the frame. Protruding sections of the wall are hidden under decorative strips. Step-by-step instructions will help you better understand the installation process.
Box assembly
The installation of an interior door begins by unpacking the purchased unit and inspecting all components. The door frame can be sold assembled or disassembled into individual elements with mounting grooves.
If you purchased a boat with ready-made fasteners, you just need to assemble it. The frame is sold from elements cut to size. There can be three of them: a false and hinged stand, as well as a lintel top bar. If a threshold is provided, then a fourth element is included.
To assemble the frame, plugs are knocked out from the ends of the racks along with connecting pins. The edges of the vertical and horizontal frame elements are joined so that the mounting holes coincide. The connecting pins are driven in with a hammer, and the holes are closed with plugs.
When knocking out the plugs, the blows are applied through wooden pads to prevent the destruction of the decorative coating.
It is much more difficult to assemble a box sold in the form of blanks made from figured veneered timber. You will need woodworking tools, as well as basic knowledge of carpentry. Assembling the boat consists of the following steps:
- First, measure the sash. The length of the frame elements is calculated so that a gap of 3 mm is formed between the inside of the pan and the canvas along the entire perimeter. If it is intended to install a sealing rubber, the size of the gap is calculated taking into account its thickness.
- The blanks are marked, then sawed with a wood hacksaw with fine teeth at an angle of 45 or 90 degrees. Direct docking is easier. To properly saw off a corner, the workpiece is placed in a miter box. Connect the prepared elements of the box with long self-tapping screws, having previously drilled holes.
- It is easier for an inexperienced person to install doors without a threshold, since only three elements will have to be connected. The shape of the box is made in the form of the letter “P”. The edges of the upper lintel are placed on the ends of the racks. Each joint is secured with two self-tapping screws.
- The sash is placed in the finished frame. Measure the gaps between the door and frame on three sides, keeping to the required 3 mm. The racks below will rest on the floor. The length is calculated so that there is a gap of 8–15 mm between the floor covering and the lower end of the sash.
- To install the threshold of an interior door, the frame is assembled from four elements. The lower jumper is inserted between the posts and then secured with self-tapping screws. The gap between the threshold and the end of the sash is maintained at 3 mm.
After the frame is made, the door leaf is laid. Having retreated 25 cm from above and below, on the hinge stand, as well as the end of the sash, mark the installation locations for the hinges. To prevent the fastening plates from protruding, recesses are selected in the wood using a chisel or milling cutter.
Two ways to install the box
The open method involves fixing the interior door frame with anchors. The frame is inserted into the opening. Displayed vertically and horizontally. All measurements are carried out with a level and a plumb line. Maintaining a gap of 10 to 40 mm, wooden wedges are driven between the frame and the walls. By knocking or loosening the spacers, the frame is perfectly level.
From the inside of the box, through holes with countersunk recesses are drilled in increments of 50–60 cm. Holes are made in the wall using a concrete drill. The anchors are screwed in so that the head is hidden inside the secret recess. After a level check, the gap between the wall and the frame is filled with foam. Secret holes are puttied and then painted over.
The second closed method of mounting the box involves the use of hangers used in the manufacture of a frame for drywall, or a special mounting system. The metal strip is screwed with self-tapping screws to the underside of the frame. The box is inserted into the interior opening, wedged with wooden wedges, the hanging petals are folded onto the wall, secured with self-tapping screws and plastic dowels.
Installation of additional equipment
When installing a door block in a deep interior opening, the frame is not able to cover the entire wall. If the width of the box is not enough, then add-ons are used. Decorative strips are installed on the longitudinal groove of the frame, having previously lubricated the lock with glue. If the door frame does not provide a lock for the extensions, the planks are fixed through secret holes with self-tapping screws. The optimal fastening pitch is 60 cm.
Installation of door leaf
Before installing the door, the door leaf is equipped with fittings. There are different types and colors of canopies available in the market. The place for their fastening is determined before installing the box. For interior doors, it is popular to install butterfly awnings that do not require insertion.
Errors that prevent you from performing high-quality fastening
There are errors that lead to poor fastening. Take them into account and try not to do:
- You cannot attach the block only to polyurethane foam because it is unreliable. Foam is an elastic substance and cannot prevent bending;
- foam itself can be a problem. This may cause bending. Everything is very simple - if it lies unevenly somewhere, this provides a bend.
Even professional installers often attach blocks to three points, and not to five, as we advise. This is bad because then the entire lower part of the jamb will be loose, which is why the fasteners bend. So listen to us and don't make mistakes.
Double doors often lack fastenings between the hinges. This is a mistake that should not be made. Be sure to add another fastener between the loops.
The flexible plate must be fixed to two walls. If it is attached only on one side, nothing good will come of it. There is no reliability with such a door. Not only will the jamb bend, it can also turn like a screw.
Preparation for installation
If you are replacing an old door with a new one, you need to remove the trim and carefully dismantle it using a nail puller, after sawing the frame and pressing it away from the opening. A firmly seated old fastener for a door frame can be cut down with a grinder.
Then it is necessary to examine the slopes for their strength, and the adjacent walls for verticality and evenness. Inconsistency with the level and curvature of the walls will lead to the fact that visually the door will appear crooked, and the platbands will not adhere to the plane of the walls.
Therefore, all defects should be corrected at this stage using plaster or cladding on the frame.
In addition, even before starting installation, you should make sure that the door leaf will fit into the opening not only in width, but also in length. The instructions say that there should be a gap of about 1 cm wide between it and the floor. Keep this in mind if the floors have not yet been leveled or the flooring has not been laid.
Note. The opening should be slightly wider than the outer dimensions of the box. If this is not the case in your case, you will have to expand it or choose a different door model.
If the opening is too wide for the selected door, it will have to be reduced by bricking it or building a plasterboard box into it. It is not recommended to leave a large gap and fill it with foam. This will weaken the reliability of the fixation and make it problematic to attach the plinth to the door frame.
Four main mounting methods
We have already described the methods of fastening the door frame above. Now let's select them as expected:
- on polyurethane foam. You shouldn’t do this - in the end, the door may simply fall out of the opening;
- at three points. The most common technique. This is a fast and easy method that is relatively reliable. Suitable for laminated doors and for those passages where there is not much traffic;
- at six points. Even GOST recommends this technique. It is considered optimal. The only negative is the plugs because they can ruin the appearance of the door;
- using plates. Ideal for expensive doors that you don’t want to spoil with plugs. The plates are attached from the back.
Now let's look at mounting options at six points and using plates in more detail.
Bottom line
High-quality materials and tools allow you to ensure the reliability of the door frame for many years. Do-it-yourself installation is a completely feasible undertaking if you strictly follow the rules.
Did you manage to solve your problem using the recommendations from the article?
Yes!
46.81%
No. More answers required. I'll ask in the comments now.
37.33%
Partially. There are still questions. I'll write in the comments now.
15.86%
Voted: 643
Traditional way
The algorithm of actions is as follows:
- The first step is to calculate the size. Gap dimensions: top and sides 3 mm, bottom 1 cm;
- joints should be cut using a miter saw at 45 degrees;
- then the timber that was sawed down must be tightened with self-tapping screws.
On one side you need to insert one self-tapping screw, and on the other - two; Classic door installation method - We mount the box exactly to the wall and vertically;
- The box is attached to self-tapping screws, holding three pieces. You cannot spoil the appearance of the door this way;
- you need to check with a level so that the box is installed level;
- then the canvas should be installed. It is important that it does not open or close on its own;
- Next, the gap above and below the door is checked and adjusted if necessary - either tighten the screws or loosen them;
- vertical clearances are also checked4
- The liners are inserted, and then foaming is done. Inserts are required to ensure that the gaps do not decrease as the foam dries;
- You need to spray the entire block with water. Then fill the gaps with foam. It will dry in about forty minutes. Use a knife to remove excess;
- Here the door is ready! The main thing is to do it reliably and with your own hands.
Features of installing a box with a threshold
There is a significant difference between installing framed interior doors for bathrooms: here frames must be installed together with thresholds. This type of box is different in that errors made during assembly cannot be eliminated during installation, so before installing the box with the threshold, be sure to check that the diagonal dimensions match. The installation of this box follows the same principle and procedure as described above. The only clarification: you will have to fix the threshold. It is on the threshold of the box that there will be constant pressure both from the box and from the residents of the house. It can be secured to the floor using self-tapping screws and dowels, and the attachment point can be hidden using a plug.
Installation according to GOST: accessible method and important recommendations
We will not argue about how to properly attach the blocks. There are 4 ways to do this, and everyone has the right to choose what they like best. We will just tell you how to work using the most proven techniques. We have already outlined one in detail above.
Now let's talk about something else. So, instructions:
- take measurements of the canvas - that is, measure its size both in width and length;
- Please note that you cannot blindly trust the dimensions indicated in the documents, because there are often differences between what is stated and what actually is. Small, only two or three millimeters. But it plays a significant role and cannot be ignored;
Door frame installation - the vertical bar should be made wider, exactly 13 mm. But the horizontal one is 6 mm;
- Why do you need to make the slats wider? In order for the gaps to ultimately be 3 mm on the sides and one centimeter at the bottom;
- Next you need a feather drill. Using it, holes are made at three points symmetrically to each other. The diameter should be 12 mm;
- from above you need to drill above the loop, below - below the loop;
- the box should be filed down;
- Next you need to assemble the box;
Now we'll give you a little advice. If you need to lay the floor covering later, place a pad underneath the jamb that will be equal in thickness to the floor covering. Afterwards you just need to remove the gasket and lay down the flooring. And that's it - no problems.
- the next step is to insert the box into the opening. Be sure to use the level! We secure it with good self-tapping screws;
- We hang the canvas in place. Checking the gaps. Next you need to adjust the gaps. We have already written about this above, in a different way. This is done by tightening the screws or, conversely, loosening them;
- then the second rack is attached. There is no need to install spacers here, which means there is no need to wait for the foam to dry. The door in this case is ready for use immediately after the foam is applied;
- We install plastic plugs. They will cover the fastenings;
- The last step is to foam the entire box.
That's all! The work is done. Judging by people's reviews, this method is really good, and GOST was not mistaken.
The main signs of a well-installed jamb:
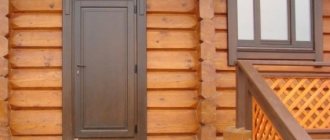
Door frame in place
- the lock, fences and other fittings must be carefully and accurately inserted into the canvas. The main thing is that nothing is skewed;
- All elements of the door frame must be carefully joined together. You can do the docking yourself, it’s not difficult;
- The loop jamb should be made vertical. It is very important! Then the door, no matter how it is opened, will not go down;
- The gaps should be the same everywhere, from top to bottom. For a single door, the gaps on the handle side should be slightly smaller than the gaps on the hinge side;
- Great attention should be paid to the doorway of the canvas, because it must be precisely and precisely adjusted. When this is done, then with the door closed, not a single gap or gap will be visible on the side of the door handle, regardless of whether there is a seal on that side of the jamb or not.
Types of door frames
In order to correctly install the door frame in the wall opening, it is first recommended to study the design of the product.
The frame is a load-bearing element of the door structure, which takes on the load of the door leaf. It consists of one horizontal and two vertical strips connected to each other. The box is fastened directly to the walls of the entrance or interior opening.
The load-bearing element of the door forms a flat portal and also ensures reliable fastening of the door itself. On one side of the box frame there are hinges on which the canvas is hung, on the other side there is a hole for the locking mechanism and a strike plate is attached.
The position of the door primarily depends on the correct installation of the load-bearing component (frame). Therefore, this particular stage of work is a priority. Even a slight misalignment will cause the door to close poorly, get scuffed and wear out quickly. It is also important to pay special attention to the strength of the frame, taking into account the weight of the material from which the canvas is made.
Door frames offered on the market are classified according to different indicators. One of them is the technology of assembling the structure: straight, diagonal or tongue-and-groove. Installation of an interior door frame into a doorway is carried out only after preliminary assembly of the structure.
In the first case, the elements of the door frame are connected to each other perpendicularly. In the second, the edges of the planks are cut at 45 degrees. In both cases, screws are used to connect them. The most reliable way to connect a structure is a tenon into a groove, which is cut directly into the plank.
Boxes can also be divided into different types based on the material used. For their production, steel, wood, plastic and MDF panels are used. Today, metal structures are most often installed at the entrance to apartments and private houses. They are the most durable, reliable and durable. Wooden doors are installed in interior openings, and plastic doors are installed on balconies.
The door catches the frame: how to fix the problem?
If, after installation, the door leaf rubs against the frame, the door closes with difficulty or does not close tightly, it is necessary to find out the reason.
Led the box
In such a situation, the first thing to check is the correct installation and reliability of the door hinges. If they are not the reason, it means that the box was deformed as a result of swelling of the construction foam due to significant temperature changes.
To eliminate the resulting defect, the door frame must be drilled through and connected to the concrete wall using long screws or anchors. The holes are then decorated with plugs.