- home
- Insulation
- LOGICPIR
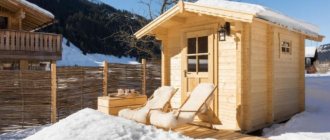
- Bath
Buy in the online store →
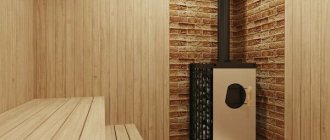
LOGICPIR Bath - foil polyurethane insulation for saunas, steam rooms, baths. The material is 2/3 more efficient than analogues, provides rapid heating of rooms, and reliably protects against heat loss. Hard, has a cellular structure. Easy to install, small thickness saves space in sauna and steam rooms.
Advantages
Thickness - 30-50 mm. This saves space during internal insulation.
Fireproof. Upon contact with fire, the outer layer chars, forming a carbon matrix. It prevents the spread of flame.
Thermal conductivity - 0.22 W/m°K. The minimum indicator among materials of this class. Thermal insulation properties are further improved by a foil layer, which reflects and does not transmit heat.
Economical. The overall cost of the work is reduced - the installation of a vapor barrier is not required due to the foil layer.
Made from rigid polyurethane , an environmentally friendly material. Does not give off any foreign odor, does not emit harmful substances at any temperature.
Does not get wet, does not absorb moisture, does not rot. Fungus, mold, etc. do not form in the thermal insulation layer and on its surface.
Service life - 50 years , during which the material retains its properties.
Easy installation due to the high compressive strength of the material. The risk of accidental damage is minimal.
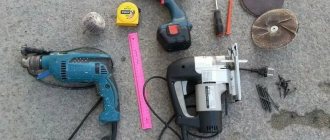
Required materials and tools
Let's start with the choice of thermal insulation. I will not now list exotic methods of insulation, which include sprayed polyurethane foam or ecowool, as well as old-fashioned methods - sawdust, dry leaves, and so on.
The most important thing is to choose insulation.
There are two main options to choose from - expanded polystyrene and mineral wool. Since the first material disrupts air infiltration and, when heated strongly, releases substances hazardous to humans, I will not recommend it for work. Therefore, only mineral wool remains.
I’ll tell you a secret, this is the material I really like to use for sauna insulation. And all because it has many advantages.
| Characteristic | Description |
| Low thermal conductivity | For effective insulation of walls, a layer of wool 50 mm thick is enough, but I would recommend laying thermal insulation 100 mm thick on the ceiling and floor. |
| High vapor permeability | The material does not prevent air infiltration through the walls due to its open structure. |
| Hydrophobicity | The insulation fibers do not absorb water, liquid does not linger inside the heat-insulating layer thanks to the hydrophobic resins used to glue the material. |
| Fire safety | Basalt mats belong to the NG category, so they not only do not burn, but also serve as a barrier to the spread of fire. |
As a material, I personally chose TechnoNIKOL Rocklight basalt mats, 50 mm thick, dimensions 1200 by 600 mm. They are perfect for solving the tasks at hand. The price of this material is 590 rubles per package of 0.432 cubic meters or 68 rubles per square meter.
TechnoNikol Rocklight is an excellent insulation for baths and saunas.
But of course, buying insulation will not end with a trip to the store. You also need to stock up on other materials:
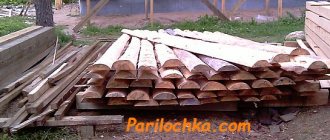
- Wooden blocks with a section of 50 by 50 mm. They will be used to make lathing for installing mineral mats on the walls.
- Wooden blocks with a section of 30 by 50 mm. They are needed for floor insulation. These will be the supporting elements on which I will fasten the boards from below before installing the insulating material on them. I will also use them as counter rails on top of the heat reflective foil.
- Rough boards. Necessary for thermal insulation of the floor (see point above).
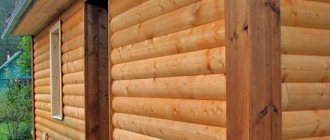
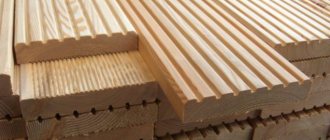
- Wooden eurolining. This will be a finishing material for decorative wall finishing in the sauna. It is necessary to take hardwood paneling, since pine releases a large amount of resin when heated.
- Galvanized perforated U-shaped hangers. They are usually used to install galvanized profiles, but for me they will hold wooden blocks. Their advantage is that they make it easy and simple to level the walls if they deviate from the vertical.
- Aluminium foil. If your bathhouse is made using frame technology or brick, the foil can be replaced with penofol, which will serve as additional insulation.
- Metallized adhesive tape. It seals the joints between adjacent sheets of aluminum foil.
The required part is aluminum foil for the heat-reflecting layer.
Now about the tools. You will need:
- screwdriver;
- construction stapler with staples;
- stationery knife;
- building level;
- tape measure and other measuring devices;
- brush.
Installation procedure
Preparing the base. The surface of the wall, floor or ceiling is cleared of debris and leveled. The cracks are sealed. The surface of the base must not have any defects. It needs to be leveled as much as possible. The absence of irregularities is checked with a 2 m long rack; depressions larger than 5 mm are removed.
Fastening thermal insulation. Use temporary fasteners to install the slabs. Place them with offset end joints (staggered). After removing the temporary fasteners, the remaining holes are filled with construction foam and sealed with tape. Next, the slabs are attached to the wall through wooden slats using self-tapping screws or dowels. The step between fasteners is no more than 40 cm.
Vapor-proof layer. The insulation has a multi-layer structure, the top layer is formed by foil and is vapor-proof. To create a sealed vapor barrier layer, the joints of the slabs formed during installation are additionally sealed with aluminum tape. This provides protection from getting wet, humidified by steam, and condensation.
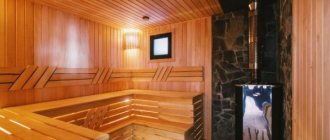
Finishing. The previously fixed slats are used as sheathing. The lining is attached to it with metal finishing nails or clamps (it is recommended to use hardwood).
Insulation technology
Insulation inside a sauna involves three stages of work or, as I said, lines of defense, which are reflected in the diagram.
Sauna insulation scheme.
I'll tell you about each of them in more detail.
Line 1 - Thermal insulation of walls
Let's start with the walls. The diagram of the insulating pie for them is shown in the figure below.
Warming pie diagram.
The working technology is as follows:
- I clean the surface of the walls from dust and sawdust. To do this, I take a regular vacuum cleaner (although I also have an industrial Karcher in my arsenal) and, using its brush, suck out all the debris from all the cracks between the beams. Otherwise, small particles of wood can become a source of mold development in the ceiling insulating layer.
The walls must be as clean as possible before insulation.
- I remove protruding parts of fasteners (screws, nails, wire) from the wall. These sharp parts can damage the waterproofing membrane, which prevents the insulation layer from becoming wet as a result of moisture penetrating from above.
- I treat the surface with an antiseptic. It is necessary to take a composition intended for use in residential premises, which during operation does not release hazardous chemical compounds into the air. The walls are treated with a brush in two layers with intermediate drying for three to four hours. If the timber has undergone pre-treatment, then it is not necessary to additionally coat the surface of the walls with an antiseptic.
The walls must be primed.
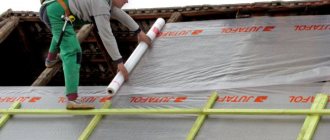
- I am installing a waterproofing membrane. Some people replace it with thick plastic film, but I still recommend buying special material (for example, Strotex or Juta brands), which protect against water but do not prevent water vapor from escaping from the thermal insulation layer. The installation diagram is as follows:
- The first sheet of membrane is laid, after which it is secured to wooden beams using staples and a construction stapler.
- The second and subsequent sheets of the membrane are laid so that the joints of the material overlap and overlap each other at a distance of at least 10 cm.
- The seams are sealed with a waterproof membrane. To do this, use adhesive tape pasted on top of the joint.
Superdiffuse membranes for waterproofing.
- I fasten the sheathing bars. The work is carried out according to the following scheme:
- I attach U-shaped brackets to the wall at a distance of 50 cm from each other vertically, which will hold the wooden beams of the frame. The frame can be fixed not only vertically, but also horizontally. This fact does not affect the effectiveness of insulation in any way.
- I treat wooden parts with antiseptic and fire retardant. These substances will protect the wood from ignition in a fire and prevent the appearance of mold, mildew and other unpleasant microorganisms in the insulating layer. After processing, the wooden blocks must dry completely, which can take up to a day.
- I install the sheathing parts on the brackets. For this purpose, self-tapping screws are used, which are screwed into the side surfaces of wooden parts. In this case, you need to ensure that they are all installed strictly vertically and at the same level. Otherwise, problems may arise during the installation of the finishing lining.
Installation of beams on U-shaped brackets.
- The distance between the beams should be 58-59 cm so that the TechnoNIKOL Rocklight insulation slabs, the width of which, as you know, reaches 60 cm, stand apart and do not fall out during operation.
Distance between bars.
- After installation is completed, you need to carefully check again that the sheathing bars are installed correctly. This is why U-shaped brackets are needed to easily align the enclosing walls that are slightly inclined in one direction or another.
Checking the correct installation of the frame.
- I install the thermal insulation layer into a pre-installed sheathing. For this, as I already said, I took material from the TechnoNikol company. If you clearly follow all the above tips, then no problems will arise. The work flow is as follows:
Entire slabs of mineral wool insulation are inserted into the sheathing. Since the distance between the parts is 58 cm, they are installed by surprise and do not require the use of any other fasteners.
Installation of thermal insulation
- To insulate other areas (where the slab does not fit entirely), you need to use pre-cut mineral wool. To do this, you need to measure the distance between adjacent frame parts, increase the resulting value by 2 cm, mark and cut the slabs using a sharp utility knife.
Cutting mineral wool slabs.
- I am installing a vapor barrier layer. Instead of a conventional polymer membrane, polished aluminum foil will be used here, which is capable of not only retaining water vapor, but also reflecting infrared rays into the room. The work is done as follows:
- The first sheet of vapor barrier is laid. The roll is positioned horizontally (since my frame is vertical). Work begins from the bottom of the room. The foil is secured to the frame using a construction stapler and staples. You need to act carefully so that there are no gaps in the continuous reflective layer through which moisture can get to the insulation layer.
Installation of a foil reflective layer.
- The second and subsequent sheets of foil are laid so that an overlap of 10 cm is formed in the area of the joint. This ensures the tightness and homogeneity of the heat-reflecting layer.
Installation of the second layer of foil with an overlap of 10 cm.
- The joints between the sheets of foil must be sealed with a special metallized adhesive tape. To do this, the protective layer of paper is removed from one side of the tape, after which it is glued to the joint of the foil. Perform the operation carefully so as not to damage the heat-reflecting layer.
Sealing the joint with aluminum tape.
- I install counter slats to secure the finish. Their role is played by wooden blocks that are installed on top of a reflective layer of foil. They are necessary in order to leave a ventilation gap between the vapor barrier and the decorative material. Through this gap, condensed moisture will evaporate without penetrating into the insulating layer.
Installation of counter rails.
- Slats for counter-cladding must be treated with an antiseptic to prevent rotting.
- The slats are fixed to the frame through a layer of metallized foil using self-tapping screws so that the caps of the latter do not rise above the surface of the wooden parts.
- The distance between the slats should be from 40 to 60 cm so that the decorative cladding does not bend under load.
Recommended spacing between slats.
- I am installing the finishing cladding from linden euro lining. To secure it, I use clamps, which allow me to compensate for the expansion of the material when heated.
Securing the finish for the walls.
Line 2 - Ceiling insulation
I will make the insulation of the ceiling from expanded clay. At the beginning of the work, my ceiling was simply wooden logs laid across the room - without upper and lower cladding. Therefore, I will describe the insulation technology, starting from this stage:
- I lined the ceiling from the inside with sheets of moisture-resistant FSF birch plywood 10 mm thick. The scheme of work is as follows:
- The plywood is secured using self-tapping screws, which must be placed at a distance of 10 cm from each other to ensure the strongest possible base for adding expanded clay. Although this material is lightweight, it doesn’t hurt to play it safe.
- When fastening plywood, the seams must be spaced apart and a distance of 2-3 mm must be made between them, due to which the thermal expansion of the plywood is compensated.
- To avoid warping of the sheathing, it is also better to make a small gap between the walls and the plywood.
The ceiling is covered with plywood.
- I attached a layer of heat-reflecting foil to the plywood. You already know the fastening technology from the previous section, so I won’t repeat it. The main thing is to carefully seal all the seams using aluminum adhesive tape.
Installing penofol on plywood.
- I installed counter slats on the foil, and a wooden lining on them. Proceed in the same way as in the case of wall insulation. There are no differences here.
- I cleaned the surface of the plywood from dust, debris and shavings from the attic side. Work now continues in the attic. It is necessary to clean the logs and plywood from foreign objects and sawdust, which can cause mold to appear in the expanded clay insulating layer.
- I poured expanded clay into the space between the joists onto a plywood backing. The technology is as simple as possible, but I’ll draw your attention to a few small nuances:
- The insulation will work effectively if its layer is at least 10 cm. I had logs of the same height, so I poured the granules flush with the top cut of the floor beams.
- If your joists are higher, then fill the expanded clay evenly (even if the layer is thicker). Otherwise, the procedure for installing the waterproofing film will become more complicated.
- The size of expanded clay granules does not matter. The more air there is in the thermal insulation layer, the lower the thermal conductivity coefficient it will have.
- For work, you need to use well-dried material, since the moisture inside can have a very detrimental effect on the integrity and service life of wooden structures, as well as reduce the efficiency of the heat-insulating layer.
Expanded clay is poured into the space between the joists.
- Fixed a waterproofing, vapor-permeable membrane. I recommend purchasing a polymer material with a permeability of at least 1300 mg per square meter. In this case, the moisture accumulated inside the expanded clay will come out, and the liquid will not get into the insulation layer. The fastening scheme is as follows:
- If expanded clay is poured to the top edge of the beams, then you just need to secure the film on top of the wooden parts using a stapler and staples.
- If the expanded clay does not reach the top, then the film must be lowered down and secured to the side surfaces of the beams using bars. The essence of this operation is to ensure that there is no free space between the insulation and the film, otherwise the membrane will make noise during operation.
- The joints, as in the cases described above, are overlapped and additionally sealed with adhesive tape.
- Installed counter grille. It is only necessary when the film is attached to the top of the joists. The counter-lattice is made of bars, which are attached to wooden parts with self-tapping screws.
- I completed the finishing cladding of the interfloor ceiling with tongue-and-groove boards. I chose this material because in the future it is planned to arrange a rest room in the attic of the bathhouse. If you do not plan to convert the under-roof space into a living space, you can also replace the boards with plywood.
Attic with installed flooring.
Line 3 - Floor insulation
Floor insulation is similar to ceiling insulation, with the exception of a few nuances:
- it will not be possible to get under the bottom of the house to secure the covering of the floor joists, there is not so much space there;
- It is necessary to carry out the highest quality waterproofing of the floor, since its surface often experiences direct contact with water (especially in the shower).
Since I didn’t have enough expanded clay, I will use mineral wool to insulate the floor. To make it easier for you to follow the presentation, I will give a schematic image of an insulating cake for the floor in a sauna:
Floor insulation scheme.
The sequence of actions that I followed:
- I attached cranial bars to the lower part of the side surfaces of the floor joists (number 3 in the diagram). To secure them, I used self-tapping screws plus, for strength, galvanized corners used in the construction of frame houses.
- I fixed a vapor-permeable membrane that prevents the insulation from being moistened by moisture penetrating from below (from under the floor). To do this, the film is fixed on the bars, after which it is wrapped around the floor joists, forming a kind of trough into which the insulation will be laid.
- I installed subfloor boards (number 5 in the diagram). They are placed directly on the film so that the ends rest on the cranial bars. This will be the supporting surface on which the thermal insulation material is then laid.
The photo shows laid subfloor boards.
- I placed mineral wool in the gaps between the joists. Here you will figure it out for yourself, since I paid a lot of attention to this aspect in the previous sections.
Laying mineral wool in the spaces between the joists.
- I laid a waterproofing film on top to protect the insulating layer from getting wet.
- A tongue and groove board floor was laid on top.
In principle, in most cases this is enough. But if the floor is insulated in the shower or you like to splash a lot of water in the steam room, I recommend making another waterproofing layer of polymer mastic on top of the boards, which is tiled. And, if necessary, install wooden drainage ladders on top.
Storage
Packages with TECHNONICOL LOGICPIR Bath insulation are stored horizontally. They can be stacked. The material is placed in a dry room at a distance of at least 1 m from heat sources.
The material can be stored outdoors in its original packaging for 3 months. The packages can be placed under a canopy so that it is not exposed to sunlight or precipitation.
If these requirements are met, the guaranteed shelf life for TECHNONICOL LOGICPIR Banya thermal insulation is 2 years (from the date of production). If this period has expired, the safety of its basic properties is monitored before installation of the material.
The thickness of the material is selected according to the design of the walls (maximum thickness of the slabs is 50 mm).
Disadvantages of insulation
The first drawback noted by Rocklight users is the absorption of moisture by the material that gets onto the surface. Therefore, additional protection from climatic precipitation is needed. To do this, you need to use a waterproofing and vapor barrier product.
Use of vapor barrier and waterproofing
When installing the vapor barrier film, do not mix up the sides of its installation. The fastening is done with an overlap of 15 centimeters.
Since the structure of the heat insulator consists of basalt fibers, when installed in ventilated facades, it is necessary to use wind protection. Otherwise, the basalt fibers will be blown out. And after a certain period of time, the technical properties of the thermal insulation material will deteriorate. There is no need to install clapboard or similar types of siding as wind protection.
Rocklite is not a completely environmentally friendly material, since it contains resins containing a small amount of phenol. Therefore, this insulation is recommended for use for external thermal insulation of a structure or in places where it will not be subject to heating.
Basalt fibers are not interesting as a “snack” for mice; however, they can create holes in the material, so it is necessary to think about additional protection. Remember also about safety precautions, as dust is released during the thermal insulation process. Irritation of the skin and respiratory tract is a small thing that can happen to a person.
Physical and mechanical characteristics
| Indicator name | Unit | LOGICPIR Wall |
| Compressive strength at 10% strain | MPa | 0,12 |
| Thermal conductivity at 25 °C | W/m*K | 0,021 |
| Water absorption by volume for 28 days | % | No more than 1 |
| Operating temperature | °C | -65/+110 |
PIR boards
1 PC.
PIR boards in the catalog of the official TECHNONICOL online store from the manufacturer: 1 product at a price of 3,480 rubles. To select and buy a product from the assortment of the “PIR slabs” section, use the filters: material, edge shape, type of structure, compressive strength at 10% linear deformation of at least, kPa, temperature conditions of use, flammability, degree, slab thickness, mm. .
The most complete range of TechnoNIKOL materials in one place
Products comply with GOST and international quality standards ISO 9001
100% original products. Warranty for all goods and services
Fast and careful delivery throughout Russia on the day of order or on any day convenient for you
Made a mistake with your choice or have some left over? We will accept the goods and return the money without your visit to the office. According to the terms of return of goods
thickness of the heating pipe in the apartment
We accept and deliver orders 7 days a week
Source
Logistics parameters
| Thickness, mm | 30 | 40 | 50 |
| Length, mm | 1185 | 1185 | 1185 |
| Width, mm | 585 | 585 | 585 |
| Number of slabs in a pack, pcs | 8 | 6 | 5 |
| Area of one slab, m2 | 0,020 | 0,027 | 0,034 |
| Product area in a pack, m2 | 5,55 | 4,16 | 3,47 |
| Product volume in one pack, m3 | 0,17 | 0,17 | 0,17 |
| Weight of one package, kg | 5,6 | 5,67 | 5,95 |
Depending on the design, you can use LOGICPIR Bath slabs in thicknesses of 50 mm.
We have other types of TECHNONICOL LOGIPIR insulation in stock.
Penoplex
Due to its characteristics, extruded polystyrene foam or penoplex as insulation for a bathhouse is a completely suitable material for use. Most often used as thermal insulation for frame and brick buildings. With the help of penoplex, you can insulate the strip foundation under the steam room, as well as perform thermal insulation of the roof, floor and walls.
The properties of the product that allow it to be positively characterized as a thermal insulator for a bath include:
Solutions TECHNONICOL LOGICPIR Bathhouse for construction
TH-WALL Bathhouse PIR
- Base (wall made of blocks, bricks, timber, etc.).
- Ceiling frame.
- PIR insulation.
- Aluminum tape for gluing joints.
- Lathing (made of 20x30 bars).
- Interior finishing (larch lining).
Advantages
- moisture-resistant insulation (not moistened by steam, does not rot, does not absorb moisture);
- safe even at high temperatures;
- durable, easy to install;
- does not spread flame (upon contact with flame, the top layer becomes charred and does not support combustion).
- Pitched roof
- Wall
- Floors
- Bath
- Balcony
- Certificates
- home
- Insulation
- LOGICPIR
- Bath
Scope of use
Thermal insulation of walls
Thermal insulator Rocklight has a wide range of uses. Basalt slabs can be laid on concrete screeds and between joists. The installation technology is to eliminate gaps. A final coating is made on top of the heat insulator. The coating can be absolutely anything (laminate, parquet, etc.).
This insulating material is used for thermal insulation and sound insulation of partitions. The thermal insulator is installed in a frame made of both wood and metal. Sheets of plasterboard are placed on top of the Rocklight, and then the final coating is installed. An additional area of use for this thermal insulation product is ventilated facades.
Rocklight is actively used during the construction of frame houses. The inside of the material is covered with a vapor barrier. This eliminates the possibility of moisture entering from the room. After installing the vapor barrier membrane, the final finishing is done. The wind protection is mounted on the outside of the heat insulator. As a wind barrier, you can install a specially designed film or OSB boards. The choice of wind protection depends on the type of coating. A pitched roof is insulated using a similar method.
Thermal insulation of the house facade
External thermal insulation of a building facade is better than internal. This way you preserve the interior space of the room. The surface of the walls will be protected from sudden temperature changes, which increases the durability of the structure. But it is important to provide an air gap for ventilation after insulation. This is necessary so that the condensate can evaporate freely.
The ease of installation and technical parameters of mineral wool - all this has made this material popular. In addition, the insulating product can withstand fire and high temperatures. Technical characteristics do not get worse even after decades.
Sources
- https://ZnatokTepla.ru/utepliteli/roklajt.html
- https://mr-build.ru/newteplo/roklajt-tehnonikol-tehniceskie-harakteristiki.html
- https://bouw.ru/article/uteplitely-roklayt-harakteristiki
- https://stroy-podskazka.ru/dom/uteplenie/roklajt-ot-kompanii-tehnonikol/
- https://ckfi.store/info/teplozvukoizolyatsionnye-materialy/kharakteristiki-uteplitelya-tekhnonikol-roklayt-/
- https://ZnatokTepla.ru/utepliteli/tehnicheskie-harakteristiki-roklajt-tehnonikol.html
[collapse]