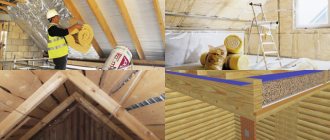
The roof structure is a complex system. It consists of several layers of dissimilar materials, each of which performs its own unique function.
To ensure comprehensive protection of the building from environmental influences, it is necessary to carry out all installation work with high quality, as well as the correct choice of basic and insulating materials. This whole process is briefly called roof insulation.
The standard composition of the roofing cake includes:
- Internal finishing layer;
- Lathing design;
- Vapor barrier material;
- Counter-breach;
- Thermal insulation (does not apply to a cold attic);
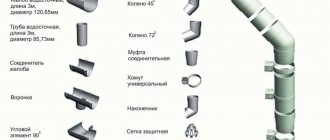
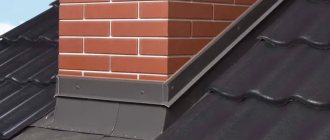
- Waterproofing layer (read about chimney waterproofing here);
- Ventilation shafts or gaps;
- Roofing covering.
Next, we will look in detail at the roof vapor barrier and how to lay a vapor barrier on the roof without the use of special tools.
Vapor barrier functions
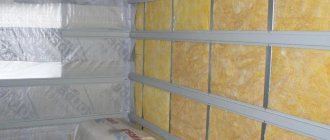
One of the conditions for long-term operation of the roof is a ventilated roofing device. Air gaps in a properly designed roof help regulate the temperature in your home, keeping your home warm in winter and cool in summer. The air rising from living spaces is warm and humid; Once in the under-roof space, it cools down. In this case, water vapor collects in condensate and tends to settle in the roofing pie. Over time, if the roof is unprotected, the insulation becomes damp, and the wood of the rafter frame becomes susceptible to mold.
The solution to this problem is the use of special protective layers in the roofing pie. For normal functioning of the roof, waterproofing is installed on the outside of the insulation (under the roof covering); under the insulation there is a vapor barrier sheet, which has the following functions:
- Insulation protection . Vapor barrier, installed in accordance with the technology, blocks the penetration of condensate into the heat-protective layer. This preserves the performance characteristics of the material and the efficiency of insulation of the building.
Place of vapor barrier film in the roofing pie Source stroyfora.ru
- Protection of the rafter frame . A vapor barrier installed according to the rules will protect wooden rafters from getting wet and rotting.
- Increased service life of the finishing coating . The lower surface of the coating is protected from moisture much worse than the front surface. The vapor barrier film protects the inside from harmful condensation.
Briefly about the main thing
A residential building located in a cold climate is isolated not only from water in its liquid state, but also from steam. If this is not done, then over time the frame of the living space itself may begin to collapse due to the constant ingress of moisture from the inside.
To understand which side to lay the vapor barrier on, you first need to look at its color and tactile sensations when running your hand over it. After the required side has been determined, the work is carried out carefully and slowly. The technology for carrying out the work varies depending on where the film is installed - on the ceiling, floor or facade.
When working, it is important to avoid the most common mistakes. Otherwise, the quality of the material may quickly deteriorate due to the appearance of frost and even ice on it.
Material requirements
The main property of all vapor barrier materials is their ability to resist steam penetration. The lower the vapor permeability, the less water vapor is able to pass through the layer of material, and the better protective properties it has. There are three classes of materials on sale; they differ in two interrelated parameters: resistance to vapor permeability and mechanical strength:
- 1 class . Rigid foil-based materials with the highest vapor permeability resistance.
- 2nd grade . Materials based on polyethylene or polypropylene.
- 3rd grade . Soft materials with low (50-100 times lower than 1st class) performance.
Vapor barrier and vapor diffusion in the roof Source krovlyakrishi.ru
Additional requirements are imposed on film materials that are important for the durability of the roof:
- Lifetime . Installation of a roof vapor barrier with a service life of 10-15 years is impractical for modern roofing structures designed for 20-25 years. After 10-15 years, the vapor barrier layer will no longer cope with its responsibilities, which will begin to affect the condition of the entire roof. Replacing the film in this case is an extremely troublesome (and expensive) task, often associated with disassembling the structure.
- Operating parameters . Materials that can properly perform their functions over a wide temperature range are valued. Most film products are designed for operation in the range from -70 to +100°C.
- Elasticity . A parameter that is important both for ease of installation and during operation, when pressure is exerted on the film by a layer of insulation.
Elasticity is one of the important properties Source iobogrev.ru
Advantages and disadvantages
Today there are a huge number of varieties of vapor barrier membranes and films. Of course, some have more advantages, others less. However, there are advantages inherent in absolutely every type.
For example, all modern films and membranes are known:
- safety and environmental friendliness;
- functionality and practicality;
- resistance to the harmful effects of climatic factors;
- resisting the destructive effects of chemical influences;
- resistance to the harmful effects of reasonable mechanical actions;
- invulnerability to the negative influence of biological factors;
- simple installation.
The disadvantage is the fear of fire, that is, the material burns.
Thus, dear friends, vapor barrier can solve a number of problems associated with the construction of a particular object, regardless of its properties and purpose.
Types of films
The construction market offers rolled vapor barriers, created using several technologies and having a different set of properties and service life. Certified products are supplied with instructions detailing the parameters of the material and its purpose - familiarity with this information will help you make your choice. The roofing films offered on the market can be classified in two ways:
- According to the material . Modern vapor barrier sheets are made of polyethylene or polypropylene.
- By functionality . There are vapor barrier, waterproof and anti-condensation materials. The purpose determines which side the vapor barrier is placed on the roof.
Polyethylene films
A single-layer under-roofing film with a low density, which, however, can provide sufficient tightness and protect the insulation from moisture. The main advantage of this insulating material is its budget cost. The main danger is low quality: manufacturing defects are common on the surface of the thinnest films, and their service life is short.
Reinforced polyethylene film Source donnews.ru
See also: Catalog of companies that specialize in roof repair and design.
Reinforced polyethylene
In terms of vapor permeability, reinforced polyethylene films are comparable to the previous type. The thin fabric is reinforced with a pressed frame made of polymer threads, which increases its strength and durability. The material has a disadvantage - during thermal lamination (gluing layers), the junctions of polyethylene with the reinforcing mesh become thinner, forming microscopic cracks. Western European manufacturers have practically abandoned the production of reinforced polyethylene film, since it is not able to provide stable vapor blocking.
Polypropylene films (vapor barriers)
Reinforced propylene films compare favorably with polyethylene materials by having a longer service life, increased strength and a higher degree of vapor barrier. Polypropylene protection is resistant to ultraviolet radiation and low temperatures, is quite elastic when stretched and does not tear at bends; the combination of qualities makes it possible to install water vapor barrier on the roof in winter.
Anti-condensation films Source info-krovlya.ru
Bag fabrics
The vapor barrier fabric looks like burlap; made from polypropylene threads laminated with polyethylene melt. Vapor barrier is characterized by high mechanical strength, but weak vapor protection, which forces it to be used primarily in the construction of cold roofs.
Which side should the hydro vapor barrier be laid on?
According to all the canons of physics, when the temperature decreases, vapor from the air always condenses, turning into liquid. In construction, this rule is always taken into account when arranging structures operating at the junction of the temperature difference between the room, insulation and the street, the ground. These include the roof, walls, base, and floor. Without high-quality insulation, a large amount of moisture accumulates on surfaces and in the structure of materials. This inevitably leads to deterioration of the properties of the foundations and their gradual destruction.
To avoid the negative consequences of the condensation process, when constructing critical structures, a specialized film is used - hydro-vapor barrier. Which side to put it on correctly is an important question.
Installation of water vapor barrier: which side?
There are several types of films. According to their structure they are divided into:
- Single-layer and double-layer (multi-layer);
- Diffusion;
- Anti-condensation.
The main task of builders is not to make a mistake on which side to lay a particular type of water vapor barrier, depending on the installation location. Incorrect application will lead to the opposite process: subsequent condensation of moisture on the surface of the membrane, as evidenced by the photo of improper arrangement of water vapor barrier.
Which side to lay a single-layer hydro-vapor barrier?
Simple single-layer films are made from polyethylene. Sometimes it is additionally reinforced with a polymer mesh to add strength. This material retains water, but allows steam in, in both directions. Therefore, the choice of installation side does not play a special role here.
It is only worth noting that such products have lost their relevance due to low efficiency and the emergence of membrane films.
Which side should the diffusion hydro-vapor barrier be laid on?
Modern film water vapor barrier for roofing is produced using a woven method from pure, 100% polypropylene. Its structure, if you look closely under a microscope, is a network of thin threads. Their interweaving forms microscopic cells. Their size is not sufficient for the unimpeded passage of water molecules in a vapor state.
High-quality diffusion hydro-vapor barrier for floors or roofs is made in two layers. Its specificity lies in its operation on the principle of a valve: passing steam from the air in only one direction (from an area of high pressure to an area of low). When there is oversaturation of moisture in the air in the room and under the influence of steam pressure (diffusion), water molecules literally seep through the film and excess moisture is removed outside.
Such material is laid when organizing a system of ventilated facades, on top of mineral insulation with the obligatory arrangement of a ventilated gap. This water vapor barrier is suitable for floors and walls.
Diffusion films usually have markings for installation, which are different for each manufacturer. Before installation, you must carefully study the instructions. Often such material is made dark and rough on the back side, lighter and smoother on the outside.
Installation is carried out with the light (water-repellent) smooth side facing away from the room in the following cases:
- for insulation when arranging the under-roof space;
- under insulation when laying the floor on concrete or soil;
- external thermal insulation when installing ventilation facades.
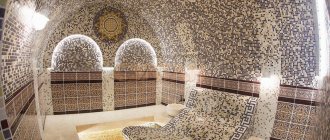
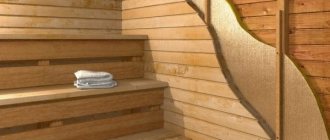
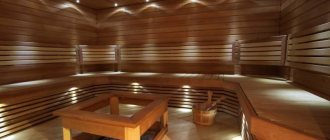
When installing a floor under a screed, protecting walls and ceilings in wet rooms (for example, baths, saunas), the water-repellent side should face the inside of the room:
Which side should the anti-condensation hydro-vapor barrier be laid on?
To give the material improved vapor barrier properties, one side of the diffusion film is coated with a special moisture-absorbing hydrophobic coating, polyester fabric, or an aluminum reflective layer is applied. Such membranes are called anti-condensation and superdiffusion. Due to the absorption of condensate, this hydro-vapor barrier is best suited for cold roofs: pitched type with metal decking. The absorbed moisture prevents the formation of metal corrosion. The additional layer provides better thermal protection.
Antioxidant hydro-vapor barrier is installed in the same way as diffusion barrier: with the water-repellent side facing away from the material that needs to be protected from moisture. Typically, manufacturers apply markings on the outer (water-repellent) side such as: “This side up”, a logo or brand designation.
Subtleties of vapor barrier installation
The main question that arises when installing a vapor barrier for a roof is which side to lay the material on, and in which part of the roofing pie. The location depends on the type of roofing structure being constructed:
- Insulated attic and mansard roof . In this case, it is important to protect the thermal insulation layer from fumes penetrating from the lower rooms. Therefore, the film is spread under the insulation (from the inside), on the rafter structure or rough sheathing. Panels of rolled material are laid horizontally and overlapping, secured with nails or staples.
Ceiling vapor barrier Source pedkolledj.ru
Tips for using Nanoizol FS
Nanoizol FS is a vapor barrier material that is a three-layer membrane.
It has two layers, similar to the layers of nanoisol B and the layer of treated lavsan. It reflects infrared radiation, which provides additional thermal insulation compared to type B.
Here the material is made of polypropylene fabric, repeating the metallized film, the same material as the fabric. By the way, thanks to the material, you can save on heating the room, since its price is quite low. Compared to other insulation materials, it can be used in attic or attic structures.
The material should be installed from the inside of the roof or wall and mounted on part of the supporting frame - beams, racks, profiles. Installation is generally similar to other options.
Vapor barrier Nanoizol is also used when installing laminated and parquet floors with cement, concrete or other base. The main requirement when laying a vapor barrier is that the surface is dry. In general, the vapor barrier is laid according to the schemes described above, depending on the type of insulation, already on a ready-made cement screed. Next, floors are laid on the finished insulation according to the flooring manufacturer’s instructions.
Video description
About diffuse vapor and waterproofing in the following video:
- A two-layer anti-condensation film is spread with the smooth side facing the insulation, and the rough side facing the source of warm, humid air, the living quarters.
- The foil film is laid with a metal layer to the living spaces - this way it can return some of the heat inside, increasing the thermal efficiency of the building.
- Diffusion double-sided membranes provide the roofing pie with the ability to “breathe”. If both surfaces of the membrane are identical, it is laid on either side. If you have chosen a one-sided membrane, it is better to check the data on the front and back surfaces with the manufacturer (in most cases, the membrane is adjacent to the thermal insulation with a rough surface).
Laying a vapor barrier in a roof with steep slopes Source bostonglobe.com
Work process
Floor vapor barrier
Performed directly in the premises on the ground floor. This operation is also carried out for rooms where humidity is significantly increased.
First, you need to carry out waterproofing - this is a set of protective measures against the harmful effects of water. Waterproofing is laid on the cement screed. For floors and walls, a coating material is more suitable - a special moisture-resistant substance that is applied in several layers to structural elements to prevent corrosion or other harmful effects of water.
A layer of insulation is laid behind the waterproofing layer, and it is covered with a one-inch thick board. A vapor barrier layer is laid on top of the board.
When the main material is film (perforated, polyethylene), it is secured with double-sided tape so that it does not sag.
Since a vapor barrier is necessary to prevent condensation from getting on the insulation, how to properly lay the material with the smooth side outward, then it will stop any moisture.
The same should be done with a vapor barrier, which is covered with aluminum on top; the shiny side should be in the room to retain moisture, and the rough side should be applied to the insulation.
The vapor barrier is always overlapped. The distance between the joints should be 15 cm. It is glued together with tape or special tape, and then secured with a stapler to the board that is located under it.
The best way to vapor barrier a floor is to use liquid rubber made from bitumen. How does it work? Liquid rubber is applied on top of the boards. When it dries, it becomes an elastic waterproof film that is very well glued to the floor and does not allow moisture to pass through.
We advise you to study - How to drill concrete, metal, tiles and wood
Vapor barrier of walls
There are two types - external and internal vapor barrier. The process itself is almost completely similar to the previous one.
For internal vapor barrier, a vapor barrier film is attached along the entire perimeter of the wall using a stapler or galvanized nails. The question often arises of how to properly install a vapor barrier. If the contents of the vapor barrier contain foil, then its shiny edge is located inside the room. When using foam propylene material, the rough side is applied to the wall.
The canvases are laid horizontally, starting from the bottom. The joints must overlap, and then, for reliability, they are glued with tape or mounting tape. Galvanized profiles are mounted on top, on which drywall is then laid. There must be ventilation gaps between the drywall and the vapor barrier.
External vapor barrier is a set of measures to protect insulation from the harmful effects of the external environment, which can come from both outside and inside, through damage to the wall covering.
To protect the insulation from the outside, it is necessary to use a wind-moisture-proof, vapor-permeable membrane, strong enough to protect the walls and insulation from wind and moisture, but with the ability to release steam out of the fiber insulation.
This material is laid starting from the bottom, along the outside of the insulation. The rough structure allows steam to pass through, so it should be laid correctly against the insulation, and the smooth, water-repellent side should remain outside.
They are mounted on a wooden frame with an overlap, there should be at least 15 cm between the joints. And then they are secured with a construction stapler. Wooden slats are installed on top of the covering, which carry the outer skin.
Another feature of the water-repellent material is that the lower edge serves to drain the flowing moisture to the basement drain of the building, otherwise the foundation may sag.
Stages of installation of a vapor barrier layer
The installation instructions specified by the manufacturer must be followed; Moreover, the rules allow for the installation of film materials both before and after the installation of the roofing pie. The progress of work on laying vapor barrier is as follows:
- Before installation, you must read the instructions from the manufacturer and determine the side of the material whose function includes contact with steam.
- Select the spreading method , horizontal or vertical. Most manufacturers accept both arrangements; In the instructions you can find out about acceptable options and layout details. The direction of the layout is affected by the slope of the slopes. On a flat roof, the roll is rolled out horizontally, perpendicular to the rafters. On a steep roof, the film is laid along the rafters.
- With any installation method, the material is laid with an overlap , the amount of which is often indicated along the edge of the film. The instructions also indicate other values (which depend on the steepness of the structure).
To the ceiling
As for the vapor barrier of the ceiling, it is overlapped with the vapor barrier of the walls up to 20 cm. The presence of a vapor barrier on the ceiling will allow the finishing material to be preserved for a long time. As a rule, vapor barrier can be installed both from the bottom of the ceiling and from above from the attic. In this case, you will get the following pie:
- Vapor barrier.
- Thermal insulation.
- Vapor barrier.
This work must be done even with concrete ceilings. When there is a temperature difference, the accumulated condensation can, after a while, provoke the appearance of mold and mildew, which is not so easy to fight.
Ceiling vapor barrier
The installation process begins with preparatory work:
- The surface is cleaned of construction debris and old finishing material.
- All existing cracks and imperfections in the base are covered.
- The ceiling is primed and dried.
The vapor barrier process looks like this:
- As mentioned above, the vapor barrier is laid overlapping with the wall one. It is attached to the ceiling with a stapler.
- It’s good if it is possible to treat the vapor barrier joint with slats.
- The joint is first covered with waterproof tape.
- On the ceiling it is enough to overlap up to 10 cm.
- There is no need to stretch the material too much. But you should not allow sagging. Otherwise, condensation will accumulate on the film and the polyethylene may break through.
Video description
About the membrane installation technology in the following video:
- The main condition for installation is that the film is fixed without tension , with a sag of approximately 2 cm. The reserve is created due to the ability of the wooden frame to change its dimensions with the change of seasons (with changes in humidity); otherwise there is a risk of the film tearing.
- For horizontal installation, installation is carried out from above (from the ridge). The strips are laid with a reverse overlap (the lower strip overlaps the upper), for additional protection of the insulation; they are connected with tape and secured to the structure with galvanized nails or a stapler.
- If the thermal insulation layer is not dense, the rolled sheet is fixed using slats , which must be antiseptic.
- Particular attention is paid to junction points (attics, windows, hatches, pipes, ventilation ducts); they are isolated especially carefully.
Fixing the film Source pro-uteplenie.ru
Recommendations
- Surfaces must be properly prepared before vapor barrier.
- If work is carried out in the cold season, the mastic is diluted with antifreeze.
- The ventilation gap width is at least 6 centimeters, which provides protection against condensation. Wall cladding should not come into contact with the film.
- When insulating the roof, the creation of a gap is ensured by sheathing, which is mounted from racks or horizontal profiles.
- The joints of the vapor barrier sheets must be glued. This is done using self-adhesive tapes. Scotch tape, especially narrow tape, is not recommended for this work.
- Installation can be done using a stapler or nails with a wide head. But experienced builders recommend using counterbattens for these purposes.
Insulating a flat roof from the inside
There are times when it is necessary to insulate the roof from the inside. The most acceptable way of internal insulation of a flat roof is from the ceiling.
The main thing is to choose a fire-resistant material. The thermal insulation process is not difficult, but the placement of lighting fixtures will need to be redesigned.
What material to choose for insulating a flat roof from the inside
For this method of thermal insulation, fire-resistant polystyrene foam boards such as PSB-S-25 or PSB-S-35, with a thickness of 25 mm, are suitable. They meet all fire safety requirements.
Stages of work
First, strips made of soft wood must be screwed to the ceiling every 40 cm. The first is attached along one of the walls, which is perpendicular to the beams of the supporting structure. The second is mounted along the opposite wall. After this, glue the expanded polystyrene slab flush to the first plank, using special glue or mastic. Then the next plank is screwed in the same way and the second heat-insulating board is glued, etc. The laying of planks and heat-insulating boards is alternated. When the insulation layer is completely laid out, a plastic film is attached to the entire ceiling area. Decorative panels are then nailed to the slats. Galvanized nails are suitable for fastening.
Read our article: Roof insulation from the inside
Roof insulation
In addition, if the roof is insulated, thoroughly waterproofed and provided with effective ventilation, this will allow, in addition to effective energy saving, to expand the living area of the room due to the resulting attic, which can be made as cozy and comfortable as all other rooms.
If the roof is located above a non-residential attic and consists of rafters, sheathing and roofing, then insulation is not always necessary. The attic is continuously ventilated, and the temperature and humidity in it are almost the same as the outside air. In such houses, the main thing is to carefully insulate the attic floor.
But if under-roof thermal insulation is installed, the temperature and humidity of the air inside the attic floor differ significantly from the air outside. Moisture rises along with the warm air and comes into contact with the colder, lower surface of the roof. This causes condensation to form on it. Also, moisture can penetrate into the roof elements, which is facilitated by inaccurate laying of the vapor-proof layer on the inner surface of the insulation, insufficient overlap of the vapor barrier strips, their loose fit to the walls and pipes, accidental ruptures, etc. Therefore, first of all, when insulating the roof, you need to take care of the device reliable vapor barrier located on the interior side. On the roof side, the insulation is protected by a layer of waterproofing laid along the rafters or a special flooring.
Such protection of an insulated roof on both sides is quite reliable, but sometimes this is not enough. It is necessary to provide a way to remove moisture that accidentally gets into the insulation. This effect is achieved by air circulation in cavities, one of which is located between the roof and the under-roof waterproofing, and the other is located between the under-roof layer and the thermal insulation layer. In order for outside air to freely enter these cavities and be removed from them just as easily, it is necessary to install vents in the roof overhang and in the upper part of the roof. To ensure free movement of air between the roof and the under-roof waterproofing, lay counter battens along the rafters. Their thickness determines the size of the air cavity. Air enters this cavity through holes located in the side overhangs of the roof.
How to avoid the problem of high humidity
After thermal insulation work, the humidity inside the room may increase, which negatively affects the microclimate. There are several reasons for this.
- Insulated structures have gaps or cracks, which means their integrity is compromised. Therefore, before starting work, it is necessary to carefully check all the bases and eliminate all existing defects in advance.
- There is no vapor barrier layer or it is damaged. In this case, moisture does not leave the room, but accumulates in the insulating material. Therefore, it is imperative to use a vapor barrier film, gluing the joints of the sheets with a tape specially designed for this.
- The system of natural and forced ventilation of the room was broken. For example, during the renovation, the ventilation holes were moved or blocked, the shaft was blocked, and metal-plastic windows were installed. All of the above actions lead to a decrease in air circulation due to excessive tightness of the structure, so it is necessary to periodically ventilate the room or take care of installing supply and exhaust ventilation.
How to properly ventilate a roof
- The area of exhaust and supply openings must be determined taking into account certain parameters, which include the volume and concentration of removed vapors, etc., which in practice is not always possible to do. Therefore, they usually use existing empirical findings. 2. The height of the ventilation gap between the base of the roof and the insulation must be at least 5 cm. It directly depends on the length and angle of inclination of the roof slopes. 3. The flow of air is organized both along the entire eaves and in local places - with the help of ventilation grilles that cut into the lining of the eaves overhang. 4. The total area of exhaust ventilation openings installed only at the highest point of the roof must be no less than the area of the supply openings for each slope. Exhaust devices are ventilation hoods for hipped roofs, ventilation ridges, roof aerators, etc. You can use both ready-made (store-bought) devices and those made by yourself. https://www.youtube.com/watch?time_continue=3&v=uzNCsJO2k6w
How to insulate a flat roof
Thermal insulation of a flat roof differs from the insulation of a pitched roof in that it can be performed not only from the inside, but also from the outside of the building. But in this case, you will have to spend more time and money on its insulation. To avoid unnecessary expenses, it is better to first insulate the roof from the outside, and after use for one year, insulate it from the inside.
Insulating a flat roof from the outside
It often turns out that external roof insulation alone is enough, and insulation from the inside is not needed.
What material to choose for insulating a flat roof.
For insulation of ventilated attic roofs, polystyrene foam with a density of 12–15 kg/m², as well as mineral wool with a density of 20–35 kg/m², are suitable. If the roofless roof will serve as a terrace, then a more solid insulating material will be required. Expanded polystyrene with a density of at least 20 kg/m² or mineral wool with a density of 150 – 220 kg/m² is suitable. The best option for this case is extruded polystyrene foam, which has high water resistance. In any case, the thickness of the thermal insulation layer must be at least 150 mm, and the insulation itself is carried out in two layers to reduce the risk of cold bridges.
When cutting and installing mineral wool slabs, be sure to wear gloves and loose-fitting protective clothing, safety glasses and a dust respirator. The workplace must be well ventilated. Upon completion of work, you should thoroughly wash your hands and take a shower.
The best material for external roof insulation is slabs made of basalt mineral wool, which are characterized by durability, high vapor permeability, low thermal conductivity, good fire safety, and excellent resistance to mechanical loads.
Does vapor permeability change when changing sides?
All of the above modern barriers are divided into the following types:
- for one-sided installation, which need to be rolled out only on a certain side, and it is recommended not to confuse them;
- and for double-sided use, usually with membranes that can be laid on either side.
You will be interested to know that for the first time, membranes that already had such properties as modern roofing membranes were used in astronautics! And from there they began to be used in construction and in many areas of the national economy. And until recently, there were not as many problems with their installation as there are today.
But now there is a strong opinion among ordinary people: if you lay the vapor barrier to the roof insulation “on the wrong side,” then the entire structure will not last long. In fact, the correct choice of side affects exclusively the service life of the interior finishing of the roofing pie, because the rough side has the same abilities as the smooth side and has absolutely the same vapor permeability. But how much it will retain droplets of condensate there is a little-studied question.
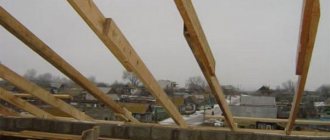
Insulation of pitched roofs
You can insulate a roof with a frame made of rafter systems in one of four ways: by laying insulation between the rafters, on the rafters, under the rafters, or in a combined way. In most cases, thermal insulation is carried out in the simplest way - by laying thermal insulation material between the rafters.
Roof insulation between rafters
The insulation with this method of insulation must be continuous, gaps are not allowed. This also applies to areas adjacent to walls, pipes and windows that are built into the roof plane. This approach is explained by the fact that any place where thermal insulation is interrupted leads to the formation of a cold bridge. Also, in insufficiently insulated places, condensation may occur due to temperature differences, which will gradually destroy the entire structure. It must be remembered that the attic always brings greater heat loss than other floors, since its entire surface is in contact with the street. Since heat escapes not only through the slopes, but also through the gables, it is necessary to insulate the entire roof contour.
For example, an uninsulated gable wall connecting to the roof structure can cause a problem. When insulating walls, Mauerlats are usually not insulated. When thermal insulation of a roof slope is carried out, it is also quite often brought only to the level of the Mauerlat. Thanks to this, a powerful cold bridge appears, along which heat leaves the room. To avoid such a negative phenomenon, you need to wrap the insulation of the attic slopes onto the Mauerlat to the place where the insulation of the outer wall reaches.
Insulating the roof from inside the house
When laying thermal insulation material below the rafters, most often the under-roof waterproofing is installed from above, along the rafters, without making a solid wooden sheathing, because the ventilation gap in any case will be large - almost the entire thickness of the rafters. The disadvantage of this method of roof insulation is the reduction in the volume of the attic.
Selecting material for roof insulation
As insulation, you can use the same materials as when installing thermal insulation between the rafters: glass wool and mineral fiber mats, polystyrene foam and polyurethane foam boards. The thickness of the thermal insulation material should not be less than 100 mm, but at the same time it cannot exceed the thickness of the rafters.
Do-it-yourself insulation of a flat roof
External insulation of a flat roof includes the installation of a vapor barrier layer, laying thermal insulation, waterproofing, and then a roll covering. The final layer is the laying of bulk material.
Before starting work, you need to clean the roof surface from debris, dust, and level it. Then install a vapor barrier as described above. After this, glue the insulation boards using cold mastic or special glue. The slabs are laid with a semi-overlapping seam, which ensures uniformity of the coating. It is permissible to lay several layers of slabs staggered and glue them with tape. This method of installation will prevent the occurrence of cold bridges.
Next, waterproofing is laid. The fire method of gluing a waterproofing carpet is often used: a cement-sand screed is laid on the slabs in a layer of at least 3 cm. After laying it, you need to wait until the concrete gains the necessary strength, then clean the surface from sagging and dirt. The waterproofing layer is glued using short-term exposure to fire. The gluing method is described in great detail on the packaging of the material. As a result of exposure to fire, the insulation does not lose its properties. After this, a rolled roof covering is laid and expanded clay or other similar material is poured.