It is recommended to install frame partitions in a wooden house after the most intensive shrinkage of the structure has been completed. So, for wild log houses built from a forest of natural moisture, this period can take 1.5-2 years, and for buildings made of timber or rounded logs - from 5-6 months to a year. Wooden-frame houses or houses made of SIP panels, provided that all the requirements of their construction technologies are met, practically do not shrink. Therefore, the installation of interior partitions (partitions) in them can not be shelved, but can be started immediately after laying the roofing.
Is it possible to build?
Partitions made from logs can have different functionality, which is why their use in the house is determined. For example, in log houses such an element is most often part of the building.
Also, such dividers can have a decorative function . There are options in which the partition does not reach the ceiling and is used as a stand. To do this, it can be made in the form of a stepped structure or grooves can be cut into a ready-made wall.
A log partition is an environmentally friendly separator with a good appearance, but its weight and fastening features should also be taken into account. Therefore, the relevance of building a separator specifically from logs is calculated from the needs for each case separately, since sometimes it will be easier or more practical to make a frame or brick structure.
Varieties
What type of interior fence to choose:
- Frame partitions in a log house are the most common and most affordable type of interior fencing that you can install yourself. They consist of a wooden frame, insulation and sheathing. Their main feature is the variety of possible installation configurations. A frame fence can divide the space into zones of different shapes. During redevelopment, the structure can be easily disassembled and moved to another location for further service.
- Carpentry (panel) wooden partitions for a log house are just as suitable as frame ones. They are ready-made panels that need to be installed on frame guides. Partitions often do not require additional finishing; they can be coated with varnish, colored composite materials with a pattern. Their disadvantage is low sound insulation, although this parameter can be adjusted when ordering, purchasing or manufacturing, choosing the option that suits you according to its characteristics.
The cost of a carpentry partition depends on the type of structure and materials used and starts from 250 rubles/m2 to 1500 rubles/m2 or more.
- Solid partitions without a frame are attached to the ceiling and floor guides using the nail method or screwed with screws. To disassemble such a structure, you will have to remove all fasteners of individual boards or panels.
Requirements for log walls
Requirements for log dividers vary depending on which of the three functions it performs:
Bearing wall.
Such a separator is installed during the construction of the building itself and cannot be disassembled. The weight of the roof rests on it and is transferred to the foundation, which is why such a structure must be very strong and made of logs of a similar size to the external walls.The height of such a partition is from the foundation to the ceiling.
- A non-load-bearing wall is a separator that has similar qualities to a load-bearing wall, but the load from the roof of the house or the floors between floors is not transmitted through it. This design presses on the foundation only with its own weight.
- A simple partition may not cover the entire height of the room, but only part of it, for example, it can be a divider in a shower room in a dressing room, or it can have a decorative function. Such a partition rests not on the foundation, but on the floor coverings.
If the partition is not used as a load-bearing structure, then it may consist of smaller or larger logs than the load-bearing walls. The main thing is that it does not add excess weight to the floors or foundation.
Interior partitions made of logs that are not load-bearing walls should be made only after the building has completely settled, since during this process the fixed enclosing structures themselves can be damaged and break the main walls. Also, due to the difference in weight, the shrinkage of the house may occur unevenly, which will lead to the building being skewed.
Due to the fact that partitions carry less weight than load-bearing walls, under excess pressure from the floors, the dividers can move vertically, bend, or begin to bulge.
Other options
Partitions can be not only static, but also movable. Making them yourself can be troublesome and costly, but if you understand the technology of their work, an experienced craftsman will be able to cope with this task.
Movable screens are sold complete with guides and all fasteners, so it is advisable to purchase a ready-made system. What types of these structures are there:
- In non-threshold systems, the canvas moves parallel along the ceiling profile;
- In rail-mounted panels, partitions move along two rails on the floor and ceiling;
- Folding canvases fold like an accordion, moving along the ceiling and floor profiles.
Each system contains instructions according to which the movable fence is installed. This is convenient to install in several cases:
- For zoning large rooms;
- To differentiate between a kitchen and a room in a studio apartment;
- To delimit space in one-room apartments.
Sliding partition panels will be useful in cases where it is necessary to visually delimit space. There is no talk of any sound insulation or heat retention.
If you want to independently make a sliding partition in a wooden house from a log house, it is worth repeating the principle of operation of ready-made systems and making the corresponding floor and ceiling profiles, making canvases. Fasteners and roller mechanisms will still have to be purchased.
Selection of building materials
When choosing logs for partitions, you should take into account their purpose and the material from which the main walls are made. This is necessary to ensure that the structure is durable, not subject to deformation, and also has an attractive appearance that will be in harmony with the surrounding environment.
2 types of material are suitable for partition walls:
"Wild Logs"
They are felled trees from which the bark has been removed without damaging the bast layer. This is necessary for better protection from moisture, so that the wood does not begin to rot or fungus appears on it.The disadvantage of such lumber is the different diameter of the sides, since the tree tapers towards the top. This leads to difficulty in aligning the entire structure.
- A rounded log is a tree that has been cut into pieces of a certain size and turned on a special machine so that it does not warp and its diameter is the same on both sides.
Most often, special grooves are made in it to make it more convenient to lay it. The disadvantage of this material is that it is more of a timber than a log and, due to turning, additional treatment with antiseptics and fire retardants is required.
Since the tree is conventionally divided into 3 parts: “komel” - lower, from the root, “drugach” - middle and “tretyak” - upper , then the choice between them is different. If the partition will be used as a load-bearing wall, then most likely it is necessary to use the “butt”, since it is used for the construction of walls.
For non-load-bearing walls and ordinary partitions, thinner and lighter parts of wood can be used.
For log partitions, a material with a strength and density similar to the main walls should be used if they are subject to excess pressure. Spruce and pine are the most commonly used woods due to their cost and availability. You can also use any other types of coniferous or deciduous trees that are available or required for the design.
The purpose of the partitions should be taken into account, since wood that was harvested in winter has a higher resistance to moisture and can be used in dividers for showers or baths.
Also, if a partition separates a living space from a utility room, it must have good thermal insulation properties. Therefore, if the temperature behind the separator can drop to -20 °C or lower, then it is necessary to take a log with a diameter of 200 mm.
When choosing a material for building partitions, you should pay attention to their appearance, since high-quality wood should have a yellow or dark yellow color . It is also necessary to select lumber without knots, cracks and deformations (for example, “torsion”). This is necessary so that the enclosing structure is not damaged during shrinkage and does not cause harm to the main walls.
Step-by-step construction of a bathhouse made of timber
The step-by-step construction of a bathhouse from timber proceeds as follows:
We make a strip foundation and isolate it from moisture with a layer of roofing material.
We insulate and waterproof. On the base covered with waterproofing, we lay boards pre-treated with an antiseptic around the perimeter. Board parameters: 5x30 centimeters. We will lay the lower crowns of the timber on these boards, so they must be additionally insulated from moisture. To do this, it will be enough to cover them with bitumen and wrap them in roofing material. Then a layer of felt and the first row of timber. Corner connections can be different; they usually use the “warm corner” technology. The joints of the beams are sealed with insulation
Important! We chamfer the outer edge of the beam. This will prevent water from getting between the crowns
Installation of timber. After laying the trim crown, we put a layer of jute or tow on it and install the next row of timber on top. It is necessary to lay the beams moving around the perimeter. That is, we build all the walls at the same time. In order for the timber to retain its shape during shrinkage and dry with minimal changes in geometry, it is mounted on special rods - dowels. They are usually installed in increments of one and a half to two meters.
What will you need?
To make partitions from logs you will need:
- A carpenter's ax is a device with a mass of 700-900 g, a straight cutting edge and a sharpening angle of 20-25 °. This tool is used for processing and turning wood.
- A carpenter's ax is needed to effectively work with logs, or more precisely, to grind out a tenon. Such a tool has an edge with a rounding radius of about 30 cm and a sharpening angle of 30 to 35 °, and a weight of more than 1 kg.
- A hammer can be useful for adjusting and shrinking parts, as well as for fastening logs together. If you do not need to hammer in nails, then use a mallet (a wide hammer that looks like a barrel with a handle) made of wood or with rubberized edges (so as not to damage or crush the wood).
- The carpenter's line is intended for marking lumber for corner cutting or longitudinal groove. It looks like a large compass.
- Hacksaw - needed for sawing logs across the grain (for example, for a tenon or groove). You can use a gas or electric saw, but they have a wider cut.
- The scraper is used to remove bark from a log. If you are using material that has already been sanded (or galvanized), then such a device may not be useful.
- A chisel and a set of caulking tools are useful for compacting insulation into cracks, and the first device is also used for turning recesses and corner notches.
- Construction staples are one of the ways to attach log partitions to walls. The legs of such “nails” are rotated 90° relative to each other.
For the layer between the logs you will need jute or flax-jute insulation. It is used as a spacer and also helps level the entire structure. You will find all the details about how and with what to seal the cracks between the logs in the house in a separate material.
A building level may also be useful, which will help get rid of distortions in the partition.
Tools:
- Hand saw or jigsaw/grinder;
- Hammer or drill with impact function;
- Screwdriver or screwdriver;
- Metal drill (diameter 6 mm and 9 mm);
- Paint brush;
- Tape measure and pencil.
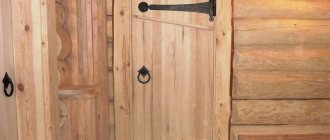
Step 1. Support bars for the partition
To construct a partition, you first need to install support bars 150 cm long from below and above. To do this, I sawed a block with a cross-section of 50x50 mm along the floors using a jigsaw with a wood saw.
Next I sanded the bars with sandpaper. This made it possible to give the bars a smooth surface on which paint would be better applied. I painted the bars with wood impregnation (walnut color).
I drilled two holes in the block that needs to be fixed to the ceiling. To do this, on each side of the block I stepped back 25 cm from the edge and drilled through holes with a drill dia. 6 mm. Then I drilled a countersunk hole for the self-tapping screw with a drill bit dia. 9 mm to a depth of 1 cm.
I marked the holes in the ceiling using a drilled block. Next, I drilled holes in the ceiling with a hammer drill and secured the block using two self-tapping screws with a 4.5x80 mm plastic dowel.
The bottom block was secured to the floor using double-sided tape and additionally secured to the wall with a metal corner. I decided to do this so as not to spoil the floor covering (laminate).
Double-sided tape was attached to the block with staples using a construction stapler.
Here's what happened:
Step 2. Installation of furniture board
To begin with, I measured the distance between the installed bars (I got a value of 255 cm) and sawed off the furniture board according to this length. The shield was sawed off using a circular saw to make the cut more even. When sawing, it is also necessary to take into account the gap between the top beam and the end of the shield of at least 5 mm (i.e., made the shield 254.5 cm long).
To install the shield, I installed embedded T-shaped profiles (30 cm long) on the lower and upper bars. This solution helped hide the shield mount and simplified its installation.
Each T-shape The profile was secured using 3 pcs. wood screws 4.0x30 mm.
I made slots on the ends of the furniture board with a grinder (it would be more convenient to do this with a circular saw). The slots are needed to install the shield on the T-shape. profiles.
Before painting, the furniture panel was sanded well with sandpaper and painted with wood impregnation. Next, I pushed the shield along the T-shape. runners and that's it. I did not additionally fix the furniture panel.
The cat constantly monitored the process so that there were no mistakes))
Step 3. Installation of vertical bars
I made vertical bars 255 cm long (the distance between the upper and lower bars). If there are any defects on the bars, you can cover them with wood putty and then carefully sand these places.
After sanding all the bars, I begin painting with wood impregnation.
Next we install the bars. I fastened them using 4.0x70 mm wood screws at an angle and screwed them completely into the body of the block. I started the installation with the outermost bar, then installed the central one, and so on.
If a little bit of the head of the screws is visible, you can tint them with the same wood impregnation.
As a result, I then added intermediate lintels from the remains of the timber for a more rigid design of the decorative partition.
In terms of money, this partition cost about 4,000 rubles. I think it turned out very well) I hope this solution will be useful to someone.
How to do it: work progress
When installing a log divider, you should consider when it is installed as well as its function.
If this is a partition that serves as a load-bearing partition, then it is made in the same way as the other walls, namely, it is laid on a foundation with an insulating layer and attached to the walls using tongue-and-groove fastenings.
Non-load-bearing ones can be placed on floor slabs if the weight allows. Decorative dividers can be laid on the floor (or on the ceiling, if possible) and attached to the walls in various ways:
- Tenon and groove. It is best suited for thick and heavy partitions, since this method can securely fasten the entire structure. The disadvantage of this method is the difficulty of cutting grooves in the wall, as well as adjusting the size of the logs for the partition.
- Using anchors, you can fix the logs both among themselves and with the floor/walls.
This type of fastening is not noticeable indoors, but for greater reliability, its outer part is fixed on the outside of the wall. Among the disadvantages, it can be noted that it can be used only after the house has completely settled, and also for structures that are not too heavy, since due to the weight, the anchors can be pulled out or the wall deformed. - Construction staples can be used to secure logs for a certain time, but they are not a reliable fastening, since when the wood dries, they will simply fall out.
- Stainless steel angles can also be used as fasteners. Among their disadvantages, it can be noted that they are mounted on top of a wooden structure and will be very noticeable, and over time, due to the drying of the wood, this fastening will become less reliable.
- Long length construction nails. They can be hammered into the outer part of the wall and used as anchors, but over time the wood will dry out and such fastenings will begin to play.
Procedure:
- Before laying on the ceiling or floor, the lower part of the first crown is leveled to have a larger contact area and better stability. If possible, attach the first log to an anchor.
- After this, the partition is laid in the same way as conventional walls. To do this, crescent-shaped indentations are made on the bottom of the log, which are used as fastenings.
- Also, instead of them, longitudinal grooves can be made, and the upper part of the lower logs can be turned with a longitudinal tenon. If the separator is only decorative, small in size, and also lightweight, then in some cases additional fastenings are not required.
Main design characteristics
The function of the sliding support is to clearly fix the rafter beam to the wall and the mauerlat in a vertical plane and the possibility of its displacement along its own axis.
The sliding support consists of two elements. One is a guide (bar), which is attached to the rafter beam. The second is a corner with a support platform, fixed to the upper crown of the log house or mauerlat. The angle is equipped with a loop that engages with the guide, but does not prevent it from moving within certain limits.
The sliding support consists of two elements
The amount of deformation may vary. The support guide element limits possible movement. There are supports on sale with the ability to move to varying degrees.
The possible sliding amplitude of the rafter leg depends on the length of the free section of the support guide bar. These three options allow for an offset of 90 to 160 mm
The supports are made of steel at least 2 mm thick. The height of the angle is usually 90 mm, the width of the plates is 40 mm. Factory products have a galvanic anti-corrosion coating. Fasteners made of ordinary steel must be protected from rust by painting with oil paint.
Difficulties and errors
The biggest difficulties in building a partition most often arise with its fastening. Cutting grooves for a tongue and groove in a finished house is a very difficult task if you do not have the necessary tools and work experience.
Incorrectly done fastening can reduce the thermal insulation of walls and also lead to their deformation or destruction.
Also, many problems arise when the building shrinks . Between the logs in the partitions it is necessary to place insulation in the same amount as the walls. Some workers skimp on this and don't put it there at all. This leads to the fact that shrinkage does not occur evenly and the partitions are deformed.
Application of sliding supports
The support platform must be mounted on the upper crown strictly perpendicular to the axis of the rafter beam, in the sliding direction. It is recommended to initially install the angle loop at the bottom of the sliding bar.
The rafter beam will sit down, so when installing the plank and corner are positioned in this way. The drawing indicates “shrinkage reserve”.
Metal elements are fastened only with screws with anti-corrosion coating.
Incorrect installation. The platform should be located on the upper crown at an angle, perpendicular to the axis of displacement of the rafter beam. In this case, the plate will jam or the corner will tear off from the crown.
In addition to the described advantages, the use of sliding supports makes it possible to simplify the design of the rafter system. There is no need to make complex cuts to the rafter beams and the top crown to provide support. If the house is built from timber or hand-cut logs, it is enough to plan a platform at the crown for attaching the support at the desired angle. In a structure made of rounded logs, this is even simpler: a square is used to measure the perpendicular on the roof element, and at the point of intersection of the log and the beam, a place for attaching the support is obtained.
Advantages and disadvantages
Among the positive qualities we can note:
- Environmental friendliness of the material.
- Attractive appearance.
- If the house is not made of wood, then a pleasant smell of wood will also appear, especially if it is coniferous.
- Good durability of such partitions.
Among the disadvantages can be noted:
- High complexity of fastening for large partitions.
- The massiveness of the structure. Its weight can damage the floors.
- The wood needs to be treated with special substances to prevent the formation of bacteria or fungi, as well as insects and rodents.
Start of installation
To mount a frame made of timber, you will need a saw (both petrol and electric will do), a hacksaw for wood, a chisel and an axe, a drill with wood drill bits, and, of course, a pencil, a marker, a tape measure and a level.
A hammer will also come in handy. A simple way to connect a new wall with an old one is to cut out a groove into which the beam will be inserted. And a tenon is cut out on it to fit into the groove.
If a tenon is necessary, make it with a height of 3-5 cm. Accordingly, the groove is cut out to a similar depth.
Before installing the beam, flax fiber is laid in the groove. An alternative is to use tow. As soon as the first block is laid, fix it to the floor using self-tapping screws.
The next stage involves installing a new beam, on which a tenon is also made and placed in grooves on top of the old beam. In this way, the partition is mounted to the ceiling.
The lower beam is first lined with jute tape.
It is imperative to attach the base with self-tapping screws to the main wall, otherwise the mounted structure will be unstable.
If there is an opening in the partition, then additional stiffeners are made. They are attached to the upper structural elements using iron corners.
conclusions
A partition made of logs is a very high-quality and beautiful design for arranging the interior of a house or as a separator between rooms. Due to their large mass and size, logs are not always a good option for building a partition.
Sometimes it is easier to make a frame structure from timber or boards. But despite this, such a separator has good thermal insulation properties and is suitable for separating the cold part of the house from the living part.
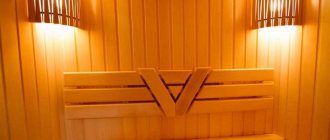
Construction of a frame partition
A frame partition is the best option for ready-made baths built from logs. Installation involves the preliminary assembly of a wooden frame from beams or boards with a cross-section of 5 × 5 cm.
For thermal insulation of the structure, a foam board, basalt or mineral wool is used.
Technology for constructing a frame partition with your own hands:
- Markings are made on the surfaces of the walls and ceiling using a plumb line, cord or building level. Vertical straight lines are marked to indicate the middle of the structure.
- A wooden frame is assembled. Individual elements are fixed to the walls using tenons; holes for the tenons are drilled with an electric drill. To simplify the process, you can use self-tapping screws for a wooden base or nails without heads. The bars are fixed at a distance of 80 cm from each other.
- Boards or lining are mounted to the finished frame using nails without heads. The cladding is performed on both sides of the frame to increase the heat and sound insulation characteristics of the structure. The distance between the sides of the sheathing is filled with the selected insulation.
Important! The wood material for constructing the frame is pre-treated with antiseptics to prevent possible rotting and destruction. For decorative cladding it is worth using lining made of hardwood