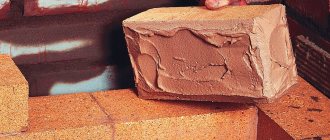
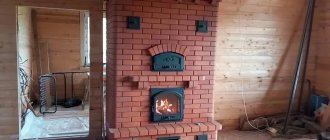
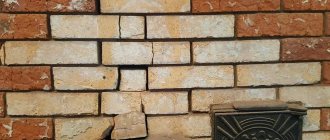
In order for the stove to generate heat more efficiently, not smoke and not be a fire hazard, you need to carefully study the information about the brick and choose it correctly. First, let's figure out what kind of bricks are stoves made of? In the kiln business, high-quality durable ceramic and fireclay bricks are used. The better it is, the longer the stove will last you. The bricks must not have chips or cracks and must be the same size.
The sound of a hammer hitting such a brick should be loud. On the contrary, unburnt, low-quality material will “sound” dull. The “correct” brick is always pink. The overburned one will be purple, and the unburned one will have a red-orange hue.
Typically, fireclay (fireproof) brick is used to lay a firebox. Ceramic - for laying the entire stove. Beginners often have a question: “Is it possible to lay the entire stove out of fireclay bricks?”
There is no particular need for this, since:
- the refractory brick gets very hot, which makes touching the stove dangerous;
- it costs more.
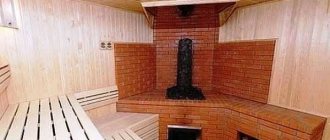
Bath stove: how to choose the right brick
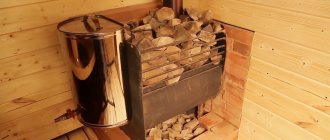
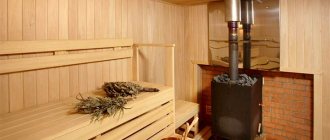
You can entrust the installation of a stove in a bathhouse to a professional stove maker, but with certain construction skills and knowledge of the peculiarities of their masonry, you can cope with the work yourself. First of all, you should choose the right material, and even before that, draw up a drawing plan with all the dimensions and perform the necessary calculations.
So, you will need:
- fire-resistant brick;
- fireclay brick - for the firebox;
- for the installation of a chimney, you can use the same refractory brick or give preference to other materials, for example, natural stone;
- material for waterproofing the foundation of the furnace, roofing felt is most often used;
- stove casting elements: grates, doors for the firebox and ash pan, views, etc.;
- clay and sand for mortar.
It is also necessary to prepare steel corners and tape, galvanized wire, and asbestos cord in advance. You will also need a large metal tank to heat the water.
Step-by-step instruction
Determine the location of the stove in the house.
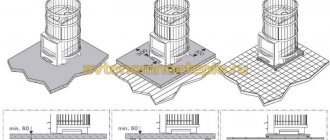
- Do not place fire-hazardous objects closer than 38 cm around the stove.
- To prevent moisture condensation or reduced draft, do not place the oven in the space between windows or near external walls.
- Check that there are no rafters where the chimney pipe passes through the roof, and that there are no joists between floors.
- The stove should not interfere with free movement in the room where it is installed.
- It is better to install it at the same level as the roof ridge. This will help shorten the length of the chimney.
Laying the foundation correctly.
- Remember that it is best if the foundation of the house and the foundation of the furnace are not connected. This will ensure that both last longer. After all, temperature differences and loads create different shrinkage.
- For the foundation, we dig a hole one meter deep, cover it with 11 centimeters of sand, and fill it with a concrete solution on top.
- Make the foundation 15 cm wider than the stove itself. Make sure it is perfectly level and its surface is 19 cm below the floor level.
Let's start laying.
- For those who are building a stove for the first time, we recommend that you first lay out the bricks according to the dry pattern, and then start working using mortar.
- Using a spatula and trowel, we lay the first row of bricks, using only solid bricks and observing the following rule: vertically located seams do not coincide with each other.
- In the second row we install the blower door. It is equipped with four hinges that are attached to the stove. We attach steel wire (diameter 1.5 millimeters) to the hinges, bury its ends in the masonry, and coat the door with the solution.
- In the third and fourth rows we install a grate without using mortar and leaving gaps.
- We lay out the furnace firebox using fireclay bricks. Because it can withstand increased heat. It is not advisable to mix it with ordinary brick. We install the firebox door according to the same principle as the blower door, but first wrap it with asbestos.
- The rows following the firebox (9 - 12) are laid out according to the usual rules. In this case, it is necessary to control the smoothness of the walls of the firebox.
- Rows 13, 14, 15 form the arch of the firebox.
- In row 16 we install a cleaning door.
- From rows 17 to 20 we form a convector with a smooth inner surface.
- Rows 21 and 22 form a jumper. On the 23rd row we install another door for cleaning.
- Rows 24 to 26 are laid out like rows 17 to 19.
- Rows 27 and 28 are used to design the overlap of the upper pass and the outlet pipe of the stove. Rows 29 to 31 will close it and complete it.
We arrange the chimney pipe.
You can create it yourself from sand-lime bricks or take a ready-made one, but properly insulated. Make sure that there are no chips or irregularities inside the chimney. Sometimes its inner walls are leveled using liquid glass.
After finishing the masonry, dry the oven for 2 weeks.
Is it necessary to wet the brick before laying and when?
While some builders strongly recommend wetting brick blocks before laying them with mortar, others consider this action pointless. They explain their point of view by the fact that modern cement mortars contain a reserve of water, which insures the mixture in the event of rapid absorption of water by the brick walls. However, as practice shows, it is absolutely necessary to soak bricks in the following cases:
- For construction, bricks are used that have already been used previously or old bars of baked clay with clogged capillaries. Using water you can wash them.
- It is recommended to wet the building material for novice masons. Moistened brick becomes more mobile, and in case of incorrect masonry it will be easier to make corrections. A dry block interacts with the solution faster, so it is much more difficult to correct the failed area.
When laying a furnace for the construction of which it is used, it is incorrect to wet it, since it is believed that moisture on the building material will subsequently cause excessive stress, and this is dangerous due to cracking of the structure. Therefore, you should not soak the red brick before laying the stove; a dry product will be more reliable for its construction.
Tips and secrets
Experienced stove craftsmen know various subtleties and secrets of stove construction. Let's talk about some of them.
- Before laying out the stove, draw up drawings and a masonry diagram . Check during construction that the rows are level using corner templates and straight edges.
- Cover the ceramic bricks with masking tape (6 cm wide). This will help avoid monitoring the mortar protruding between the seams from the front side. The solution will begin to dry, and all you have to do is remove the tape and sweep the masonry with a stiff brush.
- Do not chase the thickness of the mortar between the bricks: let it be moderately thin, then the stove will be strong and durable.
- What mixture is best for laying bricks? To build a strong and durable structure, you can prepare the mixture yourself or use a ready-made one. Without some experience and practice, it will be difficult to make clay mortar yourself. If you are new to stove building, use a convenient dry stove mix for your work. It is sold in construction supermarkets.
- The facing masonry needs thermal insulation from the combustion chamber. To do this, use a sheet of basalt cardboard (5 mm thick).
- A metal corner with a shelf width of 50 mm will help to adjust the levels of jumpers and other parts of the stove. Position the corner so that it can grip the brick on both sides. It should not be visible from the front side.
- Dampers, doors, and grate bars will fit securely into the grooves if the latter are of equal thickness to the parts themselves.
- Square metal rods 5 mm wide. and 1 m long will help to achieve a perfectly even seam between bricks. On top of the row of bricks, lay two rods, pre-lubricated with machine oil, apply mortar on top, then again a row of bricks, then you can remove the rods.
- To adjust the bricks to size, they are first laid out “dry”. After this, you need to soak them in water until the release of air bubbles from it stops.
- During installation, make sure that the mortar from the top row of bricks covers the bricks of the bottom row. Remove excess solution.
- The slope of the chimney should not exceed 5 degrees. This can be achieved using the following trick. After laying out the base of the chimney, use a plumb line and find a point on the roof in the direction of which the pipe will be located, and secure the self-tapping screw in this place. Similarly, set three more screws for the three remaining corners. Stretch bright threads on them and use them to lay the masonry.
Chamotte
© Anatoly Smirnov A fireplace stove with a transparent firebox door is a common type of fireplace in the home
© Angel David Stock. XCHNG Regardless of what material the open fireplace is made of and what it is lined with, its main disadvantage remains its low ability to accumulate heat
This refractory material is obtained by high-temperature firing of clay until it loses its plasticity and removes bound water. To achieve this, the temperature in kilns is raised to 1500°C. The fireclay is then ground into a fine-grained or coarse-grained powder. Mixing it with various types of clay in certain proportions makes it possible to obtain fireclay ceramic refractory materials with specified properties.
Features of the operation of the firebox require fire resistance from fireclay, allowing it to work in direct contact with the flame. The material itself must withstand heating up to 1200°C (the actual temperature in the firebox can be 750–1000°C). The resistance of fireclay to thermal changes is also important, since the process of firing the furnace and extracting heat is accompanied by alternating increases and decreases in temperature. To test the suitability of fireclay for use in a firebox, manufacturers give it 30 cycles of heating up to 1000°C, followed by cooling with cold water, and the solution for connecting fireclay slabs into a single product must also meet the specified requirement - this guarantees that in the future there will be no cracks.
The basis of the range of fireclay products for the hearth offered by the market are blocks for laying furnaces, modules for chimneys and fireproof insulation of metal cassette fireboxes.
Fireclay chimneys fully retain all the properties of this material, including resistance to temperature changes and moisture resistance. They are also certified according to European standards. By the way, the use of fireclay allows you to organize the design according to a modular principle, which simplifies the installation of the hearth, while at the same time not limiting the flight of imagination of designers and leaving them room for creativity, up to the creation of original projects. Parts can have dimensions from 13.5 × 13.5 to 100 × 75 cm and are selected during production based on the specifics of a particular project - from elements for a fireplace with large glass to shaped products intended for assembling compact stoves. Thus, any product sample in the model ranges of various manufacturers has its own set of parts.
The Russian market also offers fireclay slabs for open fireplaces, which can be lined with any of the known materials. The shaped stones used for assembling fireboxes are equipped with profiles for connecting to each other “in a lock” according to the principle of mating parts. For ease of laying, in addition to whole modules, the kit also includes half and corner stones. Well, the protection of the walls of the house adjacent to the firebox is provided with the help of hollow fireclay bricks, which are suitable for use in other places with a slight temperature difference.
Design safety
Violation of stove masonry technology at any stage of construction can lead to danger when using the firebox. The main mistake can be incorrect laying of the foundation.
The main signs of malfunctions that occur when the foundation is laid incorrectly:
- The roof of the firebox is destroyed.
- The doors fall out.
- Burning coal spills out.
- The brickwork is cracking right through the entire area of the stove.
- Chimneys become unusable.
It is impossible to heat the stove in this condition - there is a high risk of fire and poisoning of people from flue gases . Damage caused by an unsuitable foundation cannot be corrected. You will have to disassemble the entire stove and rebuild all the elements.
Choosing the “right” brick and mortar for laying the stove
Building a good-quality stove or fireplace is not an easy task. But before you get started, you need to choose the “right” brick and mortar for masonry. After all, the reliability and safety of the home will depend on them
Preparation
Before attaching fireclay bricks to the mortar, it is better to select and grind the selected blocks by dry laying. If necessary, the brick is pre-pressed to achieve maximum density between the blocks. At this stage, you will need a feeler gauge to check the required gap size. After a trial laying, the refractory bricks are removed in the order of dry masonry.
The thickness of the seam is acceptable if a probe of 15 mm with the thickness of the seam itself enters to a depth of 20 mm.
Fireclay stone, its composition and characteristic features
Fireclay brick has a yellow color and a porous surface and is made from fireproof clay and fireclay chips . Fireclay stones perfectly accumulate and then release heat. In addition, it is very fire resistant and does not collapse even at temperatures of 1500 degrees Celsius.
When making fireclay bricks, it is very important to fire them in a kiln for a certain period of time.
If you leave it in a kiln for a little longer than required, a thin film will form on the surface of the brick, which will subsequently make it unsuitable for constructing kilns.
If the brick is removed from the oven ahead of time, it will not have the properties that make it fire-resistant. The main element in the composition of fireclay stone is aluminum oxide, which gives the brick porosity. Porosity makes brick a good conductor of heat. A stone that is too porous takes a long time to heat up to the desired temperature, but at the same time takes longer to cool down. The percentage of thermal conductivity a fireclay brick has can be judged by its mass. The lighter it is, the more efficiently it conducts heat.
The shape of fireclay bricks can be different - from a rectangle to a trapezoid. Fireclay stones are not as in demand in the construction industry as, for example, standard red ones. Therefore, their circulation is much smaller, but at the same time the cost is higher. The price of 1 fireclay brick varies between 30-50 rubles. This is 3-5 times higher than the cost of a regular red stone.
Refractory brick for the stove. Fireclay brick
It is most often used in domestic buildings, although it is often used in the construction of industrial facilities.
This heat-resistant brick owes its name to a special material - fireclay, which is produced from white kaolin clay in rotary or shaft kilns by firing at very high temperatures (about 1400-1500⁰C). Therefore, such products can be used at high temperatures and remain neutral to chemical, acid and other influences. This type of alumina brick can have different shades.
Features of the production of fireclay bricks for furnaces greatly influence its price. And therefore, in order to reduce the cost of the stove, such products are usually used when laying the combustion chamber and some elements of the chimney system.
Main characteristics
Fireclay bricks are different:
- high fire resistance;
- the ability to accumulate and release thermal energy;
- high porosity, which is ensured by the presence of aluminum oxide in it.
By the way, the latter quality determines the long heating and the same cooling of the stone.
Important! The percentage of thermal conductivity of a brick is inversely proportional to its mass. That is, the greater the mass of the stone, the lower the thermal conductivity.
Therefore, when purchasing, you should pay special attention to this quality.
Regular fireclay bricks are produced in sizes 250x120x65 mm. Due to the increasing pace of construction and demand for products, the production of shortened and elongated blocks, as well as bricks of various volumes and configurations, has now been launched.
Thanks to the wide range of colors of products, more and more consumers are buying fireclay bricks for laying stoves and do not use facing or clinker tiles at all.
Quartz
If the clay mass used to produce refractory bricks for the furnace needs to be reinforced with large grains of quartz, graphite or coke powders, then after burning, the result will be a brick with different properties, respectively, of different types: quartz and carbon.
Quartz, like its carbon counterpart, belongs to the red refractory brick. It is used to construct vaults in reverberatory furnaces. In addition, it is used to construct the walls of furnaces, which in the future will only come into contact with metals or fire.
Clay is used to cement such products, which gives the fired product incredible strength.
Carbon
If you press clay together with coke or graphite, you get a high-quality carbon-type refractory brick. But such stones are not used for domestic purposes, but only in industrial production. For example, without them it is impossible to build an open-hearth or blast furnace.
Brick options for laying stoves
Layout of a brick oven.
Kiln bricks come in different types. When choosing one option or another, it is important to take into account the necessary characteristics and future operating conditions. Among these types of bricks, there are not only special fireproof ones, but also fireclay ones. Most often used:
- Borovichi brick. It is dense and has high frost resistance. The red brick has 3 working surfaces, slightly rounded edges, which makes the block attractive. After construction, such a stove can no longer be lined.
- Vitebsk red brick has a lower density and its frost resistance is minimal. There are 2 working surfaces, the edges of the block are sharp. It is used for laying stoves, as it has the necessary properties, and its price is optimal. Block sizes may vary slightly. This must be taken into account when performing work.
- Fireclay brick is also called fireproof brick. When choosing such a material, it is important to pay attention to quality, since it can differ significantly from different manufacturers. Good fireclay bricks are characterized by excellent density, a creamy color, sharp and even edges, and all blocks are of equal size. Today you can purchase blocks of various shapes, but Sh8 is used as standard. It is used to decorate fireboxes, the hottest areas of the furnace. The entire oven can be made from such material, but the cost will be too high. With exactly the same success, it can be made from ceramic stove bricks, and only the firebox can be made of fireclay. It should not be used in chambers intended for cooking, as chemicals are released during heating. When purchasing, it is best to give preference to well-known brands that will guarantee excellent quality. Otherwise, the stove will soon require repairs.
Comparative characteristics of red and fireclay bricks
Layout of a brick chimney.
What is the difference between fireclay brick and regular brick? It is necessary to pay attention to some characteristics that are characteristic of these products. When a stove is being built, it is recommended to make the firebox from fireclay, and the stove body from red stove brick, but they cannot be combined, since they have different characteristics.
Characteristics of fireclay bricks:
- density 1910 kg/m³,
- frost resistance 15-50,
- porosity 24-30%,
- heat capacity 1.04 kJ/kgC,
- thermal conductivity 0.84 W/mS,
- linear expansion 5.3.
Characteristics of red stove brick:
- density -1950-2050 kg/m³,
- frost resistance 15-75,
- porosity 8%,
- heat capacity 0.9 kJ/kg*C,
- thermal conductivity 0.5-0.7 W/m*C,
- linear expansion 3.5.
Furnace laying process
The thickness of the clay mortar when laying bricks should be no more than 3-5 mm.
All brick kilns can be classified into:
- Black stoves without a chimney. They are rarely used, since to start using you need to wait until all the fuel has burned out. Today they are used only for baths.
- Gray stoves have a chimney, but soot deposits are observed during use; the fuel must burn completely. Most often used for baths.
- White stoves take longer to heat up than others, but their heat transfer is optimal, and the design does not stain all surfaces around with soot. The chimney is often made of brick, although today more modern options that are easier to use can be used.
- Ovens with small cooking surfaces. During masonry, in addition to the firebox, a working surface with a cast-iron hob is also provided. On such a stove you can cook food and quickly heat water for domestic needs.
Once the stove, or rather its design, has been selected, it is necessary to prepare the order. Today you can find a variety of diagrams, which indicate in detail not only the location, but also the total number of solid bricks, halves, and quarters. This is very convenient for material calculations. Once the scheme has been selected, preparation work must begin. To do this, a place for the stove is selected, the base is poured, i.e. the foundation cushion. It is advisable that the location of the stove be provided for during the construction of the house, since the weight of the structure will be quite large.
Tools for work
To save money and due to the fireproof properties of fireclay bricks, it is used only for laying the firebox.
To build a stove with your own hands, you need to prepare the following tools:
- angle grinder, abrasive wheel designed for working on stone, metal,
- drill, mixer attachment for mixing solutions,
- 10-12 liter capacity for solutions,
- trowel for laying bricks,
- building level, plumb line,
- wooden mallet for laying bricks,
- marker, tape measure.
Furnace equipment
While laying the furnace rows, the necessary equipment is immediately installed. These are doors, grilles, hobs. All of them are made of cast iron, but it is necessary to maintain a gap, otherwise the cast iron will simply tear the already laid brick during operation. The grates are installed without mortar, the gap is maintained at 5 mm. The grid should be easy to remove for cleaning; under no circumstances should it be filled with solution.
There are several types of doors: combustion doors, cleaning doors, and blower doors. When installing them, you must use wire. Be sure to check the correct installation so that the door is not warped. To fasten the doors, there are special holes through which wire harnesses are inserted. A cast iron hob is installed only if the stove has the appropriate design.
https://ostroymaterialah.ru/youtu.be/d4FTc3Fa700
Today, manufacturers offer numerous options for materials for laying furnaces, including fireclay bricks. But its cost is high; constructing a furnace entirely from fireclay is not practical. It is better to make the structure from red stove bricks, and use fireclay for the combustion chamber.
Recommendations for choosing bricks for different types of stoves
Before you begin construction, it is worth understanding what material is needed for your structure.
B-B-Q
It has a hob and oven for baking meat, pizza and other dishes. Such a structure can weigh a lot, so it must stand on a reliable foundation.
A red solid ceramic brick is used for the base. The solution is mixed from clay and sand.
The firebox is made from heat-resistant fireclay. Regular dimensions:
- depth – 3 bricks;
- width – from 5 to 7 rows.
Fireclay is also used for laying the chimney, with the exception of the last two rows - they can be made of ceramic.
It is prohibited to use silicate or hollow type. Because they are not fireproof and begin to crumble after the first fire.
Russian stove
Recommendations for choosing material are the same as for barbecue. But it is allowed to form a firebox from heat-resistant ceramic bricks. This is explained by the relaxed thermal regime of the furnace.
Fireplace
Most families choose a fireplace as a source of heating for a country house. It creates a special atmosphere and comfort in the room.
The internal part is formed from fireclay bricks. The cladding can be done with figured shaped material. It will give the structure a neat look, and the variety of colors and shapes will allow you to decorate the interior in retro, neoclassical, and Provence styles.
Particular attention is paid to the laying of the smoke tooth, which is found in English fireplaces, since it functions as a thermal mirror and should reflect heat rays. It is recommended to build it from quartz brick. The material can be cut well with a grinder with a diamond attachment.
There are increased requirements for the construction of a stove in a steam room, because the sauna air is saturated with moisture, and not every refractory brick is suitable for laying in such conditions. In this regard, fireclay and quartz materials are not recommended.
For a small stove, clinker is well suited. You can create a structure for a bathhouse from heat-resistant ceramic bricks, and make the cladding from ordinary ceramic bricks.
When purchasing material for a stove, you need to pay attention to its appearance, surface integrity, price, brand, and name of the manufacturer. You should not skimp on the quality of the material. Then the stove will last for many years without requiring repairs.
Masonry mortar
The mortar for masonry should be clay; ordinary cement is completely unsuitable in this case. Before cooking, the clay needs to be soaked, the sand washed and sifted. You only need to take river water, no lumps and no silt content is allowed in it. The recommended fraction is 1-1.5 mm. When preparing masonry mortar, a proportion of 1:2 or 3:2 parts of sand to clay is maintained.
There are several methods for making high-quality clay masonry mortar:
A fireclay brick stove will last for many years, since the material is not subject to destruction due to temperature changes.
A solution is mixed from pre-soaked clay and sand, then a ball with a diameter of 5 cm is formed. Then it must be placed on a wooden board, and then pressed with a second board. If the clay crumbles, then the solution is of poor quality and cannot be used. If the cracks occupy 1/3 of the volume, then the solution is excellent for laying a stove. If the cracks occupy half the volume, then you need to add sand, and then check the plasticity again.
The second method is that the solution is mixed according to the selected proportion, after which 2 balls with a diameter of about 5 cm are made from the resulting solution. A flat cake 10 mm thick is rolled out of one ball, and both pieces of the solution are then left in the shade for about 2 days. If after 2 days both parts become covered with cracks, then the clay solution is greasy and requires the addition of sand. If there are no cracks, and the ball remains intact after falling, then you can use the mixture for masonry, it has the necessary qualities.
