Why do you need moisture-resistant plaster?
Moisture-resistant plaster is designed to protect premises from excess corrosion. Special additives help repel water. This prevents the appearance of rust on load-bearing structures and prevents the growth of mold and fungi.
In order for the composition to withstand moisture for many years, it is produced with average vapor permeability. Thus, thin layers continue to “breathe” and the natural microclimate in the room is not disturbed.
With everything else, you should not ignore high-quality ventilation at the place of use.
Plasters of this type are suitable for aggressive internal and external conditions. They are used to treat bathrooms, bathhouses, basements, swimming pools, basement floors, utility rooms and toilets without heating.
In addition, moisture-resistant plaster perfectly prepares walls for subsequent finishing. Paint, tiles, decorative materials, and drywall adhere to them as firmly as possible. There is a huge scope for design with both thin and thick finishing layers.
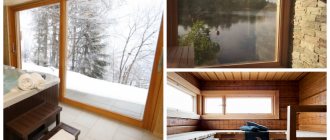
Do-it-yourself finishing of the washing room
The finishing requirements for a washing room are slightly less stringent than for the arrangement of a steam room. But although such high temperatures do not occur in this room, the humidity is always very high. Thus, finishing materials may not differ in heating characteristics without burns, but moisture resistance is a mandatory criterion. Experienced bath attendants advise to give preference to natural, environmentally friendly, breathable materials here too. Wood, such as good quality lining, can boast of these properties. But other materials are also often used, for example:
- stone;
- tile;
- plastic.
Tiles in the washing room
Plastic finishing materials must be approached with extreme caution. They must be only of the highest quality, preferably certified. Because in a bathhouse, heated plastic can emit a far from pleasant odor, or even release toxins.
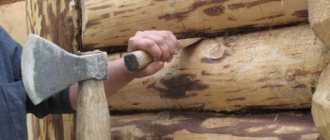
The choice of wood for finishing a washing room is much wider than for a steam room. Coniferous species can also be used here. The temperature in this room is no longer so high as to provoke the release of resin. Pine is one of the most affordable materials among its analogues. It has many advantages. For example, such wood contains phytoncides, which are very beneficial for health. The pine smell has a healing effect on the nervous system, heart, and lungs. But with intensive use of the bathhouse, pine lining may lose its decorative effect. Its pleasant color can darken.
Types of moisture-resistant plaster
Construction stores offer a huge range of water-repellent mixtures.
All of them are divided into categories:
Separately, it is worth removing the façade plasters. Despite frequent recommendations, they are often not suitable for wet areas. They cannot be used for a beautiful finish due to the coarse grit. In addition, the composition often contains toxic substances, the concentration of which in a closed space can be hazardous to health.
What plaster to take
For Bath
For bathrooms and combined sanitary facilities in apartments and offices, all types of moisture-resistant plaster are suitable, except facade and epoxy. Epoxy is less toxic than façade, but has an unpleasant odor that takes a long time to dissipate without proper ventilation. Otherwise, when choosing, you need to rely on the desired effect and type of surface finish. For example, it is better to avoid plaster under tiles.
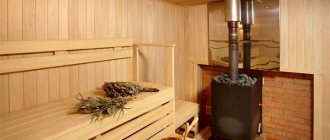
For the bath
Gypsum and cement plasters are popular for interior decoration of baths. They react steadfastly to heat and do not ignite near stoves. The unsightly appearance is easily covered with tiles and sidings. The risk of cracking is compensated for by condensation hoods.
It is better to finish rest rooms, rooms with swimming pools and plunge pools with polymer plasters, silicone, silicate plasters. In showers it is better to use sanitizing types, since there is great direct contact with water.
Utility rooms
In utility rooms remote from water and in ground floors with low traffic, all types are used, including mineral ones. The main condition for this is the possibility of ventilation or high-quality artificial ventilation.
Basements and cellars
Basements and cellars often suffer from dampness. Moisture-resistant compounds are vital there. To save money, most craftsmen use gypsum-sand mixtures and sanitizing plasters. Mineral, polymer and silicone types are practically not used due to the lack of ability to ventilate the premises.
In the case of surrounding water, it is necessary to additionally waterproof the outside.
Development of a standard project
The working design of a bathhouse made of aerated concrete is the first stage of construction of a structure, which takes into account all the main technical and operational characteristics of aerated concrete blocks.
Design involves the preparation of the necessary documentation for work related to waterproofing, vapor barrier of the bathhouse, as well as the arrangement of a dry steam room.
Various projects of aerated concrete baths include basic data:
- General dimensions of the construction site.
- Type of foundation.
- Dimensions and layout of the main premises: steam room, dressing room, rest room, sanitary unit and others.
- Type of heating equipment - location and installation method, operational characteristics.
- Arrangement of utilities - ventilation ducts, chimneys, cold and hot water supply, drainage and sewerage.
- Dimensions of openings for doors and windows.
A finished bathhouse made of aerated concrete, the design of which was developed at a professional level taking into account the main characteristics, will last for many years without the need for major repairs.
The construction of an aerated concrete bath is carried out in stages and includes:
- Laying the foundation. The best solution for buildings made of aerated concrete is a shallow strip foundation.
- Construction of wall structures with the installation of a reinforcing frame every 4 rows.
- Installation of roof truss system, covering of roofing material.
The photo shows similar projects.
How to work with moisture-resistant plaster
The technology of working with moisture-resistant plaster involves several stages.
Preparing the walls
Before application, it is necessary to remove the old coating and clean the surface from dust and dirt.
There is an opinion that paint cannot be removed. But even durable paints and varnishes can be burned off with a blowtorch. The remaining materials are scraped off with a metal brush or spatula. If the wall is fragile, pieces of technical material fall out of it, it is better to additionally strengthen it with a special means and repair chips and potholes. It is preferable to remove very weak areas and refill them with fresh solution.
For better adhesion, make several notches along all surfaces of the wall. The surface should remain slightly rough.
After the “patches” have completely dried, beacons are installed in increments of 1 to 1.5 meters. Then comes priming 1 or 2 times.
Applying plaster
First the starting layer . In the professional slang of finishers you can hear the word “spray”. This term refers to the application base. Thick mortar is applied pointwise onto a slightly damp wall using a spatula, trowel or ladle. Before the moisture has had time to be absorbed, lightly “flatten” the spots to 0.5 mm. On wood, the thickness of the starting layer is sometimes increased to 1 cm. The spray should evenly fill the entire wall.
Next comes the draft layer, also known as the main layer . Along the beacons, using the rule, new “splatters” of a larger size are drawn out. Then the beacons are removed, and the grooves that appear are corrected with a spatula or trowel.
When the base layer has dried, apply the finishing layer . A wooden trowel is moistened with water, a new portion of moisture-resistant plaster is applied in a circular motion, and leveled to the desired result.
Life hacks and tips
Experienced craftsmen have their own tricks when working with moisture-resistant plaster:
The most popular plasters include:
| Name | Type | Purpose | Price |
| AZOLIT-VSH | Cement | For brick and concrete walls | 500 RUR/25 kg |
| Profit Barrier | Cement-polymer | Under tiles for baths, bathhouses, utility rooms | 380 RUR/25 kg |
| Profit Hydrophobe | Cement-sand | For stone walls and previously plastered surfaces. All types of premises, except severe constant dampness | 200 RUR/25 kg |
| Ceresit CR 65 | Cement | Any type of foundation, especially stone | 800 RUR/25 kg |
| Weber. Vetonit TT | Cement | For all walls and rooms with a required thickness of no more than 1 cm | 330 RUR/25 kg |
| Consolid 540 | Multicomponent | Walls and ceilings in any wet areas | 240 RUR/25 kg |
| UNIS Teplon | Plaster | Universal for baths, saunas, basements and utility rooms with average humidity | 330 RUR/25 kg |
| Dufa Kratzputz aussen | Acrylic | Decorative covering in bathrooms. Orange peel effect. | 1800 rub/20 kg |
| STUC GRANITO | Polymer | For bathrooms, swimming pools and bathhouses | RUR 10,600/16 kg |
The table shows the most popular brands and series, proven by time and numerous practical experiences. There is a much larger assortment on the shelves, where everyone can find alternative options to suit their taste and budget.
How to plaster a brick wall in a bathhouse
When performing repairs, many home craftsmen are interested in whether it is possible to plaster with tile adhesive? This question can arise for a variety of reasons, for example, glue was purchased in excess, but before laying the tiles it turned out that the walls were uneven.
It is quite difficult to give a clear answer to this question, so next we will look at the pros and cons.
Remove excess glue between seams. Wait at least 12 hours before grouting unless using a quick-drying adhesive. The grout should be firmly secured in the joints using a grout sponge. Excess solution can be removed from the tiles with a regular sponge. They can then be polished with a dry cloth.
Using glue for flooring
The type of adhesive used will depend on the type of floor. When tiling over other tiles, they must also be completely free of dirt or grease and securely fastened. However, if the floor is not level and adhesive must be used to level it, then more will be needed. To ensure the tiles can bond properly, the tiles should be left to sit for 24 hours unless instant adhesive is used. When grouting on a wooden floor, a water-polymer additive will improve flexibility. Use a squeegee to press the mortar into the joints.
Installation of roof truss system
The next stage is the arrangement of the rafter system for the gable roof. The work package includes the following:
- Installation of the base, rafter and transom for the finished structure. For the rafter system, an edged board is used (dimensions 100 × 40 mm).
- Installation of triangles for gables.
- Installation of wooden sheathing from beams with a step width from 60 to 100 cm.
- Arrangement of the attic floor base in compliance with technological gaps for ventilation.
- Gable trim.
- Installation of waterproofing material on wooden sheathing.
- Laying roofing material.
General information
It would seem that each building material has its own purpose, so tiles should be glued with glue, and nothing else. However, tile adhesive even has some advantages over conventional plaster, which we will discuss below.
In addition, many home craftsmen have successful experience in decorating walls with their own hands. But, at the same time, it cannot be said unequivocally that this can be done, since this operation has a number of its own nuances, which are described below.
Excess mortar should be removed from the tile surface using a sponge. A grout tool should be used to ensure a smooth finish to the grout and improve its feel. Dry mixed adhesives containing self-priming are ideal for most walls. This type of adhesive is extremely convenient as you don't have to mix it or apply it to the walls in front of the shingles. For walls exposed to moisture, such as in the bathroom, waterproof adhesive should be used; otherwise, standard glue is good enough.
Characteristics of aerated concrete products
This building material has many advantages:
- Ease. Despite the fact that the blocks are large in size, they are very light, which greatly simplifies the work. Even an inexperienced builder can build a bathhouse from an aerated block with his own hands.
- Thermal insulation. Due to its porous structure, aerated concrete has good thermal insulation properties. If you build a bathhouse from aerated concrete, it will need less insulation.
- Durability and fire safety. This is a durable material that is resistant to rot, mold and attack by small rodents, and resistant to fire. Such properties ensure a long service life of aerated concrete products.
- Compliance. Aerated concrete blocks lend themselves well to manual processing. This allows you to build any complex structure with virtually no waste.
- Harmlessness. From an environmental point of view, aerated concrete is completely safe, which is confirmed by leading experts in this field.
- Affordability. Compared to other building materials, aerated concrete is low in cost.
In addition to its positive properties, aerated concrete material has one drawback - moisture absorption, and therefore requires external finishing.
Is it reasonable to build a bathhouse from an aerated block, where there is already high humidity? Professional builders advise using aerated concrete, but in this case additional powerful finishing will be required inside.
Start of construction
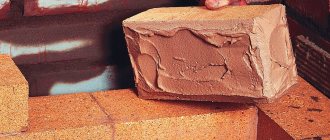
It is recommended to lay 1.5 or 2 bricks with voids, which corresponds to 38 cm and 51 cm, since this method has better thermal insulation properties. The construction of masonry indoors can be done in ¼ and half brick, respectively 6.5 and 12 cm, provided that standard building material is used, according to GOST.
The plinths and the fundamental base of the bathhouse, located below the surface layer of waterproofing, must be built from red refractory solid brick. When constructing a surface level, hollow brick can be used above the waterproofing, and the walls themselves can be made of standard white (silicate) or red brick.
The strength of brickwork largely depends on the correct execution. It is necessary to begin laying by installing a corner plumb line at the junction and intersection of the walls. The first row of corners starts with 2/4 or ¾ brick. Lightly loaded parts of the wall, for example, a window opening, are made of half a brick. Between horizontal and butt rows, the thickness of the gap between bricks should not exceed 12 cm. To control the quality of masonry, installation fines, or construction beacons, are used.
We suggest you familiarize yourself with the passage of a pipe through the ceiling in a house
Locker room
The materials for decorating this room can be very different. But it’s hard to come up with anything better than a tree. However, it can be supplemented with other types of finishing: decorative plaster, artificial stone tiles, various wall panels, etc.
It all depends on the size and purpose:
- If this is a small dressing room in a free-standing bathhouse, intended only for undressing and dressing, it is better to limit yourself to moisture-resistant wooden finishing. Especially if the bathhouse is heated once a week, and the rest of the time it is not heated.
Finishing the dressing room with a blockhouse with tinting
- If this is a spacious recreation room with a heating system from the house, then your desires are unlimited. Even wallpaper and painting on the walls - as long as you like it.
Wood finishing
Plaster, tiles and painted wood panels
Decorative plaster and stone
Blockhouse and brick
As for how to decorate the outside of the bathhouse, any façade materials can be used here. Most often, a beautiful log house is left without cladding, limited to caulking the joints, sanding and treating with decorative and protective agents.
Sanding the log house
And buildings made of brick, foam blocks and other building stones are finished in accordance with the house or imitate a log house using a wooden, plastic or metal blockhouse.
Exterior decoration with blockhouse
Tile adhesive and its properties
Types of glue
Generally, adhesives designed for floor tiles are water-resistant. If you are covering a concrete floor, it is always best to use a non-flexible adhesive, but on wood floors and floorboards a flexible adhesive should be used. Normal and instant adhesives are available for wall and floor tiles. With normal adhesives you will have to wait up to 24 hours before you can begin cementing. With speed dial, the wait is reduced to several hours. The problem with quick-release adhesive is that it can install faster than you can lay the tiles.
All existing types of tile adhesives can be divided into two types:
With normal variety, where you spread the area one square meter at a time, you will have no problem drying before laying the tiles. Adhesives are sold in a variety of colors, which is not a problem unless you are fixing natural stone tiles. Colored glue will stain them, so be sure to only use white glue.
Grout is used to fill gaps between adjacent slabs. This prevents moisture and dirt from entering and helps maintain good visibility of the wall or floor. Since most surfaces expand and contract over time, the grout can be made more flexible by using an additive. When grouting in areas where there are likely to be high levels of moisture, such as a bathtub or shower stall, you should use a waterproof grout or seal it. Today, most solutions are waterproof.
As you might guess, only the first type of adhesive can be considered as plaster. Ready-made compounds are completely unsuitable for this, although it is unlikely that anyone would want to use expensive material as plaster.
Today on the market you can find the following mineral adhesive compositions that have proven themselves:
Problems with the use of combination adhesives and solutions
There are various factors that will determine the volume of grout you need for a given area of tile. These include the size of the tiles used and the spacing between them. There are combination adhesives and solutions on the market, but you are not advised to use them. Although purchasing a combination adhesive and mortar may seem like a good way to save on costs and finish the job much faster, many who have used these products have encountered problems.
Note! Before using glue for plaster, you should make sure that it is universal, i.e. not limited to any one application or type of material with which it may interact.
Typical complaints are that the adhesive and mortar combination is of poor quality and it is difficult to achieve an acceptable finish. Also, when the "mortar" is installed, it contains small holes and must be replaced. The answer is to always use a separate adhesive and grout that is appropriate for your specific tile project.
No, flexible cementitious adhesive should be used. The added polymer content accommodates the movement caused by thermal expansion and contraction created by heat. Ready-mixed adhesives depend on evaporation to cure. Large tiles do not allow water to escape from the adhesive behind them, especially on a non-porous background, which significantly increases drying time. Yes, provided the tiles are sound, securely fastened, dry, clean and able to support the weight of the tiles and adhesive that will be attached to them.
Properties of adhesives
Among the features of dry mixes for tiles, the following points can be highlighted:
From all of the above it follows that such mixtures have even better characteristics than ordinary plaster. However, one point must be taken into account - the adhesive is not intended to be applied in a thick layer, otherwise various problems with the coating may occur.
The key can be applied to glazed tiles by rubbing with sandpaper and cleaning. Any loose tiles or tiles that sound hollow when tapped should be secured first. When choosing the type of adhesive, you need to consider the size and porosity of the tile. How to fix natural stone floor tiles? Cement-based adhesives should be used to secure natural stone, granite, limestone, marble, travertine and similar tiles. Consideration should be given to whether white cement based adhesives should be used when fixing lighter colored slabs to avoid staining.
Manufacturers of the compositions recommend applying them to the wall in a layer of no more than one centimeter. But, as practice shows, it is possible to achieve a high-quality finish by applying a layer of up to 4 - 5 cm. The only thing is that the composition should be applied in layers, and it is necessary to regulate the fat content of the solution itself by adding sand to prevent cracking of the surface.
A “hard roof” installation is recommended, whereby a ribbed layer of adhesive is applied to the floor using a notched trowel, and the back of the tile is “smeared” with adhesive. Twisting and pushing the tile into place will ensure nearly 100% coverage of the adhesive and support of the tile.
Firmly anchoring the bed is especially important when using tiles, which may contain natural voids that can be destroyed given time. Travertine is a type of limestone that has been used in Italy since Roman times. It has a very low density, in its natural state it is filled with holes and voids, these are often filled with synthetic resins on the surface. Even high quality travertines can have voids and holes. To ensure sufficient support, the “hard bed” bracing method as described above should be used.
Ceiling insulation
Warm air and steam always collect near the ceiling. Therefore, the owner of a bathhouse should definitely think about insulating it so that the heat is not wasted.
This applies to any type of ceiling - hemmed, floor or panel, regardless of what is on top: a cold attic or a warm attic.
The following requirements apply to the ceiling insulation used:
- incombustible;
- moisture resistant;
- does not emit harmful substances when heated;
- with low thermal conductivity.
Expanded clay is good in this regard - it is poured onto a waterproofed rough ceiling between the floor beams on the attic side. And then they are again isolated from moisture. Instead of expanded clay, you can add a layer of ecowool.
It is also a good idea to use basalt wool without phenolic impregnation. But it easily absorbs water, so it needs high-quality insulation from water and steam. The wool can be laid either on top of the flooring boards or hemmed underneath.
Polystyrene foam would be good for the ceiling, but it is flammable and, if manufactured poorly, releases harmful substances when heated.
When insulating the ceiling, clay or mixtures with clay are often used; find out if it is suitable here.
We recommend that you familiarize yourself with the materials from the section Insulating the ceiling of a bathhouse and Insulating the roof.
IMPORTANT! Above the steam room, the ceiling needs a double layer of vapor barrier.
A brick bathhouse can become very comfortable, but it will require a large investment of labor and money from the owner. Therefore, it is worth going to build such a bathhouse only if it seems completely acceptable.
Choosing fireproof plaster for a stove in a bathhouse
Most heat-resistant joints are universal. They can be used not only as a material for creating a flat surface and leveling walls, but also as a reliable base for brickwork. When choosing plaster, you first need to pay attention to its operating temperature and correlate it with a certain degree of heating of the stove in your home bath.
The raw materials for the production of heat-resistant fillers are clay, cement, sand, lime and gypsum. The key components - lime and clay - are used in all mixtures; other ingredients may be absent or appear in different proportions. In the past, asbestos was also added. But today it has been completely abandoned due to the high toxicity of the material and harm to health.
The range of oven putty in stores is for every taste and budget. But if you think that it is enough to just take ordinary cement plaster for the fireplace, which will retain its qualities and appearance for a long time, you are mistaken. This is only possible for decorative stoves that do not operate in the heating system. The composition for operating furnaces must have special properties.
We suggest you familiarize yourself with: Steam room oven with water tank
Is it necessary to insulate?
If with other materials it is appropriate to argue about whether insulation is necessary or not in their case, then there is no reason to doubt: insulation of a brick bathhouse is mandatory. Brick has high thermal conductivity, so without insulation it will take a very long time to heat a bathhouse, but, on the contrary, it will cool down very quickly.
Just imagine how much time and firewood it takes to heat walls that have frozen at sub-zero temperatures. By the way, insulation is always compared to a brick wall, saying that where meters of masonry are needed, you can get by with a few centimeters of insulation.
However, the next question requires more detailed consideration.
Plastering walls with adhesive mixture
Preparing the base
First of all, it is necessary to properly prepare the foundation. There should be no crumbling or peeling areas, as well as contaminants that impair adhesion.
This entails using 5 pieces of tile adhesive. This does not provide sufficient adhesive coverage or support for the tile. Do I need to prime plaster walls before tiling? When using a cement-based adhesive, the porous background must be primed with a suitable primer.
How to properly level walls with glue
When using ready-mixed glue; No primer is required unless the surface is dusty or shiny. But don't sit back just yet—at the risk of sounding like party opera, this is a fun beat. Now we need to think about adhesives and installation. After all, your new tiles will only look better if they are installed correctly.
In particular, concrete slabs must be cleaned of the oil used in their manufacture. To do this, you can use warm water and detergents. If there are traces of mold or mildew on the surface, it must be cleaned with a wire brush.
The final stage of preparation is the application of a primer, which will not only improve the adhesion of materials, but also protect the base from the effects of microorganisms. The solution is applied to the walls in two layers.
In many cases, it makes sense to choose a fast-acting adhesive. However, there are many times when you prefer to use an adhesive with a longer open time - when you are laying a floor in a complex pattern such as herringbone or when laying large format tiles on a wall and you want to ensure a flawless finish.
So as a reminder, when covering any floor and many walls, you need to use powdered adhesive. The exact choice of adhesive will depend on the color of your grout and the desired flexibility and working time. There are a few more things to consider while we're on the topic of tile adhesive. Let's take a closer look.
Installation of beacons
This stage is quite complex, as it requires extreme precision - all guide beacons must be positioned strictly horizontally, in the same plane. This determines how smooth the walls will be, i.e. what plastering is done for.
If you want to install either wet or wet, it is very important that you use flexible tile adhesive. The heating and cooling processes create significant stress, and the flexible adhesive absorbs this stress, reducing the likelihood of the tiles cracking over time.
Electric underfloor heating systems consist of small cables that are laid over the underfloor layer and then covered. However, we do recommend using a self-leveling compound to cover the cables and ensure a perfectly level surface for the tiles - it can be a nightmare to grout over exposed electrical cables!
As beacons, you should use a special plaster profile, which is fixed to the wall using lumps of gypsum or the same adhesive solution. To adjust the position of the beacon, screws can be screwed in on both sides. In this case, the profile with its edges will “lie” on their caps.
Note! If necessary, check their position several times with a building level.
If you are on a time critical project, our kits are as fast as 45 minutes. Mix, pour and go while you have your tea break! Absorbent surfaces such as plaster can suck water out of the tile adhesive, reducing bond strength and working time. Applying a to the backing in front of the tiles seals the surface, preventing water absorption and increasing bond strength. They are also useful if your substrate is too dusty or smooth for tiles.
When applying two coats of primer, it is best to apply the first coat vertically and the second coat horizontally. When it comes to fixing tiles, the old adage that "Failure to prepare to prepare for failure" couldn't be truer. So before you open your first bag or tub of tile adhesive, it's important to have your subs ready, i.e. they are flat, clean and strong enough to take your tiles.
Preparation of the solution
The peculiarity of preparing the solution in this case is that it may turn out to be too greasy, which will lead to cracking of the surface. Therefore, sand is usually added to it.
The fat content is determined during its preparation; if the solution sticks strongly to the instrument, then it is necessary to add sand. As a result, the composition should only slightly stick to the trowel.
Nobody wants uneven floor tiles - it's hard to get the tiles level and you'll end up losing the adhesive. Use a 2m straight edge to check how flat your underlayment is; if there are any deviations greater than 3mm, then we recommend pouring a layer of self-leveling layer to ensure a smooth, level surface.
Uneven walls can be made flat by using a good plaster material or by adjusting tile slabs. Dust and dirt can interfere with tile adhesion and can get into the grout, so be careful to sweep your substrates in front of the tiles. There's a good reason why a lot of chicks swear by their Henry Hoover!
Applying the composition to the wall
After preparing the base and completing the solution, you can proceed directly to plastering.
The instructions look like this:
As we touched on above, it is important to consider the weight of the tiles and adhesive when covering plaster or drywall walls. Fresh plaster can withstand 20kg per square metre, and plasterboard can withstand 32kg per square metre. Typically, you will need up to 2 - 4 kg per square meter for adhesive and mortar, on top of the weight of the tiles. This weight may vary; small ceramic tiles tend to be quite lightweight, but larger porcelain tiles can weigh over 20kg per square meter. Where possible, we advise attaching wall tiles to walls without a wall or better yet.
This completes the plastering procedure. If you do not make technological mistakes during its application, then the adhesive plaster will be quite durable and of high quality.
Conclusion
Answering the question posed at the very beginning of the article, it should be said that, in general, plastering with tile adhesive is acceptable. However, this procedure has a number of limitations, both in terms of the type of composition and the thickness of the plaster layer.
Therefore, before you get down to work, you need to take all these nuances into account. Additional information on this topic can be obtained from the video in this article.
Tiles? you need to level approximately 2.5 - 3 centimeters. Is this possible due to the thickness of the application one day before laying the tiles? if not, please advise other solutions/materials
if you need it quickly, then there is quick-drying
mp-75 dries longer but this is price-quality
Plastic panel lining
This method of finishing a sink is considered the most budget-friendly. The material is lightweight and resistant to moisture; it is mounted on a special grid. If you look visually, it is difficult to distinguish the lining from wood. Any design can be realized here. Such cladding has its drawbacks - toxins can be released when heated, the material is not environmentally friendly, airtight, and can quickly suffer mechanical damage.
To install plastic panels, you must first make waterproofing using PVC or foil film.
Topic: leveling walls with tile adhesive when laying tiles
I don’t know how to name the topic more correctly.. In the bathroom, at least one wall has a vertical difference of about 2 cm. Is it possible to level out this thickness with tile adhesive? thickness when leveling with glue? If not, then pre-level them with plaster? I’m going to lay the tiles myself, so don’t give answers like “the craftsman will do everything himself.”
If you are not in a big hurry, then where it is “thick”, first apply glue with a 10*10 comb, let it dry, and the next day - completely. The glue is thicker.
It is better to pre-level the wall than to decide on large plaster mixtures. It will be much easier for you, as a beginner, to lay tiles.
FARAON7575, I'm thinking of plastering it with glue in 2 stages, so I'll try to level it. My mother-in-law professionally does plastering, putty and other repairs. But for some reason she wants craftsmen to lay the tiles. Although there is not enough money anyway. And if he says you will lay it yourself, then I will not level it. that's bullshit
There was such a problem, the vertical difference was 2.5 cm. I found “Plitonit Maxislayer” tile adhesive; it can be applied up to 3 cm. But if you lay it while leveling it, then this is a very labor-intensive and time-consuming process. I had time, I wasn’t in a particular hurry, I managed to lay 3-5 tiles in the evening (ceramic granite 15*60cm), it turned out quite evenly, but in some places I still didn’t catch a fraction of a millimeter.
Can tile adhesive be used as plaster?
After this, you can safely apply the plaster mixtures. For a more reliable process, you can add tile adhesive and PVA glue to the plaster (mixture). Mix the mixture thoroughly. It should have a sticky consistency. Then, using a tool, apply the resulting solution to the wall. The layer thickness should be 6-7 millimeters.
So, is it possible to plaster with tile adhesive - decide for yourself. The main thing to remember is that you need to use the highest quality materials for renovations, so don’t skimp!
Laying the foundation
Due to the lightness of the aerated concrete structure, the foundation does not require special power, so the most popular strip type of foundation can be used to build a bathhouse from an aerated concrete block.
- First you need to measure the area of the territory, then mark the outline. To do this, you will need to drive pegs into the ground and pull a cord along them. It must be taken into account that the width of the foundation should be 15–20 centimeters wider than the walls.
- Next, a trench is dug to a depth below the freezing point of the ground in a specific area. The first layer is made of sand approximately 10 centimeters thick. After compaction, the next, same layer of gravel is poured in and compacted again.
- Next, for waterproofing, there is a layer of roofing material, after which the formwork is installed.
- To install the reinforcing structure, reinforcing bars are used, the thickness of each should be at least 1.2 centimeters. The reinforcement is connected by welding or tied using baked steel wire. To join at the corners, the rods are bent and then secured.
- After the preparatory work on assembling the reinforcement frame, concrete is poured. Horizontal fill lines must be smooth, so you need to monitor their level. It is best to use a concrete mixer and pour the foundation right away.
After one month, the foundation hardens, but according to the advice of professionals, it should be allowed to stand in the winter.
Is it possible to putty/level a wall with tile adhesive?
Vorpos is a little off topic, but he puzzled me a little and I’ll ask anyway. it turns out to be quite weak. that is, it can be easily passed through with a hammer drill. and is scratched with a nail. How normal is this? While tearing off the remnants of the old renovation, I also noticed an interesting feature - the tile adhesive on the floor, about 7-8 mm thick, breaks into two pieces first. Next comes the floor screed, which was done at the same time, about 5 years ago. but it is very strong, it is difficult to break and pieces break off from it very reluctantly. Why is that? from Floor screed
Source