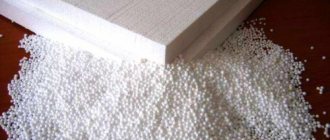
Foam plastic began to be used as insulation in the mid-20th century. The foam consists of expanded polystyrene. When foaming, air bubbles form. Due to the large number of air bubbles, polystyrene foam is considered an excellent thermal insulator. But is it possible to insulate a bathhouse with foam plastic? Let's figure it out together.
Is it possible to insulate polystyrene foam and a bathhouse?
The sequence of insulating a concrete floor from the inside of the room
Carrying out insulation inside has its own characteristics:
- the dew point is located inside the mounted structure;
- the room does not have frost protection;
- with this method it is necessary to create waterproofing on the cold side;
- reinforced cement screed is poured on top of the insulation;
- the insulating layer significantly reduces the height of the bathhouse room.
There are materials that have high strength and make it possible not to reinforce the screed.
Carrying out installation
To install polystyrene foam insulation you will need:
- knife for cutting insulation;
- container with polyurethane foam;
- glue;
- foil-coated polyethylene is required for insulation pairs;
- metal construction tape (for gluing polyethylene sheets).
How to properly insulate a concrete bathhouse floor?
Necessary tools for working with mineral wool:
- tool for cutting material;
- tape for gluing joints of film or membrane material;
- polyethylene film for waterproofing;
- thermal insulating membrane for vapor barrier.
The process of insulating the floor in a bathhouse is very responsible; it requires a competent approach in choosing the material, as well as in following the technological process. It is faster, easier, and more effective to insulate with polystyrene foam than with a mineral slab. The cost of the material will pay off in the process of comfortable and durable operation.
Each bathhouse room performs its own function. For example, waterproofing is most important where people wash directly. In other rooms, for example in a room, for rest or in a dressing room, it is not so important.
When carrying out work in an already built bathhouse, the ideal solution would be to create a layer of insulating material on top of the existing base. The insulation is inserted between the built-in joists.
https://youtube.com/watch?v=nH8EUT14t0Q
In the steam room, the floor should be higher for the fastest heating of the air; the smaller the steam room, the faster it heats up. Before carrying out work, the required materials are calculated. Insulation of the bath should be carried out under favorable weather conditions. Under such circumstances, work will be challenging and satisfying.
Underfloor heating system
Another option for insulating the flooring in a bathhouse is installing a heated floor system. In this case, you can choose a design based on electric heating elements or water pipes.
The perfect solution
Such floors can not only make the floor warm, but also heat the entire room. Therefore, if they are used in a steam room, they can participate in creating the necessary environment. Their location in other rooms of the building will make it possible to move comfortably barefoot.
They are installed in the same way as other insulation materials under reinforced lattice and screed in a concrete floor and between joists under boards in a wooden floor. An important addition is the need to install heat-insulating material under the system to prevent heat loss into the ground.
Floor insulation technology using joists
To properly insulate wooden floors in a bathhouse, some experts recommend using logs set in increments of 55 to 95 cm. This is the simplest and most affordable way to install flooded floors with a layer of insulation.
The work is performed in the following order:
- Dismantling the old flooring, cleaning the surface from debris and dirt, eliminating unevenness and deformations.
- Installation of logs from the underside of the base along its entire length.
- Fixing the logs at the optimal distance from each other. To protect against rotting and destruction, they are treated with wood antiseptics.
- Between the logs, boards or sheets of plywood are installed, on which thermal insulation material is laid. For insulation, mineral or basalt wool, as well as foam sheets, are used. The joints are carefully treated with sealant. When using cotton wool, a waterproofing layer of polyethylene film is additionally laid.
- Finally, the finishing floor covering is installed.
Tips for choosing insulation
The right choice of insulation is the key to success
The modern market offers a huge number of insulation materials. They differ from each other not only in their technical characteristics, but also in cost. However, you should not rely on the latter when choosing the best option.
The choice of insulation must be made based on:
In addition, you need to pay attention to the specific gravity of the insulation itself. A good insulation is one that does not create additional load on the foundation.
Floor installation and selection of tools
The work of arranging the floor in a bathhouse requires the use of a variety of tools. Since in most cases they are made of wood (this is especially true for steam rooms), you need to use a regular carpentry kit. The floor can be made with water passing through cracks or into one separate drain. This drain is directed in one direction, otherwise the stability of the water flow cannot be guaranteed. If the floor is formed without ducts, there is a permanent flooring underneath it, which must be replaced only at the end of its working life.
To make the surface warmer, the gutter and the drain leading into it are placed in the lowest place. The design of removable floors implies the possibility of periodic disassembly when the bathhouse is not in use. When forming the screed, you will need a cement trowel and special rakes, trowels and spatulas of various sizes. The evenness of structures is ensured using a level (hydraulic or laser).
Insulation using perlite
Perlite solution is convenient to use for insulating concrete floors. In this case, a layer of heat-insulating material is placed in the space between the rough floor screed and the final leveling fill.
Table. Floor insulation with perlite
Work stage Description
Preparation of the solution
Note! The unit of measurement in this example is a bucket. Based on the given proportions, you can prepare the required amount of solution, measuring the original ingredients in fractions, kilograms, bags, etc. Pour 2 buckets of perlite into any deep container of a suitable size, add a bucket of water to it and give the mixture time to completely shrink. Add half a bucket of cement no lower than M300 to the resulting solution, and then half a bucket of water
Important! Stir the mixture thoroughly after adding each component. Finally, you need to add a little more water (about half a liter) to the solution
The result will be a dry, crumbly mixture. Knead the semi-finished product until it becomes plastic.
Laying thermal insulation mortar
The resulting plastic solution is evenly distributed over the rough screed. The recommended thickness of the insulating layer is up to 100 mm. You can level it in any suitable way, for example, using a long rule. If you are insulating a large area, for convenience, using self-tapping screws/anchors, you can attach several guides to the floor, for example, from a profile for drywall or a wooden beam with a step corresponding to the length of the rule you are using.
Pouring the finishing leveling layer
5-7 days after applying the perlite solution (this is exactly how long it needs to harden), a finishing leveling screed is poured over the insulation. The most convenient and easy-to-use option is a modern ready-made self-leveling floor mixture. Reinforced mortars are available for sale, allowing you to create coatings with a layer of up to 8 cm or more. The developer can only prepare the mixture and apply it to the base in accordance with the manufacturer’s instructions. Helpful advice! Before pouring the final leveling layer, the surface can be covered with waterproofing material and a reinforcing mesh can be laid, but, as practice shows, the structure feels great even without such inclusions. After the leveling layer has dried, you can finish the insulated floor, for example, tiling it with suitable tiles.
Are polystyrene foam and polystyrene foam the same thing?
The insulation of the ceiling of a bathhouse with foam plastic can be somewhat diversified, while remaining faithful to the choice of this particular material.
You couldn't help but hear about an improved type of polystyrene foam - polystyrene foam. Essentially, these are the same plates made of capsules filled with a gaseous substance, only stronger, stronger, better.
Let's analyze the qualities of polystyrene foam
:
- it is not as fragile as polystyrene foam; even with not very careful transportation, the corners of the polystyrene foam plate remain intact;
- this material does not ignite as quickly as polystyrene foam filled with highly flammable gas;
- The service life of expanded polystyrene is from 15 to 35 years, polystyrene foam is from 10 to 20.
As for the price, expanded polystyrene is only 5-10% more expensive than its “big brother”.
Floor insulation with expanded clay
The procedure for filling the thermal insulation layer will vary depending on the design of the floor of the bathhouse being equipped. There are few options:
- the floor is laid over logs installed on compacted soil;
- the flooring is made on top of logs placed on brick supports;
- the structure is represented by a concrete screed or reinforced concrete floor slab.
Choose your option, read the instructions specifically for it and get to work. The information is given in the table.
Table. Floor insulation with expanded clay
| Floor construction type | Insulation procedure |
| Floor on joists on the ground | It is assumed that the joists have already been installed and all that remains is to lay layers of insulation to create the final flooring. If you are insulating an already used wooden floor, you must first remove the flooring (damaged boards are replaced with new ones), replace rotten joists and thoroughly compact the soil. The subsequent steps are similar for both cases: - waterproofing is laid on top of the compacted soil. You can put either plastic film, roofing felt or glassine. Waterproofing is placed both in the space between the joists and on top of them. Lay the sheets with an overlap of 10-15 cm. Tape the joints with construction tape. You can attach the insulation to the joists using a construction stapler with staples or small nails; — a uniform layer of expanded clay is poured over the waterproofing. Further actions depend on whether expanded clay will be used as the only insulation, or whether a second thermal insulation layer, for example, mineral wool, is planned to be laid on top of it. If thermal insulation is performed exclusively with expanded clay, the order is as follows: - the selected vapor barrier material (preferably foil) is laid on top of a leveled layer of expanded clay with a thickness of 30 cm or more. The overlaps and fasteners are the same as when laying the material for waterproofing; — finishing of the floor is carried out at the discretion of the developer. If expanded clay is used together with other insulating material, the procedure is as follows: - a vapor barrier material is placed on top of a layer of expanded clay 10-15 cm thick (the specific value is selected taking into account the planned thickness of the upper thermal insulation layer). The recommendations are similar to the previous case; — expanded polystyrene or mineral wool is laid on the vapor barrier. The functions of the frame for placing the slabs will be performed by the logs - select the width of the thermal insulation elements according to the size of the spaces between the logs (or simply fill the frame with the required parameters from timber). If the height of the logs is not enough, nail a beam on top of them at the height of the top insulation; — the thermal insulation is covered with a layer of hydro-vapor barrier. The further procedure of work remains at the discretion of the owner. So, for example, if a concrete screed is to be poured, a reinforcing mesh is first laid on the insulation. If the floor is wooden, bars are nailed to the joists for laying the boards. |
| Floor on joists on brick supports | In this case, the procedure will differ little from the option discussed above. Minor differences are present only at the initial stages of insulation: - expanded clay is poured to the level of the logs laid on top of the brick supports; - cranial bars are nailed to the joists (the most commonly used option is 4x5 cm in size); - a rough flooring made of boards or wood boards is installed on top of the bars. Further actions are carried out similarly to the previous instructions. |
| Floor on concrete slab | The sequence of activities will differ little from the instructions you have already reviewed: - the base is covered with a water vapor barrier; — expanded clay is poured; — the backfill is covered with another layer of water vapor barrier. The further procedure is determined by the developer and depends on whether a concrete floor will be poured or a wooden structure will be installed. |
Features of floor insulation in a bathhouse with penoplex
We carry out the work in the following order:
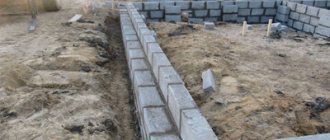
- We cover the foundation pad with bitumen mastic in two layers.
- We lay roll waterproofing with an overlap of 10 cm. Glassine or hydroglass insulation are excellent for this purpose.
- We lay foam sheets. We check the evenness of the installation using a hydraulic level.
- We make a reinforced concrete screed with a thickness of 6 cm.
- We install the facing covering.
- The best option for finishing the floor in a bathhouse is wood or ceramic tiles.
We carry out thermal insulation following the following algorithm of actions:
- We cover the logs and the space between them with a vapor barrier membrane. You can use aluminum foil, kraft paper or plastic wrap for this.
- We lay penoplex sheets with a thickness of 10 cm, pre-treated with fire retardants, between the logs.
- We fix the second layer of vapor and waterproofing
- We will equip the finishing flooring.
Insulation materials
In general, the floor in a bathhouse can be insulated with any insulation material. There are rooms with different operating modes and the floor structure may be different. Let's look at the most common materials that can be used to insulate a bath.
From old memory, many still remember such insulation as expanded clay. Until there was an alternative, it could still be considered insulation. Now, to replace a layer of mineral wool with a thickness of, for example, 8 cm, you need to pour 40 cm of expanded clay. Yes, it is cheap, but it is afraid of water, which makes it completely unattractive.
Specifics of thermal insulation of bathhouse walls with penoplex
The procedure for thermal insulation of walls in a bathhouse with penoplex looks like this:
- Cover the surface with two layers of primer.
- After complete drying, we fix the vapor barrier layer.
- We apply an adhesive composition 7-8 cm thick to the foam sheet. It should cover about 40% of the surface.
- We attach the part to the wall and additionally fix it with “fungi”.
- Having completely covered the surface of the walls, we proceed to install the second layer, moving the elements to cover the seams.
- After the adhesive has completely dried, we fill the gaps with foam.
- We reinforce the surface with fiberglass mesh, attaching it with glue, and let it dry.
- We plaster the walls and carry out further finishing of the walls.
Please note that glue for attaching the material can only be used based on cement, polyurethane or bitumen.
Technology
No matter how good the material is, failure to adhere to the accuracy of the installation technology can, over time, negatively affect the quality of heat conservation.
Therefore, having prepared the necessary material, carefully study the step-by-step instructions
.
Frame installation
Required
:
- foam sheets;
- metal profile or wooden blocks 50x50;
- film for vapor barrier.
Stages
:
- Clean the ceiling from dirt and dust, eliminate unevenness, if any. Treat the surface with an antiseptic.
- Remove electrical wiring. To do this, use a special protective corrugation.
- Attach beams or a profile to the ceiling at a distance of 50 cm. Make sure that the shape of the attached beams takes on the appearance of a large cage, each cell of which should correspond in size to the foam sheet.
- Install foam plastic using dowels or glue.
- Treat joints and cracks with polyurethane foam.
- Attach a vapor barrier layer to the insulation.
- Finally, start installing drywall, wood or other material that matches the overall interior.
Adhesive mounting option
Required
:
- sheets of foam plastic in an amount corresponding to the total area of the ceiling;
- adhesive composition.
Stages
:
- Clean the ceiling, treat it with an antiseptic and prime it for a better bond between the glue and the surface.
- Prepare an adhesive composition or use a ready-made one.
- Apply glue to the foam sheet (in continuous lines along the edge and in splashes in the center of the board). Press the foam sheet as firmly as possible against the ceiling and hold for a few seconds.
- If you are insulating the ceiling using polystyrene foam, then all the sheets should be prepared in advance: scratch with an iron brush along the working side (the one on which you will apply the adhesive).
- Start gluing the sheets from the middle of the ceiling in a checkerboard pattern.
- For greater reliability, the foam sheets can be additionally attached with dowels after the glue has dried.
- Glue the reinforced mesh on top of the foam and putty.
Tips and tricks
The insulation of a bathhouse follows the same principles as the thermal insulation of a house. But elevated temperatures and significant humidity make it possible to use not all coatings suitable for ordinary rooms. So, among mineral wool it is definitely not harmful to use only the latest modifications, which are connected using biologically neutral acrylic. Peat blocks filled with sawdust or straw do not allow bacteria to grow, but they do absorb water. It is advisable to consider the option of cork mats - they are mechanically strong and do not become saturated with liquid, and they stop heat quite well.
If the bathhouse is insulated with natural materials, then it would be correct to treat them with special compounds that block the effects of insects, rodents and microorganisms. It is advisable to caulk log houses and timber with jute (flax). When a bathhouse with brick walls is insulated, roll and slab products are most often placed in a steel frame with a zinc profile. The layer of mineral insulation on logs and beams can be limited to 80 mm (if there is no danger of severe frosts). In order for the insulator to retain its characteristics, it is taken 2-3 mm thinner than the cross-section of the bars.
To learn how and with what to insulate a bathhouse, see the following video.
Useful tips
An insulated wooden floor of a bathhouse is good, but such structures have the unpleasant feature of accumulating water vapor in the underground. For foam plastic and wood, this means an increased risk of fungus and a significant deterioration in thermal insulation. Therefore, vents are installed separately from the foundation for the subfloor with foam plastic. The inlet and outlet windows are closed with pipes, the section of the first is led into the bathhouse dressing room, the outlet is led into the riser of the chimney pipe. It turns out that the stronger and more often the bathhouse is heated, the drier the floor and the better the thermal insulation of the room.
Types of floors
Kinds:
- Wooden. They can be continuous or leaky. In the first option, the floor is a solid flooring made of boards with a point for draining water. In the second, the supporting frame is knocked together from bars, boards are placed on their surface, with a gap of 1–2 cm between them. Water flows through them into the soil.
- Concrete. Monolithic bases, similar to a multi-layer “pie”.
Types of concrete floors:
- Polished. Suitable for large industrial enterprises, lobbies in shopping centers. Polished concrete surfaces look attractive and can withstand high operating loads. The technology for manufacturing such coatings is called “Superfloor”. When used, the result is a high-quality floor that retains its attractive appearance for a long time, regardless of the load. Machines with diamond abrasive discs are used for grinding.
- Liquid. Such coatings are suitable for rooms with low operational load. The floors are seamless and smooth. The solution is poured into the center of the room and spread over the entire area. Then it levels itself, filling the voids.
- Multilayer. They consist of several layers, each of which performs specific functions. The number of layers depends on the required technical characteristics.
Multilayer floors are suitable for residential buildings and industrial premises. To protect surfaces from cracks, scratches, and chips, special coatings are applied to them.
Leaking wooden floor (Photo: Instagram / arbenin.ea)
Optimal insulation for the floor in a bathhouse: which is better and for what reasons
Extreme conditions inside the bathhouse, constant temperature changes, and significant high humidity determine the selection of all materials for insulation with special care and accuracy. It is worth understanding that the raw materials usually used for this may not be suitable, since they simply will not withstand such operating conditions. The best insulation for the floor in a bathhouse should be resistant to both one factor and another, and in addition, experts recommend choosing a material with a pronounced cellular structure, which will help it last a long time, performing all the functions that it actually provides , and are expected.
The most popular is insulating the floor in a bathhouse with expanded clay with your own hands, of course, provided that the floor is made of concrete or cement screed. This environmentally friendly, natural material is extremely lightweight and also has very enviable thermal insulation qualities and properties. Among other things, expanded clay has enviable fire-fighting properties, and it is also reliable and durable.
If you are seriously considering the best way to insulate the floor in a bathhouse, you should also pay attention to the various mineral insulation materials that are available on the market today in a wide range. Today, these are the most popular and relevant materials
Mineral wool is environmentally friendly, lightweight and it is possible to purchase foil rolls; it also does not burn at all, but it also has its drawbacks. When installing floor insulation using mineral insulation, great attention will be required to waterproofing, otherwise the entire effect will be reduced to zero.
You can also insulate the bathhouse floor with polystyrene foam, that is, foam material that is sold in the form of slabs, weighs little, and does its job perfectly. Moreover, laying it is as easy as shelling pears, and you can even cut it with a penknife. However, it is worth knowing that when heated, this synthetic material can release aldehydes into the air, which can seriously affect human health. If you are not sure whether you can properly insulate it, then you should not use it. And the fire safety of insulating floors in a bathhouse with foam plastic and concrete can be safely questioned.
You can also qualitatively insulate a concrete floor in a bathhouse using perlite, a bulk material that also has a synthetic base, like polystyrene foam. You need to know that it is simply added to the cement-sand mortar during rough pouring. On top of such an insulating layer, a finishing coating will already be poured, which must be leveled over the surface, and only then the final finishing coating, such as boards, tiles, artificial or natural stone, etc.
Among other things, it is possible to insulate the floor in a bathhouse with penoplex, which also belongs to the family of foam materials, such as styrofoam or polystyrene foam, which is essentially the same thing. This is a very high-quality material that is quite strong, durable, has high thermal insulation qualities, is resistant to moisture, and its installation is simple and accessible even to those who have never dealt with anything like this before.
As for the thickness of the thermal insulating layer, everything will depend on numerous particular conditions. For example, the climate zone plays a huge role, as well as the quality of the selected material. For example, expanded clay needs to be poured in a layer of 25-30 centimeters to ensure high-quality functionality, but mineral wool and 5-10 centimeters will be quite enough. To make calculations easier, you can use the following table.
Polystyrene foam as insulation: pros and cons
Foam plastic is loved by users not only for its good thermal insulation properties. It has a number of advantages:
- long service life (under good conditions up to 50 years, with temperature changes of 20);
- high hydrophobicity (does not absorb more than 0.2% moisture per day, one might say, a good waterproofing agent);
- does not emit toxic fumes and is not destroyed at temperatures of -60 – +95°C.
- safe, as it is approved in the food industry for packaging some food products and for making toys for children;
- price, but you should be wary if they offer to purchase a very cheap option;
- does not create an environment within itself for the development of various microorganisms, does not rot;
- easy to install, as it is light in weight and easy to cut.
But despite all the good looks, polystyrene foam has a number of disadvantages that manufacturers are constantly struggling with:
- highly flammable;
- when ignited, releases toxic fumes;
- crumbles;
- mice love to live in the material;
- does not allow air or steam to pass through.
Indeed, when burned, the material emits fumes that are harmful to humans. But manufacturers claim that modern material is made with the addition of a special fire-resistant substance, which helps it become self-extinguishing. It can ignite spontaneously only at a temperature of +420 °C; for example, spontaneous combustion of wood begins at a temperature of +270 °C.
Insulating a bathhouse with foam plastic is not as scary as it seems at first glance.
Harmful substances are released by the material when it melts, and not when heated in a bath. It is difficult to answer whether the manufacturers are telling the truth, and how to distinguish modern material from old batches. But practice has shown that insulation can be used for some parts of the bathhouse.
Floor insulation technology using joists
To properly insulate wooden floors in a bathhouse, some experts recommend using logs set in increments of 55 to 95 cm. This is the simplest and most affordable way to install flooded floors with a layer of insulation.
The work is performed in the following order:
- Dismantling the old flooring, cleaning the surface from debris and dirt, eliminating unevenness and deformations.
- Installation of logs from the underside of the base along its entire length.
- Fixing the logs at the optimal distance from each other. To protect against rotting and destruction, they are treated with wood antiseptics.
- Between the logs, boards or sheets of plywood are installed, on which thermal insulation material is laid. For insulation, mineral or basalt wool, as well as foam sheets, are used. The joints are carefully treated with sealant. When using cotton wool, a waterproofing layer of polyethylene film is additionally laid.
- Finally, the finishing floor covering is installed.
Frequently asked questions
Some questions that users have can be answered immediately, without waiting for them to arise:
If the floor is wet, is it necessary to install a waterproofing layer over the moisture-proof insulation?
Despite the properties of the heat insulator, it is recommended to cover it with a film to cut off waste water. Over time, the film will develop a layer of slime and can simply be replaced without much expense or labor. It is not practical to change the insulation every year.
If mineral wool is chosen as insulation, how to protect it from water?
The usual technique is used - laying a waterproofing sheet, then mineral wool, on top of which is another layer of polyethylene.
If foil insulation is installed as thermal insulation, will the polyethylene sheet interfere with the passage of reflected infrared rays?
Polyethylene does not interfere with IR rays. However, it is not recommended to use black film; it can cut off some of the rays.
Is it possible to insulate a wooden floor with a layer of expanded clay backfill?
There are no fundamental objections to this matter. Many sources even recommend this option. However, you will have to carefully protect the backfill from water, which is technically difficult and ineffective.
How to lay drain system pipes?
As a rule, they are laid even before the installation of the heat insulator. When laying the pipes, they are covered with pieces of insulation and all cracks and joints are filled with foam, eliminating the possibility of cold bridges.
The nuances of using penoplex and similar materials
Penoplex and similar materials are used primarily for thermal insulation of concrete floors.
Instructions for insulating a concrete floor
The procedure for independently carrying out measures related to ensuring high-quality thermal insulation of concrete bath floors is given in the following table.
Table. Floor insulation with penoplex
Work stage Description
Preparing the base
Clean the base from all kinds of dirt and dust - the presence of such can impair the adhesion of the insulation to the floor. Coat the clean base with an adhesive primer designed for treating such surfaces. Thanks to such a coating, the quality of adhesion of the glue to the base will be improved and minor floor defects will be additionally repaired. For recommendations regarding the thickness of the primer layer, please refer to the instructions for the specific product. To apply such mixtures, it is convenient to use a roller with a long handle.
Preparation of the binder composition
To attach the insulation to the base, it is recommended to use glue specially designed for such work. For recommendations regarding the preparation of glue and the required thickness of its layer, please check the instructions for your particular product - these provisions may vary depending on the type of mixture. Sometimes polyurethane foam is used to fix the “foamed” insulation in question. This option is also successful, but in practice it is often more expensive.
Applying glue
The finished adhesive is applied in a uniform layer of the recommended thickness onto the foam board. A comb spatula is usually used for application. The glue is also applied to the floor. The slab is laid on the floor and pressed firmly.
Ensuring a tight fit of the slab using fungi
Using Anchor Bolts
To ensure the highest quality adhesion of the insulation to the floor, in addition to glue, fastening mushrooms are used in combination with anchor bolts for concrete.
Use of bricks
Fixing thermal insulation boards using mushrooms and self-tapping screws is a simple and proven method
But it is important to remember that each hole in the slab is a new cold bridge, reducing the quality of thermal insulation. If possible, avoid using fungi and press down the insulation boards using another method, for example, with bricks.
After laying the penoplex over the entire planned surface, all you have to do is wait until the glue dries - also check this point in the instructions for your product.
The nuances of floor insulation on the ground using penoplex
If penoplex is chosen as insulation for the floor on the ground, the procedure will differ from that discussed earlier. To eliminate the risk of uneven shrinkage of the structure in the future, the ground level should be located half a meter below the future floor (the difference can be increased to 60 cm).
Insulation scheme
The description of the circuit is as follows:
- the bottom layer is compacted, carefully leveled and dry soil;
- a layer of dry crushed stone or gravel about 300-400 mm thick. After backfilling, the material is carefully compacted;
- a layer of sand about 10 cm thick. It is also carefully compacted. The backfill is leveled;
- foam boards of selected thickness. In the case of this type of insulation specifically, it is better to use slabs equipped with joining grooves along the edges. Additionally, the joints of the heat-insulating boards are glued with construction tape or blown with foam;
- 3 – waterproofing film.
Positions 1 and 2 in this example are assigned to the concrete screed and reinforcing mesh, respectively. Assemble a mesh with cells 15x15 cm from steel rods with a diameter of 1 cm. Fasten the rods with knitting wire or special clamps for reinforcement.
In the photo - reinforcing mesh on top of penoplex and beacons for screed
Using appropriate clamps, ensure a 5mm gap between the base and the reinforcing mesh. Without it, the rods will quickly rust. A concrete screed is poured on top of the reinforcement (standard – a share of cement, 3 shares of clean sand, about 5 shares of crushed stone and water in the amount of half the mass of cement) of the designed thickness (most often this figure is 30-40 mm). For greater convenience, you can pre-install beacons on the base, for example, from a profile for drywall.
Pouring screed over penoplex, additionally laying a heated floor system
The photo shows the laying of penoplex on a sand and crushed stone cushion, as well as the pouring of cement mortar
Good luck!
Insulation under the screed
If the bathhouse is built of brick, most likely the ceilings are made of reinforced concrete. Also, sometimes there is a need to make a floor on the ground. In this case, insulation is performed under the screed. When using this technology, the load on the insulation increases, so you should follow the following recommendations:
- choose material grade PSB-S 35 (foam plastic) or EPPS 35 (penoplex);
- the thickness of the screed is prescribed 30-50 mm (when using the “warm floor” system - more);
- when using polystyrene foam, the screed is reinforced with wire mesh with a diameter of 3-4 mm and cells of 50 by 50 mm.
If it is necessary to insulate the floor on the ground, then the base is not only leveled, but also compacted. The floor pie in this case looks like this:
- compacted soil;
- sand-gravel mixture or medium-sized sand (20-30 cm);
- concrete preparation from lean concrete B7.5—B12.5;
- waterproofing;
- insulation;
- vapor barrier;
- screed with reinforcing mesh.
The concrete floor consists of the following layers:
- reinforced concrete slab;
- waterproofing;
- insulation;
- vapor barrier;
- screed (with or without reinforcement).
Insulation of a bathhouse begins with clearing and leveling the base. All cracks in the concrete floor must be covered with cement mortar. After this, special leveling mixtures can be used. A line is drawn on the wall to mark the finished floor. This is required in order to control evenness.
Waterproofing is placed on the prepared base. It is mounted with an overlap of 10 cm (including on walls), gluing the joints with a special film.
Polystyrene foam or polystyrene foam is laid on glue. The solution is applied only along the edges and to several points in the center. When purchasing glue, it is important to check that it does not contain solvents or other substances hazardous to the insulation. The slabs are installed with the seams bandaged (in a staggered manner). A gap of 1-2 cm is provided between the polystyrene and the wall, taking into account the expansion of the material during operation; this space is filled with damper tape. Before pouring the screed, the slabs are secured to the base using disc dowels.
The need to insulate the floor of a bathhouse
Insulation of the floor in the dressing room using extruded polystyrene foam
When heated, warm air rises, partially mixing with cold air masses penetrating through cracks and voids in the floor structure. Insulating the floor avoids heat loss and reduces the penetration of cold air.
In addition, floor insulation allows you to solve problems such as:
- high fuel consumption;
- slow heating of the room;
- high humidity in the steam room;
- formation of mold and rot.
A sharp difference in temperature on the floor surface in different rooms of the bath can have a detrimental effect on human health. Especially if a person leaves the steam room many times during bathing procedures and goes to the rest room or washroom.
What materials to use
Water will become a problem when insulating the floor. Many materials are not designed for installation in conditions of high humidity. This applies to insulation with high absorption capacity.
For example, it is not allowed to use mineral wool to perform the work. This effective insulation is able to absorb water. When wet, cotton wool stops performing its intended tasks, wrinkles, settles and loses its shape.
- Styrofoam;
- extruded polystyrene foam (or penoplex);
- penoizol, etc.
Shower floors in the steam room
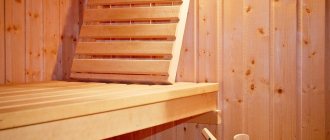
Let's start with the fact that the floor in the steam room is made only of wood. The tile, firstly, has a high heat capacity. By the time it warms up, it will be time to go home. Secondly, it can get so hot that even felt boots won’t save you. So, the floor in the steam room is wooden, but it can be torrential or not. Torrential is when the finished flooring of boards is deliberately made to be cracked. The board is laid with a gap of 5 mm or so. And under the flooring there is a rough floor, with a slope towards the drain, and the drain through the ladder leads into a drain hole or sewer.
In the washroom/shower room and in the steam room, you can make a leaky/spillable floor
With such a floor arrangement, you can pour water into the steam room. Even in bathhouses that are not heated in winter, until everything cools down it will dry out. True, if there is ventilation and it works well. To be more confident, you can not nail down the flooring, but make wooden ladders, which after the bath can be taken outside or into a more ventilated room to dry.
Insulation: how to lay materials
But what about insulating the floor in a bathhouse with such a device? And the floor under the bottom layer needs to be insulated. If as in the picture (the floor is along the joists), then nail the cranial bars. They can be a support for stacked polystyrene foam or foam glass blocks. The distance between the insulation and the timber is filled with foam.
For loose types of insulation, pieces of sheet moisture-resistant material (OSB or moisture-resistant plywood) are laid on the skull blocks. Expanded clay, granulated foam glass or its cuttings are poured into the resulting “troughs”.
The leaking floor in the bathhouse consists of two “layers”. The first one from the bottom is waterproof with a built-in drain/drain for water. The second is wooden slotted flooring
To lay mineral wool slabs between joists you can:
- pull a cord or wire or strong synthetic twine “snake”;
- line it with a net (albeit a plastic one);
- stuff thin slats.
Mineral wool slabs are laid at random. Their width should be slightly larger than the width of the trough - by 2-3 cm. Then the material holds well, and cracks do not form during “shrinkage”.
Protection of insulation from soil moisture
When using mineral wool, expanded clay or foam glass granules, the insulation must be protected from moisture in the soil. It is always there and there is always evaporation. At the same time, no matter how hard you try, some of the moist air will get from the premises into the insulation. And this moisture must be removed. Where? Usually in the underground, in which ventilation holes (vents) are made. That is, if the floor was insulated with mineral wool, expanded clay, broken or granulated foam glass, we nail a membrane from below on the subfloor side.
To maintain the normal condition of the insulation, membranes are needed
The membrane must have one-sided vapor conductivity. It should release steam from the insulation, but not let it in. There are such membranes. They are nailed using clamping strips. The holes that are formed in this case are additionally sealed. Only in combination with protection from moisture, the insulation of the floor in the bathhouse will be durable. Otherwise, you will get problems in a year.
When using slabs made of foam glass or expanded polystyrene, additional protection from moisture is not needed. Both materials do not absorb moisture and practically do not conduct steam.
We begin to understand from the very beginning: why and how to insulate the floor in a bathhouse with your own hands
Photo from the site: samstroil.ru
Many people, even having built a Russian bathhouse on their own plot, do not even imagine why all this fuss with insulation, we look for the best option for materials, believing that this is not at all necessary. In fact, you can, of course, completely abandon the insulation of the concrete floor in the bathhouse, as well as the wooden one, and the insulation of the walls and ceiling, but the results of such construction will definitely not please you. Moreover, there are many objective reasons for this, of which we will name only the most “loud” ones, which can be considered compelling arguments in favor of floor insulation, and not only them.
- It will be much more difficult to warm up the steam room, and the entire room, if the floor is not insulated, since the concrete base takes a long time to heat up, but at the same time quickly loses heat.
- In view of the first factor, the second also arises, that is, a huge rate of heat loss can lead to the fact that your bathhouse can only be used in the summer, when the heat outside the windows is thirty-five degrees.
- The “viability” and durability of the entire structure will depend on how well thought out the design is, how to properly insulate the floor in the bathhouse, and the correct choice of materials.
It is for these reasons that it is worth immediately, even when creating the primary project, to take into account the thermal insulation of the entire building, and first of all, the floors, although insulation always begins from the top. Moreover, you need to understand that it is through the floor that most of the heat from the steam room flows away, spoiling the entire effect and significantly reducing the therapeutic value for health. But before you figure out how to insulate the floor in a bathhouse in a washroom, you need to understand what materials exist for this, and how to use them correctly, and only after that you can start working.
Required materials and tools
To insulate a concrete floor in a bathhouse you will need:
- waterproofing material: polyethylene film, hydroglass insulation, armobitel and others;
- insulation: polystyrene foam, penoplex;
- reinforcing mesh with a wire thickness of 5 mm and a cell of 10 by 10 cm;
- beacons for arranging cement screed;
- dry construction mixture including additives that improve the quality of cement and screed;
- building level, usually a trowel;
- screwdriver;
- drill with mixer and container for mixing the solution.
To insulate a wooden floor you need:
- lumber (boards for rough and finished floors);
- waterproofing film;
- insulation: polystyrene foam, expanded clay and others;
- tape measure, saw, plane, screwdriver and self-tapping screws.
A cold floor in a bath not only causes discomfort, but also causes large heat losses and temperature changes in the room, which can negatively affect human health. Properly performed insulation eliminates these shortcomings and also increases the service life of the structure as a whole.
How to insulate the floor in a bathhouse on stilts with your own hands, watch the video:
Is it possible to insulate a bathhouse with foam plastic and how?
You can use insulation to insulate some parts of the bathhouse. But you should refrain from insulating the steam room with it, since the temperature in it can rise to 95 ° C, and in the sauna even higher. And foam plastic can begin to collapse at temperatures above +95 °C, so even 90 °C will be critical for it.
It is not recommended to use polystyrene foam to insulate wooden baths from the inside; the fact is that the walls will be insulated from heat and the dew point will shift between the insulation and the wall. This will lead to premature rotting. Therefore, insulation is carried out only on the outside or along internal partitions.
According to user reviews, the bathhouse, insulated from the outside with polystyrene foam, has become more comfortable, the temperature in it quickly rises and in winter does not drop below +10. The only thing you should not forget about is the vapor permeability of the foam. To prevent the walls from getting wet, it is necessary to install a ventilation system in the bathhouse.
We recommend insulating baths made of stone, brick or blocks with foam plastic. Wood itself is a good heat insulator. Moreover, a wooden bathhouse is capable of accumulating heat, that is, accumulating and retaining it for a long time.
Insulation methods
Insulation methods:
- Installation of the "Warm floor" system. An innovative way to heat surfaces. Pipes through which hot water circulates are installed in the screed, or mats with heating elements that produce infrared radiation are laid out. The main advantage is temperature control. Among the disadvantages is the need to connect a third-party energy source (water or electricity).
- Laying an insulating layer under a concrete screed. It is carried out at the initial stages of building construction. If the building is already ready and has been in use for several years, you will need to first remove the old screed. For insulation under the screed, materials with increased strength, durability, and wear resistance are used.
- Raised floor. Suitable for rooms on the second floor. If you want to insulate the floor on the first floor in this way, the house must have a basement or ground floor. Logs are fixed under the concrete floor, between which insulation blocks are installed or loose insulation is poured into a pre-prepared frame. The raised floor can be located on both sides of the ceiling. When located outside, the height of the room will decrease.
- Complementing concrete with special fillers. This option is suitable for arranging a new screed or building a building. The usual crushed stone is replaced with perlite or expanded clay. The ready-made solution is suitable for creating a new screed or pouring over the soil.
Warm floor system
Preparing rooms and surfaces
If for some reason the floor was not insulated during the construction stage, you will have to dismantle the old floor covering
It is recommended to insulate the floor during the construction stage. If for some reason this does not happen, you will have to dismantle the old floor covering.
To facilitate the assembly of the wooden floor in the future, dismantled boards and decorative elements must be numbered.
After dismantling, it is important to check the suitability of the rough beams (they make up the rough floor). Damaged ones must be replaced with new ones. To avoid rotting, they are treated with an antiseptic.
You cannot coat the material that will be used in the steam room with an antiseptic. When heated in this room, harmful chemical fumes will appear.
Insulation of the floor in different rooms of the bathhouse - steam room, wash room, relaxation room - is done in its own way. This is due to the different temperature conditions and humidity levels that are observed in them.