Penoplex Comfort
Penoplex Comfort is used in construction work in country cottages, houses and dachas, due to which it is successfully used for thermal insulation of balconies, foundations, basements and loggias, as well as for roofs, ceilings, floors and garden paths.
If you need to insulate a sauna, bathhouse or even a swimming pool, then Penoplex Comfort is perfect for these purposes. An important advantage that Penoplex Comfort has is its low thermal conductivity. The material does not allow cold to pass through and retains heat for a long time, which allows it to be used for insulating attics, loggias and balconies. The use of Penoplex Comfort is justified by its unique properties, which make it possible to easily install a heat-insulating layer. Penoplex Comfort sheets are light in weight, while their density varies between 20-30 kilograms per cubic meter. The material can be used in the temperature range from -50 to +75 degrees. When purchasing Penoplex Comfort, you can count on a service life of at least 50 years without loss of original properties.
You can view the Penoplex Comfort polystyrene foam options available for sale or compare their characteristics here.
Penoplex Foundation
When building a foundation, first of all, it is necessary to take care of comprehensive protection from freezing and moisture. To achieve optimal results, it is recommended to use Penoplex Foundation. This type is ideal for both internal insulation of the foundation and external insulation of the base of the building (including the base) with Penoplex.
For example, a 100 mm thick Penoplex sheet can be used to insulate the foundation in very harsh climatic conditions and in places where the soil is not at all stable and the groundwater level is high. The thickness of the Penoplex Foundation is 50 mm - this is a size sufficient to insulate the foundation under normal conditions.
You can view the Penoplex Foundation foam polystyrene options available for sale or compare their characteristics here.
Penoplex Facade
Penoplex Facade slabs allow you to create a lightweight and moisture-resistant heat-insulating layer on the external surfaces of any structure. The material Penoplex Facade has excellent thermal insulation properties, avoids cold bridges, does not absorb moisture and has high strength, and therefore is able to withstand any loads during operation and installation.
Pnoplex Façade panels have a rough surface; the strips are applied to the surface of the slabs using a router, which helps improve adhesion to the wall. In addition, Penoplex Facade slabs have a special tongue-and-groove located on all sides, which allows them to be perfectly evenly joined and provide a continuous layer on the surface outside the building to create plastered facades.
Penoplex Wall
Penoplex Wall is also actively used for insulating facades and internal partitions. As a rule, this type of product is used to soundproof vertical walls from inside the house. Penoplex Wall is resistant to temperature changes and moisture. In addition, this material is characterized by durability and ease of installation.
Production technology and scope
The specifics of penoplex manufacturing are aimed at improving the strength and technical characteristics of the material.
It is given special properties by the process of extrusion from raw materials in special furnaces. First, polystyrene granules are mixed with a foaming agent under conditions of high humidity and temperature. The catalyst is a composition of carbon dioxide (CO2) and freon. The polystyrene foam composition is melted in ovens and resembles lush cream. Then, through the extrusion installation, the substance begins to be squeezed out, the freon gradually evaporates, and the cells are filled with simple air.
Currently, heat insulation is in demand in different climatic conditions for insulation and protection:
- foundations and walls of low-rise buildings;
- balconies and loggias;
- pools and wells;
- ceilings and basements;
- floors and ceilings;
- water supply systems;
- airfield runways;
- railways and roads;
Penoplex of various categories is widely used in the process of reconstruction of buildings due to its high resistance to environmental changes and chemical influences. The material is used to make sandwich panels.
What is this. History of the creation of the material
The material first appeared back in 1941, when the DOW CHEMICAL company (USA) patented a fundamentally new product with high thermal insulation properties and moisture resistance. The production of the material was put on stream, but initially it was manufactured only for the needs of the Navy.
Due to its resistance to wet environments, Penoplex has been used for the production of life rafts. After some time, the material began to be used in refrigeration units. Penoplex occupied its rightful niche only in 1950, when it began to be used in construction. It is curious that in the US construction market the material is known under the brand name STROYFOAM.
Penoplex is a Russian brand that appeared only in 1988.
What is Penoplex? Essentially, it is foamed polystyrene, which is produced on extrusion machines. In its structure, the material resembles polystyrene foam, which is familiar to many, but has a denser structure and, accordingly, better characteristics.
Recommendations
When purchasing penoplex, you should pay attention to the labeling of the product, the safety of the packaging, and the technical characteristics of the material. It is worth buying 10% more material from the measured initial quantity, in case it is rejected during use. It is necessary to work with the material carefully, since if its integrity is damaged, water may get inside, which will shorten the service life of the material. It is better to use the services of professionals or read the instructions yourself and work with penoplex correctly.
Due to the possibility of toxic vapors being released under the influence of UV rays on penoplex, its use outside is considered optimal. The insulation must be treated with mesh plaster or other façade material on top of the insulation.
It is not worth covering the insulation with a water-repellent agent, because the penoplex itself is waterproof. You should be careful when you are near penoplex with other substances. Some of them can destroy the cellular structure of the slab
As a result, its technical performance will deteriorate.
Penoplex slabs should be used in the range of -50… +75 degrees. At this temperature, all the characteristics of the material are perfectly preserved. They can be stored for a long time in the manufacturer's packaging, but they should be protected from direct exposure to sunlight.
When choosing penoplex, the question is how to make the correct calculations of raw materials. For this purpose, many manufacturers’ websites have a special calculator. In it you can indicate the area of the surface to be insulated, and he himself will calculate the amount of material required.
Before you begin installing penoplex, you need to complete several points:
Preparation of the working surface, this is especially important for walls. It is necessary to remove all dirt and smooth the surface of the wall. If necessary, it is worth treating the facade walls with a primer. To fix the slabs, a special mixture with an adhesive base is prepared. To prevent the slabs from moving due to wind, they are additionally secured with fasteners.
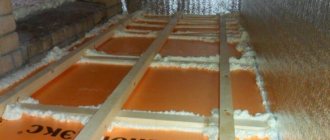
See below for a master class on floor insulation with penoplex.
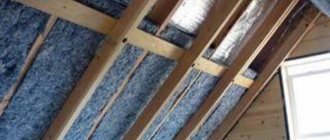
Roof thermal insulation
The work begins with laying insulation on the rafter system.
Measures to insulate this structural element are carried out either during construction or during the reconstruction of an old facility. Insulation is often carried out to turn a cold attic into a living space. Before starting work, you need to prepare the following materials:
- metal tiles or other roofing solution;
- sheathing;
- vapor-permeable moisture-resistant membrane;
- insulation;
- internal lining;
- rafter structure.
Work begins with laying insulation on the rafter system. The material is placed in a checkerboard pattern. After this, you need to lay a vapor-permeable membrane on it. Next, using longitudinal slats with a thickness of at least 40 cm, the heat insulator is fixed. In order to ensure ventilation between it and the roof, it is necessary to maintain a step of 300 mm.
After this, you can proceed to securing the transverse slats. Then, after placement, the roofing material is fixed on them. It is permissible to use metal tiles or any other.
Roll solutions for continuous flooring can be a good alternative
Penoplex differs from another popular insulation product - penoflex - by its high cost. However, this disadvantage is compensated by its excellent characteristics. It is ideal for use under plastering systems.
Penoplex is one of the best materials for creating effective thermal insulation. If you constantly feel cold in your home, then using it can solve this problem. There are significant costs involved in carrying out the work. But they are offset by savings on heating rooms. Proper implementation of the procedure minimizes heat loss and ensures comfortable living.
Pros and cons of penoplex
Penoplex has a huge number of advantages, but it also has disadvantages. And, perhaps, you need to start by listing the advantages of this insulation, which are as follows:
- Has good thermal insulation characteristics. Insulating a house with penoplex actually works quite well;
- A very low coefficient of water absorption, or rather its complete absence. Penoplex does not absorb moisture and is not destroyed under its influence. This is its advantage, it allows you to insulate the external walls of a building with high quality and for a long time;
- Not susceptible to ultraviolet radiation;
- In durability;
- Light weight and easy to install.
In addition, penoplex also has excellent soundproofing qualities, which makes it possible to use this material to produce high-quality noise insulation of rooms.
However, penoplex also has disadvantages. First of all, one can question its complete environmental friendliness and harmlessness to humans. The thing is that penoplex contains a component such as styrene, which poses a toxicological hazard.
Also, the disadvantages of penoplex include an insufficiently high degree of fire resistance. Penoplex is on fire, and nothing can be done about it. Therefore, when insulating residential buildings with it, it is imperative to comply with all fire safety standards.
Installation Tips
A guarantee of the effectiveness of thermal insulation is compliance with all stages and rules of installation work.
- Before installing penoplex, you need to prepare the surface on which the material will be laid. A non-uniform surface with cracks and dents must be sealed with a plaster mixture. If there is debris, loose elements and remnants of old finishing, then the interfering parts are removed.
- If traces of mold and moss are detected, the affected area is cleaned and treated with an antiseptic fungicidal mixture. To improve adhesion to the adhesive composition, treat the surface with a primer.
- Penoplex is a hard, inflexible thermoplastic that is attached to flat surfaces. Therefore, the level of evenness is measured. If the difference exceeds more than 2 cm, then leveling will be required. The technology for installing heat insulators differs slightly depending on the surface design - for the roof, walls or floor.
- Installation of thermal insulation can be carried out at any time of the year, but it is more comfortable if the temperature is above +5 degrees. To fix the slabs, special adhesives based on cement, bitumen, polyurethane or polymers are used. Facade mushroom-shaped dowels with a polymer rod are used as additional fastenings.
- Installation on walls is carried out using the horizontal method of placing slabs. Before installing the penoplex, you need to place a starting strip so that the insulation is in the same plane and the rows do not shift. The bottom row of insulation will rest on the bottom bar. The heat insulator is attached to glue in a checkerboard pattern with the grooves aligned. The adhesive composition can be applied in strips of 30 cm or in a continuous layer. Be sure to coat the connecting edges of the panels with glue.
- Next, holes are drilled to a depth of 8 cm. For one sheet of penoplex, 4-5 dowels are enough. Install dowels with rods, the caps should be in the same plane with the insulation. The last step will be decorative finishing of the facade.
- When insulating the floor, foam plastic is laid on a reinforced concrete floor slab or prepared soil and secured with glue. A waterproofing film is laid on which a thin layer of cement screed is applied. After complete drying, the final floor covering can be installed.
- To insulate the roof, penoplex can be laid on the attic floors above or below the rafters. When constructing a new roof or repairing a roof covering, a thermal insulator is installed on top of the rafter system. The joints are sealed with glue. Longitudinal and transverse slats 2-3 cm thick are attached to the insulation in increments of 0.5 m, forming a frame on which the roofing tiles are attached.
- Additional roof insulation is carried out inside the attic or attic space. A sheathing frame is mounted on the rafters, on which penoplex is placed, secured with dowels. A counter-lattice is installed on top with a gap of up to 4 cm. A layer of vapor barrier is applied, followed by cladding with finishing panels.
- When insulating foundations, you can use the technology of permanent formwork made from foam panels. To do this, assemble the formwork frame using a universal screed and reinforcement. After pouring the foundation with concrete, the insulation remains in the ground.
For an overview of the comparison of penoplex with other materials, see the following video.
DIY installation
Installation of penoplex on the ceiling
Thermal insulation boards are fastened using a technology that is simple and accessible to everyone. Since I have already carried out insulation with my own hands more than once, I decided to describe all the stages by which the installation of penoplex takes place:
- Preparing the walls - at this stage, all stains of dirt and grease, as well as dust and old finishes, should be removed from the surfaces. If necessary, you need to use plaster mixtures to seal all cracks and obvious irregularities. In addition, the walls are treated with antifungal agents
- Before attaching penoplex, you should make a choice among fastening materials: you can use an adhesive solution that will be applied to the surface of the slab. It should be remembered that the surface of the walls must be completely dry. In addition, it can be applied using dowels. For 1 sq. meter should take 4 dowels, while at the corners of the house more fastening materials should be used
- When the thermal insulation is fixed, you should proceed to further steps on finishing the facades. Here you can use wet technology and use plaster compounds - for better strength you need to create additional roughness and use a reinforcing mesh
- For those who do not like the use of plaster for wall cladding, an option using siding, wood or another type of hanging system, which requires the installation of lathing, is suitable.
Related article: DIY snowshoes and swamp shoes
There are times when it is not possible to insulate the outside of the house. In this case. Penoplex boards are attached to the internal walls, after which they are covered with foil-coated polyethylene film and sheathed with gypsum plasterboard sheets. After this, you can carry out subsequent interior decoration of the rooms.
Features: advantages and disadvantages
Previously, such insulation was called “Penoplex 31 C”. The high technical characteristics of this material are largely determined by its cellular structure. Cells ranging in size from 0.1 to 0.2 mm are evenly distributed throughout the entire volume of the product. This distribution gives strength and a high level of thermal insulation. The material practically does not absorb moisture, and its vapor permeability is 0.013 Mg/ (m*h*Pa).
The insulation manufacturing technology is based on the fact that polystyrene foams, enriched with inert gas. After this, the building material is passed under pressure through specialized press nozzles. The slabs are manufactured with clear geometry parameters. For comfortable joining, the edge of the slab is made in the shape of the letter G. The insulation does not contain harmful substances, so the material can be installed without using protective equipment.
Specifications:
- thermal conductivity index – 0.03 W/ (m*K);
- density – 25.0-35.0 kg/m3;
- long service life - more than 50 years;
- operating temperature range – from -50 to +75 degrees;
- fire resistance of the product;
- high compression rate;
- standard dimensions: 1200 (1185) x 600 (585) x 20,30,40,50,60,80,100 mm (for internal thermal insulation of a room, slabs with thickness parameters from 2 to 10 cm are used, for external finishing - 8-12 cm, for roofing – 4-6 cm);
- sound absorption – 41 dB.
Due to its technical characteristics, the thermal insulating material has the following advantages:
- high resistance to chemicals;
- frost resistance;
- large range of sizes;
- easy installation of the product;
- light weight structure;
- “Comfort” insulation is not exposed to mold and mildew;
- penoplex can be cut well with a painting knife.
Negative customer reviews about Penoplex Comfort insulation are based on the existing shortcomings of the material:
- the effect of UV rays has a detrimental effect on the material, it is necessary to create a protective layer;
- the insulation has low sound insulation rates;
- oil-based paints and solvents can destroy the structure of the building material, it will lose its thermal insulation qualities;
- high cost of production.
In 2015, it began producing new grades of material. These include “Penoplex Osnova”, “Penoplex Foundation”, etc. Many buyers wonder about the difference between “Osnova” and “Comfort” insulation materials. Their basic technical qualities are almost the same. The only difference is the compressive strength coefficient. For the “Comfort” insulating material this figure is 0.18 MPa, and for the “Osnova” material it is 0.20 MPa.
Types of insulation boards
We insulate the floor on the balcony
Since there are plenty of varieties of penoplex on the construction market, manufacturers produce it with specific names that allow you to speed up the selection process. Let's look at these types:
- Penoplex “roofing” - the density of roof insulation slabs is 28-33 kg/m3. Lightweight and waterproof
- “Wall” - can be used for both interior and exterior work. The density of the material is 25-33kg/m3
- “Foundation” - high density and water resistance allows the material to be used during the construction of a foundation or basement. Density – 29-33kg/m3
- “Comfort” - slabs are used for balconies and apartments, as well as uninsulated loggias. Density – 25-35kg/m3
- Penoplex “45” - this material has the highest density among others, which is 35-47 kg/m2. This is why it is used during the construction of roads and runways.
Related article: Self-adhesive film used for the kitchen
For the average consumer, I have compiled a table of the estimated cost of penoplex. Thanks to it, you can make approximate calculations of the required amount to purchase material of different thicknesses:
| Name | Thickness | Area/volume per package. m2/m3 | Sheets per package (quantity) | Cost of 1 package | Price for 1 sheet |
| PENOPLEX | 20 | 14,4/0,288 | 20 | 1 200 — 1 400 | 60-70 |
| 30 | 10,08/0,30 | 14 | 1 260 — 1 540 | 90-110 | |
| 40 | 7,2/0,288 | 10 | 1 200 — 1 400 | 120-140 | |
| 50 | 5,76/0,288 | 8 | 1 200 — 1 520 | 150-190 | |
| 60 | 5,04/0,30 | 7 | 1 260 – 1 274 | 180-182 | |
| 80 | 3,6/0,288 | 5 | 1 195 – 1 205 | 239-241 | |
| 100 | 2,88/0,288 | 4 | 1 200 – 1 240 | 300-310 |
Insulation of aerated concrete house with Penoplex
Step 1. Let's look at how a house made of aerated concrete is insulated using Penoplex. So, the first thing you need to do is build the foundation of the building.
First the foundation is built
Step 2. Next, cut-off waterproofing must be laid along the perimeter of the foundation and along the perimeter of all load-bearing walls.
Laying cut-off waterproofing
Step 3. After this, using standard technology, you need to build walls from aerated concrete blocks to the level of the upper border of the window and door openings.
Construction of house walls
Step 4. The next stage is the installation of window and door openings, and here the use of Penoplex begins. The material is laid on top of the window opening, and then, above it, perpendicular to it, you need to install two pieces of Penoplex, tighten them together with ties.
The material is laid on top of the window opening
Two pieces are installed on top
The segments are contracted
Step 5. Between two sections of Penoplex it is necessary to lay reinforcing bars and continue further construction of walls. The rods will connect two gas blocks lying along the edges of the window opening.
Laying reinforcing bars
The rods will connect two gas blocks together
Step 6. The cavity between two sections of Penoplex needs to be filled with concrete.
The cavity is filled with concrete
Step 7. In this way you need to arrange all the door and window openings.
All door and window openings are equipped
Step 8. After this, formwork is created for arranging the ceiling of the second floor
If there is a staircase in the house, it is important to leave an opening for it according to the design
The formwork is being created
Step 9. Now you should cover the formwork with sheet material, creating a full overlap.
Don't forget to leave an opening for the stairs
Step 10. Next, Penoplex should be laid around the perimeter of the building at the floor level. If necessary, the slabs are cut according to the building design.
Laying material around the perimeter of the building
Step 11. After this, the reinforcing mesh is laid and the floor surface is filled with concrete. That is, you need to make a concrete screed. Work can be continued after 7 days.
Pouring concrete
Step 12. The next step repeats step 2 in this instruction - you need to lay the waterproofing.
Waterproofing is being re-installed
Step 13. Next, you need to build the second floor of the house, not forgetting to finish the window and door openings with Penoplex as in the previous steps.
Second floor erected
Step 14. After installing the roof, you can use heat guns to dry the inside of the house.
Drying the house from the inside
Step 15. Now that the building has been erected, you can begin to insulate the facade of the house using insulation boards.
You can start insulating the facade
Step 16. First, Penoplex slabs need to be placed on glue. It must be applied to each slab along the perimeter, 1-3 cm from the edge, as well as to the middle of the slab from one edge to the other along the length.
Applying glue to the slab
Step 17. The slabs need to be glued along the entire facade.
Gluing slabs to the facade
Result of work
Step 18. Now you need to prepare holes for the dowels by drilling both the Penoplex and the concrete underneath to the required depth, focusing on the length of the dowel.
Drilling holes
Depth depends on dowel length
Step 19. Using anchors for aerated concrete, Penoplex is additionally attached. You can knock out the dowel with a hammer.
Anchor for aerated concrete
There should be a small gap
Step 20. Fixing one Penoplex slab with dowels is done in two places in the middle and along the perimeter of the slab (corners, middle of the long side).
Additional fixation of Penoplex
Step 21. Now Penoplex can be processed mechanically, making it rough, and covered with reinforcing plaster and adhesive material. All that remains is to complete the finishing touches, and the insulation of the house is complete.
Mechanical processing of material
Application of a base reinforcing plaster-adhesive layer
Penoplex wall insulation: selection, price, step-by-step installation instructions
Any residential buildings located in cold regions of the country require mandatory insulation, since walls not insulated from low temperatures are one of the main causes of heat losses, which can amount to up to 25-30%. Penoplex wall insulation is used for both external and internal thermal insulation of buildings.
Penoplex wall insulation
This material has all the necessary performance qualities that will help protect walls not only from winter cold, but also from overheating in the summer heat. Previously, ordinary polystyrene foam was more often used for these purposes. Although it is made from, in principle, the same raw materials as penoplex, the technology is completely different, so the material has a more porous structural structure, which is not entirely suitable for external insulation.
Main characteristics of penoplex
Penoplex is slabs of expanded polystyrene obtained using extrusion technology - forcing foamed molten plastic mass through molding nozzles (nozzles). As a result of the combined influence of temperature and high pressure, upon hardening the material acquires a finely porous structure, with small air “cells” of approximately the same size (from 100 to 200 microns), each of which is isolated from the others. This structure provides two main characteristics of this type of polystyrene foam - excellent insulating qualities along with high mechanical strength.
Thanks to its microporous structure, penoplex has high insulating qualities and mechanical compressive strength.
To begin with, in order to evaluate the advantages of penoplex, here are briefly a few digital indicators of the main parameters of this material.
Table: technical characteristics of penoplex
| Name | Test method | Unit | Numerical indicators |
| Compressive strength at 10% linear deformation, not less | GOST EN 826-2011 | MPa (kgf/cm²; t/m²) | 0.2 |
| Density | GOST 17177-94 | kg/m³ | 25-32 |
| Water absorption in 24 hours, no more | GOST 17177-94 | % by volume | 0.4 |
| Fire resistance category | F3-123 | group | G3 |
| Thermal conductivity coefficient at (25±5) °C | GOST 7076-99 | W/(m×°С) | 0.03 |
| Sound insulation of partition (GKL-PENOPLEX® 50 mm-GKL), Rw | GOST 27296-87 | dB | 41 |
| Standard sizes | Width | mm | 600 |
| Length | mm | 1200 | |
| Thickness | mm | 20; 30; 40; 50; 60; 80; 100; 120; 150 | |
| Operating temperature range | THAT | °C | -100 … +75 |
Even a preliminary assessment of the given characteristics shows that the material is very effective for thermal insulation work. However, it is worth considering its qualities in more detail:
Low water absorption
This parameter is very important for any insulation, since with high hygroscopicity the material swells, loses its air layer, and freezing of the absorbed water can cause its destructuring, causing it to lose its basic qualities and become useless.
The value of this parameter for penoplex was officially determined through laboratory tests. The material was completely immersed in water and then monitored for a month. At the same time, it was revealed that the penoplex absorbed a small amount of moisture only in the first ten days, and then the humidity in it did not increase at all.
After 30 days, the amount of absorbed moisture in the penoplex was about 0.6% of the total volume of the slab. Based on this, it was concluded that moisture penetrates only into the outer layer of the material and at the site of its cut, but does not enter its internal structure.
This indicator is even close to hydrophobicity, which is extremely important for insulation for external use. By the way, the fact that the material is resistant to mold and rot directly depends on this parameter.
Low thermal conductivity
The thermal conductivity of penoplex, the coefficient of which is only 0.03 W/m×°C, is one of the lowest among all insulation materials. This parameter is largely achieved due to the structural structure of penoplex and its low moisture absorption.
Thanks to these qualities, the insulation can be used for installation in rooms with high humidity, such as basements, as well as for installation outside walls and for thermal insulation of building foundations.
The foundation and basement of the house also need insulation!
The durability of a strip foundation directly depends on its protection from the effects of ground moisture and low temperatures. Penoplex is ideal for these purposes.
How to properly waterproof the foundation and insulate the foundation with penoplex - read in the special publications of our portal.
Resistance to mechanical stress
The technology for manufacturing penoplex using the extrusion method gives a highly homogeneous structure of the material and makes it very durable. Penoplex almost does not press through when you press it. There will be no significant changes in the structure of the insulation and when walking on it, since it can withstand heavy loads perfectly. The only condition for maintaining its integrity when insulating, for example, a floor, is a flat surface for laying.
Low vapor permeability
Since, in essence, penoplex is extruded polystyrene foam, but with improved physical and technical characteristics, it is highly resistant to the absorption of various fumes. The vapor permeability of a two-centimeter slab of this material can be compared with the same indicator of a layer of roofing felt, which is used for insulating hydro- and vapor barriers of walls and floors.
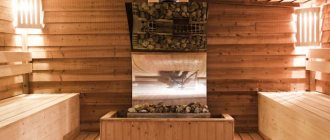
Penoplex is excellent for insulating wet rooms in baths
This makes it possible to use penoplex for insulating rooms with high humidity, for example, baths.
Light weight
In combination with low thermal conductivity and moisture absorption, the insulation is lightweight. This parameter allows you to easily lift the material to any height. Therefore, in recent years it can be seen on the external walls of panel and brick high-rise buildings - it is used to insulate both load-bearing structures of buildings and balconies.
The material is light. does not weigh down the walls, so it is often used for external insulation in multi-storey buildings
In addition, when penoplex is fixed to the surface, it does not weigh down the structure and therefore does not require approvals or permission for installation.
Easy to process and install
Another advantage of penoplex is its ease of processing. In order to cut its sheets, you do not need any special tools - just an ordinary sharp construction or stationery knife is enough. Installation of the material on the surface is quick, and this process cannot be interfered with by bad weather, since the insulation is not afraid of moisture.
Long service life
For material manufactured in compliance with all technological requirements, manufacturers establish a warranty period of up to 50 years. This period is not unfounded, it is calculated based on the results of laboratory and bench tests, which include repeated deep freezing and subsequent thawing of penoplex, heating it to the highest temperatures that can happen during operation in a wide variety of climatic regions.
Moreover, it should be noted that this is a minimum service life, since high-quality material will last longer.
Chemical resistance
Penoplex is not negatively affected by most chemical compounds used in construction. These include: alkalis, saline solutions, water-based paints, alcohol compounds, bleach, carbon dioxide, ammonia, butane and propane, various oils, concrete mixtures and freons.
However, there are also substances that can negatively affect not only the quality of the insulation, but also its integrity, that is, some of them can simply dissolve penoplex. When insulating a house from the inside or outside, you must be sure to read the information about such chemicals in order to avoid mistakes when installing penoplex.
Such compositions include: gasoline, diesel fuel, formaldehyde, acetone, methyl acetate or ethyl acetate based solvents, enamel and oil paints and other active substances.
Soundproofing with penoplex
By installing this material on the walls of the house, the owner receives not only protection from cold and heat, but also from the penetration of street noise, since penoplex has good sound insulation properties. This parameter is especially important if the house is located near a busy highway or railway tracks. Constant noise negatively affects the human psyche, as there is no opportunity for proper rest. Therefore, finishing the walls with soundproofing material is simply necessary, and penoplex is perfect for this role.
Flammability of insulation
Unfortunately, not everything is going smoothly with flammability and smoke formation.
Penoplex is marked on the flammability scale G3, which means its average level. Manufacturers call it self-extinguishing, but this is not always the case. The flammability parameter largely depends on several factors:
- The quality of the material.
- The presence of fire retardants in its composition.
- The composition of the decorative coating - it can promote or resist the maintenance of fire. This also includes materials located near the insulation - they can also increase the spread of the flame.
In addition, one cannot help but pay attention to the smoke that penoplex can create. If, by a coincidence of negative circumstances, a fire does occur, then the penoplex will emit acrid black smoke, which contains highly toxic substances. They can not only cause significant harm to people’s health, but are also extremely dangerous for their lives, as they can cause thermal and chemical burns of the mucous membranes and organs of the respiratory system, cause pulmonary edema, and affect the central nervous system.
Smoke generation characteristics also have their own classification. Material for this indicator is marked with the letter D with a number from 1 to 3, indicating the degree of smoke spread. Penoplex, just like any extruded polystyrene foam, is assigned the third degree, that is, D3.
Such negative qualities of the material predispose to the fact that, when choosing penoplex for insulating walls inside the premises or outside the building, it will be necessary to provide a reliable non-flammable finish, which will contribute to the self-extinguishing of the fire that occurs.
Video: testing penoplex panels
Types of penoplex
Five main types of penoplex are produced, which are intended for certain types of thermal insulation work.
- One of the varieties is used for flooring under road surfaces - this material is the densest and is labeled as penoplex-45. The remaining four types are intended for use in thermal insulation of residential buildings:
Penoplex for thermal insulation of foundations
- “Penoplex foundation” - this type is more suitable for installation on the basement of the house. It protects the foundation from freezing and the formation of cold bridges from the ground into the premises.
Penoplex for wall insulation
- “Penoplex wall” - designed for insulating the outside walls of a house. It has all the necessary qualities that help maintain a comfortable temperature microclimate inside the house, preventing cold or heat from entering from outside, and protecting living or working premises from external noise.
The material is also excellent for roof insulation.
- “Penoplex roof” - this type of material is intended for thermal insulation of attic floors and roof slopes. A roof structure insulated in this way will not only prevent heat from escaping from the house through the attic, but will also create ideal silence indoors during rain or strong wind. In addition, penoplex roofing is very well suited for insulating attic spaces - both their floors and walls.
Penoplex is also used for insulation work indoors.
- "Penoplex-comfort" - manufactured for interior work. It is mounted indoors on walls, ceilings and floors, and is used to transform loggias or balconies into fully functional living rooms.
Do you want to turn a balcony or loggia into a full-fledged room?
This cannot be done without thermal insulation work. And for insulation you can use a variety of materials, including penoplex.
How to properly insulate a loggia in a special publication on our portal.
Insulation of external walls of a house with penoplex
Most often, penoplex with a thickness of 100 mm is used to insulate walls. However, it should be noted that in southern climatic zones with mild winter temperatures such a layer will be redundant - a thickness of 30 ÷ 50 mm is sufficient. If the building to be insulated is located in a region with very severe winter frosts, then 50 mm material is not enough. In this case, it is recommended to lay slabs of this thickness in two layers, perpendicular to each other and “with dressing”. This method will be more effective than laying one 100mm layer.
It is recommended to lay the insulation on the walls according to the principle of brickwork - this will create additional rigidity of the structure.
Layout of penoplex slabs on the facade of the house
The scheme of external wall insulation is clearly shown in the diagram offered to your attention, but in order to do everything correctly, you need to consider all stages of the work in more detail.
This is what the entire insulation and finishing “pie” on the outer wall will look like:
For insulation and subsequent finishing work, you will need the following materials: dry construction mixture - assembly adhesive, a calculated amount of penoplex, a starting profile to begin installing the insulation. fastening dowels - “fungi”, reinforcing fiberglass mesh, perforated metal corners with mesh, primer, plaster and putty mixtures, decorative finishing (plaster or tile).
Step-by-step instructions for installing penoplex on external walls:
| Illustration | Brief description of the operation performed |
| For insulation to be effective, the foam boards must adhere well to the wall. Therefore, before installing it, it is necessary to prepare the surfaces. The preparatory process includes such activities as cleaning the walls from old plaster that has begun to peel off, sealing detected cracks that may cause the installed insulation to peel off. In addition, cracks can become “housing” for various insects, which can then move into the house. Before cleaning the walls, all elements located on them, such as ebbs, lamps, air conditioning and others, are dismantled from them. Next, you can begin cleaning, which is usually done with a spatula. If there is a relief pattern protruding more than 5 mm on the wall, then it must be knocked down, as it will interfere with the installation of insulation. | |
| If cracks are found on the wall after removing the plaster, then before sealing, they need to be widened using a chisel and hammer, a grinder with a stone wheel or a hammer drill. Widened cracks are cleaned and treated with a primer, and then filled with sealant or putty compound and leveled. Very wide cracks can be filled with polyurethane foam, and after it expands and dries, the protruding parts are cut off with an ordinary stationery knife. | |
| If there are irregularities on the wall, which can also become an obstacle to a good fit of the slabs, then the surface needs to be leveled. The protruding parts should be removed and the recesses should be filled with plaster mixture. | |
| If the global unevenness of the surfaces is visually visible, that is, there are obvious blockages on them, then they are checked using a plumb line, and then leveled by installing plaster beacons and pouring concrete mortar. The removal of walls is carried out as a rule. There is no need to think that you can then level the surfaces with insulation - it will simply repeat their direction, and thus the deviation of the wall from the vertical will remain. | |
| Using a roller or wide brush, apply a primer to the leveled walls, which must be allowed to dry thoroughly. It will be better if you carry out a double treatment, with the second layer applied only after the first has been completely absorbed and dried. | |
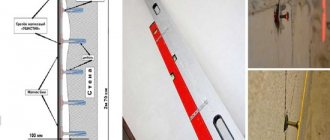
| The dried surface must be marked for installation of the starting profile. To do this, mark a strictly horizontal line at the bottom of the wall at the required height, beat it off with a paint cord, and then attach the profile along it using self-tapping screws. It is necessary to install the first row of insulation on it - the profile will not allow the penoplex to slide below the set level until the panels are securely fixed with “fungi” fasteners. The width of the profile will depend on the selected foam thickness. The profile is fixed to the wall with dowels and washers Ø 5÷7 mm, in increments of 300÷400 mm. To fasten the profile at the corners of the house, special corner joints made of plastic are used. They compensate for the expansion of materials during temperature changes. | |
| Further, if necessary, all communications are carried out along the wall, which must be hidden under insulation and finishing. Flashings are installed on window openings. | |
| The next step is cutting the penoplex into strips of the required width for mounting them on the window slopes. The adhesive composition, 7-8 mm thick, pre-mixed according to the instructions, is applied to the cut-out workpieces and distributed with a notched trowel. Then, they are mounted on the surface, pressed and left until they set securely. After the glue has dried, the penoplex slopes are finally fixed with “fungi” fasteners. | |
| After completing the installation of the insulation on the slopes, you can proceed to installing it on the walls. Fastening the penoplex begins from the bottom row. Glue is applied to the slabs - in strips along their edges and dotted in the middle. You can also use a notched trowel to spread a thick layer. | |
| Then the slabs are installed on the starting profile and pressed well against the wall surface. After installation, all slabs are checked with a level for evenness of installation horizontally, vertically and relative to the wall surface. Installation of subsequent rows is carried out “in a dressing” with an offset of approximately half the length of the slab. The convenience of branded penoplex is that the panels have lamellas for a tight connection at the seams, maintaining the evenness of the masonry - just align the locking parts during installation. | |
| To give the insulation masonry additional rigidity, the slabs are laid at the corners using a so-called “toothed connection” along the entire height of the wall. | |
| After installing two rows, you need to return to the first installed slab and start fixing each of them with dowels - “fungi” - to the wall surface. To do this, holes are drilled through the penoplex so that they extend 50÷60 mm into the wall. A “fungus” is inserted, and then a plastic spacer nail is installed into the hole in the middle of the cap, which is driven in with a hammer. The fastening cap must be pressed into the insulation, that is, be in the same plane with its surface. | |
| After completing the installation of penoplex with glue and “fungi”, before proceeding to the next stage of work, the wall is allowed to dry thoroughly - this process will take two to three days, depending on the thickness of the glue layer and its characteristics, and the weather outside. | |
| Next, the seams between the plates are sealed with polyurethane foam, and after it hardens, the protruding excess is cut off. | |
| After completing the installation and fixing of all the insulating material, it must be reinforced with a special fiberglass mesh. You need to start with the corners - perforated corners with mesh “wings” are attached to them. They will protect the corners of the insulating material from damage during its operation and will make it easier to “remove” the corners during further plastering. | |
| The next step is to strengthen the entire insulated surface by stretching and gluing mesh sheets onto it. Its installation is carried out on top of the wall, from the cornice: First, an adhesive mass is applied to a small area of the insulation surface and distributed over it with a spatula. A mesh sheet having a length equal to the height of the insulated wall is applied to the glue and pressed into the applied layer with a spatula. Excess glue from the surface is removed or redistributed to the lower section of the wall. In this way, all insulated surfaces of the house are reinforced and then left to dry. Since the glue under the mesh is applied in a thin layer, it will take no more than a day to dry. | |
| Next, putty is applied to the dried surface, which should completely cover the reinforcing mesh and make the surface smooth. This layer of putty should dry very well, so it should be left alone for two to three days. | |
| After this period, the surface of the walls must be thoroughly cleaned using a grater with an installed abrasive mesh or sandpaper. The work is done in circular movements, which are done counterclockwise. Grouting must be done carefully, without pressing hard on the wall. | |
| The final stage before decorative finishing is coating the putty wall with a primer containing quartz sand. It is necessary to create good adhesion between the wall surface and decorative plaster or tile adhesive. | |
| Decorative plaster is applied to the prepared and primed wall or tiles imitating stone or wood are glued. |
How to give a wall decorative qualities?
Gray, boring walls can never become a decoration for a home. It’s good that today’s builders have at their disposal many techniques for performing relief plaster .
How to do it yourself is in the corresponding portal article.
Typical mistakes when installing penoplex
In order for insulation to be truly effective, it is necessary to take into account some of the nuances of installing penoplex and avoid making “traditional” mistakes.
The most common mistakes include the following:
- Carrying out work in weather unfavorable for this process. If installation is carried out at higher temperatures than recommended by the manufacturer, the material may slightly change its dimensions, deform or lose its positive qualities.
- You cannot install penoplex on the wall using dowels only, without using glue. Such savings will lead to insufficient adherence of the insulation to the walls, and as a result – to a decrease in the insulating and soundproofing qualities of the structure. We can say that the insulating effect will be lost, and the money will be wasted. It must be remembered that the main fastening material is glue, and the dowels serve only for additional fixation of the penoplex to the wall.
- It is very important to choose the right and high-quality adhesive for installing insulation. Therefore, when purchasing it, it is very important to carefully study the instructions on its packaging.
Typically, craftsmen prefer to work with adhesives sold in the form of dry construction mixtures. You can’t just take any composition you like, since it must have a specific purpose - specifically for thermal insulation work. Then the proper quality of insulation will be ensured.
Pay attention to the purpose of the mixture - it should be specifically for insulation work
The glue can also be sold in finished form - usually it is an acrylic-based composition. True, its cost is much higher, and its use for insulating facade walls can hardly be called cost-effective.
Ready-made adhesive composition for polystyrene foam
- When installing penoplex, it is necessary to completely cover the entire insulated surface, without leaving even small gaps between the plates, otherwise the insulation will not “work” properly.
- Failure to comply with the installation rules according to the principle of brickwork, “in a dressing”, is also considered a mistake, since it is unacceptable to place the vertical joints of the slabs on the same line.
- It is unacceptable to take lightly the preparation of the wall surface for the installation of insulating panels, since an untreated and unrepaired surface covered with penoplex can eventually become covered with fungal colonies and mold, which will be difficult to get rid of. Meanwhile, such microflora is very harmful to human health.
Cost of material and installation work
Penoplex itself has a fairly high price, so before preparing for its installation, you need to find out its cost in the region where you live.
- On average, the price of penoplex 50 mm thick is approximately $5 per 1 m².
- Modified material with improved qualities, including the addition of fire retardants, has a price of 7 ÷ 8 $ per 1 m².
- The work of craftsmen to insulate the walls of a house from the inside will cost an average of $9 ÷ $10 per 1 m².
- Attaching penoplex to the facade of a house will cost about 13 ÷ 15 $ per 1 m², since the work is more complex due to the fact that part of it will have to be carried out at height.
Having become familiar with the basic technological methods of using penoplex as wall insulation, having specified the price level for the insulation itself and the necessary consumables and installation work, each home owner will be able to assess his capabilities and decide whether to do everything himself or invite a specialist .
Having information about typical mistakes that are often made when installing penoplex, you can exercise control over his specialist - alas, among them there are many “leftists”.
In fact, the work is simple and quite accessible to do it yourself; all the necessary tools are available. But, naturally, if you need to insulate the walls of an apartment located above the first floor, then you should not show unnecessary “heroism” - it is better to turn to professionals who have special equipment for performing installation work at height.
And in conclusion, another video about the use of penoplex for insulating a balcony.
Video: penoplex - as a material for insulating a balcony or loggia
Advantages and disadvantages
The positive features of insulation are manifested at all stages of use of this material:
- Lightweight slabs are easy to prepare and process and do not require special knowledge and skills to operate.
- They are attached in different ways and do not require additional layers of vapor and waterproofing.
- Excellent thermal insulation qualities allow you to save on other building materials.
- Durability and strength in any climate tests.
- Safety and environmental friendliness.
The disadvantages of the new generation material include:
- Susceptibility to attacks by rodents, which is typical for all types of insulation.
- Emission of acrid smoke when decomposed by open fire.
- Does not withstand combination with kerosene, gasoline or diesel fuel.
- Insufficient sound insulation compared to materials intended for this purpose.
- High prices for various types of penoplex, comparable to expensive mineral wool.
Sooner or later, the owner of any home wonders how to keep the heat inside the house in the winter, but at the same time prevent the heat from penetrating into the summer. Thermal insulation materials will come to the rescue. There is a huge selection available to buyers.
Today we will look at extruded polystyrene foam, or as it is also called penoplex. How to choose this material for facade insulation and what must be taken into account?
Which penoplex to choose for insulating walls outside under plaster?
Penoplex “comfort”
The technology of external insulation under plaster solves two problems: it becomes warm inside the house, and the appearance of the facade is radically transformed. There are mixtures on the building materials market that will help you finish house construction quickly, and if you have minimal skills, you can do everything yourself.
Important!
When determining the thickness of the insulation, the thermal conductivity of the plaster is taken into account. The presence of an additional cement layer allows you to choose penoplex of a smaller standard size.
Penoplex of any class is suitable for “wet finishing”. However, experts recommend insulating the facade with Comfort slabs. This polystyrene is easy to install and can withstand mechanical loads caused by the weight of the decorative finish. In addition, the high adhesion of the material ensures the formation of a strong bond between the surface of the slab and the plaster.
Useful tips
Most homeowners turn to external rather than internal wall insulation with penoplex. This is explained by the fact that the second option hides the usable area of the room.
When decorating floors after insulation, they often turn to grouting. For this it is better to use sandpaper. You can proceed to this stage after the reinforcing layer has completely dried. Despite the strength of penoplex, you should be careful when working with it, since this material can still be damaged or broken.
Select high-quality and most effective glue for penoplex. A special adhesive foam is ideal for laying this insulation: it firmly and tightly attaches the material to the base and holds it quite reliably. Make sure that the thickness of the penoplex for wall insulation is at least 5 cm. Ensure that the insulation is securely and tightly attached to the base. Use both nails and glue.
When installing insulation, you cannot do without a profile, especially when it comes to installing a frame structure. It is advisable to purchase a bubble or laser tool, which is both easier and more convenient to use.
To make the external insulation of a house more effective and complete, it is recommended to insulate the foundation in advance (the basement can also be insulated along with it). In this case, all the work is done quite simply: first you need to dig out the foundation, clean it of any dirt, and then glue the foam sheets. After this, the base can be buried.
When installing penoplex on the facade of a building, you must ensure that the panels overlap each other by about 10 cm. This way you can avoid the formation of cracks.
Extruded polystyrene foam is a strong and durable material, but it does not tolerate contact with the following substances:
- gasoline, diesel fuel, kerosene;
- acetone and other ketone solvents;
- formaldehyde and formaldehyde;
- benzene, xylene, toluene;
- various esters;
- polyesters;
- coal tar;
- oil paints.
It is most convenient to apply glue to materials using a notched trowel. In this case, it is advisable to make the adhesive layer no more than 10 mm.
Facade penoplex glued to the ceilings needs to be bandaged vertical seams. This technology is very similar to laying bricks.
If you are going to plaster a wall insulated with penoplex, then you should first apply a base composition with a reinforcing mesh. The density of the latter must be at least 145 g/m2. Make sure that the size of the overlap is about 10 cm. Next, you need to lay a leveling plaster layer (its thickness should be at least 5 mm). Only then should the thermal insulation material be covered with decorative finishing.
If you are sheathing a house with penoplex in 2 layers, then first glue the starting layer, and on top of it place the next layer with a slight offset. Before this, it is worth treating the slabs with a roller.
Before installing insulation, old coverings should be removed only if they have noticeable damage or crumbling areas. If the previous finish does not have any defects or complaints, then penoplex can be placed on it.
Penoplex can be installed on a variety of substrates. It can be safely used for a private/country house or city apartment. In addition, you can easily install this insulation not only on walls, but also on the roof/ceilings.
Experts advise not to rush to insulate the house until it shrinks completely. Otherwise, the layer of plaster will become cracked and may begin to crumble. To carry out thermal insulation work, it is necessary to select only high-quality materials and tools.
Leveling the bases for laying penoplex can be done with plasterboard. However, the presence of this material will reduce the additional space in the room. Owners of city apartments with uneven floors often turn to such solutions.
If you decide to lay penoplex on a wall made of foam concrete, then it will come in handy to install a vapor barrier material. These components are not needed only if we are talking about bases whose structure is not porous.
Interaction of the material with various substances
We insulate the balcony with penoplex
Since not only the density of penoplex or its technical characteristics are important to us, I decided to write with which substances this material cannot be used. Having various components, these substances destroy the integrity of the material, which indicates not only a decrease in properties, but also the complete destruction of thermal insulation boards. So, you should not use it with penoplex:
- Oil paint
- Gasoline or kerosene
- Benzene, xylene, toluene
- Acetone
Since the list of these substances is not large, it is very easy to remember it and in the future avoid making mistakes that could affect the quality of the work performed. By the way, the list of materials with which it interacts well is much longer:
- Water-based paint
- Saline solution
- Alkaline compounds
- Lime
- Butane and propane
- Cement-concrete mixtures
- Ammonia
- Freon
Since penoplex does not react at all with these materials, it becomes possible to use it in tandem with these substances.
Advantages and disadvantages of the material
Advantages of insulation:
- Excellent thermal insulation properties.
- Low vapor permeability.
- Almost zero water absorption according to GOST 15 588−86. It helps protect the foundation surface from access to melt and groundwater.
- High strength. Penoplex can withstand significant soil pressure loads.
- Good sound insulation.
- Even with a long service life, penoplex retains its chemical structure and does not decompose into harmful components.
- Biological resistance. Penoplex foundation is not susceptible to rot and mold.
- Frost resistance.
- Easy to cut and install. The material can be cut perfectly with a paint knife and does not require the use of special tools for working with slabs.
- The foundation can be insulated with penoplex in any weather and temperature, both indoors and outdoors.
- The slabs are light in weight, which does not place additional loads on the foundation.
- Service life - up to 50 years. During this time, the material retains its original shape and its functions as a heat insulator.
Disadvantages of penoplex:
- The insulation smokes heavily even after complete extinguishing.
- The material is susceptible to degradation upon prolonged contact with direct sunlight and certain solvents.
- Quite a high cost.
Penoplex insulation: how not to lose money
If designers and builders do not take into account the physical and chemical characteristics of penoplex, its strength and thermal characteristics deteriorate long before the end of its service life, which leads to a decrease in the thermal efficiency of the house. Some of the most common errors include the following solutions:
- Use of material with a density lower than technologically justified . Penoplex, like any polymer, is oxidized by atmospheric oxygen. The rate of oxidation (change in chemical structure and deterioration in performance properties) depends on the density of the material. The use of slabs with a lower density (an understandable desire to save money) deteriorates the thermal protection of the structure 2-3 times faster, and this is noticeable already in the first 7-10 years of operation.
Internal insulation
- Use of incompatible materials . Plates made of extruded polystyrene foam will deteriorate at an accelerated rate if substances that are dangerous to the structure of the penoplex (for example, oil-based paints containing volatile hydrocarbons) are used during construction.
- Ignorance of labeling features . An inexperienced person, seeing the words “Mark 25” on the packaging, makes the logical conclusion, in his opinion, that inside there are slabs with a density of 25 kg/m3. But in technical specifications this is the designation for material with a density from 15.1 to 25.0 kg/m3. Some manufacturers, caring for maximum profits, supply penoplex of the lowest density under this brand (15.1 kg/m 3 , the density of packaging plastic). The result of the substitution soon appears on the “insulated” façade – with damp spots and mold.
- Incorrectly carried out insulation . Improper insulation leaves an air gap between the wall and the slab material. The structure becomes inhomogeneous, the dew point shifts into the gap. Condensation is inevitably absorbed into a denser material (wall), and thermal efficiency drops, sometimes significantly.
Insulation is complete, finishing cladding is ahead