A properly installed drain from the roof of a house will provide reliable protection for the façade of the building from the negative effects of precipitation. The gutter is designed to drain stormwater and melt water from the roof, thereby preventing it from flowing down the walls of the house and undermining the foundation. Installing drainage from pitched roofs is a simple matter; you can cope with the task without calling specialists. Let's look at how this happens in practice.
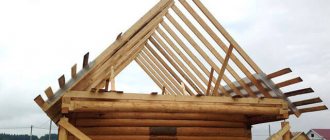
Installation of drainage from pitched roofs
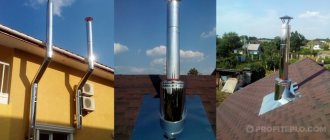
Three ways to drain water from the roof of a house
The roof of the house collects rain and melt water from a fairly large surface. The larger the roof area, the greater the amount of water discharged from the roof per unit time. It is necessary to organize the drainage of water from the roof so that it does not flood the walls of the house, does not soak the soil on which the foundation of the house rests, and does not create “rivers and lakes” on the site.
The method of draining water from the roof is chosen depending on the roof design, aesthetic preferences and construction budget.
Correct order of drainage
First you need to make a calculation of the drainage system, and only then purchase or order all the necessary structural elements. The shape of the drainage pipes and drainage gutter is not significant and depends only on the manufacturer, but their cross-sectional area should fully ensure the throughput of the entire system even in the heaviest rainfalls. When calculating the drainage system, the area and slope of the roof, statistical data on precipitation in the region where the house is located are taken into account. It is believed that 1 sq. cm of cross-sectional area of the drainage element is capable of providing drainage from a roof area of 1 sq. m.
But if it is not possible to make the calculation yourself, there are companies that are ready to make the necessary calculations and carry out all the work on installing the drainage system. The range of drainage designs on our market is quite extensive. From plastic to metal pipes, to complete waterproofing systems included in roofing kits. And only the owner can decide how to equip his home with the correct water drainage system.
Drainage systems made of gutters and pipes
The most popular solution for draining water from the roof is drainage systems, the main elements of which are hanging gutters and downpipes.
.
Each manufacturer also usually includes corner elements, protective nets, audits, fastening parts - brackets, holders, clamps, etc. in the drainage system.
The maximum cross-sectional size of a gutter is usually within the range of 100 - 150 mm, and that of a drainpipe is 70 - 100 mm . Gutters are available in different shapes: semicircular, semioval, trapezoidal, rectangular or more complex shapes. The shape of the downspouts must match the shape of the gutter. The gutter shape is usually chosen for aesthetic reasons.
All elements of the system are easily connected to each other and, if installed correctly, drain water properly.
Gutter parts can be made of PVC plastic, galvanized steel, aluminum, copper or titanium and zinc alloy. For economy-class houses, drains made of plastic or steel are usually used
. Systems made from other materials are much more expensive.
Pros and cons of a PVC plastic drainage system
The drainage system made of PVC plastic has the following advantages:
- Has a minimal cost compared to metal systems.
- The unusually smooth surface of gutters and pipes prevents the accumulation of dirt.
- High resistance to corrosion.
- Simple installation that does not require high qualifications and special expensive devices. You can assemble a plastic drain with your own hands. You just need to follow the manufacturer's recommendations.
- The parts are painted in bulk, so scratches on its surface are hardly noticeable.
When choosing a plastic drainage system, you should also take into account the following features:
- Not very high resistance to low and high temperatures. Operating temperature of parts is from -30°C to +60°C. At low temperatures, plastic elements become more fragile.
- When the temperature changes, the coefficient of linear expansion of plastic parts is 7 times greater than that of steel parts. When manufacturing and installing plastic gutters, special measures are taken to allow parts to change sizes without destroying them.
- When significant mechanical loads are applied to the drainage system, plastic parts crack and collapse, and metal parts become crushed.
Elements of gutters made of galvanized steel
often have a polymer coating in a wide range of colors, which makes it easy to match the color of the gutters to the color of the facade or roof. System parts made of steel with a polymer coating are connected to each other with locks or brackets with latches through rubber gaskets.
In Russian snowy winters, ice often forms on roof overhangs, gutters and downpipes.
. Ice prevents water from draining from the roof and clogs gutters and pipes. Under the weight of ice, gutters and pipes are deformed and destroyed.
To protect against ice, increase the durability and trouble-free operation of gutters, heating electric cables are installed on the roof overhang, in gutters and pipes.
The heating system adds a significant amount to the cost of constructing gutters. Plus, there are the annual costs of paying for electricity.
Aesthetics or practicality?
A standard drainage system performs a utilitarian function - it removes water from the pitched roof of a house away from its walls and foundation. Usually its aesthetic function is not given much importance, but this does not mean that it is unimportant.
That is why the modern market offers fully equipped gutter systems, the elements of which can be easily connected to each other. Such gutters and pipes are available in semicircular, trapezoidal, semi-elliptical, box-shaped (also called rectangular) or square, and even imitating the shape of a cornice.
The most popular in Russia are semicircular gutters, turned inward or outward. Moreover, such edges also serve as stiffening ribs, which increases the mechanical ability of the elements to withstand loads. But the elliptical shape has good throughput, and is indispensable for large roofs. In any case, it is quite difficult to make a mistake with the profile of the drain, but do not forget that the correctly selected shape of the gutters in its own way complements the aesthetic appeal of the house.
This video will tell you how to choose a drain for a pitched roof that is not only aesthetic and pleasing to the eye, but also as practical as possible:
Calculation of the dimensions of gutters and pipes
To select the dimensions of the roof drainage system elements, determine the effective area of the slope from which water is drained using the formula:
Se=(b+h/2)*c,
where: b is the horizontal distance from the eaves overhang to the ridge of the roof; h - roof height; c is the length of the roof slope along the center line. All dimensions are in meters.
If the area of the slope Se from which water is drained is less than 57 m2, then a gutter with a diameter of 100 mm is sufficient. and a drain pipe with a diameter of 70 mm.
With the slope area Se up to 97 m2, the gutter diameter is increased to 125 mm. Gutters with a diameter of 150 mm. will ensure the drainage of water from a slope with an area Se of no more than 170 m2. In the last two cases, it is enough to choose drainpipes with a diameter of 100 mm.
Design features of drains
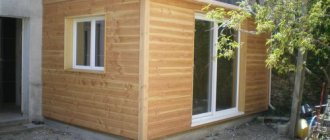
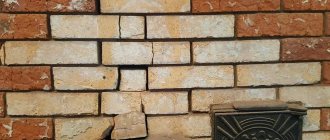
Example of a finished drain
There are various design options for drains, the choice of which depends on where exactly the drains are installed on the roof. Let's take a closer look at the design of drains made of lead.
In order to ensure the tightness of the place where the slope connects to the adjacent wall, double overlap drains are used.
In the case of a roof covered with tiles or slate tiles, the slope of which exceeds 30º, drains made of covering flashings and corners are used - plastic or lead plates bent lengthwise at an angle of 90º, the length of which is equal to the length of the overlap of the tiles.
In this case, the width of the part laid on the tiles must be at least 10 cm, and the vertical part - at least 7.5 cm.
The welded corner is installed at the end of the tile during the laying of the row, while its central part is pressed against the masonry, overlapping with a stepped drain,
Single lap drain
In the case of roofs covered with profiled tiles with a single overlap, a drain similar in design is used, but also with a single overlap.
When making it yourself, a lead sheet is inserted into the brickwork, and then lowered down to the level of the tiles. The overlap is selected in accordance with the angle of inclination of the roof and the profile of the tiles used.
After installing the sheet, it is given a shape that matches the shape of the tile covering and laying steps, after which the remaining free end is inserted behind the next ridge.
Another type of design that answers the question of how to drain a roof is drains with grooves.
Some roofing tiles offered on the market are equipped with special groove tiles, but a more common option is when metal drains are installed on the board flooring, located from the eaves overhang to the roof ridge.
In this case, a sheet of lead is laid around drain wooden slats, nailed as sides, and for a ridge equipped with two grooves, a saddle is installed. In addition, the edges of the tiles are cut to fit the groove, resulting in a distance of 10 centimeters between them.
Next, using an apron mortar, the upper part of the roof, which is at an angle and adjacent to the wall, is sealed.
In this case, the upper edge of the sheet used is built directly into the masonry joint, located two rows from the roof surface, then the entire sheet is lowered along the wall and it covers the roof surface by 15 centimeters.
You can also use plastic drains, the vertical flat post of which can be easily attached to the desired location on the roof, regardless of its location, after which the drain is covered with lead or sealed with adhesive tape for additional security.
Installation of roof gutters – gutters and pipes
The developer is quite capable of installing overhead drainage gutters and drainpipes on the roof on his own.
Three ways to install hanger gutter brackets.
For high-quality installation of gutters you need:
- Carefully study the manufacturer's instructions for installing the drainage system and carefully follow the recommendations contained in the manual.
- Install brackets for gutters and pipe holders at a distance no greater than that specified in the installation manual. Typically, the pitch of brackets for gutters is 0.35-0.5 m.
- It is imperative to ensure that the slope of the gutters in the direction of the drainpipe is 0.5 - 2% (5 - 20 mm per 1 m of gutter length). With such a tilt gutters will clean themselves
flow of rainwater. The minimum slope of the gutter is not less than 0.2% (20 mm per 10 meters of length).
- The edge of the gutter must be located at least 3 cm below the roof plane, otherwise it will slide off the roof snow will damage the gutter
.
- The outer edge of the gutter must be placed from the roof overhang at a distance of 1/2 - 2/3 of the gutter width, then water will always flow into the gutter
.
- On steep roof slopes, it may be impossible to fulfill the last two conditions. In this case To protect against snow, barriers must be installed on the roof
for his arrest.
- The outer edge of the gutter is located slightly lower than the inner one, then water overflowing over the edge of the gutter during heavy rain will not fall on the facade.
- When installing gutters at joints, maintain the thermal clearances recommended by the manufacturer of the drainage system. Gutters and pipes with temperature changes must be able to move freely
- do not clamp them too tightly at the fastening points.
To prevent snow sliding from the roof from damaging the gutter, its edge should be located 3 cm below the roof.
The parts of the drainage system made of PVC plastic are connected to each other through rubber sealing gaskets or glued together.
When assembling the system, it is necessary to take into account the outside air temperature at the time of installation. At temperatures below - 10°C, plastic becomes brittle. In addition, when cutting gutters, their length should be adjusted to take into account subsequent changes in linear dimensions with temperature fluctuations.
The gutter changes its length during temperature fluctuations, moving along the rubber seals at the joints.
What to consider when choosing roof drainage
Scheme for installing point drainage.
In order for drainage to turn out as desired, it is necessary to take into account not only moderate precipitation, but also the possibility of intense thunderstorms and simply long, heavy rains. Troubles can follow both in the spring and in the middle of winter during a thaw, when the snow melts on the roof, when water flows in streams. At night, frost freezes the moisture, and during the day everything flows again. This is where all the correctness or shortcomings in the organization of drainage usually affect. When a gutter is built into the roof itself, ice forms along its edge and in the gutter itself, which prevents the passage of water.
Water begins to look for a free passage and seeps into any accessible places in the roof. This often happens if the roof is made of small tiles, and if the slope of the roof slopes is insufficient. As a result, we get damp ceilings, peeling wallpaper, and other various troubles associated with dampness. And it is clear that drains built into the roof should not be installed in snowy regions of the country, especially if the roofing material of your roof is small.
Where should the water from the drainpipes be directed next?
The best solution is to connect drainpipes to some kind of closed water collection and drainage system . It could be:
- Underground drainage system to drain the site. The drainpipe is connected to the outlet of the drainage system through a collector well with a check valve that prevents rainwater from entering the drainage pipes;
- Storm drainage system for collecting and draining water from the surface of the site;
- A special system for collecting and storing rain and melt water for the purpose of its further use for irrigation and other household needs.
- Sewage system for household wastewater. With a centralized sewerage system, it is necessary to obtain permission to receive additional volumes of wastewater from the owner of the network (as a rule, permission is granted for an additional fee).
The rainwater inlet of the roof drainage system of a private house is equipped with a debris catcher, which must be regularly cleaned through the hatch.
Drainpipes are connected to the water intake pipes of closed storm sewer systems through special devices - storm water inlets.
These devices collect large debris (leaves, etc.), and they may also have a valve that prevents air (odors) from escaping from the sewer system. The rainwater inlet has a hatch through which you will periodically have to remove the debris that has accumulated there.
Draining rainwater through closed sewer systems significantly increases the cost of building a house.
Products for construction and repair
⇆
Most often, in economy class houses, near-surface drainage trays are used to receive and drain water flowing from a drainpipe .
From the drainpipe, water enters the drainage tray of the blind area of a private house
Such trays are usually installed not only to drain water from the roof, but also to collect and drain surface runoff from blind areas and other hard-surfaced areas. Water can be discharged from the trays onto the terrain of the site in a convenient place away from buildings or into a drainage well.
Drainage trays are usually made locally from concrete or using ready-made drainage systems made of concrete, plastic or metal. Ready-made near-surface drainage systems from different manufacturers are available for sale. The main elements of such systems are trays and removable grids that cover the tray from above.
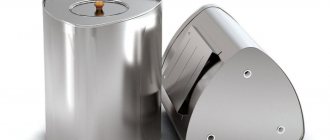
A drainage device is installed on the drainpipes, which directs rainwater into a container installed nearby, a barrel. The device stops the flow of water into the container if it is completely filled.
A decorative container for collecting and storing water from drainpipes can become a home decoration.
What are the types of usable flat roofs?
- Green (often called environmental);
- Roof terraces with seating areas;
- Parking lots (extremely rare in Russia).
Let us consider in detail the most common of them.
Green or eco-roofs
Drainage for a green roof is designed to drain the soil layer and prevent the destruction of roofing and waterproofing layers under the plants. Eco-roofs are very popular because they make big cities greener, cozier and healthier. In addition, the accumulation of stormwater in plants and soil reduces the peak load on the sewer system - unless the rain loads are so great that the plants and soil can no longer absorb the liquids. In the absence of a controlled moisture retention system, excess moisture will easily flow into the public sewer system.
Extensive landscaping is achieved with easy-to-maintain low-growing groundcovers such as grasses, moss, flowers and various types of sedum. Intensive landscaping involves a greater variety of plants: perennials, shrubs, flowers, sometimes even small trees. The only limiting factor is the stability of the roof structure: with a load-bearing capacity of up to 150 kg/m2, as a rule, only extensive landscaping can be supported, but with a load-bearing capacity of up to 500 kg/m2, intensive landscaping can be done.
Rain chain - original drain
In one-story houses, instead of traditional drainpipes, a chain can be attached to the gutters, along which water will flow.
Rain chains are extremely popular in Japan, where they are decorated with a variety of decorative elements. Chains are made from various materials; the links can have a complex spatial shape and alternate with decorative bowls and other elements. The lower and upper ends of the chain must be secured so that the chain remains taut.
When using rain chains to drain water, the roof overhang should be increased - the distance from the wall of the house to the chain should be at least 0.5 m, or the wall should be additionally protected from wetting by splashes of water.
Materials used to make drains
Drains are made from various materials: metals, concrete, rolled waterproofing materials.
- One of the best materials for this purpose is lead, due to its resistance to the negative effects of precipitation. In addition, it is technologically advanced and can be mounted on any type of roof and combined with all roofing materials.
- Plums made from zinc are cheaper, but they are not as durable as lead ones and are more difficult to process.
- For soft roofs, drains made from waterproofing roll materials impregnated with bitumen are best suited. However, elements of the simplest form can be made from them.
- Concrete drains can be found on old pitched roofs. Their disadvantage is that over time various defects appear in them. However, due to their low cost and manufacturability, they continue to be used.
Overhead drainage gutters on the eaves of the roof
In the drainage system described above, drainage trays-gutters are suspended from the roof eaves. Such gutters, when exposed to ice and snow, are easily deformed, displaced, damaged or clogged.
The relatively small slope of the gutter and the narrow and deep opening of the tray make self-cleaning of debris difficult.
In operation, the option of a drainage system with an overhead gutter on the eaves of the roof causes less trouble.
Unfortunately, elements of such a factory-made drainage system are not often found on sale.
| Roof installation with an overhead gutter: 1 – T-shaped crutch; 2 – wall gutter; 3 – fastening the gutter hook with a rivet; 4 – water intake funnel; 5 – cornice overhang; 6 – top layer of roofing carpet; 7 – bottom layer of roofing carpet; 8 – gutter hook; 9 – base for roofing carpet; 10 – additional layer of roofing carpet |
Usually, locally, on the edge of the roof, an apron for the eaves overhang (pos. 5) is made of galvanized iron and a wall-mounted gutter (pos. 2) is fixed on top. Water from the gutter flows into the receiving funnel of the drainpipe (pos. 4). It is clear that the manufacture of parts from ordinary gray galvanized iron, without a colored polymer coating, reduces the decorative effect of the roof.
Overhead gutters on slopes with a slight slope or low snow accumulation can serve as snow retention.
Due to the increased metal consumption, a drainage system with overhead gutters is usually more expensive.
than with hanging ones.
However, the greater durability and reliability of overhead gutters, the ability, in some cases, to refuse the installation of snow retainers and electric heating devices, make such gutters quite competitive.
Choosing a drainage system: recommendations from experts
As already mentioned, the choice of drainage system is made taking into account the characteristics of your region, the concept of the structure, the cost of work and materials.
Modern manufacturers offer a huge number of system options that can be installed both on buildings under construction and on finished houses.
Most home building owners prefer not to delve into the specifics of arranging a stormwater system, relying on the professionalism of construction company employees. However, it won’t hurt to get acquainted with some nuances:
- Ideally, all elements should be from the same manufacturer. This will ensure reliable installation and no leaks.
- When choosing galvanized systems, keep in mind that the unaesthetic appearance of a wide funnel compensates for errors in the manufacture of parts.
- A roof whose drainage system is made without gutters will not leak due to the reliability of the design. However, you may encounter some difficulties during installation work.
Drainpipes from the roof smoothly turn into sewers hiding underground Source prostroyer.ru
- The service life of galvanized pipes and systems made from them, with proper care, can exceed 25 years.
- Metal systems coated with zinc-polymer material look attractive, are protected from corrosion, do not require special care and last up to 50 years. In addition, it is possible to order individual designs of gutters and choose a color that matches the design of the house.
- Before installing plastic structures in the northern regions, it is necessary to consult with specialists.
Free roof drainage is not the cheapest solution
Among some developers, there is an opinion that the cheapest thing to do is to do nothing - let the water flow freely from the roof directly onto the blind area and then onto the ground.
There is no need to make a special device for collecting and draining water from the roof of the house, provided:
- Increase the overhang of the roof edge from the wall to 0.6 m.
- Carry out enhanced waterproofing of the foundation and basement walls to a height of at least 0.5 m above the surface of the blind area;
- Cover the base to the specified height with a non-moisture-resistant material with high frost resistance (for example, clinker bricks or tiles, natural stone, base siding).
- Ensure that the blind area around the house and the surface of the site have a slope of several percent away from the house.
Calculate the costs of this additional work and you will see that installing a drainage system to collect and drain water from the roof will be cheaper.
By arranging a free drain without the above measures, you risk significantly reducing the durability of the finishing of the walls of the house and the basement, and reducing the bearing capacity of the soil under the foundation due to their soaking.
In addition, unorganized water flows around the site reduce the comfort of using the territory. The blind area is often used as a pedestrian path. If there is a free drainage from the roof, such a path will become impassable during rain.
Free drainage is usually used in certain areas of the perimeter of the roof of a house and outbuildings. To collect water along the edge of the blind area, it is recommended to install a tray. The system for collecting water in a tray at the edge of the blind area is less sensitive to the effects of ice and snow, to clogging with debris, and is easier to clean than a drainage system with gutters on the roof.
Next article:
How to make a roof from corrugated sheets
Previous article:
Bituminous shingles. Installation and laying of soft roofing.
More articles on this topic
- DIY sewerage in a private country house
- Ground ventilation heat exchanger in a private house
- Frame house with communications - features and advantages
- Dry heated floor without screed in a wooden house
- Installation of internal sewerage in a private house
- DIY monolithic concrete staircase in a private house
- Norms and rules for planning a private house, cottage
- Groundwater in the basement - what to do?
DIY roof drains
If you have a country house or cottage, then in inclement weather you have probably encountered one problem: raindrops flowing from the roof can wet your clothes, and when falling to the ground, form splashes, causing a lot of inconvenience. Roof drains can easily solve this problem. Of course, you can place an order and the problem will be solved for you, but it is much more interesting (and cheaper) to make roof drains with your own hands, and doing this is not as difficult as it might seem at first glance.
The drainage system provides the house structure with a longer lifespan.
The first step is to decide on the material. To drain, you will need a sheet of metal made of galvanized steel or lead. The easiest way is to buy it at your nearest hardware store. We take measurements. We will need rectangular sheets 25 centimeters wide. The length of the sheets can only be limited by the length of the roof itself. We also need wire with a diameter of 2-3 mm and fasteners.
Steel sheet drains
Roof drain made from plastic bottles
We cut the sheets into pieces of the required length. We bend the sheets symmetrically in half until a dihedral angle of 90 degrees is formed. We drill holes in the curved sheets at a distance of 30-40 cm from each other. We thread the prepared wire into the holes so that it can be connected to fasteners pre-installed on the roof of the roof.
We hang the resulting structure on the fasteners so that the parts of the drain system overlap each other. At the point where the water hits the ground, use a shovel to make a shallow trench directed in the direction you want the water to flow. If desired, the drainage system can be extended and directed outside your suburban area. The main thing is that your structure has a slight slope, otherwise the rainwater will drain in the opposite direction.
Drains from plastic bottles
I’ll give you another way to make roof drains with your own hands. This method is unusual, but rest assured: you will not find such a system in the area. We will need 1.5 liter plastic bottles (we need a lot of bottles). You can use transparent, blue, red, orange bottles. The wider the range of colors, the more beautiful it will turn out. The task is simple: we cut off the necks and bottoms of the bottles, and also make a slot in the side. We insert the bottles into one another, alternating colored bottles, and fasten them with wire. Next, we fix the structure under the roof, directly under the water drain. The drain is ready.
There is another simpler, but also more expensive way to install a drain system. To do this, we order a ready-made drain design from the store. In this case, all you have to do is install.
When installing, it is important that the structure is installed securely and does not collapse during heavy rain and wind. You should also install a drainage mesh in the drain pipe funnel, which will prevent various types of debris from entering the system.
Building a drainage system with your own hands, as you understand, is not such a difficult task. You just need to want it, and a little skill, of course, won’t hurt.
Determining the number of funnels
The purpose of internal drainage structures is to remove water from the roof surface at any outside temperature, regardless of the volume of precipitation. Next, the liquid must be redirected to the rain or municipal sewer system.
The number of drainage funnels per roof area is calculated as follows: 1 product should be installed per 0.75 m². For internal systems, these elements are placed along the longitudinal axis of the roof. Both funnels and risers are not installed in external walls, since they can freeze in winter.
When determining the number of funnels, a number of conditions are taken into account:
- When there are no obstacles for the linear expansion of a gutter whose length does not exceed 12 meters, install 1 funnel;
- If the gutter is more than 12 meters long and there are obstacles, a compensating funnel is placed at the end of the slope;
- If the gutter is laid around the perimeter of the building, joint installation of both expansion joints and funnels is carried out.
Funnels are calculated based on passport data regarding their size, method of fixation and throughput. It must be remembered that the number of these elements always corresponds to the number of pipes in the drainage system.