A modern bathhouse offers comfortable use at any time of the year.
A classic village bathhouse with a steam room, a washing room and a small dressing room no longer suits many people. A modern bathhouse is not just a place where you can wash, but a full-fledged complex for rest and relaxation.
At a minimum, there should be a bathroom, a shower room, and a room for tea drinking. And at the very least there is also a swimming pool, a billiard room and a kitchen. If you want to equip just such a complex, the future owner will definitely have a question: how to install heating and water supply in it?
There is no definite answer to this - it all depends on the type of energy carrier used, the intended operating mode of the bathhouse, financial and technical capabilities. We will try to describe all possible options, and you will choose one of them or create your own combination.
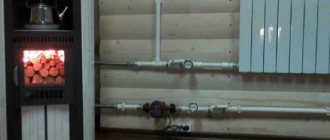
How to make heating from the stove?
There are several options for arranging a bathhouse with hot water supply. To ensure that the chosen method meets your personal needs, you should talk about the pros and cons of each in more detail.
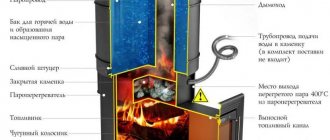
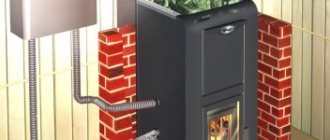
Samovar tank type
The most common modification, placed on the chimney outlet. The reservoir can have a rectangular, cylindrical, or oval shape.
The water is heated using high-temperature flue gases escaping through the pipe.
There is a fitting at the bottom of the container; some models have two pieces to connect the supply and discharge lines. The tank is equipped with a convenient hole for filling water with a removable lid.
The volume of a samovar-type tank is usually small ; its maximum dimensions do not exceed 80 liters. This option is ideal for medium-sized baths.
The material used to make the tank is stainless, heat-resistant or enameled steel with an anti-corrosion coating. Preference is mainly given to stainless steel, although it has the highest cost.
The simplest solution when filling the tank with water is to use a regular hose, since the height to the filler neck will be at least 1.5 meters.
It is prohibited to use an empty tank while the oven is operating. Overheating may cause the weld to rupture.
Advantages of the samovar type design:
- fast water heating;
- good heat dissipation;
- compactness and ergonomics;
- selection of containers of any volume;
- the ability to carry out installation yourself;
- savings on additional elements, such as heating elements or pumps.
Flaws:
- lack of visual control of water level and heating temperature;
- the large volume and high location of the container above the stove make the process of filling the tank difficult;
- impossibility of obtaining dry steam.
When buying a samovar tank, you need to pay attention to the individual serial number, passport and instruction manual. Their presence indicates compliance with all technical regulations during manufacturing.
The step-by-step installation of the tank to the chimney is carried out according to a certain scheme:
- Dismantle the pipe segment up to the ceiling passage assembly.
- Weld a pipe 8-10 cm long to the outlet of the furnace.
- Connect the pipe outlet running inside the tank to the pipe.
- Use an adapter for joining if the diameter of the pipes does not match.
- Use metal clamps to secure pipes at connection areas.
- Install the tank so that the distance between the top surface of the tank and the ceiling is at least 250 mm.
- If necessary, use an adapter for the main chimney pipe or the remaining section of the stove pipe with the same size in the upper part.
Installation diagram of a water heating system using a “samovar” type heat exchanger:
Installation of the tank on a chimney in a bathhouse is carried out provided that the chimney is made of metal.
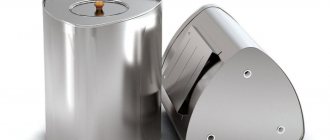
Remote tank
This product is considered the optimal solution when it is possible to remove the storage tank to other rooms in the bathhouse. In this case, the water will already be heated from the heat exchanger and flow through copper pipes into a remote reservoir.
However, when choosing in which room the tank will be located, it is necessary to take into account that the maximum length of the pipes should not exceed 3 m. The working mechanism of such a device is quite simple and fully copes with the task. Cold water falls into the furnace heat exchanger, and heated water rises into the reservoir.
The container has two main elements - the body and the bottom, connected by welding. The tank itself is equipped with two outlets, a lid and fasteners.
The tank can be selected:
- rectangular;
- oval;
- triangular shape.
The latter option is perfect for installation in the corner of the room. Vertical and horizontal models are available.
The remote tank should be located above the register, and the upper outlet of the heat exchanger should be connected to the tank of a pipeline that has an upward slope of at least 30 degrees.
The advantages of a remote tank during operation are:
- reliability and practicality;
- prolonged high temperature;
- a suitable solution for creating a bath with hot dry air;
- simultaneous heating of several rooms.
This model has its disadvantages:
- the possibility of using a pump for forced water circulation is not excluded;
- slow heating of water in a tank of significant volume;
- a large distance between the tank and the stove reduces heat transfer.
The most important thing when installing a remote tank is to follow the assembly sequence specified in the instructions:
- The tank should be placed so that its lower edge is above the heat exchanger.
- The tank is connected to the pipes by a coil.
- The upper and lower collectors of the tank are connected to the corresponding outlets of the coil.
- Check and safety valves are installed at the cold water inlet.
- For valves, pressure indicators are determined that reduce the threat of system failure.
Built-in
The built-in design is a unique option among all modern types of sauna tanks. It is placed inside the stove and combined with the combustion compartment.
In this case, the bottom of the container is at a very close distance from the open flame, which ensures a rapid rise in temperature and long-term heat retention.
You can take water from the tank using a ladle or drain it from an installed tap.
Since the tank is constantly in contact with fire, its walls and bottom must be thick enough. Therefore, the best material for a built-in tank is cast iron with a thickness of at least 5 mm.
Stainless steel tanks with a wall thickness of 1 or 1.5 mm are also considered in demand. For this method it is not recommended to use enameled steel containers.
Advantages:
- low heat loss and fast heating;
- significant savings in usable space;
- there is no need for additional design work.
The disadvantages of the built-in tank include:
- it is difficult to determine the water level and its temperature;
- the volume of the tank depends on the size of the furnace opening;
- heavy steam generated from constant boiling is not always suitable for a steam room.
Installation
A tank built into the oven is a labor-intensive option that must be thought out before laying bricks.
During construction, it is important to observe the main points:
- When laying the first row of bricks, provide a window for cleaning the chimney shaft.
- When constructing the third level, provide space for a damper and an ash pit door.
- Make a special recess or portal in the furnace where the water tank will be located, if desired, with inlet and outlet valves for hot water intake.
- When the masonry is completed to the top of the tank, two metal strips are secured to ensure the tank is safely covered with brick.
- The top of the compartment is made with a hole for the smoke exhaust.
- Insert the connecting pipe into the stone chimney.
- Seal the gap between the pipe and the wall.
The dimensions of the furnace opening should exceed the dimensions of the tank by several millimeters. In this way, all temperature expansions are compensated.
It is worth noting that such a single design can be purchased ready-made. At the same time, you can choose from options with steam exiting directly into the steam room or with discharge outside it.
Even more information about the tank built into the oven can be found in the video:
Installation of a storage water heater in a bathhouse
The passport of each electric water heater contains the manufacturer’s recommendations for its installation. There may be differences depending on the company, but they are not significant. In most cases, the diagram looks like this.
Connection diagram for storage water heater
There are several more recommendations for installing a water heater in a bathhouse:
- Do not hide water pipes between the finishing panels and the walls of the bathhouse. In any case, even with the best insulation, condensation appears on the pipes. The thermal insulation located nearby absorbs it, losing its properties. And the frequent presence of water vapor threatens the rapid appearance of fungus on the frame and/or cladding.
- It is advisable to “dress” cold water pipes in foamed polypropylene. This will not prevent the water from freezing, but it will prevent condensation from forming.
- When installing the system, do not forget about the slope of the pipes - it will make it possible to completely drain the water.
- Pay special attention to the wiring: electric water heaters of any type in a bathhouse or sauna should only be turned on through an RCD (residual current device), which will turn off the electrical device in case of problems in the network.
- It is necessary to have grounding in the bathhouse. The combination of high humidity and electricity is a potential shock hazard. And you shouldn’t neglect electrical safety.
For those who value comfort most and do not like to wait for the water to heat up in the boiler, you can make a double water heating system: provide the possibility of heated water from a storage water heater to a flow-through one. Then, even in winter, you can have hot water. Not boiling water, of course, but such a system will heat the water up to 75°C in 50 minutes, even in severe cold.
Laying out the oven from bricks
If you have some practical experience in building brick stoves, try building a large sauna stove with your own hands. We offer a stove-heater option with dimensions of 102 x 129 cm, equipped with a 170-liter tank and designed to heat a bathhouse with an area of 12 m².
To build the stove shown in the drawing, prepare a set of materials:
- solid clay brick (red) – 580 pcs.;
- fireclay stone grade ША-8 – 80 pcs.;
- cast iron grates measuring 30 x 25 cm - 2 grates;
- main door for loading firewood – 210 x 250 mm;
- ash chamber door – 14 x 25 cm;
- smoke damper – 320 x 450 mm;
- heater door – 51 x 42 cm;
- steel pipe with a diameter of 57 x 4 mm - 6.3 m;
- iron strip with a cross section of 40 x 5 mm - 2 m;
- the same, size 80 x 10 mm - 2.5 m;
- basalt cardboard, roofing felt.
Note. The list did not include the brick required for the construction of the chimney, cement, clay and sand for mixing the mortar.
Also, before construction, you need to weld a tank-boiler with dimensions of 102 x 77 x 25 cm from sheet steel grade St20 with a thickness of at least 3 mm. We will not outline the technology for installing a reinforced concrete foundation, preparing mortar and stove masonry - it is described in detail in the instructions for constructing a fireplace.
Let's move on to building the furnace according to the presented procedures:
- The zero and first rows are laid in a continuous line. Tiers 2 and 3 form an ash pit, and a blower door is installed.
- Row No. 4, covering the door, is the bottom of the fuel chamber, partially lined with fire-resistant stones with a gap of 5 mm from red bricks. Trimming is done, a grate and a loading door are inserted.
- When laying tiers 5-9, the walls of the firebox are built. On the 10th row, cells are prepared for pipes, cut into pieces 1050 mm long. These parts are placed in nests and sealed with basalt cardboard, and a water container is installed.
- From the 11th to the 20th tier, the furnace walls are built around the tank. On the 20th row, the end of the boiler is covered with two steel strips L = 35 cm.
- The heater door is installed on the 21st row, and the laying of the outer walls continues according to the scheme up to the 26th tier. On top of the door we place 2 strips 650 mm long.
- On the 27th row, the stove overlap begins to form. Cutouts are made for laying large strips 120 cm long. Bricks of the 28th tier cover the cavity of the heater, leaving a chimney opening.
- The flue valve is installed on the 28th row, tiers 29-32 finally form the stove vault and the transition to the chimney.
Six jumpers in the form of Ø57 mm pipes serve as supports for the future array of stones and at the same time serve as convective air heaters in the sauna. After 2-3 days, when the solution has dried thoroughly, you need to eliminate the defects, load the heater and begin test lighting. For a detailed description of the masonry in rows, see the next video:
Rating of the TOP 10 best gas stoves for baths in 2021
| Place | Name | Price |
| TOP 5 best gas stoves for baths by price/quality for 2021 | ||
| 1 | TMF Taimyr XXL 2021 Inox | Find out the price |
| 2 | Vesuvius Skif Forging 18 (DT-3) black | Find out the price |
| 3 | TMF Urengoy | Find out the price |
| 4 | TMF Taimyr 2021 Carbon | Find out the price |
| 5 | Vesuvius Lava 18 (DT-3) black | Find out the price |
| TOP 5 best inexpensive gas stoves for baths | ||
| 1 | TMF Taimyr | Find out the price |
| 2 | Vesuvius Gas-Wood Skif Forging 18 (DT-3) | Find out the price |
| 3 | TMF Taimyr Mini 2021 Carbon | Find out the price |
| 4 | Ermak Uralochka 30 | Find out the price |
| 5 | Ermak Uralochka 36 black | Find out the price |
Wood-burning water heaters for baths
There is another type of water heaters - wood-burning. These devices were very popular when electricity was not everywhere, and they were called “titanium”. They consist of two parts: the firebox is located below, and the water tank is located on top. The firebox is usually steel, the grate is cast iron. You can heat with any solid fuel, with the exception of coal. The water in such a device heats up very quickly even when using wood chips or some kind of flammable debris.
Wood-burning water heaters for baths
Modern models of wood-burning water heaters require connection to a water supply system, but, as practice has shown, they work very well when connected to a water tank installed on the roof of a bathhouse or a nearby building. However, you need to ensure that the titanium tank is constantly filled with water, both during operation and when stopped. In winter, in an unheated room, the water will have to be drained every time you leave.
It must be remembered that wood-burning water heaters are equipped with mixers of a special design and cannot be replaced with ordinary ones.
There are models that can operate on both solid fuel and electricity: electric heating elements are built into the water tank, and there is also a thermostat that allows you to maintain the required water temperature. These models are very convenient and economical: you can heat water using solid fuel and then maintain the temperature using heating elements. Such combined titaniums are made of either stainless steel or steel.
Conclusions: there are enough ways to organize water heating in a bathhouse and sauna, but there is no ideal one. Based on the conditions available in your bathhouse, you determine the possible options, and, after considering all the advantages and disadvantages, choose the method that is most suitable for you.

