The surface for many finished floors must be level. Therefore, the question of regulating the foundation is relevant. Thanks to the adjustable systems, the joists and the plywood laid on them provide a good foundation. This method of preparing a flat surface is convenient and simple; it allows you to make an adjustable wooden floor with your own hands.
Adjustable joists have many advantages
How an adjustable floor works and works
Finish floor coverings are installed on wooden joists (in the case of using floorboards) or on a solid base made of sheets of plywood or OSB (in the case of using laminate or soft coverings).
Adjustable floor diagram
Bolts for adjustable floor
It is very difficult to achieve such a result with the help of fixed logs; you often have to use various wedges or pads to level the spatial position. These wedges may fall out due to improper fixation or for other reasons, and the floors begin to sag and creak. It is impossible to eliminate such problems without dismantling some of the coatings, and dismantling is associated with large losses of time and money.
Adjustable floors with your own hands - a diagram of one of the possible options
Adjustable floors allow you to perfectly level surfaces on any uneven surfaces. In addition, the leveling mechanism makes it possible to adjust the gap between the floor and the load-bearing base, and this makes it possible to place various utility networks in these places.
Communications under adjustable floors
Adjustable floors consist of plastic stud bolts or metal studs, floor joists, or plywood sheets. Many modifications of regulatory systems are made, but there are no fundamental differences between them. By rotating the threaded connections, the structural elements are smoothly lowered/raised; in this way, the base of the floors can be accurately positioned in the required position.
Adjustable floor diagram
There are several types of adjustable floors, you should familiarize yourself with them in more detail.
How to use anchors for joists
Briefly, the procedure for using anchors is as follows:
- Markings are made on the floor according to pre-prepared holes in the joists and the assembly diagram of the adjustable floor;
- According to the markings, holes of 10 mm in diameter are drilled in the floor;
- The anchor is driven into the hole in the floor and the pin is screwed into the anchor for reinforcement;
- A nut is screwed onto the stud, a washer is placed on the nut;
- The logs are placed on the washers along the spaced studs;
- The second washers are placed on top of the lag and the second nuts are screwed on;
- With nuts on top, the logs are level adjustable;
- The nuts from below secure the logs firmly;
- The top of the studs is cut off with a grinder;
- Plywood is laid on the joists and finishing is carried out.
What are they?
The anchor bolt, which is used to adjust and compensate for shrinkage, does not have a very diverse design. Hardware can be standard or atypical, made to order. Basic options do not exceed 150 mm in length and have a size range from M20 to M30. All atypical diameters and dimensional characteristics of materials are most often made to order.
By type of design, adjusting anchors are most often driven-in. They involve the use of a brass stainless sleeve installed in a pre-prepared hole.
Tips for installing structures with adjustable legs
To successfully install this type of floor system you must:
- Once the installation of the leveling feet is complete, be sure to clean the subfloor before installing the deck. The fact is that uncollected debris, pieces of plastic, and sawdust after the final finishing of the floor can lead to squeaks and noise.
- All fasteners for the floor structure should be carefully driven in and tightened, because the strength and reliability of the system depends on this.
- Experts recommend using a fastening element such as an anchor for an adjustable floor for installation. This is the same dowel, but more powerful. Anchors provide reliable and durable fixation. They not only hold the beam in place, but also simultaneously attract it to the floor, imparting additional rigidity to the entire structure.
- When installing a high floor, the best solution is to place soundproofing materials between the joists. Thus, no noise will be heard during operation of the coating.
- You should not skimp on the quality of the product to create an adjustable design. It will be more financially profitable to immediately purchase expensive components than to redo all the work later.
If, upon completion of installation, it becomes necessary to move communications, you can dismantle several strips of coating and then put them back.
Areas of application
Thanks to the wide base of the racks and the uniform distribution of loads, the elements are installed on any stabilized surface.
Manufacturers produce various modifications and series of adjustable floor supports, which significantly expands the scope of application of the elements. Since polypropylene posts are not afraid of high and low temperatures, moisture, and can withstand loads of up to 1000 kg per support, the products are suitable not only for laying joist systems indoors, but also for constructing structures outdoors.
Options for using adjustable supports outdoors:
- for arranging existing and green roofs;
- balconies;
- garden terraces, areas around swimming pools, ponds;
- design of terrace extensions, summer cafes, gazebos.
General installation points. Materials used
To install an adjustable floor, in addition to the elements of the regulation system, you will need: wooden blocks and plywood.
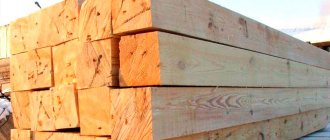
Wooden blocks used for floor installation must have a cross-section of at least 45x45 mm. Installation of adjustable floors should not be carried out using raw wood with a variable cross-sectional size of the beam. This can complicate the installation itself and cause problems during operation. Therefore, the bars must have minimal residual moisture and a stable size. For installation of adjustable floors, spliced bars are well suited, but this will increase the cost of materials. To protect against moisture and mold, the timber can be treated with a special antiseptic before installation work begins.
To ensure the required strength and rigidity, when installing an adjustable floor, plywood with a thickness of at least 18 mm should be used if the flooring is in one layer. If the flooring is made in two layers, plywood with a thickness of at least 12 mm should be used
When installing the floor, you should pay attention to the fact that the joints of the first layer of plywood must run along the block. As an additional fastening, glue can be applied to the bars; it will give the floor additional rigidity.
With a two-layer flooring, each subsequent layer should be offset by a third of the sheet.
We looked at the installation of the two most common adjustable floor systems. Both systems, depending on the cost and scope of work, have both pros and cons. This is explained by two factors: the cost of the components and the possibility of purchasing them. The last factor is most relevant for small cities, where systems of adjustable floors have not yet reached.
Flaws
The disadvantages of flooring with joists include the risk that the floor will creak; in an aggressive, humid environment, wood is not so durable. The issue of squeaking is practically reduced to zero when choosing high-quality, dried logs and the correct fasteners. Many people are confused by the possibility of laying tiles on such floors - this problem can be solved, the joists are installed in sufficient quantities to eliminate significant deflections in the canvas, and gypsum fiber is laid over the canvas.
The material of the canvas laid on the joists is quite diverse: from the most budget chipboard to two-layer plywood. Planed boards, lining and OSB - you see, a very wide choice for flooring with joists.
Peculiarities
An adjustable anchor is a metal product that has a prefabricated structure. It contains a supporting and mating part, a threaded sleeve and fasteners screwed into it. To compensate for shrinkage, simply change the height adjustment anchor, increasing or decreasing it. The supporting parts of the plates have holes in their design, with the help of which they are attached to the surface of wooden structures. Sometimes the response platform contains guide tubular elements.
The basic rule for choosing an adjusting anchor is this: its supporting pads must be sized to match the cross-section of the log or beam that they are to hold. The operating principle of the shrinkage compensator is quite simple. It is installed strictly in those areas that were planned during the design, under a pillar or support beam, with the counter element being attached to the floor joists, roof structure, or other load-bearing element of the building or structure.
This type of hardware is manufactured from alloy or carbon steel. Hot zinc coating is used to protect against corrosion. The stud and nut have a standard design with a fairly wide thread pitch. When moving the locking element, it is possible to reduce the gap between the plates.
Briefly about the main thing
The joists on the concrete floor are fixed directly or at one or another height.
The choice of fasteners is determined by the degree of evenness of the rough base, load and aggressiveness of operating conditions.
If the base is level, then you can use nickel-plated screws and plastic dowels with a length of 50 mm or more or anchor bolts to strengthen the structure.
An alternative to self-tapping screws are mounting angles, with which you can additionally adjust the verticality of the beam and the rise in case of slight deviations of the base in level.
If you need to raise the logs, you can fix them using brackets to the walls or using adjustable fastenings to the floor.
The height of the logs above the floor can be adjusted using plastic stands or studs with counter nuts.
The essence of the operation of adjustable fasteners is the presence of threaded elements and support elements for the beam.
Ratings 0
Installation of logs on metal plates
The main advantage of such floors is that the stability of the fastening is significantly increased due to the increase in the area of the lower stop. Disadvantage: the deadlines increase, the inability to do the work yourself.
Installation of logs on metal plates
The logs are fixed to the U-shaped plates using self-tapping screws; the height of the logs is adjusted using a series of vertically located holes on both sides of the plate.
Step 1. Using a blue rope, mark the locations of the floor joists. Calculate the required amount of material and additional structures.
U-shaped bracket
Step 2. Determine the floor level, make marks on the walls. Place metal plates and joists along the lines. The width of the plates must correspond to the lag tire. The distance between the plates depends on the parameters of the log; forty centimeters is enough for a bath.
Carrying out marking
Step 3. Use dowels to secure the plates to the concrete base. Immediately hammer in the dowels until they stop, then it is very difficult to tighten them - the log lies on top and prevents access to it. If the metal plates move a little during fixation, it’s okay. When installing the joists, slightly bend their side parts in the desired direction.
Fixing the bracket
Step 4. Take the first lag and place its ends in the desired position. In this position, attach the log to the side surfaces of the U-shaped plates; use wood screws for fixation. Now you can fix the plates located in the middle of the log. But to do this, constantly check the horizontal position; the joist bends a little under its own weight. If you want to do the work faster and better, then use ropes to set the horizontal level. How this is done is described above. Make sure that the self-tapping screws do not split the joists, choose them according to size, and screw them in at a slight downward slope.
Fixing the logs
Work is carried out according to the level
Step 5. After installing all the joists, you need to cut off the protruding parts of the plates with a grinder. This is quite inconvenient to do. But, despite the “difficult” cutting conditions, try to minimally damage the wooden joists with the disc.
Installation of adjustable joists
Flooring
The most important thing in flooring is to align the sheets so that the seams fall in the middle of the joists. It may happen that the seams will be significantly displaced, if the sheet does not fit onto the joist by at least a centimeter, you will have to change the layout of the sheets or make additional seams; twisting the joist is much more problematic. The seams running across the logs are pulled together from below with a bar or the same sheet material. It is important to leave a 5-15 mm gap from the walls, the canvas will have room to expand if something happens, this will in some cases avoid the floor creaking.
When laying plywood, an unpleasant phenomenon may occur: the screws may not fit into the canvas and burst, the result is not a tight fit and a squeak may appear in this place. In the place of the broken screw, you need to tighten a new one, stepping back a few centimeters. If the screws break too often, there are two options: take thicker screws instead of 3mm, for example 6mm, or before tightening, make a countersink with a drill slightly larger than the diameter of the head.
That's all, I hope I gave comprehensive information.
Floors supported by furniture studs
Another way to lay joists on adjustable supports is to use a furniture pin, double-sided - with metric and single-start threads. They have long been used for attaching hanging elements to concrete, brick, and wooden surfaces. To lay a wooden floor on joists, studs with a cross section of 8-10 mm are suitable.
The bars must be prepared in advance. To do this, every 30 cm they are drilled:
- Holes corresponding to the cross sections of the studs;
- Coaxial half-holes with a diameter of 20-25 mm and a depth of 20 mm are for screw-on nuts.
The installation of floors in the house is carried out as follows:
- The beams are laid in increments of 1 meter;
- Holes are drilled in the concrete base, coinciding with the holes in the beams;
- Install polymer dowels;
- Screw in the studs.
The next step is to prepare the support brackets: screw two nuts onto the studs and put on washers whose outer diameter exceeds 30 mm. Install the beams so that they rest on the washers; Place another nut on top. The heights are leveled: the level is set with one lower nut, and the second – the locking nut – is secured. The installation of the subfloor is completed by tightening the top nuts. Using a grinder, cut off the protruding ends of the studs and prepare the flooring - boards, plywood, OSB.
The cost of the work is minimal: you can do it yourself. The cost of hardware matters, but they are considered consumables. Compared to the costs of basic raw materials, this value can be neglected.
Adjustable joist supports are one of the easiest ways to level a subfloor. Thanks to this technology, it is possible to avoid “wet” work associated with pouring screed. This allows you to lay the finishing coating on the subfloor immediately after installing the wooden sheathing made of joists and particle boards. The article will discuss the main types of supports suitable for adjusting the height of floor beams, as well as the features of their use.
How to cover logs
Materials can be varied, from rough to finishing. For subsequent finishing, you can lay a regular edged board - this option is more suitable for a private home. Sheet materials are suitable for both private and apartment buildings. It can be plywood, chipboard, OSB.
The finishing coating includes floorboards and lining. Their further finishing consists of sanding and painting (although it is often useful to do this before installation).
As a sheet material, I would like to mention plywood - it is strong, durable and tolerates moisture well. Due to the different orientations of the veneer layers, plywood is less susceptible to variations in size. There is, however, one unpleasant drawback: in most cases, the thickness of the sheets may differ slightly by 1-2 mm, and the difference may be present at different ends of the same sheet.
Installing joists on metal studs
Adjustable floors of this type can be made independently; we will talk about this option. Select the dimensions of the logs taking into account the characteristics of the floor and maximum loads. Metal studs with zinc coating, recommended diameter 6÷8 mm. To assemble the structure you will need studs, nuts and washers.
Dowel pin for fastening lags
Set of joists with studs
Step 1. Beat parallel lines on the supporting base at a distance of 30÷50 cm. The greater the distance, the more powerful the logs you need to choose.
Step 2. Calculate the number of joists, studs, washers and nuts. The recommended distance between the studs is 30÷40 centimeters. Prepare all materials, additional elements and tools for the work.
Step 3. Mark the holes in the joists for the studs; they should all lie on the line of symmetry. In the designated places, first drill a through hole Ø6 mm for the stud (if the diameter of the stud is different, then the hole must be drilled accordingly). On the front side of the joist, use a feather drill to drill a hole for the diameter of the washer. The depth of the hole should be several millimeters greater than the sum of the height of the nut and the thickness of the washer.
Step 4. Place each joist in turn on the broken parallel lines on the concrete screed
Very carefully, one by one, mark the future installation locations of the anchor threaded elements for each joist. Make sure the joist doesn't move
For marks, use a drill or an ordinary pencil. For a drill, you need to take a drill with a pobedit tip. The places are marked - take away the lag and drill holes in the concrete. The dimensions of the hole must correspond to the dimensions of the anchors.
Anchor installation
There is a second way to mark holes for anchors; it takes more time, but completely eliminates the possibility of errors. It's done like this. First, you need to mark only the two outer holes for the anchors, screw the studs into them on two nuts, and fix the joist in the desired position. Now during further marking the lag will not move anywhere. In this position, you can immediately drill holes for the anchors to the full depth. The work is completed - the joist is removed, all the studs are screwed into place. This procedure will have to be performed with each lag; labor productivity is reduced by half. But you must make your own final decision on the marking method, taking into account the condition of the concrete subfloor and your experience in performing this type of work.
Step 5. Place a nut and washer on each stud. It is advisable to immediately determine approximately the location of their height, this will speed up the work. Screw the studs into the anchors firmly. To do this, you can use a special plumbing tool or other simple methods. You can buy studs that have holes at the end for an insert barb or a hexagon for an open-end wrench, but they cost much more than ordinary ones.
Installing joists on studs
Checking horizontality
Installed logs
Video - How to tighten hairpins
Step 6. Place the logs on the studs one by one, using a wrench of the appropriate size by turning the bottom nut left/right to align the position of the logs. We have already told you how this is done. Keep in mind that the thread pitch of metal nuts is much smaller than plastic ones. In some cases, you will have to twist for quite a long time, which is tiring. Moreover, the position will be uncomfortable: you will have to sit on your knees and bring the key from the bottom of the joist.
Step 7. The logs are exposed - you can start fixing them. Use a washer and nut and insert them into the top hole.
General view of installed joists
Heeled joists
Photo of adjustable joists
Step 8. Cut off the protruding ends of the studs with a grinder. Be careful with the joists, do not damage the integrity of the lumber with the saw blade.
The feasibility of choosing adjustable floors
Even though adjustable structures have a lot of advantages, many property owners, when carrying out renovations, doubt the advisability of their installation.
In some cases, it is preferable to install this particular type of coating, namely:
- if the rough foundation is difficult or impossible to level because it has large differences and defects;
- when when leveling the base, for a number of technical reasons, it is impossible to use materials that have a large weight;
- if the floor covering needs to be created with several levels that differ in height;
- when it is necessary to lay utility lines under the floor;
- if there is a need for additional noise and heat insulation.
Where and when can it be used
Considering the design features, advantages and disadvantages, we can conclude that this type of flooring is advisable to use when:
- It is necessary to level the surface and significantly raise its level, and the base does not allow for a thick layer of screed. The height of the level rise can reach 20 cm.
- It is necessary to lay communications, for example, heating pipes, under the raised floor.
- It is necessary to make thermal insulation or sound insulation.
- The design of the room provides areas with different floor levels.
Calculation of the distance between joists when installing the floor
The distance between the logs (step) is a very important parameter, on the basis of which calculations of the required amount of building material are made. When thick boards with good strength are used as the finishing floor, beams can be installed relatively rarely. If the flooring is carried out with thin elements, then the step must be reduced. Table 2 shows the dependence of the distance between the lags on the thickness of the finishing coating.
table 2
The data shown in Table 2 is approximate. To more accurately calculate the pitch, we can give an example when it is necessary to find out what distance should be between the beams when constructing a floor in a room 9 m long. In this case, a beam with a cross-section of 180x100 mm is used, and boards 30 mm thick are used as the finishing coating.
Scheme of laying plywood on joists.
Since the thickness of the board is 30 mm, then, according to Table 2, the step should be 0.5 m. The total number of beams will be designated as k. Therefore, the width of all joists will be equal to 100*k (mm). The first beams will be laid at a distance of 30 mm from the wall. Based on this, the step between them is k-1, and the distance between all elements is 0.5*(k-1).
To find out the pitch between the beams, you need to create an equation: length of the room = width of the beam + distance between all the joists + distance from the walls. The result is: 9 m = 100 mm*k+0.5*(k-1) m + 30 mm*2. Bringing all the values into a single number system, you get: 9 = 0.1*k + 0.5*(k-1) + 0.03*2.
Solving this equation, you will see:
- 9 = 0.1*k + 0.5*k – 0.5 + 0.06;
- 9 + 0.5 – 0.06 = 0.1*k + 0.5*k;
- 9.44 = 0.6*k;
- k = 15.7 pcs.
The number of beams must be a whole number, so the resulting value should be rounded up. That is, to construct the floor it is necessary to prepare 16 lags. The sum of all the gaps between the logs will be equal to: 9 – 0.06 – 16 * 0.1 = 7.34 m. Dividing this value by the number of gaps, you get: 7.34 / 15 = 0.489 m. For the example given, it is necessary to install logs through every 0.489 m or 48.9 cm.
Floor insulation scheme with joists.
Follow these tips to ensure the resulting design is reliable:
- The base on which the floor is to be installed must be thoroughly cleaned of debris and treated with a deep penetration primer.
- All wooden elements should be treated with an antiseptic, which can be used to increase the service life of the wooden structure.
- The beams need to be laid along the window with gaps between the walls of 3-4 cm.
- After installing the log, the surface is checked for horizontal evenness with a long level. If there are no gaps between the level and the beams, then all the work was done correctly.
The reliability of the entire structure depends on the cross-section of the logs and the step between them. Therefore, the choice of these parameters should be taken very seriously.
Wooden floors on joists are one of the oldest methods of flooring and the only one used in the northern regions of our country. Modern materials have only improved ancient technologies, due to which the scope of applications has significantly expanded and performance indicators have improved. Before proceeding directly to the consideration of various options, you should familiarize yourself a little with the engineering requirements for calculations.
Logs are distinguished from beams by their smaller size and mobility. If beams cannot be moved after installation, and repairs are very long and labor-intensive, then logs are a mobile architectural element. They are much easier to install and, if necessary, repairs are carried out faster.
Before you start building a floor, you need to study the requirements of regulatory documents for the size of the joists and the distance between them, taking into account the thickness of the floorboards.
Table of lag sections at a pitch of 70 cm
Table of distance between joists depending on the thickness of the board
In order to learn how to independently make calculations based on tables, it will be useful to consider a simple example. Initial data: the length of the room is 10 m, take a floorboard 30 mm thick.
Calculation method
According to the table, with such a thickness of the board, the distance between the logs is 50 cm; with a room length of 10 m, 20 logs will be needed. The distance between the logs and the walls cannot exceed 30 cm. This means that we will have to increase their number by one piece, the distance between the others will decrease to 45 centimeters.
There is no need to calculate dimensions and distances accurate to the millimeter; no one takes such measurements. By the way, during construction, the vast majority of architectural elements and structures are measured in centimeters, the greatest accuracy is half a centimeter. Millimeters are almost never used during measurements.
Adjustable joists main advantages
The most undeniable advantages of adjustable floors are the ability to raise the floor level to a greater height without increasing the overall weight of the structure and the speed of installation, in comparison with various screeds and self-leveling floors.
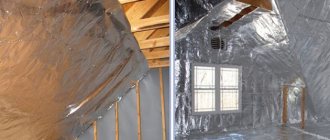
The big advantage is that there are no wet processes and therefore no need for drying. Insulation of such floors also does not cause any problems - polystyrene foam, extruded polystyrene foam, mineral wool, all these materials are acceptable. In comparison with self-leveling, floating screeds, the insulation does not have high requirements for insulation density and it is possible to select a budget material.
When pouring screeds up to 5-10 centimeters thick, the advantages of lags are not relevant, however, situations often arise when the floor level needs to be raised by 15 centimeters or more. Such heights may be required when there is a large difference in floor slabs, during partial renovation of an apartment, where it is necessary to join the old floor on joists.
Of course, there are screeds with the addition of expanded clay, various floating screeds that allow you to raise the floor level and at the same time insulate. As a rule, the cost of materials and work increases, and if a 5-centimeter screed is 1.5-2 times cheaper than an adjustable floor, then with layers of more than 10 centimeters, the cost of the lag remains the same, which cannot be said about wet screeds.
The floor arrangement system using adjustable joists has deservedly taken its place in the construction of floor coverings. This was achieved thanks to a large number of undeniable advantages - the ability to create perfectly smooth surfaces, hide imperfections in the subfloor, as well as protection from mold and mildew.
Reliable fastening is achieved through plastic bolts, which act as the main fastening and adjusting element. Thanks to this system of arranging a floor structure, you can independently build a high-quality wood floor on a concrete base in the shortest possible time.
Also, the undeniable advantages of the adjustable design include excellent ventilation of the underground space; it prevents the formation of all kinds of fungi, bacteria and mold, as well as rotting of the wood from which the logs are made. At the same time, in the underground space you can easily hide communication systems - heating pipes, electrical wiring, etc.
I would also like to note that through the use of plastic bolts, the soundproofing characteristics of the floor are improved. Also, in the space between the concrete base and the wooden floor structure, you can lay additional thermal insulation, which is especially important in apartments on the ground floor or private houses.
How to calculate size and section
The reliability of the structure during operation also depends on the correctness of the calculations performed. The thickness of the timber is determined by calculation.
A gap of 2-3 cm should be left between the wall and the end of the wood end; this is necessary to avoid the formation of possible deformations due to fluctuations in temperature and humidity conditions.
To determine which timber to use to cover 5 meters, some calculations should be made.
The thickness is directly proportional to the material used and the characteristics of the floor. The calculations take into account the maximum load and the step between supports. For residential premises, this figure is 300 kg/m2, that is, 300 kg per square meter must withstand the floor covering. There are ready-made calculation data, according to which the length of the span and the cross-section that should be purchased for the work are established.
| Distance between walls (length of product required for laying) in meters | Cross-sectional dimensions, in millimeters |
| 6 | 220x180 |
| 5 | 200x150 |
| 4 | 180x100 |
| 3 | 150x80 |
| 2 | 110x60 |
It is worth noting that the building material is made in a rectangular shape, and during installation it is placed on the edge, that is, with a smaller cross-sectional size on the foundation. Thus, rigidity and reliability during operation are achieved.
The thickness size can be selected and a larger cross-section; this is necessary when planning the laying of the insulation layer. Logs for flooring are selected based on the size of the timber and other characterizing parameters.
How to Make Adjustable Plywood Floors
Plywood is a board pressed from several layers of wood material - veneer, rather than their wood shavings. Therefore, it is quite durable, despite its low weight. Plywood floors are environmentally friendly, easy to use and easy to carry out work. This material can be used to make both rough and finished floors.
Adjustable plywood floors can be installed even on uneven surfaces
Installing an adjustable plywood floor has its advantages:
- Cost-effective investment and speed of the process;
- High thermal insulation qualities;
- If a moisture-resistant material is selected, resistance to humidity;
- Low abrasion, long service life.
When the ground has significant flaws, it makes sense to build a deck on legs using wooden beams.
First, the base is prepared, debris and dirt are removed. The surface is lined with any waterproofing material - film or rolled roofing felt. Logs made of wooden beams are installed taking into account the zero level - its line must run in exact accordance with the surface of the log.
The timber is laid against opposite walls - the position is controlled using planks and then checked with a level. Threads are stretched between the lags, playing the role of beacons, intermediate beams are laid at intervals of 40 mm.
It should be borne in mind that to lay the entire system you will need a plywood sheet 2 cm thick. At the end, the surface is polished.
What is a classic dowel?
Naturally, dowel fastening of various objects on concrete must be of high quality. The classic option is a plastic bushing with notches along the length and so-called “whiskers” used to prevent the fastener from turning through the hole. The main element of such fastening is a special rod, which contributes to the strength of the fastening in the wall, because when it is used, the bushing in the mounting hole expands. The classic mount is also quite easy to remove. The notches on the rod make it easier to unscrew with a screwdriver.
The classic dowel for concrete and other solid materials has been preferred by specialists in the field of construction and repair for a long time. Consumers often call it a “dowel-nail.” Concrete fasteners can be made of metal, nylon and various types of plastic. Naturally, products made from different materials differ in their characteristics and, accordingly, in their area of application.
Polypropylene dowel-nail with a hidden side
The load-bearing capacity of a dowel on concrete is determined by its design features. In the classic design, a dowel-nail is a sleeve, the entire outer surface of which has special notches that prevent such an element from turning in a hole in a wall or in any other building structure.
Special whiskers, which, due to their elasticity, are constantly in a decompressed state, help prevent the fastening element from being pulled out of the wall. When a screw is screwed in, the fastening element expands due to longitudinal slots on its surface, which ensures high reliability of its fixation.
Parameters of dowel-nails with a mushroom-shaped edge used for through installation (click to enlarge)
In addition to dowel fasteners, which operate on a mechanical principle, the modern market offers dowels for porous concrete and other similar materials, fixed in the holes through the use of a special adhesive composition. By filling the internal cavities of the porous material, the adhesive composition reliably fixes such an anchor element in a previously prepared hole.
The classic dowel-nail intended for concrete is such a universal fastener that it is quite difficult to list all the areas of its application. With its help, they install frames for various purposes, attach furniture and interior items to the surface of walls, fix household appliances at the required installation location, and also solve a whole list of other important tasks.
Metal driven dowel nails can be made of steel or aluminum alloys
Before direct installation, the wood must be treated with antiseptic solutions and then covered with soil. Only after completing the preparatory stage can you proceed to the installation of wooden beams, the fastening diagram of which, as well as the sequence of work, is given below:
- The timber is distributed over the entire floor area. In this case, the first two beams are laid parallel to the opposite walls of the room, and all subsequent beams are distributed with the necessary spacing, which, as mentioned earlier, depends on the material mounted on top of the structure. If the dimensions of the room exceed the length of the wooden beam, then the latter must be extended by joining two elements. After two side elements are laid along opposite walls, they must be adjusted in height using a water level. Next, a construction cord is pulled between the outer boards, along which the rest of the bars will be laid. At the next stage, a through hole is made in the wooden beam and base of the floor surface. Either a dowel or a spacer part of the anchor element is inserted into the resulting hole in the floor, taking into account the fasteners. Then a bolt or self-tapping screw is screwed in. To create additional thermal insulation between adjacent beams, any available insulation is laid. A vapor barrier layer is installed on top of the insulation. At the final stage, The prepared structure is covered with a finishing coating - sheets of plywood or wooden boards.
Preparation rules
If you decide to install adjustable supports for joists with your own hands, then you need to select the type of adjustable structure and determine the height at which the rough flooring will be fixed. You need to focus on the floor level; its thickness should be subtracted when calculating.
When arranging the floor, the room is measured and a plan is drawn. If you have a drawing on hand, you will be able to calculate the amount of material and hardware for fastening. This will allow you to determine the arrangement of cut and solid elements. In any case, a ventilation gap should be left around the perimeter of the room, the width of which will be 1 cm. The same should be between the stakes and adjacent slabs.
Before installing adjustable supports for the floor joists, it is necessary to determine the distance between the holes, which will depend on the installation of the finished floor covering. For an ideal dry screed under linoleum or floor tiles, approximately 30 cm should be maintained between the axes of the holes. Between the central points of screw devices, the maximum distance is 50 cm. This is true when leveling is carried out with slabs. But for logs this parameter is 45 cm.
If a design with adjustable joists involves laying plank floorboards at the next stage, then there is no need to nail plywood to the joists. The board is immediately attached to the beam; this should not be forgotten when you think about what the level of the subfloor should be.
Carrying out installation work
In the case of wooden products, choosing fasteners is not difficult. Nails and screws are suitable here. When working with concrete, different solutions are required. Let's consider the criteria for choosing fastenings for joists to a concrete floor:
- Level . The evenness of the rough base determines whether it is necessary to compensate for one or another height. That is, the logs will be laid directly on the floor, attached to the walls or using adjustable devices.
- Humidity . This criterion applies to the work space. For example, for flooring over a monolith in a bathhouse, it is important to consider samples that will cope with changes in humidity, temperature, and chemical reagents for a long time.
- Load . The use of floors can vary in intensity and pressure from certain factors.
Another point concerns the floors on the ground floor, which are located above the basement. Condensation often forms under wooden flooring, causing the material to rot. To avoid this, the logs are fixed to supports.
Self-tapping screws
Such fasteners are considered the simplest and most accessible, but their use is not always acceptable.
Example of dowel-nails with nickel plated Source stroikrep.ru
For example, in the case of a support system without direct contact of the timber with the base. The installation process includes the following steps:
- holes of the required diameter are drilled at the location of the hardware (both in the concrete screed and in the wooden blank to prevent the appearance of cracks);
- a plastic dowel is driven into the hole formed in the subfloor;
- the self-tapping screw is screwed through the beam and plunged into the dowel, the head is recessed into the wood a few mm.
The optimal distance between fasteners when using self-tapping screws is 400-600 mm. It is recommended to choose fasteners with a nickel plated diameter of 3.5 mm. The drill bit for the timber is selected with a size of 4-5 mm. The depth of immersion of the dowel into concrete must exceed 50 mm.