Hello, dear readers!
First of all, I want to wish you a Merry Christmas, and of course tell you something... Wood is a building material that has deservedly been adorned in the winner's laurel wreath for many centuries. How will he captivate people? Esotericists claim that it has powerful energy that has a very positive effect on humans.
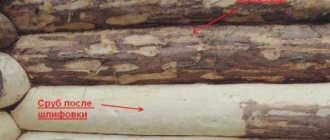
In addition, people, having tasted all the “delights” of life in brick-and-block multi-storey buildings, say with a blissful smile that a log house is a voluptuous bliss that pampers with the desired coolness in the heat and gentle warmth in the cold. In addition, wooden structures have a long service life and stunning appearance, however, with proper processing. Ordinary polishing of the log structure will preserve and enhance the presentability and aesthetics of a log structure. How, when and with what to sand wood raw materials? Let's find out now.
Required set of tools
Sanding wood with a grinder is the most common and affordable way to sand a wooden house. Typically, an angle grinder is used for grinding a frame made of planed logs. Using a grinder is also convenient for sanding grooves and ends of logs. Actually, with this tool, if you have the skills, you can process any lumber.
Model selection
There are both household and professional models that differ in power and performance. You shouldn’t buy the cheapest grinder; its power is unlikely to be enough to polish the entire frame. Expensive professional models are also not the best choice for home use. They operate at high speeds and are distinguished by considerable weight and power. A non-specialist, without the knowledge of working with such a tool, can simply ruin the surface being sanded, leaving dents on it.
It is best to opt for:
- semi-professional models with power from 800 to 1000 W. This will be quite enough to polish the frame.
- It is advisable to buy a tool with a rear air intake rather than a side one, so it will become less clogged with dust.
- You should also pay attention to the cable length. A cord that is too short is inconvenient to use.
Nozzles for an angle grinder
To work, you will have to stock up on attachments on which the abrasive is fixed. There are two types of nozzles:
- Rubber
- Plastic.
It is more convenient to work with plastic nozzles; although they are thinner than rubber ones, they last longer. Rubber ones quickly deteriorate, and in addition, if the rubber nozzle accidentally touches the wood, it will leave an ugly black mark on the surface of the wood, which is very difficult to remove.
Abrasive wheels
For grinding use regular
or flap grinding wheels. Sanding a log frame is a very dusty job. A lot of dust is released, which, together with tree resin, gets clogged into the disc, the abrasive quickly wears off, so the grinding wheels quickly become unusable.
During rough processing, one disk is enough for about 3-5 meters of log, then it has to be changed. Consumption depends on the condition of the wood and the type of surface. How many fine grinding discs are needed depends on how thoroughly the initial processing was carried out.
The alpha disk, which is a metal disk with pobedite chips soldered onto its body, has a longer service life. Grinding timber with an alpha disc allows you to significantly save on consumables. A disk clogged with sawdust can simply be cleaned with a wire brush and you can continue to work calmly.
Flap attachment for grinder Multifunctional tool
- grinder (angle grinder);
- belt sander or eccentric;
- grinding attachments (discs);
- bars with an emery base;
- chisel for processing hard-to-reach places;
- industrial vacuum cleaner;
- glasses;
- respirator;
- gloves;
- protective substances - fire retardants, antiseptics, acrylates, etc.;
- brushes or spray gun for applying products intended for wood processing;
- sealant for wood, warm seam (if there are cracks or such ideas);
- decorating paint or special oil impregnations (if desired).
How to choose the right tool?
At first glance, it seems that polishing a log frame is a simple process and doing everything with your own hands will not be difficult. We'll have to dissuade you. Study the information below and try to objectively assess your strengths. Do you have the necessary tools, time, persistence, and skills? Or maybe the best option would be to entrust this work to professionals?
As you probably know, grinding a log frame consists of several stages. Belt sanders do an excellent job. Today in stores they are presented in a fairly wide assortment, but not every one is equally well suited for this job. In order for the process to go faster, the tool should not be too heavy and powerful enough. It would be good if the model had a dust collection bag.
Belt sanders do an excellent job of sanding timber baths and flat surfaces.
Sanding with a grinder also helps get rid of fungi and mold.
But this tool is not suitable for processing semicircular logs. It is better to use a grinder with special sanding discs with sandpaper. It should not be very heavy, otherwise after the first hours of work your arms will literally fall off. A power tool of 850 W will be quite enough. It is better to choose an angle grinder from well-known manufacturers (Makita, Bosh, domestic Intersko). Buying a cheap Chinese instrument is like playing the lottery. It can last for a long time, or it can break after 2 days.
Working with an angle grinder requires certain skills. In inept hands, an angle grinder will leave deep furrows and dark stripes on the body of the log. There are 4 stages of grinding with an angle grinder, and for each you need to use a sanding disc with the appropriate grain. At the first rough stage, sanding work is carried out using sandpaper with a coarse grain size of No. 40. The sanding sheet effectively and quickly removes the top layers of darkened wood. The forty is also suitable for grinding the ends of logs.
Under no circumstances should you sand the house during construction or immediately after; it takes about 2 years for it to shrink.
At the end of this work, the sandpaper should be replaced with a sheet with a finer abrasive - No. 80 or No. 100. It removes the initially raised pile on the log and brings the surface to a state of perfect smoothness. Final (fine grinding) - from 150 to 180, finishing - grit from 220 to 240. In hard-to-reach places, you can use a chisel. If you carefully go through all 4 stages, your house can be called a real masterpiece of architecture, and the walls will not need additional decoration. Coarser grinding involves going through only the first 2 manipulations.
Purchase of discs for grinding logs
Domestic discs are several times cheaper than imported ones, but the quality is almost the same.
If you do decide to sand the frame yourself, one of the problems you will have to face is the number of sanding discs. The fact is that a lot of them are required. For 1 m² of wall it takes from 1 to 3 discs. In order to preliminarily calculate the area, volume of work and financial costs, you need to use the height coefficient used when calculating by professional teams. If the walls are not smooth, but have curved crowns, measurements are taken using a tape measure, the tape of which should go around all the curves. In the end, it turns out that in a house with a ceiling height of 2.6 m, the actual wall height is about 3 m.
And again about disks. In a construction supermarket, purchasing such a number of discs (mostly imported ones are presented there) will significantly hit your pocket. The best solution would be to pay attention to a domestic manufacturer. For example, discs from the Luga Abrasive Plant are several times cheaper, but in terms of quality characteristics they are not much inferior to imported products. Domestic disks are not available for sale at every online giant. Try contacting construction companies; they work directly with the manufacturer. Maybe you will be able to purchase small wholesale items from them at a fairly reasonable cost.
Recognized advantages and disadvantages of a log house
Wooden design
- environmental friendliness;
- security;
- durability;
- wear resistance;
- resistance to deformation;
- low thermal conductivity;
- frost resistance;
- excellent sound insulation;
- natural ventilation;
- ease of care;
- healing aroma;
- amazing appearance;
- favorable energy.
A wooden structure also has disadvantages - these are:
- change in natural shade;
- biological activity;
- flammability.
The disadvantages are quite serious, however, proper processing of raw materials will not allow them to overshadow your life in such a beautiful structure.
Surface degumming
Conifers are known to contain large amounts of natural resins. On the one hand, this circumstance is an advantage, since the resin content protects the tree from rotting and mold formation. But on the other hand, resin prevents good adhesion of paint to wood, and when sanding it spreads over the surface and spoils the appearance of the wood. Therefore, before processing the needles with a grinder, it is necessary to remove excess resin.
How to remove resin from a log before sanding? Suitable solvents for this are: acetone, white spirit, turpentine, purified gasoline. You just need to apply the selected product to the wooden surface, and rinse off the residue with warm water.
We suggest you familiarize yourself with: How and with what to whiten a log house made of logs and beams inside and out. How to bleach timber logs with your own hands Means for bleaching wood from blackness
Why is grinding needed?
The main purpose of sanding a log house is to give a wooden building an attractive appearance and to remove the top layer of wood that is infected with microorganisms. After building a wooden house made of logs, it is not recommended to move into it and live immediately. Over the course of a year, the house undergoes natural shrinkage, after which you can think about how and with what means to carry out the finishing.
More often, various protective impregnations are used for this, which not only protect the wood from the negative influence of microorganisms, but also emphasize the structure of the material. Therefore, grinding rounded logs must be approached responsibly, especially since this work is considered difficult.
Advantages of log sanding
Sanding timber is a rather labor-intensive and time-consuming process, but, as they say, “If you’re afraid of the wolf, don’t go into the forest.” Before you start work, you need to realize the importance of the matter so that the mosquito does not undermine your nose.
Sanding logs:
- perfectly levels the surface;
- ideally cleans raw materials;
- helps maintain the original shade;
- provides high adhesion to paints and varnishes;
- reduces the cost of finishing materials;
- allows antiseptic impregnation to be evenly distributed over the surface without the formation of pigment spots;
- prevents wood aging;
- protects the material from rotting, mold and insects;
- increases resistance to the negative effects of climatic, thermal, mechanical, and chemical factors.
The result of the work is walls, as in advertising photographs of presentable construction companies.
Treatment of log timber with protective compounds
Wood is a soft and fibrous material. Humidity and microorganisms turn it into an unusable material over several years, so after sanding logs and beams, their surfaces must be coated with antiseptic and fire-retardant compounds. The former are responsible for the safety of lumber from the negative effects of mold and fungi, the latter increase fire resistance.
Protective liquids are applied using conventional painting tools: brushes and rollers. If the treatment area is large, then use a spray bottle. First of all, an antiseptic is applied, after it dries and is absorbed into the wood, a fire retardant is applied.
There is another composition that gives the wood certain shades. It is called glaze material. There are more than 40 varieties of glazing compounds on the market today that give wooden walls different shades, including colorless options.
It should be noted that protective liquid materials are divided into two categories: for interior use and exterior use. They cannot be swapped, because the compositions are very toxic for external use, although they have higher protective properties.
Coating the log house with an antiseptic using a spray bottle
Mistakes when grinding with an angle grinder
The grinder is the main tool used for processing logs made from chopped logs, the surface of which contains bark residues, knots, cracks and other defects.
- For primary rough processing use:
- special grinding and polishing wheels;
- wire brushes;
- universal bases to which replaceable sanding attachments with coarse grain No. 30-60 are attached.
A grinder with these attachments copes well with the uneven surface of hand-cut logs. As a result of primary processing, all more or less large defects and protruding parts are removed from the surface.
- For stripping logs with old paintwork, bowl-shaped stripping attachments with twisted wires are best suited.
- The next stage after roughing is fine grinding, the purpose of which is to completely level the base and prepare the surface for painting or varnishing. It is performed using grinding wheels with fine-grained nozzles No. 80-120.
- If polishing of logs is planned, this operation is best done using fabric attachments.
It is not recommended to sand the entire area at once. It is advisable to treat the surface in parts, dividing the wall into certain zones. In this case, grinding productivity will be higher than when processing large areas.
A grinder is the most convenient and affordable tool for grinding, but in unprofessional hands it turns into a rather dangerous device, which can cause a lot of problems if handled improperly. Home craftsmen who do not have the skills to use an angle grinder very often make mistakes, which are the main reason for poor-quality grinding.
A typical mistake is working with an angle grinder at high speeds. Inexperienced craftsmen often find it difficult to choose the optimal disk rotation speed. As a result, the tool literally “burns” the wood at high speed, damaging its outer layer. In addition, high speeds contribute to the rapid clogging of the abrasive with wood dust, which shortens the service life of the nozzle.
Another common mistake is pressing too hard on the device while sanding. This is the most common reason for the formation of dents and grooves on the body of logs and beams, which spoil the appearance of the wood. Getting rid of these marks is not so easy; you will have to re-sand, which is not always effective.
Step-by-step execution of grinding work
The technology for polishing a log frame is not as scary as it is made out to be. The main thing is to stock up on quality tools, materials and patience. In addition, you should pay attention to some nuances. That is, the work is performed after:
- installing the roof to prevent rain from soaking the walls;
- drying the wood, otherwise the abrasive grinding wheel (wheel) will clog and the wood will become “ruffled” (the nominal drying period is about 12 months from the date of construction of the structure);
- treating the material with a bleaching antiseptic, since the log house darkens during the drying process.
In addition, if the frame is not treated with paint or antiseptic within 7 days after sanding, the surface will darken and the entire work will have to be done again. Here is an article about how to paint a log bathhouse.
It is also not recommended to delay the finishing, otherwise you can forget about a uniform, attractive shade. And yet, the work is done before installing windows, ceiling and floor coverings. I think you understand why: there will be dust - “mother, don’t worry.” So, let's go.
Grinding the timber
Let's start sanding the building:
- We put on goggles, a respirator, and gloves to protect ourselves from dust;
- We do the work from top to bottom;
- we divide the surface into areas so that the work is done more efficiently;
- inspect the walls;
- we remove the pieces that have begun to peel off, otherwise we will damage the instrument;
- we treat the areas with peeled pieces with an adhesive composition and take a technical break so that the substance dries;
- we check the caulk, if there are gaps or cracks, fill them with a special sealant for wood;
- We begin to grind the surface with large nozzles to remove unevenness and roughness;
- we use fine-grained nozzles to remove lint;
- We carry out the work carefully: we do not press too hard on the surface of the walls with the tool, otherwise we will “burn” the wood, we do not make large turns so that furrows and unevenness do not appear;
- We pay special attention to polishing the ends of the log house, because they are most susceptible to the destructive effects of climatic and biological factors;
- We begin to process the ends using nozzles - from No. 35 to No. 120;
- We treat corners and hard-to-reach places with a chisel;
- thoroughly clean the surface from wood dust with a vacuum cleaner;
- we apply protective agents to the walls - antiseptics - help prevent the development of fungus and mold, glazing substances - make the wood more beautiful, fire retardants - increase resistance to fire, acrylates - protect against the harmful effects of climatic factors;
- We paint the frame after sanding (if desired).
We suggest you read: Installing a door frame: tips for beginners
In principle, sanding a log frame with your own hands is a simple but painstaking process, so if you are not confident in your abilities, use the services of masters of construction art.
By the way, watch the video below. Conventional sandblasting is used here. I used this method to make drawings on mirrors 10 years ago. One friend and I used this method to clean the old sides of his GAZ car and clean the rusty metal garage doors. The result is good, you just need a powerful compressor and a large amount of fine, clean quartz sand.
Sanding, done meticulously, will allow your home, bathhouse or any other structure to look flawless, causing incredible delight among guests, indescribable joy among household members and the greenest envy of neighbors!
That's all. I would like to believe that someone found the article useful. Bye! Bye!
Wisdom Quote: It is better to be the subject of envy than compassion (Herodotus).
Wood sander: application, types
A wood sander is an indispensable tool for decorating a country house. Using a sanding machine allows you to speed up the process of sanding non-surfaces - wall cladding, floors, furniture, decorative elements. Wood sanders are convenient, not compact, and allow you to perform high-quality leveling of any kind.
There are several main types of sanders for household use; their different designs and operating principles determine their purpose. For construction, repairs, carpentry and carpentry work, the following types of grinding machines are used:
- machines (LSM) - a tool for aggressive, non-rough processing of wood, plastic, and metal.
- Vibratory grinders (VSM) allow for softer processing through circular movements with small amplitude. The grinding surface of the orbital sander has a rectangular shape, which makes it easier to process corners.
- A type of flat vibratory sander is a delta sander; it is distinguished by a triangular shape of the sole. The delta sander is convenient for processing small, hard-to-reach areas, corners, recesses and recesses.
- An eccentric sander refers to a tool that allows you to grind a surface to a polished state through a combination of rotational, non-oscillating movements of the sanding pad. But an eccentric sander is not suitable for processing small surfaces other than internal corners.
Belt sanders are used where it is necessary to quickly remove a fairly thick layer of material, nettle, for sanding unplaned boards or removing from surfaces. LSMs are also used for precise fitting of parts without processing the cut line.
The material is processed using an abrasive belt, closed in a ring and not tensioned on rotating rollers. When moving, the belt removes a fairly thick layer of material, comparable to the service of an electric planer. The thickness of the removed layer depends on the grain of the abrasive belt.
When choosing a blade blade for yourself, you need to control two parameters: the width, the length of the blade used, and the speed of its rotation. The area of the processed surface depends on the width; the aggressiveness, not the degree of processing, depends on the speed. The standard tape sizes for LSM are: 76x457 mm, 76x533 mm, 76x610 mm.
We suggest you read: Remedy for mold and mildew on the walls in the apartment: which antifungal and antifungal antiseptic is the best against fungal colonies
Useful functions include smooth regulation of the belt rotation speed and an automatic belt centering device that prevents it from slipping off the rollers even during rotational movements.
The operating principle of these tools is similar: grinding is carried out through light circular and oscillatory movements of the grinding surface with an amplitude of up to five mm. The material used is sheets of sandpaper with different grits, secured to the sole using clips or Velcro.
Vibratory sanders provide high quality processing and are used for grinding almost any materials: wood, plastic, metal, plaster and putty, as well as for removing corrosion products and old paint and varnish coatings.
The degree of processing depends on the amplitude of vibrations: for rough processing, an amplitude of 4-5 mm is chosen, for fine grinding - 1.5-3 mm.
The ability to regulate the eccentric amplitude, rotation speed and oscillations are very useful options for a VSM.
An important parameter is the power of the VSM; it is usually in the range of 150-600 W. The higher the power, the greater the productivity and continuous operation time of the tool. Another important factor determining the use of a VSM is the shape and area of the grinding pad. It can be square, rectangular or deltoid.
Orbital sanders are similar in principle to rectangular orbital sanders, but are distinguished by greater productivity and a finer degree of grinding and polishing due to the complex oscillation path.
Surface treatment is carried out with a grinding disc with a diameter of up to one hundred fifty mm; special sanding wheels with different grain sizes or grinding felt attachments are used as an abrasive attachment.
The power of orbital sanders is usually 200-650 W, the speed is up to thirteen thousand per minute, the eccentric oscillation speed is up to twenty-four thousand per minute. Regulating the number of revolutions and oscillations, as well as adjusting the amplitude of the eccentric, like the VSM, are very useful functions.
Also important is the length of the cord - if the cord is short, you will have to constantly use an extension cord. You can also choose a cordless sander.
When purchasing, you should pay attention to the shape of the handle and the weight of the tool, holding it in your hands for some time, trying out the inclusion and regulation of modes.
Some nuances at work
The technology for polishing a log frame is not as scary as it is made out to be. The main thing is to stock up on quality tools, materials and patience. In addition, you should pay attention to some nuances. That is, the work is performed after:
- installing the roof to prevent rain from soaking the walls;
- drying the wood, otherwise the abrasive grinding wheel (wheel) will clog and the wood will become “ruffled” (the nominal drying period is about 12 months from the date of construction of the structure);
- treating the material with a bleaching antiseptic, since the log house darkens during the drying process.
In addition, if the frame is not treated with paint or antiseptic within 7 days after sanding, the surface will darken and the entire work will have to be done again. Here is an article about how to paint a log bathhouse.
It is also not recommended to delay the finishing, otherwise you can forget about a uniform, attractive shade. And yet, the work is done before installing windows, ceiling and floor coverings. I think you understand why: there will be dust - “mother, don’t worry.” So, let's go.
Professional polishing of logs
Unlike hand-cut logs, rounded logs and beams have a smooth surface, which causes certain difficulties when processing them with a grinder. One awkward movement - and deep grooves and depressions will appear on the surface of a beam or rounded log that will remain there forever.
Working with an angle grinder is not for beginners; it requires certain skills. An angle grinder is a high-speed machine and, if handled improperly, can damage the surface. Do not press the tool too hard onto the area being treated. Sanding should be done with smooth circular movements, holding the grinder at an angle of 45 degrees. Grinding and polishing of timber should be done at low speeds. High speeds can lead to thermal destruction of the top layer of wood.
Specialists offer professional polishing services. Our craftsmen are highly qualified and know all the subtleties and nuances of grinding with an angle grinder. We use a professional tool with the necessary set of attachments, which has high performance and provides excellent grinding quality.
Calculate the cost of painting and insulating your home right now
Select types of work:
Select materials:
Do you have accurate measurements of the house?
By clicking on the button, you consent to the processing of personal data
Processing of grooves and ends of logs
Grinding the grooves of logs is always done with a grinder. The grooves are processed with a nozzle smaller than the disk. If the attachment and disc are the same size, this may cause the machine to jam.
To process the ends, use a grinding wheel with 40-grit sandpaper. Usually in these places they limit themselves to rough and medium processing, without grinding the ends to perfect smoothness. Immediately after grinding, the ends are treated with protective impregnations and antiseptics.
Tags: log, what kind, good, sander, grind
« Previous entry
