Installing heated floors in a bathhouse under tiles is a popular solution, since this type of heating improves the microclimate in the bathhouse and has a number of other advantages. Despite the fact that such a heating system is not cheap, it pays for itself in the future. The ability to quickly dry all surfaces can also be considered a plus, resulting in an increase in the service life of finishes and floors.
Currently, there is a wide variety of options for types of heated floors. They all have their positive and negative sides and installation features.
. In this article, we will examine in detail the question of what type of heated floors are best suited for a bathhouse under tiles. And to understand this, you should familiarize yourself in detail with all their types.
Types of heated floors for baths
Previously, the only way to heat the floors in a bathhouse was stove heating - instructions on how to connect a water floor in a bathhouse to a sauna stove. Modern heating devices are more efficient, and, despite the prevailing opinion about the possibility of fire, they are fireproof. There are three main options for heated floors for baths:
- Water is a closed system filled with water and having a heating electric or gas boiler.
| pros | Minuses |
| Uniform heating of the area | Labor-intensive installation |
| The cost of service is not high | Requires expensive temperature control equipment |
| Possible depressurization of the structure | |
| Conditions for carrying out repair work are difficult |
- Electric - a heating element is used for heating, in the form of a cable or mat. The principle of operation is that the supplied electricity is converted into thermal energy and distributed over the entire surface.
| pros | Minuses |
| Temperature adjustment is automatic | Expensive consumables |
| Any covering available | High cost of electricity |
| Quick installation |
- Infrared heated floors are warm electromagnetic radiation. All elements are wrapped in plastic film, which protects against electric shock.
| pros | Minuses |
| Durable and practical design | Hidden compounds are present in large quantities |
| Can be installed under any base |
Preparation before installing heated floors
Wood is often used for flooring in bathhouses, but today tiles are popular. In this case, a concrete screed serves as the base; it does not retain heat well.
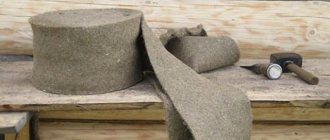
Therefore, additional insulation of the floor with a heat-protective layer is required. You can insulate with heat-insulating material: felt, expanded clay, glass wool, polystyrene foam.
The floor in the bathhouse is warmer if insulation is placed between two layers of concrete. The last layer can be made thinner than the base layer, this will save space in the room.
It is important to know ! Since the humidity level in the bathhouse is high, all parts of the subfloor should be treated with a water-repellent and antiseptic solution and waterproofed.
How to make a frame
Floors in a washing room in a wooden bath can have three types of frames. The first is designed to create a space between the floor and the raised floor, which is filled with insulation. This is a lattice made of standard section logs.
The second version of the frame provides rigidity to the wooden flooring if it has a permanent structure. Finally, the third option is to support a thin reinforced concrete drainage screed.
In a wooden bathhouse on a screw pile foundation, you can get a floor with drainage by pouring concrete onto a wooden frame, but there is another option.
Information. The construction of a foundation for a furnace necessarily requires the use of concrete. At the same time, a screed for the sink is cast in the wooden structure. It should not be made very thick. Mesh is used for reinforcement.
The frame is assembled from beams of the same section. Antiseptic treatment is required even if the frame is located under a drainage screed and under a layer of waterproofing. It will ensure a long service life of the entire structure.
Electric heated floor in the bathhouse
The electrical system for a bath is not dangerous, since there is no direct interaction with water. The basis of the design is the cable: single-core or two-core.
Installing a warm electric floor under tiles, you need to start by choosing a laying pattern; the most common is the snake, it is easier to install.
The principle of operation itself is not complicated, the main thing is to follow the following rules and retreat:
- 5 cm from all walls;
- 10 cm from heat sources;
- take a step between turns, each manufacturer has its own, according to the instructions indicated on the package.
Brief installation instructions
Otherwise, the procedure for installing electric heated floors under tiles in a bathhouse is simple:
- At the first stage, the base should be formed; it should have the correct slope along which water will flow. Its minimum level is 2 cm/m; it should not be directed towards the center of the room, but rather towards any of the walls.
A groove is made along it with a slope to collect water. The easiest way to make a gutter is to take PVC sewer pipes with a diameter of 100 mm, which are cut lengthwise.
Using waterproof silicone sealant, you can connect the pipe walls. The groove is covered with a grid.
The base includes a clay layer and a bed of sand and gravel. Each layer should be compacted well.
- The next step is to install the beacons; this should be done before pouring the screed. The distance between the beacons is 1 - 1.5 meters. If the surface to be concreted is 3 meters, then it is enough to install 1 beacon in the center, and 2 on each side, in increments of 1 meter. When finally determining the level of inclination of the base, the beacon plays an important role. It is necessary to stick damper tape along the walls; its thickness should be 10 mm and its height 200 mm.
- The surface is filled with semi-dry screed, that is, the consistency is similar to wet sand; water does not flow when compressed. This mixture perfectly retains its shape and quickly becomes durable. However, according to the laying technology, time is required for complete drying - if the cement layer is 5 cm, then the cycle duration will be 4 weeks.
Material consumption depends on the area of the room and the thickness of the screed itself. For example: if the bathhouse is 3 by 4, and the thickness of the screed is half a meter, then you will need 0.6 m³ of concrete (3 x 4 x 0.05). The ratio of water to cement is 0.45.
To secure the base, you can use reinforced mesh; it significantly increases the strength of the surface.
- The next step is to lay a heat-insulating layer of hard foam polymer having a compressive strength of 2 kg/cm². According to the technical characteristics, an extruded type with a thickness of 3 cm is ideal. It is laid in two layers, the joints are glued with tape.
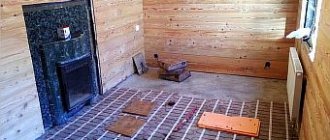
- The final stage before laying ceramic tiles is the installation of an electric heating system (mats). The cable must be laid over the entire surface of the floor. It is not recommended to place it in places where furniture is planned to be installed.
The power of all heating mats is the same - 150 W/m². Therefore, before purchasing it is necessary to draw a layout diagram. If in a bathhouse an electric heated floor under tiles is divided by a partition into a washing compartment and a steam room, then each compartment needs a separate circuit.
The electrical device must be covered with reinforced mesh. Sensors should be placed, grounded and connected according to the instructions.
Then, the design needs to be checked in action by turning it on for 10 minutes. If all elements heat up equally, then you can begin installing the tiles.
The thickness of the electric heated floor in the bathhouse under the tiles is 23 cm, from the ground to the coating.
When installing mats, it is important to be guided by the following requirements:
- do not cut or bend them;
- do not overlap one another;
- do not place heavy objects;
- do not walk on unmarked mats;
- do not lay mats at temperatures below 5 degrees;
- do not install them under walls;
- Do not place under wooden floors.
Rules for laying electric flooring in wet rooms
In a bathhouse, installation work always begins with the formation of a base with the correct slope. Water should flow over this surface. Further steps are carried out on an inclined base. Laying steps:
- a heat insulator is being built;
- a heating element or several similar heating elements are installed;
- The floor covering is formed and secured.
Advice
The minimum required slope of 2 cm per meter or visually 1 degree should be observed. The slope should be formed towards one of the walls of the bathhouse. You cannot do it towards the center of the floor, since working with a bowl-shaped surface will be much more difficult.
Film infrared floor
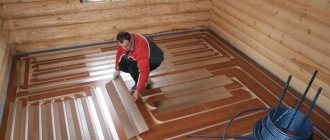
Infrared film heated floor under tiles in a bathhouse is the most economical option. This type of floor is also very easy to install. An infrared mat is a transparent material with an infrared film inside.
Installation of this type of underfloor heating begins with the installation of thermal insulation. Although, it can be laid on any type of surface.
Step-by-step instructions for laying warm film flooring in a bathhouse
- The amount of material is calculated and its preparation is carried out; all sections of the heating elements must be insulated;
- the film is spread according to the developed scheme, and the places where the cable will be installed are marked;
- the area is cleared of debris;
- heat-insulating material is laid and fixed with tape;
- the infrared film is laid and fixed in the same way;
- the film channels are connected to the power cable and secured with connecting clamps;
- joints are insulated with special impregnation;
- the operating resistance is measured;
- The final stage, before installing the tiles, is to cover the film with tile adhesive.
You can make such a warm floor under tiles in a day. After all, the peculiarity of this model is that there is no need to fill the screed.
Proper processing of lining
Having decided how to cover the lining in the steam room of the bathhouse, you can proceed to the processing itself. To perform high-quality impregnation that will last a long time, we recommend that you read the following instructions:
Processing lining in a steam room begins with preparing the wood itself. Clean it from various contaminants with sandpaper or other suitable method. It is also recommended to wash the boards with an aqueous solution of soda (300 g of soda per 10 liters of water); Next, you need to degrease the surfaces. Remember that not only the lining itself is impregnated, but also the frame to which it is attached; Sand surfaces with pumice to obtain a smooth finish; Next, you need to apply an antiseptic that will protect the wood from fungus and mold; Now you can saturate the lining
When choosing impregnation for the dressing room, pay attention to the humidity of the air in it, as well as the temperature of the steam. If the indicators are approximately equal to the indicators inside the steam room, then it is necessary to use the same impregnation.
By doing all the work correctly, you can achieve an excellent result, as in the photo.
Water heated floor
Before starting work on installing a warm water floor in a bathhouse, you need to make sure that the surface is flat, decide on the material of the pipes and plan their placement (snail, snake). The snail is the most suitable model for a bath; it heats the surface evenly.
Water is most often used as a heat source, but it is possible to replace it with antifreeze. It is not susceptible to freezing at low temperatures, which can result in pipe rupture.
Note! To ensure heating of a water floor , it must be connected to a heating boiler, but in a bathhouse it can be replaced with a stove. To do this, a boiler is installed above the stove, and water is heated in it.
This will be especially appropriate if the steam room is a separate building. A pump is required regardless of the selected heating option; it ensures water circulation in the pipes.
Overview of tools and materials
You need to prepare:
- heat exchanger (aka coil), usually made from a section of an inch pipe with a length of 3 m, exactly adjusted to the parameters of the furnace;
- storage container - optimally this is a stainless steel barrel, the wall thickness of which exceeds 5 mm. A breather is installed into it, protecting the system from steam formation. The minimum total volume of the storage tank and pipes is 100 l;
- thermostat;
- bypass, optimizing the forward and reverse direction of movement of the working fluid;
- three-way valve to the bypass;
- the main working tool is a circular pump;
- pipes;
- a distribution manifold that ensures the movement of coolant in the circuits.
For a water heated floor in a bathhouse, you will need a distribution manifold.
You will need additional components such as insulation, vapor and waterproofing, fittings, fittings, substrate, and fasteners.
Installation of a warm water floor
A water floor in a bathhouse under tiles can be laid in two ways:
- concrete - implies the presence of a concrete screed, it is poured over the pipes;
- laid - the heating circuit is laid on polystyrene foam boards or wood flooring, used when the foundation is not strong enough to withstand cement pouring.
However, more often a concrete option is used for the floor in the washroom and steam room. The procedure for installing floors using this method is as follows:
- The surface is leveled; for convenience, you can apply a special rule. In the case of wooden floors, it is necessary to make openings for pipes.
- To increase the efficiency of heat transfer, mineral wool is laid under the circuit.
- The mounting surface is installed using heat-insulating material with bosses, and pipes are laid between them. However, the pipeline can also be secured using clamps.
- The pipe is being laid; it should not have sharp turns. The step can be anything, but don’t stand too close, it will be expensive, but the effect will not change.
5. The system is connected and the presence of leaks is checked.
6. The final stage is pouring the screed.
An important point is that there is no tilt. Although the pump will be able to supply water in this position, the increased pressure will quickly damage the system.
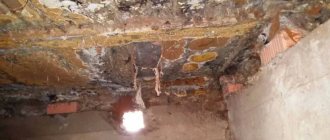
Ventilation design
The simplest method of solving the problem of ventilating the space between the rough base and the final finishing of the floor is to create holes to which pipes are connected that lead water out of the washing room.
There is another way to create ventilation - this is the installation of multi-level floors. Therefore, in each room they make a floor structure of different heights. For example, in the washroom the floor surface will be 3 millimeters lower than in the dressing room.
Option one is the most popular among developers, and the order of work is as follows:
- In the corners of the washroom at the base of the floor, holes are left for laying ventilation pipes with a diameter of 5-10 centimeters. The material used to make them may vary.
- Install pipes for ventilation after finishing the walls in the room. Products with a diameter of no more than 5 centimeters can be disguised under the casing. Pipes of a larger cross-section should be installed in bathhouse buildings that are visited more than twice a week. They are mounted in the corners of the room, attached to the surface of the walls using special clamps.
Installation errors
It is not difficult to carry out independent work on laying a heated floor in a bathhouse, despite this, mistakes are often made that lead to defects in the entire system.
To avoid them, you must adhere to the following recommendations.
- When choosing a cable or mat, you need to take into account not the entire area, but only the space where furniture will not be located.
- It is not recommended to shorten the cable placed in the system. This increases the load on it, causing it to fail. That's right, reduce the pitch and increase the heated area.
- It is forbidden to turn on the system until the concrete is completely dry.
- The heating cable element can only be laid on a clean surface that has been treated with a primer.
- The distance between parallel lines in the structure must be at least 5 cm.
- When laying the cable with your own hands, the degree of bending should be in the range: 5 - 9 of its diameters.
- The heating device sensor must be installed in an accessible place, and it must be protected by a corrugated box.
- It is imperative that the floor surface comes into contact with the sensitive probe of the sensor.
- When laying the system, do not walk on it with shoes to avoid damage.
- Before installing a water floor, you must first prepare a diagram.
- You need to carefully check the water floor for leaks.
Taking these points into account, you can independently install a heating system in the bathhouse.
Which bath floor is better to choose?
No one doubts the need for heated floors in a bathhouse under tiles, because they have a number of advantages:
- The service life is extended, because the steam room is a place with high humidity. In this regard, the likelihood that a wooden surface will begin to rot or become moldy is enormous. Dry air distributed from the bottom of the heating surface to the top promotes better drying of the room.
- Minimizes the presence of drafts, thereby reducing the likelihood of colds among bathhouse visitors. Ideally, infrared flooring solves this problem.
- Creates a more comfortable washing process - it’s more pleasant to step on a warm tiled floor.
- Maintains the bathhouse in good condition - regular heating of the room will protect it from destruction.
Despite all the positive aspects of such floors, they also have disadvantages: high cost, labor-intensive installation and difficulty in repair, because basically it requires removing the flooring.
Taking into account the design and layout of the room, you can install heated floors under tiles in the washroom, dressing room, sauna.
It is most advisable to install a film infrared heated floor in the bathhouse, since for its operation it is enough to connect to the power supply and it is quite simple to install. For a water floor, it is necessary to install a boiler, which is expensive and requires pouring screed, which takes up to one month to dry completely.
Therefore, even with the high price of electricity, the infrared system option still looks more practical and economical, since the system does not work all the time.
Which design to choose is up to the owner. It is worth starting from your preferences, financial capabilities, and, of course, the strength of the foundation and the layout of the room.
Wall edging
The edging is necessary so that during the washing process water does not flow under the lower crown of the frame and does not lead to rotting of the wooden walls of the bathhouse. However, edging must be done in any case, even if the bathhouse is brick, so that water does not fall directly on the walls.
I made the edging the height of the tile - this is the most optimal. You can make the base higher, but there is no particular point in this.
First, we attach several 2-3 cm thick bars to the wooden walls of the bathhouse to provide a ventilation gap. It is necessary so that the space between the wall of the bathhouse and the inner surface of the flange can dry out during the washing period. We fix the bars vertically according to the height of the future base. We attach pieces of DSP or moisture-resistant plasterboard to the bars, and then glue the tiles onto them. We seal the joint between the flange and the floor with sealant so that water does not flow out beyond the resulting “trough”. We also coat all tile seams with sealant to retain moisture. The top of the plinth is covered with tiles to prevent water from getting behind the wall of the plinth.
Now you can splash around in the sink and pour water onto the floor to the height of an entire tile! And the water will not leak out!
The edging along the walls will allow you to pour water onto the floor to the height of the tiles
The floor design I proposed, firstly, does not absorb moisture and does not cause an unpleasant odor in the sink, secondly, it is as hygienic as possible, thanks to porcelain tiles, and, thirdly, it additionally warms the room with the energy of the electric cable.
I hope my tips will be useful.