When visiting a bathhouse, the greatest discomfort is caused by the uneven distribution of heat in the horizontal projection:
- Burning heat near the ceiling;
- Warm air in the middle;
- And the cold pulling down my legs.
The specific location of the stove in the bathhouse does not make it possible to influence the situation. The only way to radically change such an imbalance is to modernize the floor in the bathhouse by placing an independent heat source in it.
Advantages and disadvantages
When installing a heated floor, the air is heated evenly and this completely eliminates the appearance of a convective draft, which is observed with radiator heating.
An electric floor helps in cases where the bathhouse is located far from gas lines. It has a number of advantages over other types of heating:
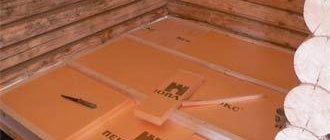
- Thermal insulation provided when installing a heated floor prevents heat from passing through it. Thanks to it, up to 40% of heat is retained.
- The installation process, if organized correctly, takes little time.
- Reducing the cost of heating itself, because unlike its centralized counterpart, it is turned on only when using the bathhouse, and not every day.
- All installation work can be carried out independently.
The disadvantages of heated floors include:
- electromagnetic radiation;
- expensive electricity (but this is a relative minus, since the bathhouse is not constantly heated).
Options for arranging kitchen units on 15 square meters
In this block we will talk about the layout and placement of the most important thing - the kitchen unit. And from there you can “dance”, shaping the further interior of the kitchen. It’s much easier to figure out how to furnish the remaining area.
So, what options are available to you at this quadrature?
1. Straight kitchen 2. U-shaped 3. L-shaped 4. Set on two sides of the walls 5. Set + island 6. Set with bar counter
We will devote a separate section and a selection of photos to each of these types of placement (except linear) so that you can see how it all looks in the interior.
Now let's discuss all the options in more detail.
Types of underfloor heating systems
In the bathhouse, all the same systems are used as in ordinary housing.
Water
Its design, consisting of a closed loop, is laid below floor level. It involves pipes in which hot water or antifreeze circulates under pressure pumped by a special pump.
The coolant is heated to a set temperature using an electric or gas boiler.
We also recommend looking at - Warm water floor under tiles: installation instructions
Electric
This system is better known as a “warm floor”, which consists of special heating sections. The expenses for arranging such a floor with daily use will return after 6 years, but for a bathhouse they will pay off much earlier.
Installation of such a coating will take only a week.
Infrared
This option is distinguished by its electrical safety and airtight design; infrared mats are laid on the sauna floor. Their gentle operating mode allows the use of such floors in wooden structures, such as baths.
At the same time, the height of the room is not lost, since laying such a floor will only require a couple of centimeters.
The best solution to the problem
In a private bathhouse, it is much more pleasant to have a wooden floor under your feet. But the destructive effects of dampness are detrimental to wood. At the same time, heated floors in the bathhouse simply attract with their comfort. But there is a way out that allows the integration of one type of equipment to immediately obtain maximum benefit, in particular:
- Warm floor;
- Dry underground space;
- Drainage through leaking floors;
- Minimum capital investment.
All this is possible when organizing air floor heating . And another important advantage is the ability to organize uniform heating of the entire floor covering.
Installation
Before carrying out it, you should check the sealing of walls, window openings and doors. Then you will need to prepare the base; it must be level. Using a level, check the flatness of the base; if there are deviations, then eliminate them by performing a screed.
Initially, a location for installing the thermostat and access to communications are selected, if we are talking about electric heating; in the case of water heating, the location of the boiler, pipes and taps should be considered.
The installation work is different for each heating system and is described in more detail below.
Wet floor
Installation begins with the selection and organization of the location for the coolant supply. Holes should be made in the walls through which the pipes will pass and the necessary shutoff valves should be installed.
It is best to arrange an outlet for such heating to provide a free niche in the bathhouse, which can be converted into a cabinet so that the communications are invisible.
A mesh for fastening pipes is laid on the pre-leveled floor, which is secured using ties. The pipe must be folded in half to organize not only the coolant input, but also its output.
When laying pipes in a spiral, it is necessary to avoid kinks, which will reduce the permeability of the coolant.
After checking the installation of water heating, you can connect it to the taps (supply and return).
After this, a test run of the system is performed, which will help identify a leak, if any, and wait for the maximum pressure of the network, which will depend on the heating of the coolant.
At the end of the installation, the screed is poured and the floor material is subsequently laid.
The entire design of water heating is multilayered:
- waterproofing material;
- insulating;
- foil;
- pipes;
- screed with reinforced elements;
- finishing floor
Pipe laying patterns can be different, and although a spiral is often used, sometimes a snake or its double version is used.
Pouring the concrete screed through the laid pipes starts from the far wall and ends at the door.
It is imperative to provide for zoning the room according to beacons, and the concrete mixture poured over the pipes is leveled according to the rule to avoid distortion of the base of the new floor.
If semi-dry mixtures are used for pouring, then after about 6 hours the surface must be sanded so that it does not completely harden.
Dry floor
Its installation will depend on the choice of the type of electric floor, and it can be:
- film;
- cable;
- using heating mats.
Film
It is made of thin strips that emit infrared radiation, it is similar to solar radiation, only unlike the latter, it excludes the influence of harmful ultraviolet radiation. Flexible strips are made of carbon and sealed in a polymer film.
When laying such a floor in a bathhouse, you should first lay Isolon - the material will reflect the resulting heat upward. Then the heating elements are laid out, which are covered with plastic film.
The latter serves as waterproofing for heating elements. At the end of the installation process, the finishing coating is laid.
Cable
The convection type of underfloor heating consists of a heating cable that is laid on a mesh base. Cable flooring is sold in rolls.
Installation of this type of electric floor is a rather labor-intensive process; it is best to entrust it to specialists. It can be used under different floor coverings.
Infrared
The rod elements are called mats. Their name comes from the heating rods that are connected to the power wires. They are connected in parallel, so there is no need to worry if one element fails.
When considering infrared mats, they can be compared to a rope ladder. They are mounted in tile adhesive or cement screed protected with isolon.
For more information about installing an infrared floor, read the article - How is an infrared heated floor installed under tiles? Overview of methods
How to lay cable flooring in wet areas
When drawing up a diagram of underfloor heating with cable, an important task is to ensure safety during operation of the heating system. Do-it-yourself installation is allowed only if you have a special specialized education.
Only a qualified electrician who is well acquainted with the rules of electrical installation regulations can make a competent installation plan and provide protection against electric shock. At the same time, careful adherence to the step-by-step plan for laying the heated floor pie will be required.
The work is carried out as follows:
- Preparing the base. Initially, waterproofing is applied for showers, washrooms, and bathrooms. To perform the work, you can choose impregnation or mastic. Waterproofing in the bathroom is often done using rolled materials such as TechnoNIKOL. The canvas is overlapped. The joints are processed using a construction hair dryer. The use of special waterproofing adhesive compositions is allowed. The principle of operation of the adhesive (based on epoxy resin) is to reliably fix the new cement coating to the old base while simultaneously protecting it from moisture leakage.
- Underlay for cable floor. It is best to use specially designed foil insulation with marked lines. The foil backing makes installation several times easier and makes it possible to more accurately calculate the floor, determine the cable pitch, etc. A base under the floor is also required if heating mats and not cables are to be laid.
- Laying the wire. The cable is installed according to a pre-designed diagram. A detailed plan for the location of the wire is saved so that in the future mechanical damage to the winding can be avoided when drilling the floor if necessary. Before laying the cable, it is necessary to install a thermostat. The safety of electric heated floors is ensured by the installation of grounding. The thermostat has a special outlet for connecting the ground. If the cable has a protective shielding layer, then it is connected to the PE bus directly. If there is no sheath, a metal mesh connected to the PE is laid on top of the cable. The danger of electric heated floors in rooms with high humidity is mitigated by installing an RCD and circuit breakers on the panel.
- Filling the screed. The minimum thickness of the poured floor according to the manufacturer's recommendations for cement mortar is 4-5 cm. For self-leveling ready-made mixtures, you can reduce the thickness of the layer-by-layer cable floor device to 3 cm.
- Laying flooring. Ceramic tiles are traditionally used in bathhouses or dressing rooms. The tile tolerates temperature changes well and is resistant to mechanical damage. In some cases, it is recommended to use heating mats instead of cables. The advantage of mats is the ability to do without installing a cake under an electric heated floor. Tiles and other types of covering are laid immediately on top of the mats. The seams are grouted with moisture-resistant grout.
The floors withstand the winter well and remain functional at sub-zero temperatures. After switching on, they quickly warm up the surface and air in the room.
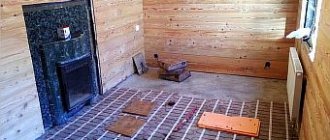
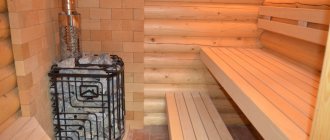
Electric floor in the bathhouse
This is an excellent solution for country villages where there is no central heating, but it is worth considering the high energy consumption. Although with proper organization of installation and insulation of the entire bathhouse and its foundation, they can be significantly reduced.
Heated floor safety system
Before purchasing and installing one of the electric floor options, it is necessary to make calculations and determine the expected resource consumption and whether the network will withstand such loads.
There are also high requirements for the bathhouse premises:
- all components and the heated floor itself are installed only in dry and clean rooms;
- the top floor covering is laid carefully so as not to damage the heating elements located underneath it;
- the flooring is selected depending on the characteristics of the room.
Operating principle of electric floors
The surface of such a floor serves as a kind of transmission panel, radiating heat along the entire perimeter of the room. The heating element itself is a system of cables enclosed in a screed or located under the tile.
The principle of heating a room is based on the conversion of electrical energy into thermal energy, due to which the bath is heated.
The thermostat built into the system maintains a comfortable temperature, and if it rises too much, its automation is triggered and turns off the entire system.
And when the room gets cool, the system turns on again.
Recommended coatings
Installing an electric floor involves using not only tiles, but also laminate, parquet boards, linoleum and plywood.
Features of flooring materials:
- Tile. Ideal for both water and electric floors, it differs from its analogues in its high wear resistance, heat transfer and variety of design.
Sudden temperature changes typical of a bath do not affect the condition of the tile surface; it is also moisture resistant.But considering that a person can drip onto it when leaving the steam room or shower, it is better to choose a rough surface to avoid slipping. If one part of the floor is destroyed, there is no need to remove all the tiles; it is enough to replace the deformed products.
- Laminate. For a bathhouse, you should choose only a waterproof type, but do not confuse it with moisture resistant, these are two analogues of different strength and resistance to water.
You need to select a material with a thickness of at least 8 mm and lay it on a substrate or plywood.If its installation is carried out on a concrete screed, then it is carried out as a “floating” floor. When laying laminate on plywood, it is attached to it with self-tapping screws.
- Parquet. The material is known for its heat-conducting properties, but unlike laminate, it expands and deforms from moisture, which is why you need to keep the room dry. It requires a plywood backing, which must be at least 20 mm thick.
- Plywood. More precisely, its painted and laminated version is similar in thermal insulation to parquet boards and laminate, but costs less. A screed thickness of more than 6 cm is required under it.
If 20 cm plywood is used, it can be mounted directly on aluminum or wooden guides.It is often used for temporary floor covering.
Choosing the right material
Before making a floor in a bathhouse, you should choose a material. The most important function of the floor is the rapid outflow of water into the drainage hole.
Therefore, floors can be made of various materials: wood, concrete, clay, earthen. So the choice of flooring material depends on your desires and capabilities.
- The cheapest and most popular option is, of course, a wooden floor. But if the drainage system is poorly thought out, the tree may begin to rot and emit an unpleasant odor. Therefore, you will have to think about antiseptics for the floor in the bathhouse.
Buy a special floor impregnation for the bathhouse, it contains less chemicals. And do not forget to ventilate the sauna after each use. In addition, in a humid environment, wood softens quite quickly and becomes shabby - such a floor will not last long. Are you ready to change the floors in your bathhouse in 4-5 years?
- The clay floor does not allow water to pass through at all. Clay swells from water, and after drying it cracks. Water stagnates in cracks and depressions and the bathhouse becomes saturated with unpleasant odors. This option is also the best.
- Concrete flooring is considered the best option, both in terms of service life and price. To make hygienic maintenance easier, you can lay tiles on the concrete floor.
- The tiled floor in the bathhouse must have a slight slope so that the water flows into the pit. To avoid getting burned on the tiles, the floor is covered with wooden grates, which are taken outside to dry after each wash.
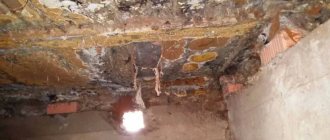
Concrete floor
Concrete floor in a bathhouse
This floor is designed for long-term use. Its service life is at least 50 years.
Concrete floor is a cold floor. It requires large financial investments, labor costs and time.
Concrete floor construction
The concrete floor in the bathhouse has the following design:
- Rough floor. At the first stage of constructing the foundations in the baths, a subfloor is installed, which serves as a support for the future structure. To install it, you should fasten the floor beams with boards and install them at a close distance relative to each other.
- Drainage system. When arranging the water inlet and drainage, it is important to insulate the connecting sections of pipes and drains in contact with the coating with compensation tape.
- Vapor barrier layer.
- Waterproofing layer. Waterproofing layers are laid from special materials. Which material to choose is up to the builder to decide; the building materials market offers a wide range of roll waterproofing.
- Insulation layer.
- Reinforcing mesh.
Don't miss: Balancing the heating system, adjusting heating radiators
Wooden floors
Wooden floor Wooden floor in a steam room
The best and cleanest material for bath floors is wood.
There are two types of wooden floors that are installed in a bathhouse:
- leaky;
- leak-proof.
We will discuss the design of each of them below.
Installation of a wooden floor with a drain due to a slope
Installation features
It is almost the same, but each individual species has its own nuances. Initially, it is necessary to prepare a pit well, which will serve to drain water.
In one of the outer walls of the bathhouse, install a pipe, the end of which will go into the collector, drainage ditch or other drainage point. The walls of an organized well must be secured to prevent them from being washed away.
Level the earthen floor and create a sand and gravel cushion 15 cm thick on it; it needs to be leveled and try to compact it more tightly. Pour a 7 centimeter thick concrete screed on top and then wait for it to cool.
Lay waterproofing, insulation on it, then heat-reflecting film. Then the installation process is slightly different.
For electric type
Laying the coolant starts from the thermostat.
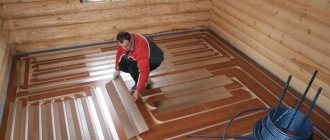
Electrical rolls are laid from the far wall to the near one.
To save material and future resource consumption, you must first mark the places where wardrobes or other massive furniture will be installed and go around it.
When the rolled out roll reaches the opposite wall, it must be carefully cut to within a few centimeters. Then lay the next heating tape parallel to the previous one, as close as possible to it.
After installing the coolant, its operation is checked, the cable is connected to the network, if everything works properly and heats up normally, then you can proceed to laying the finishing coating.
For infrared type
The film model of electrical systems is a thick cellophane, inside it there are copper wires, and on top of the material there are graphite strips. The latter, under the influence of electricity, create infrared radiation, which heats not the air, but the floor covering.
There is also an option for such a heating system as plastic mats, for which there is no need to prepare a concrete screed; they are quickly installed and heated. It is better to place infrared mats in an area free from furniture; they should cover at least 70% of the floor.
It is advisable to decide in advance on the location of the mats, make a paper sketch, on which you can also schematically arrange the furniture in order to get around it.
The base for the thermal film should not have strong differences, a slope of 1 cm per 1 linear meter is acceptable, so that the heat does not escape into the floor, it is covered with a thermal insulating substrate.
You can cut the heating film only in the designated places, which are marked on it with a dotted line; if you start doing this diagonally, it will be irrevocably damaged.
When laying mats on the floor, you need to move 10 cm away from the walls. They are laid joint to joint, with a gap of 5 mm between them. The cut areas are pre-insulated with bitumen insulation.
When all the infrared mats have been laid, they proceed to installing the thermostat, and then the functionality of the “warm” floor and all its turns is checked.
Specifics of water floor construction
First, a heat-insulating substrate is applied: all debris is removed from the floor of the bathhouse and a heat-insulating layer is laid out. It consists of strips that are fastened together with heat-reflecting tape.
Then a pipe layout diagram is drawn up; to simplify the task, you can use a checkered notebook sheet.
It is preferable to choose a “spiral” scheme, with which the room will be heated evenly.
Clips for fastening pipes are placed on the floor, then the plumbing elements themselves are laid and connected to each other, at the outlet they are connected to the boiler. A distance of 20 cm must be maintained between the walls and pipes.
Recommendations for pouring screed
The concrete base for the finishing material is made taking into account the option of arranging a “warm” floor and the specifics of the room, which may be humid.
If these are electric floors, then a plasticizer is added to the solution to create a screed above them. When the infrared mats are fixed, the solution is poured onto them, and then they wait for it to harden.
The dried screed is sanded, and then finishing material is laid on it.
It is worth noting that the screed is carried out after all the rough work has been carried out in the room.
The rough screed under the water floor must be carried out along the beacons.
The walls need to be puttied about 15 cm from the floor, this will help install the damper tape. Expanded clay concrete screed has the highest insulating layer.
First, as for an electric floor, an insulating layer is laid using an adhesive composition, and then the surface is reinforced using a special mesh. It is laid on nickels, which separate it from the insulation by about 4 cm.
After placing the pipes, fill the finished floor with a solution containing a plasticizer and small fractions of crushed stone. You can also use leveling mixtures.
After all the work done to create the screed, you must wait at least 28 days for it to harden well.
If you use a self-leveling mixture, it will dry faster.
Furnaces with heat exchangers
Furnaces equipped with heat exchange devices allow you to successfully solve all the problems of heating a room, heating water, and creating steam. Heating a bathhouse from the heat exchanger of a bathhouse stove can include not only the main rooms of the bathhouse, but also auxiliary ones, for example, a shower room, a relaxation room, a swimming pool, a billiard room, etc.
- dimensions of the bathhouse and area of heated premises;
- dimensions and weight of the furnace;
- specific gravity of the heating device;
- the number of heat exchange devices included in the furnace kit;
- the total volume and composition of the circulating coolant;
- diameter and length of the chimney.
Sauna stoves with a heat exchanger can be connected using heat-insulated pipes:
- To a remote tank for heating water used in the washing section of the bathhouse.
- To heating radiators located in the service areas of the bathhouse - recreation room, billiard room, etc.
- To a hot water supply and water heating system, which includes not only the main and service areas of the bathhouse, but also the living areas of the house.
Stoves for heating baths with wood come with an internal or external heat exchanger. The internal heat exchanger is located in the combustion chamber between the body and the casing. It uses heat obtained directly from the combustion of fuel and heating of the furnace.
An external heat exchanger is installed around the chimney pipe. It uses the heat given off by heated gases when they are removed outside. Due to the increased volume of the external heat exchanger, its operating efficiency increases. Using the heat of the gases escaping through the chimney allows you to save fuel and increase the efficiency of the furnace by reducing the temperature of the exhaust gases.
In a cast iron stove, water is heated in a heat exchanger by exhaust flue gases and thermal radiation. The heat exchanger body is located in the upper part of the firebox in the area of the chimney.
A brick stove for a bath involves the location of a heat exchanger inside the brickwork in close proximity to the firebox. This somewhat increases the thermal inertia of the heat exchanger, and also reduces the likelihood of its overheating or oxidation of its surface under the influence of open fire.
Common mistakes when laying heated floors
Negligence bordering on laziness can lead to unpleasant consequences and after installation of the heating system it will not work. The most common mistakes made by builders when creating heated floors are:
- laying an electric floor under furniture, as a result of which not only its integrity suffers, but also the cable itself from overheating in these places;
- it is necessary to clearly calculate and mark the placement of heating elements; if this is neglected, it may turn out that one area becomes very hot, while the other remains cold;
- you cannot use “warm floors” immediately after pouring the screed, this will lead to its cracking and problems with heating;
- Before laying the cable, everything must be thoroughly cleaned, otherwise small dust particles can cause the cable or mat to become clogged and it will stop working.
Preparatory work
Before starting work on the construction of a heated water floor in a bathhouse, you need to draw up a detailed diagram, indicating the size of the heated room, the length of the circuit, the location of the pump insertion, the area where the mixing unit and heat exchanger are connected. In accordance with this drawing, the amount of material required for the heating structure is determined.
After which, you can proceed to the installation work itself, which begins with preparing the base and draining:
- Remove the soil between the foundation walls and compact the surface. Before this, lay sewer pipes for wastewater. Through them, water will go into the sewer.
- Pour a layer of sand and crushed stone (15 cm) and compact it well.
Lay expanded clay insulation, its thickness is 150 - 200 mm. It is required to make a slope in the direction of the drainage.
Overview of methods
What you will need
What do you need for a heated floor? First of all, the circuit along which the coolant will move. For this purpose, heat-resistant pipes made of cross-linked polyethylene, polypropylene, copper or corrugated stainless steel are often used. To secure the pipes you will need clamps. Staples and tourniquets are used as fasteners, and recesses are provided.
You will need a mixing unit, thanks to which hot water, which has reached the boiling point, would not enter the circuit, but would be diluted with the cooled return line to the desired temperature. Thus, the mixing unit is responsible for maintaining the required temperature in the circuit.
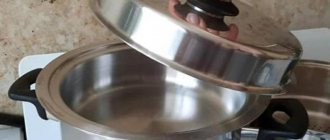
As mentioned above, you will need a heat exchanger, which is a container in which the water will be heated. It is usually placed above the firebox. Many stove models include a tank.
The "warm floor" system also uses a circulation pump. It is responsible for ensuring pressure and uniform distribution of water in the circuits.
A drainage system is necessary to remove water from the floor of the room. To do this, a hole is made in the floor, which is led into the sewer, and the floor itself is made with a slope.
When choosing pipes, we take into account cost and characteristics. Copper and stainless steel will last a long time, they have excellent performance characteristics, but are quite expensive. Polypropylene lasts longer than polyethylene. But the main thing with any choice is proper installation, calculation of distances and compliance with the required turning radius. After installation, the pipes are filled with solution. They will last for decades depending on the pipe material. For example, polypropylene can be used for up to 50 years.