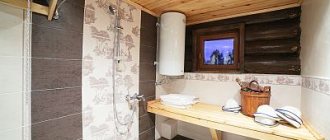
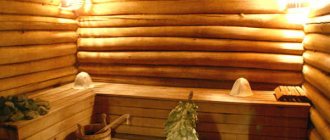
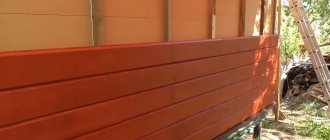
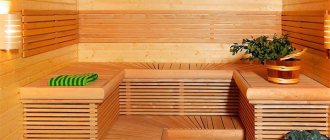
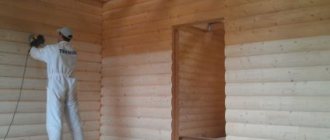
Decorating a bathhouse from timber inside may involve the use of all kinds of materials, but in any case it involves solving two problems, the first of which is decorating the walls, and the second is insulation. The need for thermal insulation in bathhouses made of timber arises for the reason that in the construction of buildings for such purposes, timber is used that is not large enough to provide warm walls.
A sauna made of timber is an inexpensive, beautiful and high-quality construction, perfect for water treatments.
Despite the fact that the bathhouse itself in the example is built from wood, the steam room space in it must be made airtight. In this case, you can use wood in tandem with insulation. But it is also important to choose the right type of wood. So, despite the fact that pine acts as the most inexpensive material among other species, it is not recommended to be used for arranging a steam room, since it contains resins that begin to release when exposed to high temperatures.
Characteristics of wood species.
For cladding the walls of a timber bathhouse, it is preferable to use linden or birch, as well as aspen.
It must be remembered that it is better to avoid using some materials for the steam room. Among such materials is, for example, linoleum. You should also avoid using:
- chipboard;
- mineral wool slabs;
- Fiberboard.
This is due to the fact that they are fire hazardous and toxic when heated. Among other things, they swell quite a lot when they become saturated with moisture.
List of requirements for finishing a bath
Thematic building is used for washing in moderately hot steam conditions.
For this reason, projects for finishing the inside of a bathhouse with your own hands or not with your own hands, but with the help of specialists, have special requirements:
- Use exclusively hardwood;
- Focus on non-flammable and natural insulation materials;
- Refusal from wood impregnated with paints and protective solutions;
- Application of rough tiles;
- Using drains for drainage;
- Organization of a protective screen and foundation around the heater;
- Use of fasteners made of wood and stainless steel.
Basic finishing methods
The construction of a bathhouse frame is permissible from wood, aerated concrete and foam blocks, and brick. If building standards are observed, the building will be functional. The choice of material depends on the personal considerations of the developer. In central Russia, preference is given to wood in 50% of cases. A log or beam. Another 25% falls on frame structures, the basis of which is also wood. The last quarter remains for other materials.
The interior decoration of a bathhouse built from logs, using frame technology or bricks and blocks, does not depend on the material of the box
It is important that it meets the specific requirements imposed by the functionality of the building. The most stressful conditions are in the steam room, where the humidity reaches 70% and the temperature reaches 90°C.
For the washing room and dressing room, a humidity of 40% at a temperature of 30 - 35°C and low humidity at 20 - 25°C are recommended, respectively. The given numerical values are indicative and justified from a medical point of view. In life, differences happen. When it comes to steam rooms, the rule of thumb is: higher the temperature, lower the humidity.
The choice of materials for the interior decoration of the bath
When choosing building materials, it is important that they meet the following requirements:
- Resistant to high temperatures and sudden changes.
- Moisture resistance.
- Safety - a person should not have an allergic reaction or burns upon contact with the material.
- Environmental safety – absence of toxic substances.
- Hygienic - the material should be easy to maintain and clean.
- Long service life.
- High strength and reliability.
- Attractive appearance.
Steam room finishing
The best material for cladding a steam room is wood, but it is better to give preference to hardwood. The thing is that these types of wood do not heat up, you won’t get burned on them, there is no release of resins, and when ventilated, the material dries quickly, making the formation of fungus impossible.
Types of wood for finishing the steam room:
- Aspen is a classic option for the northern regions of Russia, since the material is low in cost, due to its high strength it is difficult to split, and in addition, the wood has bactericidal properties.
- Linden is an attractive material with a stable color and low heat capacity. Due to this, the tree quickly gains temperature and is safe to touch. Linden also creates a pleasant atmosphere due to its special aroma and has a low price.
- Abash is a material that is just becoming popular, since it is wood from the African tropics and we still don’t know enough about it. It is best to make shelves from abasha that are resistant to steam and high temperatures, since they hardly heat up.
- Alder is an attractive visually and tactile wood material that is resistant to steam room conditions. Easy to maintain and clean, low cost.
It must be remembered that wood should never be painted or varnished, since under the influence of high temperatures the coating will release harmful chemicals and odors. When finishing, nails and screws must be carefully hidden, as they heat up and can cause burns. Experts also recommend filling the lining vertically, because the water drains much faster this way.
Waterproof skirting boards will help protect the joint between the walls and the floor. For finishing the floor, it is best to use larch or tiles - the latter option is more preferable, as it is resistant to fungus and is easy to clean. If the tile seems cold, a wooden grate is placed on it, which can be easily removed if necessary.
Finishing the dressing room and sink
It is better not to use wood for lining the sink; preference is given to tiles, since in the shower there is constant contact with water. Ceramic tiles do not rot, they are easy to care for, and for an attractive appearance, you can choose special stylish tiles that imitate natural wood.
As for the dressing room, it is a warm and cozy place, but there are no high temperatures here, so it is allowed to use coniferous wood with a pleasant and healthy aroma.
Among the popular types of wood for finishing the dressing room are:
- Pine is an attractive and durable material that has a long service life and is the most popular. During use, the wood may change color, becoming a little redder. Also popular is Scandinavian pine, which has a pink tint and annual rings that create a decorative pattern on the walls.
- Spruce has a homogeneous structure; when dried, it remains solid and does not crack. The color scheme is slightly lighter than pine.
- Fir is a tree that has properties similar to spruce, but practically does not emit resin.
Finishing material
Not all finishing materials are suitable for covering walls, ceilings, and floors inside the washing room. This is due to the influence of destructive factors.
Wood paneling and panels
Wood panels and lining are popular, classic finishing materials for Russian baths. They help give the room its originality.
Lining can be made from different types of wood:
- conifers - spruce, cedar, pine;
- deciduous - alder, aspen, linden, oak.
Coniferous lining is suitable for finishing recreation areas. For the washing room it is better to choose finishing material made of hardwood.
Benefits of wood:
- durability, strength;
- environmental friendliness;
- attractive appearance;
- ease of processing.
Flaws:
- Conifers secrete resin.
- Wood is destroyed by moisture and deformed by temperature changes.
- Fungus and mold often form on the panels.
To level out the shortcomings, the wood must be treated with special antiseptics.
Lining (Photo: Instagram / tverles)
Tile
Tile is not suitable for a steam room, since its surfaces quickly heat up under the influence of high temperatures, but for a washing room it would be the best option.
Advantages:
- Durability, reliability.
- Resistance to mechanical stress.
- Large selection of drawings.
- Easy to care for. To clean the tiles from dirt, you can wipe the surfaces with a damp cloth.
- Resistant to moisture and temperature changes.
Flaws:
- High price compared to wood, paint, plastic panels.
- Fragility. Tiles can easily break if accidentally dropped or hit.
You can lay the floor with tiles, but we must not forget that this is a cold material that will be unpleasant to walk on barefoot. To correct this drawback, you can install a “Warm Floor” system.
Tile (Photo: Instagram / ivan__neverov)
Artificial and natural stone
Such materials are used if you want to get a non-standard surface design.
Advantages:
- attractive appearance;
- large selection of sizes;
- durability, mechanical resistance, strength, wear resistance;
- immunity to moisture and temperature changes.
Flaws:
- high price;
- heavy weight.
To reduce the risk of stone collapse when fastening to walls, masonry should not be made higher than 50 cm.
Natural stone (Photo: Instagram / zelenii_kamen_perm)
Plastic panels
A universal finishing material that is resistant to aggressive factors. The panels cannot be used in a steam room, but they are suitable for a washing room and dressing room.
Advantages:
- resistance to moisture, temperature changes, ultraviolet radiation, chemicals;
- strength, durability;
- large selection of colors and designs;
- low price.
Flaws:
- Mechanical stability is not as high as that of other finishing materials.
- When exposed to extreme heat, the plastic begins to deteriorate.
It is better to choose panels from well-known manufacturers. Poor quality products may emit harmful substances during operation.
Plastic panels (Photo: Instagram / stroysya_vl)
Dye
On sale you can find various painting compositions that are suitable for coating concrete walls in conditions of high humidity, but paint is considered a less popular finishing material because it does not look as attractive as its analogues and has low resistance to aggressive factors.
What can't be used in a steam room?
It is unacceptable to decorate the walls of the steam room with coniferous species (spruce, pine). The reasons for this are as follows:
- when the walls are very hot, touching them can become unexpected and quite unpleasant;
- drops of released resins can get on the skin and burn it.
It is not recommended to use hardwoods such as oak and walnut. This is explained by their high heat capacity , which leads to the accumulation and retention of heat on their surface.
In a steam room, the walls of which are covered with clapboard made of oak or walnut, it is usually difficult to breathe . In addition, if you accidentally touch them, you can burn your skin.
You should not cover the walls in the steam room with chemical materials: varnish, stain and other similar compounds.
This is due to the harmful effects of chemicals on the human body at very high temperatures.
The primary task is to insulate the walls
If the building is based on untreated logs, you need to caulk the cracks by going through the joints with a sealant. A hut made of timber will require the following actions:
- The wall is sheathed with lathing.
- Insulation is laid between the beams.
- A vapor barrier layer, represented by oilcloth or foil waterproofing, is placed on top.
- The final stage is upholstery with clapboard or natural boards.
The following is used as an insulating element:
- mineral wool;
- peat slabs;
- chipboard;
- Styrofoam;
- traffic jam
Organic variations are suitable for the dressing room, rest room, synthetic ones to avoid the appearance of mold - in the washing department, steam room. Polystyrene foam can ignite and, when heated, becomes a source of release of hazardous chemicals.
Finishing a bathhouse made of timber
- Interior decoration
- Lining
- Tile
- Exterior decoration
- Siding
- Block house
Finishing the steam room is necessary not only for the implementation of stylistic decisions. This process also includes insulation, steam and waterproofing. External and internal finishing of a bathhouse made of timber is not carried out immediately upon completion of construction. You need to wait until the structure has completely settled and then apply caulk. Sometimes about one or two years pass between the construction of a log house and its cladding. It is not advisable to cover the structure up to the caulk, since this process involves raising the bathhouse to a height of 8-10 cm. In this case, the finishing material will be damaged.
When to carry out insulation and finishing work
When thinking about how to sheathe the outside of a log house, many bathhouse owners first build it and then almost immediately begin finishing.
If this is a bathhouse based on a log house or timber, then in the first 2-3 years the construction experiences significant shrinkage. On average this is 20 centimeters during the first 3 years.
As shrinkage occurs, cracks appear that will have to be constantly closed. Otherwise, unnecessary cold will enter inside, disrupt the microclimate, and also destroy the building itself.
Another big mistake is finishing immediately after construction, when the material is mounted as firmly as possible using lathing. As a result, the resulting design does not allow the bathhouse to sit properly.
So the first years of finishing are not carried out. Or you can cut grooves in the sheathing in such a way that the nails can gradually slide into them. But objectively this is not the best solution.
The finish will interfere with the process of caulking the cracks, which is necessary outside and inside. And the finishing material will not allow this work to be carried out fully and efficiently.
There is only one conclusion. The bathhouse should be given at least 1 year, or better yet a full 2 years, to shrink. When you see the result, then the process of insulation and finishing begins.
Methods for installing heated floors in a bathhouse
Modern construction requires maximum comfort for people, including when constructing bath complexes. After all, this is not only an opportunity to take a steam bath, but also to relax. The need to install heated floors arose when they began to be made of concrete, due to the fact that the service life is 3 times higher than that of wooden ones.
Both water and electric floors can be installed. Water ones require preliminary installation of pipes and connecting them to heating equipment. This is not always possible. Therefore, more often the choice is made in favor of the second system.
Electric floors are safe in the bath complex. The system is mounted in a screed. The concrete base must first be prepared.
It is important to avoid mistakes during installation that will later be impossible to correct. Therefore, the work must be transferred to specialists
You can make warm floors yourself by installing additional thermal insulation from the following materials:
- mineral wool;
- expanded clay;
- felt;
- polystyrene foam
To do this, you will need to pour 2 layers of concrete, between which thermal insulation should be laid.
Installation of a water floor in a bathhouse
Finishing the bathhouse inside: fixing the lining
Having completed the preparatory stage, they begin the process of finishing the bathhouse inside - the photo will help you navigate the order of actions. It is necessary to select suitable fasteners made of materials that are not susceptible to exposure to moisture and high temperatures. Immediately forget about traditional nails, as they will quickly corrode and the walls will be damaged by rust stains. And when the temperature in the steam room rises, touching the nails is dangerous - they can burn the skin.
The lining is cut immediately to size, focusing on the height of the bathhouse, then it is attached to a pre-prepared grate (or directly to the walls) with special brackets. If necessary, the width of the lining can be slightly trimmed at the corner joints.
The relaxation room in the bathhouse is the place where you spend the most time.
To finish the steam room, high-quality wood should be used that can withstand high temperatures and high humidity.
How to cover walls with clapboard: step-by-step instructions on how to do it yourself (read more)
All actions must be performed using a level to obtain a perfectly level structure. After making the frame, it is coated with an antiseptic. The lining should also be processed, but before installing it on the frame. Laying the material starts from the corner. Nails, staples and clamps are used as fasteners. The material that was used to decorate the surface of the walls can also be used to decorate the ceiling.
Light wood species are best suited for small rooms.
It is necessary to understand that the maximum temperature is located under the ceiling, which is why it is necessary to choose lining for this surface from rocks that contain a small amount of resins, otherwise their drops may burn the skin when falling. The finishing of the place where the stove will stand must be made of non-combustible materials - tiles, bricks.
On a note! It is not recommended to choose spruce or pine for the steam room. It is better to cover the dressing room with this material.
The floor in the bathhouse can be made of non-slip tiles.
Finish lining
In the first place is a wooden lining. Its installation in various rooms is described in detail in our previous articles on the site.
Attaching it to the walls of a timber bathhouse is no different, so the instructions will consist only of the main points:
- You should not choose coniferous boards for the steam room, as they contain a significant amount of resin, which, when heated, begins to come out and burn the body. This material is perfect for other rooms. It is best to use linden or its analogue - the African abashi tree. They practically do not heat up in the steam room, while saturating the atmosphere with their aroma.
- The lining should be fastened to a horizontal lathing made of timber with a cross-section of 50x50 mm. The sheathing pitch is 550 mm to conveniently insert the mineral wool mat.
- You can fasten the lining to the timber with nails, but it is best to use clamps.
Fastening wooden lining with a clamp
- There is no need to cover the boards on top with anything inside the steam room.
You can lay larch on the floor, although its price is high, but it does not rot, is durable and has a long service life. If you decide to make a concrete base for the floor, the best option would be non-slip ceramic tiles. Our website has a detailed description of the installation process.
Tip: To safely walk on wet tiles, make a removable wooden floor sheathing.
The construction of a bathhouse made of timber has been used for a very long time. Its positive aspects more than cover all the negative aspects associated with the finishing. When creating an interior, try not to deviate from natural motifs, place more emphasis on natural materials (see also the article “Finishing a bathhouse with clapboards with your own hands: creating a cozy atmosphere”).
Finishing a bathhouse inside with a block house: photos and features
Finishing a bathhouse with a block house allows you to decorate the interior in the same style. Work on the interior decoration of a bathhouse can be done independently without the involvement of specialists. The whole process is divided into stages:
- Preparation.
- Installation of vapor barrier. The system protects the material from the formation of rotting areas.
- Insulation (insulation is attached to a vapor barrier layer).
- Installation of the sheathing (wooden base on which the finishing material will be attached).
- Installation of a block house.
Important! A wooden bathhouse can be sheathed no earlier than a year after construction. This is due to the process of shrinkage of the structure
When performing finishing work with a block house in a bathhouse, special attention should be paid to the ventilation of the room. The only disadvantage of this material is the low vapor permeability
Lack of good ventilation leads to condensation.
Below are photos of the interior decoration of a bathhouse with a block house.
Preparatory work
Preparatory work for lining the interior of the bathhouse begins with the processing of wooden materials (if the work has not been completed in advance in production). For interior work, combined impregnations, antiseptics and moisture-repellent compounds are used as protection. It is not recommended to use varnish or stain. The coating will collapse under the influence of high temperature and humidity and will begin to release components harmful to human health, which is extremely undesirable in a bathhouse.
The technologies for covering wooden and brick baths are the same. But if the walls are uneven, the preparatory work may include the installation of additional sheathing. It is installed to level the surface. After installing the lathing, layers of thermal insulation and waterproofing are installed.
Specifics of finishing a bathhouse inside a block house
For interior decoration, panels with a width of 80 - 90 mm are used. The panels are fastened using nails or self-tapping screws. The resulting holes are masked with putty or a wooden dowel.
Advice! The use of staples is not recommended. They do not provide reliable fastening of the material.
Sheathing can be started both from the top and from the bottom. An important condition is the presence of gaps. They are designed for blowing out the casing. The tenon on the board should point upward. This prevents moisture from accumulating in the grooves.
Proper joining of corners in the room will prevent heat loss. To set the angles correctly, you need to make a cut at an angle of 45 degrees or use slats (internal or external).
Lining the walls with clapboard from the inside
The walls are lined with clapboard in the steam room, the washing room, and the rest room.
There are two options for fastening material for interior decoration: vertical and horizontal. In the second case, you need to start installing the lining from the bottom. More often, a vertical arrangement of elements is used - to avoid the accumulation of moisture in the seams of the coating, this method of cladding can extend the service life of the wood.
Stages of work:
- installation of the sheathing - for this, slats (50:50mm) are used, which are secured with nails or self-tapping screws; a step of 50-55 cm is maintained between adjacent elements of the sheathing;
- laying vapor barrier;
- laying insulation between the sheathing elements;
- laying waterproofing material;
- clapboard covering from the inside of the room - installation of the covering is carried out on the sheathing elements using clamps or nails.
The ceiling in the bathhouse is finished similarly to the walls. Film cannot be used as vapor and waterproofing.
It can melt under high temperatures, so professional finishers recommend using aluminum foil for this purpose.
How to properly solder polypropylene pipes
Everything seems simple if you have experience, but soldering for the first time is scary.
It is necessary to mark the pipes before welding (see information below)
Step 1. Screw couplers to the front of the soldering iron to heat the internal or external surfaces of pipes and fittings. For showers, we recommend using Ø ¾″ pipes. The pipe is heated on the outer surfaces, the connecting elements (couplings, triangles, elbows, etc.) on the inner ones.
Preparing the soldering iron for work
Step 2. Connect the soldering iron to a 220 V network. On the body of the device there is a heating temperature regulator and two indicator lights. Green indicates that the soldering iron is ready for use, red indicates that the heating temperature is insufficient.
Turn on the soldering iron and wait until the green light comes on
Step 3. Set the temperature regulator to +250°C. Specific values do not play a big role; the degree of heating of the pipe is regulated by the holding time.
Step 4. Take the two elements to be connected and insert them each into their place in the soldering iron. Heat for approximately 5-9 seconds. The ends must fit into the heaters until they stop.
Inserting heated elements
We heat the couplings along the inner surface
This also explains why you should not use a soldering iron heating temperature table. We advise you to always set it to maximum - the pipe will warm up much faster.
Pipe heating table
Step 5. The surface of the heated plastic pipe should resemble thick sour cream. Once such softening is achieved, remove the elements simultaneously from both sides of the soldering iron.
Step 6. Connect the two heated planes together as quickly as possible, keeping them as level as possible. You need to hold it in the clamped state for 10÷15 seconds, the exact time depends on the heating temperature of the plastic. As you can see, almost all parameters and modes of pipe welding are determined not by instructions, but by the experience of the master. Experience will appear already on the second or third gluing, gain skills on unnecessary segments.
Sectional connection of PP pipes
Connecting heated elements
Material selection
Methods for finishing a timber bath:
- Monolithic. The walls in all rooms are covered with clapboard without adding any additional elements.
- Combined. Wood is combined with ceramic tiles, porcelain stoneware, artificial or natural stone.
For interior decoration of bath rooms, you need to choose a material that meets a number of requirements:
- high strength, durability, wear resistance;
- low thermal conductivity;
- environmental friendliness.
Popular types of materials:
- lining made of different types of wood;
- ceramic tiles, porcelain stoneware, clinker, mosaic;
- natural or artificial stone.
More often, owners of steam rooms choose lining - wooden panels for covering walls, ceilings, gables, and anemones. Advantages:
- natural look;
- ease of installation;
- good air microcirculation;
- environmental friendliness.
The best lining options for a bath:
- Linden. Boards made from this type of wood are easy to process. Surfaces heat up slightly. Linden lining is suitable for finishing steam rooms.
- Alder. Durable, durable, wear-resistant material. It has a beautiful color and does not absorb foreign odors.
- Aspen. A durable breed that is suitable for finishing washing rooms and steam rooms. Since the tree begins to rot while still growing, it is rare to find high-quality lumber.
- Larch. Durable material that has high strength and wear resistance. Withstands prolonged exposure to moisture and is resistant to temperature changes.
The wall behind the stove can be finished with stone. Various rock types are suitable. If you want to lay stone around the stove, it is better to choose soapstone.
You can combine ceramic and clinker tiles, porcelain tiles, and mosaics with clapboard or natural stone. More often, such materials are used to finish the floor and walls behind the stove.
If the bathhouse is used in winter, the tiles will be constantly cold. To avoid hypothermia, it is recommended to install a “warm floor” system.
Is it rational to use lining or not?
The interior decoration of the steam room in the bathhouse can be done with lining. Solid linden board available. It is ideal for saunas and baths. If we consider the second grade, it is worth making sure that the cross-section was 15x80 mm.
Do-it-yourself steam room with clapboard , step-by-step instructions. For professional builders, this is an economical option. During the installation process, installation difficulties may arise. Not the best characteristics are also taken into account.
Humidity is up to 9-11%, strength also leaves much to be desired. The cost per 1 m2 is lower than other materials, so finishing a steam room in a bathhouse is possible with lining. Finnish spruce is selected for the Russian bath. Oak is recommended for the Finnish sauna. It has good density, plus the material retains heat. Oak has practically no resins , so the steam room in the bathhouse and finishing will be as comfortable as possible.
Restroom
The decoration of the rest room in the bathhouse is usually done with pine lining. This type of wood is not used for steam rooms and washing rooms. When exposed to high temperatures, resin is released from pine boards. Its fumes can be harmful, and if it comes into contact with the skin, the molten resin causes burns.
Pine wood is relatively inexpensive and durable. Its advantages:
- resistance to external influences, despite the softness of the wood, the covering made of pine lining lasts a long time and retains its attractive appearance;
- ease of use - pine is easy to process and can be coated with a variety of paints and varnishes;
- low cost - the use of pine lumber for the rest room in the bathhouse will save money.
Along with pine lining, lumber from other coniferous species - for example, spruce, larch or cedar - is also used to perform finishing work in a rest room or small dressing room. The last two options are more expensive.
Steam room and washing room
For the wettest and hottest room of the bath - the steam room - hardwood is selected as finishing. Linden, aspen, larch, and birch can withstand large amounts of steam and too high a temperature.
This wood is resistant to high temperatures and does not emit resins.
In addition, it is important to monitor the uniformity of the wood used for finishing work in the steam room - a minimum of knots in the lumber will help to avoid different levels of heating of the coating.
Professionals advise finishing the washing area in a bath taking into account the high humidity during operation. Therefore, dense hardwood is also suitable for it. To prevent mold and fungi from forming on the surface of the material, it is enough to ventilate the room after the procedure.
Deciduous wood dries quickly and does not rot. Finishing with paired ash lining is in great demand.
It has a beautiful appearance, high resistance to decay and durability. Ash is also suitable for a washing room.
In addition to wood, other materials are used to finish the washroom, for example, various plastics and ceramic tiles. If there is a shower compartment, it is often equipped with PVC panels.
DIY finishing process
A day before the start of work, it is recommended to bring into the bathhouse all the materials that will be used in the finishing process. This must be done so that the material “acclimatizes” to the room temperature.
Highlights of interior finishing step by step:
- Manufacturing of sheathing;
- Fastening steam and thermal insulation;
- Installation of wooden panels.
Requirements for installing sheathing
- The sheathing slats must be positioned strictly parallel to each other and the floor. To achieve this, a level is used.
- First, the upper and lower guides are attached, and then all the other slats.
- It is necessary to place the slats from each other at a distance of no more than fifty centimeters.
- The finished frame must be treated with an antiseptic.
Hydro- and thermal insulation of steam room walls
For vapor barriers, aluminum foil and foamed polymer materials (polypropylene) are most often used. The advantage of polymer materials is that they simultaneously have vapor and heat insulating qualities.
These materials, laminated with foil, not only help maintain a high temperature in the steam room, but also resist the accumulation of dampness and the appearance of fungus.
Sequencing:
- Attach insulation to the timber wall (mineral wool is best suited for this purpose).
- Attach a layer of foil to the insulation.
- Install the sheathing (it is necessary to create an air gap between the lining and the foil layer).
Installation of lining
- Before installation begins, the lining (as well as the sheathing) must be treated with an antiseptic.
- Installation of the lining should begin from the far corner of the steam room.
- For fastening, you can use nails (which is extremely undesirable due to their tendency to corrosion under the influence of high humidity).
A more suitable and more modern means are clamps - staples that, when installed, do not damage the surface of the lining, since they do not form holes in it. This is the so-called hidden fastener.
You should know that there are different types of clamps, depending on what materials they are intended for fastening.
- Walls should be sheathed vertically.
This is due to the fact that condensation that can form on the walls will flow down, rather than accumulating at the joints and gradually ruining their condition and appearance.
For a step-by-step guide on how to properly cover walls and ceilings with clapboard, watch the video instructions:
Let's take care of the thermal insulation of the room
Before starting work, you must wait at least 6 months after installing the log house; this does not apply only to structures made of laminated veneer lumber. During this period, the building will undergo final shrinkage, with a clear demonstration of all deformations.
After this, you can safely begin the first stage of work - thermally insulating the steam room and relaxation room with your own hands. All that remains is to decide the question of the material - natural or synthetic.
Plasterboard walls or how to decorate the inside of a timber house
Natural
Finishing the inside of a bathhouse in past times was very often associated with caulking the cracks between the beams with flax or hemp rope, as well as moss. They were available to the vast majority of the village population. These materials, of course, helped get rid of drafts, thereby providing some thermal insulation, but that’s all (
Selecting the necessary materials
For the bathhouse and dressing room, wood material is used - lining. The most inexpensive wood material is pine lining, however, due to its resin content, it is not suitable for a steam room. At high temperatures, the pine lining will begin to release resin and a pungent odor, because of this, there will be nothing to breathe in the steam room, plus you can get burned by streams of resin. Typically, hardwood is used for a steam room, and most often linden. Linden does not overheat at high temperatures, retains its light color, does not emit resin, has almost no noticeable odor, dries well and quickly, and is durable. In addition, linden creates a special microclimate in the bathhouse. The table below shows the materials for making the lining.
| Material | Description |
| Conifers | Coniferous species are characterized by high moisture resistance, however, it is better not to use such lining for finishing the steam room itself: the released resins can cause certain problems. It is believed that pine resins are beneficial for humans. When they are inhaled, the work of the cardiovascular system is stimulated, but in combination with high temperature, such a combination will be extremely dangerous. In view of this, it is better to leave the pine needles for finishing the rest room - they are ideal here. As for specific species: - pine. It has a high density, stands out with an attractive golden hue and interesting ornaments; — cedar is an expensive option with a pronounced pine smell. It has a long service life, excellent texture and antiseptic properties; - spruce. Well suited for interior decoration of a bathhouse. It has a neutral odor and an attractive appearance; - larch. Fills the air with substances beneficial to human health. The material is characterized by the highest resistance to moisture and similar density. |
| Hardwood | Most often, hardwood is used for the interior lining of bathhouses. This lining is characterized by higher thermal insulation properties, which is an additional advantage, and also helps to improve ventilation in the room and create the most healthy microclimate. Several types of wood are used to make lining: - oak. Expensive, durable and strong. Among other advantages, the material is characterized by an expressive structure and generally has an attractive appearance; - Linden. This lining has a beautiful light honey shade that does not change over many years of service; - alder. Hygroscopic and beautiful material with antimicrobial properties; - ash. Quite dense wood, resistant to deformation and has an expressive pattern. |
The following table shows the classes and their descriptions. It is worth knowing that wood with a large number of knots heats up faster and can burn. The markings are the same for all types of wooden lining.
| Class or variety | Description |
| Extra | Free from cracks, knots and other defects. The surface is perfectly smooth and even. |
| A or 1 | The surface is smooth or slightly rough. There is 1 healthy knot per 1 linear meter (knot diameter no more than 1.5 cm). There may be cracks: hairline cracks - no more than ½ panel long, non-through cracks - less than 9.5 cm long (the crack exit is directed towards the end of the panel) that appear when drying - no more than the width of the panel. There may be tars and resin pockets of 2 pcs. by 1 m.p. |
| B or 2 | There are many knots, of which no more than 2 can fall out. by 1 m.p. There may be through cracks up to 1 mm wide and up to 15-30 cm long; hairline cracks are allowed along the entire length of the board. The presence of wormholes (3 pieces per 1 m.p.) and rot (no more than 1/10 of the panel) is allowed. Grade B lining is suitable for painting. |
| C or 3 | The quality is low. Many different defects. This lining is suitable for upholstery of technical rooms or rough work. |
Lining marking
Advantages and disadvantages of each material
If you are curious about how to cover a steam room in a bathhouse, it is better to consider the pros and cons of individual materials.
Decorative stone is good in quality, but the price lets it down. Wooden lining is not so suitable in terms of properties, but the cost is definitely satisfactory. Various panels are adjacent links.
Finishing the steam room of a Russian bath is possible using plaster. The advantages include ease of operation, plus a wide range of final options. The downside is the finishing time.

