Everyone remembers the expression: “backed into a corner.” An association of a hopeless dead end and a hopeless situation immediately arises. The owners of corner dacha plots felt about the same way, who, by the will of fate or lot, “stood in a corner.” And such an owner decided to build a bathhouse, and the standard project, if it fits in, does so with big reservations. Don't be discouraged. Corner baths will successfully solve the dilemma of rational use of space, and what seemed like complete disadvantages can appear in an exceptionally presentable form. Let's get acquainted.
Advantages of a bathhouse with a terrace, veranda
A veranda is a small open or closed structure with a roof.
It is part of the bath structure, located on the same foundation. The veranda is built together with the bathhouse or later. The terrace has its own foundation, another foundation raised above the ground. Such a platform is closed, open, universal. The latter option is suitable for full use both in summer and winter. A bathhouse with a veranda or terrace has many advantages:
- on the area in front of the bathhouse you can organize barbecue, barbecue, and grilling;
- friendly gatherings, family lunch or dinner are also convenient here;
- a huge selection of modern building materials and design solutions allows you to create a building in any style;
- the extension can be located either on the side of the bathhouse or between the house and the bathhouse, so that you can relax without going far;
- plants in tubs and flowerpots will be beautifully placed on the site;
- competently executed construction allows you to comply with the chosen concept of landscape design as much as possible, without making the architectural ensemble disjointed;
- since there is no need to build a separate roof over the recreation area and the washing area, as well as to connect them with paths, the savings in time and building materials are obvious;
- from the open terrace or veranda you can admire the sunset or sunrise over a cup of tea, wrapped in a soft blanket;
- The outdoor pool can easily be located right on the terrace.
Instructions for building a corner bath
With the foundation ready, corner baths made of timber are erected as follows:
Bottom line
From all of the above, we can conclude that a corner bathhouse with an attic or gazebo can be built independently, but you will have to put in a significant amount of effort and time (read: “Which bathhouse designs with a gazebo under one roof are right for you”). However, doing the work yourself reduces construction costs. Naturally, if you have no desire to create, you can order construction from specialists who will take responsibility for all stages - from purchasing the necessary materials to their installation and putting the bathhouse into operation.
How to choose a place
According to the norms and rules, the bathhouse should be located no closer than 12 m to the well, 8 m to the house and the neighboring plot, 3 m to the fence. It should be placed on the leeward side of the main buildings (house, summer kitchen, gazebo) so that the smoke is carried away to the side. Besides:
- for better outflow of water, the place for the bathhouse should be elevated or have a raised foundation (pile or strip);
- in the absence of a central sewerage system, a drainage pit is placed at a distance of 5-6 m, drainage is made at the bottom, the walls are laid out with bricks and concrete;
- It is advisable to plan the bath so that the steam room faces south for faster heating.
Also, when drawing up a project, it should be taken into account that due to the thickness of the walls, the internal area is less than the total.
Placing a square bathhouse with a small terrace on the siteSource avatars.mds.yandex.net
The durability and functionality of the bathhouse depends on who will implement the project. Therefore, you should choose only a professional company. It may not be mega popular, but it must have good specialists on its staff to avoid substandard services. There is also special equipment, photo reports on completed projects of similar baths in the portfolio. Based on photos of already completed work, you can estimate 30% of their quality.
Bathhouse made from “wild” hand-cut logsSource i.pinimg.com
Two-story bathhouse made of laminated timber 94 sq.m.
Buildings made of laminated veneer lumber are distinguished not only by their reliability, but also by the high speed of assembly of the structure. By ordering the construction of this project, you will be able to enjoy the procedures on your own site in the shortest possible time.
The two-story bathhouse with a separate boiler room is very convenient and designed, first of all, taking into account the comfort and hygiene of visiting the steam room and living in the house.
The first floor contains all the main rooms, including a toilet room, kitchen and living room, and the second floor is ideal for a bedroom. Thus, this building can perfectly perform not only its main functions, but also serve as an excellent place for a small family to live.
Design and drawing
Distribution of internal space in 6x6 buildings:
- vestibule - 4 m2;
- washing room - 4 m2;
- steam room - 4 m2;
- dressing room - 16 m2.
If there will be more than three visitors, it is recommended to make the rest room smaller and the functional areas larger.
Distribution of internal space in a building 8x10 m:
- barbecue veranda - 17.1 m2;
- bathroom - 1.4 m2;
- washing room - 9.5 m2;
- vestibule - 1.7 m2;
- steam room - 8 m2;
- rest room - 9.4 m2.
Distribution of internal space in a building 10.7x7.6 m:
- steam room - 7.1 m2;
- relaxation room - 9.5 m2;
- bathroom - 2.1 m2;
- terrace - 16 m2;
- vestibule - 2.2 m2;
- washing room - 7 m2.
You can expand the free space by adding a terrace to the free corner and an attic above the bathhouse.
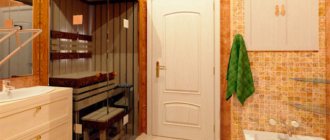
Steam room (Photo: Instagram / ermak_stoker_official)
Two-story bathhouse made of timber
Buildings made from rounded logs turn out to be quite expensive and require serious investments to maintain the log house in good condition. High humidity and bath temperature, even with good waterproofing and ventilation, cause many problems. It’s a different matter if you choose a bathhouse project made from laminated veneer lumber for a two-story building.
A box with a small attic will cost quite cheap, only abandoning the strip foundation will save at least 20 thousand rubles. The planning of the interior is practically no different from the previous version. On the top floor there is a relaxation area, the first floor is reserved for a steam room, shower and toilet.
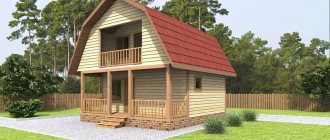
Corner bathhouse with terrace and barbecue, project of a two-story bathhouse made of timber
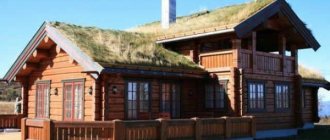
Comfort, practicality, functionality - these are the common features of any two-story corner bathhouse projects. Increasingly, not ordinary bathhouses with the obligatory waiting room, washing room and steam room are being built on land plots, but real full-fledged houses: presentable, stylish, capable of decorating any landscape. The structure is made of rounded logs - pleasant to the touch, perfectly smooth and even - looks like a fairy-tale house.
Two-story baths - profitable and beautiful
What is the main advantage of building two-story baths? First of all, this is, of course, the presence of additional space on the second floor. You can arrange the attic room to your own taste, making it an office, a billiard room or a recreation room. This will also save space, because the construction will move upward, and not “spread” throughout the entire site. It is possible to build such a structure even on a site that does not have a large area.
Also, this design provides an excellent opportunity to build a house and a bathhouse at the same time, while you will spend a significantly smaller amount on construction. Thanks to the heating of the first floor, the attic is heated, where the chimney will be located.
You can even live or receive guests in the finished two-story bathhouse. In any case, such a building is beneficial not only from an aesthetic, but also from a material point of view. With a minimum occupied space, you can compactly arrange a maximum of rooms for different purposes, from a billiard room to a workshop. After you decide on the functionality of the rooms, you can choose a suitable layout option. By the way, projects of two-story baths are often complemented by a warm pool equipped inside. You can expand the functionality of the structure using a veranda, gazebo or terrace
When choosing a project, take into account factors such as:
- the number of people who will simultaneously use the bath complex;
- required area and functionality of premises;
- location and number of existing buildings;
- the type of soil on the site - the type of foundation will depend on it.
Construction of two-story baths
Wooden two-story baths are built from glued or profiled timber, as well as from logs. It all directly depends on your financial capabilities and aesthetic preferences. The cost of the structure in most cases directly depends on the chosen material. In any case, the consumer characteristics of the log house are extremely high: the tree, regardless of the processing method, retains heat perfectly, shows resistance to temperature changes and humidity, and has a long service life.
Of course, there are a number of differences. So, for example, building a bathhouse from timber is easier and faster than a similar one, but from logs. Also, the construction of the former is cheaper, since the technology for manufacturing the materials is not complex and expensive. Log buildings are distinguished by their comfort and quality. It is very easy to breathe in such a bath both in summer and winter: after all, the walls are a natural air conditioner, they are able to “breathe”.
Rounded logs with a profile, precise and neat interlocking connections make it possible to build strong, perfectly smooth walls with excellent thermal insulation properties. Another advantage is that you no longer have to think about finishing. Baths with an insulated second floor in the form of an attic have the following advantages:
- the construction of an attic floor will be 30% cheaper compared to a full second floor;
- sloping roofs, stairs, windows allow you to create a more original design for the attic space;
- provided that there is high-quality waterproofing and vapor barrier, the use of an attic is extremely profitable.
As you may have noticed, building a bathhouse with a second floor has its advantages. You will be able to get a functional building that will not take up much space on your plot of land. You can also use such a building not only for its intended purpose, but also as a guest house, which is very convenient.
Project of a bathhouse with a relaxation room and a terrace
If both the means and opportunities allow you to build a large structure, then you can successfully choose a bathhouse design with a relaxation room and a terrace. This design is more practical and more popular. After all, the terrace for its intended purpose can only be used in the warm season. An additional room indoors, warm, allows you to use the bathhouse at any time of the year with great benefit.
Such a project has the following advantages:
- the opportunity to relax in the warmth;
- no annoying flies and mosquitoes;
- in the recreation room you can install some household appliances: refrigerator, TV, stereo system;
- here you can arrange a minibar and a bar counter if the room is used for frequent relaxation with friends.
Project of a bathhouse with a relaxation room and a terrace
There are no major disadvantages in such projects, but one can note the need to significantly increase the area of the entire structure, which entails large energy costs.
In order to be able to allocate part of the area to a recreation room, it is necessary to provide for this opportunity immediately during construction. A classic bathhouse consists of a steam room, a wash room and a dressing room. Previously, the dressing room was most often a plank unheated room used for changing clothes. Various bath utensils were also stored in it: basins, brooms, ladles.
There is a small kitchen on the bathhouse terrace
Today, a rest room is being installed instead. It has common main walls with the main premises of the bathhouse. Taking on the functions of a dressing room, this room also plays the role of a place where you can relax, sit at the table, drink tea and talk with friends. In the summer, you can go out from the relaxation room to the terrace to enjoy a fresh breath of air after a hot steam room. It is not surprising that bathhouse designs with a relaxation room and a terrace are the most popular.
An example of a bathhouse made of rounded logs
Sauna stones
It is very important to choose the right stones for laying in the stove. Not every mineral is suitable for this, since simple stones can be quite fragile. It is optimal to use soapstone, gabbro-diabase or jadeite, the evaporations from which are beneficial for the human body.
For stoves, stones with a rough surface are used, on which water is retained, gradually boils and evaporates. Do not use stones with cracks or defects - they will quickly crack from overheating.
Periodically you need to sort through the stones to remove damaged ones and replace them with new ones. The frequency of this procedure is once a year, subject to weekly use of the sauna. When heating the sauna twice a week, the stones should be inspected once every ½ year. That is, the more often you use the steam room, the more often you need to check the condition of the stones.
The electric furnace is tightly laid with stones in the spaces between the heating elements, but air must pass freely through the masonry.
Wood burning stoves are filled with stones on top of the firebox, so only a few are needed. If the stones are heated by a metal casing, the stove must be heated during the entire time the sauna is used so that the stones do not cool down. Although these stoves heat up faster, they produce denser heat that is harder to tolerate.
Features of the corner layout
The corner bath project provides for a specific location and distribution of internal volume. The classic looks like this:
- The rest room and the steam room are connected at an angle of 90 degrees;
- The heater stove is located in the center of the projection and has a through type with a long combustion tunnel, which allows the most efficient use of its thermal energy to heat almost the entire internal volume;
- Very often, premises of this type are equipped with not one, but two doorways, providing communication with the outside world. On the one hand, this is convenient, on the other hand, it makes you think seriously about heat preservation issues;
- Finally, in general terms, the structure has an L-shape, which is why, in fact, it got its name.
What are the advantages
The L-shaped projection provides several very significant advantages relative to the traditional layout, in which the shape of the structure has straight sides:
- There is a great opportunity to rationally use the area of the site. As a rule, the corner sectors of the yard are not fully in demand. One has only to place a bathhouse in the corner connection, and immediately, just like in the old joke, there is also a lot of space for “still under the giroki”.
- Imagine that you have a two-century-old luxurious oak tree on your property. Conscience does not allow you to cut down a tree; the lack of space does not allow you to build an ordinary classic bathhouse. A corner bathhouse solves the problem not only effectively, but also damn elegantly. The bathhouse wraps around a tree, and we have a gorgeous composition that, all other things being equal, we should also look for.
- Take a look around. Quite often we have standard baths, as if from an architectural incubator, which seem to be attached to a simple and uncomplicated geometric figure - a rectangle. A little diligence and you are building a non-standard beauty, from which the chief architect of the district himself will draw ideas and inspiration for a long time.
- The central placement of the stove opens up new opportunities for interesting interior solutions, and the heating of the internal volume itself becomes more uniform, and, as a result, efficient.
- The concept of two separate entrances will allow you to implement interesting solutions, for example, placing a separate barbecue area, all under one roof.
What are the disadvantages
It is well known that there are no ideal architectural solutions, just as there is no general construction concept for all occasions. Corner bathhouse projects, unfortunately, are also not without a number of disadvantages, which are worth talking about in more detail:
- Compared to a traditional bathhouse of a simple geometric shape, such a structure is characterized by a slightly higher, in the range of 15 - 17%, consumption of building materials;
- For an inexperienced designer it is more difficult to calculate, and for an inexperienced builder it is more difficult to implement in reality a reliable design for the closure of two internal volumes. This primarily concerns the roof. It is not easy to securely tie a rafter set in a perpendicular projection without sufficient experience;
- Multiple exterior doorways are certainly easy to use. However, it is worth taking care to implement a number of measures aimed at maintaining heat in your bathhouse. Here it is worth using either very high-quality door systems, which is expensive, or duplicating vestibules, which, you see, is troublesome;
- Now about the oven. Its central location is a definite plus. However, be prepared for additional costs. In order for such a stove not only to justify itself, but also to work highly efficiently, a long combustion tunnel is needed. To implement such structures as air, you need a qualified master stove maker, with a head, hands and conscience, and a good choice of refractory. Cast and welded metal furnaces of this type are also far from a budget option.
If you have weighed all the pros and cons, and the positives from implementing a project of this type outweigh all the disadvantages, then we smoothly move on to the projects themselves. Which to choose?
Types of steam room shelf designs
Depends on the area and height of the room.
The standard placement of benches is along one or two walls, parallel, perpendicular to each other.
Stepped
They are of the stationary type. They are more common than other species.
The shelves are fixed to one wall where there is no window. A multi-tiered structure is created according to the principle of steps.
This arrangement is convenient because with each tier the degree of heating increases.
It is important to take into account that the distance from the ceiling to the top shelf must be at least 1.2 m. This distance will be comfortable for a person to sit or hover
In addition, the upper tier is attached above the line of the heating boiler or stove.
Folding
Another name is a compartment shelf. The principle of arrangement and operation is reminiscent of wall shelves on a train, which can be folded down when necessary.
Suitable for a steam room with a small area. The shelves are fixed on two opposite walls parallel to each other. The upper shelves fold down, the frame of which is formed from support legs with transverse crosspieces.
There is an option for fixing without racks, as if in a hanging position. Used for light weight loads. Requires competent calculations. Not suitable for DIY production.
To remove the pull-out bench, it is lifted towards the wall and lowered to its original position to open it.
Removable
They are also called collapsible, folding. This mobile design is convenient in steam rooms with a small area. Simplifies the process of drying the flooring.
The upper and lower benches are completely removable.
Corner (L-shaped)
For small steam rooms, corner benches are often installed.
They take up little space, but are not inferior in comfort to other types.
The upper and lower elements are adjacent to one partition along the longest wall, the middle ones along the short one, which is located nearby.
There can be 2-3 steps along each partition.
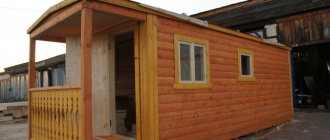
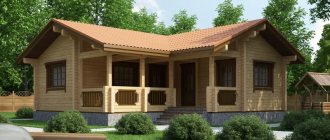
Bathhouse with veranda under one roof
We propose to introduce the following division: first, let's talk about the terraces, which fit into the quadrangular plan of the bathhouse at the design stage, and then move on to extensions, which can have different shapes and be more or less connected to the main structure.
So, the terrace included in the plan is most often located in front of the entrance, occupying the entire space along the width of the front part of the building, but there may be other options for its location depending on the designer’s imagination.
The roof over such a terrace can either be a continuation of the bathhouse roof (most often), but it can also be a separate canopy. Unfortunately, calculating rafters is not such a simple task that you can devote a couple of paragraphs of text to it.
IMPORTANT! The roof must be calculated and installed by a professional. Read books on roof calculations - see for yourself
Those who would still like to try their hand can start with a lean-to over a barn, for example.
The veranda can be positioned on the side of the pediment; in this case, we will be talking about extending the ridge and rafter system beyond the walls, supported by pillars.
The second option is along the roof ridge. In this case, the length of the rafters increases, a long overhang is made, also supported by pillars.
There is also a third option, when the veranda, located perpendicular to the ridge, has its own roof, which fits into the rafter system of the bathhouse using undercut rafters.
We have already talked about the foundation - the cheapest way to make it is columnar, but other types of foundations are also suitable. And since we are talking about a veranda inscribed in a rectangular plan, you can make a single strip for the entire structure or in the form of a solid slab (when a floating one is needed).
ADVICE! The depth of depth for the foundations of the bathhouse and terrace should be the same.
One way or another, an open veranda consists of a roof, floor, support pillars and light fencing. There's nothing else there. If, of course, it is open.
With glazed
A bathhouse with a glass veranda under one roof is already a room in which you can stay even in the cold season. This means that it provides thermal insulation, which was not mentioned above. And the heat source itself for heating must also be provided.
Glass is not the best heat insulator, so you need to install either double-glazed windows suitable for your climate, or not use this room in winter.
In general, construction companies offer two glazing options - summer (cold) and winter (insulated). Accordingly, the customer only needs to decide whether he will spend winter evenings on this veranda or not.
Red brick bathhouse with a workshop, garage, boiler room, open and closed (glazed) terrace. Teplokrepost Photos
The most beautiful – frameless – design is at the same time the most expensive and not suitable for winter.
If you choose aluminum, which, by the way, is also cold, it will be offered in two versions - hinged and sliding. It is also the cheapest.
Warm glazing is possible, as already mentioned, with double-glazed windows. That is, metal-plastic. It is an order of magnitude more expensive than aluminum. Suitable metal-plastic doors will be offered to you there.
In addition to the hinged metal-plastic version, there is a sliding version, but it is extremely cold, and this is a product of companies specially designed for it. We do not advertise anything, so we suggest you search on the Internet yourself if you want a sliding type of glazing.
Bathhouse with a glass veranda: pros and cons
Briefly about the advantages and disadvantages of baths with glazed verandas.
The cold type of glazing will probably be good where summer is often cold and rainy. In general, verandas act as a transition from home to nature, a “buffer zone” where you can sit comfortably under the roof, the air is fresh, and nature is not behind glass. So, with glazing it will be behind glass. Even behind sliding panels.
The insulated version is prettier and more expensive. You can generally combine a relaxation room with a fireplace and such a veranda - you will get a large room, but if the view behind the glass is not particularly impressive, then it is unnecessary to spend money on such a pleasure.
Bathhouse with a closed (glazed) terrace and summer kitchen. Teplokrepost Photos
In general, a glassed-in porch is good where there is something to look at.
In addition, the question arises with the doors - what kind should they be made of? In principle, a door made of metal-plastic can be quite reliable, they are even installed for residential buildings, but where to place it is up to you. If the terrace is equipped as a warm rest room, then it is better to enter from the street; if the glazing is cold, then it is better to place the entrance door on the interior premises. We also recommend reading our material about entrance doors for bathhouses.
A modern version of the sauna - an infrared cabin
Let's figure out what an infrared sauna is. An infrared cabin is an option for a home sauna that does not require a large area, laying stones or installing a chimney. Such equipment is available to many consumers (read: “What equipment is needed for an infrared sauna - types of heaters”).
Inside such a steam room, the air temperature does not rise above 60 ºС, unlike a Finnish sauna with its 110 ºС. Only the upper 4 cm of the skin is heated.
However, since only the upper layers of the skin are heated, and heat waves do not penetrate deep into the body, the effect of drying the skin due to local overheating is achieved. As a result, she ages faster.
This happens because the cabins generate waves in the range below 8 microns, which a person does not encounter in the natural environment. Consequently, a person does not have any mechanisms of protection against such waves, except for intense sweating. In addition, in this case we are not talking about any cleansing of toxins.
So it’s up to you to decide whether to try the innovations for yourself or treat yourself to procedures in a Russian or Finnish steam room.
Preparing piles for the foundation
Normal operating conditions for a wooden terrace can only be created by insulating the wood from excessive exposure to moisture. To do this, the platform must be slightly raised above the ground so that water does not accumulate under it (for more details: “Building a bathhouse on stilts with your own hands - from the foundation to the roof”).
In this regard, a pile or columnar foundation is used with preliminary treatment of the soil under the site:
- The fertile layer of soil is removed.
- Then the remaining soil is leveled and compacted.
- A crushed stone-sand cushion is poured and compacted on top of it.
Only in this case will various plants not germinate, die and rot under the terrace, which will ultimately lead to the appearance of an unpleasant odor and spore formation.
Laying the foundation
Despite often having a common roof, different foundations are laid for the terrace and bathhouse. A bathhouse, naturally, is heavier than a terrace, so for large and multi-story buildings you will need a strip monolithic foundation, and for small bathhouses you can get by with a pile foundation. If foam concrete or brick is used to build a bathhouse, then a strip foundation must be poured - another simply will not support the weight of the building.
For a wooden terrace, a pile foundation will be quite sufficient. In cases where the terrace will be located on difficult soil, prone to freezing or crumbling, on slopes, then to increase reliability it is better to lay screw piles
At the same time, for wooden buildings it is very important to properly organize waterproofing between the tree and the foundation in order to avoid rotting of the wood
An important stage in the construction of a bathhouse is laying the foundation
Location of the building
To locate the bathhouse, you need to choose the right place, taking into account a number of factors:
- It would be more correct that, taking into account the prevailing wind direction, the bathhouse should be the last in the line of buildings. If it suddenly catches fire, in this case there will be a high probability that the fire will not spread to other buildings.
- If the bathhouse and the residential building are built as separate objects, the distance between them must be at least eight meters. The reasons here are the same as in the previous case.
- It is advisable to locate the bathhouse away from the road. Even according to the requirements of the Land Code, this distance should not be less than five meters.
The terrace in its structure is an extension to the main building. In addition to the roof combined with the bathhouse, it can be protected from the wind to a certain extent, since it has one common wall with the main building and conditional partitions around the perimeter.
A solid floor is installed near the summer terrace. It can be made of wood, sometimes it is laid out with tiles or some other finishing materials. Furniture on this site includes benches, chairs, rocking chairs, and a dining table.
A terrace is usually made along the entire facade of the bathhouse. This is convenient not only in terms of construction, but also in everyday life. It’s good to come out of the steam room to such an equipped place; here you can cook and dine.
Interior Design
As a rule, two tiers are built inside the sauna for sitting and lying areas. Right angles between the walls and benches allow you to fully utilize the steam room area. All benches are made exclusively from wood. Spaces of 1.5-2 cm are left between the boards to ensure ventilation of hot and cold air in the sauna.
The width of the top shelf should be at least 50 cm so that a person can lie on it comfortably. Additionally, the front of the bench is equipped with a stand on which you can rest your feet. A distance of 70 cm should be left between tiers.
100-105 cm are left from the top bench to the ceiling so that a person can feel the maximum effect of the sauna. If the size of the room allows you to place shelves in only one tier, it should be taken into account that a very tall person, when sitting on a bench, should not reach the ceiling.
Subtleties of design
When designing construction, it is best to immediately plan the construction of a gazebo. This will help save materials and time, conveniently connect the roofs of two sections of the building and provide for any design features.
It is imperative to provide for the possibility of converting an open type extension into a closed one. After the first season of use, it may turn out that it is comfortable to sit on the open veranda only on hot days. It is best to immediately design a universal extension with removable or sliding panels made of transparent materials (glass, polycarbonate). For permanent residence, the gazebo is made all-season. In central Russia, it is advisable to build an extension closed on all sides with large panoramic windows.
Accommodation options
There are no special rules for placing gazebos near bathhouses. The owner builds this structure taking into account general sanitary standards and fire safety breaks. The most convenient option is a gazebo extension facing the sunny side: it can be used as a solarium. But for such a room it is advisable to make sliding walls so that the closed room does not become stuffy inside. In cold weather, it will be warm due to solar heat, you just have to close the openings.
Depending on the wishes of the owners, the gazebo can be made as an extension, under a single roof. But some will like a free-standing structure with a covered walkway
Sauna ventilation system
Ventilation must be provided in the sauna, since ventilation through the walls cannot be due to their heat and vapor insulation. For every 1 m3 of steam room volume, a ventilation hole with an area of 24 cm2 is required.
The arrangement of vents for ventilation involves installing a window 30 cm from the floor near the stove to provide draft. On the opposite wall, a ventilation hatch is cut 30 cm from the ceiling.
Cold air enters through the lower passage, which, passing through the stones, gradually warms up and rises. The upper ventilation window allows fresh air inside, which displaces the stagnant air in the upper part of the sauna. Forced air ventilation is not recommended so as not to cause thermal burns on the skin.
Construction principles
Project
Corner bath project
The corner bath project is no more difficult to implement than the construction of a standard rectangular building. It should also be noted that the construction of such objects provides for the possibility of using building materials with a shorter length than, for example, a traditional 5x5 object.
As a result, the longest walls can be built using long timber or rounded logs, while the remaining lumber will be used for smaller walls. As a result, choosing a project with a corner configuration allows you to avoid overuse of building materials and thereby reduce the cost of the finished structure.
Choosing material
The optimal material for the construction of corner baths is profiled timber or rounded logs.
Rounded logs of various sizes
The use of such materials guarantees the following advantages:
- Reducing labor costs and saving time, since such materials are pre-adapted for construction work, which cannot be said about conventional edged timber, which requires additional processing.
- Affordable price.
- Low thermal conductivity of walls due to the high-quality connection of profiled timber using the “tenon-to-groove” type.
- Minimal shrinkage of walls during drying.
- Minimum degree of cracking of timber due to the negative impact of environmental factors.
- Optimal aesthetic qualities of the finished building.
Timber storage
Stage 5. Frame
Building a brick sauna requires considerable experience and skill, so it will be easier to build and plank a wooden frame. After laying the thermal insulation material, the sauna will be in no way inferior to a brick one. In such cases, profiled timber is often used.
Components
Step 1. First, support beams are installed in the corners - they are secured with spacers, aligned and fixed to the base with iron brackets. Then, from above, along the entire perimeter, the supports are connected by bars. Intermediate bars are attached vertically (in increments of 1 m), they are connected with iron brackets from below and above.
Construction of an external wall
Window and door frames are fastened in appropriate places, after which transverse slats are nailed to make the structure more secure. In each corner, braces are installed that “look” in opposite directions.
Frame
Step 2. Take boards 3 cm thick and cover the finished frame with them. You need to start work from below, from one of the corners. The first board is applied to the beams, leveled to the ground and corners, and then nailed.
Technology of construction of walls and ceilings Scheme of insulated wooden floor
Step 3. The rafters are sheathed last. There remains a small hole in the roof for the chimney pipe.
Frame
