Articles
All photos from the article
Modern materials and technologies have replaced traditional wood from many industries, but in some cases it remains indispensable. If you need antique-style utensils for a bathhouse or a country house, then you can’t do without wood. We will tell you how to make a wooden bucket with your own hands.
You can make a wooden bucket yourself.
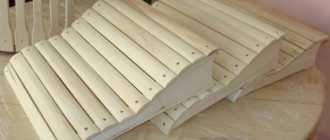
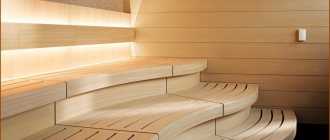
Sauna bench
In the wash room there will be a wide bench to wash with all the amenities. As an example, one of the simplest drawings of a bench is presented.
During the work you will need:
Step 1. Take one board 1500 mm long, lay it flat on the work table and secure it with clamps. Using a cutter, a longitudinal groove 10 mm deep is cut in the side surface for the entire length of the board. Exactly the same groove is made on the second board, and on the third board grooves are cut out on both sides.
Read also: How to make a wreath of leaves on your head
Step 2. The milled boards are again laid on the work surface in a row, with a board with two grooves in the middle. All grooves and both planks are coated with glue, after which the planks are inserted into the holes, firmly connecting the boards into a shield, and the product is clamped with clamps.
Assembling the shield for the bench
How to make a wooden bucket with your own hands
How to make a wooden bucket with your own hands in the form of a small cylinder, we will consider in this article.
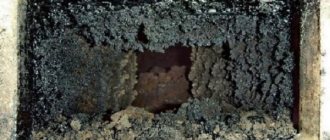
The figure shows a sectional view of the bucket design:
1.
Stacked bottom.
2.
Typesetting board.
3.
Metal hoop.
4.
Eyelet for attaching the handle.
5.
Handle.
SET BOTTOM
It is assembled using glue from boards and slats. Boards measuring 20 x 45 x 225 (mm), in which we mill grooves measuring 5 x 7.5 (mm) in the center of the side surfaces. Planks measuring 5 x 15 x 225 (mm). We compress the assembled shield with clamps and wait until the glue dries completely.
Article on the topic: How to sheathe the outside of a wooden house with clapboard
Using a jigsaw, cut a circle from the assembled shield. The end of the bottom is ground around the circumference to size 10 (mm), as shown in the drawing.
LAYING BOARD
Let's make it from a wooden plank with a cross-section size of 20 x 45 (mm), grind the side edges at an angle of 10° with an inclination to the center of the bucket. We end all the planks at the same size 350 (mm) and mill a groove from the bottom 4 (mm) deep and 12 (mm) wide. We will make chamfers on the sharp corners of the end faces.
The number of strips in the example under consideration is 18 pieces. Let's calculate the angle of inclination of the side faces: 360 / 18 / 2 = 10° The angle is an integer; there will be no problems with setting up the processing equipment.
METAL HOOP
We will make it from hot-rolled tool strip 3 x 30 GOST 4405-75. Drill holes for M5 threads along the edges of the strip. Screw the corners and insert the tightening screw as shown in the figure.
Using a nut, compress the edges of the strip to the required size and weld them. Unscrew the screws and remove the device. Finish the seam and smooth it with an abrasive wheel.
Before welding, we prepare a one-sided joint with beveled edges of the following dimensions:
• joint width 2 (mm) • joint depth 1 (mm) • joint edge angle 60°.
HANDLE EYE
We will make it in the form of a loop from highly alloyed corrosion-resistant wire Ø 5 (mm) GOST 18143-72.
We will make it from the same wire as the ear.
Assembly order
, or how to make a wooden bucket with your own hands:
1.
Let's assemble all the planks around the bottom so that the bottom fits into the grooves of the planks.
2.
Compress the assembled structure with twine.
3.
Squeeze and weld the hoops.
4.
We will weld ears to the upper hoop for attaching the handle.
5.
Insert a pen into the ears.
6.
Let's lower the product into the water.
After some time, the wooden boards will swell and all the cracks will disappear.
Price issue
You can buy a dousing bucket in a store, but the prices are, to put it mildly, quite high. The cheapest option is a pine bucket with a plastic insert with the smallest volume of 10 liters. A 15 liter bucket will cost only 20 percent more, and a 20 liter bucket will cost another 5 percent more. That is, perhaps it makes sense to overpay a little and take a bucket with a larger capacity. Without a plastic insert, such systems will cost a little less, about 20%. There are dousing buckets with a stainless steel insert. Many people prefer this combination of materials. Linden is most often used as wood. Such systems cost much more, on average 50%. Well, the most expensive types of such devices are products made from larch or oak. Among the highest quality companies, it is worth paying attention to BendWood. But you will have to fork out and pay three times more money compared to the cheapest solutions.
Read also: How to make a school bag out of paper
The technology for making a wooden bucket for a bath is presented in the video: The shower bucket for a bath is ready! You can ignore small cracks, as the wood will swell upon contact with water. All that remains is to supply water to the selected place in the bathhouse.
Simple, like everything ingenious
A dousing device for a bath, for all its simplicity and, to some experienced eyes, outright primitiveness, is an extremely effective bathing tool. If, while diving into an ice hole, a person plunges into it with his feet, then throwing a bucket of ice water over himself, instantaneous cooling occurs in the opposite direction. However, in most cases the sensations turn out to be close in intensity of passions and a fountain of emotions. A very sharp change in ambient temperature and a sharp cooling of the surface of the body is a very serious shock to the body. How's the classic doing? “Everything that doesn’t kill us makes us stronger.” This procedure, according to some ardent admirers, has the following positive qualities:
- Perfectly trains the cardiovascular system. For such a procedure, as for any branded product, they came up with a bright and catchy name - “gymnastics for blood vessels.”
- Increases the tone and turgor of the skin, making it strong and elastic. Of course, cold, as an active irritant, initiates increased blood microcirculation and supply of skin with nutrients and oxygen.
- Metabolism increases, pressure in the main vessels increases for a short time, and the pulse increases. Any physiological activity forces the body to shed ballast and activate hidden reserves.
- As a result, the overall resistance of the body at the immune level increases.
- Finally, this procedure is very invigorating, and in this process, it is unlikely to find serious competitors.
Article on the topic: Which heated floor is better for a wooden house
There are, however, some disadvantages. And the opponents of this action also have a full sleeve of trump cards, read, arguments:
- This is a state of shock for the body, and any shock, including temperature shock of different signs, is a difficult test for the heart and blood vessels. If everything is not in order in this regard, you should be careful.
- The human head, and especially the parietal part of the skull, is one of the most vulnerable locations of the body as a whole. Therefore, when dousing, you should not forget about this.
- A dousing bucket for a bath, if a large amount of water is incorrectly consumed, can provoke the manifestation of cervical radiculitis syndrome, caused by inflammatory processes in the root part of the nerve endings, due to a sharp temperature change or injuries of a purely mechanical nature, from an involuntary sudden movement of the head.
In any case, living is harmful, but moderation and balance in approaches to any bath procedures are a sign of high culture.
Briefly about the device
A bucket for dousing in a bathhouse is a wooden container assembled using metal, preferably stainless, hoops from individual elements - rivets, tightly fitted to each other or connected through a tongue-and-groove pattern, minimizing or completely eliminating the flow of water.
Important! Due to the loss of cooperage culture, some bath buckets have a polymer insert. To put it simply, we have a plastic bucket in a wooden case. Rough? But, on the other hand, it doesn’t leak.
In general, the issue of drying out of solid wood structures is very acute. The container should always be filled with water. In modern conditions, this is solved by supplying tap water or water from a well pump into a bath bucket and equipping it with an automatic filling system, with a level cut-off using a float, as in a toilet cistern. Reliable and practical. The main condition is that there is always a positive temperature inside the bathhouse during the cold season, preventing the water from freezing both in the bucket and in the supply system.
If this is not possible, and sometimes there is simply no water supply system, then the pouring bucket for the bathhouse is filled manually as the water is consumed from it. And the problem of drying out is solved by pre-soaking. 3 - 4 hours before the procedure, the container is filled to the top with hot water so that the swollen wood fills the gaps and the leaks are eliminated.
A word from Experienced! The leak problem that constantly plagues a wooden bath bucket can be eliminated in a more radical way. It involves waxing. Dry the sauna bucket thoroughly so that the defects are clearly visible. First, beeswax is melted in a water bath, to 3 parts of which 1 part of linseed oil is added and mixed thoroughly for 5 - 7 minutes, without reducing the temperature. We described similar recipes when we talked about impregnations for bath shelves. The method is similar, but the weight of the components and the principle of application are still different. Next, the waterfall bucket for the bath is heated with a hair dryer and all cracks are carefully sealed with a natural bristle brush. After the surface has cooled and the wax has set, the tightening hoops are carefully pushed down with the nose of a hammer until the wax is squeezed out of the cracks. Subsequently, the bucket in the bathhouse, which was stored without water, is pre-sedated with hoops so that the wax appears and filled with water. The foundation will serve as a reliable hydraulic lock.
It is worth noting that a sauna bucket in itself is not self-sufficient. For the system to work, it must be equipped with a tipper and a supporting frame. The supporting frame, as a rigid structure, is fixedly attached to the wall, at a height sufficient for a tall person to stand under it, on the other hand, to ensure the free movement of the bucket, preventing it from getting caught on the ceiling. As a rule, this distance is approximately 2150 - 2200 mm from the floor level. The rolling mechanism itself can be very diverse, from bearings to torsion bars. The only condition is clear movement in all spatial positions, the impossibility of failure and the availability of quick dismantling for scheduled maintenance of the tank. A shower bucket for a bath, as a rule, has a capacity of 10 to 30 liters, so the fastening and suspension system must be designed to exceed the safety margin by 4 times.
Article on the topic: How to cover the facade of a wooden house
Which wood to choose
This question is especially relevant when you are going to make a bucket for pouring into a bathhouse with your own hands. The choice is between very good material and satisfactory one. According to our good tradition, let's start with the good:
- Oak - has high strength, splits perfectly along the grain, which is very convenient for making staves. The high content of tannins gives the water a light color and a spicy aroma, this is especially pronounced immediately after production; over time, this property naturally fades. Its wood is very resistant to water and is less susceptible to deformation and fungal attack;
- Ash is similar in its properties to oak, including its unique texture and pattern;
- Alder - it is also worth considering it as a worthy option if you make a dousing device for a bathhouse with your own hands. To some extent, it splits less well along the grain and is less resistant to twisting during the drying cycle. It is obvious that alder wood is inferior to oak wood in both color and texture;
- Larch is among the leaders in resistance to the harmful effects of water. It is not without reason that bridge supports and pile structures were built on larch trees. Moderately resinous, difficult to process. Quite often there are through knots - nails, which are very undesirable in the production of cooperage products.
Products made from linden, birch, pine, and spruce can satisfy the needs of constructing products such as wooden buckets for a bath to one degree or another. If such raw materials exist, then they can be used.
Attention! In the lengthy discussions of some Internet “experts” one can find recommendations regarding the use of bog oak and bog larch wood. I would like to emphasize that stained wood is obtained from long-term exposure of tree trunks in an oxygen-free environment, completely immersed in water. At the same time, such wood is very rare, very expensive and extremely difficult to process even with modern tools. There is no need to talk about products available on the free market for reasonable money made from such wood. Is it just about banal imitations - the main purpose of which is low-grade marketing hype and making money.
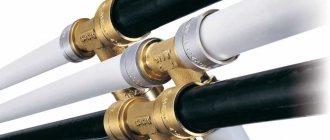
Material for fittings
Responsible manufacturers widely use stainless steel when assembling a product such as a tipping bucket for a bath. Stainless steel for baths is used by many and for good reason. The presence of metal elements under the influence not only of the humid environment of the washing compartment, but also of the direct action of water places special demands on corrosion resistance. Hoops, chains, axles, supporting frames made of corrosion-resistant material will last much longer. And this is obvious.
Article on the topic: What's in your garage
A few words about chains and ropes. They, in fact, operate the dousing bucket for the sauna. The strength and degree of tension allows you to regulate not only the speed of overturning the water flow, but also its volume. On the question of what is more practical, a chain or a rope, the opinions of the bathhouse community are divided. Some passionately argue that the chain is reliable, brutal and colorful, others convince that rope made of flax fibers works no worse in a humid environment, and that it itself is softer and lighter. It may not look so stern and masculine, but it costs several times less.
Growing vegetables in old buckets
In old buckets you can grow not only flowers, but also vegetables, such as tomatoes, especially on the balcony. And if you still like to experiment, you can try the method when tomatoes grow with their roots up.
Cut a hole in the bottom of the bucket, fill the container with soil and plant a young plant there. Hang the bucket by the handle on the balcony, terrace or in the upper tier of the greenhouse. You can also sow green crops into the soil above. All that remains is to regularly water and feed your unusual plantation.
Tomatoes grown in this way do not need to be pinched or tied up; they are reliably protected from pests, do not require weeding or loosening, ripen much earlier and produce a good harvest. And these “pots” with ripening tomatoes look very impressive. But you won’t be able to grow peppers this way, because... their stems and shoots are very brittle.
Decorative cardboard bucket
Hi all!
Today I have a simple and cute home decor idea. We will make a decorative bucket from cardboard.
What you will need for this:
- Paper cup;
- Corrugated cardboard;
- Jute twine;
- Hot glue;
- Wire;
- Stationery knife;
- Acrylic paints.
Step 1.
We take a paper cup and separate the label from it, it will act as a template and, unfolding it, transfer it to a piece of corrugated cardboard, tracing it with a pen or pencil. If there is no label, you can make a label layout yourself.
Step 2.
We finish drawing lines on the resulting image, which, when folded, will resemble boards and two loops, so that when turning the glass they are located opposite each other.
Step 3.
We cut out the workpiece and make holes in the loops.
Step 4.
Having slightly trimmed our development along the lines, we make bends and try it on the cup, wrapping it around it.
Step 5.
Cut off the top rim of the paper cup so that it does not interfere in the future.
Step 6.
Having adjusted the cardboard template, glue it to the cup with hot glue.
Step 7
Paint the resulting bucket with acrylic paint. Let's dry it.
Step 8
Now you need to stick jute twine in a circle, in the upper and lower parts of the bucket, but it will play the role of metal clamps that hold the boards together on the real bucket.
Step 9
You need to wrap jute twine around a piece of wire, securing its ends with hot glue. The handle for the bucket is ready.
Step 10
Having bent the ends of the handle, we insert them into the loops (eyes) at the top of the craft and bend them a little further so that the handle holds.
Our decorative bucket is ready! Everything is very simple and fast. With this craft, you can decorate a room by placing it in a prominent place.
If you liked this idea, share it on social networks.
Application
A wooden bucket is a container unique in its range of uses. It is made from environmentally friendly material – wood.
This container is ideal for pickling vegetables, and for use in a sauna and bathhouse, where you can steam brooms, carry and store water. A wooden bucket does not emit harmful fumes. On the contrary, the healing substances contained in the wood will give the water beneficial properties and softness, and add elasticity to the brooms.
For pickles, you can purchase a bucket with a lid. Since such products are made without the use of adhesives, the products in them will be tasty, aromatic and healthy.
A wooden bucket is also used to create a certain atmosphere and surroundings. These products are popular:
- In restaurants, clubs and cafes, whose interior is designed in the style of old taverns or hunting lodges.
- In holiday homes and hotels in the style of family estates, estates or castles of yesteryear.
- In baths and saunas. This is the most extensive area of their use, since it is rare to find a Russian bathhouse that does not have a wooden bucket.
- For all sorts of themed events, reconstruction of past events, shooting music videos, movies, advertising and various programs, you may also need a new or old wooden bucket.
- There are owners of log houses who love to decorate the premises in the style of ancient Russian chambers.
- This product will be an excellent gift. It is not only very useful in everyday life, but also looks very attractive.
A wooden bucket is a container unique in its range of uses. It is made from environmentally friendly material - wood.
A wooden bucket is a container unique in its range of uses. It is made from environmentally friendly material - wood.
Why is this necessary?
Indeed, if you need new garden furniture, a flowerbed or a napkin holder for your home, why not just buy it? Why waste time and effort on making an item that is likely to be inferior in functionality to a factory product?
- Savings are not always decisive, but they are the most obvious. A significant part of Russian summer residents are pensioners; The price of many decorative items looks quite impressive compared to the size of the pension.
- After many years of general shortages among people who found it at a conscious age, the idea of throwing away an item that is suitable for at least something causes unconscious rejection. But transforming it with your own hands into something useful, on the contrary, fills the owner with enthusiasm.
By the way: the pleasure of creativity, of independently creating something beautiful and functional, should not be forgotten either.
- Finally, some products simply cannot be found for sale. Either because they are not in demand, or simply because no one has thought of them yet.
We will devote this material to ideas that are unpopular among industrialists.
Washcloths
There is a wide range of sets of bath accessories, which include brushes, washcloths, peeling stones, etc. If you want an original product that satisfies all your preferences, make it yourself.
A washcloth is necessary for body cleansing and wet massage. This procedure is not only pleasant, but also beneficial for the body. Sponges can be of different hardness, sizes and shapes. You need to choose a washcloth based on your personal tastes.
To knit a washcloth from natural materials, choose the wool of goats, sheep or any other farm animals. You can also use linen. The yarn for the washcloth must be thick, since the product itself is subject to mechanical stress, so choose the appropriate size of knitting needles or hook.
Most often, washcloths are knitted using the “checkerboard” or “tangle” pattern. The main part of the washcloth is knitted after the handle is ready. The handle must be tight, otherwise it will lose its appearance immediately after the first use. The product will not be so tough if you pour boiling water over it.
How to get a bucket from a well using a “cat”
In the old days, buckets were taken out of a well using a horseshoe to which a rope was tied. This method is labor-intensive, requiring certain dexterity and skill. Later they came up with a tool that could pick up and pull to the surface a bucket that had sunk in a well - a “cat”. It is made of iron rods and looks like an anchor. A long, strong string is tied to the “cat,” the tool is lowered to the bottom and carefully moved from side to side, trying to locate the location of the bucket. After it is possible to find out where it lies, they begin to raise and lower the “cat”, trying to hook the handle of the bucket with one of the ends of the “anchor”. You can make a “cat” from a large fishing hook, but in this case you will need a weight tied to the end of it the same ropes as the tackle. You need to pump out the water from the well, take a powerful flashlight and try to remove the bucket.
List of materials:
– boards; – iron plates for rims; – screws with nuts; – thick wire (for the handle); – wood glue.
Choosing a tree for a bath
There are many types of wood, but not all of them are suitable for saunas and baths. There are certain requirements that the material must meet:
Conifers containing resins can only be used in the wash room, dressing room and recreation room, where there are no high temperatures. The exception is Canadian cedar, which has a low resin content and a very attractive texture. In all other cases, steam room furniture is made exclusively from hardwood - ash, linden, oak, aspen, poplar, alder and others.
Characteristics of wood
| Name | Color | Advantages | Flaws |
| White, light yellow | The material is durable, good density, easy to process, affordable price | Releases resin when heated | |
| Spruce White to reddish | Easy to process, has a beautiful texture, affordable | Highly susceptible to rotting, contains a lot of resin, a large number of knots | |
| Yellow | Beautiful texture, high density and strength, resistant to negative influences | Heavy, may crack during processing | |
| From light gray to brown | Beautiful texture, high strength, resistance to any aggressive influences | Heavy weight, requires effort when handling | |
| White to olive | Wear-resistant, not subject to cracking, bendable, has a beautiful texture | Sensitive to changes in humidity and temperature | |
| Sandy, off-white | Easy to process and light weight | Prone to rotting | |
| Light yellow | Easy to process and highly resistant to moisture | Wears out quickly and gets dark | |
| Pink to red-brown | Soft, light, easy to handle, moisture-resistant, does not deform or dry out, has a healing effect on the body | None | |
| Light beige | It has a pleasant aroma, has a healing effect, is easy to process, does not heat up, does not rot | None | |
| Reddish brown | Beautiful texture, high strength, very pleasant aroma, beneficial effect on the human body, does not rot | High price |
The wood must be dry, dense, without cracks or other defects, with a smooth surface. The higher quality the lumber, the longer the furniture will last. Raw boards are more difficult to process, and finished products become deformed when drying.
Texture of different types of wood
Bath hanger
Option 1
To create a hanger you will need:
Step 1. Each workpiece is planed on one side with a plane along the entire length to approximately ¼ of the thickness of the branch. This side of the branches will be attached to the base.
Step 2. The ends of the branches on the workpieces are treated with sandpaper, rounding off the cuts.
Branch arrangement option
Step 3. The board is sanded, then covered with stain along with the branches and dried.
Step 5. Holes for dowels 2 cm deep are also drilled in the board according to the markings, after which the branches are fastened to the base. When using nails or self-tapping screws, the caps are recessed into the wood by 1-2 mm, and then covered with heat-resistant putty to match the color of the wood.
Prices for stain
Flower pots
Every gardener has flower beds, and an old bucket is ideal as a pot for them. It will be enough to sand the surface a little and paint it in your favorite color. The imagination here is limitless - you can decorate the buckets with drawings, tie them with decorative mesh, attach thin twigs around the perimeter and many other options.
Photo from the site https://
Advantages and disadvantages
When setting up a bathhouse, you should remember that the temperature there is quite high and there is a danger of getting burned. Therefore, you need to select equipment with care. Wooden utensils are best. Particular attention should be paid to:
- It must be wooden. Basically, this material is notable for the fact that there is no such danger of burns as from metal. A plastic basin is safer in this regard. But at high temperatures in the bath it can release chemicals that are harmful to health. And the fumes coming from the tree, on the contrary, are only beneficial.
- Making it yourself is quite difficult, but possible. You just need to choose the material for its manufacture and put in a little effort.
Basic criteria for choosing bath accessories
A rack with bath accessories is available in almost every supermarket with a department offering household goods. Specialized stores offer a wide range of bath accessories. Buckets for soaking brooms, tubs and basins for water will come in handy and make visiting the steam room efficient and convenient.
The main thing you need to pay special attention to when choosing bath accessories is the quality of the products. The bathhouse is characterized by high temperatures and high humidity. The accessories you choose must withstand regular use in extreme conditions, so it is not recommended to skimp on them.
Bath accessories are made from different materials, the most popular of which are:
Each of the above materials has its own advantages and disadvantages.
Experimentation and creativity
Rating 8What is centripetal force and is it possible to turn a bucket of water over yourself without being doused from head to toe? |
- Type
- Ask
- Send to a friend
- Share
- subscribe to news
Have you always thought that if you turn a bucket of water over your head, you will get wet to the skin? Then this experiment will definitely suit you. With its help, you can not only have a lot of fun, but also show your child the features of such a natural phenomenon as centripetal force.
You will need:
1) A small plastic or metal bucket up to 5 liters with a strong handle. It is very important that it does not come off during the experiment;
2) Clear water. You can even dial it warm so that it won’t be so unpleasant if the experiment doesn’t succeed the first time;
3) A long and strong rope that can support the weight of a rotating bucket.
Procedure:
1. The experiment should be carried out in an open space. It is highly not recommended to try to do the experiment inside the house because water can spill and damage the furniture.
2. Tie a long rope tightly to the handle of the bucket.
3. Fill the bucket halfway with water.
4. Take the end of the rope in your outstretched hand and begin to spin the bucket with movements left and right until you begin to spin the bucket in a circle. Try to do this quickly so that all the water remains inside the bucket. Be prepared that if the spin speed is not high enough, you will spill all the water on yourself.
5. When your hand gets tired of twisting, carefully, at the beginning of the descent after the peak point, slow down the speed of the bucket and smoothly stop it so that the water does not splash.
What's happening?
All bodies are characterized by inertia (from Latin inactivity) or, in other words, the phenomenon of conservation of speed. This means that when you spin the bucket and it ends up at the top point at which the water should pour out on you, in addition to the force of gravity, the force of conservation of speed acts. This is why the water does not spill out and remains in the bucket as long as you twist the rope at a sufficient speed. This is called centripetal force, that is, one that acts on an object moving along a circular path and is directed towards its center. Therefore, as long as you spin the bucket at a sufficient speed, not a single drop of water will spill out of it.
How else can you experiment?
Take a simple glass filled with water in one hand and quickly move it to the side. With your other hand, abruptly stop the movement of the glass. Some of the water will splash out. This is another great example of inertia. The water continues to move at a given speed even after the glass stops and therefore splashes out.
Data
1. The basics of our experiment with a bucket were described by Newton in his first law: a free body, which is not acted upon by forces from other bodies, is in a state of rest or linear motion.
2. The effect of inertia and centripetal force is used on attractions and satellites that are in low-Earth orbit.
3. In everyday life, you can see an example of inertia and centripetal force simply by knocking down the readings of a mercury thermometer with sharp shakes before use.
Rate this publication
Article rating: 4
out of 5 based
2
ratings.
Child development 06.11.2015
Traditions
The bathing traditions of our people have always helped people not only cleanse their bodies, but also relieve fatigue after a week of work, strengthen their bodies, and drive away all sorts of ailments. Along with body massage with a broom, contrasting water procedures were always used.
Having had a good steam, it was customary to jump out into the street and throw ourselves into the snow, or even into an ice hole. And if there was no such opportunity, then the people happily doused themselves from head to toe with ice-cold water from gangs and buckets.
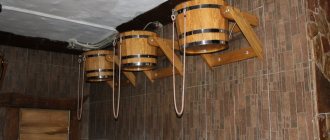
Later, they began to strengthen wooden buckets for the bath on the wall in such a way that they could be overturned sharply and pour water on the person standing below. This is how a contrast shower appeared, which to this day is considered the most useful procedure for hardening the body.
The principle of operation of the dousing device
The device, called a dousing device, is a modernized version of a wooden bucket. It was invented by ancient Russian bathhouse attendants. In the old days it was made from birch bark or from a solid log by chiseling a cavity. Later, bathhouses and other containers were made by coopers from neatly planed and polished wooden dies, tightly intercepted by two turns of rope or metal strip.
Two holes were made in the opposite walls of the wooden dousing bucket into which a wooden pin was inserted. A kind of brackets were made from bars or thin logs. They served as a support for the pin along with a dousing container rotating around it. To control the water supply, the bucket was equipped with a rope or a thin chain. In order to trigger a cooling waterfall, you had to simply “pull the string.” If they pulled harder, all the icy contents would fall onto the steamed body in an icy stream. If you weakened the applied force, refreshed yourself slightly - and adjusted the “parameters” of the water supply.
The dousing device was suspended from the ceiling of the bathhouse so that a person standing at full height could fit under it. There were no special rules for its location: they focused on convenience. To keep the water in the dousing bucket pleasantly cool, they tried not to install it next to the steam room. The difficult part was the process of filling the high-hanging container. Nowadays this difficult work is entrusted to a flexible hose connected to the bath water supply. The loud term “device” was obtained due to the installation of a signal-overriding system such as a toilet float. Other radical changes bypassed the main structural elements. Those. The dousing device remained a bucket suspended from the bathhouse ceiling, but much more advanced in terms of comfortable use.
Let us summarize and at the same time describe the main design components:
The presence of water supply in the bathhouse is a favorable condition, but not at all necessary for installing a dousing device. Nobody forbids you to periodically fill it manually.
The container can generally be installed outside to spontaneously collect very useful and soft rainwater. Mandatory for the internal location is a drain ladder through which water will be discharged into the sewer. However, there are exceptions: these are bathhouses with pouring floors and, of course, installing a pouring bucket in an open area outside the room.
This article will tell you more about sewerage in a bathhouse.
What is needed for a “Russian shower”?
The improved “Russian shower” attracts with its ease of use and design simplicity. Surely, the craftsmen examining the finished cooperage product had thoughts about applying their own efforts. Without a doubt, it’s easier and easier to buy, but it’s much more interesting to tinker with making it yourself. The process is extremely exciting, and the result can be boasted to your guests. And a considerable amount is saved, because high-quality models of dousing buckets are quite expensive.
We found out that to assemble an extreme shower with our own hands we will need:
- wooden container with a capacity of 10 to 40 liters;
- brackets capable of supporting the weight of a water container;
- preferred type float valve;
- metal rod - a piece of smooth reinforcement grade A3. The diameter of this rod can be from 8 to 14 cm, because the size depends on the calculated weight of the dousing device filled with water;
- ball valve;
- a piece of flexible hose.
You can purchase the entire list in a store and, by drilling three technological holes in a wooden bucket to install a metal axis and a float, you can quickly and easily make a dousing device. You can buy only that part of the mini-shower parts, which is pointless to do with your own hands. The home craftsman has economic justification for showing skill in making brackets and containers. So we will discuss folk methods of their production.
If you make it yourself
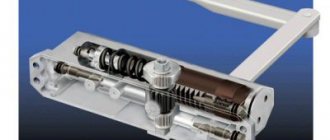
It is possible to make a dousing bucket for a bathhouse with your own hands, but it is not easy. Naturally, this formulation of the question concerns a classic wooden bucket, made in the best traditions of quality and reliability. And if there are no problems with the supporting frame, the hanging and tipping system, standard metalworking techniques are used here for assembling metal structures, then there may be a hitch with the manufacture of the wooden container itself.
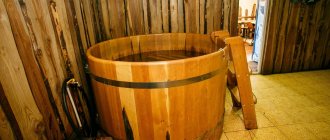
A pouring device for a bathhouse with a wooden container can be made in the form of a simple cylinder with a straight riveting and equal diameters of the neck and bottom, or in the more practical form of a jug, where the riveting is also straight, but the diameter of the neck is smaller than the diameter of the bottom.
By the way! This design allows for more dosed dousing, but at the same time requires greater effort on the chain or rope. Do you want the effort to be reduced? Make the neck wider than the bottom.
The most difficult thing is the manufacture of individual elements - rivets, design of the chimney and assembly of the structure, with adjustment to the location. In production conditions, manual labor is replaced by milling processing based on numerical control. This solves a lot of problems, from complex radius cutting to the design of a tongue-and-groove system with a given mating angle. In the conditions of home handicraft production you need:
Article on the topic: How to improve an old wooden house
- Jigsaw;
- Hand-held milling cutter with a device for radius milling and a set of cutters, with a shank mounted in a collet chuck;
- Electric drill or screwdriver;
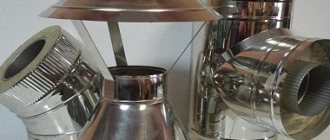
- Welding inverter for tension welding of tie hoops.
The sequence of work is as follows:
- In a calibrated board 20x50x250 mm, in the center of the side surface along the entire length, we use a cylindrical cutter to make a 5x8 mm groove.
- We produce planks 5×15×250 mm. they will play the role of a double-sided tenon, which will fit into the reciprocal grooves of the boards.
- We assemble the shield, carefully gluing the joints with polyvinyl acetate glue. We tighten the shield with clamps and leave it under tension until the glue completely polymerizes and gains the necessary bonding strength.
- On the plane of the shield we mark a circle according to the estimated area of the bottom.
- Using a jigsaw, cut out a circle along the contour. For this operation, it is convenient to use a blade for figured cutting, which has a smaller tooth size and pitch, as well as a smaller width relative to a standard cutting blade.
- The edge of the circle is processed with a profiling cutter to a thickness of 10 - 12 mm.
- We make a typesetting strip for the walls of the bucket. Its dimensions should be within 20×50 mm and a length that determines the height of the bucket. The side of each plank should be cut at an angle of 10 degrees, directed inward. Trimming can be done with the side edge of a cylindrical cutter, having previously given the angle to the workpiece using substrates of the required thickness.
- At the bottom of the planks we mill a 5x11 mm groove at the same distance from the edge, approximately 25 mm
- We collect all the planks around the bottom, stuffing them “pull” onto its edge. You can temporarily unfasten the set using twine.
- From a metal strip 30x2.5 mm we tie the set from below, determining the length. Let's cut it off. At the edges of the future hoop, we drill two holes on each and screw two corners with a hole in the shoulder in the middle, into which a tightening bolt is inserted. We bring the edges together end-to-end and weld. We repeat the operation for the middle ring and the top one.
- We weld or screw metal ears on the top ring.
- We place the hoops on the bucket, tapping them evenly with the nose of the hammer, avoiding distortions.
- We process chamfers on sharp edges.
- Check the bucket for leaks. If necessary, wax or soak.
- We fasten the bucket on a suspension, equipping it with the necessary fittings to fit the location.
Considering the prices for industrially made buckets, especially if you have wooden blanks, the necessary tools and desire, then it’s definitely worth a try.
Furniture for baths and saunas made of wood
Now it's time for the interior arrangement of the bathhouse! Shelves and benches, a table, a couch for relaxation and other furnishings must not only be selected correctly, but also correctly placed indoors so that they can be used conveniently and safely. Furniture for baths and saunas can be bought ready-made or ordered from a craftsman according to an individual sketch, but many people prefer to make it themselves. The best material for this is wood. If you have carpentry tools and basic skills in working with them, making furniture will not be difficult.
Wooden furniture for a bath
It’s quite easy to make bath furniture with your own hands
Here's a bucket for mixing bait
It holds its shape well, but folds, it is smooth and very durable and allows you to mix the required amount of fishing bait.
If desired, you can also make a hinged lid for it, for example, to carry your catch in a car. And there are other methods to protect bait from rain or sun.
Anton Turishchev - Specially for the Samodelki FISH website, Ukraine, Slavyansk
- DIY fish dryer
- Catching live bait with a homemade trap
We are modifying feeder feeders
A rod stand is a necessary accessory when fishing with a feeder, because you need its correct installation, which facilitates the process of signaling a bite, for which the quiver tip is responsible. If the feeder rod is positioned incorrectly and is not in a stable position, it is impossible to clearly distinguish whether the quivertip is reacting to a fish bite or whether it is swaying due to the wind or waves present in the reservoir.
So, let's start making the rocker arm
To do this, we will select a suitable raw birch with a diameter of at least 80 mm and a length of approximately 1.5 m. We will not remove the birch bark (my mentor claimed that it holds water well), we will use an ax to give the workpiece a rough rocker shape with a margin for deformation during drying (see. Fig. 1). In this case, you should pay special attention to the place of the bend - you need to make sure that it is of the same thickness along the entire length and does not have knots or cracks. Sometimes small cuts 2-3 mm deep are made at regular intervals on the inside of the future bend of the rocker arm.
Rice. 1. Preparation of the rocker arm (a is the starting size).
At the ends of the rocker blank opposite to the cuts, small notches are made for twine, with the help of which the ends of the blank are pulled together, bending the future rocker. Before bending the rocker, the ends of the workpiece must be immersed in boiling water for 5-10 minutes, so that later, when drying, the wood does not crack in these places - this is how the master explained. Next, the bend of the rocker arm is soaked in water, thoroughly steamed over a fire and, using a string and a stop, bent to the desired radius, making sure that the curvature of the bend of the rocker arm is smooth and uniform. Having reached the desired position, fix the rocker arm in the bent state of the towline. After drying the workpiece, use a sharp ax and a plane to bring the rocker to the required size (see Fig. 2).
Rice. 2. General view of the rocker arm.
At the ends of the rocker, recesses are made into which buckets are hooked. Later, instead of recesses, they began to use metal hooks attached to the ends of the rocker. Typically, these hooks for hooking buckets are made from 4-6 mm steel wire. The shape and dimensions of the hooks are shown in Fig. 3.
Rice. 3. Hook for hanging a bucket: a - the hook itself; b - bracket.
To attach the hook, a small groove is cut out at the end of the rocker, the hook is driven into a pre-drilled hole and, just in case, the hook is secured with a bracket (Fig. 2). That's all - the rocker is ready!
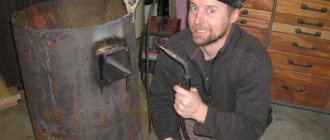
Bath bucket with plastic liner
You can make a doused bucket in the most primitive way, accessible even to people who have not previously had anything to do with wood. To do this, it is not necessary to become familiar with the basics of cooperage and learn to use special tools. A couple of simple steps will help you quickly make a wooden container that costs a lot of money on the market:
- To begin, select an ordinary plastic bucket of the most successful color. For example, white or azure blue. Water in such a container will look very advantageous.
- Next, remove the handle and any other parts present from the bucket. You don't need them at all. Don’t rush to throw them away; perhaps they will come in handy in the future.
- Prepare 25–30 not too wide sanded wooden planks. Their exact quantity depends directly on the size of the plastic bucket.
- Using super-resistant glue, attach the strips to the outer walls of the plastic container, imitating a wooden bucket. Coat the joints with transparent silicone.
- Cover the “wooden” container with a suitable varnish and strengthen it even more firmly with metal rings.
Appearance and volume
The design of the dousing container, regardless of the material used, consists of the following elements:
- A special bracket on which the container will be attached to the wall or ceiling;
- Directly the bucket itself (made of wood or other material) for water;
- Water level control connected to the water supply;
- Cords, strong ropes, chains with which the container will tip over.
The design is actually elementary, and even a novice amateur can handle it. Connoisseurs of the Russian bathhouse use exclusively a wooden dousing container. Despite the fact that caring for a wooden product requires additional effort, the external appearance of the wooden product looks harmonious and fits the interior of a natural Russian bathhouse.
The volume of the dousing bucket that is installed in the bathhouse can be different: from 7.5-8 liters to 20-22 liters.
Models on stands
Counter-mounted washbasins are containers with taps mounted on a frame. The frame has “legs” at the bottom that go into the ground. Thus, the washstand on the stand moves freely and is installed in any part of the garden plot. For ease of installation, a crossbar is installed above the support legs - this is a kind of “pedal”. You can quickly and securely install the structure by pressing the crossbar with your foot.
The frame structure of the washbasin on the counter must be reliably protected from moisture, especially its supporting parts that are immersed in the ground.
A tank with a tap can be purchased or made independently. Please note: the immersion depth of the legs for reliable stability increases in proportion to the weight of the structure. This is an important factor when choosing the tank material and its volume.
Features of sauna cages
You can’t do without this accessory in the steam room. It is used in almost all bath procedures. This universal product can be used to supply water to the stones in the steam room, contrast dousing, stirring aromatic oils in water, and brewing herbal healing infusions for inhalation.
Bath bowls are made mainly from the following materials:
Footrest
You will need 5 planks 600x70x20 mm, 2 planks 400x70x20 mm and a block 50x50 mm for making the legs.
Step 1. Well-polished planks 600 mm long are laid out in a row on a flat surface. Gaps of 10 mm are left between the slats and aligned along the length.
Step 2. Place two transverse planks on top, placing them along the edges of the planks, flush with the ends. The product is secured with screws.
Step 3. The block is cut into pieces 3-4 cm high; these will be the legs for the stand. They are applied to the transverse strips at the corners and secured with screws. Finally, treat the stand with stain or colorless wood primer.
You can make the stand not with a straight surface, but with a rounded one, which is much more comfortable for the feet. How to do this is detailed in the video.
Making a bucket
The photo shows the process of making the vessel.
So, if you have not yet changed your mind about working with your hands, then here are a few instructions for you on how to make a wooden bucket:
- From the boards we assemble a square shield, the side of which is equal to the diameter of the bottom. We connect them with glue dowels and compress them with clamps until dry. Then use a jigsaw for wood to cut out a circle;
We cut out a circle from a board panel.
- On both sides along the edge of the bottom we chamfer to a depth of 2.5 - 3 mm;
We remove the chamfer from the edge of the bottom.
- We cut the required number of boards (depending on the size of the vessel), clean and sand the cut area. At a distance of 3 - 4 cm from the edge on one side of each board we make a rectangular groove 4 mm deep and 1 cm wide;
The bottom will be inserted into the groove.
- We profile the ends of the boards for a round groove and a round tenon, as shown in the photograph;
We mill the board.
- On the front side of each board we make two grooves into which a strip of steel hoops will fit. We cut the strip so that when it is wrapped around its ends almost touch, and then we bend it 2 cm from each end at 90˚ and make holes in these ears slightly larger than the diameter of the bolts;
We make clamps from steel strip.
- Place the boards on the bottom, gently tapping them with a mallet. We insert the last board from above and hammer it into the general row with a mallet. For convenience, the boards can be tied together with twine;
We assemble the walls from boards.
- We put on the hoops and tighten them first with an adjustable wrench and then with nuts. We make sure that the boards lie level.
We tighten the products with clamps.
Important! After assembly, the bucket must be lowered into water so that the wood swells and all the cracks close.
Bath shelves: the basis of a good steam room
Bath shelves
- Measure the length of the shelves from wall to wall of your steam room. Leave a ventilation gap 10 cm wide.
- Mount the shelf frame from timber and galvanized corners. The length corresponds to the room, the width is 600 mm.
- Mount the frames with screws to the walls at the same height. Be sure to use a level to ensure the shelves don't warp.
- On the outside of the frames, install plywood strips for the ventilation hole.
- Attach the manufactured frame to the frame, securing it to the wall with screws.
- Produce and install the bottom shelf in the same way. Its recommended width is 400 mm. The length matches the room.
- For both shelves, make a lattice from slats. This will be the base of the shelf. If desired, you can make a backrest from a similar lattice.
It is advisable to impregnate bath furniture with special antiseptic compounds
- Cut five blanks two meters long from the boards. From these you have to assemble a tabletop.
- Cut one of the boards to a size of 150 cm. It will fasten the table legs together.
- Lay out five boards to form a future tabletop. Step back 30 cm from the short edges of the table and attach a thin block with 5 screws. Then step back 35 cm from the same edge, and strengthen another similar block next to it. The ends of the bars should be cut at an angle of 45 degrees.
- Attach similar bars on the opposite side.
- Make the table legs. These are 4 pieces of timber 70 cm high. You also need to make supports for them. These are 4 blanks in the shape of a trapezoid with angles of 45 degrees.
- Assemble the legs. To do this, insert two 70 cm pieces between two trapezoidal blanks and fasten the structure.
- Insert the finished legs between two bars mounted on the tabletop. Fasten everything with self-tapping screws.
- Insert a prepared board 150 cm long between the legs. If you calculated everything correctly, then on each side it should protrude 4-5 cm. Strengthen the board.
- Round all the parts using a jigsaw.
So, wooden furniture for a bath is a classic version of its design. If it is made correctly, it will last for decades. It is not difficult to make it yourself. But to make the products practical, simple, durable and non-hazardous, you need to know a few nuances. Do not clutter the bathhouse with unnecessary utensils. Incorrect placement of furniture in the steam room prevents free air circulation.
Preliminary preparation of lumber
Be sure to keep in mind that the humidity in bath rooms is very high. Before making furniture, treat the lumber with antiseptic and special polymer preparations. So, your furniture will last much longer!
Do not forget that it is strictly prohibited to coat furniture for bath rooms with varnish! This is because it contains chemicals that, when heated, can be hazardous to your health and the health of your friends.