Spray device for a bath: advantages and disadvantages. Installation of a shower bucket for a bath
- Dousing bucket for a bath: principle of operation, advantages, disadvantages
- Where to install a bucket for dousing with cold water?
- Dousing bucket for a bath: installation. How to make a bucket with your own hands?
A visit to the bathhouse is a whole ceremony that includes a number of stages: warming up in the steam room, cooling down in the pond, relaxing in the relaxation room or on the terrace. But what if there is no lake or river nearby? Of course, someone has a bathhouse with a pool or a font, but it is not always possible to install them. A cheap alternative that takes up very little space is a dousing device.
Bucket for dousing in a bathhouse: technical requirements and installation tips
The dousing bucket can have any volume based on personal preference. The location of the device should be carefully considered so that in the future you do not have to move it to another place.
Often, a shower bucket for a bath is installed in the washing room, fixed to a wall or partition, or at the exit from the steam room. If you plan to install a small waterfall, then there is no need for a centralized system.
The most crucial point is choosing the appropriate height for installation. Many experts recommend installing a dousing bucket at a height of 2 m, regardless of the volume of the wooden product.
Dousing bucket for a bath: principle of operation, advantages, disadvantages
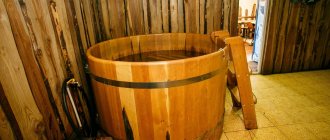
The dousing device is a classic large wooden bucket mounted on the wall. It is often called an upside-down bucket, because the device has a chain or cord; just pull it and the bucket will turn over and pour water on it.
Such a bucket has been used since ancient times; in the old days it was made from birch bark or from a solid log by hollowing out a cavity. Later, the container began to be made from wooden planks connected by metal strips.
The dousing bucket works as follows: open the tap, fill the container with water, when it is filled to the required level, the float switch will shut off the flow. When the rope or chain is pulled, the water pours out, the float goes down, and the water is again drawn to the required level.
Article on the topic: How to make a window to a bathhouse with your own hands
Each dousing device for a bath consists of the following elements:
- the container itself;
- brackets for mounting to the wall;
- water level control systems;
- rope, with the help of which the container is turned over.
As you can see, the design is incredibly simple, so even a novice master can make a dousing bucket for a bathhouse with his own hands. If you don’t want to make a bucket yourself, you can buy a ready-made one.
Such a device will cost several times less than a swimming pool, plunge pool or even a shower.
The disadvantage of a dousing bucket is that it must be filled with water in advance, because the bucket must swell, otherwise cold water will pour out through the cracks.
At the same time, you cannot keep a wooden container filled with water all the time, because the water will begin to become cloudy, an unpleasant odor will appear, and the wood will rot. For this reason, some people prefer plastic containers.
Price
If you don’t want to spend time and effort making a dousing bucket for a bathhouse with your own hands, a ready-made design can be found in specialized stores. True, the prices for wooden “shifters” are rather high. A budget purchase would be a bucket made of pine with a plastic interior with a volume of about 10 liters. Experts advise overpaying a small amount and purchasing a 20-liter bucket. The difference in price will be insignificant, and a larger capacity container is much more convenient and practical.
Significantly more expensive are those made of linden wood with a stainless steel liner. There are several well-known companies that produce the highest quality wooden buckets designed for baths. When choosing a global brand, you will have to shell out a lot of money, but you will be sure that you are purchasing a product that will last for many years.
Products made from oak or larch will cost an order of magnitude more. On average, the price for an oak bucket with a volume of 20 liters is 150-200 USD.
Bath procedures have a beneficial effect on the condition of the human body. It doesn’t matter which dousing device you choose: factory-made or home-made. Wellness bath treatments will help improve your health, lift your mood and resist viruses and germs. A wooden container for pouring is not only good for health. It will also be a pleasant addition to the eco-style bathhouse. Once you try the douche after the steam room, you will no longer be able to deny yourself this pleasure.
How to choose and install a shower bucket for a bath
Bathhouse is a traditional Russian way of spending leisure time. And this is not just an opportunity to wash. After taking a steam bath once, you always want to return, because it gives an unforgettable experience. The same applies to the sauna.
There are many traditions associated with the bathhouse, which have turned into a real cult. One of these traditions: after taking a steam bath, plunge into cold water. This is necessary primarily for hardening. In addition, such a simple procedure gives a whole whirlwind of emotions and sensations.
However, what to do if there is no pool in the premises and there are no bodies of water nearby? The best way to find yourself in a stream of ice water is a dousing bucket for baths and saunas, or a waterfall bucket. It allows both adults and children to comfortably douse with cold water.
A few subtleties
We've sorted out the location, now let's move on to the next nuances - the necessary elements and maintenance. To supply water, you will need a filling spout, a tap and a flexible connection, which can be purchased either separately or as a whole set. As for care, it won’t be difficult at all. You only need to regularly wash the inside of the bucket and monitor the condition of its components.
Important! If you place a bucket outside at the entrance to the bathhouse, you must ensure that no water remains in the container during the cold season.
How do you feel about dousing from a bucket? Share in the comments. And
subscribe to the channel so as not to miss other subtleties of arranging and visiting the steam room.
I’m talking about the nuances that will help make your stay in the bathhouse enjoyable, useful and safe.
Source
How to use a dousing bucket
The device, which is used for dousing in a sauna and bathhouse, is a wooden bucket reinforced with hoops. It is installed in a special way on the tilt system. This device is also called a bucket-waterfall. The entire structure is fixed to the wall or ceiling using brackets.
Article on the topic: Why are eyes red after a bath?
It is better to install a dousing bucket for a sauna and bathhouse in a place where there is access to water and sewerage. Modern devices have special valves that work in a similar way to a flush cistern in a toilet. When enough water is collected, the float valve rises up, and when it is completely poured out, the valve moves down, stopping the flow of liquid into the bucket.
In order for water to independently flow into the sprinkler, the bucket is connected to the pipes supplying it using flexible hoses. The dousing procedure goes like this: a rope hangs from a bath bucket, attached to the wall of the container. By pulling this rope, a person turns the bucket over and showers himself with cold streams.
The harder you pull the rope, the greater the flow of water that will fall on the bathhouse visitor. This way the person regulates the pressure himself. Everything is very simple!
Requirements for installing a dousing bucket in a bathhouse
If the size of the dousing bucket can be chosen personally by the owner of the bathhouse (large and tall or small and wide), then its location must certainly meet special requirements.
In most cases, the upside-down bucket is installed in the washing room: water is supplied there and the drainage system is set up. Although the presence of running water is not at all a prerequisite for the functioning of the “Russian shower”. Water can be brought to the container using a flexible hose or simply poured manually while standing on a bench. Sometimes a dousing bucket is installed directly on the street near the bathhouse. This option allows you to collect and use healthy rainwater for good purposes. But it is worth remembering that drainage on the street is no less necessary than inside.
The most difficult stage of installing a bucket in a bathhouse is correctly determining the required height. For people of average height, the recommended height is 2 or 2.2 m. For tall owners, it is worth setting the mark at 2.6–2.8 m. In any case, a person should be placed under the dousing bucket with their arms extended to the top. Do not forget that the vessel will turn over. Therefore, it is worth adding the height of the bucket itself to the planned mark.
Calculation of the level for a person with average height will look something like this: 170 cm (height) + 40 cm (at arms length) + 40 cm (tank height) = 2.5 m.
Regardless of the choice of location for installing the bucket, the mount must be strong enough and durable. Keep in mind that the fasteners must be able to withstand at least 60 kg! In the traditional version, the container is secured to the wall using metal brackets (even better, stainless steel). To create a movable connection, special ears can be welded to the barrels of the container. And it’s even easier to install a stainless steel rod that passes right through the wooden boat.
Materials and appearance of buckets
Traditionally, bucket-waterfalls for saunas and baths are made of wood. The most commonly used types of wood are natural and stained oak, larch, and cedar wood.
Less common raw materials in the production of drenching devices for baths and saunas are linden, birch and alder. This wood is characterized by excellent resistance to water and wear, and high strength. You can find dousing containers, the inside of which is covered with plastic. This is done for additional strength and to prevent the wood from drying out.
The appearance of dousing devices for baths and saunas is very diverse. You can find buckets of different shapes, colors, and volumes. Therefore, there will be no problems in choosing a design that will best suit the interior of the bathhouse. The capacity of the containers is usually 10-30 liters.
Installation of a bucket in a bathhouse
Another undoubted advantage that a bucket-waterfall provides for bathhouses and saunas is ease of installation. Usually, when purchasing a kit, you can find instructions with a detailed description of how to install and use the sprinkler device. The optimal place to install the bucket is the washing room.
Article on the topic: How to properly heat in a water bath
Useful bath procedure
It can also be a shower, which is especially convenient, since there is a drain, a water supply, and a sewerage system. But it is better not to install a bucket-waterfall in the shower, since if several people take a shower, this will create inconvenience and can ruin the pleasure of the procedure. It is advisable that the shower fixture be located in a small separate room next to the shower.
The waterfall bucket should be installed at a height of approximately 2.2 meters so that a person of any height can be exposed to a stream of cold water without bending over or feeling the force of the water jet.
Like any other bath fixture, the shower bucket requires maintenance. It is advisable that there is always water in it, otherwise it may dry out, cracks and damage will appear.
If these shortcomings already exist, then a few hours before dousing it is recommended to fill the waterfall bucket with water. At the same time, the wood will swell, eliminating all openings and cracks. The most reliable is a dousing bucket coated on the inside with plastic. In this case, the tree will not be exposed to strong water, and the dousing device will last much longer.
Practical recommendations for self-production
Having dealt with the technical aspects a little, let’s move on to direct actions for the manufacture of a functional dousing device. The whole short process takes place in several stages:
- we select a plastic bucket of white or azure color, the water in it will look more advantageous;
- remove the handles from it;
- prepares 25–30 polished boards with a length equal to the height of the bucket;
- We fix the strips around the bucket with moisture-resistant glue, and coat the joints with colorless sealant.
The wooden bucket with a built-in plastic liner is ready, all that remains is to secure it to the bracket. You can go the other way and make a “wrapper” from the clapboard used for interior wall cladding. You will probably have some scraps left over. But this is a more technological process; you will have to soak the panels and tighten them around the bucket. For those who have not encountered wood processing, this option will be difficult. But still, as a small educational program, we will also consider a method for individually assembling a dousing device from wooden planks without tongue-and-groove fastening.
Pouring rules
When using a waterfall bucket, you should be careful and adhere to safety regulations. Of course, everyone knows about the benefits of this method of hardening: it increases immunity, normalizes the functioning of the heart and circulatory system, and even simply improves mood. Hardening gives a person vigor and energy. But to achieve the desired result, you need to act wisely.
Rules should be followed to make dousing safe and beneficial. For example, you cannot douse yourself with cold water, like from a shower: with low pressure and gradually. Water should pour out on a person in an instant, in a single stream. This way the visitor will not get hypothermic. It is not recommended to douse the head, since this organ is not only vital, but also very susceptible to cold.
If you follow these simple rules, then pouring cold water from a bucket will become a real pleasure, which also brings health benefits.
Article on the topic: Why is a wooden house cold?
A dousing device for baths and saunas is an excellent choice for those who love bath procedures. It will allow you to diversify your leisure time, temper yourself, and get a storm of emotions. In addition, a bucket-waterfall will decorate the interior of the room. After you try dousing at least once, you will inevitably want to repeat it again and again. The main thing is to do it wisely.
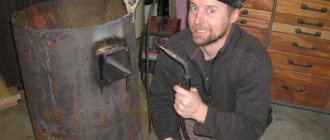
Making a dousing bucket from wood with your own hands
You can make a simple dousing device for a bathhouse with your own hands at home. The whole process is as follows: preparing a wooden container, connecting a water level control system to it, supplying water using a pipe and hose, preparing brackets. The best material for fasteners is stainless steel, which is resistant to corrosion and high moisture.
A home waterfall for a bath can be made from a board (grade 1) 10 mm thick, a metal strip for rings with a width of 2.5 to 4 cm. The output will be a container with a volume of 10 liters and a height of up to 45 cm.
All work on the manufacture of a wood dousing container is carried out in the following order:
- Preparation of a template for the manufacture of the main side parts (rivets) and the bottom of the product.
- Cutting the boards into the required parts in accordance with the prepared template. Processing elements with a mechanical plane.
- Cleaning each part and giving them a trapezoidal shape for easy assembly of the structure.
- Marking the outer and inner sides on the parts. The ends were cut at a slight angle (3 degrees) so that when assembling the rivets, a circular structure was obtained.
- The cutout of the recesses in each side element is 3.5 mm with a distance of 3.5 cm from the bottom of the structure. The recesses are provided for fixing the bottom of the product.
- First assembly of the container. All parts are assembled one by one, fastened with wire, and numbered. The diameter of the bottom is determined.
- Cut the bottom according to the prepared template. The upper and lower parts of the ends are sawed off to form a circle. In this case, the bottom diameter should be 10 mm less than the original one.
- Measuring the metal strip for making the bottom ring. Using a hammer, the product is given a rounded shape. Holes and a connector for them are made at the ends.
- Making clamps from metal strips.
- Installation of side rivets located opposite each other to the finished ring, with additional fixation with clamps. According to this scheme, the entire volume of the bucket is filled around the circumference.
- Installation of the bottom of the structure with reliable fixation.
- Measuring the upper circumference of the finished container, making the second ring. Installation at a distance of 12 cm from the top of the bucket.
- Washed down and polished the product to eliminate unevenness and roughness.
A factory poured bath bucket is sold with an installed control system. The home design of the device requires self-fixation of such a system. To do this, you can purchase a regular float valve, identical to the one used in modern flush tanks.
A dousing device for a bath is the optimal solution for lovers of health-improving bath treatments. It will improve your health, refresh your body and get a lot of pleasant emotions.
In addition, a wooden container will be an excellent decorative element of any interior. After your first acquaintance with such a device, dousing yourself with cool water after visiting your home steam room will become a good tradition.
Source
Description of dousing devices for baths and their installation
- What it is?
- What are they?
- Popular models
- Tips for choosing
- Installation stages
- Selecting a location
- Water supply
The bathhouse is a unique place where you can not only take water treatments, but also relax with company. Visiting her is a ritual that includes a number of moments. Warm up in the sauna, cool down in the snow or lake, relax. But if there are no reservoirs, rivers or lakes near the house, you can build a swimming pool. Unfortunately, not everyone has this opportunity. Therefore, the ideal option in this case (which will take up little space) is a dousing device.
What it is?
Many people know that dousing with cold water is hardening. It is especially good to do this after staying in the bathhouse. This effect is often compared to a contrast shower.
Previously, when there was no running water in the bathhouses, water was carried in buckets for the water heating tank. Therefore, there was no need for special dousing equipment. He took the bucket and went outside.
Gradually, when it became possible to install plumbing, many people had a question about how to douse themselves now. The answer is simple - a dousing device. But what is it?
The dousing device consists of three main parts, namely:
float that controls the liquid level.
This also includes the ropes that are used to turn the bucket over.
Such a device is installed in a bathhouse, washing room, sauna, bathroom, or in a specially designated place (above the font). And also some install this structure on the street, in a convenient place.
The device has a number of advantages that are worth paying attention to.
Article on the topic: How to properly prepare birch brooms for a bath
Availability. In any specialized store you can find a bucket for dousing. You just have to ask a consultant and select the required size and additional elements.
Long service life. This unit does not have a limited time of use, which makes it more attractive to purchase it.
Ecological materials. Buckets are mainly made from wood (you can also choose the wood to suit your taste).
Easy to assemble and install. This design can be assembled and attached independently.
How it works? The bucket is filled with water. This is done in advance on purpose so that the wood swells and liquid does not flow through the cracks. The required volume is collected. If there is a water supply to the system, then a special float will control the water level, which will turn off the flow of water when it reaches a given level. If you pull the rope, the bucket will tip over and the float will start working again, filling the container.
Installation rules
The dousing bucket is attached to the outside using metal rings. For fastening, a special inclined system of metal brackets is used.
The container should be installed where there is a constant supply of water and proper drainage. The bucket has valves, and its operation is similar to the flush mechanism in toilets. After the container is completely filled with water, the valve floats to the surface, and when the bucket becomes empty, the valve sinks to the bottom of the container.
There is an option to automatically fill the tank. In this case, the container is connected using flexible rubber hoses to the water supply system.
How does the dousing process take place using a bath bucket:
- The waterfall bucket is filled with cold water.
- After the steam room, a person stands directly under the container and pulls a rope or chain attached to the bucket.
- Water pours out of an overturned container.
If you pull the rope with all your might, more water will pour out on the bathhouse lover. This way you can regulate the volume of liquid poured out.
Often the device is installed in a separate room of the bathhouse, in which the water drains. In such a room, the walls are coated with a special water-repellent agent. If it is not possible to mechanically fill the tank, water is poured manually.
Some bathhouse attendants attach an upside-down bucket at the outer entrance to the bathhouse. Usually the “street” bucket is filled with water independently, but additional automatic water supply can be carried out.
Particular attention should be paid to the brackets with which the container will be attached. They must support a minimum of 60 kg of weight. Basically, a mount made of stainless steel is used. The most basic fastening option is a mechanical rod that penetrates right through the upper part of the structure.
At what height should the bucket be mounted? Usually they are guided by the average height of bathhouse attendants, placing the structure at a height of 220 cm. But you can calculate the individual height if people who are taller than average will be steaming in the bathhouse.
The most difficult moment in installing a waterfall bucket intended for a bathhouse is installing a mechanical water supply. At the height of fixing the container, a water pipe is laid and a special tap is installed. A rubber hose is connected to the pipe (it can also be made with stainless steel braiding). One end of the hose is connected to a float, which is located inside the bucket. The float will control the level of water in the container. The finished design must be pre-tested, and only after that it is put into operation.
What needs to be done in order to extend the life of the upside-down bucket:
- Before use, pour cool water into a new wooden tank and leave for 2-3 hours.
- Pour out the water and thoroughly wash all the walls with hot water.
- Under no circumstances use dishwashing detergents, floor cleaners or other household chemicals.
- The container should not be located near a hot stove.
- Do not place the bucket in an open area exposed to direct sunlight.
Adherents of natural ecology prefer to install a bucket outside where rainwater can be collected. This will be the most useful douche, provided that the bathhouse is located in an environmentally friendly area and the rainwater does not contain harmful chemicals.
What are they?
The designs of the dousing devices themselves are no different from each other. The main differences are only in the material, but the operating principle is the same. But it’s still worth considering what they are.
Basically, the buckets differ from each other. The average volume chosen for one person is 20 liters.
A volume of 30 or 40 liters is quite large, and it is usually chosen by people who have been hardening for a long time, and their body is resistant to such a large amount of cold water.
For people who have just started using this system, it is still worth paying attention to 10-liter buckets. This will allow you to get used to the procedure and will not cause the body to go into shock.
Solid oak, cedar or larch are usually chosen as the manufacturing material. This wood does not rot under the influence of water, which means it will last a long time.
Modern Waterfall systems have the ability to directly replenish water without human intervention. To do this, it is necessary to connect the water supply to the system, and the float will be responsible for adjusting the filling.
Article on the topic: Sulfur baths Tbilisi where to go
But over time, wood tends to dry out, so there are special plastic liners. They are either purchased separately for the required diameter, or built into the bucket itself.
Using the same principle, there are also models with a stainless insert in order to extend the service life. This is also quite convenient, since if the system is located directly in the bathhouse itself, then such inserts will prevent the container from heating up.
Price issue
You can buy a dousing bucket in a store, but the prices are, to put it mildly, quite high. The cheapest option is a pine bucket with a plastic insert with the smallest volume of 10 liters. A 15 liter bucket will cost only 20 percent more, and a 20 liter bucket will cost another 5 percent more. That is, perhaps it makes sense to pay a little more and take a bucket with a larger capacity.
Without a plastic insert, such systems will cost a little less, about 20%.
There are buckets for dousing with a stainless steel liner. Many people prefer this combination of materials. Linden is most often used as wood. Such systems cost much more, on average 50%.
Well, the most expensive types of such devices are products made from larch or oak. Among the highest quality companies, it is worth paying attention to BendWood. But you will have to fork out and pay three times more money compared to the cheapest solutions.
You can buy a dousing bucket in a store, but the prices are, to put it mildly, quite high. The cheapest option is a pine bucket with a plastic insert with the smallest volume of 10 liters. A 15 liter bucket will cost only 20 percent more, and a 20 liter bucket will cost another 5 percent more. That is, perhaps it makes sense to pay a little more and take a bucket with a larger capacity.
We invite you to read: Protection of the ceiling in the bathhouse above the stove
Without a plastic insert, such systems will cost a little less, about 20%.
There are buckets for dousing with a stainless steel liner. Many people prefer this combination of materials. Linden is most often used as wood. Such systems cost much more, on average 50%.
Well, the most expensive types of such devices are products made from larch or oak. Among the highest quality companies, it is worth paying attention to BendWood. But you will have to fork out and pay three times more money compared to the cheapest solutions.
Naturally, there are cheaper oak products on the market, from unbranded manufacturers, and you can save up to 50% of money.
Popular models
Several options are considered popular models among dousing devices.
"Waterfall". It occupies one of the first places because its operating principle is the simplest. By pulling the rope downward, the bucket tips over and the water pours out continuously in a waterfall. The system received its name for this ability.
- The second popular option is “Tumbler”. Quite an interesting model. Its principle of operation is that you need to pull the rope down, as if starting a mechanism, and the container tips over and swings, pouring out liquid.
- Easysteam "Cascade" is a modern model of a dousing system. It is made entirely of stainless steel, often square in shape. Its operating principle is similar to a shower. In this model, the trigger mechanism is a chain. If you pull it, water will flow in streams, like through a watering can. There is a “Rain” mechanism with a similar principle to this.
“Kolobok”, like the model presented above , is a modern version of dousing devices. It is made entirely of stainless steel, shaped like a cylinder, and has a small drain hole on the top side.
Features of operation
There are no complex structures or high-tech devices. This is an ordinary bucket, not plastic of course, but made of wood, matching the interior decoration, movably mounted on the wall. In terms of capacity, it can be larger than the standard 10 liters. With a free movement of the hand, pulling the cord or chrome chain, as you like, it tips over onto the visitor, showering him with a stream of cool water. Having released the rope, the bucket returns to its original position and is filled from the central water supply of the bathhouse.
For the first time, a primitive version of the dousing device was patented by our great-grandfathers. And the prototype was a container made of birch bark or a solid log with a hollowed out middle. At some time, the invention was forgotten. The widely developing bath industry made us remember this device, and today the upside-down bucket can be seen in many saunas and private bath buildings.
The design of a modern, functional dousing device includes the following elements:
- brackets for mounting the container on the wall;
- liquid level control systems;
- ropes or chain to operate the mechanism;
- capacity.
Everything is ingenious and simple. Even a schoolchild attending labor classes can make and install the mechanism. There are several design options developed by modern craftsmen. Naturally, the prototype for creation is a bucket, and the most problematic in this regard will be the manufacture of a wooden container.
But bathhouse craftsmen found a way out of this situation. Plastic inserts began to be installed inside. This liner allows you to avoid unnecessary hassle and at the same time maintain a presentable appearance.
Popularly, a shower device for a bath can have different names: homemade or hand shower, upside-down bucket, etc. But regardless of the name, its design includes:
- Container holding 10-20 liters;
- Water filling control system;
- Brackets for fixation;
- Rope for overturning the device.
The design is quite simple, and the execution can be varied. Devices made of wood look attractive. If they were purchased ready-made, then before using it, it is recommended to fill them with water and leave for 3-4 hours, allowing the wood to swell. In addition, you should not leave the bucket empty for a long time, as the tree may simply dry out.
Height
Determining the optimal mounting height is a very important installation step. For people of average height, a height of 2-2.2 meters is recommended. If you are tall, to determine the optimal height you need to stand up, raise your arms, measure the distance obtained and add the height of the bucket.
Water supply
Water supply is carried out as follows:
- Bring the water pipe to the height of the bucket attachment;
- Install a tap 1.5 meters from the floor to turn off the water supply.
Brackets
It is better to take fasteners from stainless steel. When making parts yourself, you need to take moisture-resistant metal. The brackets must support the full weight of the container and the water in it.
When creating a movable clamp that turns the bucket over, you need to weld iron brackets to the holder. Better yet, install a metal rod in it, passed through the container.
Like the container for steaming brooms, the dousing device (real professionals try to buy everything they need for a bathhouse) requires special care. Despite the presence of a float valve, which ensures that the tank is refilled with water, the walls of the wooden bucket used as the basis for the device may dry out. In turn, this leads to leaks and, over time, to the need to replace the container.
In order for the sauna spray device to serve for as long as possible, it is necessary to avoid turning off the shut-off valve during bath procedures. It is recommended to fill the container with water several hours before heating the steam room. Thus, the wood will swell, which will lead to the elimination of gaps and cracks in the structure naturally. True, these recommendations do not apply to the operation of devices in the form of plastic or metal containers.
Installing a dousing device in a bathhouse is an excellent solution that will allow you to diversify water treatments if you have a swimming pool, or will be a good alternative to the latter. Among the positive effects of sharply cooling the body with water, one can note not only a whole host of positive emotions, but also an increase in immunity and strengthening of the cardiovascular system.
Contrary to all stereotypes: a girl with a rare genetic disorder conquers the fashion world. This girl's name is Melanie Gaydos, and she burst into the fashion world quickly, shocking, inspiring and destroying stupid stereotypes.
9 Famous Women Who Have Fallen in Love with Women Showing interest in people other than the opposite sex is not unusual. You are unlikely to be able to surprise or shock anyone if you admit it.
Our ancestors slept differently than we do. What are we doing wrong? It’s hard to believe, but scientists and many historians are inclined to believe that modern man sleeps completely differently than his ancient ancestors. Initially.
20 photos of cats taken at the right moment Cats are amazing creatures, and perhaps everyone knows this. They are also incredibly photogenic and always know how to be in the right place at the right time.
How to look younger: the best haircuts for those over 30, 40, 50, 60 Girls in their 20s don’t worry about the shape and length of their hair. It seems that youth is created for experiments with appearance and daring curls. However, already last.
11 Weird Signs That You're Good in Bed Do you also want to believe that you please your romantic partner in bed? At least you don't want to blush and apologize.
Tags: bathhouse, bucket, dousing, installation
« Previous entry
Tips for choosing
After a hot steam room, it’s always nice to douse yourself with cold water to “throw off” all the heat. This is not only pleasant, but also very useful. Therefore, if possible, it is worth purchasing such a system.
But what should you pay attention to? After a long study of the varieties of dousing devices, it is worth thinking about exactly how much volume you need to purchase. On average this is 20 liters per person. But there are models with a larger number of liters.
Article on the topic: How to cover shelves in a bathhouse
Please also note that if you choose only wood as a material, you will need to take additional care of it. You should not constantly keep water in a barrel, as it tends to stagnate and freeze. Therefore, it is always worth draining the water. Drying can be avoided if you choose a coated bucket (plastic or steel). This, of course, is not necessary, but it will significantly increase the service life.
The main thing is the dimensions, namely the height. Due to the low height, sometimes one or another model may not fit and ruin the showering process.
Therefore, before purchasing this or that system, you need to make sure that the dimensions really allow for installation.
Installation of water supply system
Connecting the water is quite simple: the water pipe is brought to the level of the bucket installation. The water supply tap is mounted at a height of 1.2-1.5 meters from the floor.
Next, a flexible hose (plastic or rubber, or stainless steel braided) is attached to the pipe. If desired, a device for controlling the water level can be connected to the second end. It is similar to those that are built into toilet cisterns.
Now the installation and connection of a bucket for dousing in a sauna or bathhouse can be considered complete.
This design involves the use of a dousing bucket in the literal sense. The advantage is that even a person who does not have sufficient skills in working with wood can do it without anyone’s help.
You will need a simple plastic bucket, which will need to be finished with sanded strips. It is better if you can put a hoop around the perimeter, otherwise you will have to limit yourself to attaching the planks with glue. The resulting joints can be sealed with transparent sealant.
Additionally, you will need to install a water monitoring system. The same float with a toilet valve will do. Next, drill a hole in the wall to which water will be supplied, coat it with sealant, insert the system and connect the flexible hose. Now we can consider that the homemade waterfall bucket is ready.
Connecting the water is quite simple: the water pipe is brought to the level of the bucket installation. The water supply tap is mounted at a height of 1.2-1.5 meters from the floor.
Next, a flexible hose (plastic or rubber, or stainless steel braided) is attached to the pipe. If desired, a device for controlling the water level can be connected to the second end. It is similar to those that are built into toilet cisterns.
Now the installation and connection of a bucket for dousing in a sauna or bathhouse can be considered complete.
This design involves the use of a dousing bucket in the literal sense. The advantage is that even a person who does not have sufficient skills in working with wood can do it without anyone’s help.
You will need a simple plastic bucket, which will need to be finished with sanded strips. It is better if you can put a hoop around the perimeter, otherwise you will have to limit yourself to attaching the planks with glue. The resulting joints can be sealed with transparent sealant.
A stainless steel rod can be replaced with a wooden one, which is either turned or purchased ready-made. It will also easily withstand the required load, the main thing is that the material does not have cracks, knots or other flaws.
Additionally, you will need to install a water monitoring system. The same float with a toilet valve will do. Next, drill a hole in the wall to which water will be supplied, coat it with sealant, insert the system and connect the flexible hose. Now we can consider that the homemade waterfall bucket is ready.
In this situation, you can do this in several ways, and it is not necessary that there is a centralized water supply. If a large storage tank for cold water is installed in the bathhouse, you can organize a supply from it. The issue is not so much in the supply, but in the installation of a control device that limits filling.
Factory models are sold with already built-in sensors. The principle of operation of these devices is similar to the operation of the flush tank system. You can purchase the mechanism separately and install it on the supply pipe section. When filled, the float will rise with water and block the supply of liquid to the dousing device.
In the homemade version, it can be done easier. The water pipe is installed at the level of the container, and the tap that shuts off the supply is installed at a height convenient for you. Before entering the steam room, you can fill the bucket by opening the valve. A little primitive. But this option is simpler, and manual filling will take a little time.
A dousing device for a bath is a unique opportunity to diversify the adoption of procedures. For those whose dimensions do not allow them to build a pool, or simply because of a lack of funds to put it into operation, an inverted bucket will be an excellent solution to the problem.
Installation stages
Self-installation does not require special knowledge, but it will still require certain skills. You need to know how to supply water, how to properly attach the frame, what height to choose, and most importantly, how to choose the right place.
Selecting a location
When installing, the first thing to do is choose a location. If the bathhouse is large and has a special washing room, then the device will be installed there, because the room is already equipped with a drainage system, water supply, and the walls are moisture-repellent.
The structure can also be installed outdoors, without any water supply. Simply fill the tank yourself before each use.
When the steam room and washing room are combined (due to the small area of the bathhouse), it is best to install the system next to the water supply.
The most difficult thing in installation is the correct calculation of height. At what level should the device hang? This is especially difficult to do in rooms with low ceilings, because then you will have to figure out what to sit on (a small chair).
But if the ceiling height allows you to take a contrast shower while standing, then on average a person’s height plus approximately 50 cm is taken into account. That is, if a person is 1.70 m tall, then the system should be at a level of 2.20 m.
Article on the topic: What kind of foundation to make for a frame garage
It is also necessary to select the correct fastenings, because the total weight of the water tank is about 60 kg.
Water supply
If the bathhouse is equipped with running water, then bringing water to the bucket will not be difficult at all. The water pipe should be raised to the level of the bucket mounting; the tap itself for supplying water to the tank is mounted at an average height of 1.5 m from the floor. A flexible hose is led into the bucket itself from the tap. After the water supply is completed, a bucket is mounted, the hose from the tap is connected to a float so that it regulates the flow of water.
Description of dousing devices for baths and their installation in the video below.
Operating principle of the device
A dousing bucket for a bath is a wooden tank of a certain volume, reinforced on the outside with metal rings. The finished structure is installed in a wall or ceiling version on a special inclined system using metal brackets.
It is necessary to install a shower device for a bath where there is constant access to water and a drainage system.
The products are equipped with bypass valves, the principle of which is similar to the flush button in a toilet cistern. After filling the bucket with water, the valve floats to the top of the structure, and after tipping the container, it goes down.
To automatically supply water, the container is connected to water pipes using flexible hoses.
Technically, the dousing procedure using a dousing device is as follows: the sauna shower bucket is filled with water and is ready for use. The bathhouse attendant stands under it, pulls the rope attached outside, after which the container tips over and pours out water. The stronger the impact on the rope, the greater the volume of water poured onto the person.
Traditions
A modern bucket is a waterfall for a bathhouse.
The bathing traditions of our people have always helped people not only cleanse their bodies, but also relieve fatigue after a week of work, strengthen their bodies, and drive away all sorts of ailments. Along with body massage with a broom, contrasting water procedures were always used.
Having had a good steam, it was customary to jump out into the street and throw ourselves into the snow, or even into an ice hole. And if there was no such opportunity, then the people happily doused themselves from head to toe with ice-cold water from gangs and buckets.
Later, they began to strengthen wooden buckets for the bath on the wall in such a way that they could be overturned sharply and pour water on the person standing below. This is how a contrast shower appeared, which to this day is considered the most useful procedure for hardening the body.
Continuity
The photo shows an option for installing a dousing bucket in the shower for hardening procedures.
Today, many of the attributes and traditions of Russian baths are being actively revived. True, a modern bucket for pouring into a bathhouse is much more convenient than the buckets of our ancestors.
Article on the topic: Whose fence is to the left of the house?
Nowadays, more than ever, people need to relieve stress and improve their health. Bath procedures help remove harmful toxins from the body. They help improve metabolism and help harden.
A contrast shower has always been considered the best procedure that hardens and strengthens the nervous system. It is actively used for rehabilitation treatment in sanatorium and resort institutions.
Pouring ice water gives amazing results. The person becomes cheerful, the mood improves, and sleep is restored. This procedure can be used by all age groups.
Important. It is advisable to consult your doctor to see if you have any contraindications against such procedures.
Dousing devices
Some bath buckets are equipped with anti-overflow valves.
The most effective bath procedures are considered to be a massage with a broom in a steam room and subsequent dousing with ice water. Not everyone can afford to install a swimming pool or plunge pool in their bathhouse.
And a bucket for a bath will fit even in the smallest nook next to the steam room. The quite affordable price of these products allows you to install them not only in the bathhouse, but also in ordinary apartments above the bathtub for morning dousing.
Dousing devices should be made of wood, as before. This cooperage product is made by craftsmen without nails and without the use of adhesives.
The highest quality hardwood is selected for them:
- ordinary and stained oak, a very strong wood that is not subject to rotting;
- regular and stained larch, this wood is not afraid of water and does not rot;
- cedar is considered the most suitable wood in all respects; it softens water and emits phytoncides;
- tropical flounder tree.
Sometimes to make buckets they take:
- linden;
- birch;
- alder.
The wood of these species is also not subject to rotting, but it is softer than oak and cedar, and its service life is shorter. But manufacturers have found a way to extend their life. Buckets are produced with special plastic inserts, which slows down the aging of wood.
Article on the topic: How to seal cracks in a bathhouse
Installation
The dousing device is supplied with fastening elements.
The process of installing a dousing device with your own hands is not difficult; anyone who knows how to hold tools in their hands can handle it.
When purchasing this device, be sure to ask the seller for installation instructions. Such instructions from the manufacturer must accompany each device.
Advice. It is best to install the bucket on a wall at a height of at least 2.1 meters near the sauna. This height will allow people of different heights to use the device.
Usage
The dousing device can be installed outdoors next to the bathhouse.
A bucket shower can be easily installed in any bathhouse. When you pull the rope or chain, the bucket tips over. The effectiveness of dousing a body heated in a steam room with a large volume of cool water cannot be compared in effectiveness with a contrast shower.
The benefits of this procedure are much greater:
- Accumulated fatigue will instantly disappear;
- the blood rushing to the skin will give a powerful energy charge;
- After a cold douche, a person will feel fresh and invigorated.
But we do not recommend starting dousing with ice water if you have not performed this procedure before.
Here are some recommendations for dousing:
- Start dousing yourself with warm water;
- Transition to ice water gradually if you are doing this for the first time and your body is not accustomed to contrast procedures.
Dousing buckets require certain care:
- Before first use, fill a wooden bucket with cool water for 3 hours;
- after this, wash it thoroughly on all sides with hot water;
- do not use chemicals to wash the bucket;
- keep the bucket shower away from the hot stove;
- Do not store buckets near heating devices or in the sun.
Advice. If you live in an area with a clean environment, you can install such a bucket on the street, where it will be filled with rainwater. Such dousing will be doubly useful.
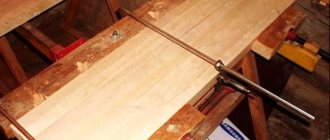
Working with wood
This process is more complicated, but visually the effect will be different. First, prepare a template for cutting out the bottom and side strips. We cut out several elements to size from a smooth planed board, which should be enough to line the bucket. To do this, first measure the circumference with a tape measure.
Then sand all the parts and mark the front side with a pencil or marker. Now you will need a jigsaw, although if you have an electric plane, it will allow you to make smoother cuts. You need to cut the side walls of each plank at an angle of 3 degrees, so that when connected they fit snugly against each other, forming a circle.
Next you will need a flat plane. If the floor is tile, work on it. Having processed the planks, lay them out in a row, and step back 4 cm from the supposed lower part, draw a line. Make a cut along it using a hand router. This will be a recess for installing the bottom. Then turn all the planks right side out and number them, then do your first fitting.
This work is best done together. One assembles and holds the panels, the other ties them with wire. Having fitted the parts, measure the radius of the bottom using the grooves cut inside the bucket. Then make a template and cut out the bottom of the bucket.