The steam room is the main room of the bathhouse, where people relieve fatigue and relax under the influence of therapeutic hot steam. Therefore, it should be equipped with comfortable shelves made of high-quality wood, designed for visitors to relax and take bath procedures. You can make bath beds yourself by choosing high-quality wood and strictly following the rules for their manufacture.
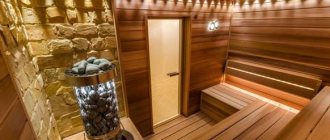
You can make sunbeds for the bath yourself. The illustration for the article is taken from open sources
Bath beds - how to make them yourself?
The steam room is the main room of the bathhouse, where people relieve fatigue and relax under the influence of therapeutic hot steam. Therefore, it should be equipped with comfortable shelves made of high-quality wood, designed for visitors to relax and take bath procedures. You can make bath beds yourself by choosing high-quality wood and strictly following the rules for their manufacture.
Please like and subscribe to the channel "
About Fazenda". This will allow us to publish more interesting gardening articles.
Orientation of shelves in the space of a paired room
In this regard, the variety of possible options is very large and you can choose the most optimal one for arranging your establishment.
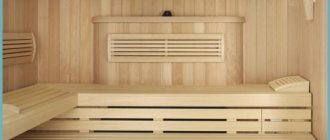
Linear shelves
They are oriented relative to only one wall. This circumstance simplifies manufacturing and installation, but somewhat limits functionality, especially in small rooms. Let’s say, making the flooring of the shelves for the steam room diversified just won’t happen on a whim. Linear shelves, in most cases, functionally correspond to uniformity in their design.
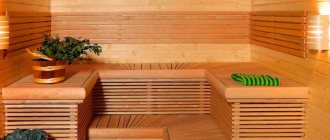
Corner shelves
More functional and free to use. Thus, the design of the front wall can be adapted to accept procedures while lying down, and the wing adjacent to it can be equipped for sitting. The transitions between them can be successfully and presentably played out by visually separating them with small but accentuated details. These may include the order in which the elements are laid out in the set, the type of wood, the very size and shape of the individual elements, and so on. At the same time, a canopy for a bathhouse of such a layout may require more voluminous space in order to prevent crowding of elements and banal cluttering of the usable area.
Choosing wood for making sun loungers
To make shelves, you need to choose wood that, when heated strongly, does not emit harmful resins, is resistant to temperature changes and moisture, and also has low thermal conductivity.
It is better to give preference to aspen, linden, birch or oak wood varieties. Accordingly, pine, spruce and other conifers are not suitable for steam rooms.
The loungers will be installed in a room with the highest possible temperature and humidity level, therefore, before their manufacture, all boards must be treated with special antifungal and antiseptic agents that protect against the appearance of fungi and the proliferation of pathogenic microorganisms.
To make sunbeds you need to have the following tools:
The entire structure is secured using wooden wedges or pins. If self-tapping screws are used, they must be placed only on the underside of the products or deepened into the recess. All boards for assembling shelves must be well cleaned with a plane and sanded.
Board fastening options
It must be reliable, but safe, therefore, when creating bath structures, several methods of fixing elements are often used.
- Fastening with self-tapping screws. The simplest method is to embed them in wood (5-6 mm). An alternative is to screw in the fasteners from the rear side of the structure.
- Oak dowels that are driven into pre-made holes. This method is completely safe, but quite labor-intensive.
The first method of fixation is the most popular, as it does not involve unusual actions. Connecting elements with dowels is recommended by experts, but this technology requires precise calculations and also leads to a greater loss of time, which is now worth its weight in gold.
The procedure for assembling sun loungers
First you need to prepare the boards by sanding all the corners with a sander. Instead of hardware, it is better to use oak wedges so that visitors to the steam room do not get burned on the metal elements of the shelves. If you make the structure of the sunbeds collapsible, the boards can be taken outside for regular drying. This will extend their service life.
Lounger with frame
Shelves without frame
The standard dimensions of shelves for a steam room are 180x90 cm. There should be a distance of at least 1.25 m between the ceiling and the top shelf, and it should retreat from the wall by about 10 cm to create a ventilation duct. If 2-3 tiers of sun loungers are installed in the steam room, they should have a distance between them of 40 to 60 cm so that people can sit on them without bending their back.
Mobile sun loungers and removable benches must be installed on rubber pads, which will ensure their stability on the floor surface. The bottom boards of the shelves should be at a distance of 10-15 cm from the floor. This will ensure good ventilation and the ability to clean.
If the bathhouse has windows, the sun loungers should be located at some distance from them so that accidentally cracked glass does not fall on people. This may happen due to high room temperature. Therefore, windows cannot be installed in the steam room, but only in the relaxation room or in other rooms of the bathhouse, where the temperature does not rise above +25...+30˚C.
Please like and subscribe to the channel “
About Fazenda ”.
This will allow us to publish more interesting gardening articles. Source
Folding the oven
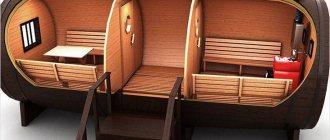
For a mobile bathhouse, you can make a stove directly at your resting place.
If you have a car, you can make a more advanced version from a pipe and a potbelly stove. Where can you get stones? It is better to purchase them in advance in the store, and find a few more cobblestones of not very large size on the spot. Stones bought in a store heat up instantly, but also quickly give off heat. Therefore, the stones you find will help retain heat longer.
There are three masonry options:
- Solid.
- Vaulted.
- With jumper.
It is worst to use the “solid” option, since the fire does not reach the top stones. The easiest way is to fold the stove with a jumper.
You can heat hot water for the bath on the stove using a metal bucket. It will boil within 3 hours. All that remains is to take a broom and pour water over the stones. Enjoy Your Bath!
Materials Dimensions Specification:
The main stages of making a sunbed for a bath:
1.
We will produce wooden assembly parts according to specifications.
2.
Lay the lying boards (1) on a flat surface. We align the ends of the boards on one plane. We set the same distance between the boards, equal to one centimeter.
3.
We fasten the lying boards (1) with connecting bars (2). The grooves in the bars are directed from the center of the boards to the edge.
Reference:
To fasten the parts we use self-tapping screws or wood screws. For one joint of parts, we use two units of fasteners.
4.
We insert the legs of the lounger (3) into the grooves of the connecting bars (2) and fasten them together.
5.
We attach the front (4) and side (5) crossbars to the legs of the lounger (3).
6.
We will install the assembled product on the legs, additionally process the front surfaces with fine sandpaper, smooth out sharp edges and remove burrs.
Share with your friends!
Kentucky chair
Let's consider the original version - the Kentucky chair, which is assembled entirely from bars. If necessary, the chair can be folded at any time and put away where it is needed for storage.
Kentucky chair
In order to make a chair you will need the following material:
- Galvanized wire with a diameter of 4 mm and 16 galvanized staples to secure the wire.
- Hammer and wire cutters.
- Fine grit sandpaper.
- You also need to take 50x33 mm bars, which are obtained if you cut a 50x100 mm board into three equal parts. If all the bars are put together, you should get 13 meters.
Build process
When the bars are ready for assembly, they need to be processed for strength (and protection from ultraviolet radiation, moisture, weathering) and to give them additional beauty.
Size and quantity table
To do this, the tree is treated with a stain called Beitz. To treat a sun lounger, you need to buy an external stain, the best of which are based on oils and wax). Among other things, you can use parquet oils, which are ideal for all wooden products.
Assembly diagram
You can apply a protective coating to the bars either with a brush or with a spray gun (the best option).
Assembling the chair
The diameter of the holes should be made one and a half to two millimeters larger than the thickness of the wire used.
We thread the wire into the bars
After preparing the required number of bars, it is necessary that the edges be carefully processed with fine-grain sandpaper. We begin to assemble the structure.
Raise the chair
You can also use galvanized studs (the edges are secured with eight nuts and washers) instead of staples and galvanized wire.
Grinding
After assembly, carefully lift the chair
How to make a sun lounger in a bathhouse with your own hands - expert advice
An important component in a Russian bath is a properly made lounger, or shelf (with emphasis on the last syllable). How to choose the right and necessary materials, as well as how to make and install a sun lounger in a bathhouse yourself, we will consider further.
From time immemorial, the unchanging attributes of a real Russian bathhouse are excellent spirit and massage with a broom. For this purpose, so-called shelves or sun loungers are provided, allowing you to sit comfortably and get the maximum benefit from the procedures performed. Therefore, they must be installed in such a way as to ensure comfort for both the steamer and the steamer.
The length and width of the lounger should be such that a person can sit on it at full height, and the height should be such that it is easy to get on and off it. However, despite the variety of information on how to make sun loungers in a bathhouse, a novice builder may encounter some mistakes that can be avoided by studying this article.
Necessary accessories for the procedure
In addition to a broom, to visit the bathhouse you will need:
- bathrobe;
- large towel;
- rubber slates;
- sheet;
- felt or wool hat;
- clean linen;
- hard mitten;
- washcloth;
- shampoo;
- soap or shower gel;
- drinks: tea, juice, decoction based on medicinal herbs, pure water without gas.
Representatives of the fair sex are recommended to take with them anti-cellulite products (if they have the problem of “orange peel”) and creams for the face and body.
It is not recommended to take alcoholic drinks with you to the bathhouse, as they create an increased load on the heart, which can cause a heart attack and other pathologies.
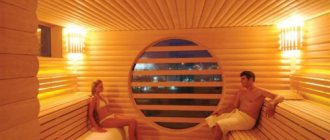
Sun beds for baths and saunas - what are their main differences?
First of all, what you need to remember when equipping a Russian bathhouse is convenience and functionality. The beauty and appearance of the interior are secondary in this case. Unlike a Russian bathhouse, which is saturated with steam, people usually come to a sauna to sit and bask in the dry air. And most of the multi-stage shelf projects presented on the Internet or in advertising brochures are still sauna beds.
They are not entirely suitable for a Russian bath for the following reasons:
Often, sauna manufacturing companies take advantage of the inexperience of buyers and sell them sun loungers and chaise lounges for baths in exquisite shapes and with built-in lighting. Unfortunately, over time, during use, their shortcomings and inconvenience for the Russian steam room become obvious. Therefore, there is a need to remake it in accordance with your needs and desires.
Notes
During operation, some shortcomings were revealed, mainly related to the stove.
First.
Initially, it was planned to install an ordinary cast iron stove door, but we liked the fireplace door with glass. And it is much larger in size, one and a half times. After installing it, the upper arch of the stove was at a short distance from the top of the door, 6-7 cm, with the recommended 15-20 cm. And therefore, when opening the door, especially when the stove is not yet heated, smoke jumps out and smokes the masonry (seen in the photo) . It’s good, of course, when the bathhouse smells of smoke, but it’s not very aesthetically pleasing.
Second
Since the door is large and expands greatly when heated, causing cracking of the masonry around it, it had to be lined with asbestos cord around the entire perimeter, and I laid asbestos only at the fastening points. By the way, all the supporting edges of the metal corners and plates used for masonry must be laid on asbestos and laid on top asbestos as well (sheets are sold in specialty stores). This can significantly reduce cracking of the stove masonry. Cracking of a brick stove due to uneven heating of the brick in the body of the stove cannot be avoided, and cracks still have to be greased once or twice a year.
The expansion coefficients of refractory (fireclay) and oven bricks are also slightly different. This is also one of the reasons for cracking of the masonry; it is recommended to make gaps between them, but then the heating of the furnace is much slower. I made a small gap just at the long ends where the various bricks meet and filled it with fine sand.
Do-it-yourself lounger in the bath: determine the size and position
Obviously, the height of the working lounger in the bathhouse should allow the steamer to massage with a broom while standing. At the same time, its position should be as comfortable as possible and not cause tension and discomfort in the back. Based on this, it is clear that you need to focus on the growth of the hairdresser. You can also determine a comfortable location by looking at a regular kitchen table. Its height will correspond to the optimal height of the working bed.
The following indicators will help you correctly design shelves in a Russian bath:
For the convenience of calculating the estimated width of a wooden bath bed, you can use the following example. In a steam room with a ceiling height of 205 cm and a wooden grate 5 cm high located on the floor, the working shelf will presumably be located at a height of 105 cm from the floor (or 100 cm from the ceiling).
This is quite high, which means that it would be advisable to install steps. In this case, it will be enough to make two of them: one, 45 cm high, placing it opposite the entrance, so that it is more convenient for the steamer to climb onto the lounger, and the second, 25 cm high, long, for the comfort of the steamer.
For a comfortable full-wall shelf, 280 cm long, you will need 8 boards, the width of which will be 13.5 cm. Taking into account the 1 cm gaps between them, the width of the lounger will be: 13.5 cm × 8 pcs + 7 cm = 115 cm. If you place another board on the side of the front side at an angle of 45°, the total width will be 115 cm + 13 cm + 1 cm (gap) = 129 cm.
The shape and arrangement of regiments as a functional feature
The shelves in the steam room consist of: a frame - a load-bearing frame structure that takes on the weight of the steamers and other loads that arise during the operation of the steam room and the flooring - a wooden plane that rests on the frame.
Basic geometric dimensions
Depending on the design features of a particular bathhouse, the width of the flooring determines the type of bathhouse. The indicator 550 - 600 mm means that the steam room is intended to be used in a dry bath mode with procedures performed while sitting. A width of 850 - 900 mm implies the adoption of procedures while lying down. Soaring with a broom determines another important indicator - the height of the shelf and the number of tiers.
A rational approach and common sense show that the shelves for a steam room where a broom is hovered have one tier. Their height is the distance from the floor to the palm of the freely lowered hand. It is quite obvious that the height of people varies within a fairly wide range; accordingly, in metric calculus, the height of the shelf from the floor ranges from 750 to 920 mm. If the soaring person stands not on the floor, but on a step - a kind of step, 270-320 mm high, then the height must be measured not from the plane of the floor, but from the plane of the step.
Attention! Active work with a broom implies the presence of sufficient space in the upper zone - from the shoulder girdle of the hover and above. Practice shows that for a person with a height of 178 - 180 cm, the distance from the flooring to the ceiling of 1450 - 1550 mm should be considered sufficient space in the upper zone.
In some regions, the starting point for the orientation that sets the shelves in the steam room is a stove - a heater. The height of its upper cut should be in the same plane as the flooring and, in fact, in this situation, the height of the stove is equal to the height of the shelf. Again, this is true for those baths in which procedures are performed mainly while lying on a shelf, with the active use of a broom and the use of an assistant in the person of a soaring person.
Types of shelves: fixed and free
Bath shelves can be attached or free. Let's translate slang expressions into a simpler and more understandable language:
- Attachment shelf - attached with mounting elements to the wall of a paired room. This is reliable and sound, but there is a danger of the fasteners “acidifying” in a humid environment. To prevent this from happening, the mating points are equipped with ceramic spacers. The most widespread are small-sized ceramic insulators, which were used in large quantities until recently in the installation of household electrical wiring;
- Free shelf - has no points of contact with the wall, but rests on the plane of the floor, as a result of which it has some freedom of movement in space, but at the same time is more demanding on the design of the supporting surfaces and their straightness.
The frame of the bathhouse shelf is made of ordinary wood, which has, first of all, such qualities as mechanical strength and resistance to the influence of adverse environmental factors in a steam room. It is quite obvious that additional convenience is provided by a folding shelf in the bathhouse. That is, the flooring, due to the movable loop connection, has a certain degree of freedom in movement and opens access to the internal space of the structure, which is never superfluous.
Another option could be a folding shelf for a bathhouse, when not only the flooring, but also the frame itself has movable joints that allow the structure to fold. On the one hand, this is extremely convenient in a small compact steam bath, when carrying out cleaning, routine repairs and other everyday tasks. On the other hand, we should not forget that any movable joint weakens the strength of the structure and to some extent reduces the load-bearing capacity that the floors in the bathhouse should provide. The rule, as old as the world, says that the simpler the product, the more reliable and durable it is. A bicycle is more reliable than a motorcycle, and a scooter, in turn, will give a bicycle a head start.
The flooring itself is more demanding on the quality of the materials used, because it is with its surface that the human body comes into contact. What are the requirements for it? He must:
- Possess a weak heat capacity. The leader in this capacity is the African maple - abashi, whose outstanding qualities were discovered by the Germans back in the last century.
- Have a pleasant texture, because in direct contact with the skin this is a very fundamental requirement.
- It is good to be machined without chips or burrs, and produces a surface of high purity and quality.
- Treated harmoniously and efficiently with protective compounds based on a mixture of beeswax and linseed oil.
- If no protective treatment is carried out, it is good to absorb sweat and retain it in the upper layers of the wood, which will be periodically removed by simple scraping.
The flooring is assembled from profiled polished planks with a spacing between individual elements of 8 - 20 mm. This distance should provide a compensation gap during swelling and sufficient air circulation and drying of the wood even in a solid structure.
The shelves in the steam room are, in some cases, equipped with railings. They provide:
- Fencing the heating space, which is especially important when using a metal stove without a brick casing;
- Convenience of lifting and lowering from the shelf for elderly people or people with limited mobility;
- Act as a fence for the upper perimeter;
- A small railing can serve as a footrest.
Important points when choosing a sun lounger
Standard bath benches
Often standard sauna shelves are unsuitable for a Russian bath. There are several reasons in this case.
In some cases, homeowners purchase a factory-assembled wooden lounger with various cutouts and lighting. It should be noted that such structures are remade with their own hands after a certain time.
Advice from the master!
Before you buy or make a sunbed, you will need to take measurements. The height is determined in such a way that the person lying down can rest comfortably in the steam room, and the steamer can work with a broom. Typically, the top shelf is installed at such a height that the steamer can work while standing. The average distance between the floor and the shelf in the steam room is 75-90 cm. The distance between the shelf and the ceiling should not be less than 25 cm. In this case, the lower shelves for the bath or steps are arranged 40 cm from the “working” shelf.
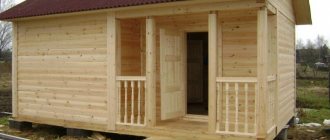
Finishing touches
To give the bathhouse a finished look, we equipped the porch with a canopy and a homemade staircase. The height of the steps on the stairs is 18 cm, the parts were assembled using mounting angles and self-tapping screws.
A path leads to the bathhouse
brooms
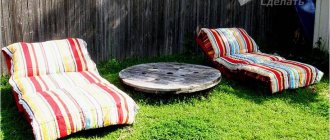
Relaxation corner
I made a path from the gate to the entrance, and near the bathhouse I managed to collect a compost box and a decent firewood rack. We brought furniture inside the bathhouse, hung shelves, curtains, and hung brooms. In the future, I plan to arrange a front garden near the bathhouse and build an outdoor barbecue.
8 cubes of firewood
- https://derevyannie-doma.com/materialy/karkasnaya-banya-proekty-i-chertezhi.html
- https://dekoriko.ru/banya/proekty/karkasnaya/
- https://obustroen.ru/banya-i-sauna/karkasnaya-banya.html
- https://svoimi-rykami.ru/stroitelstvo-doma/banya/karkasnye-bani-proekty-svoimi-rukami.html
- https://okarkase.ru/drugie-postrojki/banya/karkasnaya-banya-4×4-svoimi-rukami-poshagovaya-instrukciya.html
- https://tolkostroyka.ru/banya/karkasnye-bani-proekty-svoimi-rukami/
- https://bouw.ru/article/proekt-karkasnoy-bani-5h5
- https://2proraba.com/malye-postrojki/xozpostrojki/karkasnaya-banya-5×5-proekty-i-chertezhi.html
- https://stroyday.ru/istorii-polzovateley/kak-ya-stroil-karkasnuyu-banyu.html
Construction process of pouring floors
Organization of underground space
This is the most important thing in poured floors, take my word for it. It is imperative to ensure a quick outflow of used water into the sewer system so that the subfloor dries quickly, if possible. Otherwise you will get rot, mold, fungi and other “delights” that have no place in the bathhouse. I did this: I removed the fertile layer inside the log house, poured clay into it, and then a gravel-sand cushion, spilled it with water, and trampled it down. At the same time, the surface sloped towards the wall with a drain below. Then it was time for waterproofing. I used roofing felt - I laid it in one layer on the surface of the subfloor, and I tarred the seams with hot bitumen. In theory, the subfloor has already been waterproofed. The water will go down the drain without being absorbed into the soil, but the surface of the subfloor will remain wet. And this, again, will lead to dampness and fungal growth.
The subfloor must dry completely, and this requires ventilation, that is, a constant flow of fresh air to the space under the bathhouse. My log house stands on a strip foundation, so I initially provided for the presence of holes in it - vents. Through them, air penetrates perfectly into the “basement”. The vents should almost always be kept open, closed only when heating and steaming in the bathhouse. Otherwise, all the hot air will safely go outside.
Installation of posts to secure the joists
The height of the underground space, from the ground (covered with roofing felt) to the wooden planks of the pouring floor, should ideally be 200-300 mm. Thus, the logs of the wooden floor should not lie directly on the roofing material, but should be raised. This is done by laying them on posts. I installed columns with a height of 270 - 300 mm from brick, placing them in increments of 80 - 100 cm. After this, the bricks were completely plastered with ordinary cement mortar.
Waterproofing
I covered all surfaces of the underground space (columns, surface of the subfloor) with hot bitumen. The result is a smooth surface to which leaves, soap flakes and other bath waste do not cling. The purpose of this action was to provide additional waterproofing and ensure the rapid flushing of all kinds of bath waste into the sewer system, so that nothing remained under the floor.
Attaching joists to posts
I used metal channels as joists and covered them with bitumen - it seems to me that they will not be demolished. In general, beams made of hard wood, for example, larch, are traditionally used for lags. They must also be covered with bitumen, otherwise they will rot after a couple of weeks of use.
Metal logs will last longer than wooden ones
Creating a boardwalk
For the boardwalk, I used 40 mm thick larch boards. They were previously planed on both sides so that drops of water would not stagnate on the fibers.
Plank flooring pouring floor
I laid the boards on the joists with the convex side up (they were slightly warped when drying) with gaps of 5-6 mm. Several floorboards above the drain and near the opposite wall are removable. This solution allows me to lift the boards after washing and clear the subfloor and drain of debris. Additionally, dry the space under the floor so that the floor can last longer.
The boards closest to the wall are removable; they can be placed on edge while drying and cleaning the subfloor.
Stage 6. Construction of a log bathhouse
Comparison of Canadian and Russian logging
There are several assembly technologies:
- Russian assembly;
- Canadian;
- Norwegian
The first option - Russian felling - is the easiest to perform; even an inexperienced carpenter can handle it. Therefore, we will consider this technology.
Sauna cutting
Step 1. The construction of the log house should be carried out in stages and begin with the frame crown (in other words, from the first). The logs that will serve as the frame crown should be edged to ensure a tight fit to the foundation.
To begin with, we lay the so-called “backing” linden board on the foundation. This can be a beam about 50 - 100 mm thick and at least 150 mm wide. Then we begin to assemble the log house. Laying the first crown on the foundation.
Step 2. Lay the first pair of logs on top of the waterproofing layer. Place the next pair at an angle of 90ᵒ relative to the first and connect everything into a “cup”.
Chopping into a bowl
You can use a chainsaw - this will save a lot of time. Although the final finishing of the “cups” will still have to be done with an ax.
How to properly cut a corner in a log house Joining logs
Step 3. Next, lay the second crown using the thickest logs possible. This is explained by the fact that in the future you will cut sex joists into them. To ensure a tight fit, make a longitudinal groove in the top log, which would be equal to a third of the diameter of the previous log. To draw the boundaries of the groove, place the upper log on the lower one and mark using the “line”.
Obviously, the best option is a semicircular groove. Do it with a chainsaw and use a chisel to remove any residue.
Walling
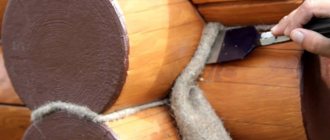
Step 4. Insulate the joints of the logs, preferably using flax-jute fabric. Place one piece of fabric on the lower crown, and seal the longitudinal groove with the second (especially if the latter has a triangular shape).
We fill the entire groove and recess of the bowl with caulking material
Step 5. Connect the crowns together. Here you can use:
- square dowels;
- round dowels made of wood.
The second method is preferable, because dowels can be purchased ready-made and holes can be made using an electric drill.
Make holes in increments of 1-1.5 m, parallel stitching the top pair of crowns completely and not completely the third one (from the bottom). To avoid distortion, after shrinkage is completed, recess the dowels into the upper crown by at least 6-7 cm.
Joining logs
Step 6. After raising the walls to the desired height, lay the ceiling beams and rafters on top of them. If damp wood was used, then lay slate sheets instead of rafters and wait until the structure shrinks. Usually, it is enough to overwinter once, but ideally, shrinkage should last a year and a half.
Flooring made of massive solid logs
In the spring, when the shrinkage is complete, start caulking.