how to make a table for a bathhouse
Everything with your own hands is the motto of a good owner. If you are one of those people and are planning to make a table for the bathhouse with your own hands , pay attention to this selection of interesting projects. In these articles you will find tips on how to make a wooden table for a bath in different versions, read instructions, see drawings, and watch a video. Why should the table be wooden, you ask? It’s just hard to imagine a high-tech bathhouse in a summer cottage. Today there are many different materials available. But for a bathhouse, wood invariably remains the most suitable. But to make a wooden bath table , it is important to choose the right wood; you will learn about this and much more from this collection of articles.
Material selection
Let's start with the fact that the vast majority of craftsmen will make a table for a bathhouse from wood. What else should you put in a wooden or wood-lined bathhouse? Who would even think of doing high-tech on the site? So the question about the material can be safely reformulated into a question about the type of wood.
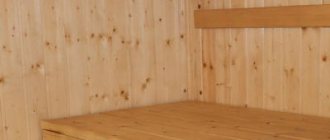
When it comes to furniture for the rest room, we have no(!) restrictions on the choice of wood.
ATTENTION! The humidity in the bathhouse during procedures is always elevated in any of the rooms.
But high humidity is not a reason to give up any preferences; you just need to take care of protecting the surface of the wood.
This means that breeds can be considered based on other qualities. In particular, in terms of hardness. Based on this criterion, we will highlight the following classes as an example:
| soft | spruce, pine, cedar, fir, juniper, poplar, linden, aspen, alder, chestnut, willow |
| average | larch, birch, beech, oak, elm, elm, birch bark, plane tree, rowan, maple, walnut, ash, apple tree |
| hard | white acacia, hornbeam, dogwood, boxwood, yew, maple, abash, merbau |
Everyone also knows about the division of species into coniferous and deciduous, which speaks primarily of the resin content and, sometimes, the number of knots (conifers often have more of them).
You can choose suitable wood by color, texture, and cut direction , but this is aesthetics (although the cut direction also affects the physical and mechanical properties). There are core and non-core species, that is, either there is or there is no color difference between the inner (core) and outer (sapwood) parts of the wood. The core with the core is usually darker than the outer one.
IMPORTANT! It is good if you have a moisture meter when purchasing a tree. Standard humidity should be 12-18%.
Remember that too wet wood may become unusable when dried, because warping is almost irreversible.
So, if you decide to make a wooden bathhouse table with your own hands, then you need to decide on the tools (if it is manual, then softer types may be preferable, although it will be easier to accidentally damage them in the future), and what the sellers offer in your region, with a budget (the cheapest species are aspen, pine, spruce, linden). In general, any tree is suitable, and then it depends on the circumstances.
Self-production: from a set of tools to the finished product
Before you make a table for a bathhouse with your own hands from wood, you should definitely take care of the availability of high-quality raw materials and a minimum sufficient set of tools.
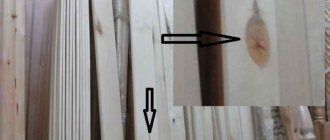
The choice of raw materials consists of selecting boards, timber and slats. Lumber must meet a number of requirements:
- Have acceptable geometric parameters regarding straightness and absence of signs of warping and torsion;
- A sign of good quality material should be the absence of through knots, the so-called “nails”;
Important! When purchasing lumber made from larch, you should know that the wood of this species very often has “knots and nails” and purchasing a board that is absolutely free of such defects is a real success.
- The wood should not show signs of damage by insect borers, fungi, molds or other biological defects.
The list of tools needed to make a wooden sauna table with your own hands is also not particularly sophisticated. The minimum set includes:
- Tape measure or carpenter's ruler. Provides preliminary and assembly marking of workpieces;
- Bubble building level. Allows you to control the straightness of the structure, both at the cutting stage and during assembly;
- A wood hacksaw or circular saw, the so-called parquet type. Will help in cutting blanks into the necessary individual structural elements. When making a table with a large number of radius curves, it is worth taking care of the presence of an electric jigsaw equipped with a blade for figured cutting;
- A screwdriver, corded or cordless, or a screwdriver with a Phillips-shaped working part;
- Sanding paper on a wooden block or belt sander. Necessary for finishing the external surfaces of the structure;
- Hand router with collet chuck and set of wood cutters. It is not a mandatory tool, like a jigsaw, but it will significantly improve and decorate the product by milling edges and applying decorations of a different nature;
- Fastening elements. These include self-tapping screws, wooden nails - spikes, bolts, studs, nuts. In the case of merging parts using a classic tenon joint, high-quality wood glue will be required;
- To eliminate defects, wood putty is a good help. Often such material is tinted to match the color of solid wood of a certain species.
Step-by-step manufacturing instructions
We offer several options for making a wooden table for a bathhouse with your own hands. Option one is classic and option two is budget.
Classic table
It is a tabletop with a straight two-meter long side and radius rounded ends, which is mounted on four legs 75 cm high. This design will allow you to accommodate at least 6 participants in the feast in fairly comfortable conditions. To make it you will need:
- Board with a cross-section of 250×40 mm, length 2000 mm, 4 pcs. for making countertops;
- Board with a section of 100×20 mm and a length of 1600 mm. - 2 pcs. 800 mm long. - 2 pcs. 750 mm long. - 2 pcs. for structural piping;
- Beam with a section of 100×100 mm. 750 mm long, 4 pieces for legs. The timber can be successfully replaced with turned balusters, which will somewhat enliven the surroundings of the structure.
Making a countertop
- A set of tabletop boards is laid on a flat and rigid base, tightly fitted to each other, and the radius of the ends is outlined using any available object, as a template: a bucket, basin, hoop, etc.
- The ends are formed using a jigsaw according to the outlined template.
- Using transverse supports placed at a distance of 400 - 450 mm from the edge of the end, a set of tabletops is secured.
- The formed tabletop can be edged with a milling cutter or simply processed with sandpaper with sequential alternation of grain from 60 to 240.
Making table top lining and installing legs
- A structural set is strengthened from the bottom of the tabletop, which will hold the legs and border the tabletop from the inside.
- The legs are installed and secured in the seats formed by the structural set.
- This design allows for free space in the leg area, without weakening the structure in terms of rigidity.
X-shaped table
This option is relatively budget and inexpensive. To make it you will need:
- Board with a section of 250×25 mm. 1750 mm long - 3 pieces, to form a tabletop;
- Board with a section of 150×25 mm. 900 mm long - 4 pieces for making legs;
- Board with a section of 100×25 mm. 1100 mm long - 2 pieces for fastening at the bottom of the legs, as spacers;
- Beam with a section of 20×40 mm. 900 mm long. — 3 pieces for making crossbars from the bottom of the tabletop.
Making a countertop
The tabletop boards are laid on a flat, hard surface with a spacing of 5 mm and secured with cross bars.
The edge is processed by milling or sanded with sanding paper.
Making legs and tying them
- On the board for making legs, 80 mm is set aside from the edge and a line is drawn from the notch to the corner. According to the resulting projection, the edge is cut off to form the supporting surface of the leg. In the same way, using the finished leg as a template, the rest are prepared.
- The legs are combined in pairs, in an oblique cross, so that the cut edges are located in the same plane.
- At the junction of the two legs, holes for the mounting bolts are marked and drilled, one above the other, in a vertical plane.
- In the lower part of the legs, notches are made “in the back” in which the boards of the longitudinal fastening of the table are strengthened.
- At the last stage, the tabletop is fused with the legs, the straightness and correctness of installation is controlled using a bubble level.
- When installing the table in place, the legs can be cut in place, adjusting the correctness of its installation relative to the floor.
Design selection
Material and design can be selected in parallel, although one does not depend on the other in any way. The table shape can be any, but still the number of basic options is limited:
- square;
- rectangular;
- round;
- oval;
- polyhedron.
This concerns the shape of the tabletop.
In addition, it can be sliding. The number of legs on the table may vary:
- one;
- two;
- three;
- four.
As for three legs, this option is, of course, rare, but possible. If the number of legs is less than three, then their stability will directly depend on the crossbars on the floor on which these legs are installed. For a one-legged person this will be a cross, for a two-legged one it will be a single perpendicular on each leg.
In addition to the tabletop and legs, there may be other structural parts. These include a transverse beam , which connects the legs, if there are two of them at the table, as well as strips that mask the junction of the legs with the frame , which at the same time impart rigidity to the structure.
Yes, and it would also be worth mentioning folding tables , which can be used not only in the rest room, but also in other rooms. This table is mounted on the wall, when folded it takes up very little space, and when unfolded it is no worse than a stationary table.
BY THE WAY! Those who love the original may recall hanging tables, like on a ship.
Varieties
There are several important features that describe a real table: shape, size, material and design. They can be used as the basis for classification, which is what we will do.
What are the shapes?
To begin with, let's highlight the two main structural elements of any table: the tabletop and the support. When it comes to shape, we primarily mean the shape of the tabletop. The main types are as follows:
- square;
- rectangle;
- circle;
- oval;
- polyhedron (starting from a triangle).
As for the rest room, the best option would be one that makes efficient use of the available space. Round and oval tables are usually placed away from the walls, often in the center of the room. The rest can be attached to the wall on one side if necessary.
ON A NOTE! However, the absence of corners increases the “capacity” of your table. This is not bad if there are more guests than you planned when choosing furniture. Another way to increase capacity is to install an extendable table.
To size
This is perhaps the most important feature of a table because it determines capacity and is worth thinking about in advance . There is a certain relationship between the size of the tabletop and how many people can sit at such a table.
IMPORTANT! Assume that a person needs at least 60 centimeters of personal space in order not to feel cramped. This is the width of the seat.
That is, it is clear that a table of 120x60 cm can comfortably fit 6 people. But for a table for four, the side of the square or the radius of the circle should be 85 cm - in this case, the person sitting will have enough space in front of him.
The second important point is the depth of the seat . This is the area by which the chair is spaced from the table when seated. It is 70 cm. Pay attention to this value - it should not be reduced or occupied with something else.
ADVICE! For more detailed information on the sizes of tables and chairs for a bath, take a look at the page with ergonomic diagrams for tables of different shapes.
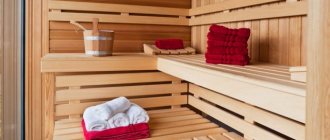
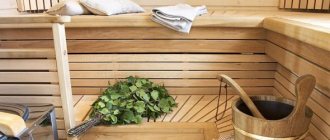
By material
Now this is an interesting point. When it comes to a Russian steam room, it would never even occur to anyone that there might not be a wooden table for a bath. But saunas are more variable in design , and if the style allows, then the material for the table can be glass in combination with metal , for example. However, it’s worth focusing on the majority, and besides, the tree can be different.
Wooden
Different types of wood differ from each other in hardness, color, texture, amount of moisture absorbed, number of knots, presence or absence of resins , as well as many other parameters. But a log can also be cut in different ways, for example, there is a tangential cut , which reveals the beauty of the annual rings of the tree.
Of course, if you paint wood, then a lot can be ignored, but still...
Let's start with the fact that in addition to solid wood, chipboard, MDF and even thick plywood . We strongly do not recommend making your own or purchasing bath furniture from these materials. Because the humidity in it is high.
In principle, all the important characteristics of wood are mentioned in the article to which a link has already been given above. However, let's repeat briefly:
- Soft wood is easier to process, but it is easier to be mechanically damaged during use. These species include: linden, aspen, alder, poplar, spruce, pine, fir, etc.
- Medium hardness is inherent in: oak, birch, larch, elm, plane tree and other species.
- Very hard wood at the same time has high density and resistance to damage, including biological damage from rodents and insects. Almost all exotic species have high hardness, as well as those more familiar to us - white acacia, yew, dogwood, maple, etc.
- Resistance to decay is higher in conifers due to their resins.
ATTENTION! Wooden tables for the bathhouse can be made from any wood that the owner likes, because the relaxation room is a cool room with moderate (compared to the steam room and washing room) humidity.
By design
The design is more about supports for the tabletop. They really can be very, very different. The number of legs on the table varies from 1 to 4 (extra legs may appear in particularly long individuals).
Biped with a king
When there is only one leg, it is attached to the cross, which gives it stability. In this case, the connection of the leg with the cross and the tabletop is often additionally strengthened with jibs.
- A two-legged table also needs increased stability, which is achieved with crossbars that turn both legs into inverted T shapes. Another crossbar (called a “tsar”) fastens the legs together so that they do not loosen or move apart.
- A three-legged table is usually made light, like a coffee table; it is stable, but not too much.
- Four legs is the most common design. A common way to add additional rigidity to the attachment of legs to the tabletop is to use ribs that cover the outside of the attachment. However, no one bothers to connect the legs at the bottom with the help of transverse or diagonal beams, or with the help of a spacer in the form of the letter I (in another font it has visible upper and lower bars).
- However, the matter is not limited to this, because there are a couple more designs of legless tables. One of these options is hanging. Moreover, you can hang it from the ceiling or the wall.
Folding
Why not consider separately a variety that can increase the usable area by folding an unused table? There are two types of folding table
- held horizontally by a pair of chains or other flexible attachment to the wall;
- resting on a folding support from below.
ADVICE! When choosing the design of such a table, pay attention to where the greatest load is applied. It is undesirable for these to be loops.
The stop itself can be attached to the wall or rest on the floor.
Photo source
IMPORTANT! The folding table cannot be large. Usually its size is such that the maximum number of people behind it is no more than 3.
In shape it can be semicircular, semi-oval or square, rectangular .
Coating
Since any of the tables you choose will be in the bathhouse, you definitely need to take care of the covering. This can be either paint or varnish. Nothing prevents you from first covering the wood with an antiseptic, and only then with varnish or paint.
Again, there are no restrictions on the use of this or that coating . You don’t even have to spend money on more expensive imported bath varnishes - they are designed for washing or steam rooms, and in the relaxation room you can cover everything that is suitable for residential premises.
Sizes that are comfortable for a person
There is no way to get around this point: there is a certain relationship between the size of the table and how many people can comfortably (or not) fit behind it. Therefore, each bathhouse owner should estimate in advance how many people will most likely gather at the table in the recreation room or on the veranda at the same time.
The second important factor in choosing the size (and, possibly, shape) will be the area of the room. After all, you need not just to place a table, but to make sure that a person can sit down and get up from the table freely, that there is room for passage, etc. To do this, you need to add a few more parameters to the table dimensions - the width and depth of the seat, the width of the seat for one person at the table, and also the minimum width of the passage.
For our part, we will present the standards of ergonomics, which is the science of how to adapt things to human anatomy.
REMEMBER! To sit comfortably at the table, a person needs 70 cm of space. This is called the seat depth (see picture). Add these 70 cm to the dimensions of the table on all sides - you will get a spot that you allocate for this area. The minimum passage behind the seated person, if necessary, must be at least half a meter.
Now the dimensions of the countertops themselves (according to the estimated capacity):
A person is comfortable at a table if he is provided with at least 60 cm of table space in width. It's minimum.
A two-seater table of square or round shape should be 60 cm on the side or in diameter. However, the “spot” of the zone together with the chairs is calculated as 120 by 210 for a square and 120 by 200 for a circle.
A three-seater table is only possible for a round shape, but the dimensions increase: the table diameter is 80 cm, the spots are 220 cm.
The four-seater can be either cross-shaped or parallel. The side of the square is 85 cm, the side of the spot is 225 cm. The diameter of the circle is 90, the spot is 230 cm. The rectangle is 85 by 125 cm, the spot is 185x225 cm.
Five-seater - circle 100 cm, spot 240; rectangle, size 135 by 85 cm, spot - 235 by 225 cm.
Six-seaters - three types. Circle: diameter 120, spot 260, rectangle parallel seating - 85x175, spot - 235x225 cm, perimeter - 85x145 cm, spot - 285x225 cm.
We'll probably stick with eight-seaters The circle is 140 cm in diameter, the spot is 2.8 meters. Rectangle: parallel seating - 80 by 250 cm, spot 220x285 cm around the perimeter - 85 by 195 cm, spot 225x285 cm.
Also worth mentioning is a design called a “corner”. It looks cozy and fills the space well. The module of the proposed scheme is a seat measuring 55x55 cm. A corner measuring 220 by 165 cm is folded out of them. The table is also square in shape with a square side of 85 cm. Single seats in front of the table are the same dimensions as the module.
Blueprints
In principle, the diagrams that we have given above can already be a source of inspiration when creating a table.
Below we present several drawings that we found on the vastness of the worldwide computer network. We do not claim authorship and do not know their authors, therefore we cannot provide links to primary sources (see appeal to copyright holders).
Let's go through the options already mentioned above. Let's start with a one-legged table made in the shape of a polyhedron. It rests on a crosspiece, and for greater strength (and, partly, greater decorativeness), the connections of the legs with the crosspiece and the tabletop are reinforced with jibs. The parts are fastened using glue and self-tapping screws.
A table with two legs also looks very attractive in a recreation room. In addition, it is not difficult to manufacture. As can be seen from the drawing, the transverse beam is inserted into the holes made for it in the legs and fixed with pins.
Three-legged tables are not used for feasts. Therefore, let’s immediately move on to the “classic” - a table with four legs.
As you can see, the table is very simple, without frills, but correct in design and suitable for making even for beginners.
This is what we will use as the basis for our instructions.
When shape and size matter
It must be said that a bathhouse, in most cases, has quite limited dimensions of the interior spaces and this circumstance must be taken into account when making superficial design sketches or when serious and detailed interior design. In any case, it is necessary to take into account the unwritten rules of the domestic bath tradition:
- The table for the bath, however, like the rest of the bath decoration, should be as practical as possible. If you are faced with a dilemma between choosing an elaborate and elegant one or a modest but very comfortable one, give preference to the second. You will never regret it.
- The interior decoration of a real bathhouse should be natural. You should also not overuse various decorative chemicals, which give simple wood the charm and shine of exotic varieties. Believe me, there are many ways to refine wood without resorting to impregnations, stains, paints and varnishes. An exception may be perhaps completely substandard wood, the defectiveness of which should be masked with the help of global toning. And objects treated in this way should be located away from the steam room, with its temperature and humidity.
- Internal space should be used rationally. Surely it’s worth sacrificing one seat, rather than all the participants in the feast experiencing global inconvenience.
- If the interior space, after installing the furniture, in particular the table, looks excessively cramped and cluttered, then it is necessary to use bath tables with high legs and focus the visual perception on the horizontal elements of the structure.
- When placing such a large object as a table in the internal volume, always use the golden rule - the farther from the steam room, the better and more durable.
- Don't get hung up on stereotypes and dogmas. You need to feel free to experiment. For example, with wicker furniture. Lightness, openwork, naturalness, along with sufficient strength and durability make you look closely at objects of this type. Leather furniture can also be good, but only natural, with sufficient strength and resistance to the difficult conditions of a bathhouse. It is necessary to select an appropriate table for it, which will look harmonious and natural, framed by leather splendor.
How to make: instructions
So, the model is quite simple. You don't even need an expensive tool for it.
Tools
- any saw - hand saw, miter saw, circular saw, even a jigsaw;
- (possibly) an electric drill with drills to match the diameter of the dowels;
- any grinding machine - manual, grinder, regular electric.
ATTENTION! It is assumed that you purchased high-quality material, and you will not have to joint the boards, bringing them to uniform dimensions.
Material
- boards 30x100, 20x100 mm;
- beam 60 mm section;
- glue;
- self-tapping screws;
- (possibly) dowels.
Actions
First you need to cut the parts of the required size in accordance with the drawing. These will be:
- 7 boards 30x100 mm, length 120 cm;
- 2 boards 20x100, 100 cm long;
- 2 boards 20x100, length 62 cm;
- 2 boards 30x100, length 58 cm;
- 4 bars with a cross-section of 60 mm and a length of 67 cm.
In the parts, 58 cm long, grooves are cut out at both ends for the legs of the table - 60x60 mm. The future legs are chamfered from one (only one!) of the corners.
The surface of all parts is pre-treated by grinding.
ADVICE! A second sanding can be done after the table surface has been varnished for the first time.
Now there is an important point: the fastening of parts is variable. They can be placed on self-tapping screws, screws , or dowels with glue . In addition, the methods can be combined.
Since we do not provide for turning any of the usual carpentry joints of parts, we decided that in some cases, dowels can be used to improve the reliability of fastening . An alternative method would be to fasten it with a metal corner. But first things first.
So, you have processed all the blanks. Let's start assembly.
First of all, the tabletop boards are laid on a flat surface and fixed. Then, according to the drawing, 58 cm boards are placed on them, which fasten the tabletop with self-tapping screws. They are screwed in from below, and the length should extend into the tabletop board by about half its thickness . That is, the length of the screw or self-tapping screw is 2 + 1.5 = 3.5 cm.
photo source: https://chertegnik.ru/mebel/45-chertezhi-stolov-iz-dereva.html
The next step is to attach the legs to the slots in the crossbars you just screwed on. We recommend gluing the connection, and then securing it with self-tapping screws, which are screwed in perpendicularly, fastening the leg to both sides of the groove.
To increase the rigidity and strength of the structure, you also need to make side ribs. Please note that the side ribs on the short sides have somewhere to fasten even without the participation of the table top - there is a block along the entire length, and the side ribs on the long side are fixed only 10 cm from each end.
Therefore, we offer two options: either connect them to the tabletop with dowels, or with a metal corner screwed to the inside of the rib.
If dowels are selected, then three on each of the two long sides are sufficient. Holes half the thickness of the board are drilled under the dowels using an electric drill. The connection is made with glue.
IMPORTANT! Why are dowels better than corners? The fact is that any wood joints tend to “breathe,” which loosens any metal fasteners over time (therefore they should be tightened occasionally), and the wooden dowel moves with the wood.
You can place one corner in the middle or several along the entire length - this is optional.
At this point the table is ready.
Healing properties of wood
A Russian bathhouse is a special place where you do more than just wash yourself. Here you can cleanse and strengthen the body. Hot steam helps cleanse the circulatory system, normalize the functioning of the heart, liver, lungs and other systems. This has been known since ancient times. In Rus', all diseases of internal organs were treated with a steam room. Therefore, the furniture for the bath should be appropriate. When making it, the bioenergy of each breed known from the Druid heritage is taken into account. Solid wood products produced in Moscow are not only amazingly beautiful, but also have healing properties.
Protective coatings
All that remains is to varnish or paint it. Since the first layer always only saturates the surface of the wood, after which all the fibers on it rise, it is recommended to sand everything before the second layer .
Since our table is intended for a bath, it will inevitably encounter high humidity .
If the wood species is not resistant to rot and pests, you can first treat the table with an antiseptic, then varnish or paint.
Since we are talking about a rest room, we are no longer considering options for water-repellent impregnations - the varnish looks better.
As for recommendations, we recommend time-tested ones: Pinotex, Tikkurila, Dulux, Neomid. They all offer water-based acrylic varnishes that can be used in baths and saunas.