What types of stoves are there?
Before you properly install a stove in your home, you need to determine its functions.
There are three types of similar structures for a private home:
- For heating. The structure includes a firebox and a large chimney with many branches. The resulting flue gases give off their heat to the surrounding space through the walls of the chimney. Such stoves, which are heated mainly in winter, are usually equipped in houses with electric or gas stoves.
- For cooking. This appliance is intended exclusively for cooking. It is distinguished by the presence of a short straight chimney that immediately goes out onto the roof. A cast iron stove is mounted on top of the firebox for cooking. In the space between the firebox and the chimney there is also room for an oven (it provides a cooking mode, like in a Russian stove). Summer kitchens and private houses with centralized and gas heating are usually equipped in a similar way.
- Heating and cooking. With the help of such a stove you can simultaneously cook food and heat your home. Its design consists of a hob, an oven and a massive chimney with a developed heat exchange system. The heating and cooking variety is most widespread. With its help, both private residential cottages and small country houses are equipped.
Recommendations for installing the stove
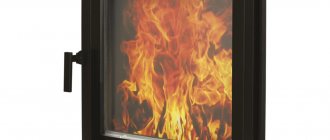
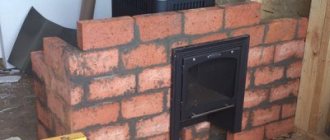
Furnace installation
Metal stoves are installed in accordance with the provisions and rules of current regulatory documents.
The firebox and chimney of the stove should be at a minimum distance.
Installed metal stove
Lightweight stoves can be installed without a foundation, on a dense metal sheet. Relatively heavy units require an individual base made of concrete or brick. The recommended foundation height is up to 200 mm.
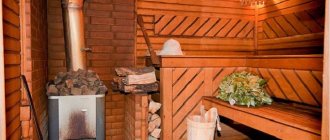
Installation of a sauna stove
Now you have the information necessary to make your own metal stove. Follow the provisions of the presented manual, and the finished heating unit will effectively cope with the tasks assigned to it for many years.
Furnace installation option
Good luck!
Advantages of a homemade metal stove
A homemade metal stove has a number of advantages over brick heating units. Among the main advantages of the structures under consideration, it is necessary to highlight the simplicity of their design and the availability of raw materials.
DIY metal stove
Making a simple metal stove will not take much time - there are usually no difficulties in finding (purchasing) metal sheets or iron containers of a suitable size.
The installation of a metal furnace will require many times less financial investment compared to the construction of a brick heating unit. At the same time, a metal stove does not take up much space and heats up very quickly during operation.
Homemade metal stove
Metal stoves weigh much less than their brick counterparts, which eliminates the need for a strong foundation. To further increase heating efficiency, a screen made of heat-resistant brick can be laid around a metal heating unit.
Extraordinary handmade stove
Blower size
To build a stove vent with your own hands, you need to know its usual dimensions. Although there are no standards at all in size, there is one simple rule: the ash pan must be identical in size to the grate.
If the blower is smaller, then the soot will settle on the grate and will not allow air to pass to the flame.
If the ashlar does not have a door, then it is worth installing a drawer or tray. Here the dimensions are more clear. The width of the tray is the same as the distance from edge to edge of the blower. The length should be longer than the firebox.
You need to determine in advance which type of oven is right for you. When you know what exactly you want to cost, then you will find the right sizes for your type of stove. In a matter where there is no exact ideal, there may be room for your imagination.
Additional ways to realize the potential of a steel furnace
In this case, one simple rule applies: the more storage material (metal, water, stone), the more heat will remain inside the house:
If you plan to use the stove even periodically as a stove, you can install additional heat sinks on the upper wall of the firebox. To do this, you need to weld corners or strips on the edge along the entire length from the inside.
The same ribs on the side walls will provide a 5 to 10% improvement in efficiency. At the same time, they will strengthen the plane of the wall.
If a chimney made of a steel pipe is provided, it is also possible to weld corners along its length, which will remove some of the residual heat from the exhaust gases. This is another plus of 3–5%.
Cuttings of a round or profile pipe welded vertically along the side walls will create an effect that is used in modern long-burning stoves. Constant heating ensures continuous movement of air inside the pipe. Up to 20% increase in heat transfer.
By covering the stove on one or more sides with bricks without mortar, we will get a stone heat accumulator and protect the walls of the room from overheating. A variation of this method - baskets or bunkers with cobblestones around the firebox - is used in baths. Can provide 15 to 20% improvement in efficiency.
A household fan directed at the stove will protect it from overheating and even out the air temperature in the room by mixing it. Adds 10–20%.
The use of all the described methods together can increase the productivity of the heat exchanger, which in the basic version is the firebox itself, by 50–75%. The described methods, while improving performance characteristics, increase the weight of the product. Keep this in mind when choosing a base for installing the stove.
Stoves without grates have one drawback for all - the absence of an ash pan. Its combined function - accumulated ash serves as protection for the bottom of the firebox from burning out - does not allow cleaning the firebox during operation. On the other hand, prolonged combustion produces less solid waste, which means that cleaning can be done much less frequently. The ash is removed quickly and the room does not have time to cool down during this time.
We also want to tell you about long-burning stoves with vertical loading.
rmnt.ru
A few tips to make your firebox even more efficient
The firebox will be even more effective if you pay attention to the following points:
- wet wood can cause the flame to go out after a while; the reason is the formation of a large amount of carbon monoxide inside the chamber; It’s better to forget about undried fuel altogether, but if an unpleasant situation arises, you need to close the combustion damper and open the chimney and damper for 10-20 minutes; after this, you can open the outer door (of the chamber) for a while;
- It is not recommended to move logs that are not at least 50% burned;
- It is advisable to shovel the coals that formed earlier than others into the center of the furnace bottom and cover them with burning fuel and hot coals;
- It is better that the temperature in the firebox exceeds 200 degrees; in this case, soot almost does not settle on the chimney walls.
Purpose of the stove in the house
They come in several types.
Previously, when open fires were used for cooking, there could be two stoves in the house - one for cooking, the other for heating. In small houses, universal structures were laid out, simultaneously suitable for domestic needs and heating. Such stoves were built together with the house and were located between the adjacent wall, providing heating for two rooms. The scheme is quite complex and the process of its implementation is labor-intensive, but the conveniences are obvious. It was possible (especially for the summer season) for only the stove to be heated. This made life much easier, because such an attribute in the house needed constant care. It consists of a set of activities performed daily or once or twice a year. With intensive use, the coarse needs to be cleaned from accumulated ash. A large amount of it will interfere with normal air circulation, causing the firewood to not burn completely. Another nuance in using a brick oven is the cracking of its finish. Experienced users advise not to overheat the surface. The normal temperature is 17-18 degrees, and the features of the brick allow you to retain moisture indoors. Such a microclimate can only be achieved by using a stove; other heating devices often dry out the air, and lower temperatures make the room feel damp and cool.
Making a sauna stove with your own hands: detailed instructions
Let's figure out how to make a vertical and horizontal oven, what equipment, tools and materials need to be prepared for manufacturing, and what theoretical knowledge you need to have in order to realize all your plans.
Advantages of homemade sauna stoves
If you are still in doubt whether it is worth making a sauna stove with your own hands, then pay attention to the advantages of this solution, which significantly outweigh the expenditure of time and effort on making the structure:
- The walls are thick, that is, they have a high thermal capacity. Therefore, even after the fuel burns out, the room will remain warm for some time;
- Since the stoves are made of metal, they are highly durable and can withstand even strong temperature changes;
- Due to the perfectly round cut of the pipe, the finished stove design has the shape of a cylinder or dome. This solution allows you to effectively distribute heat over the entire area of the stove and create natural draft;
- The room warms up very quickly - in just an hour;
- Unlike the brick version, a metal stove does not need a foundation;
- Due to the high temperature and corrosion of water, a pipe with thick walls does not collapse very quickly. Therefore, a homemade design can serve faithfully for many decades;
- To carry out the work, you do not need to have any serious knowledge, you just need to be able to handle the tool and strictly follow the drawings and diagrams.
Moreover, a homemade device will cost you much less than a purchased one. And, if you find a pipe of the required diameter at the dacha or in the garage, you can assemble the stove almost free of charge. True, buying a stove allows you to save time and nerves in its manufacture.
How to make an ash pan with your own hands?
In fact, constructing an ash pan is quite simple. It is enough to carefully study the structure of the furnace. You must follow these rules:
- Complete the drawing. A rough sketch will help in design.
- Prepare all the necessary materials, count how many there should be.
- Prepare your tools for work.
Guided by these superficial rules, you will be closer to the result. Now closer to the point:
Materials and tools
The design of each furnace can be individual. But the standard set of tools for work looks exactly like this:
- construction trowel,
- mallet,
- building level,
- plumb line,
- brick hammer,
- construction tape.
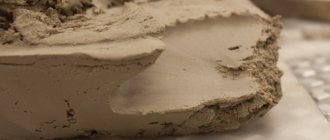
It is important to choose the right materials when making an ash pan. They must be fire resistant because they are right at the epicenter of a fire.
Experts say that the ideal material for the ash pan is steel (0.8 mm) . If there is no door, then the ash pit can be made of fire-resistant brick, like the rest of the stove structure.
Do not forget about the quality of the material for the stove. Naturally, joy will come from a product that will last you as long as possible. Price plays a very important role, but remember that cheap materials will have to be changed frequently and, in addition, will waste your time.
You will need some special materials for making. Definitely worth adding to the list:
- metal corner,
- chamber door,
- ash door,
- valves,
- refractory brick,
- fireproof mastic.
Then your shopping list will grow, depending on your desires and the complexity of your stove design.
It is worth buying the necessary materials in specialized stores (construction stores, more likely). The consultants there will tell you, if anything happens, which products are best suited for the job. You can also find materials for building a stove on the Internet and choose the most suitable ones.
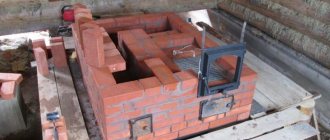
Manufacturing instructions
The diagram shows the location of the blower in a brick oven
First, you need to lay out several rows of the oven without mortar to know whether everything will turn out exactly as required. Next, it is worth laying the lower rows so that the laying of the second completely covers the joints of the first. Next comes the blower and cleaning channels.
In the next two rows you should leave room for the blower and ducts and attach a door to each opening. To install them you will need to drill holes in the frames in all corners.
Next, you need to insert a soft steel wire into the holes that have formed and bring the end of each wire out. To strengthen the frame, wrap it with asbestos cord. Already during installation, it is worth placing each end of the wire in the solution.
Then you can safely lay out the top rows of the stove.
Stage 1
Stage 2
Stage 3
Safety issues: how to prepare a place to install a stove
In order for a sauna stove made of pipes to serve for many years, to be convenient and safe to use, the place for it should be properly arranged. You need to start with the foundation. Usually concrete is poured, but foam concrete slabs can also be used. The recommended foundation height is 25-30 cm. A 70x70 cm brick platform is prepared on it. It is best to use refractory bricks and clay mortar. As a result, the platform should be 15-20 cm higher than the floor.
The steam room wall must be protected with a 1.2 m high screen made of the same brick. The distance should be calculated so that after installation the stove is 20 cm from the brick screen. Sheathing made of steel sheets can also be used as protection. It is necessary to consider the location of the stove so that its body does not come into contact with wood and other flammable materials. The wooden finishing of the steam room near the stove must be treated with antiseptics and fire retardants. This will help maintain the appearance and integrity of the walls. To protect the room from sparks from the firebox, a sheet of metal or other fire-resistant material measuring 50x70 cm is placed in front of it.
When arranging the screen, you should remember that the height of 1.2 m is the minimum. If you want to protect the wooden walls of the steam room as much as possible, you can make a screen up to the ceiling
There are no particular difficulties in the manufacturing technology of a tube furnace, but it is very important to perform all the work efficiently. Experts advise installing a movable valve in the chimney so that the draft force can be adjusted
It is also advisable to make an afterburner to ensure fire safety, especially if you choose a horizontal model. This will prevent excessive soot deposition and combustion. When the structure is ready, its appearance can be refined. The functional oven is ready. At minimal cost you have ensured yourself a good bathing holiday. You have something to be proud of!
Schemes of a wood-burning stove for a summer residence
Iron potbelly stoves used in the country come in different sizes, shapes, structural features of the combustion chamber, with or without a blower.
They are divided according to the type of work and design:
- to regular (single-chamber);
- to channel;
- long burning of fuel.
Reference. Metal stoves, potbelly stoves, are heated with wood, wood chips, brown and hard coal, and peat briquettes. They burn cardboard, sawdust, and dung.
Coal burns slowly, gives a high temperature ( 1500 degrees and above ), because of this the air, walls, ceiling, and cutting become very hot. That’s why coal is rarely used in country houses . wood, bark and wood chips in potbelly stoves . Let's consider options for potbelly stoves that the owner of a garage or cottage can make with his own hands.
Single-chamber potbelly stoves consist of a solid metal body, which houses a ash pan (ash box), a grate, a combustion chamber, and a hole for a pipe (chimney). An example of such a potbelly stove is a cast iron Soviet army stove, the simplest single-chamber iron stove for heating change houses.
Photo 1. Diagram of a single-chamber stove-stove. The main parts of the device: firebox, ash pan, chimney pipe.
The body of a factory-produced potbelly stove has the shape of a rectangular parallelepiped with dimensions:
- height - 65.6 cm ;
- length (depth) - 50.2 cm ;
- width - 35.8 cm ;
- height of stands (legs) - 19.4 cm;
- the height of the pipe intended for installing the chimney is 6 cm;
- chimney diameter - 11 cm.
The stove weighs 36 kilograms , the thermal power of the potbelly stove is 5 kW. The heater body is made of steel sheet 6 mm . There is a solid steel door for loading fuel, and a drawer (ash pan) for removing ash. Firewood is used as fuel.
This small potbelly stove is designed to heat a room up to 60-70 square meters . The flat top of the body is used as a hob. Holes for the burners are cut out in it, which are closed with rings of standard sizes.
A potbelly stove with a duct firebox has a more complex design. Steel plates ( from one to two ) are welded inside the firebox, which form smoke channels. The channels slow down the movement of flue gases.
Reference. Factory heating and cooking iron stoves are ducted in design.
Long-burning metal potbelly stoves are large in size. Air is supplied to the combustion chamber not only through the blower, but also through the side gearboxes.
In simplified versions, there is no blower, and holes are made in the door, the width of which is adjusted with a special latch.
The firebox is filled two-thirds full. After the fuel ignites, the air flow is reduced by closing the ash pan and opening the upper regulators.
The firewood smolders slowly in the top layer and releases heat for several hours.
How to calculate the chimney diameter
There are two calculation options: complex and simplified, but they all take into account the amount of oxygen required to ensure fuel combustion in a sauna stove. Optimal characteristics of chimneys
Optimal characteristics of chimneys
| Parameter | Meaning |
| Temperature of gases at the chimney outlet | +120°С |
| Minimum speed of gas movement | Not less than 2 m/s |
| Recommended chimney height | 5 meters |
| The amount of fuel burned in one stack of the firebox | 10 kg/hour |
Based on these characteristics, you can calculate the diameter of the chimney using the formula
Chimney diameter
- D – chimney diameter;
- Vr – volume of air.
You can calculate the height of the chimney depending on the cross-section geometry using a graph.
Dependency graph
To calculate, you need to know the firebox area (F) and the chimney area f, divide the first value by the second and determine the percentage. For example, the ratio of the chimney cross-section to the firebox cross-section is 10%. This means that the minimum height of a round chimney is 7 meters, a square one is 9 meters, and a rectangular one is 11 meters. The difference in height compensates for the vortex resistance created by each type of chimney.
You must understand that these values only apply to a straight pipe, which is difficult to achieve in a sauna. For the most part, chimney pipes have various turns, this negatively affects draft. To accurately calculate a specific chimney with various curvatures, you will have to invite a “professor”, and we advise you to slightly increase the resulting diameter. All calculations were made with a large margin, plus some increase - this is quite enough for a stove operating on solid fuel.
Some more practical tips on chimneys
| Advice | Illustration |
| If a residential building is heated with wood, the rules recommend checking the draft annually before the start of the heating season. | How to check traction |
| If necessary, the chimney is cleaned. In practice, cleaning is done no more than once every 10–15 years. The baths are heated mainly once a week. Accordingly, chimneys need to be cleaned much less often. Conclusion - there is no need to make special complex structures for cleaning. | Brush for cleaning the chimney of a bathhouse |
| The main “enemy” of the chimney is wet firewood. During combustion, they evaporate a lot of water, the temperature of the gases drops significantly. There is always condensation inside the chimney, to which soot sticks. In such conditions, the chimney may not last even one season. Conclusion - use only dry firewood. | Dry birch firewood |
| To increase the temperature in the bathhouse, a metal chimney pipe can be connected to several elbows - the heat transfer area increases significantly, the bathhouse warms up faster. | Sandwich chimney elbow |
| Try not to lead the chimney through the roof; it is much easier to place it at the end of the bathhouse. In this way, it will be possible not only to reduce installation time, but also to eliminate the risk of leaks on the roof. | Chimney outlet through the wall |
Chimneys can be brick, ceramic or sandwich pipes (double). Let's consider the installation of each of these types.
How to properly heat a sauna stove?
The algorithm for lighting a sauna stove is somewhat different. The basic rule is to melt it so that there is no carbon monoxide at all. All actions with dampers and valves are carried out so that in no case is there a lack of air in the chamber. For example, if it is necessary to “muffle” the stove, first cover the view, and then cover the vent. If you need to increase traction, do the opposite.
Figure 7. Firebox of a sauna stove
One more nuance. The coals should be collected and extinguished in a container of water as soon as the carbonic blue flame disappears. Moreover, regardless of the fuel type.
Details on how to properly heat a sauna are described in a separate article.
Designs of sauna stoves: general points and differences for different types
So what is a stove? This is a fire built inside a container. But combustion is an oxidation reaction of fuel, therefore, it cannot occur without oxygen. Therefore, we will call a furnace that container through which, at least temporarily, with the dampers open, flowing air moves.
Traction
This movement is called "traction" and it occurs when there are inlet and outlet openings.
Of course, such a definition suffers from incompleteness, because it does not apply to electric heaters. In them, heating occurs due to the passage of current through a material with high resistance. This releases heat.
But let's return to furnaces, where heat is released due to a chemical reaction. The art of the stove maker is to skillfully vary the amount of incoming air and the amount of firewood in the stack in order to achieve their uniform burning and maximum complete combustion.
What happens if the combustion is still ongoing, but the air is blocked? Instead of carbon dioxide, dangerous monoxide will begin to form - carbon monoxide. But why block the pipe if it is so dangerous? — The draft is shut off so as not to let the stove cool down when the wood burns out, because heat flies into the chimney along with the air.
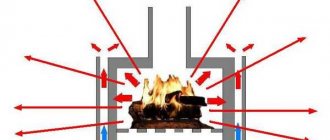
So, we know about the role of air. Let's look at a diagram of the simplest draft furnace. What must be present in it? Three things:
- inlet (air vent or firebox door);
- firebox (aka firebox);
- outlet (chimney).
The first division of stoves can be made by the presence or absence of a blower: without it they are called “stoves with a blind hearth.” In this case, air is supplied through the open firebox door. Here's what both look like in cross-section:
Kamenka
what all sauna stoves have, heaters, batteries, creating light steam
There are two classifications of heaters according to different criteria: one takes into account contact with fire in the firebox, the second - contact with air.
If there are gaps between the firebox and the heater through which the flames lick the stones, then this is a flow-through heater.
If the barrier is blind, then the heater is called blind.
When the container with stones is inside the stove, it is a closed heater.
And if the stones are in sight, it’s open.
In this regard, furnaces are classified as follows:
Blower
The vent is the first air chamber in the furnace, which usually has a door. The blower chamber is laid out according to the dimensions of the grate. It can be wider than the grate and overlapped by overlap of rows of side walls up to the grate. Through the ash chamber, air enters the firebox through the grate; in addition, it serves to collect ash and other fuel waste.
Blower: 1 - blower chamber; 2 - blower door
The blower door can be of any size, but no larger than the blower door. Through this door it is convenient to remove ash from the wide ash chamber, and as for air, there is enough of it with a door even half as small as shown. Practice has shown that the best place for the blower door is on the second row of the stove masonry. The door is installed in the blower window, which is connected to the blower chamber. When the door is open, air rushes through the window into the ash chamber. The more the door is open, the more air will enter the ash pan and the better the fuel will burn. Air, especially coming from below, is needed to maintain fuel combustion. Hence the name - blower.
Sometimes the door is used to regulate the draft in the oven: the less the door is open, the less draft. It is not necessary to install a blower door, but it is advisable, because without it a draft can occur in devices that do not close tightly, such as valves. And then the heat will go out into the chimney, and the stove will release less heat into the room.
If there is no door, the draft is adjusted using a valve. The more the valve is open, the stronger the draft, and with it more air will enter the stove and the draft will be stronger, which means the fuel will burn better. If there is no door in the ash window, but there is a view, then the fuel will constantly burn with the same intensity, but with this intensity a lot of heat will go into the pipe, which the brick could absorb. The viewer cannot regulate either thrust or fuel combustion.
Let's say that the door is a few millimeters smaller than shown in the figure. In any case, the seams should be no more than 3-5 mm. To do this, the laying must be carried out from the door to the corner of the stove. The last seam turns out thicker than expected, and such a seam cannot be made. To maintain the thickness of the seams, you need to break off a quarter from a whole brick in the corner of the wall where the door is located. You will get a three-quarter and a quarter. Next, you need to break off a larger quarter, taking into account the thickness of the seam. It will seem to lengthen the whole brick. Instead of a whole brick, you need to put the first three-quarter and the second quarter - it will take the place of the thick seam. The masonry of the top row above this quarter will be made of a whole brick - it will block this quarter. If a thick seam is obtained near the door, then you need to do the same in this place.
If, because of the door, the firebox turns out to be several millimeters narrower and the flues are wider, then this will not affect the operation of the stove. In some areas of the country, stoves are installed without a blower at all. In these furnaces, the combustion doors have windows-openings for air intake instead of a blower. In such fireboxes, only wood and peat fuel burns, but the firewood is buried in ash and forms a lot of firebrands. When they burn out, the heat goes into the chimney, so the firebrands have to be pulled out of the firebox and placed in a bucket of water. Such ovens are made due to the lack of grates. If they exist, then they are installed above the blower chamber.
Design and principle of operation
The construction of a stove will be pointless for the purpose of constant use in harsh climatic conditions, because the design of the stove is not intended for long-term heating of a large space. This stove is less heat efficient than others, so it is better suited for seasonal use.
Small oven is rough
The design of a rough stove is relatively simple, but in order to build a building yourself, you need to know the basic principles of heating engineering and have skills in working with bricks. The principle of operation of coarse stoves is the same as that of other brick kilns.
Firewood is placed in the firebox, the open ash pit allows smoke to escape without entering the room. A special winding chimney removes combustion gases to the outside. This design of chimney pipes allows you to retain heat and heat a large area. A long pipe and a special type of shield make it possible to heat with minimal fuel consumption.
The design contains the following elements:
- A blower with a door, necessary for good air circulation,
- Firebox - a chamber for supplying fuel to the stove,
- A shield with special channels designed for the passage of gas,
- The chimney in the furnace, as in any other furnace, is designed to remove gases from burnt fuel to the outside. A door and a damper are required.
Construction of the furnace foundation
Before you build the stove yourself in the country, you will need to first lay the foundation. It is installed separately on the ground, without connecting it to the main foundation of the house.
We lay the base of the oven with our own hands step by step in the following sequence of operations:
- Preparation of concrete mortar grade M200. 3.5 buckets of sand and one bucket of cement are mixed in a mortar vessel. After diluting the dry mixture with water, thoroughly knead until a slightly fluid homogeneous mass is formed. Crushed stone in the amount of 5-6 buckets is poured into the resulting slurry, after which it is brought to the state of a homogeneous thick solution. To make the concrete more flexible, you can add a little liquid soap or dishwashing liquid to it.
- Digging a pit. For the foundation, you need to dig a pit 45-60 cm deep. Its dimensions on each side should be larger than the dimensions of the furnace. The bottom of the trench is compacted, and the side walls are reinforced with board or plywood formwork. Next, a sand cushion 10-15 cm high is poured, and rubble stone is placed on top of it in a layer of 15-25 cm. Sometimes the walls are reinforced not with formwork, but with pieces of roofing felt.
- Pouring the solution. Reinforcing lining is installed at the bottom of the trench, for which reinforcing lining made from welded reinforcing bars or steel pipes is used. Concrete is poured in several portions. To achieve good density, the solution is pierced to the bottom with a wooden strip or piece of reinforcement: this allows the air accumulated inside to escape out. The upper part of the base is reinforced with a steel reinforcing mesh. A finishing layer of concrete 2-4 cm thick is placed on top of it.
- Leveling and hardening the foundation. A rule is used to level the poured concrete solution. It is necessary to achieve strict horizontality of the upper surface of the base: it should be inferior to the level of the finished floor by 8-12 cm. After this, the foundation is covered with a polyethylene film, leaving in this position for about 7 days, until the solution has completely hardened.
Operating rules
A rough stove can only be used for one or two seasons, or inside a small house, since it is not capable of heating large spaces. Also, its power is not enough for heating in winter.
It is necessary to regularly clean the chimney from soot and remove soot. If this is not done, the outlet will become smaller due to accumulations of combustion products, and some of the harmful gases will penetrate back into the house, which can lead to poisoning.
You should not put a lot of fuel in one stack of firewood or coal, and also do not close the door too tightly.
Technique of use
For cooking, only heat-resistant cookware is used, which when heated does not deform and does not emit harmful substances. For example, from clay, cast iron.
Immediately after laying and drying the mortar, you should conduct a test heating with a small amount of fuel, for example, burn a couple of newspapers. To make sure that the smoke exhaust is working properly.
Firebox
Not only fuel burns in the firebox, but also chemicals released during fuel combustion - gases, resins - are burned with it. And the water contained in the fuel is converted into dry steam, which determines whether there will be soot streaks on the stove. To prevent gases and tars from turning into damp soot that settles in the flue ducts, and to keep the steam dry, there must be enough free space above the fuel in the firebox in which lighter fuel particles burn. Therefore, in heating stoves in which the firebox is arranged at the entire height of the stove, there is almost no soot.
The width of the firebox sometimes reaches 38 cm. In indoor stoves, the best firebox is 26 cm wide (according to the size of the door). Practice shows that if you make a firebox 26 cm wide and 31 cm long with steep side walls, and bevel up to 2 cm at the front and rear walls, then the coal (anthracite) in such a firebox burns completely. Coal does not bake well, so a firebox with a more expanded shape for coal is worse - in such a firebox, little air flows to the walls. A funnel-shaped firebox with a large bevel is good for firewood and brushwood: as the fuel burns, it settles down toward the grate. In a firebox with a stove, there should be a space above the fuel formed by two rows of masonry (at least).
Installation of a grate for fuel: a - wood; b - coal; 1 — blower chamber; 2 — blower door; 3 - grate
The grate separates the firebox and the blower chamber. For wood fuel, the grate is installed to the rear wall of the stove, slightly raised. Practice shows that it is not necessary to lift the hearth under the firewood, since the rise is formed over time from growing ash. Under the coal, the grate is placed exactly horizontally one or two rows below the fire door. It is good to assemble it from piece cast iron grates covering the entire width of the firebox - up to 26 cm. The solid grate is fragile and therefore soon fails. Individual grates are stronger; they are specially produced for heating with coal. Any fuel burns on such grates. For brown (Moscow region) coal, the grate is installed two rows below the combustion door, so there will be at least three rows of masonry above the blower window.
Potbelly stove with smoke circulation
This is a rectangular stove with minimal fuel consumption and the ability to regulate combustion intensity. The structure (furnace body) is assembled from metal sheets by welding.
Required materials and tools:
- welding machine complete with electrodes;
- grinder and circles for cutting metal;
- roulette;
- metal corners;
- metal rods for the grate;
- pipeline;
- sheet metal.
The furnace consists of the following sections: firebox, smoke circulation, ash pan, exhaust pipe. Additional elements: doors with canopies and latches, grate, metal legs, valve on the pipeline to reduce heat loss.
Assembling a potbelly stove with smoke circuits
- We make a drawing of the future furnace.
- According to the dimensions indicated in the drawing, we make markings on the sheet metal and use a grinder to cut out blanks for the future firebox.
- We join the sheets of metal to form a rectangle. We weld metal corners inside (on the side walls of the oven) on which the grate will be placed.
- The grate is made from a set of longitudinal and transverse metal rods of the same length, connected by welding. The cells must be of sufficient size to retain fuel on them and free passage of combustion products through the grate. There is no need to weld the grate itself to the body of the firebox, then it can be pulled out while cleaning the stove from ash and ash.
- At the next stage of work, it is necessary to weld a sheet of metal inside the firebox, which forms a smoke circulation. The size of this sheet of metal should match the bottom of the furnace in width and be slightly shorter in length.
- After the interior of the stove is ready, it is necessary to make a ash door and a door for putting fuel into the stove. We make the doors in such a way that it is convenient to clean the oven and remove the grate. To make canopies, we use a metal rod and a tube of suitable size. We cut them with a grinder and weld them to the walls of the firebox and to the doors, respectively, then insert the free section of the rod into the tube. For ease of use of the doors, we make handles from thin strips of metal and attach them by welding. We make the valves in the form of a long curved strip of metal and, accordingly, a hook to which it will cling.
- The legs of the stove can be made entirely from metal corners or adjustable. To be able to adjust the length of the legs, you will need nuts and threaded metal rods of appropriate thickness. Thanks to this technique, the potbelly stove will stand steadily even on an uneven surface. And also, with the help of such legs, it is convenient to disconnect the stove from the pipe and carry out maintenance or replacement of any parts.
- Outlet pipeline with damper. For the damper itself you will need a metal rod of small diameter and a sheet of round metal with a diameter slightly smaller than the diameter of the pipe. We drill two holes in the pipe, insert a rod into them, bend its outer part for convenience, and install and weld a metal circle inside the pipe. Thus, when the rod turns, the circle will turn accordingly, changing the gap and reducing heat loss from the furnace to the atmosphere.
- In the upper part of the furnace we cut a hole corresponding to the diameter of the outlet pipe and weld it hermetically.
There can be two or three smoke circuits in a potbelly stove. And in order to reduce heat loss from the metal walls into the atmosphere, the outside of the furnace is lined with refractory bricks or a reflective metal screen is installed with a layer of heat-insulating material, for example, an asbestos sheet.
To light a fire in the stove, newspapers, sawdust are placed on the grate, small dry logs are placed on top and the newspapers are set on fire with matches. Once the logs are hot, larger pieces of wood are added to the stove. Do not open the firebox and ash door at the same time. Regulation of draft and combustion intensity occurs by changing the gap in the pipe (valve) and through the blower.
So that the stove gives heat, don’t forget about the vent
Making a stove with your own hands or with the help of a specialist is not so difficult, knowing the device and some design features. Today we will not talk about all the components of the stove, but we will talk about the vent for the stove. Everyone understands that any fuel (coal, peat, firewood) has some kind of residue when burned. A portion of combustion products is removed as smoke, soot and soot through the chimney, and some, such as ash and ash, remain in the combustion chamber.
So, the blower is the main air chamber of a rectangular oven. Air passes through its door, which cools the grates and supplies the firebox with oxygen. In addition, it serves as a place where ash and other fuel waste are collected. They can be removed through the door, so it is worth considering its comfortable dimensions.
The standard dimensions inside the chamber for a brick kiln are 25 × 38 cm. Other dimensions are possible. But in any case, the blower door should be smaller than the chamber itself. It is laid on the second row of the stove masonry.
The firebox must, due to its purpose, withstand high temperatures. This design promotes precise, uniform air distribution and absorption. The ash pan is equipped with two openings: the front one is a ash pit with a blower door and the top one is covered with a grate.
The ash pit or ash chamber is located immediately under the firebox grate. As I already said, it is necessary to collect ash and regulate the flow of air into the firebox. Such a chamber is often equipped with a blower. Its height is about 14 cm. It is worth remembering that after each firebox you need to clean the chamber from combustion products.
The ash pan is usually equipped with a metal tray. Ash from the firebox ends up in the ash pit through the grates. The air enters the fire through the grate and this ensures efficient combustion of the fuel.
The blower can be made with or without doors. To increase the air flow, just open the door slightly. And, conversely, to reduce the intensity of the fire, cover it. If your structure is so complicated that doors were not provided, no problem. In this case, you can increase the traction by pulling out the drawer. To prevent ash and ash from spilling out, the blower should be made inclined.
As for the size of the ash pan. As I already said, there are no identical stoves and fireplaces, so there simply cannot be uniform blower sizes. The main thing to take into account is that the ash pan must match the size of the grate. If you do less, most of the ash will remain on the grate, and this will prevent air from reaching the fire.
If the vent is not originally equipped with doors, install a drawer or tray. To calculate the size of this device, you need to know that the width of the tray should be equal to the distance from the wall to the wall of the blower, and the length should exceed the dimensions of the firebox. Why? Yes, because to increase traction you will need to pull out this drawer or tray, otherwise the ash will spill out and accumulate at the back wall.
As for the material for the ash pan. We remember that it needs to withstand high temperatures. The best option is steel with a thickness of 0.8 mm. For blowers with doors, the presence of a drawer is not necessary. The ash pit is made from the same brick as the stove. It would be better if it was fireproof.
It is clear that the vent needs to be cleaned periodically. A tray or box is made for these purposes - this will simplify the cleaning process. You just have to remove and pour out the ash that has accumulated during the combustion process. Even if this device is not provided, the cleaning process will not take much time. But follow safety precautions. Wait until the ash cools down and then start cleaning. It's a little more time-consuming, but not super difficult. Prepare a brush, dustpan and bucket. By the way, there is a special vacuum cleaner for fireplaces. It will ideally help cope with dust, ash and ash.
This concerns the designs of the furnace. But there are different opinions and approaches to the issue of the need for blowers in fireplaces. Today you can choose designs to suit every taste. It is possible to choose with or without a blower.
In small stoves and fireplaces, instead of a blower door, it is sometimes advisable to use an ash box in the form of a scoop. You can prepare it yourself. The body is cut out from a sheet of steel 0.6-1 mm thick. The sides and edges are folded along the marked lines. Holes should be drilled for the rivets. The body is riveted, then the front wall is mounted to it using rivets. Its top is turned away in the fold directions, creating a comfortable handle of sufficient width.
A sign that the furnace element has been completed correctly is that our completed ash box will fit into the ash pit so that its front wall tightly covers the ash hole.
In any case, to achieve high efficiency of the furnace, the required amount of air must enter the firebox. Its lack will lead to incomplete combustion of fuel and loss of heat. In addition, it leads to the deposition of a considerable amount of soot in the furnace channels. Even a small amount of deposited soot can affect the thermal conductivity of the furnace walls. Under no circumstances should the stove be lit with the ash pan closed in smoldering combustion mode.
If there is insufficient air flow, the flame will have a dark red hue. This is also evidenced by the presence of dark smoke from the chimney. The humming noise in the firebox and the bright white color of the fire indicate excess air. This is also not good, because excess air simply passes through the oven, cooling it. In this case, it is worth closing the blower door and the valve.
At the best combustion mode, the color of the flame should be light yellow and the smoke from the stove should be colorless.
These are the main points you need to know about the furnace vent. With this I say goodbye to you. Until next time.
Operating rules
Operating a brick oven not only does not create difficulties for amateurs, but also creates a feeling of comfort from an open fire.
- It is better to use a coarse oven seasonally. Low thermal efficiency does not allow the stove to be used all year round; it will not be able to warm up a large house well during the cold winter.
- It is necessary to regularly clean the chimney so that gases do not enter the room and poison the inhabitants of the house.
- Heat the stove only in compliance with safety precautions, do not put too much firewood at one time, close the firebox door tightly after loading a batch of fuel.
- If the oven is used as a hob, it is necessary to use appropriate cast iron, clay or aluminum cookware, as well as various oven mitts or gloves to avoid burns.
- If you have a stove bench, you should only heat it with wood. The coal heats up the surface of the bed too much.
- Before using the stove, be sure to ensure that the chimney is installed correctly.
- It is better to use wood or coal as fuel. It is not recommended to use various waste materials made from modern materials; they emit gases that are harmful to health and clog the chimney.
Not recommended:
- Use gasoline and other flammable liquids to light the stove. This may result in an explosion and fire.
- Burn garbage, polymers, roofing felt, roofing felt, old shoes, etc. in the stove. This leads to clogging of the stove with difficult-to-remove resinous soot and an unpleasant odor in the house.
- Heat with raw wood. Up to 40% of the heat can be spent on evaporation of moisture contained in firewood. In addition, wet firewood produces a large amount of soot. Firewood is considered dry if it has been stored under cover for 1 year. If there is no dry firewood, then it is good to dry a two- to three-day supply of raw firewood in the house (near the stove).
- Cover the stove roof (or the bench of a Russian stove) with combustible materials. This leads to fires. You can put anything on the stove only 2-3 hours after the fire stops, i.e., when the stove starts to cool down.
- Reheat the stoves. The temperature of the furnace walls should not exceed 70 °C.
How to clean a stove vent?
The presence of a door in the ash pit plays a positive role in regulating the pressure of the fire. But with cleaning we get the opposite result. The box is more convenient for cleaning. You can simply pull it out and shake it in the right place.
Ash box
If there is no drawer, then you will have to clean the oven manually. First, you should wait until the oven has completely cooled down. Next, using a brush, dustpan and bucket, you need to clean out all excess from the installation. There is nothing difficult about purchasing such cleaning products.
There are also special vacuum cleaners for fireplaces that can also be used in the stove. With their help, cleaning will not be difficult for you.
Often, due to a clogged oven, various types of problems occur. Example: The stove often leaks smoke. People who are not very familiar with the structure of the furnace and do not know how to operate it complain about caustic soot in the house or garage. The solution to the problem is incredibly simple: you need to regularly clean the ash pan, using the right tool.
What it is?
The ash pan is the same as the ash pan. An ash pan has long been included in the design of any stove. This is a chamber under the firebox grate, which is equipped with a metal tray.
When any material is burned in a furnace, ash and ash remain. For such waste, a special place is needed, and that is exactly what the ash pit is.
It's hard to imagine a stove without a blower. Then the entire structure ceases to function normally, and may even make no sense. After all, the ash pan is an important component, without which all excess waste would come out.
Dust from the firebox is transferred to the ash pan using a grate. The air thus gets to the fire and allows the fuel to burn as efficiently as possible. After which the air passes further and is removed into the chimney.
Secrets of long-term operation of solid fuel units
The whole secret of long-term burning of a potbelly stove is hidden in the way of putting fuel into it. The firewood in such a stove is ignited from above, so there is no danger of all the logs placed in the fuel chamber catching fire at the same time.
Despite its unassuming appearance, a homemade long-burning potbelly stove successfully competes with many factory-made wood stoves
Additionally, this is facilitated by the method of air supply. The oxygen required for combustion is supplied only to the top layer of fuel. Such solutions make it possible to increase the size of the filling as much as the dimensions of the furnace allow. Of course, the continuous operation time of such units increases tens of times.
The secret of long-burning stoves is an efficient way of burning fuel
The duration of one heating cycle can be further increased by the pyrolytic decomposition of solid fuel, which occurs at high temperatures and lack of oxygen. In this case, firewood does not burn, but smolders, simultaneously forming a large amount of volatile hydrocarbon compounds. Pyrolysis gases burn under the roof of the furnace, releasing a large amount of heat. Thus, smoldering helps to lengthen the continuous combustion period, and pyrolysis makes it possible to increase the efficiency of the heat generator many times over.
Features of wood burning and preparation for the process
The efficiency of lighting a wood-burning stove depends on three main factors:
- firewood quality;
- condition of the heating structure;
- stove maker skills.
Firewood quality
The best firewood for a stove fireplace is logs from deciduous trees, which are characterized by high density. Oak and birch are deservedly popular. The denser the wood, the higher its heat output and the longer it burns.
The highest quality firewood is obtained as a result of winter harvesting - during this period, sap flow is reduced.
But the most important aspect to pay attention to is the dryness of the fuel. Therefore, it is very important to either buy high-quality logs or prepare them in advance. During combustion, wet wood fuel releases steam, which settles on the walls of the chimney and stove chamber.
Figure 2. Harvested firewood
Burning insufficiently dried wood results in:
- reducing the diameter of heat removal channels;
- contamination of the internal zone of the furnace;
- the formation of acid, which reduces the service life of the hearth.
The size of the logs also matters. It is recommended to use firewood whose cross-section is within 8-10 cm. Experience shows that, all other things being equal, fuel with such parameters burns extremely long and efficiently.
State of the furnace structure
An obvious point is the proper execution of the stove. The design must meet requirements based on the interdependence of physical processes. That is why it is better to entrust the laying of the stove to a specialist - an experienced stove maker will build a stove taking into account a lot of nuances.
Conclusion
Loginov's design allows minimizing fuel costs. The model can be modified and improved, and is easy to manufacture. Making a potbelly stove yourself is much cheaper than buying a ready-made one, provided you have basic skills in working with metal. Pyankov’s scheme is no worse than Loginov’s and is a little simpler to manufacture - no threads or blower tubes.
For experienced craftsmen, there is the opportunity to turn a potbelly stove into an electric generator. This requires a Peltier element. It converts thermal energy into electricity. The integrated heating elements heat up and produce 12 volts DC with a power of 60 watts. This is not enough to fully provide electricity, but in conditions of winter fishing, army training grounds and dacha cooperatives without electrification, it will be very useful.
Loginov's potbelly stove is safer and more efficient in operation. Its compact dimensions allow it to be used in any area, and its low weight allows it to be installed even on very flimsy ceilings and joists. The disadvantage of the design is that it is difficult to clean - not everyone is able to lift and tilt a heavy metal stove. One day of work, and as a result, your own stove heating with a wide range of applications.