Domestic brick stoves for coal remain worthy competitors to solid fuel boilers in a situation where in winter it is necessary to heat a small and medium-sized home, and main gas is not supplied. If in some respects coal stoves are inferior to steel and cast iron heat generators, then in other respects they have no equal. Therefore, the demand for the construction of brick kilns remains consistently high.
Using coal instead of firewood is an inexpensive and efficient option for heating your home.
Advantages of brick heat source
Installing a solid fuel boiler is easier and cheaper than building a brick heating stove in the middle of the house. On the other hand, for the unit to operate, it is necessary to install a water heating system, and the stove can do without it.
Despite the high cost and complexity of construction, many homeowners still prefer brick ovens. The reasons are significant:
Features of placing the stove in the house.
- Durability. When coal is burned in the firebox of any heater, a fairly high temperature arises, which over time destroys steel products. While even ordinary ceramic bricks will last for decades.
- Cast iron boiler heat exchangers run the risk of cracking due to temperature changes, while brickwork can easily withstand temperature shock.
- Heat capacity. A brick stove on coal accumulates a large amount of heat during operation, and the boiler for this requires a buffer tank, which costs a lot of money.
- The accumulated heat is released into the room for a long time after the coal in the combustion chamber has died out.
- The stove produces healthy, pleasant heat transmitted through infrared radiation and convection.
Since coal stoves still cannot do without the firewood required for kindling and heating, an indescribable atmosphere is created in the house, saturated with the natural smells of nature. There are 2 types of such heat sources:
How to load fuel and operate the unit correctly
A long-burning unit differs from a traditional furnace by an increased loading volume and limited access of oxygen to the working area. The operating time of the boiler depends on the amount of fuel loaded, so the firewood is stacked as tightly as possible, without leaving large gaps between the logs. If materials such as peat, fine coal, shavings, sawdust or pallets are used as fuel, then they are poured to the level of the smoke channel without compacting. The necessary compaction of the fuel will be provided by a heavy metal piston.
Fuel loading is performed in the following order:
- remove the top cover from the unit;
- remove the air distribution device;
- load the stove to the level of the chimney;
- spray the top layer of flammable material with lighter fluid;
- install an air regulator;
- return the cover to its place;
- A piece of rags soaked in a flammable liquid is thrown inside the air channel.
Steady combustion is accompanied by smoke coming out of the chimney evenly. As the wood burns, the duct pipe moves down. It can be used to judge the remaining operating time of the solid fuel unit.
It is best to light the stove using a rag moistened with a flammable liquid.
During operation, ash and ash accumulate at the bottom of the barrel. It must be said that their quantity does not have any effect on the combustion process. However, fuel combustion products must be periodically removed, since they reduce the thickness of the filling layer. To do this, open the bottom door and scoop out the ash using a regular metal scoop.
When removing ash, leave a layer 10–20 mm thick on the bottom of the oven. This will not have a particular effect on the amount of firewood; however, it will create an excellent heat-insulating cushion that will protect the bottom of the unit from burning out.
Properties of a natural fuel stove
As already mentioned, the combustion temperature of coal is quite high. With sufficient air supply to the firebox, it reaches 1000-1100 °C, so not every material can withstand such conditions for a long time.
For comparison: dry wood under identical circumstances can produce no more than 700 °C in the firebox, and even then very rarely. In addition, coal fuel is much higher in calories than firewood.
That is, when burning 1 kg of anthracite, almost 2 times more thermal energy is generated than from the same amount of wood, as shown in the table:
| Type of fuel | Calorific value | |
| MJ/kg | kW/kg | |
| Wood with a moisture content of 25% | 10,1 | 2,8 |
| Stone coals | 21,5 | 5,9 |
| Brown coals | 15,5 | 4,3 |
Previously, in old houses, heating stoves or slabs were made only of solid red brick. When constantly burning high-calorie coals, the masonry gradually began to crumble due to exposure to high temperatures, so the owners lined the inside of the firebox with thick steel soles from railway tracks to protect the walls.
At the moment, the problem of burning coal is solved much easier - with the help of fireclay bricks. The design of the furnace provides for lining the fuel chamber with fireclay stone grade ША, ШБ or ШВ to a thickness of a quarter or half a brick. This material can easily maintain temperatures of 1400 °C and short-term temperatures of up to 1650 °C.
There is another point: due to the higher calorie content than wood, a larger amount of heat is released, part of which goes with the combustion products into the chimney.
To avoid this, a more developed smoke circulation network is provided in the coal furnace, where flue gases have time to transfer heat to the brick walls, and not immediately fly out into the chimney.
Otherwise, this is an ordinary brick stove with all the advantages and disadvantages.
Production of charcoal in a charcoal kiln
In addition to waste wood of various species, knots, sawdust, and hemp are suitable for the production of charcoal. If the area is swampy, peat is used for these purposes. The process of burning wood goes through mandatory 3 stages:
- Drying.
- Thermal decomposition.
- Cooling.
The first step requires heating the chamber in which the raw material is placed to a temperature of 280 0C. Only after this does an exothermic reaction begin with the release of thermal energy and the process of “cooking” coal begins.
The finished product requires cooling to the point where spontaneous combustion becomes impossible. Usually this indicator is kept at 40°C. Even after cooling for about another day, the mixture of released gas will contain a large percentage of water. After complete drying, you can use the material for its intended purpose.
How to build a stove?
First you need to understand what requirements are put forward for a heating stove for coal:
- the heater must warm up evenly and quickly, intensively transferring heat to the air in the rooms;
- the outer walls of the brickwork facing the rooms can warm up to a maximum of 90 °C;
- fuel combustion must be efficient;
- the stove should be located in the house in such a way that its walls heat several rooms;
- when constructing the body of the stove and chimney, it is important to comply with all fire safety rules;
- It is not allowed to use flammable materials during construction;
- the masonry must be smooth, without cracking;
- The heater should be finished in accordance with the interior of the home.
When the requirements are known and worked out in relation to your home, you should select a stove design that is suitable in size and lay a solid foundation for it.
Laying the foundation
A coal stove is a massive and quite heavy structure, and therefore the foundation for it must be made reliable. Its dimensions in plan are taken to be 5 cm larger in each direction from the dimensions of the future structure.
An important condition: the foundation of a brick heating or cooking device should not be connected to the base of the building itself, but should be at least 10 cm away from it.
Work on laying the foundation is carried out in the following sequence:
After laying the foundation, you can begin building the stove according to the procedures.
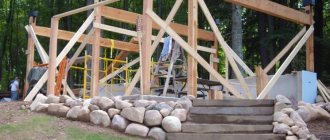
Shed with a gable roof made of metal tiles
This barn was built alone. The construction is also frame: the cheapest way. In this case, the assembly method is “balloon” - gradual alignment of the racks. It all starts the same way: first we made columns for the foundation. Only this time they are brick.
Foundation for a barn made of brick pillars
As you can see, there are studs built into the corner posts. Holes are drilled in the strapping beam and it is put on studs. They can be done not only in corners, but also on intermediate posts: it will hold on more firmly.
This barn has a small porch-veranda, so a cross beam is installed at the required distance. And the wall will support it. Columns were also pre-made for it.
The logs were also attached to the plates
The logs can also be attached with a notch. Then a notch in the shape of the log is cut out in the strapping beam. In depth it should not exceed 30% of the thickness of the beam, so the joist is cut so that it is flush with the frame. This method is more labor-intensive.
Next, the frame was assembled: corner posts 100*100 mm, intermediate posts - 50*100 mm, the top frame and rafter system were assembled from the same board. The triangles at the top are reinforced with applied metal plates. Smaller plates were also attached at the junction of the upper frame beam and the racks. They were connected end-to-end without cutting, nailed on top and diagonally with nails. The plates reduced the likelihood of folding under lateral loads.
Next, the rafter system was assembled - a 150 * 50 mm board, on which - lathing for metal tiles. It was chosen because the dacha was roofed with the same material.
Assembled rafter system with sheathing
The frame was covered with OSB sheets - the most convenient size for construction. Subsequently, the walls will be finished with wood siding.
This is an almost finished barn with a gable roof. Wall decoration left
The sheathing, by the way, does not have to be made of plywood or OSB. You can attach the lining or board directly to the racks. But then, when assembling the frame, you need to install slopes: without the rigidity of the slab material, the building will be flimsy. If you don’t set the slopes, you can swing them by hand.
Such braces will give sufficient rigidity to the walls of the frame shed
After installing the braces, you can add boards, lining, block house, imitation timber, siding - the choice is yours.
Frame shed sheathed with boards
Similar frame sheds can be made from profile pipes. For strapping and corner posts, a cross-section of 60*60 mm or 60*40 mm is sufficient; for intermediate posts, even less - 20*40 will be normal. Only to attach the outer sheathing will you need to assemble and fasten the sheathing. Read more about building a shed from pipes and metal profiles here.
For those who are concerned about the appearance of the building, here are some ideas on how to make a barn beautiful in video format.
Recommendations for masonry
To lay a stove where you plan to burn coal, you will need 2 types of mortar - clay-sand and fireproof. With the help of the first, the body of the furnace is built from solid ceramic bricks, and the second is used for the internal masonry of fireclay stones. The thickness of the seams also differs: for ordinary masonry it is a maximum of 5 mm, for fireproof masonry - 3 mm.
To prepare both types of mortar, it is recommended to purchase ready-made construction mixtures that are commercially available. Only experienced stove makers can make a good solution from natural clay. You also need to prepare masonry and measuring tools, and then start building the stove:
The stove solution does not harden, but dries, for which it needs to be given 2-3 days. Afterwards, all that remains is to lay out the chimney, observing the rules for passing through the floors and roof, and at the end make a test firebox. You can fill the stove with coal only after it has completely warmed up, making sure that there are no cracks or crevices.
This site uses Akismet to reduce spam. Find out how your comment data is processed.
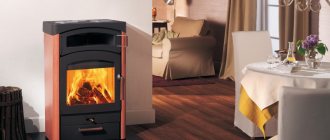
Often a coal stove is chosen for installation in a country house or bathhouse. Its heat output is one and a half to two times higher than that of a wood stove due to the fact that coal burns at a higher temperature.
This stove has a simple design, reliable operation, and is also economical due to the low cost of fuel.
The main elements that contribute to the process of designing and landscaping the yard of a house
Arrangement of the yard of a private house begins directly with the project itself, after which estimates are drawn up and planned expenses are calculated. Then building materials, small architectural forms and planting material are purchased.
There are basic elements that should not be forgotten. These include the following components:
1. Buildings and structures. These elements are basic and dominant. On private territory there must be a house to live in, as well as some buildings: a garage, a bathhouse, an outbuilding (storage of work equipment, various accessories), a greenhouse, etc.
2. Road and path network. It divides all zones among themselves according to the functions they perform. When planning, you should lay all paths only along the shortest distance, which will save time when moving and financial resources for building materials.
The yard of a country house may also contain complex systems of paths with a variety of paving options.
3. Lighting – the presence of lighting devices is provided. It can be used not only for practical purposes, but also to create a beautiful decorative effect.
4. Flower beds – adding aesthetics to the area. Probably not a single owner can imagine how to arrange a yard without planting flower plants.
There are a huge number of such elements: a flower bed (a regular-shaped flower garden), a mixborder (a complex flower garden consisting of perennial flowers), a border (a flower garden along the paths), a rock garden, a rock garden (a complex flower garden that includes natural stones and various mountain plants), and other. This element will perfectly complement any area.
5. Small architectural forms. Thanks to them, you can distinguish which zone is which. These are various garden furniture, sculptures, fountains, lanterns and lamps.
6. Trees and shrubs. They can be planted in beautiful groups to create hedges and beautiful unique tapeworms. Thanks to proper planting, the creation of surprise in open views and their smooth transition into each other is guaranteed.
7. Ponds are an excellent element that will perfectly give a feeling of nature, naturalness and natural beauty. These can be small ponds, fountains, cascades and decorative waterfalls, streams and pools. They look very beautiful with natural stones and aquatic plants.
Thanks to proper planning of the territory and the presence of basic elements, your yard will be the most irresistible and beautiful, constantly attracting everyone's attention
Everyone living in a private house knows that a room is needed to store solid fuel for the winter. I suggest the option: “angle with a lifting roof.” This immediately begs the question: why with a lifting one? Based on my experience last year, when I had to throw coal into a coal pit, I realized that this is unpleasant work.
To make the square I needed:
profile pipe 20x40, 40x40, 50x50, 25x25 mm, door canopies, welding machine, electrodes, grinder, cutting discs for metal, level, tape measure, drill with drills, anchor bolts, pgs, cement, sand, concrete mixer.
To do this, I just needed to extend the parking area and I simply filled it and concreted it. On one side, instead of formwork, I laid out a brick “wall”, and on the other I laid an asbestos-cement pipe. Using anchors, I attached a “device” to the concrete base to hold the pillars, made from a 50x50 profile pipe, 200 mm long and a 3 mm thick metal plate with dimensions 150 x 150 mm.
Coal stove diagram for home
The design of a brick coal stove is almost no different from the design of a conventional wood stove.
It consists of, located in a certain sequence: foundation, ash pit, combustion chamber, vault, chimney.
The main difference between a coal stove is a reinforced firebox and an increased volume of the ash pan (when burning coal, a larger amount of ash is produced than when burning wood).
A larger area grate is also required (ideally it replaces the bottom of the firebox).
The coal in the combustion chamber of the furnace burns out from below, so the walls of the compartment are made inclined - this design helps the upper layers of coal to sink as they burn out. The dimensions of the standard device are 110x900cm , the height without a chimney is about a meter.
For the bath
The sauna device is characterized by the presence of a heater - a container for stones. Together with it, the height of the stove will be 1.6 m , length 1.1 m , width 90 cm . The heater is made open and located in the upper part of the stove. Because of this, the chimney is located not above the combustion chamber, but to the side.
More compact metal stoves are often installed in the bathhouse. The dimensions of a standard metal coal stove are 50x80 cm and height 80 cm . It is recommended to make the wall thickness at least 8-10 mm.
The main stages of making a potbelly stove
1. All the details are marked on a sheet of metal: 6 steel rectangles for the walls of the oven, 1 rectangle for creating a smoke reflector, plates for the grate and latch for the door. 2. You can cut a sheet of metal at any metal base. The guillotine, unlike the grinder, allows you to cut (chop) it more accurately.
4. To avoid mistakes, the furnace box is first only tacked by welding in several places, and only then, after checking its horizontal and vertical positions, its seams are welded.
Important! All connections in the body are thoroughly welded; To check the seams for leaks, you can coat the joints with chalk or kerosene. 5. Welding seams are cleaned with a wire brush.6
The internal space of the potbelly stove is divided into three parts: the firebox, the smoke circulation chamber and the ash pan. To separate the firebox from the ash pan, a grate is laid between them, on which the fuel will be placed. To do this, at a height of 10-15 cm from the bottom of the stove, 5x5 cm corners are welded on the sides and on the back of the box. On which the grill will be located
Welding seams are cleaned with a wire brush.6. The internal space of the potbelly stove is divided into three parts: the firebox, the smoke circulation chamber and the ash pan. To separate the firebox from the ash pan, a grate is laid between them, on which the fuel will be placed. To do this, at a height of 10-15 cm from the bottom of the stove, 5x5 cm corners are welded on the sides and on the back of the box. On which the grill will be located
5. Welding seams are cleaned with a wire brush.6. The internal space of the potbelly stove is divided into three parts: the firebox, the smoke circulation chamber and the ash pan. To separate the firebox from the ash pan, a grate is laid between them, on which the fuel will be placed. To do this, at a height of 10-15 cm from the bottom of the stove, 5x5 cm corners are welded on the sides and on the back of the box, on which the grate will be located.
7. The grate is welded from thick steel rods or strips 30 mm wide. They are attached to 2 stiffeners - rods with a diameter of 20 mm. Since the grates burn out over time, it is better to make such a grate removable.
Manufacturing of grate
8. At a distance of 15 cm from the top of the box, two strong rods are welded, on which one or two removable reflectors will be placed - thick-walled metal sheets that will delay the flow of hot gases and send them for afterburning. However, they should not completely block the oven. To allow hot smoke to enter the chimney, an indent of about 8 cm is made from the front (for the first sheet) and back of the stove.
Diagram of the passage of gases in a simple potbelly stove and stove with an installed reflector
9. Next, the upper part of the box is welded, and then a hole for the pipe is cut in it.
Pipe hole
10. The front part of the stove with holes cut in it for the firebox doors and ash pan is welded last. 11. The size of the firebox door must be sufficient to allow fuel to be added and grates to be changed without effort. The hole for the ash pan is made a little smaller. 12. The hinges are welded first to the door, and then to the body of the potbelly stove. They can be bought ready-made or welded from two tubes of different diameters. Door handles can be made from a strip of metal or rod.
Important! When attaching the doors, you should fit them to the body as tightly as possible; To do this, they are straightened (leveled) and cleaned with an emery wheel. The wedge latches that close the doors are fitted to the body as tightly as possible. 13
You can cook food or heat water on such a stove. To do this, a hole of the required diameter is cut in the upper part of the box. Stove burner. which will be inserted into this hole can be purchased at any hardware store.14. For ease of use, the structure is mounted on legs or a welded pipe stand.15
13. You can cook food or heat water on such a stove. To do this, a hole of the required diameter is cut in the upper part of the box. Stove burner. which will be inserted into this hole can be purchased at any hardware store.14. For ease of use, the structure is installed on legs or a welded stand made of pipes.15.
The chimney pipe is connected to the stove using a sleeve. 16. For inserting a gate valve. to regulate the smoke output, two holes are drilled in the pipe. A metal rod is inserted into the holes and bent at 90°. A metal “penny” is attached to it in the center of the pipe - a gate, the diameter of which should be slightly less than the diameter of the pipe itself by 3-4 mm.
Gate valve for adjusting smoke output
Making a device yourself
Carrying out brickwork is quite a difficult job if you lack experience. Therefore, before starting construction, it is better to seek advice from a master. When making a stove yourself, it is important to carefully follow all the steps and not change the selected project design.
Project selection, drawings
The choice of oven model is primarily influenced by the desired power of the device. The efficiency of the heater depends on the size of the combustion chamber. Typically, coal combustion has a heat output of about 500 kcal/hour . Therefore, a device of standard dimensions 110cmx90cm is suitable for heating a room up to 35 square meters. m .
Photo 1. Drawing of a metal coal stove. The device is small in size, it will fit even in small rooms.
Photo 2. Drawing of a coal stove made of metal. Arrows also indicate all parts of the device.
Materials and tools
To build a coal stove, you will need fireclay bricks that can withstand heating up to 1400-1650 degrees without cracking. To prepare masonry mortar, fatty clay is used mixed with water and sand. To lay out the external walls you will need solid red brick.
Doors, hinges, and grate are purchased at a hardware store.
The work will also require tools: hammers, a trowel, usually a mortar shovel, a hacksaw, a grinder, a building level, plumb lines, and a tape measure.
Stages of work
When choosing a place to build a stove, factors such as the location of the chimney and the size of the room (in a large area it is better to install the equipment in the center).
The walls and ceiling in the selected area are sheathed with fire-resistant material.
It is better to immediately think about the place where the coal will be stored - in order to avoid fire hazards, it should not be placed in close proximity to the stove . It is also necessary to take into account that coal is very dusty and dirty.
A massive brick oven is installed only on a concrete foundation , which is not connected to the main one. Therefore, its location is better than
Construction of a coal furnace
Before construction begins, each owner will choose his own design option. Some will prefer to install a long-burning coal stove in their home, while others will opt for the economical “baby” or “housekeeper” option. But for each of the available options, the sequence of construction work remains unchanged.
If you don’t know where to start working on the construction of a furnace, and the materials and tools have already been selected, then the first thing you need to do is prepare the construction site. To do this, you will have to clean it of foreign objects and debris. Then, if the stove is being built indoors, you need to remove the floor covering, which is an unreliable combustible material and is not suitable for the base of the stove.
When constructing a coal furnace for a long time, even if the most economical and lightweight design option is chosen, one must not forget about a reliable foundation. It is this that will prevent the stove from sinking into the ground over time or changing its geometric dimensions due to the lowering of one of the corners. The foundation must be made reliable and solid, then if it is necessary to change the configuration of the furnace or modernize it, you will not have to deal with it again.
When the site and foundation of the future furnace are ready, its serial construction can begin. The ordering scheme can be taken from open sources. It is this that will not allow a novice specialist to make mistakes when constructing load-bearing walls and internal lintels.
When the coal stove is folded, it is necessary to make a chimney for it. Here you will have to apply all the knowledge accumulated by your ancestors and modern developments, because the chimney will essentially be constantly open and it is necessary to prevent rapid cooling of the room and reverse draft. The basis of the chimney of a coal furnace should be a horizontal or vertical chimney, which will reduce the speed of the flue gases and allow the furnace body to receive additional heat from them.
When building a coal furnace, special attention must be paid to its safe operation, and the space in front of the firebox on the combustible floor covering should be covered as much as possible with metal material
The operating principle of wood and coal stoves
Technologies do not stand still. And gradually a new trend is gaining popularity. These are so-called long-burning furnaces. This design increases the combustion time of firewood by 2 times, and coal by 3 times.
The operating principle of such a furnace is based on forced air supply and fuel combustion in the upper chamber. The fuel is pressed down with a special weight, which sinks lower and lower as it burns. The air is pumped using a fan.
This principle is fundamentally different from the classical one, when combustion occurs due to the supply of air from below, through the blower.
The stove can use any solid fuel: brown coal, anthracite, briquettes, sawdust, firewood, etc. The fuel supply process can be automated. In this mode, the oven can operate for up to several weeks. As in the classic version, there is an ash chamber located below. It is separated from the combustion chamber by a grate.
Main types of homemade stove designs
Here are the main types of structures:
- non-removable;
- partially collapsible;
- completely collapsible.
The advantages of a non-separable design are maximum rigidity and strength, the main disadvantage is the large size. A partially collapsible oven consists of several blocks, so its strength and rigidity directly depend on the same parameter of each block.
Based on the type of fuel combustion, these devices are divided into 3 main designs:
- traditional;
- with lower secondary air supply;
- with upper secondary air supply.
The first consists of walls and a bottom, so its design is the most primitive and easiest to manufacture. The second is noticeably more complicated, because it is formed from outer and inner buildings installed on a common bottom. Secondary air, which did not enter through the grate holes, freely passes between the outer and inner casings.
Advantages and disadvantages
This solution has obvious advantages:
- the oven can operate offline for up to 10 days;
- the operating time on one load of fuel increases by 2 times for firewood, and by 3 times for coal;
- low requirements for fuel quality;
- simplicity of design and installation;
- the ability to add additional options.
But practice has shown that there are also disadvantages:
- it is impossible to add fuel until the previous fuel is completely burned;
- you need a dry place to store fuel;
- coal produces a lot of dust and soot;
- high fire hazard if the requirements of SNiP 2.04.05-91 are not followed;
- The ash pan must be cleaned after each firebox, and the chimney before each heating season;
- environmental pollution.
You can make the stove yourself or purchase a factory-made analogue. The purchased option is preferable. Such a furnace will allow you to automate the process as much as possible. But it’s not cheap either.
To save money, you can make a similar design yourself. It will not be equipped with modern automation, but for a summer residence this is often not necessary.
The best material for the stove is heat-resistant alloy steel. Sometimes, when making it yourself, they use old gas cylinders. They are made of St3 steel with a high carbon content. Fire-resistant bricks are also widely used.
A long-burning stove using coal and wood can heat one room, or maybe an entire cottage. It all depends on the power. In the latter case, the furnace is used to heat the coolant - water, which enters the heating system.
Features of kindling and preparation
For safe and fruitful charcoal lighting, there are some simple rules to remember. Before ignition, accumulated ash remaining from the last time is removed from the stove and from the grate. Periodic cleaning of soot is also necessary (carried out at least once a year, at the start of the heating season). In the absence of a procedure, soot and combustion products will accumulate on the walls, which will interfere with high-quality heating. A dirty stove requires more heating material and produces less heat. A dirty grate makes it difficult to burn by not allowing enough air to flow through.
Winter kindling after a long break is fraught with difficulties. It is much more difficult to achieve high-quality ignition in a cooled stove in the cold outside than in a warm one. During severe cold weather, you can treat the inside of the structure with a hair dryer before starting heating. In winter conditions, it is recommended to take four-hour breaks between kindlings.
Regardless of the time of year, the following preventive measures are carried out before starting heating:
- Inspection and testing of coal fuel. High-quality coal has a dense consistency and does not crumble when squeezed. The fuel mass may contain coal dust. It burns first; To prevent the room from filling with a burning smell, it is recommended to sift the fuel before ignition.
- The furnace masonry is inspected for cracks. They provoke the penetration of smoke and combustion products into the rooms, creating a risk of destruction of the stove structure. If found, damage is repaired with a sand-clay mixture.
- The attic pipe and the part above the roof surface must be covered with whitewash. Before heating begins, bare areas are whitewashed. It is recommended to clean the pipe 2 times a month.
To prevent overheating, kindling is carried out several times a day with breaks. You cannot start heating if damage is found on the stove until the problem is fixed.
Scheme of a stone oven
The stove in the house is smoking: all the possible reasons and what can be done about it, read here.
Which stove is better to choose for your home?
Criterias of choice
When choosing a specific stove, pay attention to the following characteristics:
- power
- operating time on one fuel fill
- coefficient of performance (efficiency).
- The worse the room is insulated, the more heat will escape outside. Accordingly, in order to save money, it makes sense to take care of reliable thermal insulation in advance.
- When purchasing a factory model, all data will be indicated in the product passport. If you decide to make the oven yourself, then you will have to do the calculations yourself. Divide the area to be heated by 10 and take 20% as a reserve. This will give you the power you need.
- The next parameter is the operating time on one fuel load. Modern models can work autonomously for up to 48 hours. The longer the operating time on one tab, the more efficiently the fuel is used. And the less often you need to add it.
- There are models that use a hopper to automatically add fuel. Such a stove can operate autonomously for up to 10 days.
- The operating time of a stove for a summer cottage using wood and coal on one stack should be at least 12 hours. You won't enjoy waking up at night to add fuel. The efficiency of factory models is 75-90%. For homemade analogues – 75-80%. Factory boilers are beyond competition here. The only negative is their cost.
Review of the best models
The following table contains the 10 most popular models of factory-made solid fuel boilers. This is a long-burning wood-coal stove using wood, coal, and pellets.
| Model | Characteristics (power, room area, dimensions) | Material | Weight, kg | Price, rubles |
| Dobrokhot 6P |
| Steel | 70 | 12 800 |
| Zota Master |
| Steel | 103 | 24 890 |
| Siberia KVO 10 TPE |
| Steel | 85 | 16 842 |
| Magnum KDG 15 TE |
| Steel | 160 | 36 921 |
| Cooper OK-15 |
| Steel | 98 | 21 563 |
| FACI – 26 with fuel bunker |
| Steel | 350 | 158 000 |
| KST-20 with automation |
| Steel | – | 40 000 |
| Cooper PRO-22 |
| Steel | 115 | 26 751 |
| UmTech TTX-15 |
| Steel | 340 | — |
| Partner 16 |
| Steel | 83 | 21 960 |
How to choose the right finished product?
You should choose a furnace for producing charcoal for your production needs based on the type of fuel it will be operated on, the expected power and the amount of product produced.
In order to accurately observe technological conditions, it is necessary to carefully read the technical documentation for the product, what temperature and time the oven can produce, how quickly or slowly this or that stage of processing of raw materials or product occurs.
The financial capabilities of the enterprise, as well as the projected payback period of the new equipment, should also be taken into account.
The most popular models of standard furnaces for the production of charcoal are:
- Charcoal kiln Enchantress. The volume of its working chamber is 4.5 cubic meters. meters. It runs on wood, the output of finished products is 500 kg per one working cycle. It has a device for afterburning pyrolysis gases and is environmentally friendly. Its cost is 160,000 - 180,000 rubles.
- Charcoal kiln "Klen-E". The dimensions of its working chambers vary from 10 to 15 cubic meters. meters, depending on modification. It is a metal cylinder with a diameter of 2162 millimeters and a length of 4.5 meters. It is equipped with a separate firebox and gasification unit, the yield of the finished product is 1400 - 1500 kg per one working cycle lasting 70 hours. The price for charcoal kilns of the Klen-E series is 90,000 - 100,000 rubles.
- Mobile coal burning furnaces UPP-2M, Solza, PUM-6. These are compact installations, their productivity is 80,000 kg of coal per year, and their weight is only 2.5 tons. They are mobile, easily installed on any surface, and equipped with reverse movement of the coolant inside the chamber. Their disadvantage is poor thermal insulation.
- Installation "Polikor". This is a powerful charcoal stove, its productivity is 5200 kilograms of coal per day. It is easy to maintain, its cost is 400,000 - 500,000 rubles.
- Charcoal burning plant "Zarya - 50". The furnace with internal coolant is made of heat-resistant steel. Produces 4300 kilograms of coal per production cycle, the volume of loaded firewood is 25 - 28 cubic meters. meters. Its dimensions are 12.4x2.45x2.5 meters. Its price is 800,000 rubles.
Features of operation
If you heat the stove incorrectly, you can lose up to 70% of the heat. Below are the basic rules that must be followed.
Wood burning
Proper preparation of materials
But that's not all. In air, the humidity of firewood is 25 - 30%. The optimal value is no more than 12%. Therefore, before firing, they are dried indoors. If you place the firewood 1–1.5 m in front of the stove, it will dry out in 48 hours.
To do this, use a special tub in which logs are placed (see Fig. No. 1 below). Such firewood will have the optimal humidity and give off the heat indicated in the reference books. Keeping firewood closer than 1 m from the front surface of the stove is prohibited due to fire safety rules. The design of the stove may include a special place for drying firewood - a firewood shed.
Rice. No. 1 Tub for drying firewood
Cleaning the firebox, ash pan and inspecting the stove
You need to clean the stove from ash before firing it. This will eliminate the possibility of fire due to unextinguished sparks. First, the firebox is completely cleared of ash. All remains are swept into the ash pan. Then it is cleaned using a scoop. Ash should not be thrown away. This is an excellent mineral fertilizer.
It is necessary to wipe the doors, view and gate. Dust is the most common cause of chimney fires. When burned, it turns into bitumen. And it forms a dense soot that is very difficult to remove.
Another important step is checking traction
If the draft is insufficient, all the smoke will enter the room and it will be difficult to bring the stove to operating mode.
How to check traction? Very simple. They take a candle. Close the combustion door tightly. The blower is opened slightly. And they bring a burning candle to her. The flame should tilt towards the stove and burn evenly.
What to do if there is no traction? This means that either a vapor lock has formed in the oven or an air lock in the chimney.
You need to completely open the blower, view and gate. And prepare kindling from newspapers, oiled rags or sawdust. The kindling is slowly burned in the stove until the smoke breaks through the plug.
If all else fails, inspect the deflector. It may be damaged or clogged.
Refueling and lighting the stove
To fire the stove, a mandatory tool will be tongs. Without them, it will be difficult to straighten burning logs or coal. And if the wood, when burned, settles unevenly, then a lot of heat is wasted.
How to refuel the oven correctly? First, kindling is placed in the middle of the future bookmark. It is best to use an oiled rag. Just don't let it drip. Also use several sheets of newspaper or thin dry wood chips.
How to properly stack firewood is shown in Fig. 2.
Rice. No. 2 Options for stacking firewood in the stove
Classic is option number 1 . Firewood is stacked in the same way as in a woodpile. Option No. 2 is used if the firewood is too large or not dry enough. There should be free space in the middle, and the gaps between the logs should be 2-3 times smaller than their width. And method No. 3 is suitable for a small firebox.
Conclusion
Charcoal is a sought-after raw material for many economic purposes and household needs of summer residents and lovers of outdoor recreation, and barbecue makers. The installation for its production will pay for itself quickly, it is unpretentious to use and has low energy consumption.
But you also need to remember the safety rules when working with charcoal kilns. All work should be carried out only in the open air, or in a room equipped with forced exhaust ventilation from a source of gas generation and combustion.
( 2 ratings, average: 4.00 out of 5)
How to make your own stove to heat your home with wood and coal?
What to do if buying a factory model is too expensive? Below are step-by-step instructions for making a stove for wood and coal with your own hands.
Rice. No. 3 Schematic diagram of a homemade boiler
The schematic diagram of such a boiler can be seen in Fig. No. 3 . For manufacturing, heat-resistant steel with a high content of alloying elements is used. Sometimes gas cylinders made of St3 steel with a high carbon content are used.
You can also burn a brick oven with coal. But there are difficulties with constant cleaning. Coal produces a lot of soot.
And the firebox must be made of fireclay bricks. The masonry process itself is also quite labor-intensive and expensive. However, there is a simple option that is quite suitable for a small country house (up to 36 m2).
Setting up a coal and wood stove
Rice. No. 4 Detailed order of a brick oven on coal and wood
Laying instructions
For the future you can download the order here.
Step-by-step diagram for making a brick oven using wood and coal:
- To install the furnace, you will need a concrete foundation with reinforcement. The dimensions of the foundation should be 100 mm larger than the dimensions of the furnace. And the height is 500 – 700 mm. The top of the foundation is at -0.150.
- Lay out the base - the first 2 rows (see Fig. No. 4) with standard dressing of vertical seams. The masonry is carried out using cement-sand mortar. Next, fireclay clay is used as a mineral binder.
- The first row is the bottom of the ash pan. The laying is carried out strictly according to the scheme.
- When laying rows 2 and 3, you must remember to position and secure the blower door with wire.
- The fourth row covers the ash pan and the hole for the blower.
- The grate is laid in the 5th row.
- The firebox door is installed when laying 6-8 rows.
- Carry out the laying according to the diagram. Rows 6–9 form the firebox.
- Row 8 is the arch of the firebox. It is made of ¾ brick. And rows 9-14 overlap it.
- Smoke channels are laid out according to the diagram.
- The valves are located in rows 26 and 29.
- Finish covering the furnace.
- Next, lay out the chimney.
- Drying the oven.
Even a beginner can make such a stove with his own hands. It is enough to have basic masonry skills. No complicated tool is required either. Heat-resistant mortar mixtures for laying stoves can be easily purchased at any construction supermarket.
Homemade designs
The simplest smokeless furnace for burning waste is made from a metal barrel (the desired wall thickness is from 2 mm). A 200 liter container is suitable, not too rusty to ensure a long service life of the product. An alternative option is a piece of pipe with a diameter of 500 mm. They have thick walls (from 8 mm), which increases the weight of the structure and makes it more difficult to make holes. Although the system turns out to be stronger and more durable. To work with any workpiece you will need:
- drill or screwdriver;
- grinder - for removing the bottom or cutting out large holes in it;
- metal rods or finished grate;
- welding machine (optional);
- bricks or other material for the frame.
It will be enough to dig a hole (according to the diameter of the structure and a depth of 20-30 cm) above which, on legs made of bricks or other objects, the firebox will be placed. For better traction, holes with a diameter of 25 mm are made at the bottom of the body and above the stiffeners.
The garden stove can also be made in the form of a rectangular box. The combustion chamber is located at the bottom (side loading). To make this design you will need:
- blueprints;
- sheet steel, thickness from 2 mm (replaced with a rectangular tank if available);
- metal corners;
- welding machine;
- cutting tools.
A ready-made container is the optimal solution. But even in this case, you will need welding equipment to attach the lid hinges, chimney and other components. Making a hearth from scratch will take longer than turning a tank into a stove. First, steel parts of specified sizes are cut out, depending on the planned volumes of waste to be burned and the area of the selected area - some sellers offer to perform this procedure for the client. Places of future connections are cleared. For additional strength, the corners are fixed from the inside. They can reinforce all seams, but 4 elements at the joints of the sides are sufficient.
For the chimney, if provided, it is convenient to take a metal pipe of round, square or rectangular cross-section. The size is calculated based on the parameters of the firebox, but for a small stove a channel with a passage diameter of 80-100 mm is suitable. You can cover the chimney with thermal insulation and equip it with a filter with a spark catching function.
The energy generated is suitable for cooking or heating food. You should not barbecue over garbage coals. But its heat from an iron barrel is suitable for heating water; warm liquid is a necessary condition for dissolving a number of fertilizers and poisons. A large pan fits well into the hole without blocking the draft due to the perforation of the hearth body. The upper plane of the rectangular heat exchanger will turn into a full-fledged cooking surface.
A brick kiln is also used for recycling solid waste. Both the sauna hearth, which has received a second life, and a new design created specifically for the task are used. The bricks are placed without mortar, remaining in place due to their weight and rough surface. They line a barrel or create independent structures. Be sure to use fireproof blocks. Suitable for oven:
- Fireclay stone can withstand temperatures up to 1500°C, but only if the manufacturing conditions are met. Blocks overexposed in the oven lose their fire-resistant properties.
- Red brick - designed for heat up to 1000°C. Solid blocks are used for masonry.
- Graphite - intended for finishing the inner surface of the firebox. Depending on the composition, it can withstand up to 1600-1700°C.
Products made from red clay are the most affordable. Brick, due to the lower outside temperature, provides greater safety compared to bare metal. It opens up additional design possibilities, allowing you to make a two-chamber waste incineration furnace without welding and cutting tools - you just need to correctly design the arrangement of the blocks and then complete the drawing.
Let's sum it up
Buying a cooking stove is easier and more convenient. But if you have a limited budget, you will have to make the stove yourself. It's cheaper, but requires certain skills.
The best material for a coal and wood stove is heat-resistant alloy steel. However, in practice, old gas cylinders made of St3 steel or brick are more often used. A large cottage cannot be heated with such a stove. But for a country house with 1 - 2 rooms it is quite suitable.
How to make such a stove with your own hands is discussed above. One of its disadvantages is the need for frequent cleaning. And such a stove will have to be heated 3-4 times a day. But coal will warm up the room much faster. And such a design will cost 2–3 times less than the factory equivalent.
For those for whom the issue of saving is not so pressing, you can purchase a factory boiler. You just need to choose the right power and take into account possible heat losses: window and door openings, etc.
This option has many advantages. One load of fuel will last at least 36 hours. And the unit will have to be cleaned much less often. There is only one drawback - you have to spend a considerable amount of money.
Best models
Let's look at the best factory-made models, and then move on to making a coal stove with your own hands. These models are suitable even for a large country cottage. You can buy them on the manufacturer’s website by submitting an online application.
| Name and price (RUB) | Characteristics | ||||
| Room area m2 | power, kWt | Dimensions, mm Chimney, mm | Weight, kg | ||
| Zota stakhanov 100, from 370000 | 1000 | 100 | 900x1608x1796, 800 | 880 | |
| Teplov T-100, from 185000 | 1000 | 100 | 1770x810x810, 250 | 900 | |
| Vulkan EKO-100, from 330000 | 1500 | 100 | 1770x810x810, 250 | 900 | |
| “Bourgeois-K” T-100A-2K, from 272000 | 1000 | 100 | 780x1420x1890, 250 | 900 | |
| Ferroli Forest 100, from 1200000 | 1000 | 115 | 2898x4533x2700, 200 | 1230 | |