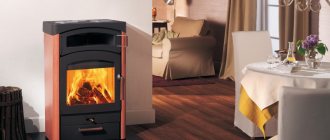
An excellent option for organizing an autonomous heating system in a private house or bathhouse is a stationary stove with a water heating boiler.
Such a device is practical and economical, has high heat transfer and efficiency, which allows you to effectively heat rooms of various sizes in a short period of time.
It is quite easy to organize such a system yourself, without involving expensive specialists.
Types of stoves with built-in boiler
The design can be made of metal or brick with different placement of the heater, with a boiler for heating water for washing, if we are talking about a bathhouse. The dimensions are not limited: the choice of parameters is determined taking into account the dimensions of the room, the building materials, as well as the local climate.
It is necessary to consider the design features of two types of furnaces with heating boilers:
- The boiler is built into the chimney. This model has a long service life, the walls of the stove completely receive heat from the firebox, and the heat transfer rates are unchanged. Disadvantage: you cannot heat a large area.
- The boiler is located directly in the firebox. You can heat a large area of the room. It is possible to use different types of heat exchanger. Disadvantages: metal parts come into direct contact with fire, resulting in destruction. Due to the low temperature of the heat exchanger, condensation is generated, which later causes a lot of soot to stick to the surface, resulting in a decrease in efficiency.
Masonry and brick
The principle of brick laying
Stove makers have enjoyed well-deserved respect since ancient times. Masters of their craft create stoves with a heating boiler, which always have good “draft” and an evenly heated surface.
There are several general rules that all specialists follow without exception:
- Combustion chambers are made of fire-resistant materials. Open fire can easily damage ordinary brick and even stone.
- You shouldn’t skimp on materials by laying quarter-brick walls. This reduces the reliability and stability of the entire structure.
- It is necessary to carefully monitor the tightness of the seams. Any gap will subsequently allow carbon monoxide to pass through, which is dangerous for the lives of the inhabitants of the house.
Sometimes home owners resort to a little trick by setting up separate chambers for heating and cooking in the summer. This is a completely justified solution that allows you to save fuel in the warm season.
Laying the boiler and installing a horizontal heat exchanger in it
A do-it-yourself heat exchanger using any of the options is installed in a brick boiler. The latter is laid according to the same principle as a brick oven.
The dimensions of a solid fuel boiler must be proportional to the volume of the premises that must be heated by it. The values available in the article are given based on a house with an area of 90-100 square meters. m. with 6 cast iron radiators and a distribution of 2 pipes (25-50 mm).
The choice and design of the boiler piping should be based on many factors:
- How many circuits are there in the system?
- How complex is the system?
- Is there any other equipment available?
The entire boiler must stand on a solid reinforced concrete foundation.
The size of the foundation is selected based on the dimensions of the furnace. When laying a solid fuel boiler, the heat exchanger must be positioned so that the outlet pipe is the highest point. The height difference must be at least 10 mm. This is necessary to ensure that a plug of air does not form in the boiler while filling with water. This slope will also improve fluid circulation. Brickwork is done with your own hands, following the rules for bandaging the seams. The pipes should be approximately 2-3 cm lower than the brick wall itself. To prevent a decrease in efficiency, it is necessary to have a removable cast-iron plate on top of the boiler for easier cleaning. The smoke is discharged into a separate or main pipe. The pipe can be brick or metal.
Preparatory activities
Organizing stove heating involves preparing drawings, choosing a suitable location for pipes and radiators, as well as competent calculation of power. Next, a register is made or purchased and the structure with a built-in heat exchanger is laid.
Calculation of power and dimensions
The efficiency of a heat exchanger is determined by the materials from which it is made. Cast iron products of the MS-110-300 and MS90-300 series have a power of 0.14–0.16 kW/sq. m for the rib. Taking into account such figures, it is possible to predict the number of sections for heating each circuit. For 10 sq. m of area you need at least 1 kW. For a building of 60 sq. m. requires a register with a power of 5.5 kW.
The efficiency of a heat exchanger is affected by the materials from which it is made.
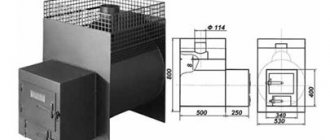
The dimensions of the furnace system are 1020x1160x2380 mm. The heat exchanger has dimensions of 750x500x350 mm.
Required materials and tools
To assemble the stove you need to prepare:
- A sufficient amount of fireclay and solid bricks with fire-resistant properties.
- Furnace and blower doors.
- Grate.
- Steel corners and strips.
- Valves for ovens and cooking chambers.
- Pre-furnace sheet.
The tools you will need are a basic stove set and containers for mixing the solution.
Radiator assembly
Assembling radiators is a simple process, because it completely repeats the process of disassembling them. The sections are connected by nipples that have left and right threads on both sides. This way, the sections at the top and bottom will be pulled tightly against each other when the nipple is turned. When the gap becomes 2 cm wide, you should wind the asbestos-impregnated cord and only then tighten the nipples completely.
When the entire structure is assembled, you should wait for the drying oil to dry, and then check the joints for leaks. that is, supply water under high pressure to the radiator. This will ensure the subsequent use of the radiator and there will be no leaks.
The return and coolant supply pipes must be connected diagonally to the radiators. Holes that remain open must be closed with plugs. It is better to take inch pipes. On one side of the radiator there will be a right-hand thread, so there will be no difficulties with connection. On the opposite side, use a coupling with a squeegee and a nipple.
What dimensions should the chimney have?
Chimney placement options.
The draft in the chimney channel will occur due to differences in the height of the inlet and outlet, as well as due to temperature differences. To ensure continuous operation of any heating device, you will need to make a strong draft
Before starting masonry, it is important to decide what type of heating device will be used, what dimensions it has and how many channels it is planned to make
The number of channels can be determined taking into account the power of the heating device, fuel and the special requirements of the device manufacturer.
If the diameter of the chimney channel significantly exceeds the calculated value, the draft in such a channel will greatly decrease. As a result, there will be frequent interruptions in the functioning of a gas boiler or other heating device. If the channel diameter is smaller, this may impede the removal of combustion products. It is for this reason that in most cases the operation of boilers stops.
To make brick channels, you will need to use ceramic brick grade M50-75. You can also use concrete blocks that have channels with a square cross-section.
If you plan to use ceramic bricks to make a chimney, then you should know that its minimum cross-section is 14x14 cm. If you plan to purchase material with a round cross-section, then the permissible diameter is 15 cm or more.
In a brick chimney whose height is less than 5 m, the dimensions of the channels must be increased to 14x20 cm or 18 cm in diameter. Such structures should be made in the walls between rooms that are planned to be heated. In this way, it will be possible to create a certain protection of supporting structures from cooling, which in most cases leads to a weakening of traction.
It is necessary to try to group the chimney channels so that in the device that will be installed above the roof, their number is maximum. In this way, it will be possible to reduce the cost of manufacturing work and significantly improve the performance of the chimney device.
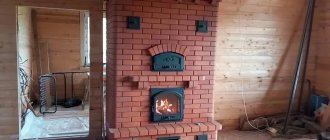
Laying a brick oven with a water boiler
Diagram of a solid fuel boiler.
Laying a brick oven with a water boiler is carried out in the following sequence:
- The foundation is poured under the furnace location.
- While the foundation is drying, mix a solution of clay and sand in a ratio of 1:2. Depending on the fat content of the clay, this proportion can be changed. Before preparing the mixture, the clay is soaked in water for 10-12 hours (large lumps of clay must be kneaded with your hands). Before starting masonry, sand and clay are thoroughly mixed.
- Waterproofing is laid on the dried foundation - usually roofing material the size of the future furnace.
- A layer of mortar is applied over the waterproofing, the first layer of brick is leveled and laid. It should be noted that it is better to use beautiful brick for the outer layer; it will look more aesthetically pleasing. The inner layers can be formed from defective or broken bricks.
- Each layer of brick is carefully covered with mortar.
- At the required height, a compartment for ash and the firebox itself are made.
- A sheet of metal is placed in the ash compartment to make it convenient to remove ash residues in the future. The blower door is installed here.
- Behind the firebox, in front of the chimney, a water boiler is installed. Brick ledges with metal corners are built for it. A level must be used to prevent air pockets from forming. A door for loading fuel is fixed in the firebox itself.
- A metal plate is placed on top of the boiler, a chimney and a cleaning system are formed. It would be useful to make a separate door for cleaning the boiler from carbon deposits.
- A metal sheet is fixed to the floor in front of the firebox in order to comply with fire safety regulations.
Boiler design diagram.
When you first light up a finished stove, you must ensure that the system is in good working order and that there are no leaks. The room must be ventilated, as often during the first heating there are unpleasant odors of burning industrial lubricants and heating clay. It is carried out for at least an hour with the maximum possible amount of fuel.
A brick stove with a homemade boiler is one of the best ways to heat small country houses, which will allow you to enjoy the warmth on cold winter evenings and save your budget.
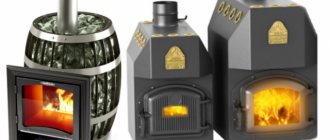
Peculiarities
Today, heating boilers have sufficient power to heat rooms for various purposes. They are economical. Their continuous operation time is almost the entire heating season.
These devices can operate on wood, coal, pellets (wood waste compressed and processed into granules), briquettes, peat, and wood gas.
Boiler types
Depending on the type of solid fuel, they are divided into the following types:
- wood-burning (heated not only with wood, but also with pellets);
- universal (they use different types of fuel and their combinations for work);
- gas generator boilers (they have increased efficiency and operate on wood and wood gas).
Models of the latter type are more convenient to use, since soot does not accumulate inside them, and a minimum of ash remains.
There are models of long-burning boilers, dependent on the electrical energy carrier and independent.
Such heating equipment operates on the principle of top combustion (the hearth burns from top to bottom). The combustion chamber, located at the top of the structure, is filled with fuel. The fan forces air through the duct, and the heat generated by combustion is sent to the heat exchanger. The volume of the combustion chamber is about 500 dm3, so such a heating device can operate without interruption for several days.
Advantages
Long-burning designs are heating devices that are very popular among the population. This is explained by their many advantages: not only the use of various types of fuel, but also their long combustion time, as well as the simplicity and environmental safety of their use.
A boiler of this type in its modern variation is a design equipped with automation and a fan to increase the pressure in the system. With a small amount of fuel consumed, such devices can maintain the temperature in large rooms.
The big disadvantage of the design is the high cost, more than 1000 USD. e.
Cast iron radiators as a boiler
You can build old radiators into a brick stove, and they will serve as a boiler. Cast iron built-in water heating elements have their own characteristics, for example, cast iron does not react very well to open fire. Nevertheless, this method is used quite widely. You can use the M-140 radiator, which can easily be found at demolition sites of five-story buildings. If you weld a dozen sections, you will get a heater with an area of 3 sq.m and 18 liters of capacity. A flat boiler with the same characteristics would require a lot of space. Such boilers can heat large areas.
Before the radiators are welded together, they must be disassembled, cleaned of dirt and thoroughly rinsed with a hot 6% hydrochloric acid solution. Then rinse again with water. Then change the cardboard spacers located between the sections, as they will simply burn out. Instead, use asbestos cord impregnated with graphite powder and natural drying oil.
The radiator elements should be assembled in a certain sequence. Screw nipples with their right and left threads into the sections to be connected, then wind an impregnated asbestos cord around them and tighten both nipples with a wrench, making sure that there is no misalignment of the sections. After connecting two sections, you can attach a third, then compress the radiator to check the quality of the assembly. Now you can install the risers.
You can position the cold water inlet and hot water outlet diagonally. The other two holes can be plugged to allow water to circulate through the entire volume. The radiator must be mounted in the smoke duct located behind the firebox. This will help avoid contact of cast iron with open fire: the boiler will be heated by hot gases.
You can increase the natural circulation of water in such furnaces by running a return line pipe through its foundation and the space under the floor, which will increase the temperature difference between the return and hot lines. The battery in the furnace is installed with a slight slope to allow air to escape and enter the system. For cleaning, you can build an additional door into the smoke channel itself.
Conclusion
The rough stove is an economical source of heat that creates a comfortable atmosphere. A brick stove gives the house a unique feeling of coziness and rustic identity. If anyone wants to build such a unit, anyone can just understand a little about the principles of brickwork.
If you have the appropriate skills, a chimney can also be made of brick, but you should do this with caution, building a chimney requires precision. For a small dacha, ruba is especially convenient; it will ensure uniform distribution of heat in the house and will not take up much space. The oven will also be an excellent device for cooking food.
Boiler installation
When implementing plans to create a combined heating system, it is important to pay attention to some features. Water-heated brick stoves have many options, each of which differs in material, type of main element and other nuances. Ignoring technical and construction requirements will certainly lead to the rejection of the entire work
Ignoring technical and construction requirements will certainly lead to the rejection of the entire work.
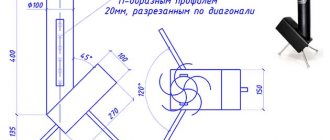
The boiler must fit completely into the firebox. However, in practice there are incidental situations when part of the heat exchanger is located outside the stove. This is unacceptable, because the main task of the unit is to heat the coolant. The boiler is made in the shape of a “P” from pipes or sheet iron. All its elements are hollow and are designed to remove heat.
The preferred option is from pipes. It has a larger convection area and allows the flame to reach the cooking surface to cook food. In addition, attention is required:
Dimensions. It would seem that a massive product is needed that can heat a lot of water and provide heat to a decent-sized structure. But that's not true. The boiler itself is made of very modest dimensions - 75 * 50 * 30 cm (length, width, height). The convection surface of such a device is enough to heat a house up to 200 square meters. Installing a pump for forced circulation of coolant increases productivity by up to 50%. Boiler. Its shape is designed in such a way that the heated surface area is as large as possible
It is very important to install it in the center of the combustion center. This is the only way to achieve high efficiency of water heating. Peculiarities
A small gap must be left between the walls of the furnace and the surface of the boiler. The optimal distance is considered to be 5 millimeters. It is quite sufficient to level the free movement of the metal during thermal expansion.
The heat supply and outlet lines are carried out in strict accordance with the laws of physics. It is known from school that hot flows tend to go upward, while cold flows are always directed downward. Therefore, the pipe supplying hot water to the house is always adjacent to the boiler at the top point, and the channel with the “return” is at the lowest point. This arrangement eliminates the accumulation of hot steam, which poses a serious threat to the integrity of the system.
Where is the best place to install?
The grub can be installed almost anywhere. If your furnace only serves to heat the house, it is better to build it in a utility room to free up space in the main part of the house and prevent smoke from entering the living rooms.
If the user of the stove wants to build a simplified, beautiful fireplace for himself, it is better to install it in a room that is a gathering place for family and guests. Everyone will appreciate an unusual and attractive element of the interior if the stove is built carefully, additionally covering it with a special facing material.
When building a stove with a built-in panel, the best place for installation will be the kitchen. In this case, the grinder functions as a hob; cooking food on it will not only give the food a special taste, but will also significantly save electricity or gas.
It is important that the area where the stove is installed has a sufficiently strong floor. The roof where the chimney passes must not be altered.
Flat-plate heat exchanger
A popular option, which is used both for stoves in the bathhouse and for the home. They are the simplest to manufacture, the surface is easy to clean from soot accumulations, installation is possible both vertically and horizontally, and the efficiency is relatively high.
A flat boiler can have a high volume, so you can take hot water for washing directly from the heating system. An expansion tank with an increased linear size is installed, into which water constantly flows after the level drops below critical. This option is quite convenient and helps solve several problems at once, but there is also a condition - the room temperature in winter should not drop to minus.
Key disadvantage: a sharp decrease in heat transfer from the furnace walls. This type of heat exchanger is made in the shape of the letter “P” and is installed around the perimeter of the firebox, bypassing the door. As a result, it turns out that the temperature of the external walls is quite low, as a result, warming up the room takes much longer. This is critical only if the stove is installed in a bathhouse; for residential buildings, where the stove is constantly heated, increasing the warm-up time by several hours does not play any role.
Thus, when choosing a flat boiler, think about how you can increase the heating rate. One option is to enlarge the heater and place it directly above the firebox. Second option: using a metal chimney for heating, increasing its length.
Simple rules for an efficient heat exchanger
The operating principle of stove heating.
If the house has a ready-made brick stove, then organizing water heating with your own hands is a fairly simple task. To do this, it is enough to place a homemade boiler in the firebox in the form of a coil or any other shape. The main thing to consider is:
- The height difference between the fluid outlet from the heat exchanger and its inlet;
- It is necessary to ensure the maximum possible surface area;
- The heat exchanger should not interfere with the loading and combustion of fuel.
If you are building a stove with your own hands, then the boiler for a brick stove can be made as efficient as possible. To do this, several important conditions must be met:
- Combustion products must leave the chimney as cold as possible;
- Greater heat transfer of furnace gases inside the furnace increases its efficiency;
- It is best to place the heat exchanger in the chimney rather than in the firebox.
These rules may seem somewhat strange, because logically, the heat exchanger should be heated best by the open flame of the firebox. However, it is necessary to take into account other processes occurring in the furnace. From a physics point of view, flames are burning fuel particles. And if we take heat away from these particles, then they will not burn completely, which will reduce the usefulness of the stove.
Diagram of connecting the boiler to the heating system.
In addition, for better heating, the coolant must move towards the heat flow. Only in this way is the temperature difference between different parts of the coolant maintained, increasing the heating efficiency and ensuring better circulation within the system.
Another advantage of this arrangement of the heating tank is that less condensation forms on it, which contributes to the absence of corrosion.
Operating rules
Operating a brick oven not only does not create difficulties for amateurs, but also creates a feeling of comfort from an open fire.
- It is better to use a coarse oven seasonally. Low thermal efficiency does not allow the stove to be used all year round; it will not be able to warm up a large house well during the cold winter.
- It is necessary to regularly clean the chimney so that gases do not enter the room and poison the inhabitants of the house.
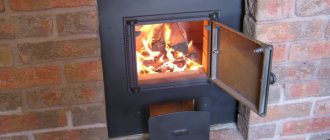
- Heat the stove only in compliance with safety precautions, do not put too much firewood at one time, close the firebox door tightly after loading a batch of fuel.
- If the oven is used as a hob, it is necessary to use appropriate cast iron, clay or aluminum cookware, as well as various oven mitts or gloves to avoid burns.
- If you have a stove bench, you should only heat it with wood. The coal heats up the surface of the bed too much.
- Before using the stove, be sure to ensure that the chimney is installed correctly.
- It is better to use wood or coal as fuel. It is not recommended to use various waste materials made from modern materials; they emit gases that are harmful to health and clog the chimney.
Laying a furnace with a boiler
If you decide to delve deeper into the topic, you may decide to install a Kuznetsov bell furnace, the operating principle of which is the free flow of gases, which does not require additional external energy. The drawings are available on the Internet. Here we will talk about a simpler design. So, first you need to pour a foundation, the depth of which is 50-70 cm. Sand should be poured onto the base in a layer of 10-15 cm, crushed stone, gravel or construction waste should be laid on top, and a space of 25-30 cm should be kept for pouring cement. It is best to prepare the solution for the foundation without using sand, replacing it with screenings, the ratio will be approximately 1:6. Roofing felt should be laid under and on top of the screed for waterproofing.
Then you should make a solution of clay + sand in a ratio of 1: 2.5, however, the proportions may vary depending on the level of fat content of the material
It is important not to leave lumps, and therefore the clay should be soaked in the evening. If the mixture slides off the trowel, leaving small streaks on it, then the concentration is appropriate
Before starting masonry, it is necessary to lay out roofing felt over the area of the poured foundation and cover it with mortar. The first row is laid out with a pallet completely made of bricks, where the furnace will then be laid. Then the first row of the furnace contour is laid out, then the next, etc. During laying you will need order.
Now the firebox, ash compartment and ash pit are made. The doors are secured using galvanized wire or a strip of galvanized sheet. It is necessary to trim the brick above the doors using a grinder, but it is best to make one of them with a wedge, so that the masonry will not crack. Make protrusions for the boiler on the brick in advance, which can also be cut with a grinder. Do not forget that the instructions require level installation, and therefore you should use a level. Then the firebox and the rear part of the structure are installed, where the chimney with cleaning is located. The pipe should protrude at least 50 cm above the roof.
You can make your own stoves for heating your home without being a pro in this matter. They are versatile and have a high heat transfer coefficient. The big advantage is their autonomy, since they do not depend on external energy sources. Such boilers can have any size depending on the area of the heated room.
Special requirements
We repeat: the advantages are simple - compactness and the ability to build in an existing house without major construction work. But it is not so easy to place a more powerful firebox in a furnace structure of generally the same dimensions; from excessive heat load it will quickly become unusable. If special requirements are not met:
- Furnace foundation.
- Masonry mortars.
- Methods of laying the structure of the furnace.
- The choice and methods of installing stove fittings.
Foundation
The design of the foundation for the rough is shown in Fig. The crushed stone cushion without sand bedding is leveled to the horizon before pouring. Pouring mortar M150 – cement M300 and sand 1:2. The gap between the rubble foundation and the flooring is 30-40 mm. Don't forget to support the cut joists! Leaving their ends hanging is a common but serious mistake. The dimensions of the foundation in plan should protrude onto the contour of the furnace by at least 100-150 mm.
Construction of the furnace foundation - rough
Note: the brick bed on the foundation under the furnace is laid out with bandaging in the rows and between the rows in the same way as the first 2 rows of masonry for the furnace structure, see below.
Solutions
To fold the rough, 3 types of solutions are used, see fig. below. The bed on the foundation and the chimney are laid out on lime mortar as it combines sufficient heat and moisture resistance, but the rubble must be laid only on a completely moisture-resistant cement-sand mortar. It is highly advisable to use mountain or ravine sand with rough grains for clay mortar. Ordinary clay - purchased from the oven, guaranteed fat content and, most importantly, purity. Self-excavated clay, brought to the required fat content with sand, is of little use for coarse masonry.
Compositions of masonry mortars for coarse stoves
Masonry
For rough masonry, stove bricks and, if the order (see below) is provided for, fireclay bricks are used; red worker is of the highest quality - light red in color (fully annealed), without burn marks, distortion and swelling. Dry molded brick is absolutely unsuitable. The masonry of the structure is roughly carried out following the trail. rules:
- If you are an inexperienced stove maker, each row of masonry is first laid out dry; detected defects in cutting/chipping bricks are eliminated.
- Before laying on the mortar, each brick is soaked until the release of air bubbles stops. You can’t dump all the bricks into a barrel indiscriminately!
- A 5 mm layer of mortar is applied to the bed and the base of the brick being laid.
- The brick being laid is laid with a smooth movement, slightly tilted, and moved towards the previous one so that there are no air bubbles left in the seam.
- The brick is pressed until the seam comes together to 3 mm; You can't knock!
- Between fireclay and ordinary masonry, the initial seam is 8-10 mm; after pressing – 6 mm.
- The seam between bricks and metal embedded parts (see below) is 10 mm.
- Excess mortar squeezed out of the seam is removed with a trowel (trowel).
- The recesses in the seams found after removing excess mortar are filled with mortar by pressing without transverse movements, but not by rubbing!
Those who prefer to learn visually can watch a video tutorial on laying heating and cooking stoves below:
Video: laying a heating and cooking stove
Accessories
Incorrect oven door installation
Fittings and grates for roughing require cast iron; doors and latches - with an installation skirt and holes in it for diagonal wire whiskers. Welded steel or cast iron fittings with eyes for straight lugs (laid along the corresponding furnace wall) are unsuitable in this case. However, install the doors/latches as in Fig. on the right, in the rough it is impossible; This is not according to stove rules at all. For a Dutch country house with 2.5 bricks in plan, which is heated once or twice a season, it may be fine, but not for a rough one.
It is necessary, firstly, to crimp the mustache (galvanized wire 2-3 mm) with a twist so that it does not move. Press not too tightly at first, place it at the desired angle (at least 12 mm should remain from the far end of the mustache to the inside of the masonry). Then tighten carefully and shake the door/latch slightly. Didn't leave? Good. Then, secondly, you need to tightly wrap the skirt with asbestos cord (or basalt fiber), and only now put it in place. You can also watch the following videos about installing accessories into the oven.
Video: installing the oven door
Video: grates and stove
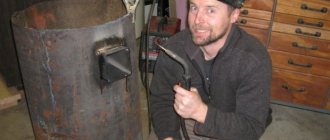
Water boiler made of cast iron radiators
M-140 radiators are suitable for this type of boiler. They are quite easy to find, since large quantities of them are sent to scrap when radiators are replaced with more modern ones or old buildings are demolished. Each section of such a radiator has a capacity of 1.5 liters, and their area is 0.254 square. That is, if you combine 12 sections, the volume of the heat exchanger will be 18 liters, and the area will be 3 square meters. Such a boiler has a capacity of up to 100 square meters. So it’s quite enough for a residential building.
In order to use the radiator, you need to modify it a little. Initially, you should remove the cardboard gaskets located between the sections with your own hands. The best replacement for them would be an asbestos cord, which must be impregnated with drying oil with the addition of graphite. Thus, the gaskets will be protected from burning through at high temperatures.
In addition, before starting assembly, the sections should be washed from the inside using a 6% solution of hydrochloric acid, and then washed with water. This will clean the pipes from dirt and rust that has accumulated there during operation.
Useful additions
A home-made long-burning boiler assembled at home must be equipped with monitoring devices - a pressure gauge and a thermometer. If you decide to install an automation kit and a blower fan on your unit, then you will need to make a seat for it. The fan is placed in the top cover of the housing; it is better to make the electronic control unit remote by mounting it on the nearest wall inside the furnace room. Temperature and pressure sensors are embedded in the water jacket body. In this case, conventional indicating devices should not be ignored, because they will be able to operate when the power is turned off. Therefore, it is also better to install them, since not every electronic display displays coolant pressure.
After assembly, wood heating boilers must be checked for permeability of welds. Using a compressor, this is easy to do: fill the jacket of the device with water and create an excess pressure of 3 bar in it. Before testing, the seams must be cleaned of slag. Sinks and uncooked areas will make themselves known by leaking. When there is no compressor on the premises, the heating installation will need to be ignited and heated outside until a critical pressure of 3 bar is created in the jacket. Water pressure and temperature can be monitored using a thermometer and pressure gauge.
It is recommended to cover the casing of the water jacket and the inside of all doors of a home-made unit with heat-insulating material. As the latter, asbestos sheets and basalt wool are used, which are not afraid of high temperatures. For external cladding of insulation, you can use thin metal 0.3-0.5 mm with a polymer coating of the desired color.
Heat exchanger construction
Installation diagram of the heat exchanger and storage tank.
You can easily build an effective boiler with your own hands. If it is made in the form of a tank, then high-quality steel is required, which can withstand thermal loads and corrosion due to the coolant. In addition, the manufacturing material must have high thermal conductivity to increase the efficiency of the system.
The thickness of the tank walls should be within 4-5 mm, which ensures its strength while simultaneously heating quickly. There are no standard sizes for such a heat exchanger; it all depends on the configuration of the existing or planned furnace. The main thing is that the height of the tank is at least 500 mm for better circulation.
If the heat exchanger is a coil or another circuit of pipes, then there are also some nuances. Pipes for the manufacture of such structures must be thick-walled and have no seams. If it is difficult to find a seamless pipe, then it is necessary to weld the existing seams to prevent possible coolant leakage.
The inlet pipe is best located at the top of the structure, and the return pipe is located in any convenient place. The pipes are not butt welded, but with chamfers to avoid unwelded areas that will leak in the future. The minimum distance between the knees of the structure is 5-6 cm, so that the heating of each knee is maximum. Before placing such a boiler directly into the oven, it is necessary to fill it with water and check for leaks, which are promptly eliminated.
When placing the boiler directly into the furnace, you should adhere to the level, but minor deviations are allowed.
Varieties
A do-it-yourself stove can be built with a shield built into the body (structure) of the stove, and then in appearance it is indistinguishable from the stove, pos. 1 in Fig. The rough-slab is compact, the least material-intensive, the lightest, and requires a minimum amount of additional construction work, but its thermal power is limited to 10-12 kW, and then with great effort. Therefore, rough slabs are installed mostly in seasonal dachas (spring-autumn) with occasional trips there in winter, hunting lodges, etc. An important advantage of a rough slab is that it can be built without a foundation directly on the floor, if its load-bearing capacity is at least 500 kgf/sq. m.
Types of rough ovens
A rough structure with an attached shield (item 2) is structurally more complex and heavier, although a simplified foundation (see below) is also suitable for it, but its thermal power is potentially greater. A wood-burning grub with an attached shield can develop up to 16-18 kW; on coal - up to 20-22 kW. The diagram of the flow of flue gases in the hood with a shield is given in pos. 3; This is how the popular Galanka stove was built. However, you need to know that there is no point in building a furnace with more than 3 revolutions: such a furnace with a single cycle will be simpler and cheaper. In addition, during construction it will be necessary to pay special attention to some of the features of rough stoves, the consideration of which is devoted to a significant part of the article.
Note: roughing on wood can also be done with a stove bench, see below. It is not advisable to heat such a stove with coal; the stove will overheat.
Why is it rude - rude
Visually, a rough stove can be distinguished from a stove with a later added shield due to the integrity of the structure (item 4), but in essence they are one and the same. The calculation of a heat-efficient furnace is very complex and requires fairly deep knowledge of heating engineering, and the development of a furnace design based on its results also requires solid practical experience. It is much easier to design and build a rough fire because its furnace (fire) part and the shield are calculated separately, and then “molded” together according to the rules for pairing building structures, taking into account the requirements of heating engineering. Naturally, the thermal efficiency of the resulting device will be lower, because the interaction of the thermal cycles of the fire part and the shield is not taken into account, and it is by taking it into account that it is possible to increase the efficiency of a single cycle furnace. Therefore, if you live in an area with a harsh climate, a rude stove may only make sense for you as a seasonal stove for temporary use.
Brick chimney construction
Brick chimney laying diagram.
Laying should begin with the mounting tube. It should be laid out in compliance with the brick dressing. After this, a cutting (fluff) is formed. It needs to be laid out from 5 bricks. The channel will have dimensions of 270x140 mm. The external dimensions of the cutting are 450x590 mm. This can be achieved by inserting brick halves. To maintain the dimensions of the channel, you will need to insert brick plates inside. In this case, the channel will not change.
The next row will have dimensions of 650x510 mm. Brick plates 6 cm thick are mounted inside. At this stage, the cutting will begin to take its shape. In the next row, the external dimensions will be 710x570 mm. Inside you will need to install material 9-10 cm thick.
After this, the fluff ends. In the next row, be sure to observe the dressing. If you need to make a cut of greater height, you can install another row; the dressing should be done under the bottom row.
To allow the riser to exit outside, you will need to prepare a hole in the roof. Next, the riser should be routed through the roof. The rest of the work is done on the roof.
At the next stage, the riser is laid out. You need to carefully monitor the dressing of the brickwork. The riser must be placed several rows above the roof. After this, the otter lays out. The internal plates are selected so that the channel does not expand.
After this you will need to form the neck and head. The actions will be the same as in the case of erecting a cutting.
Benefits from combining the two systems
A traditional stove-heater consists of a combustion chamber, grates, ash pan and channels for smoke removal. All the attributes of a familiar Russian stove are known to every village resident. Modern boiler furnaces are practically no different visually.
But they have different characteristics:
- An ordinary rural stove can produce a little more than 6500 kcal of heat in one hour of full operation. This energy is enough to create a comfortable microclimate in a small house. For example, this heating method is suitable for a summer house.
- If you install a water boiler, its productivity will be 2.5 times greater. Naturally, the area of the heated room will also increase proportionally. The amount of fuel burned is the same. And savings are achieved through improved heat extraction. That is, less warm gases are released into the atmosphere.
- Next, a very important nuance becomes clear. If you combine convection (oven) and water (boiler) heating systems, the efficiency increases multiple. The point is that when both systems are running, their performance is additive. In other words, a tandem of two heating methods produces about 21,000 kcal per hour of operation. This is quite enough to heat about 300 square meters of living space.
- The positive aspect of this method of heat supply is the availability of energy resources. In most cases, firewood or a combination of wood and coal is used. The cost of these types of fuel is low, and acquiring them is not particularly difficult.
- The oven does not need to be lit all the time. Fuel is added 2 times a day. A comfortable microclimate is created in the house, regardless of the temperature outside the window.
- If the efficiency of a traditional stove did not even reach 50%, then the combined option reaches 85%. And for wood heating this is almost an ideal indicator.
- The price of materials is low. The cost is usually determined by installation work.
Circuit
The pipeline consists of a supply from the furnace and a return to it. In the room farthest from the stove, both branches are connected. In other rooms they run in two lines along the outer walls.
On a note! This option is cheaper than a system with radiators and is easier to install.
Rules you need to know when building a chimney
Diagram of a brick chimney.
The structure for solid fuel boilers is made together with the walls of a private house. These elements are constructed according to a single principle, and it does not matter whether the channels will be used as ventilation or smoke. You will definitely need to build a foundation for the chimney. The base structure can be made of brick or concrete.
In all cases, a foundation project is prepared. During the design process, it must be taken into account that its height must be at least 30 cm, and its width must be such that the base structure extends beyond the border of the chimney device by 15 cm or more. If the chimney is made as an element of the external wall, then you need to know that the lower part of the chimney base must be placed at the lower level of the wall base.
During the construction of chimney structures, special attention should be paid to the quality of tightness. To make a durable brick chimney, you will need to follow the rules
The material should be laid so that the seams overlap the elements of the next row. In most cases, the same mixture is used as for the construction of load-bearing walls of the structure.
In the process of making a chimney for a solid fuel boiler, it must be taken into account that its internal base must be smooth.
Therefore, when performing construction work, you need to use a template. The walls between the elements must be at least half a brick thick. For ventilation elements, the thickness of the partition should be 2 times less.
At the end you will need to make a header. The extreme parts of the element must protrude beyond the structure by 10 cm or more. The outlets of the ventilation ducts must be created under the head; in most cases, 2 walls are used, which are placed opposite each other. This placement method will prevent air from being blown in.
What is pyrolysis combustion
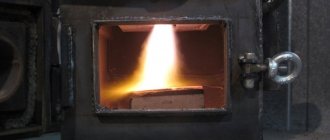
As you know, it is not very convenient to heat a particular room with firewood, since this fuel burns quickly without releasing the required amount of energy. However, if the oxygen content in the firebox is low, the material will be consumed much more slowly. This is precisely what the principle of pyrolysis combustion is based on, due to which significantly less fuel is required and efficiency increases. The main products obtained in this case are coke, ash, and flammable gas, which also releases a large amount of heat.
This means that when constructing a homemade long-burning boiler, you need to take into account the following points:
- Initially, wood burning with a limited supply of oxygen releases flammable gas;
- then the resulting mixture is burned, in turn releasing heat.
Many home-made boilers operate on this principle, but it is important to remember that the equipment must be adjusted so that its operation does not damage the overall system for providing heat to the home