The stove is folded, and the chimney proudly rises above the roof of the house. Do you think the work is finished? Not at all - it's time to think about how to insulate the chimney pipe and protect the house from fire and the roof from leaks. It’s good if you thought about this issue while designing the stove - in this case, the insulation of the chimney will be reliable and safe. It is more difficult to insulate an already built chimney; sometimes this work entails changing the design of the floors and roof. However, the costs will be offset by a feeling of security and comfort.
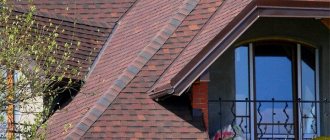
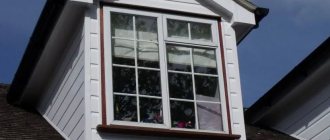
Insulated chimney pipe
Sealing gaps on tile roofs
This is the easiest way to seal gaps between a pipe and a slate or tile roof that you can do yourself.
To seal, you will need a moisture-resistant cement-based building mixture, a container for mixing the mortar, metal corners, a decorative collar and water. Sequence of work:
- The seam between the outer wall of the chimney and the roofing is lined with metal corners. If the pipe has a round shape, then a self-adhesive rubber seal is used for this purpose.
- A galvanized decorative collar is placed over the top of the pipe and secured with self-tapping screws.
- A waterproof solution is poured through the gap between the chimney and the collar and left for a day to harden.
- After the solution has completely hardened, an inclined surface is prepared from sheet steel for liquid drainage. To do this, cut a hole in the sheet corresponding to the diameter of the decorative collar, put it through the pipe and secure it with self-tapping screws at its base.
To seal the roof with a solution, it is necessary to use a high-quality waterproof mixture, otherwise, with the first serious rain, cracks will form through which moisture will enter the under-roof space.
Thermal insulation options
Before you start work, you need to decide on the insulation material. You can use almost any, you just have to take into account that the chimney heats up to high temperatures, which means the insulation must be heat-resistant and non-flammable.
It is not recommended to use foam plastic for thermal insulation of chimneys due to its flammability.
The choice of insulation method depends largely on the material of the chimney. It is also necessary to take into account the strength of the structure on which the structure will be installed. Heavy thermal insulation can over time push through the ceiling and cause its deformation.
Video: professional advice on choosing fiber insulation
Waterproofing a square chimney pipe
From a technological point of view, for the correct organization of work with your own hands, what is important is not the nature of the roofing material - metal tiles, ondulin, but the cross-section of the chimney - rectangular or round.
Waterproofing the chimney is carried out together with laying a waterproofing membrane on the roof.
- The film web in this area is cut so that the material overlaps the chimney. The film is glued to the walls of the chimney using polymer-bitumen mastic.
- A layer of bitumen mastic is again applied over the tightly pressed edges of the membrane. This waterproofing is already quite reliable, but is not very durable.
- A sheathing under the apron is fixed on top of the membrane - the second waterproofing element on the roof. The distance between the wall and the slats is 5–10 cm. It is recommended to treat the bars with fire retardants.
- An apron is installed around the chimney, starting from the bottom element. The apron is located 10–15 cm above the roof and covers an area of 20–30 cm around the perimeter of the chimney. Fastening - dowel-nails in increments of 15–20 cm.
- The joints between the elements and the chimney are treated with heat-resistant sealant.
- Then the roofing material is laid over the lower apron. Roof elements made of metal tiles or ondulin are laid end-to-end, making sure that the gaps are as small as possible.
If we are talking about a roof made of corrugated sheets, then a hole is formed in the sheet under the chimney with dimensions 1.5–2 cm smaller than the parameters of the chimney. Cuts are made in the corners of the hole, and the edges of the sheet are carefully folded back. At the stage of laying the roofing, this fragment is put on the chimney and the bent edges are aligned, trying to reduce the joints to a minimum. For waterproofing, a special device is used, such as bitumen waterproofing tape, or roofing felt and water-repellent sealant.
- A metal upper apron, similar to the lower one, is mounted on top of the roof made of corrugated sheets, metal tiles and other materials. You can use adhesive materials like Wakaflex, Master Flash, Onduflesh, etc.
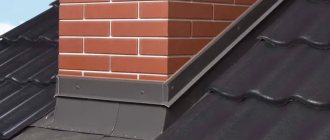
In the photo you can see the installation of an apron around the stove chimney on the roof.
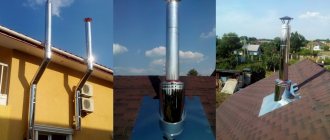
Waterproofing of a round chimney
This need arose due to the widespread use of sandwich pipes, which are very practical and more affordable. It’s even easier to do it yourself, since here the waterproofing is provided by a special device - pipe penetration.
The penetration looks like a box made of steel or aluminum with a cap made of polymer material.
- A wooden sheathing is installed around the chimney, just as was done in the previous case. Roofing material is laid.
- A hole with the required diameter is cut out in the flexible polymer part of the penetration. The device is put on the pipe and pressed against the roofing material.
- The joints are treated with a special heat-resistant sealant. The penetration is secured with self-tapping screws to the sheathing in increments of 7–10 cm.
The video discusses the waterproofing of round and rectangular pipes.
Sealing rectangular and square pipes
To ensure the reliability of the roof in the areas of valleys and junctions, a tie made of metal parts (junction strips), which are inserted 150-200 mm under the covering, will help.
The junction of the apron with the corrugated sheet around the chimney is sealed with roofing sealant. Eaves outlets are installed at the bottom and sides, directing the flow of precipitation onto the roof slope.
Before applying corrugated sheeting, it is necessary to seal the passage of the riser with a membrane.
- A cross-shaped cut is made in the material and glued to the walls of the chimney at a height of more than 5 cm.
- Self-adhesive “Vakaflex” tape is attached under the upper junction bar: from below, from the side, then from above.
- Sometimes a chimney is installed in a finished roof, cutting a hole in the corrugated sheeting with a margin of 1.5-2 cm. To do this, the metal sheet at the junction of the rectangular pipe is bent, a waterproofing membrane is glued and a lower and then an upper sheathing is installed, tightly pressed against the roofing pie and the chimney.
Safety precautions when installing a chimney must be strictly observed
Plastering a pipe
To avoid the formation of a thick layer of plaster, you should know how to properly insulate pipes:
- First, seal all existing irregularities in the pipe with cement mortar;
- Then cover the walls with reinforcing mesh;
- The final stage is applying plaster.
Important! Before covering the first layer, bring the solution of lime, cement and slag chips (or sand) to the consistency of sour cream, spray without leveling. The second coating is denser; it is applied with a trowel, rubbing until a smooth surface is obtained.
The reinforcing mesh will allow the plaster to adhere well to the pipe and not crack when drying
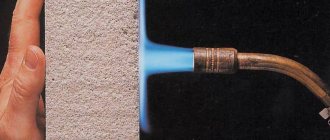
Strengthening the pipe with asbestos cement
Lining a chimney with asbestos cement requires the use of a cement-lime mixture applied to the surface of the slabs.
- The chimney is reinforced with mesh and the first layer of solution is sprayed.
- A new layer of the mixture is applied to the insulation sections and attached to the surface of the chimney.
Asbestos contains carcinogens that are dangerous to humans, so experts do not recommend using it in residential areas.
Sheet iron cladding
When insulating a metal pipe, you should maintain a distance of 60 cm from the chimney to flammable materials.
- The structure is wrapped in mineral wool 5 cm thick, overlapping, and clamped with steel wire. The top is wrapped with a metal sheet.
- Rivets are inserted into the previously prepared gaps, and the heads of the clamps are closed with a special tool.
What is the goal?
When preparing drawings, it is important to provide for the direct location of the pipe coming from the furnace.
- The maximum heating temperature of the outer wall of the chimney should not exceed 50 degrees.
- Waterproofing a brick chimney on the roof allows you to comply with established standards, and metal elements will require additional insulation to prevent the formation of condensation.
After installing the pipe, it is enough to carry out plastering followed by laying millite silica, thermal insulation wool MKRR-130 or rolled felt MKRF-100.
If the outer part of the pipe is 2 meters or more in height, it is strengthened with additional braces
What types of sealants are best to use for chimney pipes? characteristics
The chimney is one of the most important communications in residential buildings, the efficiency of which largely determines the ability to live in the house. However, in order for the functioning of smoke structures to be effective and safe, simply installing them is not enough - it is also necessary to ensure the tightness of the structure.
During the operation of the chimney, the very high temperature that occurs inside it (1300 °C) contributes to the formation of various cracks and fistulas in the structure. This significantly reduces draft and allows toxic combustion products to penetrate into the room. Therefore, the need to ensure the tightness of chimneys becomes vital.
The need for repair and sealing sooner or later arises even for expensive and high-quality pipe products, for example, galvanized or made of stainless steel. In order for sealing to be effective and long-term, you should use high-quality and reliable sealant for chimney pipes for this purpose.
Why do you need to insulate a chimney?
When fuel burns, heated smoke and moisture are formed, which are transported through the smoke exhaust duct to the street. If the walls of the pipe are exposed to cold from the outside, some of the moisture condenses onto their inner surface. Condensate penetrates into microcracks in the brickwork, where, as the temperature drops, it crystallizes, increasing in volume. The resulting ice crystals press from the inside on the brick and mortar in the joints and destroy them.
In terms of its chemical composition, condensate is not just water, but a chemically active solution formed by the interaction of moisture and fuel decomposition products. Possessing high acidity, such a liquid is capable of corroding the walls of steel chimneys in a fairly short time.
Thermal insulation of chimney walls using modern insulating building materials significantly reduces the risk of destruction of brickwork and reduces the rate of corrosion of metal chimneys.
Important points
The waterproofing of chimneys, if it is damaged, can be restored in several ways: the choice of the most suitable one depends on several factors:
- A pipe installed on a slate roof must be freed from the cement apron, and then the slate sheets adjacent to the pipe must be removed. After checking the condition of the pipe for mechanical damage, an apron should be made from sheet metal. The joints are treated with oven clay with the addition of Portland cement or fire-resistant mastic. Now you can lay slate sheets on the apron, and then coat them with cement mortar.
- Fused insulation can be used to insulate leaky areas, but damaged slate sheets should also be replaced.
- If the pipe is made of brick and the first two above points are completed, it is enough to coat it with clay-cement mortar.
- For a metal roof, you need an apron made of the same material: it can be made using special scissors. The outlets of round pipes can be sealed using special corrugated rubber elements.
- If the distance between the pipe and the ridge is large, special bitumen tapes with metal inserts are used.
The exit points of round pipes are sealed using rubber corrugated inserts
Options for sealing the junction of the roof to rectangular or square pipes
To arrange connections around pipes with a rectangular or square cross-section (most often brick), ready-made standard systems manufactured by roofing manufacturers are also used. In this regard, when purchasing this or that roofing material, you can immediately buy or order a set of penetration parts for a brick or concrete chimney in specific sizes.
This standard option, made of sheet metal, can be used for roofing materials such as metal tiles, profiled sheets, as well as the familiar old and new slate modifications. For the above-mentioned coatings, the joint sealing scheme shown below is usually used.
Standard metal structure for sealing the passage of a pipe through a roof covering
So, before the roofing sheets are fixed to the sheathing frame, preparatory work is carried out, which includes the following steps.
- Additional sheathing bars are fixed around the pipe; their cross-sectional size can be the same as that of other sheathing elements.
- Then, from the front wall of the pipe down to the roof eaves, a so-called “tie” is fixed, equipped with a flange on both sides. The tie is usually made from galvanized sheet metal.
- Next, around the pipe, on top of the “tie”, a wall profile is laid and secured. Its upper edge, which has a bend in the opposite direction measuring 8÷10 mm, is inserted into a pre-cut groove on the chimney wall.
- Then, at this junction of the wall apron and the pipe wall, it is necessary to apply a weather-resistant sealant, that is, intended for external work.
- The next step is the installation of roofing material.
- The final stage is the installation and fastening of the external wall profile - an apron consisting of four elements installed on all sides of the pipe. These apron parts are screwed to the walls of the chimney, and are also fastened together at its corners.
Sealing the passage of a brick pipe using plastic lead self-adhesive tape
Another, more modern option for sealing the junction involves the use of self-adhesive waterproofing lead tape, which is convenient for use on both flat and any textured roofing.
When using such a tape, it must be fixed on the surfaces of the pipe walls using special metal clamping strips, which can be made independently. The upper junction of the planks with the walls of the pipe must be additionally covered with a layer of weather-resistant sealant.
Flexible waterproofing self-adhesive tape is perfect for sealing the junction of roofing coverings that have a fairly high relief pattern, since it easily takes its shape when gluing and retains it. This tape is often used to cover joints if the roof is covered with ceramic tiles, metal tiles, slate or ondulin.
Prices for ceramic tiles
ceramic tiles
Sealing the junction of an ondulin roof to a brick chimney pipe - step by step
It was already mentioned above that many manufacturers of roofing materials strive to accompany their products with proprietary systems for sealing pipe passages. One example is the design system for the connection to a pipe of the currently quite popular corrugated cellulose-bitumen roofing material Ondulin.
| Illustration | Brief description of the operation performed |
| In this case, an option is presented for arranging the connection of a roof covered with ondulin to a stove or fireplace pipe of rectangular cross-section. The sealing system will be installed after laying the roofing material on the sheathing. The gap between the coating and the sides of the pipe, as well as below it, should be 20÷30 mm. On the rear side of the chimney, that is, facing the ridge, the distance between the pipe wall and the sheathing beam can vary between 50 and 100 mm. | |
| In order to secure the sealing apron around the perimeter of the pipe, it is necessary to include in advance additional sheathing elements into the roof structure, which are fixed along the walls of the chimney pipe. For this additional sheathing, a timber with a cross-sectional size of 40×40, 40×30 or 50×30 mm is suitable. | |
| The first step is to close the junction at the junction of the roof with the pipe on the front side of the pipe with a covering apron made specifically for ondulin. Typically, the manufacturer of roofing material also produces additional elements for the design of junctions, ridges and other complex and vulnerable covering components. Therefore, when purchasing material, you must immediately inquire about the range of additional elements, and, making preliminary calculations, they must be immediately included in the project. | |
| The covering apron is applied to the place of its future installation - along the lower edge of the pipe facing the eaves. Markings are made on the apron along which it will be necessary to make cuts. The upper, flat part of the apron should remain exactly the width of the pipe, and the wavy part should have one wave on each side. In this case, it is necessary to cut the wavy part along the lower crest of the wave. First, markings are made with a pencil. | |
| And then the apron is cut according to the applied markings. It is most convenient to cut the part with a sharp construction knife. | |
| Next, the finished apron is pressed against the pipe and fixed to the roof surface using branded roofing nails. The nails must enter through the ondulin into the sheathing beam installed around the pipe. | |
| In this case, nails are driven into the top of each wave of the apron relief. Fastening is not carried out only on the extreme waves that extend beyond the dimensions of the pipe on both sides. It is very important to drive the nails in correctly, strictly vertical to the roof surface. And balance the efforts so as not to deform the coating if the fasteners are hammered in too much. | |
| Now you need to prepare the Onduflash-super waterproofing self-adhesive tape. This material is excellent for sealing difficult areas - the butyl rubber component has excellent waterproofing qualities, and the aluminum base allows the tape to be given very complex shapes. The standard tape width is 300 mm. The length of the first segment should be 250÷300 mm | |
| The cut piece of tape is applied to the future installation site and is pre-bent along the relief of the corner to be sealed. The function of this segment will be to seal the edges of the previously fixed apron. | |
| After fitting the tape to the installation site, the protective film covering the adhesive layer is removed from its back side. | |
| The tape is applied at the junction of the roof and the pipe at the front corners so that it can simultaneously cover the upper and lower parts of the apron by 70÷80 mm. In order for the tape to bend into the required position and fit tightly to the material of the roof, apron and pipe, its corner is trimmed. | |
| Next, the tape must be pressed with good force onto all surfaces. It is especially important that the tape fits as tightly as possible along the joint line. First, such sealing is carried out on one lower corner of the pipe, and then the same is done on the opposite side. | |
| The next step is to apply a side apron to the pipe. The part is pressed against the roof surface and the side wall of the pipe and the cut lines are marked. | |
| The cuts at the top of the apron must be made clearly along the vertical boundaries of the pipe, that is, the edges of the apron are cut at a certain angle. And the lower part of the part, located on the roofing, should extend beyond the pipe in both its lower and upper parts by 100÷150 mm. | |
| The cuts are made along the marked lines using a sharp knife. First, a metal ruler is applied to the marking and a knife must be drawn along it with gentle pressure. | |
| That is, the apron material is cut through approximately ⅔ of its thickness. Then, due to a slight bending force, the apron part neatly breaks off along the cut line. | |
| The next step is to nail the prepared side parts of the apron to the roofing surface, under which additional sheathing elements are fixed. It is enough to drive three nails into each of the side parts of the apron - one in the center and one at the top and bottom. | |
| Next, a piece is cut from the waterproofing self-adhesive tape, the length exceeding the width of the pipe by 200 mm. This section will be used to seal the rear, most vulnerable part of the chimney pipe penetration. | |
| The cut part of the waterproofing tape is applied to the place of its future installation and bent along the line where the roofing sheets adjoin the pipe. At the same time, they try to immediately give its lower part the maximum shape that repeats the waves of ondulin sheets. | |
| Next, the protective film is carefully removed from the tape, and the waterproofing material is pressed tightly against the surface of the pipe and the roofing. The sides of the tape are cut so that the top of the cut parts can be glued to the sides of the pipe, where the apron elements are already fixed. Thus, the tape isolates the junction of the side element of the apron with the pipe wall, preventing drops of water from penetrating here during rain. | |
| The next task is to glue the waterproofing tape to the front side of the pipe. It is fixed on top of the front upper part of the apron, that is, the one that extends onto the pipe. The width of the tape should be 100÷150 mm, and its length should exceed the width of the pipe by 200÷300 mm, since it will bend onto the sides of the pipe and hide under the side parts of the apron. The tape must also be pressed very well against the brick or plaster surface of the pipe. | |
| Next, the upper edge of the waterproofing tape on the front side of the chimney is pressed with a metal fixing strip. It is secured with dowels. | |
| The same strips are screwed to the sides of the pipe, 15÷17 mm below the edge of the apron. The photo clearly shows how the fixing strip should be positioned, the ends of which are cut along the line of the pipe corners. | |
| Next, the edges of the apron remaining on top of the screwed side clamping strips must be slightly bent from the surface of the pipe. | |
| Now this formed corner between the pipe wall and the slightly bent edge of the apron is tightly filled with a layer of polyurethane sealant. For this operation you will need a special construction syringe gun. | |
| Now all that remains is to cut out and lay an additional piece of ondulin on the back side of the pipe. Its width should be equal to the width of the side elements of the apron. and the length is from the ridge to the pipe. An additional piece of ondulin is laid on top of the already laid covering, as well as on top of the waterproofing tape glued to it and the pipe. | |
| The laid additional fragment of ondulin is nailed to the sheathing directly through the coating that has cooled below. Fixation is carried out with roofing nails driven into the top of each wave of the covering. | |
| When the arrangement of the junction of the roofing material to the pipe is completed, you can proceed to further installation of the ridge elements. This ridge element will cover the upper edge of the additional ondulin sheet on top of the pipe. |
* * * * * * *
The information presented above quite convincingly indicates that there is nothing supernaturally difficult in sealing the area where the roof adjoins the chimney pipe. This kind of work can be done on your own. However, you should not forget about compliance with all safety requirements, since the work will take place at high altitude. Carrying out any installation operations on roof slopes without safety devices is extremely frivolous!
At the end of the publication, we suggest watching a video that shows in detail the process of sealing the junction of a tiled roof.
If you don't seal the joint
When removing the chimney, a hole is made in the roof. The gap between the coating and the walls of the chimney is sealed with special aprons, collars and seals. They can be bought at any hardware store. These protective elements are easy to make with your own hands.
If you do not seal the seams on the roof in time, the following consequences are possible:
- Increased wear of roofing material. Water penetrating into the gap ends up on the inner surface of the roof, which causes deformation of the coating.
- Reduced service life of the building frame. Water that is poured into the gap between the pipe and the roofing contributes to the gradual rotting of the wood. This is fraught with deformation and destruction of the rafters.
- The insulation loses its effectiveness. Thermal insulating materials with which the roof is equipped can quickly lose their properties when wet. If hard insulation is not very exposed to moisture, then soft insulation quickly begins to rot.
- Increased humidity in the attic. Increased dampness causes stale, heavy air to appear. This can negatively affect the interior decoration of the attic.
The method for eliminating the gap between the pipe and the roof depends on its size and type of coating. The shape of the chimney is also taken into account. For a distance of less than 5 mm, use a heat-resistant sealant. If the gap width exceeds 1 cm, use cement mortar, an apron or a special sealant.
It is necessary to seal the gap between the pipe and the roof for:
- ensuring insulation of the attic space from atmospheric moisture;
- to increase the efficiency of thermal and waterproofing;
- increasing the service life of the rafter system and the entire roofing structure;
- eliminating cold bridges.
Sealing the chimney on the roof avoids destruction of the roof itself.
Methods for insulating furnace ducts
The choice of materials and technology for performing chimney thermal insulation work with your own hands depends on several factors. Let's look at the main ones in more detail, indicating the positive and negative qualities of thermal insulators.
Basalt wool insulation
One of the most common thermal insulation materials - this is due to its advantages:
- low level of thermal conductivity. According to this characteristic, the material is equivalent to polystyrene, rubber and cork;
- high level of water insulation of basalt fiber. Water easily wets the outer layer of the material, but cannot get inside. It is possible to work in indoor conditions with constant air humidity, while maintaining the basic characteristics;
- high fire resistance ratings. Cotton wool can withstand heating above 10,000, without loss of quality of the thermal insulation layer;
- inside the material, the fibers are arranged longitudinally and vertically, this feature allows it to withstand high compressive loads. The maximum permissible deformation of the layer is 10%.
Among manufacturers, according to customer reviews, several companies are leading:
- "Rockwool" - thermal insulation from Danish manufacturers. It is ahead of competitors in a number of characteristics, which makes it possible to ensure high-quality performance of the layer with minimal dimensions in thickness. It is recommended to use for insulation of ceramic chimneys and fireplaces;
- "URSA" - this Italian brand has been working in Russia for a long time. Products are produced for the entire range of work in industry and private housing construction;
- “Izovat” - slabs from this company are produced with different levels of strength. They are produced in thicknesses of 30-200 mm and can be installed on a small chimney for a sauna stove or for industrial boiler installations;
- “Paroc” - Swedish stoves have been produced since the middle of the last century. Production has been established throughout the European continent. The characteristics of the material make it possible to use cotton wool to protect steel pipelines. The “Paroc Pro Section” and “Paroc Pro Bend” product series with an outer layer have high thermal insulation and protection of steel pipelines and surfaces.
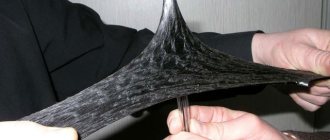
Applications of kaolin
Such materials are produced using advanced scientific developments. Inorganic binding additives are added to the mullite-silica base in a vacuum and subsequent drying of the material. To increase strength, a clay binder is added to them.
Kaolin fibers have a number of advantages:
- safe for human health. Do not contain asbestos and do not emit harmful substances when heated;
- high level of safety from fires;
- thermal energy losses are reduced;
- the material is guaranteed not to be destroyed even during the 2001 start or stop of the furnace. Can be used in a country house with occasional use of the stove;
- the slabs are easy to process and install;
- low density with high thermal insulation values affects the dimensions of the slabs and makes it possible to reduce the thickness while maintaining performance characteristics.
Insulation with mineral wool
This thermal insulation has a number of advantages:
- properties allow you to maintain optimal flow temperature at different times of the year. The temperature of the heated gases leaving the furnace and inside the room itself can vary significantly. This property is achieved by the composition and characteristics of the material. Can be used for thermal insulation of walls and pipelines.
- the substance is absolutely non-flammable. Able to not ignite even at temperatures of 10,000 and above. This layer does not allow a fire to develop and protects it from open fire. Some binders begin to evaporate at lower temperatures;
- at high heating temperatures, the thermal insulation layer retains its shape and is able to withstand small mechanical forces. This feature is achieved by introducing certain additives;
- high sound insulation rates. This material prevents the passage of sounds through the surfaces of protected walls. Air gaps form between the fibers, preventing sound from passing through;
- the top layer of cotton wool may get wet, but the water does not pass to the pipeline and does not freeze at low temperatures. This feature does not allow the development of colonies of fungi and mold;
- Environmentally friendly materials are used for production. There is no harmful effect on the atmosphere or human health.
The disadvantages of this material include several characteristics:
- the material is not the cheapest. If you are offered expensive material at a bargain price, it means that they are trying to sell you a defect or a fake made from low-quality materials and produced in artisanal conditions;
- large amounts of dust emitted during work. It is recommended to work in protective suits and respiratory protection.
Among the manufacturers there are products from several companies:
- “ROCKWOOL” - stone wool from this company is in demand among domestic and foreign consumers. Among its advantages, several characteristics stand out: a high level of strength and a long service life (at least 15 years). To this we add the application of an additional protective waterproofing layer and increased sound insulation characteristics of housing;
- mineral material from . Basalt rocks are used to make it. It has an increased level of heat and sound insulation of residential premises. Light weight and ease of cutting allows you to reduce work time and perform such chimney protection yourself;
- The well-known insulation material is probably known to every consumer. The material is rolled into rolls - this makes it easier to transport and reduces the amount of waste during installation. The material does not contain formaldehyde. Recommended for use in residential, children's and school premises and hospitals.
Tape sealant
Tape sealant is a solid material. Many builders consider it the most cost-effective option for roof sealing. Material Features:
- it is based on butyl rubber;
- The sealant tape is highly resistant to ultraviolet radiation and high temperatures;
- it has high adhesiveness, making it easy to install;
- Ideal for sealing joints between chimneys and roofing.
The tape has an aluminum coating, which increases the service life of the sealant for outdoor use. The tape is easy to install and operate. The average service life of the product is 10 years. Thanks to a wide range of colors, the tape can be used to seal various roofing coverings. The sealant has exceptional adhesion to various surfaces. The tape is used when it is necessary to seal wooden, plastic, and metal surfaces. The tape is also successfully used for sealing translucent roofs.
How to use
The surface of the pipe and roof on which the tape is applied must be cleaned and dried
It is important that the area being treated is level. To apply the tape, you need to cut a piece of a certain length, then remove the protective film and press the product tightly against the joint (slot)
At temperatures below +5, the tape is first kept indoors at a temperature of 15 degrees for 12 hours.
Using the tape in sub-zero temperatures involves heating the surface to be treated. The tape is not used for surfaces with an operating temperature above 80 degrees or when the roof slope is more than 55 degrees.
Advantages of an insulated chimney
External insulation of the chimney duct is an effective way to protect against the harmful effects of condensation, precipitation and wind. Of course, it is not possible to completely eliminate all risks with the help of thermal insulation, but it is quite capable of extending the life of the structure. This happens due to the following factors:
- reducing the amount of deposits on the canal walls, saturated with aggressive substances. Chemically active elements that make up the combustion products of fuel will fly out into the chimney along with a stream of smoke;
- reducing the temperature difference between hot steam and the surface of the walls of the chimney, cooled from the outside by cold air, due to which condensation forms;
- reducing energy losses. During operation, an insulated pipe takes in less energy generated by fuel combustion, so it will be possible to maintain a constant temperature in the room with less wood or coal consumption;
- increasing strength and stability. The thermal insulation system installed around the chimney serves as an additional frame, which increases the strength and resistance of the structure to wind loads.
Sealing seams on a corrugated roof
Work sequences:
- L-shaped junction strips are applied to the chimney and lines are drawn on its walls along the upper edge of the strips;
- using this marking, an angle grinder with a stone disc makes grooves 10-15 mm deep;
- The lower abutment strip is installed first, while the bend in its upper part is inserted into the groove;
- then the side strips are installed in the same way with an overlap on the bottom and lastly the top.
The grooves are filled with heat-resistant silicone sealant, and the lower horizontal parts of the planks are fixed with self-tapping screws to the sheathing. To prevent leakage at fastening points, it is necessary to use special roofing screws with rubberized heads. If you don’t have these, you can cut gaskets out of rubber and put them on a self-tapping screw under the head.
At the final stage, a so-called tie made of waterproof material is installed so that water flows into the drainage system of the house. Corrugated sheeting is laid on top of the structure, another decorative false apron is installed and fixed to the pipe with self-tapping screws.
When sealing in this way, you can do without cutting the grooves, but for this you need to lay out a pipe with a protrusion under which the abutment strips will be inserted.
Many furnaces are equipped with round pipes consisting of several layers. To seal the seams around such a pipe, ready-made caps with an apron are produced. They are a galvanized sheet with a hole to which a cone is attached at an angle. The sheet is fixed with self-tapping screws on the sheathing, the pipe is inserted through the hole in the cap. The upper part of the cone is pressed around the pipe with a metal clamp with a gasket, ensuring a tight connection.
In addition to rigid caps, Master Flash elastic penetrations are available for sale, allowing you to seal the seam near the pipe quickly and efficiently. They can be used not only to seal chimneys, but also other roof elements - antennas, ventilation pipes. In appearance, Master Flash is similar to a metal cap, only it is made of rubber or silicone. It can be used at temperatures from – 50°C to 130°C on any type of coating, and is especially suitable for use on translucent roofs.
Installation of flexible penetration is not difficult at all. A hole is cut at its base slightly smaller than the diameter of the chimney. The penetration is simply pulled onto the pipe, the base around the perimeter is coated with heat-resistant silicone sealant and fixed to the corrugated sheet with roofing screws. You can additionally glue the junction of the base and roof with self-adhesive tape. To protect the penetration from ultraviolet radiation, a decorative cap is placed on top of it to match the color of the roofing.
Chimney fire protection
Today, ready-made “sandwich” panels made of steel or ceramics are available for sale. Their installation proceeds as follows:
- To install a modular system, an asbestos gasket is installed between the stove and the chimney.
- Then a layer of solution is applied on which the module is placed. Level, and secure subsequent blocks with a layer of mortar.
- The places where the smoke device passes through the roof are well insulated. Fire-resistant insulation of the roof will be provided by a galvanized steel box, secured with staples to the rafters and cross beams at the point where the pipe passes.
Pipe waterproofing
Quick and reliable protection of the chimney from leakage is carried out by applying roll materials.
Main stages of installation work:
- The pipe is coated with a primer and covered with a superdiffusion membrane. Instead of a primer, it is possible to use polymer-bitumen mastic. The membrane is glued to the roof, the edges are placed on the pipe.
- The top and bottom ties are made from metal. The bars are stuffed onto the sheathing and the corners are secured.
- The rolled material is laid overlapping, allowing for proper water drainage on a soft or metal roof. The length of the bottom sheet reaches the roof overhang.
- The joints are insulated with bitumen mastic. The corners are secured to the sheathing with dowels. The cracks are treated with heat-resistant sealant.
- The roofing decking is laid, a PVC apron is placed on top using Onduflesh tape, and the sealing is completed.
Device for connecting the roof to the pipe
Fixing a roof leak near a pipe
There is a leaking pipe on the roof of the house - bitumen tape, a polymer cap or a tin apron will solve the problem.
How to protect a chimney from moisture
Practice shows that most often water leaks on the roof near the pipe are associated with poor-quality sealing of the roof section. If the cutting is under the roof, it will leak from below, if on top, it will leak from above. To prevent this, the chimney on the roof is waterproofed by installing insulating aprons.
The work is carried out in several stages:
- First of all, a drainage gutter is placed in the waterproofing layer above the chimney, designed to remove moisture from the chimney.
- Then an internal apron is installed, ensuring complete sealing of the junction of the roofing covering and the chimney.
- Next, the so-called “tie” is laid. This is an element cut from waterproofing material, placed under the lower edge of the inner apron. The structure must reach the very edge of the roof. If the roof is covered with slate or metal tiles, the edge of the tie is brought out between the lower sheets of covering onto the roof surface. Along the edges of the structure, be sure to make a side with the help of pliers, which will prevent water from spreading over the roof, but will direct it down the slope.
- A roof covering is laid around the pipe.
- An external decorative apron is mounted on top of the roof. It is installed in the same way as the internal one. The only difference is that the top edge is fixed directly to the pipe wall.
Sealing the chimney with roofing felt and installing an “apron”
Insulating aprons are made independently, but if desired, you can purchase industrially manufactured units designed specifically for these purposes. They are used for wiring circular chimneys through the roof and are called roof passages. The nodes are an element consisting of a flat sheet of steel in the form of a base, to which an apron made in the form of a cap is attached. A chimney runs inside it.
Roofing penetrations are available in different colors to make it easier to choose the right option
To ensure stove draft, it is necessary to install ventilation outlets on the roof. They form air flows, protect ventilation from precipitation and create draft in heating devices. The outlets must be fixed strictly vertically and be equal in height to the chimney; only in this case the air flows generated in them will be strong enough to ensure optimal combustion of fuel in the heating device.
Waterproofing a pipe is a responsible undertaking. Not only the integrity of the roofing pie, but also the safety of using heating devices depends on the correctness of its implementation. Of course, you can do all the work yourself, but you need to calculate your strength and be sure that everything will be installed absolutely correctly. If you still have doubts about your competence, it is better to entrust the installation of waterproofing to specialists and receive a unit mounted in accordance with all the rules in a short time.
How is it carried out?
If the owner of the property notices that a leak appears near the pipe, then in most cases the cause is poor-quality roof sealing. To avoid leaks, specialists install aprons. Installation must be carried out in accordance with the algorithm:
It is necessary to lay a drainage gutter
. It is required to remove moisture from the pipe.
To ensure maximum joint tightness
roof covering and chimney, an internal apron is used for the pipe on the roof.
You need to cut out the waterproofing backing
, which should be placed under the bottom edge of the apron. If the roof is covered with sheet material, then the edge of the substrate must be brought out between the sheets from below. It is imperative to create a side to direct the water along the slope.
Roof covering must be laid around the pipe
.
The external apron is installed using an identical algorithm
. The only difference is in securing the top edge to the chimney.
Insulating apron
can be created manually or a ready-made version can be purchased. The chimney must pass inside the apron.
Attaching the apron to the pipe On our website you can find contacts of construction companies that offer roof repair services. You can communicate directly with representatives by visiting the “Low-Rise Country” exhibition of houses.
Deciding on the type of waterproofing material
The development of chemical production makes it possible today to produce a large number of insulating materials for roof carpets. What type of material should I choose: roll, liquid, powder? What composition should it have in order to long-term and reliably protect the house from water penetration under the roof, especially in places where pipes exit onto it?
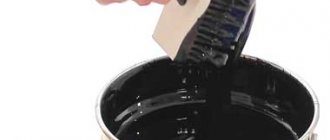
Waterproofing of pipes along with the base of flat roofs is carried out using liquid reinforced mastics - mixtures of organic binders with extremely crushed fillers. The composition of such mastics is very different, most often they are hot or cold bitumen-gasoline mixtures. Today, more and more often on the market there are branded liquid or powder mastics, intended for subsequent dilution with solvents, with a complex multi-component composition.
Treating the pipe with mastic
On pitched roofs, roll mastics, film and non-woven materials are used, which are also glued to the base using mastics or fastened with self-tapping screws. The well-known roofing material is one of the roll mastics. A special film, polyethylene and polypropylene, or non-woven synthetic membranes can be used as a material for waterproofing. Roll waterproofing has many modifications, allowing you to specifically select the one that will most fully meet the functions of a particular roof.
Special film is used quite often today as a waterproofing material.
The quality of roof waterproofing work depends to a large extent on whether the joints formed by the pipes exiting to its surface are executed correctly or not. It is these areas that often reveal the unprofessionalism of the builders. Based on the foregoing, one should conclude: contacting specialists at the stage of waterproofing pipes and any exits to the roof will help to avoid unnecessary financial and labor costs in the future.
Criteria for choosing chimney waterproofing products
Previously, roofers used materials unused after roofing work for insulation operations. Today the market offers a wide range of materials and devices, with the use of which you can independently perform high-quality and reliable waterproofing.
Requirements for pipe waterproofing products:
- Highest moisture-resistant and anti-corrosion properties.
- Thermal stability at temperature changes from -20 to 1000 C.
- Low thermal conductivity so as not to overheat wooden roof structures.
- Not sensitive to ultraviolet rays.
- Endurance, wear resistance, long service life.
- Fully compatible with base coat. For roofs made of metal materials, galvanized parts are used, for soft roofs - bitumen.
It is not recommended to do moisture protection using conventional silicone sealing paste, bitumen or cement. The product is selected taking into account the maximum temperature of the chimney walls and the type of roof.
We cover the chimney with corrugated sheeting
The priority of autonomous heating of a private home is increasingly obvious. In addition to significant savings, this is the opportunity to independently choose alternative heating methods. Among the sufficient number of available options, stove heating is still popular. Despite certain installation difficulties, this is the best way to create a favorable microclimate in the house.
Any autonomous heating, with the exception of electricity, requires the removal of combustion products through a chimney. Today there are enough materials with which it can be organized. If it is a fire-resistant brick, it is most advisable to protect it from the negative effects of aggressive environmental factors by means of cladding.
Attention. Our readers think that morning fishing is a myth! The secret of the catch has been revealed, you just need to dissolve 1 sachet in 0.5 liters of water read more
The chimney lining is a kind of shield that prevents the formation of condensation as a result of the interaction of the difference in ambient temperatures and the chimney pipe.
How to insulate a chimney on a roof
Almost every private house has a stove or fireplace, which is necessarily equipped with a chimney to remove combustion products. The temperature of this element can reach several hundred degrees, and the only thing that separates it from the room is the chimney wall.
When constructing a chimney, the most important aspect of the work is compliance with fire safety rules at home. The most vulnerable areas from the point of view of fire and overheating are the junction of the chimney with the ceiling and roof. Therefore, special insulation techniques depending on the type of chimney, floor and roof material.
Heat-resistant chimney sealants
This type of sealing material has a silicone base to which iron oxides are added. Such additives not only increase the temperature resistance of the sealant, but also give it a reddish tint, which makes the composition invisible when processing brick chimneys.
When using heat-resistant silicone sealants, a number of their important features should be taken into account, in particular:
- Such materials may release acetic acid, promoting an acid reaction. This is the reason that they cannot be used for metal chimneys.
- Some types of heat-resistant sealants are not resistant to solar radiation, which limits their use for roof structures.
- Good adhesion to many substances and materials (brick, ceramics, glass, concrete, etc.) makes their scope of application quite wide.
- Due to their high water resistance, they can be used to seal the upper sections of chimney structures.
- They have good ductility and strength, as a result of which they can be used in structures experiencing significant wind loads.
- The hardening process of silicone sealants takes from several hours to several days, and depends on the temperature and humidity of the environment. The optimal values for these indicators are 25 °C and 50%.
- It is not recommended to use silicone sealants for deep seams or cracks.
- To improve the quality of sealing, before applying the composition, the surfaces of the seams should be cleaned of dust, dirt, grease deposits and other debris.
- Silicone sealants can only be applied to completely dry surfaces.
- Conventional silicone sealants used in construction are not heat-resistant and cannot be used to seal chimney structures.
Types of sealants
In order for the sealant to perform its protective properties for a long time, it must be heat-resistant and moisture-resistant, so you cannot buy ordinary silicone or bitumen materials for these purposes. To do this, purchase a special heat-resistant silicone material or thiokol heat-resistant composition, which has a temperature indicator of up to 1300C. Good fluidity and elastic properties allow the sealant to penetrate deeply into the most inaccessible cracks and seams, filling them.
Silicone sealant for high-temperature pipe surfaces is made with the addition of iron oxide and is available in two types: acidic or neutral. The first, when cured, forms aggressive acetic or ethanoic acid, which makes it unsuitable for application to the surfaces of metals that are not resistant to corrosion, for example, low-alloy steel with weak anti-corrosion properties. In these cases, only neutral sealants are purchased, which harden with the release of alcohol and water. Typically, such insulators have a long warranty period of up to 20 years.
Silicate sealants can withstand a maximum temperature of about 1500 C. They, unlike elastic silicone compounds, create a durable solid layer after the hardening process is completed. Therefore, when structural units are displaced, cracks may form.
High-temperature pastes are available in standard colors:
- Red-brown, sometimes called automobile. Brown can withstand temperatures of 600 C, and red - up to 350 C.
- Black or furnace, operating in a temperature zone up to 1500 C with a brick flue.
The most important characteristic when choosing sealants according to GOST requirements is environmental safety; as a rule, the price of pastes will depend on this parameter.
Usually, cheap ones emit hazardous substances when heated. In the retail chain today, it is possible to purchase ready-made kits for waterproofing seams, which greatly simplifies the work.
Popular means for sealing chimney pipes:
- Iron aprons are the most common and are used for square chimneys. They are made in the form of a prefabricated device from a steel angle, attached to the roof slope and chimney.
- Rubber funnel-shaped seals for chimneys of round or oval cross-section. They are installed on the chimney using the tension method, fit it tightly and are fixed to the sheathing through the rolled covering.
- Membranes in the form of strips are glued around the circumference/perimeter of the pipe to protect against water ingress.
Chimney finishing, choice of materials
Negative factors affecting the chimney include
:
- atmospheric influences (wind, precipitation, ultraviolet radiation);
- difference in ambient temperatures;
- high temperature operating loads.
Due to the difference between the temperature of the working pipe and the air temperature in the chimney, condensation forms, which provokes destruction of the pipe during the combustion of heating oil
. To avoid the formation of condensation and protect the pipe from external influences, it is necessary to provide reliable insulation of the chimney through lining.
Various materials are used to cover the protruding part of the pipe. When choosing, you should consider
:
- resistance to external factors, wear resistance;
- appearance and color scheme (matching the roofing or wall decoration of the building).
Finishing a chimney on the roof is most often done using
:
- clinker bricks or tiles;
- plasters;
- cement fiber boards;
- roofing material (corrugated sheeting, slate).
Characteristics of finishing materials
Clinker bricks or tiles are a practical option for finishing a chimney pipe, since dirt is not noticeable on such material.
The advantages of clinker materials also include the aesthetics of the masonry; such a chimney goes well with any type of roofing. It is worth noting the resistance of tiles and bricks to weather conditions, temperature changes, as well as the strength of the material. For lining the chimney, exclusively solid clinker bricks are used, laid on a clinker mortar; special compounds are used for grouting joints. Thin, lightweight clinker tiles are usually used for lining tall pipes. Finishing a chimney on the roof with plaster is characterized by
:
- affordable cost;
- simple installation;
- versatility (suitable for any roofing);
- the ability to implement any color schemes (plaster can be painted with silicone paint).
Plastering pipes is carried out using the same technology as finishing facade walls. Traditional cement or lime-cement mortar can be used, but a more durable option is to use mineral, silicone, silicate or acrylic plaster. Painting the dried surface increases the wear resistance and durability of the finish.
Small-format cement-fiber boards are durable, resistant to ultraviolet radiation, moisture, temperature fluctuations, and light in weight. This is an environmentally friendly, non-flammable material. Smooth or structured slabs can be used for lining the chimney; the material is available for sale in a wide range of colors.
If slate is used for roofing, the chimney lining on the roof is usually made of the same material. Slate slabs can be shaped like an arc, flake, rectangle or octagon. The color of this natural material depends on the deposit. This color is usually graphite, green or purple.
A fairly simple and inexpensive option for finishing a pipe is to use corrugated sheeting. It is used if the roof covering is made of the same material. The pipe, finished in the color of the roof, looks aesthetically attractive.
Manufactured in a factory, the chimney elements for the roof passage have an aesthetic appearance and are quite easy to install. They are equipped with a steel chimney duct and can have a ready-made external cladding made of any material, or be prepared for independent finishing so that the chimney is externally in harmony with the roof. The modular steel structure is not additionally finished; it is enough to install it at the point of passage through the roofing pie.
Tips for choosing thermal insulation material
When choosing insulation, you need to consider what material the chimney itself is made of:
- brick. A brick pipe can be insulated using plaster;
- metal. For insulating metal structures, cylinders made of mineral wool, fixed with wire stitching and aluminum foil, are suitable;
- Asbestos-cement pipes are best insulated with a steel casing and loose insulation used to fill the gap between the two structures.
If you are just planning to build a chimney, then it is better to immediately buy and install a sandwich pipe, rather than waste time and money on thermal insulation measures.
Waterproofing a chimney on the roof
When making a passage through the roof, it is important to comply with SNiP standards. A gap should be left between the roof elements and the chimney, the size of which is regulated by documents
At the point of passage through the roof, a box (wooden or galvanized metal) is usually installed, in which all the free space around the pipe is filled with non-combustible material - stone or glass wool.
Sealing a chimney on the roof can be done using improvised means or using standardized elements. Around the chimney you should make a so-called collar, or flashing - a trim made of strips of metal, about 40 cm wide, in accordance with the dimensions of the pipe. The bend angle of the steel strips must correspond to the angle of passage of the chimney pipe through the roof. To calculate the length of the section, you need to take into account
:
- slope angle;
- chimney dimensions;
- chimney finishing type.
If the flashings are made of galvanized sheets, then they are interconnected with an overlay and soldered. Elements made of sheet steel are connected by a double standing seam. The rebated seam connection is used to seal the passageway on roofs made of corrugated slabs and tiles. If the roof slope angle is more than 30 degrees, a special beam should be installed behind the chimney - a “bumper”, which will protect the pipe from rainwater flows and excessive snow pressure in winter
.
A protective elastic apron for a chimney can be made
:
- from flexible metal tape (lead or aluminum);
- made of galvanized metal with polymer coating.
The apron is installed around the pipe in two layers around the entire perimeter. The bottom layer of the apron is placed under the roofing, and the top layer is mounted on top of the roofing material. To cover the top layer of the apron, a waterproofing film and metal profiles are used.
The top curved edge of each apron should fit into a groove cut around the perimeter of the chimney. After installing the edge into the groove, the joint is filled with polymer sealant or silicone for roofing.
Ready solutions
Sealing a chimney on the roof is a rather complex task, the quality of the solution of which determines the reliability of the thermal and waterproofing of the roof. You can make the passage assembly yourself, using various materials and special strips, or mount a ready-made structure, which includes a wide protective apron.
Ready-made roof cutting on the construction market is presented in many versions - models differ in material and manufacturing method, as well as the angle of inclination of the element that protects the place where the pipe passes through the roofing pie from water. The angle of inclination can be from 15 to 55 degrees, therefore, the cutting of the chimney on the roof is designed for the most common slope options.
To install such a structure, a hole of appropriate dimensions is made in the roofing pie. A seal made of rubber is attached to the outside of the structure using silicone. The distance between the pipe and the collection passage is filled with non-combustible insulation. The roofing penetration covers the passage unit, after which the penetration can be attached to the roof with self-tapping screws. To ensure a tight connection, it is recommended to use a sealant.
When choosing the option of how to seal a chimney on the roof, you can use other ready-made solutions, for example, Master flash roofing penetrations.
https://youtube.com/watch?v=rL-_Irakk4s
How to seal the gaps between the pipe and slate
Slate is the most affordable roofing material available. Therefore, solutions for sealing the gap between the pipe and the roof should also be cheap, as well as simple and quick to implement.
So, if you are looking for something to seal the gap between the chimney and the slate roof, then asbestos mortar is best suited for this purpose. If you need a more technologically advanced and durable method of sealing the joint, then place a steel apron on the pipe.
Mortar of cement with asbestos
Sealing a pipe on a slate roof with a mixture of cement and asbestos is a makeshift, but no less effective method. After all, it is not for nothing that asbestos continues to be used to create fire-resistant coatings and materials, despite its tarnished reputation.
The method itself is simple: asbestos soaked in water is mixed with cement and the resulting solution is used to cover the joints between the chimney pipe and the slate. The main thing is not to forget about latex gloves and a respirator. Still, the reputation of this material is spoiled for a reason - it is classified as a first-degree carcinogen, that is, it reliably causes cancer. And asbestos is especially dangerous if it gets into the lungs. However, if you follow simple safety measures, the risk is almost zero.
Now we’ll tell you step by step how to seal the gap between the pipe and the roof with asbestos mortar:
- Asbestos is soaked in water in a ratio of 1 to 1. It is better if the asbestos is in the form of fibers or powder, but crushed asbestos sheets can also be used.
- Soaked asbestos in a ratio of 1 to 1 is mixed with M400 cement.
- Before covering the pipe on the roof, the slate around it and 100-150 mm of the chimney are thoroughly cleaned of dirt and degreased.
- The resulting solution is used to cover the gap between the pipe and the slate. Everything is standard on the bottom and sides: the solution should extend slightly onto the pipe in order to better adhere to it. But at the back you need to fashion a small hump from the mixture with a sharp “ridge” in the center and smooth slopes. This is necessary so that the snow does not accumulate behind the pipe, but appears to be cut and slides down the sides.
- With hands dipped in water, smooth out the solution so that there are no ledges or roughness that could interfere with water drainage or snow removal.
Asbestos mortar is very cheap and can easily withstand temperatures of more than 1000 °C, so it can be used to cover the gap between the pipe and the roof of the bathhouse without fear that the mixture will crack due to heating. In addition, asbestos mortar has excellent adhesion to slate and is resistant to caustic substances and temperature changes. But it has three main disadvantages.
Firstly, the joint between the pipe and the roof should not be very wide. Otherwise, when puttying, the mixture will simply fall through the gap. Even if you manage to hammer a wide gap, the solution will begin to crumble over time, which will lead to leakage.
Secondly, the solution stuck to the pipe looks ugly. If we are talking about a bathhouse or an outbuilding, then this may not matter, but sealing a chimney on the roof of a house is a completely different matter.
Thirdly, the knot is not very reliable. A small mistake in mixing the solution or applying it is enough for the roof to leak at the first rain. But even if the technology is followed, the service life of the connection is unlikely to exceed 15 years. Again, this is acceptable for a bathhouse, but not for the roof of the main house.
Apron made of galvanized metal or stainless steel
Another inexpensive way to seal the gap between a slate roof and a round chimney. However, unlike asbestos mortar, this method is suitable for all types of non-metallic roofing.
A steel apron or pipe penetration is a base made of a flat steel sheet to which a cone with a cut off top is welded. The cone is placed on a round chimney and sealed, and the base is attached to the roofing. The result is a reliable and durable unit, which, if installed correctly, can maintain tightness for decades.
This is what a stainless steel apron looks like for sealing the passage of a round pipe through a pitched roof
Sealing a roof pipe with a steel flashing is done in seven steps:
- The slate and pipe are cleaned of contaminants and, if the roofing pie with insulation has not yet been installed, washed with a stream of water.
- An apron is placed on the pipe so that the base is pressed tightly against the roofing and goes under the ridge. If the pipe outlet is far from the ridge, then the steel sheet is increased to bring its upper edge under the ridge strip by at least 60 mm. This must be done, otherwise the joint between the pipe and the roof will leak, no matter how much sealant you use.
- The base is screwed to the sheathing using roofing screws with an EPDM rubber gasket to protect the joints from leaks. For the same reason, screws are screwed into the top of the wave. Before screwing in the screws, it is necessary to drill holes in the slate so that it does not crack.
- The side edges of the base of the apron are bent with a mallet so that they fit snugly against the slate and coated with polyurethane or silicone sealant.
- A clamp is installed on the pipe and clamped at the transition point between the apron and the chimney.
- The clamp is carefully sealed. For better protection, you can place a collar with a “skirt” close to the clamp, which will cut off water from the connection.
- A sealant is placed or foam is blown into the holes formed between the base and the slate waves.
Like asbestos mortar, this sealing method is also suitable for sealing joints between the chimney pipe and slate. The main thing in this case is to use a high-temperature sealant.
It is advisable that the apron be made of stainless steel - this way its service life will be counted for decades. Galvanized steel is also acceptable, but then the pipe passage through the roof will most likely have to be repaired or redone in 15-20 years.
Advantages of a steel apron for sealing slate roofing:
- cheapness;
- durability;
- relative ease of installation;
- resistance to high temperatures;
- ease of repair and restoration.
Disadvantages of this method:
- Insects, birds and rodents can settle in the lower part of the pipe between the base of the apron and the slate;
- without placing a base under the ridge, leakage is guaranteed;
- increased likelihood of freezing due to the difference in thermal conductivity between slate and metal.
Possible problems with poor-quality sealing of the roof passage
Corrugated sheeting is a high-quality roofing material that has a complex layered structure. The following layers are applied to the outer steel sheet base:
- zinc;
- additional anti-corrosion;
- primers;
- polymer (polyester);
- installation protection.
And on the inside, galvanization, primer and corrosion protection are also applied. Thanks to this structure, corrugated sheeting has excellent load-bearing capacity, protection from rust, fire and rot. The building material retains its properties over a wide temperature range.
It is customary to create various openings on the roofs of houses for ventilation and smoke escape. This naturally leads to damage to the waterproofing and other protective layers. Therefore, sealing the joints between the pipe and the roof surface is of great importance. This process must be carried out correctly, otherwise problems may arise:
- Leak. When the pipe is routed through the roof, the presence of uninsulated cracks leads to the penetration of water into the house, living quarters, dampness of the walls, including load-bearing ones, the appearance of mold, etc.
- Destruction of rafters. The roof structure consists of wooden rafters. Moisture entering through the joints contributes to the rotting of the wood and the destruction of the entire structure.
- Corrugated sheeting corrosion. Although the roofing material is protected by anti-corrosion layers, the internal protection is weaker than the outer layer. Corrosion gradually destroys corrugated sheeting, reducing its protective characteristics and attractive appearance.
- Reduced roof insulation level. When water penetrates into the layers of thermal insulation, the latter lose their ability to retain heat and protect from external cold. The insulator loses about 50% of its ability to effectively retain warm air in residential areas.
To be sure of the quality of your roof, you should seal the joints in a high-quality manner. Various sealing methods have now been developed that allow high-quality waterproofing of the gaps between the pipe and the flooring.
Nuances of laying Wakaflex material
Wakaflex is an adhesive elastic waterproofing strip with internal aluminum reinforcement. Its design allows it to repeat the shape of the roof and at the same time adhere tightly to the pipe surface.
Laying Wakaflex material
Installing Wakaflex is simple, which you can do yourself:
- The strip is glued along the lower edge of the chimney. They cut it around the circumference. Bend it in half along the tape, release the top protective film and glue it to the chimney, pressing it with a hard roller.
- Subsequently, the lower protective layer is removed and glued to the roof, scrupulously pressing with a roller to ensure complete adhesion.
- The corners are carefully trimmed, wrapped onto the pipe walls and glued.
- The sides of the chimney are treated in a similar way.
- The corners are carefully placed on the lower/upper area of the pipe, the corners are rounded for the best contact and wind protection.
- The upper wall of the pipe is processed last, its corners are fixed to the side planes.
- A Vaka strip is attached to the chimney on top of the waterproofing tape, which prevents water from flowing down the pipe surface.
Waterproofing prevents water damage or destruction in the chimney. If the chimney duct masonry already has gaps, voids, cracks or missing mortar, it should be repaired before waterproofing. Its outer surface must be cleaned before waterproofing, since any particles or dirt will not allow the waterproofing material to create a tight connection.
Carrying out moisture protection is a mandatory operation for every chimney; if this is not done, the damage caused by water to the smoke ventilation system can be significant and lead to its complete destruction. Modern waterproofing materials are well represented in construction stores in all regions of the country, including Moscow.
How to choose the right location for the chimney on the roof
The best option, according to boilermakers and roofers, would be to install a smoke exhaust on the roof near the ridge.
- This makes it possible to ensure minimal accumulation of snow around the chimney pipe in winter and the absence of snow pockets near the ridge, that is, leakage in the junction area is eliminated.
- The height of the chimney above the roof
is small, which reduces the impact of external unfavorable external factors on its design. - The low height of the chimney relative to the ridge creates favorable conditions for the formation of the smallest amount of condensation.
It should be taken into account that the lower the chimney pipe is located along the roof slope, the greater, according to building regulations, the height of the chimney above the roof should be.
If there is a common wall with a multi-story building, then the pipe is installed above the roof of the multi-story building.
Where it is not recommended to install a chimney pipe
It is better not to install passage units in the following places:
- next to the attic windows, since any gust of wind will bring carbon monoxide and smoke into the attic;
- valleys, the junction of two slopes that form an internal corner, where it will be difficult to ensure a high-quality connection to the pipe, in addition, a huge snow pocket will form there.
The chimney cannot be rigidly fixed to the roof, since if the integrity of the roof is damaged, there is a danger of destruction of the chimney, and therefore a fire.
Where does waterproofing begin?
The fireplace heating system will operate normally only if the work was carried out in accordance with the requirements of sanitary standards and regulations. At the state level, rules and recommendations for builders are regulated. By listening to them, you will be able to carry out insulation work without an emergency.
- Rafters and roofs should not be adjacent to each other. The spacing distance depends on the specific material. Combustible isolates should be spaced at least 150 millimeters to 300. Non-combustible (like asbestos and mineral wool) can be spaced between 100 and 250 mm. Be careful with flammables. Some gaskets are easily flammable. When combined with Euro slate, a fire may start, which will be difficult to extinguish.
- It is important to maintain the correct sequence of layers. Moisture should not be able to get inside the layer system, as it will destroy them. In addition, it will begin to accumulate and cause damage to the brick. There must be a mandatory gap between the pipe and the inner layer. Most isolates are flammable even at low temperatures.
- Don't neglect the box. This is the area that is between the roof and the insulation. It must be filled with any non-flammable material, such as mineral wool.
Insulating films should be cut to fit an envelope.
After this, they are pulled to the central beam so that it can be secured with hardware. Waterproofing is mounted on the sheathing, vapor barrier systems are installed on the frames. The joints between the box and the insulation are laid with special tapes.
How is it carried out?
Often after insulation work, the owner of the house notices sudden leaks. For example, they may be in the place where the roof meets the chimney pipe. The reasons for this are natural and always indicate an error.
An error occurred during one of the stages. To avoid leakage, you can install an apron.
When working, you must follow the following sequence:
- Moisture will form in any case - that’s why the insulating layer is needed. This can be avoided by using a drainage chute. This is a long groove into which water flows and is gradually removed to a safe place.
- Waterproofing pipes will be more productive if you install an apron inside to protect against leakage inside.
- A special backing can be cut from the waterproofing to cover the lower edge of the apron. For sheet roofs (profile decking, metal tiles, bitumen slate) it can be brought out between the sheets from below. To drain water, install a side that will direct the flow to the drain from the roof.
- There must be a roof covering around the pipe.
- You can make an apron yourself using ready-made drawings. Factory models are sold in fireplace stores. The pipe must pass inside it.
This instruction also works for exterior splashbacks.
Waterproofing tasks
Waterproofing pipes is the last stage in roofing work. If you ordered work from a team, you should know about laziness. Often developers and roofers neglect this stage because they consider them unnecessary. Indeed, for some time you can use fireplace heating without insulation, but after two winters you will feel a significant decrease in efficiency.
The procedure solves the following problems in the house:
- Increased security. New types of houses always have wood in their construction. For example, the roof sheathing is made of timber, which is a fire hazard. The heat released from the fire also goes into the chimney and can reach several hundred degrees. Solid fuel stoves are capable of developing a temperature that will cause the sheathing to smolder. The isolate will cut the wood and prevent it from igniting.
- Reduced heat loss. Due to the low temperature outside the window, the quality of the brick - thermal conductivity - comes into force. That is, it tries to equalize the temperature and cools the room.
- Condensation protection. Condensation, like moisture in general, is the main enemy of brick. As it accumulates and freezes (the effect of thermal conductivity), it expands by ten percent, which leads to damage to the ceramic structure. It begins to crumble and crumble, becomes loose and after a few years the chimney falls apart.
The waterproofing procedure dramatically increases comfort, as both the efficiency of the fireplace and the appearance of the roof are improved. Interior designers and experienced builders emphasize that properly done insulation makes a home look complete.
Any roofing material can be equipped with a nice apron, which is selected individually by color.
Conclusion
The installation of a pipe outlet through the roof should be approached with the utmost responsibility. If the work is done poorly, moisture will regularly enter the attic. This will entail dampening of the rafter system and insulation.
High humidity has a negative effect on the condition of wood. As a result, many load-bearing elements of the attic are deformed. This can lead to sagging of the roof and the appearance of cracks in it. High humidity in the attic has a destructive effect on the internal cladding material. The durability of the roof depends on the correct selection and installation of sealant.
Materials used
There are many materials for waterproofing pipes in stores, but three types are traditionally used.
Common types of mineral wool are stone wool or glass wool. Sold in the form of rolls or slabs of different widths and thicknesses. Cotton isolates have:
Roll filters
A mullite-siliceous mixture that impregnates the fibers. The filter is sold in rolls and has the following advantages:
Asbestos and kaolin boards
The composition is similar to previous materials. Recently, asbestos is rarely used due to its high carcinogenicity. That is, constant inhalation of its dust can lead to cancer. But, in the case of waterproofing a pipe on the roof, it will not be able to get into the air and harm health.
Do-it-yourself insulation - procedure
Before you start installing thermal insulation, prepare everything you need for work. Clean the pipe from dust, repair cracks and chips. It is important that the surface is dry, otherwise the quality of thermal insulation will decrease.
Plastering
Video: plastering and insulating the chimney
Lining or sandwich chimney
When working with fibrous materials, protect your respiratory system with a mask or a damp cloth with an elastic band.
Video: instructions for making a sandwich chimney
Lining a brick chimney
The method described above is suitable for metal and asbestos chimneys; brick chimneys will require a lot of effort and time.
Wrap the insulating layer with foil, this will increase its thermal insulation properties.
Insulation with bulk materials
Such simple work will not only protect the chimney from destruction and extend its service life, but will also help to significantly save money by minimizing heat loss.
Source
Choosing a thermal insulation method depending on the chimney material
Gone are the days when chimneys were made primarily of brick. With the advent of gas and solid fuel boilers, they began to be made of metal, and asbestos pipes are also not uncommon. Insulation of different pipes requires an individual approach.
Insulation of metal pipes
To insulate the pipes of fireplaces and stoves that are not the main source of heating, but are used periodically, it is enough to plaster the pipe. This method is most often used for brick pipes, but is also applicable for metal ones.
For chimneys of furnaces and heating boilers, a different method is used. These are so-called sandwich chimneys. Such designs are available for sale, but they are not cheap. If you have a limited budget, you can make them yourself.
You should not use a galvanized pipe for the chimney. When exposed to high temperatures, zinc evaporates, forming toxic compounds that are harmful to health.
Asbestos pipes are also insulated using the same principle. In addition to mineral wool, you can use bulk insulation.
Thermal insulation of asbestos pipes
Mineral wool is considered the best insulation for asbestos pipes. This material is most often covered with a moisture-proof protective film, which is very important for asbestos because of its ability to absorb moisture. For thermal insulation with bulk material, a protective casing must be installed around the pipe, into which the insulation must be poured. To prevent moisture from entering from above, the gap between the pipe and the casing is filled with cement solution.
Steel apron
To finish the chimney, aprons made of galvanized steel are used. They can later be painted in the desired shade. The configuration of this element may vary. There are ready-made aprons of different sizes on sale.
How is the apron installed?
- The edges of the waterproofing membrane and thermal insulation that were damaged when the pipe was brought to the roof must be secured to the chimney with construction tape.
- To install the wall profile, the pipe is grooved along the entire perimeter (before this, markings should be applied). The upper part of the strip is inserted into the recess and fixed with a high-temperature resistant sealant.
- The first layer of the apron is placed under the profiled covering and fixed with roofing screws.
- The second layer of the protective device is mounted on a profiled sheet with an overlap of 10...15 cm.
Installation diagram of a steel apron
All joints are treated with sealant.
The protective apron should be fixed using special self-tapping screws with a rubber seal. If such hardware is not available, you can use homemade rubber gaskets that fit under the fastener heads.
Handmade metal apron
For those who have skills in working with tools and metal, the best option for an apron may be a self-made design.
Table. Tools necessary for the manufacture and installation of an apron.
| № | Tool | Illustration |
| 1 | Screwdriver | |
| 2 | Metal scissors | |
| 3 | Envelope forming pliers (heron) | |
| 4 | Tongs (45 degrees) | |
| 5 | Manual bender (sheet bender) | |
| 6 | Kiyanka |
In addition, you should prepare sheets of metal (smooth) of suitable size and roofing screws.
Important! To cut a metal sheet, you should not use a grinder. Otherwise, the edges of the corrugated sheeting, which is not very resistant to high-temperature influences, will be deformed. It is best to use metal scissors for these purposes.
The task is to make an apron from sheet metal for this chimney.
We will make an apron for this chimney
Step 1 . Dimensions are taken. This point must be taken with great responsibility, since the functionality of the design depends on it. The height of the apron must be at least 15...20 cm.
Step 2 . The four components of the apron are being prepared. To bend the sheet, you need a bender. This handheld device replaces a bending machine.
To bend a sheet you need a bender
Metal cutting is done with scissors.
Metal trimming
You will need four blanks:
- rear end;
The back part
of the edge must be slightly bent so that snow does not fall between the apron and the roofing.
- two sidewalls with stiffening ribs;
Sidewalls with stiffening ribs
The sidewalls should also have bends.
Fold on the side
- front end.
Front
It has a more open angle.
Step 3 . The rear element is mounted first.
Rear element installation
The part is pressed tightly against the chimney and fixed.
Step 4 . The sides are folded into an envelope. This ensures that there are no cuts on the apron. All folds of the envelope are tightly tapped with a mallet.
The sides are folded into an envelope
After the envelope is formed, a semicircle is cut out on the sides (on the side that will be in contact with the back panel).
A semicircle is cut out
A smoothly smoothed transition will also avoid cuts. After processing, the sidewalls look like this.
Sidewalls after processing
Step 5 . The sides are pressed tightly against the pipe and screwed to the roof. Self-tapping screws should be fixed on the protrusion of the corrugated sheet.
Step 6. The protruding part of the back part is cut to the size of the side panel, taking into account a small margin. It is necessary for the subsequent bending of the rear element onto the side.
The protruding part of the rear part must be trimmed with a margin
Step 7 . The back wall is bent onto the sidewall protrusion. This ensures a tight connection between the two parts. The seam is tapped carefully.
The seam is tapped
The same procedure is carried out with the second sidewall.
Step 8. The front element is installed in place and fixed with self-tapping screws to the chimney and corrugated sheet. This apron piece also has envelope folded side edges. They are also cut in a semicircle.
Fixing the front element
The sides (protruding beyond the chimney) are cut in a semicircle 1...2 cm higher than the front part, after which they are folded onto the walls of the front part, creating a lock. The result was a completely sealed chimney lining.
Sealed chimney liner
The only weak point of this design is the connection of the top of the slats to the pipe. Moisture penetration may occur in these areas. To eliminate this problem, the joints must be treated with sealant.
Video - Details about the design of the apron
A protective apron for a chimney can not only prevent leaks, but can also become a decoration for the roof.