Water level regulator RUV-1
390 ₽ More details
Satin ribbon, blue, width 4 cm, length 22 meters
243 ₽ More details
Vortex fecal pumps
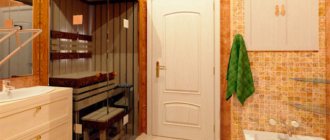
It's damp autumn weather outside, you want warmth and comfort. Immediately there is a desire to plunge into a warm bath. Imagine having a basement sauna in your home. And you don’t need to go anywhere - the steam room is always ready for use.
Advantages of a sauna
The installation location is chosen by the owner himself. But most recommendations are aimed at installing a sauna in the basement of a private house. What are the pros and cons of this arrangement?
- You can go steam from any corner of the house without going outside.
- The cost of heating the sauna is saved by placing it inside the building.
- If desired, you can build an adjacent room with a swimming pool and a relaxation room.
More details: features of a swimming pool in the basement of a private house.
The sauna has a number of advantages
- The pipes do not need to be routed separately to the street; everything can be laid inside.
- The cost of maintaining a sauna is reduced.
- If you build a sauna or bathhouse on a plot of land next to your house, then you purposefully take away space for planting a garden. This place can be usefully used for the construction of a small pond, recreation area or gazebo.
The only downside is the complexity of organizing wastewater disposal.
Sewage disposal system
Removing dirty water at the end of bath procedures is not as simple as it might seem at first glance. The reason is obvious - the basement itself is located below the level of the sewer pipes and drains of the house.
Therefore, all wastewater in the basement is collected in a sealed tank or cistern connected to the sewer riser of the house at the level of the first floor. An air compressor is connected to the container with waste water; after turning it on, excess air pressure forces the collected liquids into the general sewer system of the house.
Sometimes bathhouse owners take a more expensive and reliable route; instead of a compressor, a submersible fecal pump is installed in a collection tank in the basement subfloor, capable of pumping the contents directly into a septic tank or cesspool.
Materials for arranging a home sauna
To create the necessary microclimate conditions inside the steam room, it is best to use wood for construction. This does not mean that it is impossible to equip a sauna in brick and concrete buildings. For such premises it is necessary to provide additional lining of the internal surfaces of the walls with clapboard.
A sauna or bathhouse in the basement must be insulated with special material. It is laid from the inside to the room, then covered with a layer of vapor barrier on top and only then the sheathing is performed. For insulation, stone wool is used, which can be presented in the form of slabs or rolls.
In this video you will learn more about the sauna in the basement:
In combination with a wooden covering, the insulating layer is able to easily pass hot vapors from inside the steam room, without being saturated with moisture. If there is a cold concrete wall next to the stone wool, the steam transfer effect will not be achieved and the insulation will begin to quickly fail.
Some homeowners try to lay insulation material in several layers, forgetting that each subsequent layer must have a greater degree of vapor permeability. Foil material is often used as a vapor barrier layer, which does not allow moisture to pass through and does not allow condensation to form. To achieve maximum results in those places where the walls meet the ceiling, the vapor barrier material is overlapped by 15 centimeters.
Ventilation and sewerage
The second most important element of a sauna is the ventilation and ventilation system. For a bathhouse located below ground level, an exhaust air exchange system is used. This means that overheated and over-humidified air is removed through a ventilation pipe in the corner of the ceiling.
In a small sauna, it is enough to install one exhaust shaft to ventilate the gap between the walls and the insulation and two pipes for the interior of the bath. One of the vertical air ducts is located in the steam room, in the area of the shelves. Thanks to the exhaust pipe, part of the superheated air from the stove enters the sauna steam room in the shortest possible way and heats the shelves to 60-70 ° C.
In full-size saunas, ventilation ducts and ducts are hidden behind the ceiling sheathing and connected to a centrifugal fan located in a moisture-free area of the basement.
To remove dirty and waste water in the bathhouse, special collection containers are used, from which the collected material is discharged outside the basement.
Sauna equipment
An electric stove, preferably factory-made, is used as heating equipment, the power of which is calculated based on the volume of the sauna. For example, with a steam room volume of 20 cubic meters, the power of the heating stove must be at least 10 kW.
The equipment must be equipped with an automatic shutdown. It must be installed at a short distance from the floor surface - approximately 20 centimeters. For the stove, a fence is arranged around the entire perimeter so that the boards rise slightly above the stove, and the distance between them and the equipment is at least 5 centimeters.
Special stones for the sauna, which differ from each other in their characteristics and healing properties, will subsequently be placed in this space. The stones should heat up very quickly and retain heat for quite a long time, having a positive effect on the human body.
Natural stone heats up, reaching a maximum temperature, then, under the influence of water, local cooling of the rock occurs. Therefore, stones must be selected with high heat resistance, which will not crack or split.
In addition to the stove, lighting fixtures, thermometers for measuring the air temperature inside, an hourglass and ventilation valves, which are fastened with screws to the internal wooden lining, are installed in the sauna room.
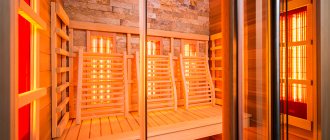
For those who do not want to deal with the installation of a chimney, the construction of a heating stove with the laying of stones, we offer the installation of a ready-made infrared cabin.
Of course, it does not have a high steam temperature, and the depth of heating of the skin is also small. Infrared waves do not penetrate inside, and the skin dries out, which is not very favorable for its healthy condition.
Important. It is recommended to stay in the infrared cabin for no more than half an hour.
Don't forget to prepare material for the sauna
Security measures
Basic safety measures are taken into account at the design stage - non-flammable materials are selected for the steam room, the door to the steam room is placed so that it opens outwards. For the floor, tiles with a rough surface are used, and the lining is opened with stain and varnish only in the rest room; this is absolutely forbidden to do this in the steam room.
The stove should be located no closer than 0.5 meters from the doorway. And all switches should be at a height of 0.8-1.0 meters from the floor so that the hand can freely reach the switch. By the way, sockets and switches near the shower cabin, swimming pool and washbasin should be at such a distance and at such a height that splashes cannot get on the conductors and contacts.
Stages of the technological process of constructing a sauna
For the correct and reliable functioning of a bathhouse in the basement of a private house, it is necessary to adhere to construction technology. After all, the basement is very specific and requires the use of high-quality material with excellent performance characteristics.
Insulating the basement
To insulate the external walls of the steam room, insulation with a foil base is used. A prerequisite for long-term operation of the insulating layer is the observance of air layers that facilitate moisture removal.
Advice: to make the walls in the basement last a long time and look aesthetically pleasing, use natural wood without varnish or impregnation: alder, oak, larch.
Organization of ventilation system and lighting
To effectively reduce dampness and prevent fungus and mold, install a ventilation system in the form of a deflector, which will allow:
- provide forced air exchange with fresh air supply;
- supplying additional cool air to the heating furnace;
- removal of combustion products into the atmosphere.
To install lighting fixtures, taking into account the high humidity in the basement, all electrical wiring is laid in corrugation, which will protect the cable from damage and provide protection from moisture.
It is prohibited to install paired sockets, switches and carriers indoors, and to lay electrical wires under wooden sheathing. Lamps are installed only in a moisture-proof design.
Execution of drainage
When drawing up an individual design for a steam room in a private house, water supply and drainage must be provided. You can make the drainage device yourself: dig a shaft into which water flows from the steam room at an incline, and in the same way install a pipe at the outlet that drains the water far beyond the sauna.
A storage tank is installed to collect water.
Installation of a drying system
To dry the air in a sauna, use an air conditioner or a fan with a radiator, the purpose of which is to:
- removing excess steam;
- supply and conditioning of dry air.
Sometimes a monoblock air conditioner is installed in the window opening, which removes excess moisture from the room. This is a low-effective method, but it also has a right to life.
Installation of a heating stove
To begin with, arrange a concrete base. Then the stove is installed, connecting it to the smoke exhaust pipe.
Don't forget to install the oven
Preliminary calculations and preparatory work
The first step is to prepare a working draft, which indicates:
- sauna dimensions;
- layout plan for auxiliary premises;
- laid communications;
- specification of materials and equipment used.
When installing a bathhouse in the basement and basement rooms, where utility rooms were previously located, you need to check the condition of the communications and, if necessary, replace them with new ones, so as not to repair them after putting the steam room into operation. It is best to try to remove hard-to-reach communications from the basement sauna. This is necessary for ease of maintenance.
Hydro- and sound insulation device
A sauna or bathhouse in the basement must have good sound and waterproofing. And you shouldn’t skimp on the quality of insulating materials. Vertical walls are carefully processed, and the ceiling is best covered with a double layer of heat-insulating material. It is preferable to use rolled materials for sound insulation. They are stronger, their coverage area is much larger, and there are much fewer joints. If you use sound insulation with a foil layer, then it is convenient to glue the junction of the two parts using the same foil tape.
Ventilation
Natural supply and exhaust air circulation is based on the pressure difference between hot and cold air flows. The first one always tends to rise up to the ceiling, and the cool one occupies the bottom of the room, squeezing out the warm one. However, punching holes at the bottom and top of the steam room is not enough. There are several ways to ensure effective air circulation. It depends on the location of the sauna room and on the ventilation system of the entire building.
The most common option is to install an inlet in the lower part of the room near the stove, and the exhaust hole must be punched between the first and second rows of shelves in height, and its diameter should be 1.5 times larger than the inlet.
Features of building a cellar in a bathhouse
Construction of a basement under a bathhouse is quite a complex operation even for experienced builders. It is much easier to first build a cellar, and then, above it, a bathhouse. But if you are patient, you will succeed!
By the way, there are even entire projects of ready-made bathhouses called “House-bathhouse with a cellar,” but these are options that you can order from construction companies; our task is to build a cellar for a bathhouse with your own hands!
For example, areas of gas underground. When they are opened, there is a risk of collapse. And if you are completely unlucky and you discover a large karst sinkhole, the bathhouse, the house, and you may go underground. Therefore, you should be very careful when studying the soil. To avoid mistakes, we recommend contacting the appropriate company.
Pay attention to the depth of groundwater. Professionals do not recommend building a basement directly above them
The minimum height is 50 cm. Otherwise: increased humidity, soil erosion and the risk of wall deformation and even collapse.
It is recommended to use blocks for construction. This is one of the easiest materials to use, combining good technical characteristics and low cost. But remember that blocks are afraid of moisture, so equip them with high-quality waterproofing. A sand cushion is required.
Bathhouse with a cellar: project and its nuances
The most important nuance that was indicated but not disclosed is waterproofing. It must be of very high quality, otherwise the service life of the cellar will be relatively short.
Why do you need to spend extra money on repairs? It is the arrangement of waterproofing that we would like to pay the main attention to. Moisture can penetrate from all sides: from below, through walls or through the ceiling
Even when vapors enter the room, condensation will accumulate, which will lead to the formation of moisture. We get rid of all factors one by one
Moisture can penetrate from all sides: from below, through walls or through the ceiling. Even when vapors enter the room, condensation will accumulate, which will lead to the formation of moisture. We get rid of all factors one by one.
- The entrance to the basement should be optimally equipped. There is no need to do it in a steam room or in a washing compartment, otherwise moisture will enter through it, both directly and in the form of steam. It can be installed on the side, in the rest room or dressing room.
- Moisture penetrates from the walls due to burst pipes or rain. In the most advanced cases, groundwater is to blame for the penetration of moisture through the walls. You can get rid of this trouble with the help of high-quality waterproofing.
- From below, water enters the basement due to groundwater. To avoid mistakes, conduct an experiment. Calculate the maximum depth in the room. Dig a small hole to this depth next to the bathhouse and watch it for two days. If there was no water in it, you can begin construction. Otherwise, you should abstain.
- Condensate. This problem can be solved with the help of ventilation.
Some builders prefer to use a drainage system to drain groundwater from under the bathhouse. But we do not recommend that you do this, because it has two significant drawbacks.
Firstly, it is expensive, and you will have to spend money on electricity every day, even when you are not at home.
Secondly, the soil is washed away along with the water.
The result is gradual shrinkage, deformation of the walls, and destruction.
Possible problems
There are several situations that arise in the cellar under the bathhouse.
- Flooding during floods. This is inevitable for any type of cellar. You need to deal with this problem as it arises.
- Unsuitable soil composition may cause construction to be abandoned.
- In advanced cases, condensation turns into puddles on the floor. This occurs due to the large temperature difference between the floor and ceiling of the room. This phenomenon is especially relevant during periods of using a bathhouse. And the owner will only have to guess where the leak is. Therefore, the presence of forced ventilation is mandatory.
- Arranging a basement under any house is a threat of the building collapsing. Therefore, before starting work, consult with specialists and make accurate calculations.
Steam room assembly
After determining the location of the sauna and making an individual project, they begin to assemble the steam room. According to sizes:
- vertical and horizontal bars are installed;
- all corners of the structure are checked;
- outside the frame, the walls are sheathed with sandwich panels, clapboard or plywood;
- Insulation is laid on the inside, and a vapor barrier layer is placed on it;
- all joints are carefully covered with foil tape;
- internal walls are sheathed with longitudinal or transverse slats made of non-coniferous wood;
- similar actions are performed with the ceiling;
- the floor inside is covered with ceramic tiles, on top of which a grating is installed so as not to burn your feet;
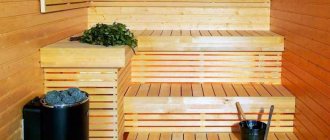
- build two shelves for a comfortable position while sitting or lying down;
- a stove (floor or wall) is installed with an enclosing structure.
When assembling the steam room, do not forget to follow the instructions
Insulation of the interior
When building a garage steam room, you need to take care of additional insulation of the room. The bathhouse cannot be warm enough only due to the walls of the garage. Therefore, you need to create a sealed “thermos” that guarantees heat retention in the bathhouse (up to two days). The insulation consists of several layers:
- foam plastic or mineral wool
- vapor barriers;
- foil cardboard;
- strips to secure the structure (it is necessary to leave a 5 mm wide gap between the trim and the foil cardboard).
The insulation is secured with a construction stapler or overlapping wood screws. The joints are sealed with double-sided adhesive tape. After insulating the walls, you need to take care of the floors. After cleaning and repeated application of penetrating primer, they are insulated in the same way as the entire structure, only instead of foil cardboard, construction film is used to prevent rotting of the insulation.
The gate or common entrance door also needs to be insulated or replaced if it is not airtight.
Wood stoves
Many enthusiasts do not accept modern solutions. They claim that the heat from a wood stove is more “mild” and “friendly.” Both of these adjectives may seem strange. But since they are in the realm of the senses, it is most likely that proponents of wood-burning stoves are simply appreciating the natural ambiance of a sauna made of wood.
The only real difference is that a traditional wood stove creates a distinctive smell around it. However, this is not a scent that would be associated with aromatherapy. In addition, it should be remembered that a wood-burning stove, like all others, needs gas removal, in this case - in the chimney. It must be constructed in accordance with applicable building codes. Of course, manufacturers have already solved this problem, and you can order ready-made chimney elements for almost any type of stove.
Water filtration
In most cases, skimmer filtration systems are used. The main working device collects the top layer of water, where there is usually the most dirt. The system has a fairly high efficiency when cleaning large elements. Its main disadvantage is that purified water flows back into the pool. Water returns to the system through holes in the walls.
In accordance with the filtration system used, it is customary to distinguish between two types of pools: overflow and skimmer. The choice of one type or another will depend on the shape of the constructed or assembled reservoir.
Overflow water filtration circuit.
If your home pond has a square or traditional rectangular shape, then a skimmer will do just fine. A skimmer is a special device that during operation absorbs the upper layers of water, where the main dirt accumulates. On the other hand, the same water enters the pool, but already purified and filtered. Recharge occurs through special holes in the wall.
Skimmer water filtration circuit.
It is not recommended to place an overflow pool on the ground floor, because when they are used, the water overflows into special side holes, and clean water flows through the holes at the bottom of the reservoir.
Why have a pool at home?
A huge swimming pool in a private house speaks of the owner’s financial well-being, his concern for health, and his active lifestyle. Even without leaving your own yard, you can spend your free time with health benefits. The reservoir opens up a lot of possibilities:
- Now you can not just take a bath or shower, but swim fully.
- Swimming is available at any time of the year, regardless of the weather outside.
- A home pool located inside a building is much easier to maintain. Costs are minimal.
- The design of an internal reservoir does not require any special refinements. For such a pool, the design can be simple and concise, and the color scheme can be neutral. You can use 1-2 bright accents that will lift your spirits. After all, the main task of an artificial reservoir is the opportunity to fully swim at home and relax properly.
It's always great to have a huge pool at home
Project development
Where should you start building a bathhouse? The answer is quite simple - from project development. If the construction of structures is not carried out according to plan, then it is almost impossible to avoid most problems.
A real estate construction project is presented by a document that should answer the following questions:
- What should be the foundation? It is selected depending on the load size, soil type and other criteria.
- Layout diagram indicating the location of all the main elements, in the case of a bathhouse, stove, windows and sunbeds.
- The type of material used in the construction of walls, ceilings and roofs. Quite a lot of attention should be paid to this point.
- Features of connecting various communications. The bathhouse needs light, and an electric heater can be installed to maintain the required temperature.
The more information the developed project contains, the fewer problems will arise during installation work.
When developing a bathhouse project, the following recommendations should be taken into account:
The concept of a bathhouse and a sauna are significantly different. A classic Russian bathhouse consists of only three rooms: a steam room, a vestibule, and a dressing room. Other premises can also be built, for example, a recreation room or a swimming pool. In order for the bathhouse to be as comfortable as possible, one important recommendation should be taken into account - the steam room area should provide at least 4 square meters for each person. Otherwise there won't be enough space. When developing a project, the location of the furnace is also taken into account. During its construction, using bricks will put quite a lot of pressure on the base. That is why a solid foundation is being created. At the time of the preparatory stage, the material is selected. The difference between timber and logs was given above
As for other materials, you should pay attention to red brick or silicate blocks. They can also be used to create a sauna, but such a structure cannot be called a traditional Russian bath
When using non-solid wood, a variety of finishing materials are used.
When creating a project, an estimate is calculated, which allows you to determine upcoming costs. Today, when most building materials are purchased via the Internet, creating an estimate is quite simple. To do this, you only need to calculate the volume of materials used during construction.
Drafting
Ceilings should be between 1.85 m and 2.05 meters high. This indicator is limited by the foundation and walls of the building’s basement. Too high ceilings are not very good for a steam room, since you will need to do excessive heating, and if you make small ones, it will be inconvenient for anyone who is tall to use the steam room.
In addition, a low ceiling is dangerous from a fire safety point of view. All materials must be treated against moisture and fire-resistant impregnation.
For a company of 4 people, the steam room made should be approximately 3 square meters. The shelves are made in 2 rows, each 0.5 m wide. The first row is placed 0.5 m from the floor, after 40 cm another shelf is made, and the third row is placed very rarely, with high ceilings.
The width of the shelves greatly affects the air circulation inside the steam room.
The sauna structure is installed so that the following requirements are met:
- 2 sides must be adjacent to the walls of the house;
- Proper supply of electricity, water supply and sewage drains is necessary;
- Ventilation must provide sufficient air exchange.
It is necessary to equip a separate exit to the outside in case of an emergency.
Some technical details
Of course, the simplest and most convenient option is to put an electric stove in such a bathhouse. But, if for you the only option for a steam room is thick, rich “Russian” steam, then get ready to seriously deal with the chimney and issues with the hood. These are: smoke sensors, a separate exhaust for the steam room, controlled inflow and outlet of smoke. All this can be implemented if desired, just be sure to invite a specialist to check everything thoroughly later.
As for the installation of the stove, the chimney can be led directly through the base to the street or installed through the ceiling into an existing one. Like in this project:
And now about hot water. If the house has a boiler, you can use pipes to organize a closed circuit with a circular pump - it’s quite simple.
You can see how to properly organize ventilation in a basement bathhouse in the following illustrations:
Requirements for ensuring epidemic well-being
These requirements imply:
- monthly activities to exterminate rodents and parasites;
- ongoing elimination of defects in floors and walls (as cracks form);
- weekly general cleaning;
- routine cleaning during the working day;
- the final “promenade” of the cleaning employee at the end of the working day, the last cleaning is done with the mandatory use of disinfectants.
The SES will definitely check the disinfection log and the consumer’s corner in the sauna.
Work progress
When a place has been chosen, the future premises are marked, the turf is removed and after that you can start digging a pit. This may take several hours or several days - the volume is about 30 cubic meters.
Next, drainage is performed, where the water will flow, and roll waterproofing is installed.
Then we begin to build a “shed” inside the pit. You can use dead wood and dead wood for it. First, corner pillars and load-bearing pillars are installed under the roof, then logs are laid around the perimeter. The waterproofing is fixed, and the void between the logs is filled with earth. External walls can be treated with clay.
Next, the rafter structure is assembled, the ceiling and roof are installed.
The top is covered with waterproofing material, the chimney is removed and the surface is covered with turf - the underground bathhouse is almost ready!
A window is very desirable, even necessary, for fire safety and natural light. Diesel lamps are often used as light bulbs in such a bathhouse.
Next, internal partitions and structures are erected to the owner’s taste, and a stove is installed. This could be a stove or another option.
Any design is possible inside, but wood looks best.
Outside, it is recommended to organize a ladder from boards.
You can build doors between rooms with your own hands, or you can buy them to better retain steam.
This is what a real forest bathhouse that has been in use for many years might look like inside and out:
How to fold a stove-stove:
Regulations
There are quite a lot of regulations regulating the activities of bath and sauna organizations. The main ones are:
- ZPPP No. 2300-1.
- SanPiN 1.2. 3150-13 (a document regulating both the design and operation of saunas).
- SNiP 31-05-2003 (rules for the construction of housing and communal services).
- SP 118.13330.2012/SNiP 31-06-2009 (requirements for public buildings).
- Federal Law No. 123, pay attention to table 11. This law is a technical regulation of fire safety (fire safety).
- NPB 110-03 (list defining the types of knowledge to be protected by automatic fire extinguishing systems and automatic fire extinguishing systems).
Before starting work, make sure that local authorities have not provided you with a SNiP specially developed for the city or region.
How to choose heater power
It can be assumed that for every 1–1.1 m3 of bath area, 1 kW of furnace power is required. For example, a bathhouse with the following dimensions: 200 cm (width) by 200 cm (depth) by 200 cm (height). Let's calculate the volume: 2 m x 2 m x 2 m = 8 m3. We calculate the furnace power: 8 m3 divided by 1.1 m3 = 7.27 kW. Choose a more powerful stove if your sauna has a window or other additional heat outlet.
The starting point is the stove, the cost of which depends on its type. If you want to save money, choose a dry sauna. You can also adjust the price of furnishing the premises using different materials. In this case, the amount depends on the type of wood, so you can choose it using the same common sense as when building the cabin itself. A sauna in the basement of a house should also be equipped with light sources - closed lamps. Look for cost-effective lighting, but don't forget about quality and safety.
Finishing
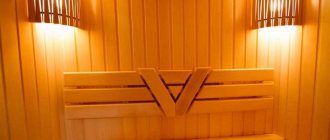
When lining the interior of a steam room, it is better to use natural stones or low-resin wood. These include oak, aspen or ash.
Decorative cladding
Coniferous species should not be used, because when heated they release resins and gluten, which will complicate the use of the steam room and its safety for human health.
Varnishing and painting the wood will be unnecessary; the structure and color of the wood will organically fit into the interior of the sauna. And it’s worth treating each timber with fire-fighting solutions and anti-moisture compounds.
Wood is heat-intensive, moisture-resistant and can provide the necessary microclimate in the room. All shelves are made like the walls, from the same types of wood.
Doors
Door leaves are chosen from the same materials as for the interior - they must be resistant to humidity and high temperatures. It is necessary to ensure that the closure is tight and that there are no metal parts, especially from the inside. Most often, glass, wooden or combined doors are made.
Drain shaft
When designing a steam room in the basement, you need to build a drainage shaft, making it vertical. The depth is chosen to prevent freezing in the winter season. Metal mesh is placed over all openings to prevent blockages.
Pouring the floor
For saunas, a strip foundation is used, which is poured with concrete over the top layer. Tiles or ceramic tiles are laid on top of the concrete layer. In order not to burn your feet, you need to lay a wooden sheathing, making removable wooden shields.
Light
The size of the lamps and their number depend on the owner’s imagination. When laying electrical wiring, it is necessary to carefully protect it from moisture to prevent fire.
Selection of oven
The stove is the main element for any steam room. If you choose the right equipment, the operation of the sauna will be stable. There are many models with both wall mounting and floor placement. Due to the design features, the walls do not heat up when the room is heated.
Peter Kravets
auto RU
For any mounting, the stove is surrounded by a fence. For basements and saunas, you need to choose stoves that run on electricity, choosing a model based on the total area of the sauna and the steam room itself. The stones are placed evenly in the oven so that the air has sufficient space to circulate.
Kiln stones
The stones in the steam room will be the only source of steam, so you need to carefully consider the choice of this material - it must be heat-resistant, resistant to high changes, and environmentally friendly. As a rule, gibbro-diabase and soap chloride are used.