Some stoves require decorative finishing. If funds allow, you can decorate them with natural materials. Since this solution is not for everyone, many choose to line the stove with artificial stone. This option has many advantages.
The article discusses the types of suitable materials, issues of base preparation and installation. Using the instructions, you can finish the oven yourself. But even if do-it-yourself cladding is not included in the plans, the information will help you not make a mistake in choosing a stone and monitor the work of a specialist.
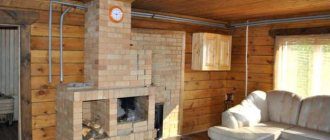
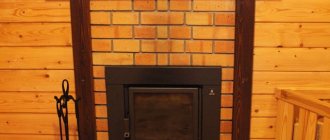
Figure 1. Stove lined with artificial stone in the interior
How to lay it correctly?
Gypsum tiles are quite unpretentious.
Metal, wood, concrete surfaces, as well as old brickwork are suitable for installation. If you are going to decorate a less substantial object, finished with plasterboard, OSB board or plywood board, you need to make sure that these surfaces are able to maintain their shape. Attaching gypsum decor to drywall should begin after checking it for dryness.
Working with wood involves attaching fiberglass to it, which must be plastered. There are two methods of fastening gypsum tiles: dry (using fasteners) and wet.
Regardless of the chosen method, there is a set of preparatory activities that are fundamental:
- Leveling the surface.
- Cleaning from excess substances or contaminants using a soap solution, after which the surfaces will need to be thoroughly dried.
- Now you can directly begin manipulating the facing bricks - they should be sorted, eliminate defective or broken specimens, and lay them out for ease of fastening.
Dry installation method:
- Make sure that the elements being fixed have side grooves for fastenings.
- Marking the wall. From any corner of the wall or furniture, a distance equal to the length of one tile is set aside. The guide is mounted vertically.
- The resulting “tunnel” is filled with tiles from top to bottom.
- The decor is secured using special bolts.
- Repeatedly plotting the length of a given element next door.
Wet method:
Determine what method the bricks will be placed - in a joint or by opening the seams. Marking rows directly on the area to be treated and preliminary laying out tiles before fixing them to the wall
We must not forget about the thickness of the future seam, if it was decided to provide for it. Prepare a small portion of the adhesive solution, remembering that it begins to set within thirty minutes. Work must be done in the direction from bottom to top, starting from the bottom corner. The adhesive composition is applied directly to the tile or to the working area with a thickness of no more than 2 mm. The gypsum blank is pressed into the wall with a rotational motion very carefully.
Marking the base
Where to start? And how to ensure even seams? Marking the walls helps with this. It is necessary to determine the starting points of installation. To do this, use a laser or water level. The latter option is preferable if you have a limited budget. It is in no way inferior to the technological version. Plus, in a small area, using a laser does not have any pronounced advantages.
The following recommendations will help you understand where to start and how to work:
- in most cases you need to start from the corners (at least there should be whole elements in the corners);
- with seamless cladding, it is better to lay the stone from the bottom up, and when laying with subsequent jointing (especially when laying porous slabs), it will be more convenient to go from top to bottom - this way the slabs will not become dirty;
- whole slabs - the most visible places; usually these are the top and corners, but you need to look at the situation;
- Usually the bottom row is left for last - it is more convenient to cover the floor with trimming, rather than adjusting the floor covering to the stove stone.
Based on this, the starting points are determined. After this, either lay the first row along the laser mark, or pull the beacon cord (according to the marks).
How to cover a stove with artificial stone with your own hands
Cladding a stove with stone with your own hands is a fairly simple matter. But it requires a certain set of tools, surface preparation for cladding, calculation of the required amount of material required, as well as jointing.
List of required tools
To carry out such work, you will need a few tools:
- A grinder or angle grinder equipped with a disc for concrete.
- Trowel for plastering work.
- Construction level.
- Measuring tool (tape measure or ruler).
- Master OK.
- Rubberized bucket for cement mortar.
Calculation of material quantity
Before purchasing the required amount of material, you should measure the surface to be covered and calculate the total area of work. Another 10-15% should be added to the resulting figure, since parts of the decorative elements will be cut off, and they may also be damaged during transportation.
The required amount should always be rounded up. If the material is sold in packages with a certain number of pieces in it, then you should take packages from one batch and with an estimated reserve. It should be remembered that the color of artificial stone in different batches of the same model may differ.
Surface preparation
Before starting the main process and covering the stove with decorative stone, you should carefully prepare and level the surfaces of the stove on which the installation will be carried out. To do this, you need to moisten the brickwork using a spray gun, and then apply a solution of plaster or sand-cement mixture. The work is carried out using a trowel.
Layers of plaster are laid with uniform movements from top to bottom, their thickness should be 5 - 8 millimeters. Additionally, it is recommended to reinforce this layer using a special mesh, or hemp or tow. Upon completion of plastering the surface, it should be carefully primed using solutions with high adhesive properties such as “Betonokontakta”.
Artificial stone laying technology
- Cladding work should be carried out starting from the corners of the stove.
- Using a trowel, a layer of mortar is applied to the decorative stone element, then it is applied to the primed surface and the mortar is leveled with light movements from side to side.
- Excess mixture is removed using a trowel.
- Upon completion of laying a number of elements, using a building level, their pressing into the solution is adjusted.
Rules for seaming
There are seamless and jointed options for laying artificial material on a stove or fireplace. The installation option with jointing is more reliable when exposed to high temperatures. After laying the main part of the artificial stone is completed, the joints are filled using a bag with a cut off edge, and excess mortar is also removed.
Drying
Masonry made of artificial material must be dried for 1 - 2 days. After this, finishing of the seams with a special water-repellent composition is necessary; this is necessary to prevent destruction of the masonry structure due to temperature and humidity changes.
Grouting and jointing
Figure 9. Grouting seams using a ball
For aesthetic and hygienic purposes, the seams are jointed - filled with a durable heat-resistant grout mixture. There are two main options for jointing - using a rubber spatula and using a syringe (or its replacement - a regular bag with a hole).
The trowel is suitable in situations with smooth stone and thin joints. Wide joints and porous tiles are the reason to turn to another option.
The process of jointing with a spatula:
- the grout is applied with a spatula using diagonal (relative to the joints) movements;
- the fugue should fill at least 2/3 of the seam thickness;
- without allowing the grout to set, its excess is removed from the surface of the stone, and a fugue at the joints is formed using a finger or, for example, a piece of wire;
- The coating is polished using a foam sponge.
The process of jointing using a bag:
- You should fill a strong cellophane bag with the mixture and cut off one corner; it turned out to be an analogue of a syringe, with which the grout can be squeezed into the seam;
- avoiding the fugue getting on the surface of the stone, fill the joints with it;
- after filling a certain area, the joints are embroidered in the same way - using a round object of suitable diameter.
Testing artificial stone in a muffle furnace
Artificial stone is undoubtedly suitable for cladding fireplaces. The fireplace does not heat up; you can even use gypsum stone there. But we will now find out whether cement stone can be used for a furnace with fully heated walls. Tests in two stages: 700 C and 300 C.
Cement stone with mesh and glue in an oven at 750 C
Prepared a sample
Place the sample in the oven
Oven temperature
Everything looks intact, but it’s not.
The mesh crumbles in your hands
The longitudinal, thicker fibers retained some of their strength, much like sewing thread. The transverse fibers have completely lost their strength and crumble when touched.
The stone is covered with small cracks
cutting
Figure 8. Options for cutting stone and tiles
Stone on a concrete base is cut with a grinder with a diamond wheel. When laying ceramic granite, use a specialized tool - a tile cutter.
When decorating the corners of stone cladding, do not use tiled corners. Instead, they make a bevel - they cut the sidewalls at an angle of 45 degrees. On an industrial scale, electric tile cutters are used for this purpose, but in our case, a grinder is sufficient. If the stone is soft, the process does not require much effort and high qualifications. Cut corners can be effectively joined to each other.
Traditional methods
The first 3 points and positions in Fig. and in the list above - traditional methods of facing fireplaces and stoves. The best of them, but the most expensive and complex, is finishing with tiles; it increases the efficiency of the stove by 15-17 percentage points. For example, if the initial efficiency of the stove is 60%, then after tiling it will reach 70%; For this reason, we will return to tiling later.
Finishing the furnace with dry-molded facing bricks gives an increase in efficiency of 7-9 percentage points. provided that it is carried out at the same time as the construction of the furnace, i.e. decorative brick cladding was included in its layout at the design stage. Otherwise, when lining an already standing fire (running) stove, an increase in efficiency is possible, as when lining with terracotta, up to 5 percentage points. The facing brick is then mounted on the fireplace/stove structure in the same way as stone (see below), but the labor-intensive procedure of its preliminary laying is much simplified.
Brick cladding of heating devices
When using a modern insulated fireplace insert with glass and a standard chimney for it, a small fireplace can be made entirely of face brick, pos. 1 in Fig. on right. Just not silicate, in Fig. just light! And a stove or stove-fireplace with a lining of red facing brick under a simple worker fits well aesthetically with majolica, pos. 2. However, these and other types of “brick” decor can be achieved more easily and cheaper by facing with terracotta and clinker. But before moving on to them, let's linger a little on the plaster.
Stove/fireplace plaster
Plastering a fireplace or stove allows you to achieve good aesthetics of the device in various types of interiors, see figure, but it is very labor-intensive even for simple white plaster. Decorative plasters, e.g. Venetian or polished stucco, you will have to leave it here altogether, this is a separate complex topic. In any case, the main obstacle when plastering a stove/fireplace is cutting the seams. If the appliance and masonry mortar in the joints are sintered into stone, preparing its surface for plaster becomes not only long, but exhausting, requiring extreme attention and experience so that a crack does not appear in the joint.
Cladding stoves and fireplaces with plaster
Next, the plaster mass needs lime. Even in the conditions of a fireplace shopping center, gypsum soon begins to lose water of crystallization, causing the plaster to dry out. The addition of vermiculite does not help, it only worsens heat transfer. In general, the procedure for plastering a fireplace or stove is as follows:
- The parts of the furnace structure to be lined are cleaned of the previous finish until there are no traces of it; the last residues are removed with a steel brush.
- The surface under the plaster is moistened by applying lightly moistened burlap or technical cloth for 1-1.5 hours.
- Masonry joints are cut to a depth of 9-10 mm with a narrow chisel for cutting out grooves - a cross-cutting tool - and light blows of a hammer.
- If the device was previously in use (heated), it will not be possible to cut the seams to the required depth right away: picking at dry clay mortar is unacceptable! In this case, wetting and cutting are repeated several times.
- The surface with cut seams is carefully brushed to remove dust and crumbs, then moistened with a plaster brush.
- Prepare a primary (starting) plaster solution with the consistency of medium-thick sour cream.
- The starting solution is used to fill the cut seams and the base surface to a thickness of 4-5 mm.
- After the primary plaster has dried, the same finishing solution or decorative plaster with the consistency of very thick sour cream or soft plasticine is prepared.
- The finishing plaster is applied in a layer of the same thickness.
- After the plaster has completely dried, a full cycle of putting the furnace into operation (starting up) is carried out: drying, a series of accelerating fireboxes, a test firebox.
And one more thing about the stone...
Recently, flexible stone has also been used for cladding fireplaces: a textile base impregnated with a polyester binder, onto which stone chips are applied “in an artistic disorder.” The textures of the first samples were drawn out manually, but now the crumbs are poured into special installations controlled by computers, which makes it possible to produce a wide variety of unique patterns, see Fig., resulting in generally inexpensive material.
Flexible stone
The flexible stone is cut with metal scissors; they can be used to outline curved surfaces (bottom right in the figure). The disadvantage of this material is always a rough surface; No one has yet learned how to produce polished flexible stone. Flexible stone can be mounted on the base surface in different ways, see, for example. track. plot:
Ceramic tile finishing
The simplest finishing option, which is quite easy to handle, but only if you have high-quality material and well-written instructions.
Option for facing the fireplace with ceramic tiles
Stage 1. Material selection
The following materials are used for finishing fireplaces:
- porcelain stoneware;
- clinker;
- majolica (pressed tiles covered with glaze);
- terracotta.
All of these options are characterized by increased thermal conductivity, the ability to withstand high temperatures, mechanical strength, durability and impressive appearance.
Regarding the glue, it must be heat-resistant and consist of elastic materials that neutralize thermal deformations that inevitably occur when the structure is cooled/heated.
Heat resistant glue
Stage 2. Finishing the fireplace
Step 1. First, the surface is cleaned of dirt, the seams are deepened by approximately 1 cm (the same as before applying plaster to the walls), and if necessary, the old coating is removed.
Corner brick fireplace
Step 2. Laying tiles are adjusted. Cladding can be carried out only after the entire set has been cut to size.
Step 3. The surface is marked. To do this, you will need a building level and a plumb line, but if possible it is better to use a laser level.
Step 4. The bottom row is laid, starting with the first uncut tile. The adhesive is applied to several tiles at once and carefully distributed with a notched trowel. Each tile must be pressed and, if necessary, tapped with a rubber hammer.
Step 5. Upon completion of installation, the surface is checked with a level to ensure it is flat. The sooner this is done, the faster the necessary adjustments will be made.
Laying tiles on the fireplace
Laying tiles on the fireplace
Step 6. Immediately after laying, the surface of the tile is cleaned of any adhesive residue, otherwise the glaze may be damaged.
Step 7. The seams are rubbed even before the solution has completely hardened. They are filled with thick cement mortar using a rubber spatula. Each processed seam is smoothed with a wet sponge.
Fireplace grouting
Choosing tile adhesive
Figure 5. Options for “stove” adhesive
The stone is laid on tile adhesive. We will not repeat the importance of resistance to high temperatures. But this is not the only criterion for choosing a composition.
Artificial stone is usually not large in size. But if the oven is lined with dimensional materials, you need to take care of adhesion. In such cases, you need to purchase glue designed to work with heavy slabs. And in general, it’s better not to skimp and buy a mixture with excellent grip.
If the base is properly prepared, the glue calculation is carried out according to the diagram specified in the instructions. Otherwise, the quantity must be adjusted taking into account deviations of the furnace surface from the plane and vertical.
Laying process
Figure 7. Laying stone on a stove The cladding process is easier to demonstrate in a list format with recommended points:
it is better to apply glue both to the stone and to the base; in one case, the glue is immediately removed, leaving a minimal layer; in the other, the mixture is leveled with a notched trowel, forming a layer of a given thickness on all slabs; the stone must be gently, but with force, pressed to the base; corner areas must be completely filled with glue - voids are fraught with destruction of the coating; when working with elements of different sizes, it is necessary to alternate slabs - this will give a natural-looking cladding; special attention to the first row; the result depends on how well the start is set; when laying from bottom to top, a rail is used to fix the first row; when working with slow-flowing glue, you don’t need to use a support, but you will have to let the mixture set a little in order to continue lining; to form seams, use tile wedges, crosses or any other auxiliary elements; when using stones of different thicknesses on the same plane, you need to start from the thickest slabs; the more porous the stone, the more carefully you need to work - glue that gets into the pores is very difficult to remove; cladding with flat slabs must be periodically controlled with a batten or rule; tiles with complex terrain (for example, cobblestones) do not need this.
We suggest you familiarize yourself with: Oven cleaning products
Tools needed for oven adhesive finishing
*
Figure 6. Tools for laying artificial stone
For stone cladding you will need:
- level (laser, water or bubble);
- grinder for cutting stone;
- spatula for applying the mixture;
- notched spatula (comb) for forming an adhesive layer;
- rubber spatula;
- rod or rule;
- tile wedges;
- foam sponge.
If the stove needs to be tiled with porcelain stoneware, a tile cutter will not hurt. It makes it much easier to cut tiles evenly and without chipping. A tile cutter cannot cut torn stone, and the effects of working with a grinder on it are almost invisible.
It is better to mix the glue with a mixer or a drill with a mixing attachment. But if you don’t have a drill, you can knead by hand. It is not recommended to do this - it takes a long time and is of lower quality, but not critical. It is only important to bring the mixture to the maximum possible homogeneity.
We do not mention small tools. Surely there is a tape measure and other little things in every home.
About tiles
The tiled stove is a truly luxurious structure, even if it is dilapidated, see fig. However, tiling is definitely not the kind of work that can be done by studying the technology from the descriptions; This is an even more delicate matter, requiring experience and accuracy than cladding with natural stone.
Tiled stoves and fireplaces
Tiles are generally prepared from the same kaolin mass as high-quality tiles. To harmonize with TKR and improve the heating technology of the furnace, the tiles are molded into box-shaped ones with a cavity - a tiller, pos. 1a next rice. – which is filled with sand during the cladding process. You need mountain sand with rough grains and a minimal admixture of clay; it does not swell, does not sinter or cake due to cyclic heating. The tiles are placed on a greasy clay mortar; The clay used is white, the sand is the same mountain sand. Add half a glass to a glass of table salt to a bucket of the prepared solution.
Cladding the stove with tiles
Before facing, the tiles are laid out and sorted out, as in the case of wild stone, achieving evenness in the rows. The dimensions of the tiles have been standardized by GOST since 1947, but the tolerance is quite wide, approx. 1.5 mm. It is impossible to achieve less due to the properties of the material itself. With a cladding height of 10 rows, the spacing of the seams can reach 15 mm, which, as you understand, is in no way acceptable.
The tiling is done in order, tying the tiles together with steel pins and wire. As a rule, the stove is lined with tiles in the order of its construction, and the lining must always be ahead of the masonry, as shown in pos. 3. In this case, the tiles are knitted with anchor loops, as in pos. 1b. Some craftsmen (qualitatively few) know how to tile walk-in stoves; in this case, knitting is done with anchor pins, pos. 2.
Fire protection of adjacent areas
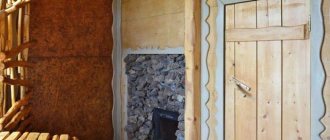
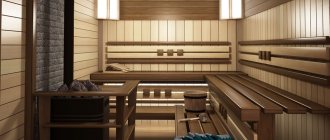
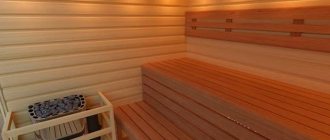
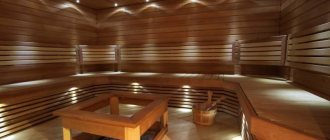
Lining the firebox with bricks in a bathhouse is good protection against fire
The finishing of a sauna stove, as well as the design of fireplaces and stoves in other rooms with wooden surfaces, necessarily involves the installation of protective structures. Their need is quite obvious: the walls of the stove, especially those made of metal, become very hot, and therefore any contact with a flammable material (and wood, even if impregnated with antipyretics, still remains flammable) can lead to a fire.
To solve this problem, you can use a variety of heat-resistant materials to decorate the walls near the stove. I will briefly describe the most popular products in the table below:
Fastening mineralite with screws with bushings
| Material | Features of use |
| Brick | The easiest way to protect wooden walls from fire is to build a false wall made of refractory bricks around the stove in a bathhouse or other room. Building stone tolerates heat well and absorbs heat, therefore, in addition to fire protection, it can also act as an additional heat accumulator. |
| Fireproof plasterboard | Plasterboard sheets lined with natural stone or porcelain stoneware are also a good solution for preventing fire. Fire-resistant plasterboard itself, of course, cannot resist prolonged exposure to very high temperatures, but together with stone cladding it forms a fairly reliable screen. |
| Minerite | Non-asbestos material produced by the Finnish company Cembrit Oy. Minerite sheets are attached to the wall with screws, and if the stove is closer than 50 cm to the wall, then using ceramic bushings we create a 3 cm gap between the wood and the mineralite. |
| Cink Steel | The polished steel screen protects the wall well primarily due to its reflective ability. Naturally, such a screen is mounted not on the tree itself, but on a substrate made of non-flammable material - basalt wool, asbestos sheet, the already mentioned mineralite, etc. |
Types of decorative stone and their features
There are many types of decorative stone, and each of them has its own characteristics. For example, gypsum material is not suitable for rooms with high humidity, while natural material is quite suitable both in the bathroom and in the hallway. The cost of the panels also depends on this parameter, and the appearance should not be discounted. Let's look at the main types of such finishing materials.
Gypsum decorative stone and its features
Gypsum stone for interior decoration is very convenient. It is easy to process, has low weight, and is also quite low in cost. Most often it is sold unpainted, which allows you to choose any desired shade.
But we cannot help but note some disadvantages. The hygroscopic material does not allow it to be washed with large amounts of water. Also, do not rub it too hard - you can ruin the coating. Although you can protect it from external influences by covering it with varnish. Another alternative option is gypsum decorative stone with a polymer coating. But it costs a little more. We offer our dear reader several photos of wall decoration with decorative gypsum stone:
Decorative stone in the interior of the hallway: photo of cement finishing
Today this is the most common option, which is more durable than gypsum. Caring for such surfaces is quite simple - it is not afraid of cleaning even with the use of detergents. However, cement tiles also have their disadvantages. Due to the strength of the material, it is quite difficult to process. Also, such tiles are heavier and more expensive. Below you can see what cement facing stone looks like for interior decoration:
Natural stone: advantages and disadvantages
Wall decoration with natural materials is the most expensive, but its durability is higher than that of other materials. However, it is worth considering that, despite the apparent environmental cleanliness, some agglomerates can emit various toxins or even radiation.
Installation of natural stone is somewhat more difficult than artificial stone. This is due to the fairly large weight. But it doesn’t matter what the humidity in the room is. It is even suitable for exterior decoration. It also does not require any special care and can easily withstand cleaning with various means, including aggressive ones. Photos of interior finishing with facing stone in the interior can be seen below:
Decorative brick: features of finishing with similar material
It can be called the most convenient to install. Quite light, but at the same time durable. However, it will not always be appropriate. It is not customary to tile bathrooms and toilets with it. But for a living room decorated in the loft style, it will come in handy.
We invite you to look at photos of decorative bricks in the interior, laid by home craftsmen:
Related article:
Wallpaper “under the stone”: photo in the interior
Below are photos of finishing the kitchen with decorative stone and wallpaper, as well as two materials together:
Related article:
How to tile a stove with gypsum tiles?
The use of gypsum tiles for cladding stoves has become widespread in recent years. This material has the following properties:
- Strength;
- Thermal insulation;
- Soundproofing;
- Aesthetic beauty.
Gypsum is environmentally friendly, non-flammable and maintains a good indoor microclimate, which makes it an excellent material for lining furnaces. The thickness of such tiles is from 6 to 8 millimeters. Finishing with gypsum material has its own characteristics. Laying is done joint to joint, without a seam, as when finishing with ceramic tiles.
We suggest you read: How to line an iron stove with bricks with your own hands
Note! To get different colors of tiles, you can first lay out the elements that will be painted in one color, paint them, and then glue the remaining elements.
Installation subtleties
This stone can be laid on any surface, even wood and drywall. Only in this case additional surface preparation is required. For a wooden wall, it would be appropriate to install sheathing and waterproof it. With concrete and brick surfaces everything is simpler, but careful leveling of the surface cannot be avoided. It should be clean and smooth.
Walls are different everywhere, it is necessary to take into account all the nuances.
- The walls are cleaned of dirt and dust.
- Cracks, irregularities, and holes are repaired using putty.
- If the walls have pronounced unevenness, you need to use drywall.
- Carefully seal all joints and cover the surface with putty.
- Then coat with primer, if necessary, do this twice, waiting for the first layer to dry.
- Treat the wall additionally if there is fungus on it. It is not enough to simply remove it; you need to dry the wall well, then treat it with a primer.
- If there is old coating on the walls, it must be completely removed. This applies to paint, wallpaper, decorative plaster.
The prepared surface is treated with a primer. Rooms with high humidity are treated with a special composition that prevents the appearance of fungus and mold. You can glue the gypsum stone using a cement-adhesive mortar, which is applied to the wall with a notched trowel. The glue dries very quickly, so there is no need to dilute a lot at once. You should try and get used to how much you can use in a certain amount of time.
This is a very important point, because the quality of the glue determines how the decorative elements will stick. It can be of several types.
- A dry mixture based on cement. Provides good adhesion of the material to the surface, but shrinks.
- Dry mixture with a gypsum base. Most suitable for gypsum tiles due to its composition.
- You can use glue that is available for tiles, as well as liquid nails and mastic. Each composition contains instructions for the preparation and use of the material.
To lay out the panels efficiently, you must first make markings. To do this, you need to use a level and draw a line along which the first row will be laid out.
Laying begins from the bottom corner to the central part. The stone can be laid in even or uneven rows, leaving seams, which are then sealed with grout having a gypsum, alabaster, or cement base. When working, use a narrow spatula, act carefully, trying not to cover the tiles. If the surface gets dirty, you should immediately remove the solution with a wet sponge.
Preparing a place for the fireplace mantel
A 4 cm thick wooden mantelpiece should be hidden in a groove. Draw a line at a height of 4 cm from the surface along which the stone will be laid.
Marking the mantelpiece
Trim the corner along the line
The groove for the mantelpiece is ready
Work in progress
Types of cladding for fireplaces and stoves
On the one hand, the external finishing of metal stoves is simpler, because... the metal is plastic, elastic, and the peeled lining can often be corrected while the device is moving. On the other hand, it is more difficult due to the large TCR of the metal and the high temperature of the furnace body. Therefore, metal stoves are most often painted with heat-resistant enamels; one, but significant exception will be discussed further; we will deal mainly with brick heating and cooking appliances. It is not easy to fulfill all the above conditions, but the stove business has existed and developed for millennia. Stove makers, like all high-class craftsmen, are sensible people, so as a rule they do not reject the achievements of modern technologies suitable for their work. Therefore, for amateurs, the choice of methods for covering a fireplace and/or stove with their own hands is quite wide, see fig. and the list below:
Types of cladding for fireplaces and stoves
- Plastering with simple or decorative plaster;
- Facing brick finishing;
- Tiling;
- Finishing with clinker tiles;
- Cladding with ceramic terracotta tiles;
- Majolica cladding;
- Facing with natural stone;
- Artificial stone finishing;
- Cladding with marble and other ornamental minerals.
Tile and porcelain stoneware
Often fireplaces with stoves are lined with tiles and porcelain stoneware. The reason is the relative cheapness of materials, the simplicity and accessibility of the technology for their installation. But, generally speaking, tiles and porcelain stoneware are not the best facing materials for heating devices; they are difficult to match according to TKR in a given temperature range, and the values of their heat capacity and thermal conductivity in this case are far from the required ones.
Calibrated kaolin tiles, white on the inside, can be used to decorate decorative fireplaces, installing them in the same way as terracotta tiles, see below. If the stove is finished with tiles, additional metal supporting elements are required, see for example. video below. But this is not entirely good - parts with a large TCR appear in the structure of the cladding, so the stove must have been previously heated many times.
Video: finishing the stove with tiles on homemade corners
Porcelain tiles are suitable for cladding heating devices of the same kind using the same methods, but tiles from it must be taken of zero caliber
There are other publications about the properties of porcelain stoneware, but in this case it is important that the initial mass was minimally deformed during the firing process, which means that the TC will withstand the use at the site of use
Advantages and disadvantages of this finish
The main advantages of using artificial material in the decoration of fireplaces and stoves are:
- When covering surfaces with the help of such elements, no special skills are required. This material is easier to work with than tiles.
- You don’t need a large set of tools, the most complex of which will be a grinder or angle grinder
- The weight of the masonry will be minimal, since the artificial stone for lining the stove is lightweight
- Thanks to the huge assortment of types and palettes of such material, choosing the right pattern or texture in style will not be difficult
- Prices for such decorative elements are much lower than for natural rocks
- Using such a stone from a stove or fireplace, it is easy to create a real work of art that will become a worthy decoration of the room.
There are practically no downsides to such a finishing stone, with the exception of some features of individual materials. Decorative stone for finishing a gypsum stove is afraid of high temperatures, at which it loses its properties, darkens and collapses. Therefore, it should only be used in fireplace linings. The same applies to wooden cladding elements.
Laying stone
First, pieces of stones are selected according to size and laid out on a horizontal surface to create a future composition. Then, in the same sequence, they are transferred to the prepared oven surface.
The pieces can be adjusted in size to the desired size using a grinder. You need to be very careful to maintain the integrity of the stone, and therefore work at low speeds of the tool.
You can create and lay out various variations of masonry, but the simplest is in even rows. For accuracy in the first row it is necessary to use a building level.
For reliable installation, a special mixture is used, but not silicone, as this will have a bad effect on the quality of work.
Some people believe that when laying out decorative stone, order is not important. However, their random arrangement will give the surface an untidy appearance. The most commonly used is seamless masonry.
For masonry imitating brick, a certain distance is left between the tiles. Scraps of cardboard are used to adjust the width of the seam, and plasterboard is used for wider seams. You need to ensure that the seams harmoniously complement the appearance, since too wide ones look unnatural.
And if you make seamless masonry, the resulting structure will have a complete monolithic appearance.
If we compare decorative and natural stone, the first is more durable and is not prone to becoming covered with moss or fungus.
Structural variety of artificial stone:
The properties of natural stone suggest such advantages as:
- strength.
- Practicality.
- Fire resistance.
- Ability to withstand high and low temperatures without deformation.
- Moisture resistance.
- Wear resistance and frost resistance.
- Durability. Natural material is not subject to corrosion, rotting, and does not contribute to the breeding of insects on the surface.
When installing natural stone, you need to take into account its heavy weight and strengthen the surface of the stove.
Lining the stove with stone involves the use of natural materials such as soapstone, coil or jadeite. They lend themselves well to processing and have a rich range of colors in gray and malachite tones.
Quality and safety
Quality depends not only on the skill of the builder. It is important to take care of the preparation of materials and tools, as well as personal safety. All work should be carried out in special protective clothing. Special attention should be paid to protecting the skin of the face and hands from mixtures. For this you will need special glasses and construction gloves. They will avoid not only contamination, but also possible allergic reactions.
Cladding stoves with artificial stone is a modern solution for a private home, affordable. You can do it yourself and not spend a lot of time on it. If you follow the rules of work, the result will please the eye for decades.
How to prepare the masonry surface
The third component of a high-quality fireplace cladding is a carefully prepared base. It is strictly necessary to prime brickwork and the composition for this should be of the highest quality possible. It is recommended to use Knauf Tiefengrund or similar acrylate-based primers Dufa Putzgrung, Marshall Export Base, but only for interior work.
The second step is to secure the plaster mesh. The cell size must be chosen twice as large as the planned thickness of the adhesive seam. You cannot fasten the mesh with dowels in plastic plugs; you should use metal anchor wedges with a diameter of 6 mm. The fastening points are located with a frequency of about 25–30 cm. It is necessary to fasten into the body of the brick, and not into the seam. To prevent the masonry from splitting, turn the hammer drill to low speed.
Additionally, you can “tear” the surface of the masonry by tapping it with a hammer and chisel to form many notches. This will significantly increase adhesion, but this can only be done at the initial stage before priming. At the end of the preparation, the surface must be thoroughly dust-free; you can also open the masonry with another layer of primer from a hand sprayer.
Preparing the surface of the fireplace stove for cladding
Heat-resistant primer G-77
We put up the fireplace or stove, cleaned it, then primed it. Any acrylic primer is suitable as a primer for fireplaces. For stoves and fireplace stoves, it is better to use a heat-resistant primer. Apply primer with a brush or roller.
To prevent the primer from spilling, the roller must be applied from the bottom up!
After drying, apply the first layer of glue.
Apply the adhesive solution to the primed surface
Use stronger glue.
You can use this adhesive solution
Apply the first layer
Applying a grid
Don't do like builders: put a mesh on a bare surface and then glue. It will be stronger like this: glue-mesh-glue.
The entire fireplace stove is covered with a mesh and glue
The glue has dried. Installed a blower and cleaning
To avoid staining the stove appliances, we seal them with masking tape.
Characteristics
If we compare natural stone and gypsum, we can note a number of advantageous characteristics. Externally, it is almost impossible to distinguish a natural version from an artificial one; the latter looks very decent. But for interior decoration of an apartment, decorative material is also convenient because it is much lighter than its natural counterpart. This means that installation is much easier. The load on the wall is small, and accordingly, the material will hold better.
You can make the facing stone yourself. To reduce the cost of processing the material, you can initially produce a stone with a smooth surface.
Gypsum stone is more resistant to negative influences than its natural counterpart. The artificial material is easy to clean and is resistant to stains. A varied color palette allows you to choose the best option for finishing.
In order to create such a finishing material with your own hands, you need to use anhydride, gypsum, water and the necessary form. It is best to use a silicone base for these purposes; it is more pliable and plastic, and therefore the finished stone looks more natural. But along with silicone molds, metal, wooden, and plastic containers are used. However, this process is labor-intensive and time-consuming. Therefore, it is more familiar and convenient to use a ready-made stone.
Is it possible to glue tiles to putty?
That is, the putty simply will not support the weight of the tile and the weight of the glue underneath it. ... That is, you cannot lay tiles directly on walls leveled with finishing putty (any kind), as the tile will move away from the surface along with the putty. After notching, you need to remove dust and prime the surface to dry.
Interesting materials:
What is unit division of labor? What is ESP in a car? What is a flagship office? What is flux and soldering acid? What is force majeure in a contract? What is a frontal photo? What is hydrophilic property? What is Glass N TPU case? What is glossy lipstick? What is the horizon and horizon lines?
Preparation for finishing
First you need to calculate the amount of material. If the stone will cover the entire area of the walls in the hallway, you should subtract the area of the openings and add 10%! (MISSING) If the decor will be located around openings, niches, in separate fragments on open walls, draw a rough sketch of the decoration and take measurements of each area. Then the area is summed up and 10-15% of the trimming is added. When purchasing material, you should remember that the amount of stone with an angular shape is calculated in linear meters, and of a regular shape - in square meters.
Artificial stone in the hallway
Additionally you will need:
hacksaw or grinder (depending on the type of stone); Bulgarian simple spatula 7-9 cm; Spatula notched spatula 15-17 cm; Notched trowel level; Professional cast Kapro level long ruler; pencil; paint brushes; varnish; file; acrylic primer. Acrylic primer for walls
Artificial stone can be attached using liquid nails, cement-based or gypsum-based glue. The glue consumption must be indicated on the packaging, so when purchasing, you should know exactly the finishing area and take it with a small margin.
Liquid Nails
If you use gypsum stone, you will need a special miter box with high sides for cutting.
Plastic miter box
When everything you need has been purchased, you should start preparing the surface.
Step 1. Dismantling the coating
Dismantling the coating
If the stone covers the hallway walls completely, the old coating is removed completely to the base. If separate areas are intended for decoration, the coating must be dismantled very carefully.
On the wallpaper, mark the boundaries of the finish with a pencil and carefully trim it with a utility knife, leaving a margin of 1-2 cm wide for stones. The wallpaper glue is soaked in water and removed with a spatula, the walls are thoroughly washed
They also remove the paint if it is peeling or cracked, and clean off any loose plaster.
Step 2. Leveling the walls
putty
The stone should be laid on a flat, smooth surface - this will facilitate the work process and increase the strength of the decorative coating. Therefore, all small cracks, gaps, and depressions are filled with putty, and if there are differences of more than 5 mm, it is better to plaster the entire area
Particular attention should be paid to doorways: deep cracks may form around the perimeter of the frame, for sealing of which it is recommended to use a cement solution
Step 3: Priming
Padding
Dry walls must be lightly sanded to smooth out the unevenness of the puttied areas, and then wiped with a rag to remove dust. After this, the surface is treated 1-2 times with an acrylic primer. If there is wallpaper around the perimeter of the areas to be treated, the primer should be applied so as to cover an edge 1 cm wide - what will be hidden under the cladding.
Leveling the oven base
Figure 4. Preparing the stove base for finishing
Theoretically, you can do without plastering. It is quite possible to line the stove with stone and mortar. But this is the last century - today there are many special heat-resistant mixtures on sale that increase the service life of the coating. And the consumption of such compounds is regulated by technical and financial considerations. Accordingly, the base should be as smooth as possible.
The ratio of sand, cement and clay is 0.2/1/3. Water is added according to the situation - the consistency depends on the layer of mortar and the size of the slabs.
However, it is more advisable to purchase a ready-made mixture. It is distinguished by a more precise composition and strict mixing. There are many options on sale.
We recommend reading about how to properly plaster in articles devoted to this process. It is important to heat the stove before work, and then let the finished plaster sit for several days. This will increase the service life of the coating and avoid the appearance of cracks.
It will also be useful: barbecue oven - types and characteristics.
Rules for choosing artificial stone
In all the variety of products offered from this artificial material, it is easy for an unprepared buyer to get confused. To prevent this from happening, it is necessary to identify the main positions by which this material should be selected.
Criterias of choice
Base materials. They can be very diverse - granite, marble, sand chips, gypsum. The choice will depend on preferences and the style in which the stove or fireplace is lined.
Safety certificates. In the production of facing materials, many substances containing complex chemical compounds are used. Therefore, a hygienic certificate for the product is required. Type of substrate. Finishing the stove with flexible stone involves the presence of curved surfaces. Regular rectangular blocks are suitable for strict geometry with angles of 90 degrees. Date of production. Artificial elements must rest for at least a month before they can be worked with
You should pay attention to the production date of the batch on the packaging.
The best manufacturers
Is it possible to line a stove with artificial stone without buying expensive European materials? Below are comparative examples to help you navigate the prices and make your choice:
- Artificial elements of the “Byzantium” series. Russian production from New Technologies Stone. Price per 1 sq. meter - 1130 rubles.
- Artificial alpine slate. Available in several colors. Russian production. The cost is 540 rubles per 0.5 sq. m. meters.
- Gypsum cement tiles "Chateau". Produced by Russian. Environmentally friendly inorganic materials are used as dyes. The price is 290 rubles per 0.5 sq. meters.
- Artificial elements of the Milan series. Russian production from New Technologies Stone. Price per 1 sq. meter - 1064 rubles.
- Artificial cream facing stone REDSTONE Old Peter SP-13/R. Russian production, price per 1 sq. meter will be 1250 rubles.
- Facing elements White Hills Fjord Land, lilac color. Russian production, 45 pieces per package, price per 1 sq. meter will be 1160 rubles.
- Facing elements “Ideal Stone”, Booth collection. Produced by Russian. The cost is 990 rubles per 1 sq. meter.
- Artificial facing stone “Ideal Stone”, Jura marble collection. Produced by Russian. The cost is 1390 rubles per 1 sq. meter.
- White Hills North Ridge siding, white. Russian production, 15 pieces in a package, price per 1 sq. meter will be 1450 rubles.
- White Hills Rutland cladding elements, white. Russian production, 21 pieces in a package, price per 1 sq. meter will be 1320 rubles.
Material selection criteria
Figure 3. And a few more variations of the stone
*
When choosing stove stones, you need to pay attention to the following aspects:
- price; very often the price of imported materials is higher than domestic ones - despite the fact that the quality is no better; This is far from an axiom, but it is recommended to take a closer look at the market;
- compliance of the slabs with the necessary requirements; first of all, the stone must be heat-resistant - otherwise the coating will not last long; the material must be strong and wear-resistant, preferably chemically inert; the packaging contains markings declaring the most important characteristics;
- date of manufacture; no, we are not talking about “delay”, but quite the opposite - too “fresh” concrete materials are not yet ready to become finishing materials, especially in the context of lining furnaces.
Remember! The lower your qualifications, the more desirable the blurry shape of the slabs. This will hide the flaws that will inevitably occur when installing it yourself.
Features of fireplace inserts (interior decoration)
When deciding how to decorate a fireplace, the design of its firebox matters
If you are interested in what you can use to decorate a fireplace, you should also learn about something else: what a firebox is. The fireplace is the place where solids burn - it can be wood, coal or some other fuel. Decorative finishing of the fireplace also includes working with the firebox, but more on this below.
To finish this part of the structure, today they use:
- Brick;
- Drywall sheets;
- Natural stone.
Plasterboard cladding
You can actually use sheets of plasterboard to cover the fireplace insert (after all, such material can even be laid on the floor - it is durable). But, only if the work is carried out with a false fireplace. However, exceptions to the rules are also allowed. Drywall may be necessary if it is necessary to level the surface in the firebox; Only a special material can be used in work of this level - moisture-resistant plasterboard
It is not recommended to use any other; During the work, it is also worth paying attention - if such material is used, the volume of the firebox can be significantly reduced. This happens because the sheets are fastened to a frame (of course, metal)
It is made on the surface from a special profile.
What is used to perform installation work:
- The material itself is needed;
- Metal profile;
- Screwdriver and screws.
And now about the installation in detail
:
During the work, some difficulties may arise - their likelihood is especially high when there are places in the fireplace that are difficult to access. This is why it is recommended to work with a screwdriver (a tool that operates using rechargeable batteries); The fireplace insert is usually sheathed with plasterboard when the size of the firebox needs to be reduced - to a significant extent.
This happens when the fireplace is large and the owner wants to correct the situation; If you decide to use sheets of such material, it is important to think through the interior decoration in advance so that the material can be protected from the destructive effects of fire and high temperatures.
Cladding with wood or decorative stone - solutions that will always be relevant for structures of this type
This will definitely help you:
- Decorative stone;
- A natural stone;
- Ceramic tiles (not used often, rather an exception).
We use brick
Brick for finishing fireplaces is also often used
Typically, brick is used in a situation where the fireplace itself is built from this material. In this situation, the firebox is erected together with the rest of the structure; there is no need for additional decorative finishing.
In addition, brick is chosen in the case when the entire fireplace structure is made of another material - which cannot cope with temperature influences in any way (or is simply flammable and does not tolerate heat).
Such materials are:
- Wood;
- Drywall that is not fire resistant.
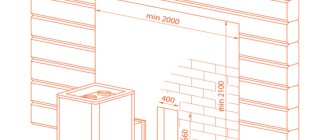
The chimney is laid out of brick, the firebox itself is inside the structure
And in order to ensure maximum safety, it is important to maintain a certain distance from the fireplace box to the facing brick layer. This interval should be at least 200 (or even better – 250) mm
Ceramic tile cladding
Ceramic tiles are another option worth considering
If the decorative decoration of the fireplace is exactly what interests you, you cannot pass by such a wonderful material as ceramic tiles.
In general, it is rarely used for interior decoration of fireboxes; it is attached only to a surface that is flat (usually on drywall; we have already figured out above that its installation is not such a difficult task).
You can easily install ceramic tiles if you have:
- Concrete mortar;
- Two spatulas;
- The finishing material itself;
- Cross-shaped plastic beacons (needed to ensure that the seam is even).
Features of using ceramic tiles:
The material is very fire resistant. To perform the installation efficiently, it is best to use special construction adhesive or concrete mortar.
Tile design options in the interior
There are a large number of different designs, for example, 3D tiles with patterns in the form of waves, ripples, circles, honeycombs and other shapes. Such voluminous finishing advantageously complements the entire interior space and gives it originality and originality.
The photo shows a wall in the living room decorated with voluminous white gypsum tiles.
Also, this cladding can be completely smooth slabs, decorated with various ornaments, geometric patterns and lace monograms, or imitate old brick, which is especially attractive for connoisseurs of authentic design.
The photo shows the bedroom interior and 3D gypsum tiles with a wavy pattern on the wall.
An equally interesting effect can be achieved using gypsum tiles in combination with wallpaper, decorative plaster, wood panels or using partial finishing, which can be laid out in a straight line, a ladder or abstractly.
Fire protection system in the partition
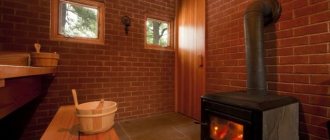
To achieve maximum heating efficiency in a bathhouse, it is advisable to place the stove in a partition. In this case, it will heat the partition, and not the outer wall or corner, which is much more rational and profitable, since firewood or gas will be well saved.
The partition in the bathhouse near the stove should be well protected. All the same methods are suitable for this as for the usual placement of the furnace. You can use all the techniques described above (brick, tile, metal) both for the outer wall and for the partition.
A brick partition in a bathhouse near the stove will be the most convenient option. It should be noted that brick partitions are often found in wooden bathhouses. Basically, they are made there for design reasons because of the beautiful facing bricks, but the option with a stove is much more functional.