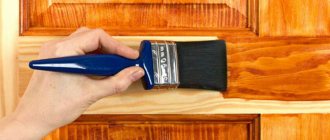
The topic of repairs continues, and today we will tell you how to easily remove an old window from the wall of your house. In an apartment you can also use it in the same way, only if you live on the ground floor. In general, changing windows in an apartment yourself is a very risky thing. Repair work at heights is best left to professionals. Today we will dismantle old windows in a private house. As one great builder of all times and peoples said: “To break is not to build!” As you can understand from these words, there is nothing complicated about this, but we will still tell you.
Many people simply knock out an old window with their feet, hammers, axes and sledgehammers. This is not our method. The old window can be useful for other small buildings in the yard. You can even make a greenhouse from the doors. For the correct dismantling of windows by specialists, the price varies from 400 to 1500 + window sill and ebb 500 rubles. In total, it turns out to be 1000-1500 rubles out of the blue. We will help you save this amount and do it all yourself. Read our step-by-step instructions and strictly follow each step of the instructions. Let's get started!
Do-it-yourself dismantling of wooden windows
Do-it-yourself dismantling of wooden windows
Before installing a new metal-plastic or wooden window, it is necessary to dismantle the old one. This work does not require any specific skills or tools and is designed more for strength than for intelligence.
When dismantling the window, you will have a lot of dust and debris, therefore, it is advisable to remove all curtains, curtains, carpet from the floor and remove all furniture away from the experimental window. The floor surface needs to be covered; for this, some old carpet runners or rags will do.
Tools you will need:
An electric jigsaw or grinder with a wood circle to cut the window frame.
After preparing all the necessary tools, you can begin to work. Firstly, there is no need to remove glass from old windows unless you need them in the future. An old wooden window is usually dismantled along with the glass.
First you need to remove the doors. To do this, you need to open them and try to remove them from their hinges. If the sash does not respond to the efforts of only one hand, then you need to try to pull it off its hinges using a crowbar or a hatchet. To do this, place the tool under the bottom of the sash and pull it sharply upward.
If the hinges are very soured or there is no way, or rather space, to move the sash upward, then you can simply saw the hinges with a grinder and that’s it, it will be much faster and easier than trying to somehow move the hinges that have long been unusable.
After you are done with the doors, you can begin dismantling the box. Be prepared for the fact that while working with the box, plaster may fall off the slopes, and sometimes the layers of plaster are very large and the entire slope falls off.
You also need to take into account the fact that sometimes houses were previously built in such a way that a lintel was not placed on the window opening, but a box was simply walled up and the bricks were laid directly on it. This only applies to old small private houses and outbuildings. So check if this jumper is there. If not, then when you pull out the box, bricks that were held directly on it may fall off from above. In this case, it would be better to first cut into the wall and install a reinforced concrete or metal jumper, and only then remove the box.
To make the box easier to remove, it is necessary to cut its side posts in the middle. This can be done using an electric jigsaw or grinder. If there is neither one nor the other, then an ordinary hacksaw for wood will do, but this process will take a little longer.
After the side posts have been sawn, you can try using a crowbar or a hatchet to pull out the box if it has not yet fallen on its own.
Share this article with your friends:
Author: Administrator| Date: 2011-08-16| Views:(7075)| Comments:(0)
A little about screw-in hinges
Loop device
Screw-in hinges for doors and windows consist of three main parts:
- frame part, which is attached to the door frame;
- the leaf part installed directly on the door leaf;
- connecting pin.
Components of the screw-in hinge design
Some types of loops are equipped with a nylon insert and a ball. Additional design elements are intended for:
- silent operation of fittings;
- reducing the friction force that affects the service life of the fittings.
Additional elements in the screw-in hinge design
Any hinge can be supplemented with a decorative cap that hides the internal structure of the fittings and gives the hinge an aesthetic appearance so that it does not stand out from the overall design of the room.
Overlays for screw-in hinges, giving the fittings an aesthetic appearance
The more additional elements added to the hinge design, the higher the cost of the fittings and often the longer the life of the product.
Types of loops
Screw-in door hinges differ in several ways:
- dimensions. Loops are currently available in various sizes. The small screw-in hinge is a window hinge, the large hinges are door hinges;
Various sizes of screw-in hinges
- number of pins. Screw-in hinges are equipped with 1-4 pins in each part. Hinges with 1-2 pins are optimally suited for lightweight plastic doors and window sashes. Hinges with 3 pins are installed on doors made of wood panels. Screw-in hinges with 4 pins are recommended for mounting doors made of solid wood;
Screw-in hinges designed for various types of doors
- Screw-in hinges can be adjustable, that is, after installing the hinge, you can align the position of the door in three main planes and are non-adjustable.
It is recommended to select screw-in hinges based on all the parameters presented. An overview of various types of screw-in hinges is presented in the video.
Application area
Screw-in hinges are used for installing interior and other wooden doors, as well as wooden windows. This type of loop has a number of advantages, which include:
- ease of installation. To install the hinge you will need a drill, marking tools and a minimum of installer skills;
- installed hinges are almost invisible, and the visible part can be covered with various decorative elements that give the hinge an individual look;
- most hinges are equipped with an adjustment that allows you to hide minor defects that arose during the installation of the door;
- minimal care. The hinge requires periodic lubrication, which is applied without removing the door leaf from the hinges;
Caring for screw-in hinges
- low cost. Due to the simplicity of the design, the cost of fittings is lower than that of other types of hinges.
Instructions for dismantling wooden windows
Depending on whether the windows are old or modern, there are some differences in operation. The following instructions show in detail how to safely and effectively dismantle old and new wooden windows, as well as aluminum and plastic.
Of course, every job requires the right materials and tools.
This also applies to window removal.
- Reciprocating saw
- Concrete cutter (not necessary, but useful)
- Hammer
- Scrap
- Screwdriver
- Pliers
- Knife with insert blades
Pay attention to safety when dismantling windows.
Protect your eyes with assembly glasses from flying fragments, and your hands with comfortable work gloves from splinters. 1. Preparatory work
Before you begin removing the window, first cover the floors and furniture with protective film.
Before dismantling, be sure to measure the opening and compare it with new windows.
If the dimensions match, you can safely begin dismantling. (Fig. 1)
Window sizes in older buildings are calculated differently than in new ones. Detailed instructions on how to measure windows correctly can be found here.
2. Remove the window sash
The first step in dismantling a window is removing the sash. There are a number of differences in dismantling old-style or modern windows. An important point is whether you are removing a swing sash with old hinges, or a tilt and turn sash with modern fittings.
a) old-style wooden windows
Simply open the sash, lift it up and remove it from its hinges, just like a door. When removing, make sure you don't stain the wall with oil pins.
b) New wood, plastic and aluminum
If the sash is pivoting, simply open the sash, lift it up and remove it from its hinges, just like in old windows.
For a tilt-and-turn mechanism, open the sash and place the handle in the tilt position. Now lift the sash so that the pin comes out of the bottom hinge. Now take the so-called scissors - a metal strip that holds the sash in an inclined position, at the top of the window, and simply unfasten it. (Fig. 2).
It is convenient to remove the sash with an assistant, especially if the scissors are located high.
c) Remove the sash from modern wooden, aluminum or plastic windows
Removing the sash from a modern window - be it wooden, aluminum or plastic - can be done easily and quickly compared to first-generation windows. All you need is a pair of pliers or a screwdriver.
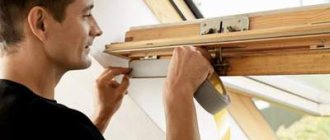
Regardless of whether the tilt mechanism is installed or not, simply open the sash and pull the pin out of the top hinge. To do this, first remove the plastic cover from the top hinge. Once the top hinge is open, simply pull the pin down (Figure 3). Now you can easily remove the window sash from the bottom hinge by lifting it up.
3. Dismantling the window frame
The frame holds the sash and is rigidly mounted into the opening. A crowbar and a reciprocating saw or a hand router are used here.
Before you begin dismantling the window frame, first cut the joint between the window and the slopes. If there are flashings, tear them off. (Fig. 4a) To cut old frames, use a concrete router so as not to damage the tool when it comes into contact with concrete or brick (Fig. 4b). If you don't have a concrete router, use a stable saw, but be careful when moving the saw close to the wall (Figure 4c). In addition to the danger of damaging the tool, if it jams, you can injure yourself. Since fasteners are mainly installed at the top and bottom of the window, it is enough to make a cut on the left and right sides of the frame. If it later turns out that the fastenings are not limited to the top and bottom, make additional cuts. The frame has now been cut into several pieces so that it can be safely removed. Typically, only six cuts are needed to cut the window frame into several pieces: two on the left, two on the right, one on the top and one on the bottom. Make the slots as V-shaped as possible so that the frame parts do not become wedged when removed.
Now insert a crowbar or hammer under the window frame and move the individual parts away from the window opening. If you notice that the frame is still fastened in one place, simply cut the masonry again in this place (Fig. 4d), or use a strong push with a crowbar to pull out the fasteners.
With this step-by-step guide, you'll be able to remove a window - a similar procedure also used when removing balcony doors - simply, safely and efficiently. If you want to see for yourself how this kind of dismantling happens, we will post a video soon.
Functionality of window hinges
Hinges for plastic windows are responsible for the tightness of structures, smooth, silent opening and keeping the sashes from sagging. They are adjustable in 3 planes and are designed for different loads:
- 90 kg;
- 120 kg;
- 160 kg.
All new hinges are compatible with automatic opening systems, so windows and doors can be connected to an electric drive. This is especially important for structures installed in hard-to-reach places. These include attic models, skylights and high windows with folding transoms.
How to dismantle an old wooden window.
To begin installation, of course, you need to prepare, or rather dismantle. If windows are being replaced in houses built back in Soviet times, then the old wooden window frames must first be dismantled. In this article, we will tell you how to do it correctly.
In order for the new window to take its place in the opening, it is necessary to remove the old wooden frame. This work will not require any special knowledge from you, since it requires physical strength more than skill.
Please remember that the dismantling process generates a lot of dust. Therefore, it is advisable to remove curtains in advance, as well as roll up carpets and rugs. It is better to protect the area of the floor near the window with some kind of rag, since fragments of the slopes will probably fall off.
Overhead hinges
Such loops are a design of two small-width patch cards with a cylinder. A rod is inserted into the cylinder, and such hinges are used to connect the window sashes of paired structures.
It can be used for both right-handed and left-handed attachments - simply by changing the rod. In this case, a hinge card of greater width is screwed to a quarter of the inner sashes, and a less wide one is screwed to the overlaps of the outer sashes.
All forces that arise at the moment of overturning of the outer sashes will act in the longitudinal direction of the horizontal axis of the screws. In this case, the holding force of the hinges will depend practically on the resistance of the screws to pulling out. It should be remembered that the overlay of the outer sash, which has a thickness of 12 mm, may not provide the required strength.
The tilting fittings of wooden windows themselves must ensure horizontal rotation of the sash. Unlike a hinged structure, which is mounted on the vertical bars of a window sash, no torque can arise in a tilting system, and therefore there are no special requirements for the strength of the structure during installation.
Video: WINDOW HINGE GIESSE FLASH BASE
Instructions
1. Work begins with removing the sashes. There is no need to remove glass from them in order to save time. They are removed only if they are useful in the future.
2. To remove the doors, you will need to open the frame and try to lift them up. If they don't come off, use a crowbar or hatchet. The tool is located under the bottom of the window element, after which it should be pressed.
3. In most cases, this is enough to cope with the task. But sometimes it’s easier to cut metal hinges with a grinder than to put in too much physical effort.
4. Having got rid of the sashes, proceed to dismantling the box. When it is removed, the plaster slopes are partially destroyed. You may need to additionally hammer and chisel some areas. At the same time, sometimes quite large pieces fall onto the windowsill and floor. Be prepared for this.
5. In old-style houses, window lintels are not always present. The wooden frame was installed during the construction process, after which it was immediately walled up with bricks. Without a jumper, removing the box is somewhat more difficult, since the upper part may partially crumble. You can avoid this kind of trouble by installing a concrete or metal crossbar in the opening in advance.
6. The easiest way to remove the box itself is in parts. To do this, its side posts are sawed with a hacksaw. An electric jigsaw will also work. It must be used carefully so that the file does not come into contact with brick and hardened cement, otherwise it will quickly become dull.
7. When the posts are sawn, they are broken out with a crowbar or an ax. Then remove the remaining pieces of the box from the top and bottom. In this way, the window opening becomes free. Now you need to do a little cleaning and move on to installing a new plastic window.
Mortise hinges
This is the most advanced design of conventional window hinges, which corresponds to a similar type of door hinge system - the only difference is in size. Such hinges are used when installing windows with separate sashes that cannot be lifted. If you hang mortise hinges on the flaps, then only a movable rod is used.
Combined hinges
In this design, one card is embedded, and the other is only seated on screws with the appearance of semi-countersunk heads. Here you can pay special attention to such advantages as:
- Less material is consumed for making loops
- No overturning moment due to contact of the embedded card cylinder with the middle rod
- Greater friction when gripping the mortise card due to the larger contact surface area of the sides
- You can use metal fittings for wooden windows both on the left and on the right, and as folding hinges - since the rod is removable and can be inserted from both sides
- Quick installation - due to the fastening of mortise hinge cards on the sashes
- High strength
Do-it-yourself window dismantling
The construction market is full of offers from manufacturers of metal-plastic windows, and every year the quality of frames, double-glazed windows and fittings becomes more and more advanced. Removing windows yourself will save on installation costs
Often a major renovation or cosmetic renovation entails replacing old windows with new ones. As a rule, sellers provide a service for dismantling old structures, but this must be paid for. Therefore, if you want new windows to cost you the lowest price, dismantle them yourself. In our article you will learn how to do this correctly and what tools are needed for this.
When is it necessary?
The dismantling process in private or apartment buildings may be required in the following cases :
- Major renovation of housing, complete replacement of the old structure with a new one.
- Putting the window structure in order, repairing it, polishing and replacing individual parts (glazed windows, structural elements).
- Low sound insulation and thermal conductivity. After removing the frame, the window opening is restored, puttyed, primed, insulated with heat-insulating material, and waterproofing is applied. The joints are then sealed with sealants.
- The window has reached its end of life and is decommissioned (industrial enterprises).
- Poor aesthetic appearance. The appearance of expansions and cracks on the outer surface of the frame, requiring stripping of the layer, treatment with an antiseptic, polymer and paintwork.
- The frame moves away from the platbands (over time, for more than 30 years) or its geometric lines have shifted (deformations can occur due to man-made and seismic accidents).
Dismantling is focused on the individual preferences of the owner of the premises and his financial capabilities. Most often, old windows are removed in order to replace them with more modern models made of profiled or laminated timber with double-glazed windows that will be resistant to dust, temperature changes, precipitation, and will not form cold bridges.
If the windows are protected from the outside by metal fences, which is found on the first floors, then these bars are cut off first, and only then all other work is carried out.
Stages of work:
First of all, the opening elements (window sashes and vents) are removed. If the hinges are in good condition, this will not be difficult. In cases where the structure cannot be removed, a crowbar is used. In extreme cases, the loops can be cut with a grinder.
If you need glass, you can remove it only when the frame is removed from the window frame.
After all opening elements have been removed, proceed to removing the box. To do this, cut the bottom beam in half using a grinder or hacksaw.
Next, the side parts of the box are removed in the same way, the top beam is demolished last.
Product classification
- Location:
- Upper
- Corner
- Lower
- Options:
- Regular ones that fit most models.
- Large sizes that are mounted on entrance areas where the fittings need to withstand heavy loads.
- Small parts are chosen for non-standard or small windows.
- According to the form of window operation:
- Overlay parts are an inexpensive, short-lived product that provides outward opening.
- Folding mechanisms are needed for products when the doors open upward.
- According to the adjustment option:
- Adjustable – the most practical and durable products. Convenient to use when changing the geometry of the sash.
Unregulated mechanisms require infrequent use of windows and doors. Suitable for office and commercial premises.
- By manufacturing method:
- Forged hinges
Pressed
- From the shift axis of the fitting groove:
- 13 mm (usually for Rehau profile or its analogues)
- 9 mm (KBE profile and analogues)
Pivot hinges are used where door and window panels can open outward or inward.
- Manufacturer:
- Great Britain
- Slovenia
- Germany
Alloys of brass, aluminum and steel are used for fittings, regardless of the manufacturing method. The steel is coated with an anti-corrosion compound, and on the outside all steel elements are protected by plastic plugs for the hinges.
Removing a plastic window
The design of a metal-plastic window has prefabricated elements, so its dismantling is much easier:
First of all, the slopes are removed;
After this, it is necessary to remove the double-glazed window - this is the most fragile and heaviest part of the structure;
To remove the sash, you need to pull out the metal rod from the top hinge, then carefully lift it and remove it from the bottom hinge;
In the case of a fixed window, decorative panels are first removed; a spatula is used for this purpose: it is carefully inserted between the sash and the bead in the center of the structure;
After removing the fragile elements, they begin to remove the frame; using a screwdriver or screwdriver, remove the fastening elements (anchor plates);
Using a hacksaw or a knife with replaceable blades, you need to cut through the polyurethane foam around the entire perimeter of the window. After this, the frame will easily come out of the window opening.
Then the ebb tide is removed;
The window sill can be removed quite easily, as it is fixed using polyurethane foam.
What it is?
Work on window structures, in addition to installation, necessarily includes dismantling after some time of operation. This concept is explained by experts as the primary stage of replacing a window opening, which is carried out with or without preserving the old window (for restoration).
Dismantling is carried out using special carpentry tools. It includes several main steps :
Preparing for the process.- Removing window sashes.
- Cutting and cleaning of the impost and frame.
- Separation from the wall of the window sill and ebb.
- Cleaning the surface from insulation and cleaning the opening.
- Garbage collection.
You can do the dismantling yourself or invite specialists. To carry out the dismantling steps, builders use the technical document SP 325.1325800.2017, which describes the sequence of the process and is applied to any buildings and structures.
When removing the window structure, be sure to follow safety precautions and protect yourself from possible injuries:
- work clothes;
- gloves;
- glasses;
- shoes;
- comfortable headdress.
The specifics of the dismantling work depend on the pre-drawn up work sequence plan and the type of window construction (sliding, removable, hinged).
Do-it-yourself window dismantling
In an old city apartment bought for relatively little money, for example in a Brezhnevka or Khrushchevka, you will most likely have to do major repairs, unless of course you plan to live in it.
In such an apartment, if it was purchased for a sum that is quite small for apartments, in addition to worn-out communications, replacing floors, finishing walls and everything else, as a rule, you also need to change windows and interior doors.
For people who plan to carry out all repair work themselves, our article will most likely prove to be quite useful, since we want to talk about how to properly dismantle an old wooden window before installing a new plastic one.
Preparatory work
In this list of works we will include the selection of the necessary construction tools, resolving the issue of garbage removal and its preliminary packaging if necessary.
Among the tools we will need a crowbar, a nail puller, a heavy hammer or sledgehammer, a cutting tool - a hacksaw, or better yet, a jigsaw. A large flat-head screwdriver, pliers or wire cutters will also be useful. It is also worth picking up a couple of thick plastic bags for small debris and glass wool, as well as film for covering furniture.
Advantages of screw-in hinges
Pin hinges are usually installed on interior doors with a hinged part. Installation occurs by screwing the fittings into the door leaf. The choice of screw-in hinge model depends on the size and weight of the door. Therefore, these products are purchased only after the door has been finally selected or even purchased. We propose to consider the positive qualities of loops of the mentioned type. These include:
- variety of colors;
— excellent wear resistance;
— possibility of decorating with special caps;
— decent appearance;
— reliability;
— compactness.
The screw-in mechanism is universal, so it doesn’t matter at all on which side the door will be installed (right/left). We offer to buy high-quality devices at an affordable price.