Restoring wooden structures is a measure resorted to by owners of private houses with a long service life.
The decision to repair a window is made based on a number of factors that directly indicate that it is necessary. This may be the unsightly appearance of the opening, the appearance of deformation, the formation of cold bridges or condensation at the corners of the frame.
A careful visual inspection of the internal and external surfaces of the window, checking the functional ability of the sashes (opening, closing), assessing the condition of the frame elements, joints, slopes, ebbs, and fittings allows us to develop an effective restoration plan.
You can carry out repair work yourself or invite a specialized specialist. How to do this correctly, and what is needed for this, read more in the presented article.
The feasibility of repairing wooden windows
Restoring wooden windows with your own hands allows you to save money and improve the dilapidated window structure.
Before starting repairs, it is necessary to take into account the “lifetime” of the material from which the frames are made. Larch and pine can last no more than 35 years, oak and beech - more than half a century. Restoring wooden windows is unlikely to lead to the desired result if:
- The structure of the wood is so loose that when pressed, strong dents form;
- There is complete loosening of the window frames in the openings;
- Large dark spots are visible under the paint, which usually indicate rot and decay;
- Frames are bent or severely deformed;
- Wooden windows are very seriously damaged (for example, frames are split).
After reconstruction, the old window looks like new
The doors close tightly
The cause of this trouble may be the skew of the frames or their deformation as a result of swelling of the wood. If the hinges have settled, they can be moved to new places or the height of the sashes can be adjusted by winding the wire around the window hinge rods.
If the wood is swollen, plan off the excess with a plane and gradually adjust the frame to the box. When a specific pinched area is not visually determined, it is found by placing a carbon copy between the box and the frame. The painted areas are planed.
The window may not close well due to years of paint buildup. It can be cleaned off with coarse sandpaper.
Main defects and ways to eliminate them
During the operation of wooden window structures, their owners often have to deal with the following problems:
- The gap between the frame and the window frame.
- Problems with surface coating.
- Warping of window frames.
- Rotting of part of the binding or frame.
- The doors close tightly.
Defect 1. The problem of insufficient tightness is one of the most pressing. Such gaps are formed due to the fact that wood is a material that is easily deformed. The need to restore old wooden windows in this case is explained by constant drafts.
But fixing this problem is quite simple. You just need to install an additional seal.
Defect 2. Repair of old wooden windows will also be required in case of worn stain or cracked paint. After a few years, the paint on such structures loses its original properties, regardless of its quality and price. To restore the window, it will be enough to simply update the painting.
Defect 3. A pressing problem, especially when it comes to frames made of solid boards. The main reason for the distortion is the properties of wood to deform under the influence of moisture or direct sunlight. Such distortions can be eliminated by adjusting the fittings. If this is not possible due to the technical features of the selected parts, you will have to change the hinges.
Defect 4. This is the most difficult wood defect that cannot be eliminated. In case of rotting, you will need to completely change the window structure.
Defect 5. A fairly common problem during the operation of old wooden windows. To return them to the ability to close normally again, you should first check whether the structure as a whole has sagged. If so, simply adjust the height of the sashes.
For what and why is it necessary?
Repairing wooden structures is considered an appropriate solution. With a “good attitude” towards the material (care and maintenance of operational ability), it can last for quite a long time, providing its owners with heat retention and protection from external temperature and atmospheric manifestations.
In addition, wood is a hard material with good density and strength, and is also an environmentally friendly product.
Wooden windows
are easy to process :
- antiseptics;
- polymeric substances;
- LMB.
They also adhere well to any materials, and the joints are sealed with suitable insulation and sealants.
The construction market is represented by a huge number of affordable materials that make it possible to completely restore windows and extend their service life. Moreover, any type of repair significantly saves the family budget.
Structures can be repaired using cosmetic or major restoration, after a thorough visual inspection, measurements taken and determination of functional (operational) characteristics. To do this, they preliminarily outline a work plan, purchase building materials and prepare tools.
Cosmetic repairs are needed to improve the appearance of the window:
- painting it in the chosen color;
- sealing joints, lubricating fittings for opening and closing sashes;
- replacing old worn parts.
Major repairs concern the complete replacement of elements (parts) of a window if they have crumbled, broken, do not open well, let in a lot of cold, or if the glass unit is broken.
Deep restoration helps restore any parts of a dilapidated window, with the exception of completely rotten elements. Repairing wooden windows will be unsuccessful only in the following cases :
- looseness and dents were noted when pressing on the wood;
- window frames are very loose;
- the paint does not hide dark spots, which indicates internal decomposition of the wood;
- The convexity of the frames and their deformation are visually striking;
- severe damage to the frame (split).
You can repair a wooden window structure with or without dismantling, but always with preliminary preparation of the surface and performing successive step-by-step actions, each of which has certain features.
Cosmetic or major repairs begin only after thorough drying of the wooden window parts.
Causes of these defects and their elimination
Let's look at the TOP 13 common problems that arise during the installation of windows and their operation. Let's find out the main causes and ways to get rid of problems.
Condensation and mold
Such problems often arise as a result of unprofessional installation and operation, lack of obstruction of gas and liquid exchange between media and the absence or improper ventilation in the building.
What you need to do to get rid of the problem:
- install equipment that will help ventilate the room;
- replace a double-glazed window with certain heat transfer parameters;
- insulate the installation seam;
- fix plastic slopes, which will also conduct heat;
- adhere to GOST rules.
Defects on slopes
Usually they buy slopes that are created from several pieces of material. If the work is done efficiently, the seams can be firmly protected from exposure to water and excess moisture. The main technology uses the installation of monolithic slopes without cuts, breaks or cracks. If you do not follow this rule, mold and dirt will appear.
Blowing or leaking from a window
Air from a PVC window can penetrate into the room due to poor quality work or a poorly closed window. If the master adjusts the plastic windows, installs new fittings, adds some fittings, and replaces the insulation, then this can save the situation.
In addition, the main causes of leakage may be:
- Ventilation problems. In winter there will be increased humidity.
- Poor room heating.
- The glass unit is not “warm” enough.
Defective mosquito nets
Typically this problem occurs due to rapid wear or installation of low-quality fasteners. Re-upholstering the fabric and installing fasteners will help bring the mesh back to normal condition.
Clogged drain holes
The problem happens because people do not follow care advice. In this situation, a specialist should clean the window drainage holes.
Creaks, various kinds of noise during smooth opening or closing
The most common problem is the appearance of various kinds of squeaks during use of the sashes. Often there is not enough lubrication on the mechanisms for the sash to work continuously and without sound, which is why it is important to lubricate the elements with simple machine oil.
Stages of restoration of old wooden windows
House owners do not replace old window frames with new ones if they lack funds, or when they want to maintain the exclusivity of the appearance of the house. In any case, restoring the integrity and external beauty of the glass frame is of paramount importance.
The degree of wear of window frames can be determined by the following indicators:
- Violation of the tightness between window elements;
- Difficulty closing window sashes;
- Cracking of layers of paint;
- Formation of gaps between the frame and the additional upper window sash (transom);
- Presence of rotten areas of window frames and window frames;
- Distortion of window elements.
Repairing wooden window frames is recommended on warm, fine days. The dismantling of window elements and processing of wood is carried out in dry conditions.
Dismantling and cleaning
Step-by-step work on restoring a wooden window with your own hands includes the following activities:
- Dismantling window fragments: removing sashes from awnings, removing glass;
- Removing old paint from the surface of a window using one of the existing methods: mechanical or chemical.
Using a hair dryer, the paint is removed from the entire surface. Use the device to heat the paint until swelling appears and quickly remove the heated paint with a spatula. This is a mechanical option for cleaning windows from old layers of paint.
The chemical cleaning method involves treating the frame with kerosene. To do this, after dismantling, the frame is disassembled into its components, wrapped in a rag soaked in kerosene, and placed in a plastic bag for several days.
After this period, each element is cleaned with a spatula to remove old paint. It is removed from the surface of each element, and you need to work quickly, not allowing the kerosene to evaporate, since the paint, after the kerosene evaporates, takes on its previous appearance.
All procedures are performed using means that protect the respiratory tract and skin of the hands from the effects of kerosene - the performer of the work must be provided with rubber gloves and a mask.
The work is completed by cleaning the structural elements using sandpaper and a grinding machine.
Restoration of old wooden windows, bent as a result of deformation processes, consists of straightening the frame elements. To do this, perform the following steps:
- The window sashes are dismantled, the glazing beads are removed and the glass is removed;
- Remove fittings and wooden ebbs, steel angles and nails;
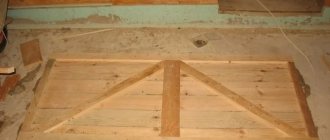
- The window frame and sashes are placed on the prepared shield, and then leveled until a rectangular shape appears. Then the window sashes are aligned. This window element requires a more careful approach due to its small size. A 1 mm discrepancy between the diagonal sizes will result in the presence of gaps.
Cracks that appear during the process of leveling the window contour can be corrected by filling them with PVA glue. After the glue has completely dried, the area of the repaired surface must be cleaned. The repaired frame is puttied and painted.
Replacing rotten window elements
Restoring old wooden windows that have fallen into disrepair should begin with dismantling them.
- Areas of the frame that require restoration must be cleaned of traces of old paint and the rotted, loose layer of wood must be removed;
- The prepared area is treated with putty;
- After complete drying, the frame is sanded, leveling the surface;
- A section of the frame that has become unusable is removed with a chisel, forming a recess in the form of a rectangle;
- An insert is made according to the shape and size of the recess with a small allowance;
- Using glue, the insert is fixed in the area of the frame prepared for repair;
- In this place, several through holes are made with a drill and pins with glue are inserted;
- The procedure for restoring the rotted area is completed by leveling the surface by grinding.
Installation and final finishing of wooden windows
In order for repaired windows to have a long service life, a number of other procedures must be performed:
- After eliminating all identified defects in wooden windows, the repaired areas are treated with an antiseptic and lubricated with wood glue and connected;
- Using a right triangle, check the correctness of the frame and window sashes;
- Closed parts can be secured in a tripod for greater strength;
- To increase the strength of the connection of window components, axles mounted on glue are used;
- Minor defects, in the form of small cracks, are removed by leveling the restored surface with sandpaper, followed by impregnation with primer and putty;
- Elimination of cracks in the end part of the window is carried out by filling them with a mixture of sawdust and wood glue;
- The dried areas are sanded using a sanding device;
- To increase the strength and durability of wood, it is treated with drying oil, which is applied in several layers. It is considered that the drying oil has been completely absorbed if there is no feeling of stickiness when touching the treated surface;
- If the appearance of the frame after restoration is good, then it is possible to leave the window frame in a natural color. This can be done using stain. Applying several layers will enhance the tone. Varnishing will preserve the external natural beauty of the wood for several years;
- Glass installation plays an important role. This window element must be installed with high precision, since the tightness of the window structure depends on it. The strong fastening of the glass to the window frame is facilitated by its placement on silicone adhesive. Along the entire perimeter, the glass is additionally secured with beading;
- To insulate wooden windows and increase tightness, foam and rubber gaskets are used.
This completes the DIY window repair. Ancient and modern technologies, techniques and materials were used in this procedure. The windows acquired a refined appearance for many years.
Repair and restoration of wooden windows - step-by-step instructions
Repair and restoration of wooden windows are carried out as needed. The peculiarity of the material makes it necessary to take measures to maintain the visual appeal of structures. In order for the effect to be high, you need to know in what cases to carry out cosmetic work, and when a major restoration is required.
Advantages
Materials for the production of frames are varied, but wood holds a leading position. This is due to the advantages
- environmental Safety;
- naturalness of the base material;
- possibility of use in different interiors and styles;
- hygroscopicity;
- thermal conductivity is low;
- aesthetics.
If the material is properly cared for, the service life is 15-20 years without additional repairs and restoration. That is why restoration of wooden windows is actively carried out when they are installed in a house.
In what cases is restoration required?
It will be necessary to restore a wooden product in the following cases:
- it begins to blow from under the sash;
- deformation of the frame has occurred;
- a fungus has appeared;
- the glass has lost its integrity;
- window fittings are damaged;
- the sash does not close tightly;
- the integrity of the tree is compromised.
Repair is also necessary when a distortion occurs or rotten areas appear.
Important! A complete restoration requires additional repair work. These include the installation of new frames and window sills, improvement of external and internal slopes. That is why restoration is chosen as a method of saving time and money.
What does this concept include?
The concept of “recovery” includes:
- assessment of the extent of damage;
- preparation of tools and materials;
- dismantling;
- carrying out basic work to eliminate the problem.
The process may require painting of the frames. To do this, the old coating is first removed. Removal of fittings followed by their replacement and installation.
Full recovery
This is a complete restoration of existing wooden windows. Major repairs including replacement of some components, painting, surface leveling. To carry out the work, you need special tools and the stage of dismantling frames or damaged glass.
If you are repairing windows yourself, it is additionally recommended that you familiarize yourself with the rules and features of the upcoming process in order to reduce the likelihood of errors.
Required Tools
To carry out the restoration you will need the following:
- a construction hair dryer that allows you to remove paint without damaging the wood;
- sandpaper with fine or medium grain - to clean the area in need of repair;
- grinding machine for leveling the surface;
- shoe knife;
- brushes;
- chisels;
- accessories;
- seal;
- putty knife.
Materials for restoration:
- putty;
- dye;
- varnish;
- drying oil;
- primer.
The cost of consumables varies and depends on the degree of damage and the selected compositions.
Advice! Restoration activities are recommended to be carried out in the warm season. It is better to choose a sunny day without wind or precipitation, since high humidity negatively affects the result of the work - the wood changes geometry, the applied paint dries poorly.
Dismantling
Before repairs, wooden windows must be removed from the awnings. Peculiarity:
- if in a restoration piece the glass is set on putty, it must be removed with a chisel, but without pressing hard, so as not to damage the canvas;
- when fastening is done on slats, careful dismantling of the fastening structure is indicated.
The glass will need to be removed, washed and put away until the repair is completed. The fittings are removed. It is also recommended to disconnect the ebb tides.
Self-tapping screws, nails, and metal corners are removed from the frame.
The prepared frame needs to be placed on a flat surface and measured. The diagonals must be the same length to prevent distortion and the formation of cracks. It is recommended to attach it to a hard surface.
It is necessary to check the condition of the dowels; if they are old, knock them out with a hammer or drill them out. If they are loose, fix them with glue.
Removing paint
The next stage, which involves the restoration of wooden window frames, is removing the paint. The process is carried out using a hair dryer or chemical means. If you use a hairdryer, you need to set the temperature to 250°C and prevent the air flow from hitting the glass.
During the heating process, the paint will soften and blisters will appear, which can be easily removed.
It is not recommended to use a putty knife as it may damage the wood.
Removal of chemicals using washes or liquids is carried out carefully, following the instructions on the packaging. Residues are removed using sandpaper or a grinder.
Elimination of deformation
Old wooden windows are subject to negative changes. They lead to distortions and distortion of the frame. As a result, glass may fall out and the window may not open.
The defect can be easily eliminated in a simple way: place the prepared product under a press and a weighting agent.
Restoration of rotten areas
Rot areas appear when old wooden windows are exposed to moisture for a long time. Restoration is carried out if a complete replacement is not included in the plans.
An epoxy putty designed specifically for wood will help remove rotten areas. The composition includes fiberglass, which increases the rigidity of the structure. The damaged area must be cleaned of paint and debris removed.
The next step is to apply putty. It dries in 24 hours.
Replacing a frame part
It is carried out in the following way:
- the structure is inspected for damage or deformation;
- identified imperfections are marked with a marker;
- cut out the area;
- prepare parts for replacement.
Restoration is performed using glue. The elements are fixed with clamps. Leave the structure for 24 hours, then sand, prime, and paint.
Putty and sanding
After thorough cleaning, putty is applied. The composition can be purchased ready-made or you can mix the necessary components yourself.
It must be applied to the surface immediately, as the solution dries quickly. After the putty has completely dried, sanding is performed.
Coating
The next stage is coating the wood with a special composition:
If you choose a drying oil made from natural ingredients, then the application process is carried out in two ways:
- cold - without preheating;
- hot - heating is done in a water bath.
For a high-quality result, it is recommended to coat the surface 2-3 times. Each layer must be completely dry before applying the next.
Important! Heating drying oil over an open fire to a boil is dangerous - the composition is highly flammable. You need to work in a protective suit.
Using stain or varnish for coating allows you to preserve the natural shade of wood, removing visual imperfections. Stain allows you to slightly change the color - tint the surface.
It is recommended to check the concentration of the composition on a separate surface before the first application.
Features of stain coating:
- increasing aesthetics;
- protection from damage;
- UV resistance.
Rotting processes do not occur, fungus does not form. The texture of the wood is not disturbed even after exposure to the skin.
Applying a layer of varnish is the final stage of covering it with protective and decorative agents. The composition should be applied to dry wood.
In order not to lose the shade, you need to use a transparent varnish - acrylic, matte or glossy.
Glass replacement and installation
Glass is replaced when it is damaged. It is necessary to carry out work while maintaining tightness to avoid the penetration of wind.
The glass must be installed using silicone glue.
Feature: you need to install glass in the opening 2-3 mm smaller, since it will expand under the influence of external temperatures.
Fixation is done additionally using small nails.
Installing hinges
The process of replacing outdated or broken hinges is not complicated and takes 5-10 minutes:
- it is necessary to determine and mark the location of fastening of new parts;
- elements are inserted and fixed into the opening using wooden wedges;
- The gap must be marked with a marker for subsequent installation.
The grooves for landing are knocked out with a chisel, the hinges are screwed in using self-tapping screws.
Painting and removing marks
Visual defects in wooden windows can be eliminated by painting. If you only need to refresh the condition of the frames, you can use stain and varnish. The compositions will eliminate minor imperfections.
It is recommended to coat the putty areas with paint. Masking tape is used to protect the glass from contamination. The coloring process is done from glass.
The protective layer is removed after complete drying. Remaining traces must be removed carefully.
Replacing paintwork: recommendations
In order to carry out restoration work most effectively, it is first necessary to remove the old paintwork from the frames. The work begins by removing the frames from their hinges and removing all metal parts and glass from them. If these works are carried out in full, the restoration work itself is significantly reduced.
To remove old paint from frames, there are several methods, most of which will require the involvement of a team of professionals with special chemical compounds. But if all the work is done independently, then mechanical cleaning methods are used: scrapers, spatulas or abrasive materials are used.
When the surface is cleared of paint, dust is removed from it and washed with an alkaline solution, which is purchased at hardware stores. After this, the remaining paint comes off and is easily removed with a spatula.
If you have the skills to cut glass, you can do all the work yourself. Otherwise, it is better to use the services of specialists, who will simply need to take measurements.
When the glass of the required dimensions is cut, a layer of putty or sealant is applied to the frame folds, which will ensure a tight fit of the glass to the frame. When the glass is installed, all cracks are also coated with sealant.
Which options require renewal?
You will need to update a wooden product in the following options:
- it begins to blow from under the sash;
- deformation of the frame occurred;
- a fungus has arisen;
- the glass has lost its integrity;
- window fittings are damaged;
- the sash does not close tightly;
- the integrity of the tree is damaged.
Repair is also needed in cases where there is a misalignment or rotten areas have arisen.
Important!
A complete renovation involves additional repair work. These include the installation of new frames and window sills, improvement of external and internal slopes.
Thanks to this, restoration is selected as a method of saving time and money.
What does this concept include?
The concept of “resumption” includes:
- assessment of the extent of damage;
- preparation of materials and tools;
- dismantling execution;
- carrying out major work to eliminate the problem that has arisen.
The frames may need to be painted during the process.
To do this, the coating that is already outdated is cleaned in advance. Removal of fittings with further replacement and installation.
How to restore an attractive appearance
Old wooden windows, as a rule, are covered with more than one layer of paint, which has begun to peel off and has smudges. Of course, you don’t have to waste a lot of time, clean up what is falling off and apply another layer, but in order for the window to look like new, the old coating must be completely removed.
Removing paint
Before starting work, it is necessary to remove the frames from the box, remove the glass and remove all metal elements of the mechanisms.
There are three methods for removing old paint:
- Mechanical;
- Thermal;
- Chemical.
The first is the most complex and time-consuming, but does not require special tools and materials. The paint can be removed manually with a spatula, sandpaper or scraper. The method is not always effective; it is appropriate if there is a thick layer of paint on the frames, which is easily removed. The work will go faster with a grinder.
For thermal cleaning, a hair dryer is required. It needs to be directed to a section of the frame, heated for several minutes and immediately removed the paint with a spatula. The warm coating is easily removed, with virtually no residue. Areas where the paint sticks tightly can be cleaned with sandpaper.
When chemical cleaning, a special liquid is used to remove paint; you can also use what is at hand, for example, kerosene.
For this method, the frames need to be wrapped in rags, moistened generously with solvent and packed in a plastic bag. Leave for a couple of days, after which you can clean the surface with a spatula to remove the softened paint. The wood after such treatment will not be perfectly clean; you will need to remove the remaining coating with a grinding machine or sandpaper.
Preparation
The next stage is puttying. This type of processing is necessary to level out minor defects: cracks and irregularities. Before this procedure, it is recommended to remove burrs, trim off protruding parts and clean the surface of dust. The composition must be applied in as thin a layer as possible. Then dry well and sand.
Before painting, the wood must be protected from damage. Such a coating can be drying oil or an antiseptic. Frames should be impregnated with them in several layers.
The “old-fashioned” way of dipping wood into hot drying oil is dangerous to life and health.
You can begin applying paint after the protective coating has dried. You can check the readiness of the drying oil by touching the frame; if your hand does not stick, then the surface can be painted.
Coloring
Applying fresh paint is the most important step. Here a lot depends on the choice of material. Oil paint is best for windows. The samples presented on store shelves are made of synthetic components and have a short service life.
To keep windows looking good for 10 years, you need natural paint. It can be prepared from thickly ground paint based on mineral pigment, mixed with linseed or nut oil.
It is more convenient to apply the coating with a thin brush. It is better to remove the glass so as not to accidentally stain it. You can put the frames in place when the second coat of paint has dried. It can also be used to cover drainage, window sills and internal slopes.
How to restore wooden window frames, including installation of seals, removal of old coating, puttying and painting, is clearly presented in the video:
Defect 4. Rotting of part of the binding or frame
Sometimes you can find entire fragments of rotten wood on old wooden windows. In this case, there is nothing left to do but replace them with new ones. To do this, use a chisel to cut out the damaged part, and try to capture some healthy tissue to prevent the spread of rotting. Then coat the resulting recess with epoxy resin or wood glue and fix a new piece of wood cut out in advance there. After the glue has hardened, this area is sanded with a sanding machine or sanding paper.
How to repair rotten sections of a frame
A rotten section of frame can be replaced or restored. For restoration, epoxy wood putty is required. The damaged area must be freed from paint and dust removed. Then apply putty, carefully filling all the recesses and cracks. Form the missing part. It should be slightly larger than the required size, since the excess will be removed during subsequent grinding.
If the rotten area cannot be replaced, the defect is eliminated using putty
Leave the frame to dry for at least a day. Sand the repaired area with sandpaper or a grinder.
It is worth understanding that such repairs of old wooden windows help restore the appearance, but do not provide the necessary reliability, especially in areas of active use. But on a blind or rarely used window, this method will allow you to restore the structure without a radical replacement.
Putty and primer for small defects
Before carrying out this operation, it is necessary to identify cracks, chips and other defects in wooden windows, mark them with a marker and treat them with sandpaper. Then cover the marked areas with latex or oil putty. The work is carried out with a rubber spatula, immediately removing excess material. If necessary, after the first layer has dried, apply a second one. Finally, the wooden surface is treated with fine-grained sandpaper. The primer is applied in 2 layers.
Impregnation of wooden windows
In order for repaired antique and Soviet windows to last as long as possible, they need to be covered with drying oil. It will block the development of new rot germs and, if possible, restore the structure of old wood.
Coating with drying oil will extend the life of the window frame and prevent the formation of rot.
The drying oil is applied with a brush in 3-4 layers: the next one - after the previous one has been completely absorbed and dried. This treatment will last for 2-3 years (until the next repair). Impregnation for many decades is carried out in a piece of iron pipe 10-12 cm thick, sealed at one end. All actions must be performed only on the street, away from residential buildings.
Place the pipe at an angle of 300, fill it ¾ full with drying oil and heat it from below with hot air from a hairdryer or electric stove. As the temperature rises, the drying oil will begin to swell - this will release moisture and air. If the smell suddenly increases, you need to move the heater away and wait a little. Impregnation begins after the bubbles disappear:
- Prepare an iron hook with a sharp end 5-6 mm thick;
- Place the part in the pipe and press down with a hook for 4-5 minutes;
- Hook the bar with the point of the hook, remove it and lay it to dry;
- It is forbidden to touch the parts with your hands (even with gloves), since the temperature of the hot drying oil exceeds 130 degrees.
Such treatment allows you to extend the service life of wooden window frames by more than 100 years, and if they are coated with an oil composition, repainting will be required no earlier than after 15 years.
What parts need updating?
To determine which parts need restoration, visual diagnostics are necessary.
The technician carefully diagnoses:
- inspects surfaces;
- checks the glass unit;
- condition of glazing beads;
- current functions of the structure, noting shortcomings.
Also in the diagnostic process :
- the sashes are removed;
- glass is removed;
- low tides;
- the sealant is removed;
- insulation and old paint;
- fasteners and metal corners are unscrewed.
All parts that look unsightly, are broken or are out of order require mandatory replacement. This also applies to drains, window sills, slopes - the elements are installed new. Particular attention is paid to the frame with sashes and the glass unit itself. A window with a large number of layers of paint, broken glass, worn-out fasteners and fittings does not look attractive.
Even a rotted section of a frame can be repaired or replaced by using new parts, sanding down the damaged surface, and using an epoxy putty designed for wood.
Damaged parts are freed from paint and dust, and the surface is primed and sealed with putty, covering existing cracks and recesses. The created missing part is formed several mm larger than the required dimension. Extra millimeters are removed by grinding.
Layers of old paint are removed using a hair dryer, a spatula and a homemade stripping device. As soon as the surface softens and the layer begins to bubble, it is scraped off the surface. Removing old paint allows you to assess the condition of the windows, for example, detect rotten parts of the frame. But this drawback can be removed if it is removed and a specially cut liner is glued onto the missing part with construction adhesive.
Sections are replaced in such a way that not only the appearance of the window is improved, but also its functionality. Rusty corners, fittings, dowels and handles are replaced with new, modern ones. At the same time, the cracks are sealed and slopes are formed.
Broken glass is carefully removed after removing the beads and disassembling the frame. New double-glazed windows are installed in their place. Don’t forget about waterproofing windows and drainage systems. The latter can be purchased on the construction market - their price is low.
When repairing an old window, do not forget about impregnating the surface with polymer and antiseptic compounds.
Assembling the sashes
The prepared sashes are placed on the shield and carefully aligned to a rectangular shape. The details of the window require special attention: a 1 mm difference in diagonals will provide a 0.7 mm gap.
The leveled area is secured with glue or nails, carefully driving them into the shield near the sash. They look through the old dowels (“chopiki”).
When assembling the sashes, it is necessary to strictly observe the rectangularity
Drill them in the middle of the corner using a larger diameter drill. If one of the dowels is shifted to one side, then you need to:
- Secure it along the border with a few drops of “Super Glue”;
- Drill the correct location;
- Pass the saw blade through the gap between the fixing lugs and saw through the old dowel.
After assembling all the corners, you should get a fairly rigid structure. Now you can take the frame and install the sashes into it. They will fit more tightly if plywood strips of the appropriate width and thickness are glued to the frame.
Place all parts on a leveled surface and press down with a weight (approximately 100 kg). Leave to dry and level for 2-3 days.
Disassembly and inspection
The most important element of the window design is the wooden pins-pins (“chopiks”) that fasten it at the corners. Sufficient attention will be paid to the description of how to work with them, and window repair begins with the inspection and revision of the pins.
First of all, we remove the sashes, remove the glazing beads or carefully pick out the putty with a chisel and remove the glass. Then we completely remove the fittings (you will still need new ones); We carefully remove the wooden ebbs (teardrops) from the outer sashes: they are on nails, which are probably rusty. We also take out all the other nails, remove the steel angles - for further work, only wood should remain in the frame and sashes.
Next, we place the frame and then the sashes one by one on the panel and level them to rectangularity, measuring the diagonals: they should be equal in length. We especially carefully measure and align the window sashes: they are small and the cost of a mistake is high. 1 mm discrepancy between the diagonals along the length gives a gap of 0.6-0.7 mm.
Example: on the sash we made a mistake by 3 mm, and by the same amount in the opposite direction on the frame. You will get a gap about 4 mm wide, clearly visible, and pulling from it will also be noticeable.
We secure the aligned part of the window with nails, carefully driving them into the panel close to the sash, and check the old pins. If everything sits as it should, approximately in the middle of the corner, carefully drill them out with a drill of a larger diameter, but not more than 0.6 of the width of the rectangular one, without taking into account the grooves, quarters and bevels of solid wood (see Fig. lower part). If there is someone who has left, which is not uncommon, see the figure above, we work like this:
- We drip 3-4 drops of superglue along the contour of the old one, this is necessary so that it does not fall out when drilling and the hole does not go away.
- We wait 5-10 minutes for the glue to set firmly in the depths; it flows far.
- Drill a correctly positioned hole.
- Using a saw blade, inserting it into the cracks between the joint whiskers, we saw through the old dowel.
After the mounting holes are drilled in all the window parts, we disassemble the frames into parts and clean them of old paint.
Insulation of wooden windows
High-quality repair of wooden double-glazed windows includes their insulation, which can significantly reduce heat loss in the house. There are several ways to insulate windows yourself:
- Silicone sealants;
- Special paper;
- Fabric strips;
- Tubular profiles;
- Heat-saving film;
- Sealant in frame sashes.
The last two methods are considered the most effective. First, the junctions of the sashes and glass are covered with silicone sealant. Then they take a cutter and cut a 5 mm recess along the perimeter of the sash at an angle of 450. Clear it of shavings. Consistently press the PVC seal into the resulting groove, but do not stretch it.
When restoring a structure, an obligatory step is insulating the window frame
Repair of wooden windows using Swedish technology
Modern wooden windows
Modern wooden window structures, with proper installation and subsequent timely repairs, will serve you for many years. Why is there a need to repair them?
Any paint coating exposed to the sun and moisture over time ceases to protect the window from destruction. Therefore, timely painting will prevent the destruction of wood, the occurrence of fungus, rot and drying out. Cracks and chips may also appear on the window frame; repair and restoration of the window will solve this problem.
New wooden windows have a lot of weight due to the double-glazed windows installed in them. Therefore, fittings and mechanisms are constantly overloaded. All mechanisms and fittings need timely adjustment and lubrication. Otherwise, they do not perform their functions, the sashes sag and begin to cling to the frame, the mechanisms open and close the window with difficulty, cracks appear due to poor fit of the seal, and over time they completely fail.
The seals on modern windows are made of rubber and have their own service life. During operation, the rubber seal loses its elasticity, as a result of which it does not fit tightly, and cracks are formed that worsen the heat and noise insulation. The seal must be replaced with a better one (Swedish silicone sealant EvroStrip).
Old wooden windows
The Teplo-Oknodel company's craftsmen service and repair old wooden windows and doors in Moscow and the Moscow region. In Moscow houses and apartments built from the 70s to the 90s, windows of the so-called “Finnish type” were installed. These are windows with paired sash on tie bolts; when open, when washed inside, they resemble a book. In houses of older construction, “Stalin-type” windows were installed. These are windows with separate sash and frame, closed with bolts, and most often have a transom.
The company's specialists carry out repair work using Swedish technology with this type of windows. Swedish technology is the elimination of any defect in wood (chip, crack, dent), building up rotten parts. Restoring the geometry, adjusting the sashes until they open and close freely. Removing all layers of old enamel, coating with an antiseptic, painting with new enamel. Repair, adjustment, replacement of any window fittings. Sealing the seam between the frame and the slopes with acrylic sealant. It is also possible to carry out insulation work on any wooden window using the Swedish EvroStrip technology.
Wood window restoration technology
The restoration procedure is carried out in several stages. First, you need to decide on the technology. For independent restoration, it is better to choose the Swedish method. The technology consists of using a mortise seal. It is fixed in the window frame and fills voids, preventing the penetration of cold air, water and dust. For this purpose, a Euro-strip mortise seal is usually used. There are several seal parameters:
- diameter 6 mm, length 200 m;
- diameter 8 mm, length 150 m;
- diameter 10 m, length 100 m.
Seals are made from EPDM and rubber. The Swedish method provides additional insulation, so it allows you to solve two problems at the same time. The technology qualitatively improves the properties of the window opening: it insulates, seals and insulates.
Window restoration using Swedish technology
Restoration involves performing three types of work: preparatory, main and final. For a complete restoration, you will have to completely remove the old paint, replace most of the fittings and use a new frame. The list of tools depends on the condition of the window opening and the work to be done. For a complete restoration you will need:
- construction hair dryer for removing old paint;
- spatulas of various sizes;
- sandpaper P280, P240, P600 or P400;
- wood grinder;
- hand saw;
- Bulgarian;
- masking tape;
- drill and drill bits for wood;
- hammer and pliers;
- carpenter's knife;
- brushes for applying liquid compositions;
- screws 5, 10, 20 cm;
- chisel;
- accessories;
- glass (you can use old one);
- nails no less than 15 mm;
- equipment for work (safety glasses, gloves, clothing).
The final list of required tools may vary.
The materials needed depend on the condition of the wood. If the frame is not suitable for restoration, it will have to be replaced. It is necessary to take hardwood species for replacement. The restoration includes not only restoring the properties of the glass unit, but also its appearance. To do this you will need the following materials:
- antiseptic primer for wood (Adler Lignovit IG, Tikkurila, Teknos);
- wood sealant (Sazilast, Steez V);
- Euro-strip mortise seal;
- wood putty (Triora, VGT, Parade S50);
- masking tape;
- varnish (Vidaron, Pinotex, VGT);
- drying oil
To restore old windows, you need to use several types of putty: coarse-grained and fine-grained. Coarse putty is used to seal cracks and defects. Fine-grained - for interior decoration of window openings. Preference should be given to an antiseptic primer. It will prevent the development of fungus and the appearance of insects. It is recommended to use a deep penetration primer. It will ensure better adhesion of the putty to the paint. Drying oil should be based on linseed or sunflower oil. According to GOST 190-78, it should contain no more than 5% chemical additives.
Working conditions are of great importance for the quality of restoration. It is better to do the work on a sunny, warm day. This will allow the materials to dry and bond faster. Humidity should not exceed 60%. Excess moisture will expand the wood and cracks will appear in the primer once it dries. If it rains, the window opening must be covered with film.