Repairing wooden windows with your own hands is a very relevant issue. Wooden windows do not retreat even in the age of modern plastic ones. Wood is not only a natural, prestigious material, it also has real advantages: wooden windows are resistant to external influences and provide excellent sound and heat insulation. And most importantly, optimal humidity is automatically maintained in a house with wooden windows.
As the window market declines, they are vying to offer windows made from modified wood. There is nothing bad to say about them, except for the price: not only is it not pleasing, it’s scary. Meanwhile, restoring wooden windows with your own hands is not so difficult, and as a result, a great-grandfather’s killed window can be restored to the appearance of a completely new product.
Which windows make sense to restore?
It would seem that a completely damaged window frame is still quite subject to restoration
To assess the feasibility of restoration, you need to take into account the material from which the frames are made. Larch and pine have a “life” limit of 25–35 years, beech and oak have a lifespan of more than 50 years .
Restoration will not meet your expectations if:
- there is complete loosening of the window frames in the openings;
- the wood of the windows has dried out;
- the structure of the wood looks loose, when pressed, dents remain;
- dark spots appear under the paint (underneath them, as a rule, is rot and rot);
- windows are seriously damaged (frames are split, etc.);
- a visual inspection shows that the frames are bent or severely deformed during operation.
Before restoration, also pay attention to the fact that the wood must be dry.
Photo gallery: materials needed to repair old wooden frames
Using a primer will significantly extend the service life of wooden windows. Alkyd paint is considered the most popular when painting window frames. The film will not only retain heat, but also protect the room from unwanted light. In most cases, the tubular seal is equipped with an adhesive strip, which greatly facilitates its installation on the window frame. Silicone sealant for windows will allow you to get rid of even the smallest cracks Paper strips can be bought, although it is not at all difficult to make them yourself Treatment with an antiseptic will protect windows from mold and mildew Putty allows you to eliminate cracks and chips on old frames Using metal corners you can correct the geometry of the window
How to repair a wooden window with your own hands?
Let's start by understanding the definition: window repair or restoration are similar works that have no fundamental differences; they involve cleaning, filling, painting, sealing and insulating windows. Painting windows does not belong to repair work, but rather to restoration work, since it does not affect the functional qualities of a wooden window. Only the appearance changes.
Depending on the degree of wear of the windows (frames, glass and fittings), the approach to carrying out restoration work will differ.
The technology for repairing wooden windows is quite simple, but requires scrupulous execution of each stage of work.
Removing old paint from window frames
Paint can be removed thermally or chemically.
Thermal method
To perform thermal cleaning, we will need an industrial hair dryer (heat gun).
It is best to remove old paint using a hair dryer
Do not try to heat up wood with a hair dryer. It will not give the desired temperature (200°). Also, do not use a blowtorch or propane torch - you will only char the surface!
On an industrial hair dryer, the temperature is set in the range of 200–250° . It is not necessary to go higher, as this will lead to a loss of quality of the material. It is advisable to put a narrow nozzle on the heat-generating hole, which will prevent the glass from heating up. They should be included in the set of such heat devices.
The frame needs to be placed on a narrow edge and rotated as needed. We consistently heat up sections of 20–30 cm, while keeping the hairdryer at a distance of 10–15 cm from the frame. When the paint begins to bubble, remove it with a spatula or shoe knife.
After heating with a hairdryer, the paint is removed from the wood with almost no effort.
Remember that the hair dryer quickly overheats, so follow the regime: 5 minutes of operation - 10 minutes of cooling.
You should not use a sharpened spatula; it will slip over the old paint or, conversely, cut into the surface.
Chemical method
The chemical method is effective only with a small number of layers of old paint. A special reagent, which is sold in hardware stores, is applied to the surface and left for a certain time according to the instructions. Then remove the softened paint with a spatula and rags.
The substances used are toxic, so it is better to do the work outside (or on an open balcony). Also remember about protective equipment: gloves, respirator, goggles.
Impregnation
The next stage of work is impregnation with drying oil. The purpose is to prevent the germs of rot killed by heat or chemicals from developing again, and to restore as much as possible the structure of the old wood. As a quick fix, for several years before the next repair, impregnate the parts with a brush on all sides 3-4 times; the next one - after the previous one is completely absorbed. Before subsequent impregnation, the surface of the part should not be touched.
They are impregnated for centuries in a special device: a piece of 100-120 mm steel pipe welded at one end. It is installed obliquely at about 30 degrees; It is advisable to use a welded goat from a corner so that the pipe does not roll off. The operation is performed only in the open air, away from residential buildings: in the yard, in the country. You should definitely have a burlap or fiberglass mat on hand: drying oil can catch fire. You need to know this in advance, and not be afraid, but immediately throw a felt felt over the neck of the pipe. When it goes out, you can continue.
Drying oil is poured into the pipe 3/4 full and heated from below with a hairdryer or a stream of hot air from an electric stove. As the drying oil heats up, it will begin to bubble: moisture evaporates from it and air comes out. If the smell of drying oil suddenly intensifies, move the heater away, wait a little and continue heating. When there are no more bubbles, you can begin impregnation.
Caution: Never look directly into the neck of the pipe or lean over it! You need to watch the drying oil from the side sideways.
For impregnation you will need a 5-6 mm steel wire hook with a pointed end. The part is placed in a pipe and pressed down with a hook for 3-5 minutes, then, hooked with the tip, it is removed and placed on the table to dry. Do not grab the parts with your hands, even with mittens: hot drying oil with a temperature of over 130 degrees will drain from them.
Parts made from the most common pine treated in this way last outdoors for 150 years or more, while those painted with oil paint require repainting no more than once every 15 years.
Putty and primer
Before carrying out this operation, you should carefully examine the window and use a marker to mark all cracks and chips, and then use sandpaper to eliminate obvious roughness. All detected cracks and irregularities should be treated with oil or latex putty.
The puttying process should be given special attention, since the heat-saving properties of windows directly depend on its quality
A rubber spatula is used to complete the work. Excess putty should be removed immediately; after it hardens, this will be problematic.
Wood putty has a certain drying time according to the instructions, which must be maintained.
As soon as the first layer of putty has dried, if necessary, apply a second one. When the second layer has dried, you should go over the putty surfaces with fine-grained sandpaper.
Geometry straightening
The appearance of drafts when the window is closed, increased audibility of street noise, as well as squeaks and significant physical effort required to open or close the window are typical signs of broken window geometry. Check the geometry of the valves, adjust them if necessary and secure the result by installing metal corners.
Please note that window geometry does not always have to obey the “right angle” rule. If, for example, the window frame itself is somewhat skewed, then it makes no sense to check the geometry of the window using a square. It is better to pay attention to how the window closes and opens.
The geometry is adjusted by adjusting the tension of the screws located in the window hinges. If, when closing, the window sash catches the frame, adjustment of the upper hinge is required. The lower hinge is responsible for moving the sash to the right/left.
Installation of corners
The corners can be screwed in with a regular screwdriver, but it’s faster and easier to do this with a screwdriver
Metal corners are attached to the joints of frame parts and have both decorative and fixing purposes. The correct location for the corners is on the inside of the window. Quantity: four pieces per frame. To install, first prepare the grooves of the required size using a chisel. We insert the corners into the grooves. We check the accuracy of the installation: we check the length of the frame diagonals.
Insulation
There are several ways to reduce heat loss from windows, using:
- paper for covering windows;
- silicone sealants;
- fabric strips;
- tubular profiles;
- seals in frame sashes;
- heat-saving film.
The last two methods are the most effective and aesthetically pleasing.
First, we treat the junction of the glass and sashes with silicone sealant.
Silicone sealant is excellent for insulating wooden windows
Then, along the perimeter of the sash, using a milling cutter at an angle of 45° in the direction of the flashing, we cut out a groove 5 mm deep and remove the chips from the channel. We consistently press the PVC seal into the resulting groove along its entire length, without stretching it.
To facilitate installation of the seal in the groove, you can use a special roller
The seal, in addition to protecting against drafts, provides additional sound insulation.
Recently, energy-saving film has been used to insulate windows. It is transparent, does not impair visibility and has a self-adhesive backing.
Energy-saving film not only saves heat, but also protects the room from excessive sunlight
Its functional features are as follows: the film allows daylight to pass through, but prevents heat transfer from the room, which allows you to save up to 60% of the heat escaping through the windows. The method of applying each specific film is described in detail in the instructions supplied with it.
Window finishing
Before painting the frame, it should be soaked with an antiseptic. This will avoid fungal infections and rotting. If the climate of your region is quite dry, then the antiseptic may not be used. Then priming is carried out. Alkyd, acrylic and polystyrene primers are considered the most suitable for wooden frames.
| Alkyd | It is based on zinc phosphate or zinc chromate. The first is usually used before painting the frame with alkyd paints. |
| Acrylic | Dries quickly, but is not suitable for priming metal window elements. |
| Polystyrene | It is effective, but toxic, so it can only be used on the outside of the frame. In this case, priming is carried out layer by layer (usually two layers are enough), maintaining the drying time set out in the instructions. |
After the primer has dried, the frames can be painted.
There are three different types of paint you can use:
| Alkyd | The oils and resins that make up its base actively prevent fading and deformation that occurs due to temperature changes. In addition, after painting the frames can be washed with any detergent. White spirit (less often drying oil or turpentine) is used as a solvent. |
| Acrylic | It is based on water and polymers. It is quite resistant to the sun, precipitation, and abrasion. By adding color you can choose the desired shade. There is no unpleasant odor. Dries quickly. Plain water can be used as a solvent. |
| Dispersive (water-based) | The main advantage is the ability to repaint the surface of windows many times without removing layers of old paint. Has good resistance to fading. Inexpensive. Solvent – water. |
Painting windows is a simple process, which, however, requires some care.
It is advisable to paint windows in two or three layers. Dilute paint correctly with solvent. It is better to do this as you use it. For example, pour 300–500 grams into a separate container and mix there. Optimal density allows you to create a clean, uniform layer that does not spread.
For the first layer, it is advisable to use a thinner consistency of paint. Do not try to cover up all visible defects at once. The first layer is partially absorbed. Be sure to let it dry thoroughly, otherwise the second layer applied to a damp surface will become covered with wrinkles and bubbles.
To avoid the unpleasant procedure of removing paint from glass, use a special masking tape and stick it on the glass close to the frame in advance.
If you don't want to paint the frames, you can simply varnish them. Varnishing happens:
- Opaque - using pigmented varnishes that completely hide the texture and color of the wood;
- Transparent - a colorless varnish is used for it, preserving the natural appearance of the wood.
Of course, there are other types of finishing for window frames, such as imitation and special. They are quite labor-intensive and require a certain level of professional training, as well as the use of special tools.
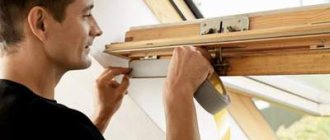
After the finishing coating has dried, if necessary, new window fittings are installed. The process of replacing hinges requires comment here. First, we correctly determine the place of their attachment. For this purpose, we insert the frame into the opening and fix it with wedges. Only when an equal gap between the frame and the opening is achieved along the entire perimeter do we mark the locations of the installation points. Using a chisel, we make a groove for future seating of the hinge and screw in the screws.
Price for work
The cost of restoration work can differ several times, or even dozens of times. This is due to restoration projects, the most expensive work is with wooden blocks located on historical sites.
For private and apartment buildings, the final cost of restoration will always be less than the purchase and installation of a new window block and depends on the area of the block, the source material, technical condition and number of floors.
Average cost of restoration of wooden window blocks in houses built 1960-1980.
- double-leaf with separate binding, 9,000 rubles;
- three-leaf with separate binding, 14,000 rub.
- double-leaf with double binding, 8200 RUR;
- three-leaf with paired binding, 10,500 rubles;
- balcony block, 12,000 rubles;
- restoration of slopes and window sills, 1500 rub.