From time immemorial, after a hot steam room, visitors to a traditional Russian bathhouse hurried to cool down, and did it in different ways: some in a snowdrift, some in an ice hole, and some under a pouring bucket. Nowadays, in times of progress and high technology, you can cool down and wash off the sweat of work in the bath in a much more convenient and comfortable way. A shower cabin for a bath is an excellent effective tool in this necessary task. Let's meet and choose.
Creation Rules
Water from the washing room to the drain tank passes through a pipe that is installed in the trench.
The ditch is dug at an angle of 20 degrees. To avoid blockages, solid parts without seams or corners are used for showers in the bathhouse. If the soil freezes to 1-1.2 m in winter, then the sewerage system is insulated with glass wool or expanded clay. Arrangement of drain pipesSource septik27.ru
The section of pipe entering the bathhouse is covered with a plug. The perimeter of the drain structure is covered with a thick layer of crushed stone, creating a slope towards the tank. The trench is filled with concrete mortar. To increase strength, use mesh.
The drain hole inside the shower in the bathhouse is installed near one of the partitions or in the corner. After the screed has dried, remove the plug and install the filter. After completion of the rough work, they are tiled or a pallet is placed.
If a washing room in the bathhouse is not provided for in the plan, then the floor covering in the room is dismantled for the installation, and part of the soil is removed. After installing the sewer pipe, slats are installed under the logs, which make a slope of 20 degrees. The boards are returned to their place, a drain hole is cut in the upper part. The floor is filled with reinforced screed, then the finishing is laid.
Shower in the bath: design
The design of the shower is determined by the style of the bath itself. In fact, there is not too much choice here.
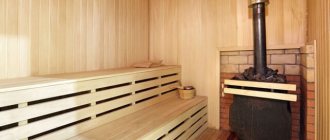
The simplest option is a ready-made shower stall. Despite the utilitarian “technical” appearance, such a product looks equally good in a tiled room, a wooden one or a log house.
Russian - most often does not involve a shower, but a “bucket-waterfall” - necessarily wooden and voluminous. However, the latter can serve an exclusively decorative role. In such cases, it is better to hide communications and the shower itself as much as possible: only the watering can, holder and valves remain visible on the wooden walls.
Finishing with tiles allows you to get a shower in any style except rustic. To do this, just select the appropriate type of ceramic tile. If a techno or hi-tech style is implemented, communications along with shower accessories can be safely left in sight. However, in this case, metal pipes must be used or at least given that appearance.
Loft and even modern modern assume one brick wall next to tiled walls.
Cladding with artificial stone turns the shower into an accessory from an oriental fairy tale. This is the most expensive and most effective option.
Conclusion
You can arrange a shower in the bathhouse with your own hands. Moreover, it is possible to use several installation schemes, different water heating tanks and even different methods of water supply. However, some work - for example, connecting a gas heater for a warm shower - should only be carried out by specialists.
Recommended Posts
Wooden doors for baths
Abash for baths
Bathhouse project 7 by 7
Changing room in the bathhouse: design, photo
Bathhouse made of sip panels
Bathhouse made of cinder block
Artificial and natural stone
Finishing the sink with stone is a practical and durable option. The material is suitable for cladding floors and wall surfaces up to 50 cm in height. An excellent solution for finishing a shower is a combined masonry made of natural and artificial stone.
Natural stone has a number of advantages:
- high environmental friendliness and safety;
- practicality and durability;
- inertness to mechanical damage;
- resistance to high humidity;
- attractiveness and aesthetics.
Among the disadvantages are:
- heavy weight;
- the difficulty of doing independent masonry;
- high cost.
An alternative to expensive natural stone is its artificial counterpart. It is less environmentally friendly, but at the same time lightweight and easy to install.
Finishing the shower in the bath
- Step by step, starting with pouring the foundation and ending with arranging the interior, you will be able to organize a bathhouse with a washing room. Where not only cool but also warm water will be used for aqua procedures.
- Resolving issues with water splashing and ventilation systems can be a way to purchase a shower stall, where all this is provided for by its design. This solution is easy, but expensive.
- Another rinsing option can be a bucket of water installed using a special hinge mount. Such a “system” does not lack pumps, water heaters, or power supplies. Usually, dousing buckets are installed in bathhouses with showers, where space is very limited. But the absence of the benefits of civilization will not prevent you from taking the wave function of cool or previously warmed water. Buying such a shower for a bath can cost 6 thousand - fifteen thousand rubles.
conclusions
The process of arranging a bathhouse with a toilet and shower is quite difficult, since it requires certain knowledge and skills. Such work should be entrusted to a professional, since only a knowledgeable person can install a shower in a bathhouse without running water quickly and efficiently. But if you decide to take on the task of arranging a washing room yourself, then be sure to adhere to the algorithm of actions presented above, and also do not forget about the basic rules of your own safety.
Heating methods
You can get hot water for showers using:
wood column; large capacity electric boiler; geyser; bake.
To install a wood-burning heater, you need to provide a water supply system and a chimney in the room. Such equipment consists of a steel tank, a heating furnace and a mixer. The water in the column will heat up quickly. It can be heated using any type of fuel, excluding coal. It is great for small baths. The tank volume in such equipment is about 90 liters.
Gas water heaters are economical. In addition, modern devices are safe: when the wick goes out, the fuel automatically stops supplying. But before installing it, you need to obtain permits from specialized authorities. Installation of such a column is carried out as follows:
- First, a hood is installed: a hole is made in the ceiling or wall into which an asbestos pipe at least 1.5 m long is inserted.
- a column is mounted under it, screwing the device to the wall with dowels;
- the column, chimney or hood is connected using corrugations, after which gas is supplied to the structure;
- a tee is cut into the gas pipeline and a pipe through which gas will circulate is attached to it with clips.
It turns out a column with gas, but without heating the water. To provide a bathhouse with hot water, you need to insert a tee into the water supply, mount a faucet, install magnetic and salt filters next to it, and then connect the structure to the water supply.
All that remains is to test the safety and performance of the device. To do this, you need to open the gas and use a soap solution to check for leaks at the tap and joints. After this, you need to check the water supply in the same way.
If the bathhouse is quite large, then a gas or wood-burning water heater will not be able to heat enough water, so it is better to purchase a boiler. It is advisable to choose a model with heated water in the tank, then you won’t have to drain it at night. The presence of a thermometer will simplify the operation of the device.
To connect the boiler you will need:
- electric heater 2 kW;
- cable from the distribution panel;
- circuit breaker;
- RCD.
Connecting the water heater to the water supply is carried out as follows:
- A safety valve is placed on the pipe. It is responsible for admitting cold water into the boiler. The device cannot be used without it.
- Using flexible pipes made of copper or plastic, the boiler is connected to the water supply.
- After this, the valve opens to fill the tank with cold water.
- Then you can turn on the tap. If hot water flows out of it after filling the tank, then everything is in order.
Connecting the device to the power supply is carried out as follows:
- After a power outage in the network, the wires of the device are connected to it in compliance with polarity.
- At the end, a ground wire is connected.
- The lid of the device is closed, after which the heater is connected to the network.
In this article you will find more details about connecting an electric boiler to the water supply and electrical network.
It must be remembered that the tank cannot be connected to electricity if it is not filled with water.
Brick stoves produce the softest steam, so they are often used in baths. Of course, it is better to have the oven installed by a professional. Therefore, those who want to equip it indoors need to invite a stove maker. But lighting a stove is quite troublesome, and many today prefer to use boilers or water heaters.
Assembling doors and curtains
After the floor in the booth is made, you can begin installing the doors. Moreover, after making the floor, you can purchase everything else ready-made, or you can assemble everything yourself from purchased components. It all depends on your financial capabilities, desires and creative abilities.
Plumbing stores have a huge assortment of both ready-made shower stalls and various parts and fragments for them. Therefore, you can buy ready-made curtains, or you can assemble them yourself.
First you need to decide which type of door is most suitable and convenient for you. As mentioned above, they differ in type, design and materials. If your space allows, you can make hinged doors. The number of sashes can be chosen according to your taste and discretion. You can also choose any material - plastic, glass or plastic. Sliding doors are also easy to assemble from components or buy ready-made ones.
If you have skillful hands and are at least a little creative, then you can easily design a shower in a bathhouse yourself. Do not forget that you will need tools - a hammer, screwdriver, drill, screws and bolts with nuts, as well as materials - cement and sand.
Return to content
How to make a wooden shower in a bathhouse yourself
If you want to make a wooden version of a bath shower, it is easy to make and install it yourself. This rather simple and convenient design will bring you many pleasant minutes after the steam room.
- First, boards 99 cm long are marked with lines, departing one from the other by 9 cm
- Then two 0.3 mm holes are drilled in each square. They should be located diagonally.
- The boards for the rear wall are laid on a flat surface, on top of which the transverse boards are placed. Then, using self-tapping screws, they are secured at a distance of 50.5 cm.
- A semicircle is drawn using a rope tied to a nail driven into the center
- Now carefully cut out this arc with a saw or jigsaw.
- We measure the distance from the upper edge of the future back wall 40 cm and drill a hole where the water pipe will be located in the future. The pipe is inserted into the pipe and clamped with two nuts on the board in the center.
- On the outside, a decorative metal washer is put on the squeegee, and on the back, a plug is screwed onto it.
- The copper water pipe is connected to the tee and, using two clamps, attached to the shower wall
- On the opposite side, a fitting is attached to the pipe to attach a watering hose
- In the back wall of the shower stall at a height of 65-70 cm, a 0.35 mm hole is drilled using a core drill
- For the floor in the shower, boards 1 m long and transverse boards 95 cm long are taken. The same thing is done in the same sequence as originally. When laying the boards, make a gap of 5 mm to allow water to drain.
- The shelves are made from 63-centimeter boards, cutting off the corner of each of them
- To assemble the side wall of the cabin, boards and a 63-centimeter long crossbar are taken. The latter is placed 15 cm above the floor. Then a shelf is placed at a height of 70 cm.
- Using self-tapping screws, another shelf is attached to the outside through the holes made in the boards
- In the lower corner of the wall, drive a nail with twine and mark an arc R = 1 m
- To secure the side walls of the booth from the back, you will need a board screwed strictly perpendicularly with self-tapping screws
- First, the side and rear walls are fastened with clamps, inserting a floor board between them
- Now three 0.5 mm through holes are drilled into the boards, which also pass through the boards for the back wall. Now furniture screws are inserted into the holes and secured with nuts on the other side.
- The final stage of manufacturing the booth is painting it with a protective antiseptic and paint or varnish.
Now that you know what shower cabins are for a bath, how they differ in type and design, you can begin purchasing and installing the design that is most suitable for you. Everything will depend on your decision - buy a ready-made one, assemble it from components, or do it all yourself.
Shower boxes of this type are a very convenient and useful thing. If you find a little time to arrange your sauna, you will enjoy many years of pleasant moments of relaxation and rest after work.
How to heat water for a shower in a bathhouse
Water can be heated using a storage tank located on the chimney
There are several ways to heat water in a bathhouse. The appropriate one is selected depending on whether the building has electricity and how many people need to be served in one procedure.
For electric heating, flow-through and storage heaters are suitable. The second option is less demanding on the water supply and electrical network. Another way is to use a heat exchanger in a wood stove and a remote tank for hot water. Whenever using such devices, one should not forget about electrical safety.
Heating from the stove is good because it allows you to provide visitors with water without using electricity. The classic way is to use a wood-burning unit. There are also modifications such as fixing the tank to the pipe and using a remote container heated by a heat exchanger.
Types of shower cabins for baths
Photos of washing machines in a bathhouse
A simple cabin can be installed between two walls, and any suitable one can be chosen as a door. The most popular in Russia is a regular pallet - it is much cheaper than cabins, more reliable and simpler from a technical point of view. The shower room in the bathhouse is equipped with trays made of various materials.
Acrylic tray
There are types:
- Enameled steel is strong and lightweight, but over time it develops rust. They rattle due to the strong pressure of water;
- Earthenware or ceramic pallets - have high decorative qualities;
- Marble ones are the most expensive;
- Enameled cast iron - heavy but durable;
- Acrylic pallets require installation on supporting legs, as they can sag under weight.
Simple shower in a wooden bath
The closed shower cabin for a bath has a complex design; it is equipped with additional accessories and is installed in the washing room. Most often, it is customary to install it where a centralized sewerage system or septic tank is available, as well as a full water supply.
Another type is a shower room with a Turkish bath. It differs from the Russian one in that steam is supplied to the cabin. It is produced by boiling water and thrown inside through a specially installed nozzle.
The steam generator is located behind the shower, and the humidity level is controlled using special devices - a hygrometer and thermometer. Shower box with Turkish bath is sold as a set.
Self-installation of a shower in a bathhouse
Shower in baths is convenient
Heating water for a shower can be done either with or without electricity. In the first case, a flow-through storage water heater is installed.
Cold liquid is supplied into it under pressure, but to achieve a comfortable temperature it is important to meet the following conditions:
- Device power 8 kW;
- The pump should handle up to 8 liters per minute.
Often these conditions are not met, and it is better to give preference to a storage heater or a stove with a tank. A septic tank is installed under the bathhouse - a multi-stage chamber for collecting wastewater, to which an asbestos pipe is connected.
Hot water supply in the bathhouse
Instructions for assembling the shower cabin:
- Install a pallet or lay it out of tiles;
- Connect it to the drain hole;
- Install faucets for hot and cold water;
- Check the sealing of nearby walls and floors;
- Strengthen the metal arc for the curtain.
Note! The size of the shower in the bathhouse depends on personal preferences, but when assembling it yourself, it is important to add up to 30 cm to the height and up to 15-20 cm to the width.
Features of the interior of the bathhouse
Decoration of the washing room in the bathhouse
It is difficult to imagine a bathhouse without modern amenities, which include a relaxation room, toilet, swimming pool, billiards and kitchenette. A good bathhouse is like a small entertainment complex for family, friends and acquaintances.
Particular attention is paid not only to the design of rooms for communication and games, but also directly for washing. And finishing the shower in the bathhouse can turn this corner into a fabulous place with an original waterfall.
The standard structure of a bath includes a dressing room, a steam room and a wash room. Each of these rooms is decorated differently depending on the style of the bath itself. It is not uncommon for a shower to be installed in the washroom, especially in bathhouses located in summer cottages.
It is necessary to plan all the necessary elements and internal arrangement before starting work. You can install a standard shower cabin for a bath, the price of which sometimes reaches several tens of thousands of rubles, or get by with an ordinary pallet, but it is much more interesting to feel like a designer and decorate the interior space to your liking.
For a non-standard design of the washroom, you can use different decorative finishes; preference is given to natural materials - stone, wood, unfired tiles. The main thing is to create a finished image that is close to you.
Different directions of bath design
Country style
There are an endless number of options for decoration and it comes down not only to the selection of accessories and furniture. The interior of a shower room in a bathhouse can have a different style. For example, country style involves finishing the shower with solid wood, hiding all communications behind decorative details.
What types of finishes are there and where are they used:
- The most common building material is lining. Coniferous species are suitable for the dressing room and auxiliary rooms. Deciduous – for steam rooms and washrooms;
- Ceramic tiles - they are used to decorate the part of the room where the shower bath is installed;
- Plastic is used only in the pool, recreation room, kitchen and billiards, if any;
- Metal parts and glass are present in minimal quantities as accessories;
- Natural stone, marble, mosaic, stained glass - are used to decorate walls and ceilings in washrooms and directly for showers.
A creative approach will help you fit into the interior a stylish shower stall with the most modern functions. A floor made of ceramic tiles without a glossy finish, oak benches, and walls trimmed with natural stone will create an atmosphere of rustic style.
You can create a bright, unusual atmosphere in the washroom with the help of a mosaic, if you decorate with it the part that is reserved for the shower. Mosaic tiles are sold in specialized stores; you can use them to lay out any pattern, for example, an oriental pattern, with your own hands.
A standard shower cabin will not fit into the interior of a Russian-style bathhouse. Here you need to use your imagination to give the room an individual character. This style is characterized by walls made of logs, wooden benches, barrels of water and a dousing bucket instead of the usual shower.
Making a shower cabin
Option 1 - do-it-yourself shower for a summer house made from metal corners
The shower stall should be spacious enough, its minimum dimensions: 1 x 1.3 x 2.2 m. The dimensions 190x140x250 cm are more convenient, since together with the thickness of the walls it comes out to 200x150x250 cm, and for board sizes this is a waste-free option.
- Make a frame from 30*30 mm corners connected with reinforcement with a diameter of 12 mm.
- Concrete the bottom trim.
- Attach wooden blocks to the vertical corners; finishing material will need to be attached to them.
- The shower stall (the resulting frame) can be finished with anything: wood, plastic, plastic film, waterproof fabric, plywood, polycarbonate or tarpaulin.
Option 2 - do-it-yourself shower cabin for the dacha made of timber
- Site marking.
- Installation of racks made of 100*100 mm timber for the tank, pre-tarred or wrapped in roofing felt, tarred with tar or waste machine oil, and deepening them by 1300 mm.
- It is advisable to concrete the racks.
- Next to the booth we make a changing room (dimensions 100*90 cm) and a washing room (dimensions 100*130 cm) (racks for them). General dimensions of 190x140x250 cm are more convenient, since together with the thickness of the walls it comes out to 200x150x250 cm, and for board sizes this is a waste-free option.
- Construction of the upper frame: assemble the frame on the ground, lift it and secure it at the ends with capscrew bolts.
- Make a platform for the tank - it is highly desirable that the washing area is not under the tank, but in front.
- Construction of the lower frame, also the base for the floor.
- The floor can be made of boards, packed at intervals of 5-10 mm, or a grate can be placed on a concrete floor with a slope towards the drain. It is advisable that the floor be at a height of 100-150 mm from the ground.
- If you don’t want to make a floor with cracks from which air can blow, you need to make a half-pallet.
- The dressing room and washing area are separated by a high threshold and curtain.
- The door is hung with hinges on a beam attached to the casing. It is better not to make it close to the box, because it may swell, but to achieve tightness, use a double sealing circuit.
- For wall cladding we use asbestos cement sheets or boards treated with drying oil
- You can make a window for ventilation and a light source opposite the door.
- The shower can be sheathed with moisture-resistant plywood, coated with glazing antiseptics or drying oil and painted with oil paint. You can also nail clapboard, siding, fiberboard, or roofing felt sheets onto the frame.
- The frame can be insulated with expanded polystyrene, covered with a film on top (vapor barrier + moisture barrier), attached with a stapler. You can finish the inside on top of the film.
Option 3 - a major shower for a summer house with a foundation and lighting
Foundation
Fill a 300*300 mm trench around the perimeter of the site with a solution of 1:3:5 (cement:sand:crushed stone). Before this, the sand needs to be sifted, and crushed stone taken smaller with a diameter of 5-20 mm. After hardening, if necessary, level the foundation.
Walls
The mortar for masonry walls is 1 to 4, it is better to use cement M500. Plumb masonry in a checkerboard pattern of half a brick. First, the corners are laid out in three or four rows, then the horizontal line is laid out along the level line. Use a level throughout the entire laying of the walls.
Roof
A 50*100 mm beam is installed on edge on the walls, then two more rows are erected so that the beam is inside. Then a metal sheet is laid and attached to the beams.
Interior decoration
The walls are finished with tiles, which are laid on a special tile adhesive or a solution of M500 cement and sand 1 to 4.
You are your own master! Making a shower stall with your own hands
If you have skillful hands, and you feel the strength to make a shower stall in a bathhouse at the dacha, then with simple skills, this is very possible.
First you need to decide what flooring will be in the shower. You can choose the option with a pallet, but you can also make it simpler - an inclined floor. If you follow all the rules and do the work carefully, such a floor will be reliable and will last a long time.
Before making a shower in the bathhouse, decide on its location.
Now you need to make a recess in the floor for future drainage of water (drain). Then, before laying the tiles, be sure to insulate and seal the floor to prevent water leakage. Moreover, the insulation under the tiles is a system of several layers. First comes the concrete base. A foam thermal insulation layer is placed on top of it. Then a two-layer concrete “pie” with a waterproofing layer between the layers.
And only the tiles are laid on it, with a slight slope towards the drain hole. Therefore, before you start making the floor, you need to take into account its height reserve of about 15 centimeters.
Return to content
Sequence of installation work
- A sewerage system is installed in the corner of the room where the cabin will be located. Then, on the already prepared concrete base, markings are made for the pallet and the location of the siphon is determined.
- Now a siphon is installed and tightly connected to the pipe going into the sewer. Another pipe is connected to a deaeration channel, which removes excess air when draining water.
- Next, foam plastic 5-centimeter thermal insulation is laid and adjusted to the siphon
- A 4-5 centimeter layer of concrete is placed on top and carefully leveled
- After letting the concrete layer dry, we lay the waterproofing layer, bending it onto the walls 15 cm above the concrete layer
- Two pieces are cut out of roofing felt. One is the size of a pallet, the second is half the size. A hole is made in the center of the small piece, where the siphon will then be inserted. This piece is placed on the drain and the siphon is tightly attached to it with screws.
- In the second, larger piece of roofing felt, a hole is cut with a sharp knife. The diameter of the hole should be slightly larger than the diameter of the siphon.
- Using a welding machine, it is necessary to heat both pieces of roofing material and connect them to each other and to the pallet, observing safety precautions
- Pre-cut pieces of roofing felt in the form of strips are laid with a reserve on the walls, they are also heated and pressed tightly against the walls and floor
- After laying the insulating layer, a drain grid is inserted into the siphon
- We form an inclined floor for the pallet. To do this, we install formwork from boards, and the floor level near the walls should be several centimeters higher than the place where the drain is located.
- We lay concrete into the formwork prepared in this way and carefully level it, first closing the siphon to prevent it from becoming clogged with mortar.
- For additional insulation, we attach a special self-adhesive insulating tape along the edges of the pallet, after moistening the surface for better adhesion.
- Now that everything is ready, you can lay the tiles. It is mounted starting from the drain in all directions to the walls.
If you decide to make a floor option in your booth with a ready-made pallet, then when purchasing it, pay special attention to ensure that it is equipped with all the parts necessary for installation.
- Special legs are attached to the bottom of the pallet. It is better to place a piece of cardboard under each leg.
- Before installing the tray into the floor, carefully smooth all surfaces with a chisel, removing all sharp edges
- Don't forget to check the angle of the room. It should be 90°. This is easy to do using ceramic tiles. An indirect angle needs to be leveled.
- Sewage pipes are installed until the socket opening coincides with the drain
- Now all that remains is to carefully install the tray horizontally and adjust the legs
Return to content
Wall decoration
There are many known materials that can be used to cover shower walls. Each of them has certain characteristics, strengths, and weaknesses.
Material selection
The choice of material for finishing the walls in the washing bath depends on the style of the room:
- Traditional Russian style - timber, lining.
- Modern loft - brick, ceramic tiles. Communication must be open to match the style.
- Mediterranean style - a combination of ceramic tiles with natural stone.
- Roman style - a variety of mosaics that decorate columns.
Wood
More often, steam rooms and showers are lined with wooden clapboards. Advantages:
- installation work can be performed by a person even without practical skills;
- attractive appearance;
- resistance to mechanical damage.
Flaws:
- Some types of wood release resin when heated strongly.
- If the lining is not impregnated with a special antiseptic composition, it will gradually become covered with mold and mildew.
The main advantage of wood is that it does not emit harmful substances when heated strongly.
Ceramic tile
For steam rooms, ceramic tiles cannot be used as a finishing material. It becomes very hot and can cause serious burns. At the same time, ceramics are suitable for showers. Advantages:
- durability, high strength;
- easy cleaning of the surface from dirt and dust;
- high resistance to mechanical damage;
- resistance to various chemicals.
Ceramic tiles have no serious disadvantages.
Natural stone
Using natural minerals, you can create a unique natural design that will appeal to many bathhouse attendants. For interior decoration of bathhouses, different types of stones are used - travertine, granite, marble, sandstone, quartz.
Advantages:
- attractive appearance;
- durability, reliability, resistance to damage.
Natural minerals are not suitable for cladding walls inside steam rooms. The stones become very hot and touching them can cause serious burns. In addition, minerals weigh a lot and require the use of additional fasteners.
Plastic panels
Plastic is a popular material for finishing bathtubs and showers. PVC panels can be purchased at a hardware store. Advantages:
- fungus and mold do not form on the plates;
- plastic is durable and does not deteriorate from water;
- the material does not emit harmful substances to the body;
- You can find different types of slabs in stores.
Disadvantages include the low resistance of plastic to strong heat, a gradual change in appearance with prolonged exposure to high temperatures.
Painting
The inside of the shower room can be painted. In this case, you need to assemble a frame from waterproof plasterboard on top of the walls. To build the frame, you need metal guides and connecting jumpers. The paint must withstand constant humidity and high temperatures without deteriorating.
The lining is nailed on top of the wooden walls using finishing nails. You need to nail the vapor barrier film onto the wall using wooden slats. Lining is stuffed on top
It is important not to drive the tenon completely into the groove. You need to leave a little space so that the tree can contract and expand during changes in temperature and humidity. Ceramic tiles and decorative stone are fixed with special masonry mortars. To secure plastic boards to vertical walls, you need to use metal or wood screws.
Methods for heating water in the country
The most difficult issue is heating the water in the washing room of the bathhouse.
You should take into account the frequency of use of the bathhouse, as well as its engineering characteristics.
Below are the three most common methods of heating water:
- Heating water in a steam room boiler. There are many boiler options available on the modern market. The advantages of these units include their relatively low cost, and the disadvantages are the ability to take a shower only simultaneously with bath procedures;
- Water heating using a separate boiler. A great option, and you can use the shower at any time. The disadvantages include the fact that the electrical network must withstand the power of this device;
- Heating water using a combined method. The most convenient method, since in this case the shower room is connected both to the boiler and to a separate boiler. Thus, you can switch the water supply depending on the conditions, that is, if taking a shower is carried out simultaneously with heating the bathhouse, then water is supplied from the boiler, and if the bathhouse is not heated, then from the boiler. The advantages include ease of use, as well as savings on electricity. The disadvantages are that the installation process becomes significantly more complicated, as does the water pipe system.
Features of choice
When choosing a wooden cabin for a summer residence, you need to pay attention to the following points:
- The type of wood from which the structure is made - it is desirable that the tree itself is strong enough and durable. For example, larch is an excellent option.
- Design – a wooden shower cabin for a bathhouse or a bathroom in a country house should fit well into the surrounding interior and at the same time look attractive in itself.
- The quality of the fittings, and this applies not only to such elements as a shower or faucet, but also to fastening rings, as well as other metal parts. They must be made of material that is not susceptible to corrosion.
- Complete set - like a regular cabin, this product can have an overhead and hand shower, as well as additional options.
Cabin with high tray
The depth of the pan - the convenience of plumbing depends on this. For example, if elderly people live at the dacha, then you should not purchase a structure with a high side that is difficult to step over. It should be noted that there are booths without a pallet at all. Their installation involves installing a drain directly in the floor. In this case, for convenience, use a wooden flooring for the shower stall, which is placed on the floor. The location of the drain and other nuances, which will facilitate the installation of the structure in the future
This is especially important if you are going to connect the plumbing yourself. Coating – to increase service life, some manufacturers treat booths with additional compounds. It is extremely important that the protective coating does not contain harmful chemicals.
Doors for wooden cabins - can be made of glass or other material
Some cabins do not have doors at all, as they are designed to use curtains. In this case, the choice depends solely on your own preferences.
Cabin with curtain
Here, in fact, are all the most important points that should be taken into account when choosing a shower stall made of wood.
https://youtube.com/watch?v=Ss8GuYarCJQ
Choosing a shower cabin with a Turkish bath
Having decided on the technical characteristics of the steam generator, you can select a cabin that meets your needs in size and appearance. Like regular models, hammam designs vary in size. To ensure that your body does not come into contact with the walls and especially metal parts during procedures, it is worth choosing a cabin with dimensions of at least 100*100 cm. In such a space, even a large person will not feel cramped and will be able to make active movements. Another factor to consider is the presence of a seat. If a shower requires a short stay in the cabin, then it is hardly possible to enjoy a bath within 5-7 minutes. In order for the body not only to steam, but also to be saturated with moisture, you need to spend at least 20-30 minutes in the steam room. Standing on your feet all this time is not the best solution. It is much more comfortable to be in a sitting position, when you can relax and truly enjoy the procedure. The seat will make the bathhouse safer - it makes it much easier to treat many parts of the body.
A fundamental point that seems unimportant to many buyers is the features of the doors. If the doors do not fit tightly or close poorly, steam will leak out. This will lead to both a decrease in temperature and a decrease in humidity. As a result, the effectiveness of the procedures will decrease and the very essence of the bath will be lost. It is believed that a better solution would be a cabin with sliding doors, ensuring complete isolation of the internal space.
It would not be amiss to make sure that there is a convenient and understandable control panel, which manufacturers provide designs with for greater comfort. Using this panel you can regulate the temperature, steam volume, and steam supply speed. More expensive models provide the ability to change the lighting, turn on the radio, ozonate the air, etc.
Installation principles
To independently install a shower in the washing room of a bathhouse, you do not need to have practical skills. It is enough to familiarize yourself with the theory, correctly connect the tubes for supplying and discharging water.
Preparation and design
You need to prepare the room: install a water drain and a liquid supply point. Select a method for heating the liquid. Install a boiler or flow circuit.
Tools and materials
To install a shower stall in a bathhouse, you must prepare:
- set of wrenches;
- plastic tubes of different diameters;
- hoses, clamps;
- anchor, hammer drill.
After preparing the tools, you need to choose a shower stall.
Choosing a shower stall
The choice of shower stall depends on the size of the room:
- if there is enough space inside the washing room, it is better to choose a shower with hinged doors;
- For small washrooms, the best option is a special small-volume tray or a design with folding doors.
If a bath attendant wants to spend time in the shower in comfort, it is better to choose a closed model. If you just need to wash quickly, open it.
Installation
The shower stall must be installed on a level base. To prevent it from shaking and to stand steadily, it is necessary to nail the legs under the base to the concrete floor with anchors. Hoses, tubes, drains should be arranged as indicated in the instructions. It comes complete with a shower stall.
Sequence of actions in the washroom
Work on installing a shower in a bathhouse is carried out according to a certain algorithm src=»https://rubanya.com/wp-content/uploads/2017/10/2-1.jpg» class=»aligncenter» width=»400″ height=» 266″[/img]But before you begin the process itself, you should decide on the following:
- You need to decide on the location of the shower;
- It is necessary to arrange a cold water supply;
- From the previous paragraph comes the need to arrange a drain for water;
- It is also very important to choose a shower tray or shower cabin;
- The shower requires not only cold but also hot water. That is why you should take care of installing water heating devices;
- Among other things, you should decide on the material of the water and sewer pipes.
Choosing the type of foundation
A bathhouse with a shower in the country is a lightweight object and allows the construction of one of the following types of foundation:
- strip shallow foundation;
- pile-screw;
- columnar.
You can do without a foundation at all; this option is suitable for building or purchasing a mobile bathhouse with a shower for your country house.
The construction of a mobile bathhouse differs from the traditional version in the absence of a foundation. This design is installed on a car trailer and can be easily moved if necessary. Inside the mobile bathhouse it is easy to organize a shower, steam room and a small relaxation room.
Furniture and other equipment
Before planning the arrangement of the washing room, you need to think about what equipment will be there, and also whether a layout is being made with or without a shower. The standard set of furniture includes:
- shop;
- a barrel of cold water;
- shower;
- sink;
- hooks for clothes;
- mirror;
- shelves on which towels, detergents and washcloths are stored.
When setting up a washing room, you need to properly organize the interior. To do this, it is necessary to avoid the most common mistakes that occur when planning premises.
- You should immediately take care of how heat will be supplied to the bathhouse. If it does not warm up sufficiently, then additional construction work will require considerable investment.
- If ventilation is not thought out, then problems with dampness and mold cannot be ruled out.
- It is best to avoid smooth ceramic surfaces as they create the potential for herbs due to slips and falls.
- It is not recommended to cover the ceiling with plastic, since over time an unpleasant odor will inevitably appear, and the surface does not always keep its shape.
- You should completely abandon the use of tongue and groove boards. It causes the appearance of dampness and fungal microorganisms.
An original solution for a bathhouse - equip the washing room with a swimming pool
But you must immediately take into account that water will constantly pour out into the font, the moisture quickly evaporates, so constant heating will be required. If you want to have a pool whose area exceeds 3 meters, then for these purposes it is better to immediately provide separate square meters
For a country house option, the bathhouse in the washing room can have sun loungers, wall lamps and LED strips. All this creates additional comfort and makes the room more original.
When planning shelves for hygiene products, it is recommended to choose moisture-resistant materials, since after a bath session, soaps and shampoos will need additional drying.
If you wish, you can add a little greenery to the interior.
Washing room layout: shower, toilet, sink
In the process of drawing up a design for a bathhouse with a toilet and shower, you need to carefully consider the location of the washing room.
Important! The optimal location for the shower room is the room adjacent to the steam room.
The main thing is that the shower is located right at the exit from the steam room, in this case, after spending time in the steam room, you can immediately get into a cold shower.
The room should also not be a walk-through room, and if used year-round, it must be equipped with heating.
The choice of the optimal location is influenced by the supply of water supply and sewerage. Thus, the washing room should be located in a room adjacent to the toilet.
For technical convenience, you should place the shower in the washing room in the bathhouse near the main water intake points. This is done to avoid additional costs for pipeline installation.
The actual location in the room depends on the preferences of the bathhouse owner. It is optimal to place the shower stall in the corner of the room, or simply limit the space with a curtain.
The materials used in the bath also play a role. This is due to the fact that for the concrete floor in the washing room you can choose any booth or arrange a tray yourself.
If the question arises about a wooden floor, then you should install pallets from the store, specially designed for this design.
If you do not need to supply hot water to the sink, you can limit yourself to a wooden dousing bucket. In this case, you should take care of the tap, with which the bucket will be filled with water.
Advantages of the washing compartment
The washing compartment in the bathhouse is arranged in a separate area, fenced off from the steam room, dressing room and relaxation room. In small baths, all rooms are combined, and the washing area is separated from other functional areas by a decorative partition.
The combined option of a washing compartment with a steam room provides significant space savings, but makes the room less convenient to use.
The advantages of a separate sink include:
- the ability to create a unique and practical interior;
- possibility of accommodating a large number of people;
- the possibility of using wear-resistant and durable materials for internal lining;
- simplicity and accessibility of washing machine maintenance.
In a small-sized private bathhouse there can be two rooms: in one there is a dressing room with a relaxation area, in the other there is a steam room with a sink. A stove for a bath and an area for storing bath accessories are located in the steam room, a shower and benches for relaxation are located in the washing bath.
This design has some advantages, including:
- Economical consumption of fuel material for heating combined rooms.
- A laconic and practical interior, when a heater with an extended firebox can be installed in a steam room and washing room. This will provide simultaneous heating of the premises and hot water supply.
How to properly solder polypropylene pipes
Everything seems simple if you have experience, but soldering for the first time is scary.
It is necessary to mark the pipes before welding (see information below)
Step 1. Screw couplers to the front of the soldering iron to heat the internal or external surfaces of pipes and fittings. For showers, we recommend using Ø ¾″ pipes. The pipe is heated on the outer surfaces, the connecting elements (couplings, triangles, elbows, etc.) on the inner ones.
Preparing the soldering iron for work
Step 2. Connect the soldering iron to a 220 V network. On the body of the device there is a heating temperature regulator and two indicator lights. Green indicates that the soldering iron is ready for use, red indicates that the heating temperature is insufficient.
Turn on the soldering iron and wait until the green light comes on
Step 3. Set the temperature regulator to +250°C. Specific values do not play a big role; the degree of heating of the pipe is regulated by the holding time.
Step 4. Take the two elements to be connected and insert them each into their place in the soldering iron. Heat for approximately 5-9 seconds. The ends must fit into the heaters until they stop.
Inserting heated elements
We heat the couplings along the inner surface
This also explains why you should not use a soldering iron heating temperature table. We advise you to always set it to maximum - the pipe will warm up much faster.
Pipe heating table
Step 5. The surface of the heated plastic pipe should resemble thick sour cream. Once such softening is achieved, remove the elements simultaneously from both sides of the soldering iron.
Step 6. Connect the two heated planes together as quickly as possible, keeping them as level as possible. You need to hold it in the clamped state for 10÷15 seconds, the exact time depends on the heating temperature of the plastic. As you can see, almost all parameters and modes of pipe welding are determined not by instructions, but by the experience of the master. Experience will appear already on the second or third gluing, gain skills on unnecessary segments.
Sectional connection of PP pipes
Connecting heated elements
Installation of a shower cabin with a Turkish bath
It is impossible to find out whether a particular model has the ability to carry out bath procedures solely by appearance. A cabin with a Turkish bath has the same components as a regular one - a body with a fence and doors, a tray, a roof. The fundamental difference lies in the presence of a steam generator - a device responsible for creating the hammam microclimate inside the cabin. itself is a container equipped with an electric heating element and small holes. When water is heated, steam is formed, which enters the cabin through these holes. As a result of the distribution of steam using a fan throughout the cabin, the air warms up to 40-60 degrees and is maximally saturated with moisture. As a rule, the steam generator is located in the lower part of the cabin. This allows the heated air to rise upward on its own, thereby achieving more uniform heating of the cabin.
Features of shower cabins with a steam generator
The shower cabin with the “Turkish bath” function is equipped with a steam generator - a capacity with a capacity of 2-3.5 kW. Due to the electric heating element, the water in it is heated, releasing steam through the holes. Thanks to the fan, the steam is distributed throughout the cabin, creating a temperature from +45 to +60 degrees. It is impossible and not necessary to achieve a higher temperature in a home steam room, due to the presence of metal components. By adding aromatic oils to water, you can achieve an effect similar to that in spa salons. Shower boxes with a steam room effect provide a comfortable seat, because it takes 15-20 minutes to warm up. Along with the “Turkish bath” function, modern shower boxes have a lot of high-tech useful and secondary options:
- cascade and rain shower;
- hydromassage of feet, legs, back;
- backlight;
- music;
- Charcot's soul;
- aromatherapy, ozonation, etc.
Shower stall and drain
There are many options for a shower stall: from the simplest pipe built into the walls, along which a waterproof curtain “rides” on rings, to a super-modern (or not super) shower stall. From experience we can say that if a cabin is installed in a bathhouse, then it is the most primitive one - walls, a door and a tray, and in principle nothing more is needed. This is an option for those who do not want to bother with waterproofing adjacent walls and like quick solutions.
Bath shower with titanium
In general, if the layout does not provide for a separate small room for the shower, you can fence off part of the washing compartment where the drainage system should be organized. If there is no drain, you will have to arrange one.
If you plan to install a pan, it requires a separate concrete base with a connected drain pipe. The base is needed so that the plastic of the tray does not “walk” under the weight of a person, since most bath showers contain plastic products - they are inexpensive and, if installed correctly, are quite durable, and the plastic bends under the weight of even a not very large person.
If a tray is not provided and the floor is wooden, you need to protect it from water. To do this, galvanized metal is laid in the area where the shower stall will be installed, and the joints of the sheets are carefully sealed with silicone sealant (for example, Ceresit CS 25). Screed reinforcement is laid on the metal with a slope towards the drain, everything is filled with cement mortar. Floor tiles are laid on the fresh mortar (while maintaining the slope), and its joints are also well coated with silicone. Instead of galvanized metal, you can use modern films for waterproofing. In this case they must be reinforced.
Shower drain
If the walls in the shower stall are wooden, they need protection from water. You can protect them with ceramic tiles, plastic panels, or simply lay sheets of plastic of a suitable size, sealing the joints with the same silicone. Under any type of finish, it is also advisable to lay a layer of waterproofing. In the simplest case, it is a plastic film that is attached to the walls using staples from a construction stapler or strips and nails, and it is advisable to seal the resulting holes with reinforced tape.
Plastic shower panels
Plastic shower panels are a budget option for protecting walls in a shower stall; anyone can handle the installation. At the first stage, metal profiles are attached to the walls, from which the frame-sheathing of the walls is assembled. Plastic panels are attached to the profiles with self-tapping screws with a wide head, which are connected to one another using a lock. The connection is sealed (you just need to be careful not to damage the rather fragile edges of the locks). In the external and internal corners, special corners are used, which are sold in the same place as the panels; baseboards are reinforced at the top and bottom. Indeed, there is nothing complicated, but the appearance is like that of a monolithic wall and the protection from water is almost 100%.
The general principles of how to make a shower in a bathhouse are outlined, but how to do it is up to everyone to decide for themselves. There are simply a lot of options here, because you can simply hang a bucket shower and tip it over, or build a full-fledged shower stall with automatic hot water supply. Below are real photos of the shower in the bathhouse. Maybe you'll find an idea for yourself...
Homemade shower
Sprinkler + shower
Hot tub plus shower
Shower using an electric boiler
Which pump to use
When deciding how to make a shower in a bathhouse, you cannot miss a very important point: for normal operation of the water heater, you will need a water supply under appropriate pressure. For this reason, equipping a bathhouse with a shower involves installing a pump. Depending on the source of water, the following can be used:
- a deep pump, with which water is supplied from a well;
- a submersible pump designed to extract water from shallow wells or reservoirs;
- surface, which serves to raise water from a depth not exceeding 7 m; such a unit can be used to increase pressure in pipes connected to a centralized water supply.
Water supply options
It is equally important to think through the process of supplying water to the bathhouse.
It can be produced in different ways:
- Bring the bathhouse building to the central water supply;
- Install your own water supply.
To install a plumbing system, you need to install pipes to the bathhouse, and also think about how to ensure water heating.
If you expect to heat the bathhouse exclusively with one stove, you can use a storage tank for the shower in the bathhouse in the ceiling or on the surface of the bathhouse roof. It is recommended to do this close to the stove.
If you have chosen a well as a source of water supply, then you need to take care of the pump. Pumps are:
- Deep. They supply it from the deep bowels of the earth. The best option if the well has a small diameter;
- Superficial. They supply water to a height of up to 7 meters;
- Submersible. Water is supplied from shallow sources.