A bathhouse in the country or in the village helps maintain health, vigor and good mood. The household value of the bathhouse is also great. If there is no central hot water, only in the bathhouse you can wash yourself, wash clothes and heat water for bathing children. You can accommodate guests in the bathhouse if there is not enough room for everyone in the house.
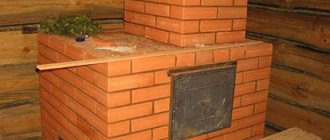
Home craftsmen prefer to make sauna stoves with their own hands. Even if the stove was purchased in a store, it is subject to fine-tuning . This is done to better suit the stove to the specific place of use. This article will talk about how to make a sauna stove with your own hands.
There is a similar article on this topic - Bath stones: which ones are better to choose?
How to properly install a stove in a bathhouse?
According to safety rules, in order to properly install a stove in a bathhouse, you must:
- observe fire breaks;
- insulate the walls adjacent to the chimney and the body;
- install a non-flammable base for the body, etc.
Where to place the stove in the bathhouse?
Many people wonder how to place the stove in the bathhouse
In order to correctly choose the location of the stove, it is necessary to take into account such a factor as the type of structure - an iron stove with a remote-type firebox cannot be placed anywhere. The latest developments are equipped with a telescopic firebox
In addition, if necessary, you can make the firebox longer by adjusting its size to the width of the bulkhead.
However, installing the stove below floor level is impractical, but can be used in some cases. Then it is necessary to build a large enough recess in the floor so that firewood can be placed in the firebox.
The location of the stove in a bathhouse with a separate steam room should provide for the following nuance. It must be placed in such a way that one part of the unit is in the steam room, and the other heats the rest room or shower room.
To ensure the availability of hot water in the shower, it is necessary to install a heat exchanger or boiler. In the first case, the water will be heated directly from the structure itself without additional consumption of electricity and other resources.
Fire safety when installing a sauna stove
The cladding of walls located close to the unit must be made of fire-resistant materials. If this is not possible, then the logs should be covered with heat-insulating material and sheathed with a sheet of steel.
The gaps represent safe distances from the wall to the stove, which are specified in the fire safety rules (FPR). Their purpose is to prevent the possibility of fire. According to PPB, the distance from the stove to the wall made of flammable materials must be at least 110-125 cm. After laying thermal insulation, it is reduced to 50-80 cm. Other equipment must be at least 1.1 m away from the heating device.
The unit is installed on a special base located at or below the floor level (10-15 cm). It is advisable to provide a place for the stove during the construction of the foundation of the bathhouse. In addition, you need to understand how to properly install a boiler in a bathhouse.
The cushion or base for installing the structure is constructed as follows:
- the boards are covered with an even layer of diluted clay;
- a brick row is placed on top.
When installing a metal stove in a bathhouse on a wood floor, safety rules do not provide for the construction of a functional foundation.
Firing the furnace before installation
It is carried out outdoors, as increased formation of caustic gas is possible. First you need to treat the heating unit with an anti-corrosion agent, and at the same time carefully inspect for cracks, chips and other defects on the grill, door, heat exchanger, and also make sure that there are no cracks or gaps. Then:
Thanks to this, the internal coating of the heat generator will finally harden, and it will be possible to proceed to permanent operation.
Support the development of the channel! Subscribe so we write useful articles for you!
Bath decoration
The decor of the bathhouse begins with the interior walls. For finishing use tiles, tiles or water-repellent imitation of wood or stone. For a country-style bathhouse, wood with any pattern is suitable. In the Scandinavian direction, white wood or marble and stone are welcome. Provence or loft harmonizes perfectly with tiles or tiles in warm or light colors. Depending on the height, the ceiling is left wooden, and frame inserts are made for LED lighting.
An artificial pond can be organized on the terrace, if there is one on the 2nd floor. A living room with an aquarium or artificial fountain will create a harmonious and lively environment. Decorative items: pillows, paintings, embroidery and figurines are chosen only to suit the style of the bathhouse interior. The exception is the national style of the setting.
Need for additional heating
The classic option for heating a steam room for bathing procedures is a brick or metal heater. In this case, additional equipment is used to maintain a given air heating temperature both in the steam room and in other rooms.
It is impossible to ensure fast and uniform heating of the dressing room and rest room from a sauna stove.
And if in summer this does not cause problems, then in winter such a situation can lead to a decrease in comfort when organizing a bathing holiday. In this case, all the heat produced will be accumulated in the steam room, and the dressing room and other rooms of the bath will remain unheated.
Installation of additional heating equipment will ensure the maintenance of a comfortable temperature necessary for a long stay in the dressing room.
Choosing a sauna stove with a separate sink and steam room
Any bathhouse should be equipped with a sink and a steam room. To effectively use space, many owners install a special stove. It divides the bathhouse into two rooms.
How to choose?
To know how to choose a stove for a sauna with a separate steam room and sink, you should use the following tips:
- The fryer must have high thermal power, sufficient to heat the steam room and water in the washing room, as well as provide steam. For each room, this indicator is individual and depends on the size of the heated area and the material from which the bathhouse is made.
- A properly selected design is compact in size, easy to use and eliminates the possibility of fire.
- The stove must be equipped with a high-quality steam generator and heat accumulator. This is necessary in order to easily set the desired mode that determines the type of bath: from real Russian to dry Finnish.
- It is necessary that the roaster be equipped with tools to adjust the convection.
- There should be no significant areas on the furnace structure whose temperature may exceed 150 degrees.
- If you are offered a brick or metal Dutch oven, opt for the latter option. Metal stoves are capable of heating a steam room with high speed and efficiency, take up less space, do not require a foundation, and are easy to use and maintain.
This is what a sauna stove with a separate sink and steam room looks like:
Popular models
Let's look at sauna stoves with a separate sink and steam room from several manufacturers, and compare their prices and characteristics.
Mounting and installation
Sauna stoves with a separate sink and steam room from well-known brands are usually installed by employees of the manufacturer or according to the individual instructions supplied.
But you can also install it yourself using the following approximate algorithm and diagram:
Layout of the furnace and remote tank:
3 different connection diagrams for elements:
Installation tips:
- The design of the furnace does not require a special foundation, but the foundation for it must be prepared. It is performed using brickwork. The base area is 70x70 cm, the height should be more than 10 cm.
- Cover the walls adjacent to the stove using bricks and insulate them with heat-insulating materials.
- If you plan to heat the stove from the waiting room, make a hole “with a reserve” in the partition between it and the steam room.
- On the prepared base, lay a layer of heat insulation material and an iron sheet on which the furnace structure is installed. The firebox is inserted into the partition.
- Fill the stove with stones.
- Cover the floor boards with a metal apron, which is secured over a sheet of thermal insulation.
- Mount the decorative trim on the front section of the firebox, install the ash pan and the door.
- Install the pipe. If the roof is flat, the height of the pipe should be more than half a meter, if it is gable - more than one and a half meters.
- Weld a metal screen to the predetermined contact point between the ceiling and the pipe. This part reliably connects the two halves of the pipe and protects the ceiling from elevated temperatures.
- The water tank, as well as the heat exchanger, should be installed simultaneously with the main pipe.
A stove in a bathhouse with a washing room and steam room is a reasonable solution for a small area. The modern market offers a large number of stove options. The choice should be made based on the size of the room, the desired heat capacity, the dimensions of the structure, and your personal preferences. Our recommendations will help with this.
Choosing a sauna stove with a separate sink and steam room
Features of choosing and installing a stove for a bath with a separate sink and steam room. Examples of optimal furnace models from different manufacturers are given.
Options for the internal layout of a 4x5 m bath: the best projects
The procedure for designing such elements as the foundation, wall construction material, roof characteristics, etc. determined by the characteristics of a particular situation and remains primarily at the discretion of the owner. You are also invited to familiarize yourself with the most popular and successful options for internal planning of the space of a 4x5 m bathhouse with separate steam room and wash room.
The simplest design of a 4x5 m bathhouse
The so-called “minimum set”.
The simplest design of a 4x5 m bathhouse
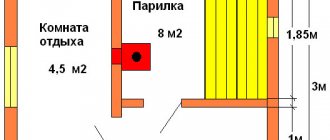
The bathhouse consists of one floor and has dimensions of 4x5 m. There is no vestibule/dressing room, which makes the use of such a bathhouse possible only in warm weather (the reasons were described earlier). The entrance to the building leads to a fairly spacious recreation room measuring 2.85 x 4 m. It is proposed to install a table and a corner sofa or benches here. If desired, the room can be equipped with a TV and related equipment. From the rest room you can get into a wash room measuring 1.8 x 2 m, equipped with a shower, toilet and sink. The door from the washing room leads to a steam room measuring 2x2.1 m with a stove occupying 1 m2.
Project of a 4x5 m bathhouse with a terrace
The set of interior spaces remains similar to the previous version, but a quite spacious terrace appears. The proposed dimensions are 1.5 x 4 m. If desired, the terrace can be glazed to create a veranda. Often, an additional seating area is organized on the terraces/verandas, or even a barbecue oven is installed, if free space allows.
Project of a 4x5 m bathhouse with a terrace
The entrance from the terrace leads to a recreation room measuring 2x3.5 m. Recommendations for equipping this room are similar to the previous and all subsequent projects. The internal door from the relaxation room leads to the shower room (1.5x2 m), and from there to the steam room (2x2 m). Thus, even the presence of a terrace made it possible to correctly fit all the necessary premises into the available space.
Bathhouse 4x5 m with dressing room
In this project, a small dressing room with dimensions of 1.1 x 1.7 m appears. The presence of this room will allow you to comfortably operate the bathhouse in cold weather. It is also proposed to store firewood here.
Bathhouse 4x5 m with dressing room
The exit from the dressing room leads to a small corridor, and from there to the rest room. The latter is connected by a door to the washing compartment, and it is connected to the steam room. Recommendations regarding the dimensions and internal arrangement of each room are given in the diagram. You can take it as a basis, changing the necessary parameters at your discretion, or implement an identical project - the finished bathhouse, despite its relatively modest dimensions, will be very convenient.
Bathhouse 4x5 m, complemented by a vestibule and a bathroom
In this project, in addition to the main premises, there was a vestibule and a bathroom separated from the washing room, which is very convenient.
Bathhouse, complete with vestibule and toilet
The door from the vestibule leads to the rest room, from where you can go to the bathroom or washroom. The washing room is connected by a door to the steam room. The project is one of the most successful and popular.
Bathhouse 4x5 m with porch and attic floor
The presence of an attic tier allows you to use the space of the construction site with maximum benefit and efficiency.
Bathhouse 4x5 m with porch and attic floor
Additionally, it is recommended that the building be equipped with a porch measuring 1.5 x 2.5 m. If desired, instead of a porch, you can make a vestibule, which will allow you to use the bathhouse throughout the year. It is proposed to equip a bedroom on the attic floor. If desired, the space can be divided into a place for sleeping and a relaxation room, or you can make a billiard room here.
Tips for location and layout
Following fire safety rules, it is better to locate the bathhouse at a distance of at least 15 m from other buildings. This way, in the event of a fire, the fire will not spread to the house. Suitable soil is sand and gravel. Otherwise, you need to dig a hole for the foundation 1.5 m deep.
- It is better to place doors on the south side if the region is characterized by severe snowy winters. In this case, you will have to clear the passage less before bath procedures.
- Also, don't forget about the windows. This is the simplest ventilation and an additional source of lighting, so it is better to place them on the west side to provide more natural light in the evening. The optimal size is 40x40 cm.
As for the layout inside the 3 by 3 bathhouse, regardless of its type, you can try to implement one of the following options:
- With locker room and steam room. This is the simplest option with dividing the room into 2 more or less equal parts. One contains a locker room, benches and a table for relaxation. In the other there is a steam room.
- With steam room and sink. In this case, the locker room occupies about 4.5 m². The washing zone can be distinguished by dividing the steam room into 2 equal parts. This option will allow you to create separate rooms for smoothly changing the heating temperature.
- With a veranda. If the climate in the region is warm enough, tables can be placed under a canopy outside the bathhouse. In this case, a minimum space is allocated for the locker room, and the steam room is expanded.
There is no need to completely abandon the dressing room. This is a buffer that prevents drafts and protects against a rapid drop in temperature every time the front door is opened.
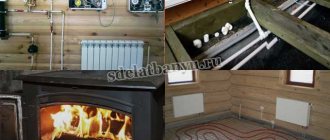
Installing a heat exchanger for a sauna stove or boiler with your own hands
Modern models of sauna stoves and boilers are often supplemented with heat exchangers - devices for heating water. What they are, the nuances and difficulties of installation will be discussed below.
Scheme: 1 – heat exchanger; 2 – storage tank; 3 – upper outlet (min tilt 20°); 4 – lower outlet (min downward slope 1-2°); 5 – drain valve of the storage tank; 6 – drain valve of the system.
Heat exchanger device
The work is based on the physical properties of water, which when hot expands and goes to the top, cold water remains at the bottom.
Small heat exchangers are placed in the bathhouse for quick heating. One pipe goes to it from above, the other from below.
A water tank is sometimes installed in the steam room, but more often in the wash room. And at such a level that it cannot be touched.
Hot water flows through the upper pipe to the tank, and cold water is poured through the lower pipe as hot water is consumed.
Important installation details
The heat exchanger can:
- be built into the oven;
- attached to the chimney;
- fixed to the ceiling of the steam room.
The unit’s capacity of 5 liters is enough to fill a 120 liter tank with boiling water.
To ensure constant availability of hot water in the washing machine, it is necessary to maintain the combustion process in the furnace and an uninterrupted supply of water to the tank. To realize the second point, a circulation pump is often used.
You can do without it when the diameter of the pipes is 1 inch.
To reduce heat losses, the total length of pipes should not be more than 3 m.
Before installation, you should consider the following recommendations:
- A high-quality heat exchanger should not consume more than 10% of the energy generated by the furnace.
- The pipes are laid in such a way that water flows on its own with direct supply at an angle of 250 degrees, and with reverse supply at an angle of 30 degrees.
- The volume of water in the tank is selected separately for each heat exchanger model. This depends on the selected power. If there is not enough of it, it will boil frequently and scale will begin to accumulate on the walls, which can cause a fire. If the volume of water is too high, the heating process will take a long time.
- The power reserve should be enough in case of cooling after the wood burns out in the stove.
When the water tank is placed directly in the steam room, the heat exchanger is connected in the following order:
- The inlet hole into the tank is made 5 cm above the upper register fitting (at least 1.5 m from the floor). This will ensure better water circulation.
- The bottom of the tank should be at least 1.5 m above the floor or even higher.
- You need to step back another half meter from the ceiling.
Because the tank is located too high, it is difficult to control the water level in it.
Therefore, there are other connection options:
- The tank is located below.
- The fitting is equipped on the side under the underwater circuit.
The disadvantage of this method is that when the water level is less than the upper fitting, circulation will not occur. The water in the heat exchanger will stand and boil at times, but in the tank it will remain cold.
When placing the tank in a sink, the installation requirements remain the same.
It is important to note that the heat exchanger pipes that will be in contact with the hot furnace must be stainless steel to withstand the high temperature and humidity.
You can buy connecting pipes made of metal-plastic or take regular flexible hoses. Diameter - 1 inch. With a larger diameter you will have to install a circulation pump.
Seals should be made of durable tangit, fitting gaskets should be made of paronite.
A drain valve must be installed. Through it, you can remove blockages from the system and drain the water during the period of non-use of the bath.
Dimensions of sauna stoves: metal
All that can be found on the market are metal stoves. They can be steel or cast iron, wood-burning, electric or gas, but they all belong to the class mentioned. So there shouldn’t be any problems with them: the manufacturer will tell you everything himself.
Steel and cast iron, with most models for Russian baths:
| Model | Manufacturer | Length mm | Depth mm | Height mm |
| "Anapa" | "EasySteam" | 420 | 730 | 800 |
| "Angara 2012" | "Termofor" | 415 | 830 | 900 |
| "Taimyr" | 415 | 605 | 800 | |
| "Vesuvius Russian steam" | "Vesuvius" | 660 | 860 | 1120 |
| "Hephaestus ZK" | "Techno Lit" | 396 | 731 | 534 |
| "Zhiharka" | "Zhar Gorynych" | 350 | 650 | 1400 |
| "Cinderella" | 500 | 500 | 1800 | |
| "Emelyanich" | "Dionysus" | 510 | 630 | 1050 |
| "Karelia 4" | "Petrozavodskmash" | 500 | 500 | 980 |
| "Kalita Russian steam" | "Magnum" | 650 | 800 | 1110/ 1365/ 1600 |
| "Sudarushka Prima" | "Inzhkomcenter VVD" | 595 | 860 | 1130 |
| "Enchantress Russian Steam" | 610 | 886 | 1042 | |
| "Steam Classic" | "Feringer" | 460 | 790 | 740 |
| "Baby Steam" | 460 | 790 | 740 | |
| "Steam Harmony" | 550 | 870 | 900 | |
| "Kuban" | "Teplodar" | 493 | 701 | 907 |
| "Lagoon" | 330 | 690 | 855 | |
| Kutkin 1.0 | "Kutkin" | 460 | 450 | 900 |
| Kutkin 1.5 | 450 | 540 | 900 | |
| Kutkin 2.0 | 450 | 620 | 900 | |
| "Slavyanka Russian steam" | "Svarozhich" | 480 | 570 | 900 |
| "Firebird Russian Par" | 640 | 770 | 1600 | |
| "Troika-06M2" | "Troika" | 320 | 700 | 1150 |
| "Khangar" | "Teklar" | 440 | 670 | 800 |
| "Etna" | 500 | 900 | 1306 | |
| Harvia Classic 280 TOP | "Harvia" | 485 | 520 | 930 |
| "Volcano Etna" | "Vulkankomplekt" | 610 | 770 | 800 |
| "Ermak Elite 16" | "Ermak" | 450 | 620 | 730 |
| "Cuirassier" | TM Greivari, Technotrade company | 430 | 477 | 688 |
| "Wasp" | "Termofor" | 415 | 415 | 605 |
| "Rus 12" | "Teplodar" | 335 | 690 | 810 |
| "Sahara 24" | 398 | 693 | 800 | |
| "Scythian" | "Vesuvius" | 520 | 710 | 580 |
| "Tunguska" | "Termofor" | 510 | 740 | 820 |
| AITO AK | Narvi | 570 | 570 | 1160 |
| Harvia M3 | Harvia | 390 | 450 | 710 |
| Helo 20 PK | Helo/Kastor | 390 | 470 | 730 |
| Kastor Saga 22 | 585 | 600 | 825 | |
| Narvi NM 600 | Narvi | 430 | 280 | 580 |
| "Olympus" | FireCom | 500 | 820 | 770 |
| "Tornado" | "Compact" | 410 | 620 | 950 |
You can find out which models are the best for a Russian bath by studying the information from a separate publication.
As for electric heaters, the sizes of the models in question are presented in the reviews that are available on our website. One of them is dedicated to models of domestic manufacturers, the other - only to electric heaters from the Finnish Harvia, the third - to other Finnish companies that make electric stoves for saunas and baths.
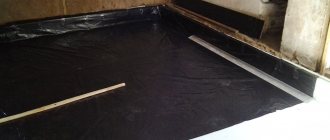
Rubble concrete foundation
Foundation for the stove.
The formwork must be installed on the base. A layer of large stones is placed in it. The resulting cavities are filled with crushed stone. Then the stone and crushed stone are filled with cement-sand mortar.
Mix the solution as follows: 1 part cement M 400-500 to 3 parts sand. The solution should be thick, like sour cream. They need to pour the first row of stone and take a break for a day, then lay the next row, which is then poured with mortar.
If the volume is small, then you can make a certain amount of concrete and complete the work in one day. After about a week, the foundation is ready for laying.
Preparing the walls
Above, we determined what the distance to the flammable wall should be, and there we came to the conclusion that it is much more practical to decorate them with refractory materials, so as not to waste the space of the steam room. Now it's time to talk about how this is done.
Budget-friendly, but not the best option, a sheet of galvanized sheet nailed to the wall
So, we have three and a half options:
- We attach the refractory sheet to the wall;
- plastering the wall;
- we make a brick casing for the stove;
- replacing part of a wooden wall with brick.
Let us explain why 3.5 - often they hang the refractory on the wall and build the casing. Moreover, the latter is installed not only for the purpose of fire safety, but also simply for safety, as well as for heat redistribution. You will learn more about why it is needed and how to make it in this article.
As for refractory, you can use mineralite - these are sheets of cement with fillers, reinforced with fibers. Excellent fire resistance. You just need to attach it correctly.
If the stove is located almost flush against the wall, then you will need two layers of mineralite with an air gap between them, which you will create using 3-centimeter ceramic bushings. The first layer is directly adjacent to the wooden wall, then there are bushings and a second layer of mineralite.
If the distance is larger, you can limit yourself to one layer, but it should not touch the wall - the same bushings are used to attach it to the tree.
You can put, for example, heat-resistant tiles on top of the mineralite (it is placed on heat-resistant mastic) or come up with another decorative design. As an option - mirror stainless steel. Its sheets perfectly reflect heat, but at the same time heat up themselves. Therefore, stainless steel is attached to a layer of any refractory - mineral wool, ceramic fiber, superisol, etc.
In principle, you can plaster a flammable wall (a layer of at least 2.5 cm) or use fire-resistant plasterboard.
Those who decide to bring the firebox into the dressing room either immediately put up a brick wall, or then cut out part of the log house or timber. In the brickwork, space is left for the combustion tunnel with a reserve, where a heat insulator, for example, mineral wool, is then clogged. The heat insulator is also used in places where the brickwork contacts the wooden wall. If you don’t want to replace the entire wall, make a portal – at least a meter long.
Frame wall construction
How to properly install a sauna stove equipped with an external firebox? Of course, with the installation of a partition between the steam room and the adjacent room. It is made from two beams with a cross section of 100 by 600 mm and a height equal to the ceiling of the room, pre-treated with an antiseptic. Place these spacers vertically, securing them at the top and bottom with self-tapping screws using perforated corners. Also fix a horizontal jumper between them to create a frame shaped like the letter H. There will be a fuel channel and brickwork on the floor, and at the top, at the floor level, there will be sheathing and insulation. Insulate the structure - fasten basalt wool slabs between the beams, install the lining with lathing, fix the foil steam protection with a construction stapler. After this, make brickwork, leaving a gap of 3-4 mm between it and the channel and wooden guides. For reliability, use corners, take care of the visual beauty of the seams. The finished portal should look aesthetically pleasing, so mount the trim, complete the finishing, level it and correctly determine the center.
Peculiarities
The Gorynych 3 sauna stove is designed for heating a steam room, as well as adjacent locations. During the heating process, thick, high-quality steam is formed, ideal for steam rooms. Buyers can choose from two model options – with a tank on the right and left side. The model can only be used on the basis of baths with an individual washing compartment. Thick material ensures long service life. The thickness of the firebox is 8 millimeters. The volume of the water tank is 100 liters.
For high reliability, manufacturers used organosilicate enamel. During the first use, a polymerization process occurs, which gives the coating its final strength.
General requirements for the characteristics of bathhouses
The space provided by the bathhouse, measuring 4x5 m, is enough for a completely comfortable holiday for a family or a small group of 3-4 people.
In accordance with current regulatory requirements, each visitor to the steam room should have at least 1-1.2 m2 of free space if the person steams while in a sitting position. If the bath lover lies down or prefers to take some other possible position, the requirements for the dimensions of the steam room will change accordingly.
These points must be taken into account when designing a bathhouse in general and shelves in a steam room in particular. Information regarding possible body positions in the bath and recommendations for shelf sizes for each of them are shown in the following image.
Recommended shelf sizes for different body positions
Arrangement of shelves in the steam room
Regarding the area of the washing room, the recommendations are similar - at least 1-1.2 m2 for each visitor. In order to save space, the sink, as a rule, is made of relatively small sizes so that there is enough space for 1-2 visitors who come here at the same time.
A modern compact shower cabin will allow you to effectively solve the problem of distributing free space in the washroom. In general, the dimensions of the washing room can increase depending on its operating conditions. For example, if the owner decides to install a boiler here to heat water or even a washing machine (relevant when arranging a bath house), the size of the room will have to be increased accordingly.
Shower options
The recommended height of the steam room is about 210 cm, the washing room is 220-230 cm. When designing a steam room, you should adhere to the rule that there should be at least 110 cm of free space between the ceiling and the top shelf
It is also important that the top shelf in the steam room is arranged higher than the stove - the requirement is dictated by considerations according to which it should be the hottest on the top shelf of the bath. The heater itself (the most popular version of the sauna stove) is placed at an average height of 100 cm from the floor
For other types of sauna stoves, the requirements are determined by the individual characteristics of the units used.
Calculation of the minimum required parameters
Recommended steam room dimensions
To prevent water from splashing from one room to another, door thresholds are installed approximately 200-300 mm above the floor. The requirement is also relevant for the main entrance door; if the bathhouse is not equipped with a porch/terrace/veranda, then the high threshold will not allow melt water to penetrate into the room in the spring, and will make the process of clearing snow more convenient.
Room layout
Having outlined the goals of building a bathhouse, the number of guests who will be inside the building at the same time, we begin to calculate the internal space. Initially, you need to determine the area of the necessary premises, without which it is impossible to imagine a bathhouse. These include:
- steam room;
- sink or shower;
- dressing room;
- bathroom (at recreation centers).
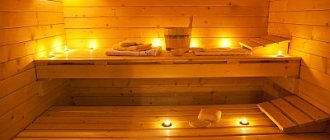
Steam room
People usually gather at the bathhouse to visit the steam room. For some, it is enough to warm up for a few minutes to steam the skin before soap procedures. The more experienced ones will prefer to linger inside: make a few passes, whip themselves and their comrades with a broom. It is necessary to provide both sitting and lying areas; usually they are combined to save space.
The steam room is made in the room farthest from the entrance, this is due to the fact that the main (more often the only) heat source is installed in it. The entire building is heated by hot air when entering/exiting the steam room. During pre-firing of the furnace, the doors in adjacent rooms (washroom, dressing room) are left open so that warm air warms them up to a comfortable temperature.
When drawing up a steam room design, the following parameters are taken into account:
- The minimum area per person in the steam room is 1 square. m, preferably more, but you shouldn’t go below this level;
- Everyone’s perception of temperature is different, so you need to provide shelves at different levels;
- the upper shelf (lying down) is made wide (60-120 cm): further from the floor - the temperature is higher, in the lying position the heat seems less;
- the width of other shelves is usually no more than 40 cm: enough to accommodate while sitting, and the steamer can freely reach the person on the top shelf with a broom;
- the distance from the top shelf to the ceiling is at least 100-120 cm, in order to sit without resting your head, and for a normal swing of the broom in a lying position;
- height between shelves of adjacent levels: 40-50 cm, this allows you to rest your legs on your feet in a sitting position to relieve stress from the joints;
- shelves are placed along one or several walls (L-shaped, U-shaped) depending on the shape of the steam room, its size, location of the front door, stove.
Sink or shower
The washroom occupies a place between the steam room and the dressing room. It is equipped with tanks with hot and cold water, benches, basins, or it may have a shower, which is more practical, but not everything is so simple. Both options have the right not only to life, but also to peaceful coexistence.
Many people are looking for an opportunity to escape from the bustle of the city for a while and get a little closer to nature; for some, this opportunity is a bathhouse. Scoop up water from the tanks with a ladle, mix it in a basin to the desired temperature, slowly sit on a bench with soap and a washcloth... There is a special charm in this, understandable to anyone who has been to a village bathhouse. In addition, not everywhere there is running water. Many people carry water in buckets from the river or use imported water. In this case, building a shower does not make sense.
However, the shower came to the bathhouse from city apartments for a reason. It allows you to speed up the washing process and free the room from water tanks, basins, and benches. Using shower cabins simplifies the organization of drainage, but shower heads installed on the wall or ceiling allow you to use space more efficiently.
If you have a connection to the water supply, there is no reason to refuse a shower, but you should not forget the old “old-fashioned” method. Soaking hands, feet and other parts of the body in a basin filled with healing infusions cannot be done in a shower stall. And it’s easier to wash a child while sitting on a bench. If there is enough space, it would be a good idea to install benches with water tanks and shower heads on the opposite wall in one room.
Waiting room
The room in front of the entrance to the sink is used for changing clothes and storing things, as well as for relaxing between trips to the steam room. For some, it’s a respite of a few minutes before a new wave of impressions in the steam room; for others, the steam room is just an addition to meeting friends. The layout of the dressing room and its equipment with furniture and other interior elements depends on this. In one case, benches with a table will be enough; in another, a refrigerator, a bar counter and a sound system will not be superfluous.
Pool
A separate room for a swimming pool with a total area of 24 sq. m. m (excluding walls and partitions) there is no need to allocate. This will negatively affect the rest of the premises. If there are no natural bodies of water nearby, but you want to take a dip in the water, you can borrow part of the washing basin to install. It must be remembered that each cube. m of water in it will weigh 1 ton, and this is a significant load. If the foundation is slab, the font can be placed anywhere, otherwise a separate foundation may be required for it.
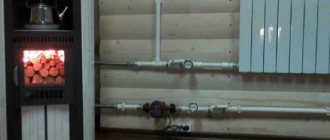
Heating by furnaces with heat exchangers
Stoves with heat exchangers are an alternative option to conventional heaters, which provide space heating, hot water supply and steam generation.
Heating in a bathhouse from a stove heat exchanger can be organized both for the main premises - steam room and washing room, and for auxiliary ones - dressing room, relaxation room, billiard room, shower room, swimming pool.
At the design stage of heating equipment with a heat exchanger, the following data is taken into account:
- dimensions of the building and area of premises;
- design features of the furnace;
- weight of heating equipment;
- number of heat exchangers;
- coolant volume;
- length and diameter of the chimney pipe.
The following options for connecting heating equipment using pipes are possible:
- to the expansion tank for hot water supply in the washing compartment;
- to heating radiators installed in functional rooms;
- to hot water supply and water heating system in the main premises of the bathhouse and residential building.
Heating stoves are equipped with internal and external heat exchangers. The internal element is located in the firebox, the external element is located around the chimney pipe.
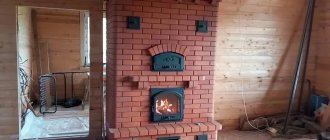
Furnace Gorynych-3
| 43,600 rub. Checkout |
The sauna stove is intended only for saunas in which the steam room and washing compartment are separated by a partition.
One of the most important points with this layout is heating the washing compartment. This stove model allows you to heat the entire bathhouse without installing an additional boiler and heating radiators, both in spring and autumn, and in winter. The stove is heated from the dressing room (rest room), the sink and steam room are separated by a wall.
A special feature of this stove is that the partition between the sink and the steam room runs along the surface of the stove, thereby dividing it into two parts. The leader, which has no analogues, in heating baths with a separate washing compartment. Advantages of the oven
The water tank and part of the firebox are located in the washing compartment, heating it. The compact arrangement of the stove, which is very important when dividing it into a steam room and a washing compartment. In the steam room, the heater is located along the wall and protrudes 45*70 cm (with another stove installed in the steam room, the minimum space occupied by the stove is 80*60 cm, taking into account air gaps)
In the washing room, the water tank is located on the wall and occupies 30*70 cm. The furnace firebox from the rest room heats this room. Significantly more convenient compared to the version of the firebox made from a washing machine. The layout of the bathhouse should be as follows. Scheme of the bathhouse Gorynych-3L
The stove perfectly warms up the rooms, both in winter and in summer: Steam room and stones - due to the pipe with exhaust combustion gases located in the heater. The washing compartment and floors are due to the heating of the tank and the protruding lower part of the firebox under the tank. The floors are heated by radiation from the firebox (you cannot lay bricks under the tank in the washing compartment). The rest room - the stove is heated from the rest room and warms it up due to the front metal part. Significantly more convenient compared to the version of the firebox made from a washing machine. To fully heat the rest room, it is advisable to install an air heating system on the stove (air from the rest room is forced into the system of air channels of the furnace, heated from the walls of the heated furnace firebox and returned to the rest room). The rest room warms up very quickly in winter, 30-40 minutes
The compact location of the stove, which is very important when dividing it into a steam room and a washing compartment. In the steam room, the heater is located along the wall and protrudes 45*70 cm (when the stove is located in the steam room, the minimum space occupied by the stove is 80*60 cm)
In the washing machine, the water tank is located on the wall and occupies 30*70 cm Drawing of the stove and installation diagram of Gorynych-3 tank, right. PHOTO MONTAGE
The stove uses the grateless principle of longitudinal combustion. The service life of the stove is more than 15 years!!!
| Overall dimensions of the oven without tank (L*W*H) | 970 * 775 * 950mm The minimum width of the door in the bathhouse to accommodate the stove is 670 mm. !!! |
| Weight | 215 kg |
| Steam room volume | from 8 to 18 cubic meters |
| Washing compartment volume | from 8 to 18 cubic meters m |
| Loading weight of stones | 100 kg |
| Chimney internal diameter | 150 mm |
| Painting | black heat-resistant enamel |
| Furnace firebox | steel 8mm |
| Oven price (without tank) | 43,600 rubles |
| Stainless steel tank 1 mm. 100 liters | 6,800 rubles |
| Model when ordering a stove with a tank | Gorynych-3L (tank on the left) -50,400 rubles Gorynych-3P (tank on the right) -50,400 rubles |
| Door with heat-resistant glass small Glass size W 230 * H 185 flange size W 590 * H 540 | +6,900 rubles |
| Glass size W 440 * H 300 flange size W 700 * H 590 | +17,000 rubles |
| Additional air heating system for the rest room and washing compartment for stoves with a metal door (without a portal) | +17,000 rubles |
| Additional air heating system for the rest room and washing compartment with a portal | + 26,800 rubles |
Back to section
Mounting and installation
Sauna stoves with a separate sink and steam room from well-known brands are usually installed by employees of the manufacturer or according to the individual instructions supplied.
But you can also install it yourself using the following approximate algorithm and diagram:
Layout of the furnace and remote tank:
3 different connection diagrams for elements:
Scheme 1
Scheme 2
Scheme 3
Installation tips:
- The design of the furnace does not require a special foundation, but the foundation for it must be prepared. It is performed using brickwork. The base area is 70x70 cm, the height should be more than 10 cm.
- Cover the walls adjacent to the stove using bricks and insulate them with heat-insulating materials.
- If you plan to heat the stove from the waiting room, make a hole “with a reserve” in the partition between it and the steam room.
- On the prepared base, lay a layer of heat insulation material and an iron sheet on which the furnace structure is installed. The firebox is inserted into the partition.
- Fill the stove with stones.
- Cover the floor boards with a metal apron, which is secured over a sheet of thermal insulation.
- Mount the decorative trim on the front section of the firebox, install the ash pan and the door.
- Install the pipe. If the roof is flat, the height of the pipe should be more than half a meter, if it is gable - more than one and a half meters.
- Weld a metal screen to the predetermined contact point between the ceiling and the pipe. This part reliably connects the two halves of the pipe and protects the ceiling from elevated temperatures.
- The water tank, as well as the heat exchanger, should be installed simultaneously with the main pipe.
Safe placement and connection of an electric oven
A convenient solution is an electric heater. This is a great alternative to a wood stove. Doesn't take up much space. There is no chimney pipe. No need to clean or load fuel. It is enough to set the temperature correctly.
When connecting, it is important to follow the rules for connecting to the network and fire safety.
It is recommended to ground the electric heater. If this is not possible, then zeroing is carried out. To do this, on the distribution panel, the grounding wire of the electric furnace is connected to the zero terminals.
Installation of an RCD is required. This is excellent protection against short circuits during voltage surges in the network.
The wiring covering must be heat-resistant. The cross section is selected according to power and mains voltage. Read more in the article: “Electrical installation of a bathhouse.”
Some design principles
Regardless of the size of the bathhouse, there are general principles that are used in its design. So, the total area must be divided into functional zones. The minimum layout of a 3x5 bath includes two rooms; in larger projects other options are possible.
The location of the stove can be designed in different rooms. But the most appropriate would be to install it near the wall separating the dressing room (rest room) and the steam room. This way, the heat will be used with maximum benefit: not only the steam room will be heated, but also the adjacent room.
Once upon a time, ovens were only stone (brick); they have not lost their significance even now. It takes a lot of fuel and time to heat them up, but they give off heat just as slowly.
Wood-burning stove in a small steam roomSource prokamin.in.ua
In addition to classic designs, metal stoves are used to heat steam rooms. They attract attention with their heating speed, but there is also a minus: they cool down as quickly as they heat up. The installation site of the metal structure is equipped especially carefully, in compliance with safety measures, which, however, cannot completely protect against accidental touch and painful burns.
A modern option is an electric oven. It doesn’t need firewood, it heats up in a matter of minutes, but it also cools down quite quickly. The disadvantages are rightly called the high cost and enhanced safety measures required during installation and operation of the unit in conditions of high humidity.
In the project, it is important to take into account and reproduce all the functions of a classic bathhouse. For example, in order to get maximum pleasure and benefit from the bath, you must enter the steam room clean; Why was a special room invented - a washing room?
Combination of rest room and locker roomSource klafs.de
In small projects it is difficult to allocate space for a separate room with such a purpose. There are different ways to get out of the situation. For example, they organize a shower, or allocate a place in the steam room itself, at the entrance. If it is possible to make a separate washing room, it is designed adjacent to the steam room. This is not only convenient, but also practical: the heat from the steam room heats the adjacent room, making it comfortable.
Ceiling
Its preparation is implied by any competent scheme for installing a stove in a bathhouse. Why? Because a significant part of fires start from above the room - due to overheating or cracks in the pipe. Therefore, when arranging the ceilings, a hole is left for the chimney - with a diameter of 90 cm. Thanks to this solution, later, when connecting the heating unit, you will not have to cut out part of the beams and invent jumpers to maintain the strength of the structure. Attention, the pre-designed passage must be square, not round, so that the cutting box can be tightly inserted. This is a channel made of tin and stainless steel, inside of which the pipe will be located. But the outside still needs to be wrapped with basalt cardboard to prevent direct contact with the wood of the walls of the room.
We combine a steam room and a washing room in a bathhouse
For many, steaming in a bathhouse, where the steam room is combined with a washing room, is the image of classic bath procedures. This is due to the fact that often in villages it was not expected to spend a large amount of resources and time on the construction of a bathhouse. Therefore, the design of the bathhouse was quite compact, which led to the need to combine a steam room and a washing compartment.
Advantages and disadvantages of washing in a steam room
The biggest advantage and the main reason why a washroom is installed with a steam room in the same room is that this solution allows you to build a bathhouse with minimal dimensions of 4x4 or even 3x3. Once upon a time, the main purpose of a bathhouse in villages was the ability to wash in it. That is, even if the family was not rich, a small bathhouse was still necessary for regular bathing procedures for hygiene purposes.
Therefore, at least small but fully functional bathhouses were built, where one could wash and steam. Since the space inside such a structure is minimal, it was impossible to separate the washroom and steam room.
Combining a washroom with a steam room also has its drawbacks. First of all, we need to talk about the inconvenience of taking bath procedures in a large company. Obviously, a small bathhouse is usually built either for one or two people, or for a small family. But, if you plan to use it for several people, then you must immediately take into account that you can wash only after everyone has steamed.
If you wash after steaming, the air in the steam room will become quite damp and further steaming will not be of such quality. In addition, after taking a shower, the smells of soap and shampoo remain in the room, which also adds unpleasant sensations to those who will be steaming next. So here you will have to choose: either everyone will steam and wash together, or those who will steam after someone else has already washed will have to put up with a lower-quality atmosphere in the steam room.
It has also long been noticed that when one room is used together for both steaming and showering, the floor in it requires replacement noticeably faster. And since the design of such a bathhouse is usually budget-friendly, the floor here is made from wooden planks. It is better to place all the elements in it in such a way that it is possible to replace the floorboards without much difficulty.
Recommendations
When equipping a steam room, you need to take into account the features of this space.
The main point is the complete drainage equipment. Any steam room must have a high-quality drain through which water flows. It must be equipped in such a way that water flows towards the main pipe. It is through it that the water leaves the steam room. Despite the fact that many people think this system is more suitable for showers or washrooms, it can also be safely used in steam rooms. Having planned a full-fledged sewer system, it is worth working on this process from the very beginning. To do this, you need to lay the pipe at the stage when the foundation is being created. Ideally, it should be taken out into a pit located at least three meters from the bathhouse. Often this very pit is additionally lined with bricks or dense concrete rings. The bottom in this case is laid out with gravel. All this guarantees reliable protection against waste leakage.
Another equally important point is thermal insulation. A good steam room must be well insulated, and there are many ways to make this idea a reality. This includes a high-quality foil coating, which, due to its thinness, prevents the construction of too dense a finish, as well as mineral wool and other materials.
When choosing one type of insulation, you should definitely take into account that most of them react negatively to high levels of humidity. If this is the case, then it is necessary to additionally waterproof the protective layer.
It is also important to take into account the presence of adequate and high-quality ventilation. This is a very important detail
If the ventilation is poor, then it is unlikely that you will be able to fully relax in the steam room. Instead of relaxation and rest, headaches and problems with the cardiovascular system may occur.
Hoods, according to professionals, should be located at the top. The fact is that when the air heats up, the temperature first rises at the top. Therefore, it is in this area that ventilation holes and supply vents are located. They must also be supplemented with special exhaust grilles. It is these structures that are responsible for allowing cool air into the room.
In some cases, steam room owners prefer to make do by periodically opening the doors or windows during procedures. It’s easy to guess that this is not enough, and you can’t do without a full-fledged ventilation system. Its installation must be taken responsibly, and, if possible, the structure should be located closer to the stove so that the cold air coming from the street is immediately warmed up, because cold air is contraindicated in such conditions.
In conclusion, we can say that if a person can make a steam room correctly, that is, equip and insulate it, then he will be able to get maximum pleasure. And this will give you the opportunity to enjoy not only the work done, but also the visit to the steam room. The main thing is to avoid even minor mistakes.
To learn how to properly decorate a steam room in a bathhouse, see the following video.