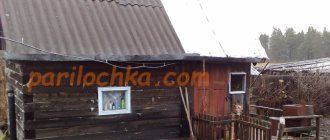
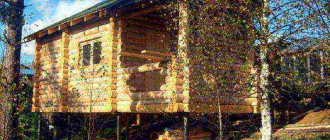
Everyone who builds a house, garage, shed or other structure wants it to last as long as possible and cause as few problems as possible. This fully applies to the bathhouse. Its construction requires taking into account many details and nuances that may not be obvious at first glance. And the owner of a private house should pay great attention to one of these details - the question of waterproofing the floor in the bathhouse and its quality. Want to know more about this? Then check out this article.
Waterproofing the floor in the bathhouse
Main types of bathhouse floor waterproofing
| Traditional | This type of waterproofing can be applied using caulking or gluing. Mastic is applied to the prepared surface in several layers, a roll of waterproofing material is laid, and finishing material is placed on top. This type of insulation provides good water resistance, but reduces the height by almost 50 mm and can emit a pungent bitumen odor. |
| Penetrating | This type of waterproofing is optimal for organizing a bathhouse. The floor is pre-cleaned of dirt and debris and primed. After drying, a layer of waterproofing is applied to it. |
Penetrating waterproofing is divided into types:
RECOMMENDED ON THE TOPIC
- Waterproofing the blind area around...
- Pouring the floor with self-leveling mixture
- Concreting : It is characterized by frost resistance and high density, used in the construction of concrete waterproof structures.
- Polymer-cement : Eco-friendly, durable, has a high level of adhesion.
- Cement inorganic : Used in rooms with high humidity levels
- Seamless : Suitable for all types of premises
Insulation of walls and ceilings
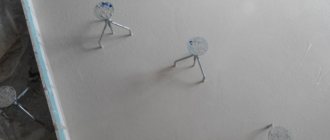
Waterproofing the ceiling and walls in the bathhouse is carried out using the same technology. Among the many insulators, popular ones combine hydro-, steam- and heat-insulating properties, for example, penofol, isospan and isolon. These are thin foamed polymers covered on both sides with foil. It is recommended to use a kraft paper base in the steam room. The panels are laid with an overlap of ≥ 10 cm and secured to the wooden sheathing with metal brackets. The joints are sealed with self-adhesive aluminum tape. Additional fixation of the insulation is carried out with thin slats that create a ventilation gap before the finishing is attached to them.
Roof insulation is no different from normal roof insulation.
Baths
Floor preparation
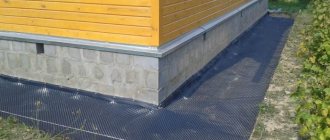
In order for water to be removed from the premises in a timely manner, it is necessary to correctly design the drainage at the very stage of construction planning. Properly arranged drainage of water from the washing room will protect structural elements from destruction by moisture, as well as from the appearance of unpleasant odors and the appearance of fungus.
The drainage drain must be located at the lowest point of the floor. When pouring a cement screed, the entire flooring is sloped to drain the water independently. A drain is a closed gutter or pipe protected from corrosion and high temperatures.
Waterproofing wooden floors
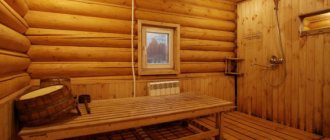
The most common material for bathhouse floors is wood - coniferous or deciduous. Wood retains heat well, has an aesthetic appearance and a pleasant smell.
Such floors are comfortable for the feet, but have one significant drawback - under the influence of moisture they can quickly become unusable. Wooden coverings additionally provide ways for moisture to escape - small diameter holes in places where water drains.
Wooden coverings are:
- Leaky : These floors have cracks to allow water to drain into the soil under the bathhouse.
- Non-leakage : In such floors, water flows through a drainage hole into a special water collector and leaves outside the bathhouse through a drain pipe.
Wet areas
Perhaps some readers are only interested in learning about the principles of waterproofing a steam room and a washroom in a bathhouse or sauna. Indeed, most of the waterproofing work is the same for a residential building and a bathhouse, but the two rooms require special treatment.
Steam room in the bathhouse
The steam room in the Russian bath is a humid room. Of course, it can’t be compared with a washroom, but still.
Let's assume that we have a finished floor, a box of walls, and a ceiling. How and which of these can be isolated from water?
A wooden floor is not waterproofed, but hydrophobized - it can be covered with impregnations or floor varnishes in a damp room. The Finns, for example, promise that their products for wooden floors will not slip. See material about painting the floor of a bathhouse.
As for waterproofing a bathhouse from the inside of a steam room, a good vapor barrier is foil, which can be used to cover the walls and ceiling over a layer of heat insulation. But, of course, if this does not violate your preferences, because not everyone is a supporter of foil in the steam room.
ATTENTION! We do not recommend using foil materials with polyethylene foam or film - they are not at all suitable for waterproofing a steam room in a bathhouse! If you need something stronger than just foil - foil kraft paper.
Steam room in the sauna
The steam room in a sauna least of all needs protection from water, because there is a minimal amount of moisture there. But this is only if the owners adhere to Finnish rules.
In general, a worthy replacement for waterproofing in a sauna is proper ventilation, which ensures a constant change of air and, accordingly, the removal of water vapor.
If you alternate the modes of the Russian and Finnish baths, then it is better to navigate the construction of the steam room using the Russian one and the advice given above for it.
Washing room
The washroom is more tolerant of materials that can be used in it to protect against moisture. In principle, everything is the same as mentioned above for the steam room, but it is already possible to use, say, moisture-resistant drywall in the finishing.
In general, when finishing a sink, you can take and use all the same materials that are suitable for bathrooms in residential buildings.
Of course, this is not suitable for wooden walls, but if you have wood in the sink, then it is best to soak it either in oils/oil waxes or cover it with water-based acrylic varnish (read here about painting the inside of a bathhouse).
***
Waterproofing installation process
When laying the floor on logs laid at an angle, 50*50 mm bars are attached. Subfloor boards are laid on them, and on them - one or two layers of waterproofing material (roofing felt, plastic film, etc.).
Then mineral wool, glass wool, polystyrene foam or other heat-insulating material is laid on the flooring and protected from moisture. To do this, two or three layers of roofing material are laid, which is coated with molten bitumen or a solution of bitumen in diesel fuel.
Conclusion
In the video presented in this article you will find additional information on this topic. Also, based on the text presented above, we can conclude that there are a number of different types of insulation. They all have their own characteristics and purpose.
Moreover, if surface protection work is done with your own hands, then professionals recommend using highly specialized substances. Therefore, for a bathhouse it is worth using special waterproofing materials designed for the critical conditions inherent in this type of structure.
Did you like the article? Subscribe to our Yandex.Zen channel
Waterproofing concrete floors
In rooms with high humidity, steam rooms and washing rooms, it is recommended to make a concrete floor. Such floor coverings are durable (up to 25 years of operation), moisture-resistant and fireproof. But they also need waterproofing.
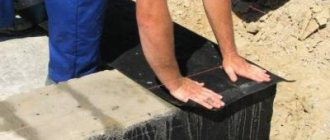
Waterproofing a concrete coating should only begin after the concrete has completely dried. To do this, the surface is covered with a cement-sand screed up to 20 mm, onto which waterproofing is then applied. The floor must be level, without cracks or holes. Liquid waterproofing mastic is applied to the screed in several layers, and roll waterproofing (polyethylene film or roofing felt) is applied to it.
Mixed impregnations
Where is it better to use mixed impregnations? Mixed products are products that not only protect walls and floors from rotting, but also prevent fire. The washroom is a room with high humidity, so the likelihood of a fire in it is low. In the rest room, air humidity is approximately 60%, and in the dressing room - no more than 30%.
To provide high-quality protection not only from rotting, but also from fire, it is advisable to use mixed types of impregnations in the dressing room. As a rule, such products contain fire retardant reagents that do not pose a threat to health.
Step-by-step process for waterproofing a floor
After installing the hole for the drain pipe, you can install the waterproofing in just a few simple steps:
- Plywood is secured to the subfloor using screws
- Waterproofing is laid on the plywood so that the edges of the material fit under the lining on the wall
- The joints of the waterproofing material are welded with a construction hair dryer.
- The edges of the waterproofing under the lining are sealed with construction tape
- A reinforcing steel mesh with a slot for the bathhouse sewer drain neck is laid on top of the insulation.
- Next, the entire perimeter of the lining from below and the rocks of the doorway is taped with tape so as not to stain them with cement mortar
- A cement-sand mortar is poured onto the floor and left to dry.
Floors in the bathhouse. How to do it right and not make mistakes!
For the optimal choice of waterproofing material and its installation technology, it is recommended to consult with a specialist in this matter.
Ceiling vapor barrier
Ceiling vapor barrier
Initial data: the ceiling is covered with clapboard, pressed mineral wool was chosen as a thermal insulation material. It is these materials that can guarantee the expected effect from the work performed.
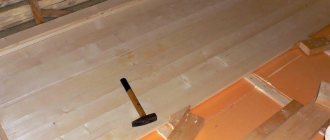
Step 1: Nail the rough ceiling to the ceiling joists. You can use not only edged boards; the gaps do not affect the quality. The main thing is that they are relatively smooth and do not have protruding sharp elements. If any are found, the boards must be cleaned with sandpaper. The thickness of the boards is within 20 mm.
Laying the rough ceiling
Rough ceiling
Step 2. Prepare even and smooth slats approximately five centimeters wide and two centimeters thick, to which the finishing lining of the ceiling will be attached.
Step 3
Carefully spread the foil on the ceiling; this work cannot be done alone; there is a high probability of tearing the material. In terms of strength, foil is not very high
Do not stretch the film too much, but do not allow it to sag more than two centimeters.
Vapor barrier
Step 4. When nailing the planks, be very careful, immediately estimate where they will be installed and do not “fidget” on the film several times.
Step 5. The planks are secured, begin to sheathe the ceiling with clapboard. Fix the ceiling plinths in the corners.
The photo shows the slats and the lining attached to them
DIY clapboard ceiling. The gap between the lining and the wall is up to 2 cm
Flange ceiling
The interior work is completed, go up to the attic to insulate the ceiling. We recommend using mineral wool, but in principle you can use any materials: from foam plastic to expanded clay. Mineral wool has the highest heat-saving characteristics, the optimal thickness is 10 centimeters. Place the cotton wool tightly, without gaps. The sheets are perfectly cut to existing sizes, and unproductive waste is close to zero.
Nail boards on top of the ceiling beams. The thickness and quality of the boards depends on how you will use the attic space in the future. Although our advice is, regardless of “today’s plans,” lay the flooring with high-quality material. The boards must be edged, with a thickness of at least 25 mm, the installation process is no different from the process of laying floorboards. Press them with special or homemade clamps, do not allow cracks or curvature to appear. For fixation, you can use nails or self-tapping screws, the length of the nails is at least 70 mm.
Vapor barrier of bathhouse ceiling with foil