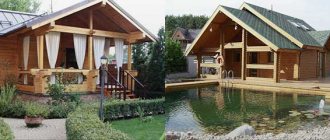
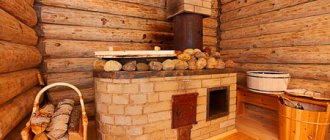
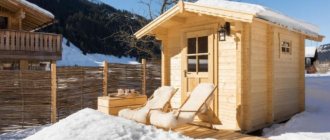
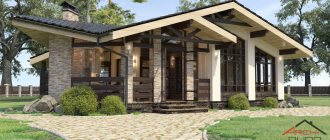
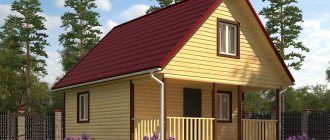
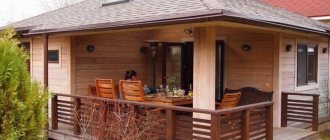
Previously, the bathhouse was used to cleanse the body, today visiting the bathhouse is primarily a relaxation in nature. People go to the steam room, then breathe fresh air outside and make barbecue. For this reason, most of those who plan to build a bathhouse choose the option of designing a bathhouse with a terrace.
Photos of bathhouse projects with a terrace
Even at the planning stage, it is important to correctly determine the location of the future structure so that the developed technical documentation complies with the norms of current legislation.
When designing, it is necessary to take as a basis SNiP 30-02-97 and SP 11-106-97, which clearly define the rules for the development of suburban areas and indicate the recommended distance of the structure being created from other objects.
According to the standards, the minimum permissible distance of a bathhouse from other buildings, vegetation to:
- main residential building - from 7 to 10 m;
- roadway - from 6 to 7 m;
- borders of the estate, fence - from 1 to 3 m;
- neighbors’ houses – from 15 to 17 m;
- wooden utility blocks - from 10 to 13 m;
- structures made of non-combustible materials - from 6 to 9 m;
- well – 10 m;
- forests – 16 m;
- trees – 4 m;
- bushes - 2 m.
If the terrain allows, then the craftsmen recommend building a bathhouse on a hill to simplify the drainage of water from the steam room, shower and improve ventilation. In this case, screw piles will be the best foundation.
Let's take a closer look at the features and advantages of different designs with a terrace with examples of finished objects in the photo.
Corner type
The location of the bath compartment and the terrace canopy at right angles to each other is an original and ergonomic move. The design fits into any area and saves a lot of space. A small courtyard inside the corner can be planted with a lawn, equipped as a playground, or used as an additional recreation area.
A significant advantage of this layout is the location of the firebox exactly in the middle. All rooms will be heated in parallel. This will save the owner from the need to insulate the glazed terrace for year-round use.
Under the same roof
It is considered a universal option. Most often, summer residents build this way due to the ease of construction and economical consumption of materials.
Photo: bathhouse made of foam blocks and a summer terrace with barbecue under one roof
When the terrace is under a common roof with a bathhouse, the rafter system rests on beams - frame elements. The option of fastening fencing is possible.
The photo below is an example of a beautiful bathhouse made of fresh logs, complemented by a summer extension for relaxation.
Here is a version of a timber bathhouse with a small terrace. Floor finishing - decking. The roof is pitched. The design looks simple and at the same time modern.
The terrace can be located along the facade (front), next to one of the walls (side), along three walls or around the entire building (encircling), along adjacent walls (corner).
With grill or barbecue
The recommended area of the attached room, taking into account the installation of a barbecue, is from 7 square meters. m or more. For a large company, an area of 10 square meters is considered optimal. m. If in the first case it will be possible to place only a table with chairs, then in the second it will be possible to add several wicker chairs. Vacationers will not be disturbed by smoke from the barbecue. The person doing the cooking will not be constrained in his movements.
It is important to take into account that the foundation for the barbecue installation is laid separately. The average height is 70 cm from the floor.
The main material for the construction of the furnace is red fireclay brick, which has increased resistance to high temperatures.
To eliminate the risk of fire from a barbecue, the area around is laid with fireproof ceramic paving slabs.
The stove itself is lined with artificial or natural stone.
It is necessary to choose the right location and install a chimney, which is responsible for removing burning and smoke from the room. The comfort of not only vacationers, but also neighbors depends on the quality of work.
You can also provide space for a niche that will serve as a woodshed.
With a well-designed plan, such a terrace will take on the functions of a summer kitchen.
Glazed
Glazing of the veranda is made of plastic, aluminum, and wooden sliding frames.
Plastic frames are an essential element of warm glazing. Used in closed extensions for year-round use. Provide good heat and noise insulation.
Aluminum and wooden frames with glass are placed in unheated extensions, since they do not retain heat well and the indoor temperature in cold weather differs from the outdoor temperature by only a couple of degrees.
Photo: log house with terrace and bathhouse
The veranda with panoramic glazing looks great. Vacationers have an overview of the site. Being indoors, a person becomes closer to nature.
The downside is that everything that happens in the extension is also clearly visible.
Another option for glass structures is sliding walls. The closed veranda quickly transforms into an open one. The frame is made of plastic.
The windows can be decorated with multi-colored stained glass windows, thanks to which the lighting in the room will shimmer in different colors.
Two-story
A two-story structure is suitable for owners of a small plot, with no space for the construction of additional extensions.
In the classic version, the steam room, shower room, dressing room are located on the first floor, the guest or relaxation room is on the second.
Photo of a wooden bathhouse made of rounded logs with a small terrace and balcony.
The second floor turns out to be an attic and is located under a sloping (gable) roof. Due to this form, the free space can be fully utilized.
We must not forget the regularity - the larger the area of the structure, the longer it will take to warm up.
The main requirement for buildings with several floors is the presence of reinforced floors that will support not only the weight of a person, but also furniture.
The two-story bathhouse with a covered terrace can comfortably accommodate many guests. If space allows, then one rest room should be made downstairs, the second upstairs.
One-story
Photo: Russian-style bathhouse
Usually this is a small house with a covered summer extension for relaxation. The internal set of rooms is standard - locker room, washing room, steam room. Construction of a one-story bathhouse is inexpensive.
But there are also one-story bathhouses of increased comfort, which have a swimming pool, a relaxation room, several bathrooms, and a kitchen. Such a project costs many times more.
The terrace for such a building is a remote seating area for warm weather. If we are talking about a glassed room, then you can use it all year round.
Closed
Can be used regardless of the season or outside temperature. It is customary to glass it with metal-plastic double-glazed windows, which perfectly retain heat in the room. The roof can also be made transparent if desired.
A stove and a fireplace for heating are installed inside, and a niche is set up for a woodshed. An alternative is gas or electric heating.
Flowers in pots are placed on the walls and window sills. Skillful housewives turn such a terrace into a full-fledged greenhouse.
The construction requires high-quality insulation of both the foundation, walls, and roof.
If the area is large, then you can make a gym or home library on the terrace.
Open
It is considered a summer recreation area. It is not customary to glaze it. Instead of walls and windows, railings up to 1 m high are installed around the perimeter. Depending on the project, you can do without them altogether.
This covered canopy is good protection from rain and sun.
The floor is made slightly sloping for better water drainage. Material – terrace board, stone, tile.
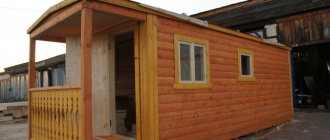
Photo: you can make a garden house or a small bathhouse from a construction trailer
The following are placed in the open area:
- table with chairs;
- shops;
- sun loungers;
- wicker rocking chairs;
- barbecue and woodshed for it;
- small cutting table.
The number and types of interior items are selected according to the area of the structure.
With a balcony
A balcony can be added to two-story baths. But such construction will take a lot of time and money. The average area of such a structure with a balcony is from 30 to 45 sq.m. In bath complexes the figure is significantly higher.
At the project development stage, several sketches of the future balcony are created separately, a view from the outside and inside, the material consumption is calculated, and a decision is made whether to cover it with double-glazed windows or leave it open.
The roof for such a bathhouse is made so that it completely covers the balcony.
Roofing at an angle - reducing free space. But nevertheless, there will be enough space on the second floor to install a billiard table, a large corner sofa with armchairs and a table.
The space leading up will also be taken up. The design of the steep spiral staircase is interesting. Classic - carved wood.
With a rest room
With it, the bathhouse turns into a guest house. In the recreation room, a wood-burning or electric fireplace is installed, a plasma TV is hung on the wall, and chairs and a sofa are placed. Avid athletes equip the room with exercise equipment.
Photo of a wooden bathhouse project with a relaxation room on the second floor.
Let's assume the option of an open veranda. When, after a steam room in warm weather, guests are placed in the fresh air.
Bath complexes have several rest rooms.
If you don’t have the money to build such a structure, you can easily rent it for a few days.
After all, constant maintenance and heating of such a building is expensive. It is not surprising that many owners take up construction not for personal recreation, but to make a profit from rentals.
Pros of having a relaxation room in the bathhouse:
- year-round operation;
- your rest will not be disturbed by annoying insects;
- possibility of installing various household appliances;
- reception and accommodation of guests.
There are projects where the room is equipped with a minibar, a billiard table, armchairs and a poker table.
We recommend reading our other articles:
- Do-it-yourself bathhouse shelf made of wood
- How to make a bath floor correctly
Frame extension: do-it-yourself step-by-step installation
Whatever the structure of the walls of the bathhouse, whether they are made not only of wood, but also of blocks or bricks, the veranda most often has a frame structure, it is easy to attach it to an existing building. A veranda attached to a bathhouse with your own hands will not only be a convenient place for relaxation, but will also make the building more attractive.
Option with attached veranda
Brief instructions in pictures will tell you how to do this:
| Photos, steps | A comment |
Layout of extension axes | The location of the extension must be marked by driving in pegs and tensioning the twine. Since the foundation will be columnar, you need to draw all the contours of the holes for the pillars on the ground with a shovel. |
Excavation for pillars | When constructing a shallow foundation, the bottom row of blocks is buried only halfway (15-20 cm). When digging holes, you need to add to this size the thickness of the drainage pad made of crushed stone and sand (at least 10 cm). This way the blocks will never get wet in water, because concrete doesn’t like that. |
Laying crushed stone | Cover the hole with a piece of geotextile and fill it with crushed stone. |
Tamping | You can tamp it in any way possible - you can do it as in the photo. |
Laying sand | Now pour sand. There is no need to lay out the entire volume at once - after all, you need to level the base, adjusting its height to the desired level. |
Determining the elevation of the top of the foundation | Mark the top of the foundation on the peg as a guide. |
Sand bed compaction | Compact each layer of sand well, measuring the desired height to the mark. |
Checking the horizontality of blocks | Wrap the ends of the geotextile inside the backfill, place the two lower blocks on them and check the horizontality with a level. |
Mixing glue | In this case, foam blocks are used to lay the pillars, so not ordinary masonry mortar, but special glue is used. They can also be used to install polystyrene concrete blocks. |
Applying glue to blocks | First, the surfaces of the vertical joints of the blocks are coated with glue, then the horizontal ones. |
Laying the second row of blocks | The second row of blocks is laid out. |
Installation of the bottom trim | When all the pillars are ready, a piece of roofing material is placed on each one so that the beam does not come into contact with the concrete. A frame is made around the perimeter of the veranda and floor joists are installed. |
Pairing the stand with the harness | The racks are attached directly to the framing beam, secured with angles, staples, miter bars and other methods common in construction. The racks are also tied with timber along the upper perimeter. |
The frame is ready, the roof remains.
Next, it’s a matter of technique: the roof rafters and roofing material are installed, the floor is sheathed, crossbars and window frames (if the veranda is closed) or decorative fences are installed.
Frame for a closed veranda
Such a veranda or terrace can be attached to a brick or block bathhouse.
Summer veranda with climbing plants
Open terrace with canopy
Drawings and diagrams of a bathhouse with a terrace
Photo: diagram of a two-story wooden bathhouse 6x6 meters.
Following the step-by-step instructions, the first step is to draw up a drawing of the future structure. As a basis, you can take existing buildings with completed calculations, a ready-made estimate, or develop a project yourself.
A visual image of the building simplifies and speeds up installation work, and allows you to document and eliminate possible shortcomings.
For a small family of 2-3 people, a one-story bathhouse with a closed terrace is quite enough. If the number of residents reaches 5–8 people, then it is better to consider the design of a medium-sized bathhouse with an attic.
Downstairs, according to the standard, there is a steam room, a shower room, a dressing room, a relaxation room and a kitchen (if the area allows). The second floor is equipped for comfortable leisure of the whole family. A billiard table is installed here, a games room or home cinema is set up.
The diagram above is an example of a one-story bathhouse with a terrace and a swimming pool inside.
Photo. Bathhouse 2.3x6 meters made of profiled timber 100x150x6000 mm with an open terrace 2.3x1 m under a common roof.
This drawing is suitable for a country holiday with a small family. An open extension is made under one roof.
Scheme of a one-story bathhouse 6x6 meters
This is an example of a one-story bathhouse with an open terrace and a large relaxation room.
Bathhouse layout with a garage for 2 cars, a veranda and a utility room.
An interesting design option, where the bathhouse is combined with a garage on one side, and on the other side there is a terrace, and there is also a utility room.
Ready-made examples
After heavy gardening work, it’s nice to wash yourself in a small bathhouse, built with your own hands. It performs the functions of a steam room and shower perfectly, although it is not attractive in appearance. But sometimes the bathhouse is subject to more than just hygienic requirements. Around it is formed a whole complex of facilities for complete relaxation with a swimming pool, sun loungers and a barbecue area with a dining group on the veranda. To relax your body and soul, the bathhouse and its surroundings should look great.
We invite you to appreciate the beauty of the baths, created for relaxation by real professionals:
a veranda separate from the bathhouse;
To learn how to mount a veranda, see the following video.
Selection of materials for building a bathhouse
Let's look at the types of raw materials that are in greatest demand.
Tree
Traditional material for Russian baths. Retains heat well and is environmentally friendly. Certain breeds have a healing effect on the body.
But wood requires additional protection from moisture, insects, and fire, so before construction it is treated with special means.
For a small bathhouse with a terrace, a columnar foundation or, on difficult soils, a pile foundation is sufficient.
In order for the tree to last longer, it is necessary to make high-quality waterproofing between the wooden covering and the foundation.
The following types of wood are used for construction.
Log
Whole, sanded trunks are taken, which do not need to be rounded. The construction of a bathhouse from a fresh log house is done by grooving the parts together.
The logs are placed perpendicular to each other. Gutters are formed in them, along the edges there are recesses of the same size.
If you order calibrated logs of the same diameter, the corners of the building will look neater.
The wood is impregnated with antiseptics and fire retardants (the latter are needed for protection against fire).
Beam (profiled, glued)
Logs are cheaper, which is why they are more popular.
There is a particularly high demand for profiled timber, which is usually profiled on a special machine, giving an ideal smoothness to the surface. The top of the raw material is coated with antiseptics and varnish, due to which the wood does not darken.
The outer part of the structure does not require additional finishing.
For construction, timber is cut to specified sizes. Wooden pins are used to connect the elements.
There is no need to finish the interior. But if ordinary timber was taken, then the owners prefer to cover the walls with clapboard, choosing hardwood raw materials. Coniferous species are used in rooms where there are no high temperatures (not suitable for steam rooms).
The finished design turns out neat and modern, becoming an environmentally friendly decoration of the estate.
Frame technology
This is a prefabricated bathhouse with a small canopy. It won't cost much. It will fit even on a site with limited space. Differs in installation speed. A popular material is timber.
If the structure is well insulated, it can be used in winter.
Block and brick
They are used for the construction of baths that will be used at any time of the year. Due to the significant weight of the raw materials, it is necessary to take care of pouring a reliable foundation.
Let's take a closer look at the features of the materials.
Foam block
Foam concrete has a porous structure. It is considered a breathable material. Light in weight. Large block sizes speed up laying.
Due to its poor resistance to moisture, a building made of foam concrete requires mandatory cladding both outside (along the facade) and inside.
Exterior finishing options:
- clinker tiles;
- decorative plaster;
- siding;
- block house.
The quality of thermal insulation of the foam block is inferior to wood, so it will be necessary to insulate the bathhouse from the inside.
Gas silicate block
Technical characteristics are similar to foam concrete.
But gas blocks are less resistant to moisture.
To ensure that the structure lasts longer and the material does not begin to crumble, deep penetration waterproofing is used for the walls and ceiling.
The inside of the room is plastered and finished with tiles, stone or wood.
Brickwork
This material is considered a leader in fire safety.
Due to the high cost, it is rarely used for the construction of baths.
In addition, brick construction:
- takes a long time to warm up;
- needs ventilation installation;
- laying high-quality waterproofing (brick is hygroscopic).
But, once heated, the material retains heat well. Brick walls have good sound insulation and last a long time.
The inside of the bathhouse is lined with plaster and wood. It is convenient to place a small kitchen here, install a wood stove or fireplace.
The pool can be replaced with a cold water plunge pool.
Building sizes
A modern bathhouse is not only a steam room, a washing room, but also a whole complex that can also combine a relaxation room, a kitchen, a toilet, and a small bedroom. Such a structure, if necessary, can become a full-fledged summer home. The bath terrace will have a barbecue area, a fireplace, and even a small swimming pool.
When drawing up a plan, it is important to take into account many rules and principles for the construction of such structures. The minimum comfortable area of the steam room is 9-11 meters, height – from two. Doors and windows are made on the south, or at least on the east side, to minimize heat loss. All electrical appliances, wires, sockets, switches, if provided, must be protected from moisture to avoid electric shock if they malfunction.
The choice of a suitable project depends on how large the area is around the house:
- 6 by 9 meters are “classic”, the optimal size of a bathhouse in a spacious yard. The guest area here is so large that it can accommodate not only a family of four to six people, but also a dozen friends. It is recommended to build a common foundation for both zones; you can even organize a second floor: then there will be a sauna and a veranda itself below, and a billiards room or a relaxation room, a toilet above;
- The bathhouse attached to a residential building has dimensions of 6 by 6 or 5 by 6 meters - such proportions look harmonious on any standard site. The construction allows you to significantly increase the area of the house, creating a cozy place under a canopy for gatherings with family and friends. An undoubted advantage here is additional protection from the cold of the building itself;
- 4 by 4 or 4 by 4.5 meters is also a typical bathhouse, consisting of a steam room, a font, and a relaxation area. The veranda is located on its own foundation - it is usually open, which is not very convenient, provided that the entrance is from the street. In some options, the structure is made covered or part of the room is converted into a small dressing room;
- in a 4 by 6 meter bath project, a vestibule is provided immediately, since the building is intended to be used in the autumn-winter period. The shower here is not combined with a steam room, but they are almost the same size - the latter is always a little larger, since it must accommodate at least two or three people at the same time;
- a typical bathhouse 5 by 6 meters has a protruding terrace and a fenced dressing room, which takes up very little space. The veranda is designed as an extension, sometimes it is L-shaped, which allows you to comfortably accommodate a large company by arranging a convenient barbecue corner, fireplace or tea area;
- the 6 by 6 meter bathhouse project has a spacious steam room, shower, locker room, vestibule, a place to relax or even a small bedroom. You can also set up a smoking room here. The terrace can be closed or open.
Selection of materials for decking flooring
Basic recommendations for flooring in an open extension:
- Wear resistance. The material should not wear off even over the years.
- Not slippery, even when wet. This will reduce the risk of injury when walking on it.
- Low temperature resistance. Refers to regions with severe frosty winters.
- Do not deform under the influence of moisture or precipitation.
There are no such restrictions for a closed terrace, since the floor is not exposed to external factors.
Let's look at popular flooring materials.
Tiles, porcelain stoneware
The tiles are taken with the most rough, textured surface to prevent slipping.
Suitable tiles:
- ceramic;
- sidewalk;
- concrete.
It is strictly not recommended to use tiles. When wet, it becomes very slippery, which leads to unwanted injuries.
It is possible to lay porcelain tiles and pieces of stone. This flooring will go well with a bathhouse made of blocks and bricks.
Terrace board
Terrace boards are made from natural solid wood or with the addition of polymer raw materials. The latter type is preferable in an open terrace, since it is not afraid of moisture and does not deform due to temperature changes.
Available in the following breeds:
- oak;
- pine;
- ash;
- larch;
- hornbeam;
- teak.
It is used to cover the floor in bathhouses made of logs and beams, complementing the wooden ensemble.
How to make a wooden terrace on a pile foundation
The most problematic option is wood. If you plan to use it, then you need to choose from varieties that tolerate being outdoors well. It also requires treatment with protective impregnations, varnishing or painting.
Preparing piles
To create normal operating conditions for wooden terraces, it is necessary to think through the design so that water does not accumulate under the structure. In general, it is advisable to make the platform made of wood raised above the ground level so that the boards below are well blown and ventilated. Therefore, most often a pile or columnar foundation is made for such structures. Moreover, the fertile layer under the terrace is removed, the remaining soil is leveled and compacted, and then covered with crushed stone and also compacted. This is done to prevent the vegetation from rotting and spreading “odors” and spores.
The installation step of the posts is at least 1-1.5 meters - this way the boards will not sag. Material of manufacture - any. You can drive asbestos or iron pipes into the ground and pour concrete into them. This is a very durable, but not cheap option.
Roofing felt piles
Much less money (but more labor) will require piles with roofing felt formwork.
This is how you can make permanent formwork for piles from roofing felt | Photo by: Alexey (na4alnik75 www.forumhouse.ru)
Ruberoid is rolled into round columns in two or three layers. Diameter - 20-22 cm, height - about 1 meter (70 cm is recessed in the ground, 30 cm is on top). This is for soils with an average tendency to heave. In order not to have to worry about measuring the diameter of this formwork, you can use a pattern. If you find a water bottle of a suitable diameter (these are nine-liter containers), the work will be simple: screw on the roofing material, secure it with tape, and pull out the “pattern” by the handle.
It is more convenient to fasten with tape, as usual. It just doesn’t want to stick to the powder. To ensure adhesion, remove the crumbs in the right places with a brush and wipe the cleaned area with white spirit. Once dry, the hold is excellent. So prepare the required number of columns.
Using a drill, make the required number of recesses, slightly larger in diameter than the molded posts and 25 cm deeper. These 25 cm are used to construct the pillow: they are covered with a 15 cm layer of crushed stone and compacted. Sand is added, which is also compacted.
Then formwork is installed in the prepared pits. All columns must be leveled. This can be done using two rods driven along the edges of the planned terrace and a cord stretched between them. Its verticality can be checked with a building level, adjusting the height of the rods if necessary. The second way is to set the height of the bars using a hydraulic level (you can also use a laser level, but it’s difficult to work with outdoors - the beam is visible only in the evening or in cloudy weather). After fiddling with positioning the cord, you will then quickly bring all the columns in one row to the same height. Repeat the procedure in the following.
How to attach support pillars to concrete piles - one of the options
The columns also need to be placed vertically. You can't do without a plumb line here. It’s a simple tool, but nothing better has been invented yet.
Next, to increase the strength, it is advisable to insert several reinforcement bars inside - 2-3 per column. You can use smooth rods with a diameter of 8-10 mm. Then pour concrete inside. It needs to be compacted, since it is not worth knocking on the roofing felt; you will need to take a long metal rod and bayonet it (pierce it through and pull it a little from side to side). As a result of such actions, the level of concrete will become a little lower - air will escape, you will have to add a little. Everything becomes easier if you have a submersible hand or mobile concrete vibrator. When the solution has set, you can begin further work.
Brick pillars
On heaving soils, the posts can simply be squeezed out, causing the terrace to slide down. What is needed here is a wider platform that will stabilize the situation. For such a foundation, small pits are dug, measuring 50*50 or 60*60 cm. The soil is compacted in them, crushed stone is poured, it is also compacted, and formwork is installed from boards 20-25 cm high.
The foundation for the terrace can be made of brick pillars
Several pieces of reinforcement are laid on the halves of the bricks - lengthwise and crosswise - to form a cage (2-3 rods each). A pipe is inserted into the middle (verticality is checked). All this is filled with concrete (maybe with crushed stone). Thickness - 20 cm.
After the mortar has set, a brick column is made around the pipe. The height is set just below the required flooring height - leaving room for the bottom trim.
How to make a bottom harness
There are two options for installing support pillars:
- first, logs are attached to the columns, and then support pillars are attached to the logs;
- when pouring concrete, galvanized embedded plates are inserted into the columns, then the bars of the posts are attached to them (put twice folded roofing material under the posts, treat the ends with impregnation, although it is better to tar or paint).
Another option for a foundation for a terrace is ready-made concrete blocks. You just need to dig a corresponding pit for each column, make a gravel backfill, place a half-block, and a rectangular block on top of the solution
The first method is used most often, but the second also occurs. It requires a little less cost, but there will be more fuss with laying the logs.
When making the lower trim, a beam of 100*75 mm, 75*75 mm or wider is used - it depends on the size of the terrace and the load on it. They are treated with antibacterial impregnations, laid on a concrete column covered with a layer of waterproofing (lay twice folded roofing material or coat with mastic or liquid waterproofing).
The beams cost a lot, but you can cheat by making a spliced beam from boards. It is not suitable for support pillars - the appearance is not the same, but for joists it is even better, since it has increased strength. How to make timber from boards:
- Take an edged board with a width equal to the length of the side of the beam, with a thickness of at least 25 mm.
- The number of boards to be spliced is determined based on the required thickness of the timber. If you need timber 75 mm thick, then there will be three boards.
- They are connected with self-tapping screws in increments of 10-15 cm (the length of the self-tapping screw is slightly shorter than the width of all the boards being joined). When connecting, the fasteners are placed in a checkerboard pattern.
- When creating long beams, boards can be spliced. But at the same time, you need to ensure that the joint is at least half a meter away from the joint.
- Such spliced bars are laid on the edge. Only in this state do they have high strength (even stronger than solid timber).
What does a deck frame look like | Author: Alexey (na4alnik75 www.forumhouse.ru)
Regardless of the chosen method, all wooden elements must be impregnated with protective and antifungal compounds. To improve their appearance and extend their service life, they are coated with varnish. It is better to use compositions for external use, and if we talk about varnishes, then yacht varnish is preferable - it is well adapted to a humid environment and protects the wood from the effects of salts.
It is possible to create a frame made of metal. You can use a powerful corner or a square pipe. This base is more reliable and durable. It is well primed, then carefully painted and will serve for decades. To prevent the board from being damaged upon contact with metal, a waterproofing material, such as TechnoNIKOL, etc., is glued to the metal. When attaching the flooring, you will have to drill holes - it is unlikely that you will be able to screw in the screws directly.
The frame can be welded from metal. Such a terrace will be much more repairable
Flooring
After making and securing the strapping, you can begin making the flooring. An edged board is usually used. There is a special terrace board - it has not a flat, but a wavy front surface, but it is more often laid around fonts or pools built on the terrace. The wavy surface, even when wet, does not allow slipping, and if you make a slight slope, the water will quickly drain without lingering on the flooring.
The thickness of the board, as for the floor, is rarely thinner than 20 mm, although its thickness depends on the distance between the piles. At a distance of 1.5 meters, the thickness of the board is 25 mm, then it will not sag when walking.
Boards for plank flooring need to be of decent thickness. To make them last longer, they are treated with antiseptics and varnished or painted.
Features of installation of heat and vapor barrier
Insulation is carried out on closed verandas, which will be used all year round.
The walls are first checked for cracks and defects. The condition of doors and double-glazed windows is assessed in order to eliminate possible sources of cold in advance.
Builders advise performing internal insulation. This is many times more effective than external thermal insulation.
The most commonly purchased materials are sheets of polystyrene foam 10 cm thick. The downside is that the free area of the room is reduced.
Beginners may have trouble fitting the sheets due to the fragility of the foam. An alternative is rolled mineral wool, which will be simpler and more convenient to install.
There are also expensive insulation materials on sale with a foil protective coating, which are superior in thermal insulation to the previous two types.
You need to start insulating the brick walls of the terrace by installing a wooden sheathing made of bars with a cross-section of 25–40 mm. The fastener spacing is selected based on the size of the slabs. Polystyrene foam is inserted into the openings.
After insulation, the walls are finished (optional). Walls:
- putty;
- paint;
- laid out with tiles;
- covered with plastic panels.
Before insulating the ceiling, the integrity of the roof is checked. Otherwise, if the roof starts to leak, then all the work will be in vain.
The ceiling is waterproofed with perforated film. The joints are sealed with construction tape. The insulation is fixed using more reliable fasteners (screws, dowels).
Design styles of combined buildings
Below are the design styles of buildings with photographs indicating the characteristic features of each direction.
Chalet
The chalet is distinguished by the use of natural materials - wood, stone.
The building is being erected from a fresh log house. The floor of the terrace is laid out with pieces of stone. It is appropriate to place a wood-burning fireplace inside.
The furniture is selected wooden. A popular method is antique styling.
If the terrace serves as a recreation room, then installation of panoramic windows is allowed. The interior is characterized by a hunting theme. Guns and paintings with corresponding images are hung on the walls.
The color scheme is calm, without flashy tones.
Provence
The style comes from the southern coast of France. It is calm and airy.
Light-colored materials are used in the interior and decoration.
Characteristic colors:
- lavender;
- sand;
- beige;
- light pink;
- blue;
- lilac.
- soft green.
Floral patterns predominate in textiles. The terrace is furnished with many living plants in vases and pots. Embroidered bedspreads on sofas and armchairs are allowed.
In Provence, preference is given to wood among materials. They cover the walls with it and select wooden furniture.
The wood is made artificially aged, the painted boards are rubbed down or fired.
Forged parts are welcome. Paintings with landscapes are hung on the walls.
High tech
Such a building is created using the latest technologies. The terrace is equipped with a minimal set of furniture. The main requirement is functionality and practicality.
Materials:
- raw concrete;
- stone;
- glass;
- metal;
- polycarbonate
When decorating, contrasting combinations of black and steel, beige and brown are used.
The roof of the terrace can be completely glass. Panoramic glazing of the building is possible. The doors are installed sliding.
The shower room is equipped with plumbing fixtures with the latest features.
Useless interior decorations are not used in high-tech.
Oriental
A striking example of such design is the Turkish sauna. Finishing the floors and walls of the bath rooms - ceramic tiles, multi-colored mosaic pieces with plant motifs.
The main attribute of the oriental style in the bathhouse is the pool. Special attention is paid to its cladding. Entire patterns are created on the surface from pieces of stone.
When the terrace becomes a relaxation room, it is furnished with a large, comfortable, brightly upholstered sofa with pillows.
Variegated shades are also used when decorating walls. In open extensions, the walls are replaced with bright curtains.
Half-timbered
Half-timbering involves the use of frame technology for the construction of structures.
The structure is built from logs and timber. The roof is made with beams protruding outwards. Inside the room, wooden roof partitions are not hidden, but rather become a style accent.
Half-timbering implies strict lines in the interior. Part of the building is made entirely of glass for a better view of the estate.
Loft
Loft is rough lines, unpolished surfaces of materials, minimalism of details.
Imitation of unfinished brick has gained popularity in the loft. This is how the interior of the walls of the room is decorated. There is a variant of concrete walls with graffiti applied or without it at all.
In furniture, natural raw materials (wood, forging) are combined with innovations (plastic). An alternative to an upholstered chair is unpolished wooden benches.
One simple chandelier is hung in the center of the room. The use of spotlights is undesirable. A laconic combination of wood and metal is a characteristic feature of the loft.
Adding a terrace to a bathhouse means creating a space for relaxation with even greater comfort. The design option, placement, and materials are carefully thought out at the design stage, since it will not be possible to make any amendments during the construction process.
