Published: 06.20.2014 Category: Tools and accessories, Repair, Plumbing work Views: 110091
How and with what to remove old sealant and apply new one
Even if you are not renovating your bathroom, pay attention to the condition of the silicone sealant joint on the side of the sink or bathtub. Even modern sanitary silicone sealants specifically designed for use in the bathroom or kitchen can, over time, be affected by fungus and mold, and simply darken and change their previously attractive appearance.
If you decide to renew a previously applied sealant, but do not know how to properly remove the old layer of sealant and apply a new one, then this article is just for you. There is nothing complicated in replacing old sealant, and we will show you step by step how to do it correctly and easier.
In rooms with high humidity, such as a bathroom or kitchen, mold or mildew may appear on the seams between ceramic tiles, so it is best to use grout with fungicidal additives for grouting.
Mold on the side of the bathtub | Mold on the side of the shower tray |
Particularly at risk are the sides of a bathtub, sink, shower stall or shower tray where water flows down the wall or any other place where the water does not evaporate quickly enough, creating ideal conditions for mold growth. Mold in this area, as a rule, looks like small, dark (to black) spots. At first glance, such darkening can be mistaken for ordinary dirt, but this is not so.
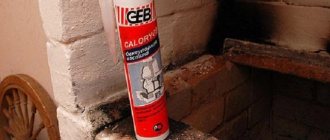
How to use headlight sealant?
Abro 904 headlight sealant has excellent adhesive properties and does not stain hands or adjacent surfaces. To glue glass, you need to cut a piece of the required length from the tape in the package and place it in the gap between the materials being glued, and then press it with your fingers.
Interesting materials:
What is depreciation? What is the profession of diplomat? What are transportation procurement costs? What happens to blood vessels during diabetes? What breaks down carbohydrates? What was given away in PS Plus? What does CrossFit develop? What does Plank develop on the elbows? What to eat before cardio? What to eat in the evening after training?
Procedure for removing sealant and applying new one
Several illustrative examples of removing old sealant and applying new ones will help you decide on the sequence of actions.
Example #1
Use a sharp tool or a special scraper to remove the old sealant. This must be done carefully so as not to scratch the sink, but at the same time deeply and thoroughly so that no traces of the old sealant remain. You can also remove old sealant using special chemicals.
Before applying new sealant, thoroughly clean the surface from dust and dirt. Degrease the surface with alcohol or White Spirit. After the surface is prepared for applying a new sealant, you need to decide what will be more effective and of better quality in your case. Apply the sealant immediately or first cover the application area with masking tape, colored tape or electrical tape. The main point is to provide a better and more even layer of sealant after pressing it in and removing excess.
You can evenly smooth the sealant with your finger, but a better quality seam is obtained if you use a special plastic spatula to apply the sealant. Special sets of spatulas for applying sealant are sold; they are also called spatulas for silicone. They differ in different thicknesses, edge angles and shapes, for better formation of the sealant seam.
By the way, it wouldn’t hurt to say that there are also special attachments on sale that fit directly onto the sealant tube and allow you to apply and level the sealant in one pass.
Nozzle for applying and leveling sealant
Example No. 2
These articles may also be of interest to you:
- How to remove old sealant and apply new one
- Types and properties of sealants. Which sealant is better to choose?
- How to disassemble a sink siphon
- Replacing the siphon and sink drain
From the tile
To get rid of silicone from the tile surface, follow these steps:
- Use a knife to cut off as much of the sealant as possible from the track.
- Small stains will remain on the surface; these are removed with solvents of the same brand. Sometimes you have to experiment, because the owner of the home may not always remember exactly what silicone was used to do the work. These could be Lugato, Quilosa, Silicon-Entferner, Penta-840, Dow Corning OS.
- After applying the solvent, you need to wait a while and when the silicone softens a little, scrape it off with a spatula.
When performing all the steps, extreme care is required - you can damage the glaze.
How to remove sealant from a tile surface can be seen in more detail in the video
Peculiarities
Silicone is a unique substance available for use in sealing. It is non-toxic, so it is often used to seal tile joints in the bathroom, kitchen, swimming pool, refrigerators and ovens. Over time, it can still turn yellow, crack, and its sealing properties are impaired. Then you need to carry out a planned replacement of the material, and for this you will have to remove the old one. This material is also used as an adhesive base for joining different parts.
The difficulty of removal lies in the ability of silicone to penetrate deep into the cracks and pores of rough surfaces. The width of the silicone-coated surface can also complicate the work. Therefore, you will have to clean off the sealant very carefully.
As for the composition of the mixture, in addition to the main substance, it contains various types of additives. Bactericidal compounds that prevent the penetration and development of microorganisms in the joints of kitchen or toilet tiles, plus various solvents that give the substance elastic and sticky properties.
Due to the solvent, the sealant has a recognizable pungent odor, so chemicals to remove the material are used with extreme caution.
There are two groups of silicone sealants on the market - one-component and two-component.
They are sold in ordinary plastic or polyethylene tubes. They harden when the solvent in the mixture evaporates, but only thin strokes can dry completely in due time. Most adhesives on the counter are one-component, which in turn can be acidic or neutral:
- Acidic - have a distinct smell of acetic acid, are very inexpensive and effective.
- Neutral - practically odorless, more resistant to temperature changes, and their price is noticeably higher.
The purpose of the adhesive-sealant is usually indicated on the packaging: automotive, construction, special and others. Two-component (compounds) harden when interacting with a kind of catalyst. They are rarely found in regular stores due to the fact that they are used mainly for industrial purposes. Completely hardens in any quantity and on any surface.
Professional solvents
- Tytan (Selena, Poland). Phosphoric acid based sealant solvent, odorless. Can easily dissolve dried silicone. The cleaner operates for 12 hours. It effectively cleans textured substrates, so it is often used to clean tiles with a three-dimensional pattern. The product leaves greasy traces.
- XADO Mottec Antisilicone (Ukraine). All-purpose alcohol-based car cleaner. Used to degrease and clean substrates from traces of tape and sealant. Can be used on ceramic and acrylic materials. Does not require rinsing, no traces remain after treatment.
- Soudal (Belgium). Hydrocarbon based silicone remover. Available in gel form. Easy to apply, has a moderately pungent odor. Begins to act after 10 minutes. Can only be applied to dry substrates. Before using on ceramic, acrylic, plastic and stone substrates, it is better to test the product on an inconspicuous area. After processing it leaves traces of fat.
- Body Antisil 770 (Greece). Car wash, which is available in aerosol form. Cleans any base. Based on organic solvents. Can dissolve various sealants. Stubborn stains may require re-treatment.
- Dow Corning (Dow Sil, USA). Silicone based solvent. Starts the depolymerization process of the sealant. Safe for any surfaces, including painted ones. Does not change the color of the dye, does not leave stains. Available in aerosol or liquid form. The latter is suitable for removing old traces of silicone.
- Penta-840. Cleans waterproofing from tiles, metal and acrylic substrates. A washcloth is used for application. After washing, the surface is covered with oilcloth for several minutes. The softened silicone is removed with a sponge.
Due to prolonged exposure of the remover to the metal, corrosion may begin. Do not allow the product to come into contact with the skin, eyes or respiratory tract.
When to delete
- The sealant is not applied correctly, resulting in no protection against moisture penetration. Then the carelessly applied layer is removed, and the seam is filled with sealant again.
- Over time, the sealing layer wears out and deteriorates, and it may change color due to fading or severe contamination. The seam may crack, which will significantly impair its moisture-proof characteristics. The damaged layer must be removed immediately.
- Even if the sealant contains antiseptic additives, during prolonged use in conditions of high humidity, for example, in a bathroom, microorganisms can multiply on the surface, causing mold to quickly appear. The contaminated layer must be removed as quickly as possible, since mold that multiplies in dampness can worsen the well-being of apartment residents.
- During repairs, sealant accidentally ends up on inappropriate surfaces.
Required Tools
The following tools are useful for cleaning hard surfaces:
- sponge;
- brush;
- knife (special corner knife, shoe knife, stationery knife);
- sandpaper;
- screwdriver;
- steel wool, usually used for pots;
- plastic scraper.
The sealant is heated with a construction hairdryer and then the softened material is removed with a plastic scraper. The method is ideal for mirrors, glass and aluminum surfaces.
While working, pieces of cellophane or bags will come in handy. With their help, you can easily get rid of dirt on your hands within a few minutes.
Briefly about the main thing
It is quite difficult to remove hardened sealant from any surface. Therefore, it is recommended to remove traces of the mixture before completing its polymerization.
Mechanical techniques and various chemicals are used to remove silicone-containing compounds. It is recommended to initially clean the surface with a wallpaper knife or spatula. After removing large pieces of material, you can move on to final cleaning using ethanol, solvents and other substances.
There are industrial products on sale that effectively deal with stains from silicone rubbers. They are used exactly according to the instructions after preliminary testing.
Ratings 0
Methods for cleaning different surfaces
To determine how to remove silicone sealant, you need to try and combine different methods. Specific recommendations depend on the type of coating being treated.
Removing unusable sealant Source prorab.help
Bath
When choosing how to clean the sealant on the bathtub, you can follow the following tips:
- The layer of hardened mixture must be carefully pryed off with a sharp blade.
- Use your hands to try to completely remove the material.
- The surface should be wiped with a damp cloth soaked in salt of minimal grain size.
- If there are traces of the sealing agent left on the bathtub, they can be washed off with vinegar or solvent.
If the silicone-containing substance has not yet hardened, there is no need to perform these manipulations. The mixture that has contaminated the surface of the bath can be easily removed with a solvent.
Removing silicone-containing products from the bathtub Source kak-otteret.ru
Tiles on the wall
To understand how to wash silicone, you need to read the following instructions:
- It is recommended to remove large pieces of silicone using a thin object.
- A washcloth is soaked in a solvent and the dirty tiles are treated. There must be a lot of liquid so that it can be “absorbed” into the hardened mixture.
- After 10 minutes, remaining silicone can be removed with a hard cloth soaked in solvent.
- At the final stage, it is recommended to wash the tiles using a soap solution.
Cleaning rules
When sealing seams or cracks, when protecting surfaces from the adverse effects of aggressive substances, a sealant is often used to glue a structure. This material has successfully replaced outdated putties and grouts; thanks to its properties and excellent adhesion, it has become much easier to process seams or seal cracks.
Sinks, bathtubs, showers - this is not a complete list where silicone sealant is used. Using this material, you can seal the joints between the bathtub and the wall, glue the walls of the aquarium, or seal the joints in the shower stall.
When working with the material, you should know how to quickly clean it from any surface. During work, it is better to wipe off excess silicone immediately, otherwise the sealant will harden very quickly and removing the excess will be problematic.
When sealing seams, glue can get on clothes and stain them. First of all, you should protect yourself from such contamination and work in special work clothes. If the sealant does get on the fabric, you should know how to remove it from the surface.
If the contamination is fresh, you should place the contaminated area under hot water and remove it. In the case when the sealant has already hardened, such treatment will not produce results.
Silicone sealant is used to repair the engine in a car. Silicone often ends up on car covers. To clean the cover, as with any fabric surface, it is better to immediately remove fresh dirt. When using aggressive chemicals, there is a possibility of damaging the fabric. A solvent is applied to the contaminated area and left to soak for 30-40 minutes. The impregnated material is cleaned with a brush. After this, the fabric is washed by hand or in a washing machine.
If it is undesirable to use a solvent, you can use another method of removing the sealant:
- clothes or other fabric are laid out on the surface;
- the fabric should be stretched a little;
- take a scraper or a mild knife and remove the silicone from the surface;
- the trace of oil is wiped with an alcohol solution or vinegar;
- the fabric is soaked for 3 hours and then washed by hand or by machine.
When choosing silicone sealant for repair work, take into account what surfaces it is suitable for. You can find alkaline, acidic and neutral sealants in the store. When purchasing an acid sealant, you should know that it should not be used on metal surfaces. The letter “A” will be written on its packaging, this means that it contains acetic acid, which can lead to metal corrosion.
It should also not be used when working with marble surfaces or cement. For such materials it is better to choose a neutral sealant. It matches with any surface.
Salt
Salt can also be helpful in removing sealant. The salt must first be slightly wetted, then applied to a clean cloth, or gauze can be used. The prepared salt swab must be used to wipe the places where the sealant remains, wiping must be done in a circle and lightly pressing on the surface.
Cleaning surfaces from sealant and its effectiveness depends on the cleanliness of the surface itself, as well as the quality of the sealant itself. If the sealant is applied to glass surfaces, it is of high quality - it can be cleaned off by simple mechanical action . In particularly difficult cases, glass surfaces must be heated to a certain temperature. The silicone will melt, and its residues must be removed using any mechanical means for cleaning glass surfaces.
Chemicals
How to dissolve the sealant? Special products are used to remove a specific type of silicone product. They have the same brand as the sealant.
Conventional universal solvents are more accessible:
- White Spirit;
- acetone;
- petrol;
- vinegar;
- kerosene.
In some cases, they do the job just as effectively as expensive products.
Not all surfaces will withstand aggressive exposure to solvents. Use with caution on plastic, rubber, enamel and painted surfaces. Do not use vinegar or alkaline substances on metal - rust will appear.