Lining is one of the most popular building materials when it comes to interior cladding of walls and ceilings. Attaching it is quite simple, but this cladding will require some attention and a mandatory preparatory stage. First of all, this is a wooden sheathing for the lining, the basis for optimal fastening of the material and its long-term operation. In addition, the frame can also be used to eliminate wall defects. On the other hand, improper installation work can completely ruin the appearance of the coating, while reducing its durability and practicality. But in order not to make the mistake of “reinventing the wooden bicycle,” follow the tips and step-by-step instructions that we have collected for you in this article.
Choice: wood or metal?
Professional craftsmen consider timber to be the most popular building material for sheathing under lining. Ease of use during installation work, small “weight category” - and creating a frame with your own hands will be easier and faster. This material also has sufficient functional durability. So we choose a wooden beam.
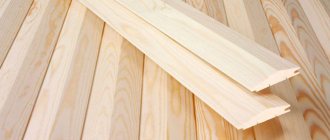
Timber for lining
We will use standard size bars - 50 by 25, 60 by 27 millimeters. This building material is almost ideal both externally and internally. But when purchasing, make sure that there are no defects or chips on it. It is also important to know the moisture level of the wood. Recommended – 16 percent, no more.
Description of work
In order for the lathing for the lining to be strong and durable, it is necessary to follow a certain work technology.
It consists of three stages:
- Calculation and purchase of materials.
- Preparing the bar for use.
- Installation of the structure.
Each stage is important, so carefully read the entire review to avoid errors during operation.
To get the perfect result, you need to secure the frame correctly
Required: processing solutions
Do not neglect antiseptics and insecticides. This step extends the durability of the sheathing. The minimum level of treatment is a solution against fungus, rot, and mold. And insect control products should be used in houses standing on the ground - dachas, utility rooms. By the way, the cost of the compositions is not too high, and the right thing to do would be to play it safe and treat both the wooden frame and the wall with the ceiling in any room where the sheathing under the lining is being installed. The rules for using solutions are usually written on the packaging - read before you start spraying.
This is what a timber frame looks like
Kinds
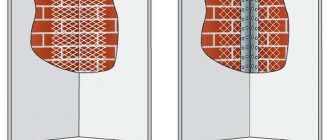
According to the construction method, the sheathing is of three types:
- Horizontal – for vertically oriented material sheets.
- Vertical - with horizontal fastening of the lamellas (what are the methods for fastening the lining?).
- With counter-lattice - adding an additional layer of thermal insulation under the skin for normal ventilation.
Important
The counter grille is constructed only from wooden beams.
Lathing for lining: step-by-step instructions
Preparation of the bar
The material for work should be prepared in advance. The timber should be kept for several days in the room where the finishing will be done. This will allow the building materials to acclimatize, and their temperature and humidity will become similar to that in the room.
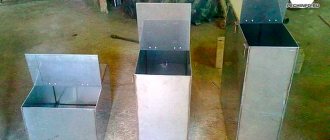
Next, the sheathing elements are treated with an antiseptic compound (if possible and, if necessary, with an insecticide). This can be done either using ordinary brushes, processing everything in order and carefully. If the volume of work is large enough, then you can build a small trough from boards and cover it with polyethylene. We pour an antiseptic composition there and dip each of the bars. This option will provide high-quality protection against mold and mildew.
Antiseptic trough
Preparing the walls
While the timber is drying, we prepare the surface of the walls. To do this, mark the width of the racks using a pencil and using a level so that all the lines are as even as possible. Such a “drawing” will allow you to clearly see how the entire structure will subsequently look, simplifying the work and controlling the correct location of the sheathing elements.
You should also determine the starting point for installing the sheathing. It can be the lowest corner available in the room (we find it using a water or laser level). After the necessary measurements, we draw out the wall and draw a horizontal line.
Marking
Lathing with timber
How to hide wall defects
If the unevenness is significant, then it is necessary to secure the beam using special hangers, which should be positioned in a line (every half a meter) and secured perpendicularly. The prices for this type of fasteners are low, so the costs will not increase significantly. When fastening, the ends of the hangers are bent in the direction of the bar, after which it is leveled and fixed. This option is convenient due to its simplicity and accuracy: you can level surfaces quite quickly and easily.
Wooden wedges can also be used: they are the most important element for leveling significant unevenness in the surface of the walls. Prepare a certain number of wedges of different sizes in advance and treat them with antiseptics. As practice says, they tend to come in handy in most cases.
Hangers will help align the frames evenly
The installation of the sheathing under the lining is constantly monitored by level. We check the position of the bars and only then fasten them. To strengthen the angle, you can install a jumper in these places. This ensures maximum rigidity of the frame and simplifies fastening in corners.
What to consider during manufacturing?
Despite the simplicity of finishing surfaces with wooden lining, there are still several points that deserve attention:
- The size of the timber, its cross-section and shape. For reliable fastening, slats with a cross-section of 2x2 or 2x4 cm are needed. With such parameters, the guides have the necessary strength to withstand the cladding structure. The use of larger size bars will not increase the strength of the structure, but will significantly affect the cost of finishing.
- Step. The optimal distance of adjacent guides on the ceiling is 0.4 m, and on the walls - 0.5 m. With this arrangement, the optimal combination of cladding strength and its cost is achieved. Additional slats should be attached along the length of the joint, if provided.
- Method of fastening to the surface of the ceiling and walls. Unlike a metal profile, special brackets are not required to fix a wooden block to the wall. The guide is located along or across the wall with fastening with self-tapping screws or dowels.
AdviceIf there are uneven spots on the wall, and in some places the plank does not adhere tightly, then they can be filled with special pads.
What to choose - wood or metal?
The material for installation must have the following qualities:
- Resistance to aggressive moisture. If these are metal profiles, then they must be made of stainless steel, and if they are wooden, then they are coated with special impregnations.
- For internal cladding, a standard metal profile is required: it is used as a frame for drywall, and for wooden beams - a section of no more than 2x4 cm.
- The strength and durability of the cladding depends on the quality of the supporting structure. Therefore, the bars should not contain cracks or a large number of knots, and should be of an even shade.
- Cedar and larch are the most suitable species. Types other than pine lumber may be used since such wood is prone to cracking in the future as it dries.
- If the timber is treated with protective compounds, then after such a coating it must be kept indoors for at least 2 days, which will allow the material to adapt to the microclimate.
- The degree and method of drying are of great importance. Dry material that has been kept under natural conditions is best suited for the frame. However, its price is high.
Advice
To determine the degree of dryness of the wood, you need to touch the end of the lumber. If it is oozing resin or wet, you must discard the selection.
Distance between bars
To secure the lining to the wall, you need to provide a strong frame (read about how to properly secure the material here). It is necessary to calculate the optimal distance between the bars so that there is no waste of material and the strength of the coating is maximized.
To do this, it is recommended to maintain a distance of no more than 0.5 m on the walls in the horizontal, diagonal or vertical direction between the supporting elements of the sheathing. With this arrangement of the bars, the cladding will receive sufficient strength. More frequent installation of bars will lead to a loss of money and time, but the strength will practically not change.
If the guides are positioned with a step larger than 0.6-0.8 m, then the wood will have sufficient space to change its shape during operation. Often this lining swells or bends inward. Therefore, you need to adhere to the parameters recommended by the technology for installing wooden panels. The ceiling lining must be attached to the frame in increments of up to 0.4 m, since its “suspended” fastening method requires a reinforced structure.
What to choose - self-tapping screws or dowels?
The choice of specific fastening materials is based on the type of wall and its material. If the surface is made of plasterboard, metal profiles or plastered shingles, then the installation of the bars is carried out with long-length self-tapping screws.
To install the sheathing on a concrete or brick surface, the use of special dowels with casings is required, which, during the screwing process, expand and are tightly fixed in the supporting structure. This method of holding wooden blocks for these walls is more reliable.
Other tools
- A screwdriver or drill will come in handy. Since there is a huge amount of work ahead with more than a hundred dowels and screws, it is better to automate the process, reducing the time of attaching one point to a minimum.
- You will need a jigsaw or wood saw. They cut a block or cladding sheet to the required length.
- A tape measure or construction ruler will be required for accurate measurements of the parameters of the working surfaces.
- You need a plumb line, a wood pencil, a building level with an alcohol capsule. In order for the coating to be installed quickly, beautifully and durable, it is necessary to position the first cladding element very accurately relative to the horizon.
Attention
The accuracy of placing the first panel determines the quality of installation of the entire wall covering, so this operation must be performed very carefully and carefully.
Installation of insulation and waterproofing
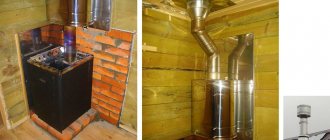
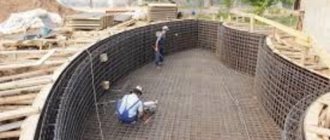
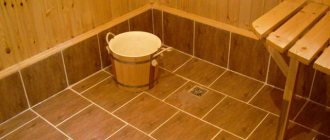
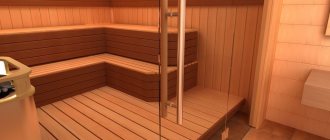
After placing the bars, insulation material can be laid between them. It can be mineral wool, penoplex with polystyrene foam, and other variations on the theme. The thickness of the insulation varies depending on the purpose of the room itself, as well as the climatic environment. For example, in a bathhouse such indicators can reach ten centimeters (the need to ensure a minimum of heat loss).
After installing the insulation, we install a waterproofing film and protection against condensation. This is extremely necessary, for example, in the bathroom, in the steam room, or in rooms where the humidity is higher than normal. We cover the entire surface of the walls with foil, including the timber. For fastening, we use short pieces of timber, which we fasten to the sheathing with self-tapping screws.
Sheathing for lining: installation of foil
We install an additional beam (seal) in the ceiling and under the plinth. It provides maximum fit and also protects the “pie” of the walls from moisture and steam.
At this stage, installation work is considered complete. You can additionally coat it with a protective agent (varnish) and dry it.
Purpose of the lattice structure
Any methods of attaching the lining to the sheathing are not designed for installation on an empty wall. Therefore, it is necessary to first set up a frame that simplifies the fixation of various elements on it.
If you install the sheathing according to the rules, the process of attaching the finishing material will be greatly simplified, and the final result will be very attractive.
Metal carcass
The main purpose of the frame is to create a level base on which you can hang the lining.
Ceiling: lathing for lining step by step
- First of all, we install dowels: 0.8 by 4 centimeters. For installation, as a rule, you need to drill holes using a drill (depth about 5 centimeters). Next, the dowels are placed inside, and holes of the same diameter are drilled in the bars for fastenings.
- Using a cord (string), we mark the ceiling; along its perimeter, fragments of the sheathing will be placed (the interval is 50-60 centimeters).
- For evenness of installation, we use a level and fishing line (string). At least 2 people will be required to complete the work.
- The block is attached to the ceiling; if necessary, we install special plates that level the sheathing horizontally. To fix the sheathing in the ceiling surface, we use self-tapping screws.
Video: do-it-yourself ceiling installation:
As you can see, lathing under the lining is within the capabilities of everyone. It is enough to follow the simple rules given in this article, and also use high-quality material to carry out the work. And everything will probably work out!
Distance between bars
This parameter has already been indicated in previous paragraphs, but it is better to focus on it again. Knowing the distance between the bars will greatly simplify the installation of the cladding on the prepared surface. For reliable fixation, the step should be 40-60 cm, but no more.
Distance between hangers
There are certain subtleties in this process. The step must be selected based on the purpose of the repair. If you need to additionally place insulation, then the distance is taken slightly less than the width of the sealing material. The fact is that the insulation must adhere tightly to the ceiling in order to improve its insulating qualities.
Material quality control
After you have decided on the type, color, and quantity of the lining and delivered it to the work site, you need to check its quality. All panels should be laid out on a horizontal, flat surface and checked to see how well they correspond to the stated characteristics. Sometimes unscrupulous sellers place defective samples inside the packaging to avoid losses due to their rejection. Of course, it is advisable to pay attention to this during the shopping process in the store.
The next step if you plan to work with wood paneling is to dry it. PVC and MDF panels do not require this manipulation. To prevent the wooden lining mounted on the ceiling from becoming deformed, it must be thoroughly dried on a horizontal surface. The minimum drying period is 2 weeks, but a longer interval is allowed. If you do not want the wooden ceiling lining to soon lose its presentable appearance, drying cannot be neglected.
Material calculation
Before covering the ceiling with clapboard in a wooden house, you should take care of purchasing a sufficient amount of material so that during the work you do not need to take breaks for additional purchases. The standard dimensions of one lining board are 15 cm wide, 600 cm long and 1.2-2.5 cm thick. These are the requirements of GOST 8242-88.
For interior decoration, panels with a thickness of less than 1.6 cm are used, and for exterior decoration, panels with a thickness of 1.8 cm or more are used. To determine the number of boards for finishing the ceiling with eurolining, you need to calculate the area of 1 plank and compare it with the total area of the surface to be sheathed. Thus, if we take a panel 9.5 cm wide and 6 m long, its total area will be 0.57 m2.
Let's assume that the total ceiling area in the room is 9 m2. Then for work you will need 9÷0.57=17.3≈18 boards. This is the minimum number of panels, since during the cladding process the width of the canvas will be reduced due to the peculiarities of the installation of the lining. It is fastened with a comb into the groove.
How to level?
It is very difficult to level the sheathing after installing the sheathing panels. It is better to set all levels along the plane of the wall in advance. But it happens that the sheathing “sinks” already during operation, for example, under the influence of moisture. In this case, it is best to disassemble the casing and replace the deformed beam. If the deformation of the wall was caused simply by a loose beam fastening, you will still have to remove the panels to re-secure the loose section.