Shower floors are a centuries-old drainage system that was traditionally installed in Russian bathhouses. It is easy to implement, cheap and effective. The shower floor in the bathhouse is made from high-quality waterproof wood that does not absorb moisture. Larch is best suited for this. The durability of the bathhouse and its elements made of wood is achieved by treating it with protective antiseptic impregnations. The gaps between the boards should not exceed 5-6 mm. The subfloor is waterproofed, and the drain is diverted outside the building.
Floor in a Russian bath
For a Russian bath, a plank floor is a simple and cost-effective solution. A feature of the arrangement of the floor covering is the presence of cracks. The boards are not laid closely, but with a small gap. During bathing, water escapes through cracks under the floor. Her further path from the bathhouse depends on the arrangement of the area.
The design of the poured floor is made from lumber. When wood was cheap, thick boards were used. Floor lumber made from coniferous trees was considered popular. Larch lasted the longest. A thick board increased the life of the floor in conditions of increased dampness. Without repairs, the bathhouse could stand for more than 10 years. When the wooden elements of the structure rotted to a critical state, they were replaced with new ones. The wooden bathhouse was propped up with jacks. The lower part of the walls was updated by replacing 1-2 crowns. A new floor was laid along with the joists.
Now prices for lumber are high. Even once a decade, major floor renovations are expensive. However, new technologies have come to the aid of Russian bath lovers. Many special impregnations and varnishes have been developed to protect wood from rotting, mold formation, and destruction by grinder beetles. Due to protective compounds, the service life of wood increases. Boards for laying poured floors can now be used with a smaller thickness, which reduces the cost of the material.
Important! Impregnations are produced on a chemical and organic basis. To avoid poisoning, the board in the steam room cannot be treated with compounds from the first group.
Materials
According to experts, it is best to make the base of the floor from concrete, especially if you want to build a permanent building made of brick or stone, with several rooms, which will be used throughout the whole year. The concrete floor must be supplemented with a water drainage system and provided with waterproofing. This design is strong and durable; it is not afraid of water, steam, or temperature changes. Concrete floors can be used for up to 45 years without additional repairs.
However, there are certain disadvantages. Firstly, they are cold, so they have to be insulated with an additional coating, for example, tiled or self-leveling. Secondly, concrete floors require significant investments, both financial and labor. Concrete floors can be poured in three stages.
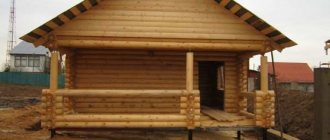
If you are building a small bathhouse that is used only during the summer season, then it makes sense to choose a wooden floor. It is quickly and easily built from environmentally friendly materials (preferably larch boards), looks very attractive and creates a unique atmosphere in the steam room of an old Russian bathhouse.
When installing wooden floors, it is recommended to choose coniferous trees - fir, larch, pine and others. Since such wood contains a large amount of resin, it will be less susceptible to humidity, and the released essential oils will have a positive effect on the health of those taking water procedures. It is worth adding that coniferous floorboards, when moistened, will not become slippery, which means they will prevent falls.
Wooden structures are divided into leaking and non-leaking. The pouring floor does not have insulation, so it is suitable for bathhouses located in the southern regions, or for options used exclusively in the warm season.
The leak-proof floor is constructed from two layers of boards. The upper one, which will go on top, is preferably constructed from pine or hardwood boards, and the lower, dry one can be equipped with insulation.
The logs are installed on the foundation beam in the case of a columnar foundation, or on the edge in a situation with a strip foundation. Contact points are insulated with roofing felt coated with bitumen, Eurobitumen or similar waterproofing material.
Wood floors should not be painted or treated with chemical solutions. This is unlikely to add durability, but it will deprive the boards of the ability to breathe and fill the steam room with a unique pine aroma. The most acceptable solution would be to thoroughly sand the boards before starting construction. You can also cover the floor with a heat-resistant water-based varnish that can withstand up to 120 degrees. The elastic coating prevents moisture, steam and dirt from penetrating the boards.
The two-layer composition is applied to the sanded and disinfected coating using a paint brush. The entire procedure is carried out in a ventilated room at a temperature of 5–30 degrees. Only after the varnish has dried after 2-3 hours is it possible to begin laying the floor covering.
What should good pouring floors look like?
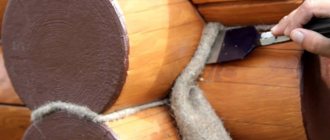
A special feature of the poured bath floor is the presence of gaps between the boards. The gap is left within 5-6 mm. It is not advisable to make smaller cracks, as over time they will quickly become clogged with dirt and soap. Large gaps are also not needed. Through them, heat will leave the bathhouse, and cold air will enter the room.
The quality of the poured floor depends on the arrangement of the underground. The bathhouse has low water consumption. To simplify the organization of drains, many owners install drainage under the floor. The option is economically good if the bathhouse is located on loose soil. Water flowing through the cracks of the pouring floor falls onto the drainage cushion of sand and crushed stone, and then it is absorbed into the ground.
The disadvantage of the drainage drain is the accumulation of soap and dirt residues under the floor. Even with the most intense absorption of water, dampness still remains under the floor for a long time. In such conditions, pathogenic bacteria multiply. The bathhouse becomes a breeding ground for infection.
High-quality poured flooring is made from wood species that have excellent moisture resistance. It is optimal to give preference to larch. The board and all wooden structural elements must be treated with protective impregnations. Be sure to maintain a gap size of 5-6 mm. It is optimal to make the underground waterproofed from the ground, and drain the waste water outside the bathhouse.
Stage 6: Cladding
Cladding work is an important part of creating the exterior of the future bathhouse. Despite the fact that the structure, lined with OSB boards, is completely ready for use, the appearance is still far from perfect. Today there are many materials for cladding rooms. Let's look at the most popular of them.
Lining
This is what the lining looks like
For baths, decorative or imitation lining is usually used. This is the cheapest and most accessible material, characterized by average strength and reliability characteristics.
It is recommended to place the boards horizontally, having previously laid a layer of waterproofing, for which you can use glassine. The sheets must be fastened with an overlap to prevent moisture from getting under the cracks. Often the seams are additionally taped on the inside - this increases protection from precipitation. After attaching the lining, it is coated with decorative varnish or paint to avoid cracks and rotting.
Find out how to arrange an artificial pond in your garden in this article.
Thermal panels
This is a modern material, representing a three-layer construction with insulation; usually mineral wool or polystyrene foam is used for this purpose. The outer surface can have different textures, colors and shapes. It is usually made of artificial stone, clinker or porcelain stoneware; glazed tiles are often used.
The panels have mutual grooves, so they not only form a monolithic pattern, but also provide reliable protection for the building from humidity, sun and other unfavorable climatic conditions. They are resistant to mold and microbial activity. Typically, the outer layers are made of porcelain stoneware, a highly durable material suitable for use in the interiors and exteriors of buildings.
Facing brick
Inexpensive but high-quality material with which you can decorate a bathhouse in any area. Facing bricks are made from high-grade clay, which ensures good strength and resistance to damage and temperature changes. Depending on the manufacturing technology, it can be ceramic, silicate or clinker. If you follow the installation rules, as well as adding an additional layer of insulation, you can increase the thermal insulation properties of the building. The material is easy to use; no auxiliary tools are required for work.
Vinyl siding
One of the lightest and most common materials for cladding residential and commercial premises. Externally it looks like an ordinary board for cladding buildings, but does not lose its appearance for 20 years. Withstands temperature changes, washes well with plain water, and is not affected by fungus and mold. There is a wide variety of vinyl siding colors, so the bathhouse will complement the main building on the site. Easy to install, low cost.
Beautiful zoning of the territory near a private house is described here.
Block house
It is a planed board made in the form of a profiled or rounded beam. Used for both exterior and interior decoration. It is made mainly from coniferous wood, but you can find models from aspen or linden. Allows you to create the illusion that the bathhouse is built from timber.
Shower floors for baths on columnar or pile foundations
For a bathhouse, a columnar or pile foundation is considered the best foundation. The advantage of the design is not only its cheapness and ease of construction. The pillars or piles are spaced at specific intervals. There is no closed ring, as is the case with a concrete strip. An ideal ventilated space is formed under the floor of the bathhouse. Even if drainage is organized on loose soil, the underground will dry out quickly. The floorboard will not withstand dampness, will last longer, and there is no risk of mold quickly spreading.
Important! With a columnar or pile foundation, a drainage underground can be organized even on clay soil that does not absorb water well.
The bathhouse is erected on a hill. Water should flow completely down the slopes and not stagnate in puddles under the pouring floor.
The logs are laid on pillars located throughout the entire area of the underground space of the bathhouse. The optimal distance between them is 80 cm. The logs can be hewn logs or a board with a section of 50x100 mm. The pillars are erected square with a side size of 400x400 mm. A hole 600 mm deep is dug under each support. Sand 200 mm thick is poured onto the bottom, filled with water, and compacted.
The pillars are erected from cinder blocks, concrete blocks, or poured monolithic from concrete mortar. All supports are checked with a level so that they rise to the same height. When leveling, the pillars are raised with a cement screed.
Attention! It is unacceptable to use red and sand-lime bricks for the construction of pillars. The material deteriorates quickly. Heavy bath floors will sag over time.
The laying of the logs is carried out half a month after the erection of the pillars. Between the wooden elements and the concrete surface of the support, waterproofing from a double layer of roofing material is laid. The edges of the logs are additionally fixed to the lower crown of the bathhouse frame with mounting metal corners. After laying all the elements, the pouring floor board is nailed.
results
As a result, my bathhouse always has warm and dry floors. And also - light steam and quick heating of all surfaces.
The climate in the bathhouse is as follows:
- With the doors closed and the furnace fired, the temperature on the shelf rises to 45°C in 10-15 minutes (provided that the bathhouse is slightly warmed up with the doors open to a temperature on the shelf of 25°C).
- After an hour of bathing procedures, the temperature on the shelf is about 60°C, the floorboards heat up to 50°C. The floor becomes pleasantly warm, almost hot, as do the walls with the shelf.
- The floor in the steam room dries almost instantly, and in the sink area - in a few hours.
- It is easy to breathe in the steam room, as there is an influx of fresh air (which is immediately heated by the stove) through the ventilation duct.
- There is no need for frequent ventilation.
- No musty smell.
- You feel that the air is drier than in the old Russian baths, but, of course, not to the same extent as in the sauna. It’s easy to increase the humidity – you just need to add water to the heater.
There are also some shortcomings, but they are minor, at least for me. Firstly, the efficiency of the bathhouse is somewhat reduced, since fresh air is constantly heated, and the heated portion is discharged onto the street. Secondly, various soaps and shampoos become very hot on a hot floor. You need to look for another place for them or take them outside the steam room during particularly intense steaming.
In general, I like my bathhouse. Warming up in the shortest possible time, fresh air, warm, dry floors. The problem of mustiness, rotting floorboards and cold floors is completely solved.
Eugene
Shower floor in a bathhouse on a strip foundation
In the case of a strip foundation, the lags are laid on the pillars in the same way. The difficulty arises with the organization of water drainage. The strip foundation forms a trough. In some places, ventilation holes are provided in the tape - vents. However, they are not enough for ideal ventilation of the underground space if drainage is organized. In bathhouses with strip foundations, it is advisable to divert water outside the log house.
A concrete screed is made under the pouring floor. A complex design option is based on maintaining a slope from all 4 walls to the center of the floor. At this point there is a drain hole through which water is discharged through a pipeline outside the bathhouse.
A simpler option also involves installing a screed under the pouring floor of the bathhouse, but the slope is made only towards one wall. It is better to direct the slope to where the stove will be located. In this place, the floor warms up better and moisture evaporates faster. The second advantage of one slope is that there is no need to lay a drainage pipeline. In the section of the tape where the slope is made, a hole is punched a couple of centimeters below the level of the screed. A piece of pipe is inserted into the window to drain water, and the gaps are filled with foam or sealed with mortar. If the vents coincide in level with the screed, then water drainage can also be organized through them.
Attention! The slope of the screed towards one wall is maintained at the rate of 1 cm/1 linear. m.
Selection of sewer pipes
Choosing the diameter of the pipe depending on the level of the slope A correctly made slope at the base of the drain does not yet guarantee the rapid evacuation of water masses from the room. In this matter, the choice of sewer pipes is not the least important. Since the bathhouse uses a non-pressure liquid discharge system, it is advisable to use the following pipes to install the hydraulic apparatus:
- The minimum diameter of the pipe should be 50-60 mm, and the thickness of its walls should be at least 3-4 mm;
- It is advisable to assemble the external pipeline from PVC materials, since they are more frost-resistant;
- During the installation process, pipes are laid in the soil at a level that is below the freezing point.
How to make a pouring floor in a bathhouse
Laying boards for a pouring floor follows the same principle for a bathhouse installed on any type of foundation. The preparatory work associated with the arrangement of the underground differs.
Preparatory work
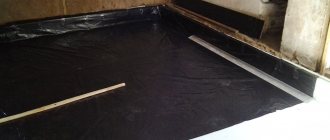
The optimal height of the underground for a bath is 200 mm. The bottom plane of the joist should be at least 100 mm away from the surface of the screed or drainage embankment. To organize drainage on one slope, the ground is leveled so that there is a difference in height at opposite walls. The soil is compacted with the addition of clay. Instead of a screed, you can lay waterproofing from several layers of roofing felt. A thick film or a special waterproofing membrane will do.
If a decision is made to take a difficult path, then a sewer pipeline is laid first. The drain is located in the center. The first base is poured with concrete, crushed stone is added and reinforced with reinforcing mesh. The finishing layer is a concrete screed, which ideally adjusts the slopes to the drain on all four sides.
When arranging a drainage bottom, a drainage hole is created under the bathhouse. A recess is made about 40 cm. Sand is poured into the hole as the first layer, crushed stone as the second. The thickness of the drainage pad is at least 25 cm.
Step-by-step instruction
All work on the construction of a leaking floor in a bathhouse consists of the following steps:
- Support pillars made of blocks or monolith are installed under the logs.
- The drainage is arranged according to the chosen option: concrete screed, waterproofing with roofing felt or a drainage pit. If you organize a screed under the floor in a bathhouse, then it is advisable to also cover it with waterproofing. Regular bitumen or special mastics will do. Even concrete columns for laying logs are protected with waterproofing. They are simply lubricated with bitumen.
- Two layers of roofing material are laid on top of the pillars. The logs are treated with protective impregnation. Ideally, they should be additionally treated with bitumen. Each log is laid on a support, the ends are fixed with mounting angles to the crown of the log house.
- The boards also begin to be laid after pre-treatment with protective impregnation. There is no need for a gap on the floor in the waiting room. Gaps are left only in the washing area.
When laying poured floors, boards can be nailed to the joists or removable panels can be made. If the first option is chosen, then a couple of boards on opposite walls and above the drain are left removable for easy cleaning of the underground space from dirt.
Finishing
Even before starting work, you should prepare the final coating, that is, thoroughly dry all the boards. If you neglect this stage, then during the operation of the bathhouse the risk of floor deformation increases many times over. It is necessary to dry the boards as long as possible. If this is not possible, then it is better to give preference to thin timber. Of course, it can withstand a much smaller load, but this disadvantage can be compensated for by securing an additional layer of transverse joists. As practice shows, the tendency to swelling and deformation in boards less than 2.5 cm thick is almost invisible.
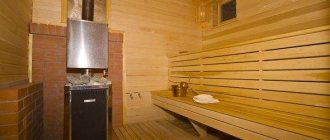
In the vast majority of cases, linden lining is used for covering the floor in steam rooms. This material can withstand temperature fluctuations, it retains its technical and operational properties for a long time, does not rot or change color. Over time, a dark coating appears on the surface, but this can be removed by sanding.
The advantages of linden lining also include the reduced heat capacity of the material; such a floor does not overheat, so the likelihood of a burn upon contact with the skin is minimized.
Aspen is similar to linden in its characteristics, so it is also used for finishing the finished floor in a steam room. In addition, this material is much cheaper. The only negative is reduced resistance to water and darkening of the surface with use. For this reason, aspen paneling is usually used to cover the floors of dry steam saunas.
Aspen is pleasant to the touch, it does not overheat, so there is no risk of burning your feet in such a room.
The best facing material for the floor in the steam room is considered to be cedar board. This is due to the fact that its structure consists of thin shortened fibers - thanks to this, the board does not change its original shape even with frequent contact with water. Cedar wood has an increased concentration of oleoresin; when heated, such boards begin to release phytoncides that have healing properties. In addition, cedar does not require any additional antimicrobial treatment, so this board can be used in its natural form.
When arranging the floor, it is necessary to take into account the overall style of the room. Each type of wood has its own shade; dark and light varieties, pink and mahogany species are conventionally distinguished
Less commonly, bottle caps and tiles are used to finish the floor in steam rooms; the latter can be used to lay out a relaxation area or dressing room, since in the steam room and washing area the tiles become slippery under the influence of water.
Practical advice
Three good tips will help you get rid of dubious myths and simplify the installation of a pouring floor in a bathhouse:
- There is an opinion that it is better not to nail down a poured floor board. After visiting the bathhouse, they are placed on their edges for better drying. The mistake is that, according to the law of ventilation, the amount of air leaving the room depends on the size of the supply and exhaust openings. Boards placed on edge increase the inlet gaps of the pouring floor. However, the outlet of the vents remains the same. The boards will not dry faster, since the dampness remains inside the bathhouse, and the worries will only increase with their re-installation.
- Removable panels in the bathhouse are also not the best flooring option. Drying of the wood will be uneven. If the ventilation inside the bathhouse is poorly adjusted, the raised flood floor panels will again attract dampness. The work is useless and time-consuming. It is optimal to organize effective ventilation under the floor in the bathhouse.
- A smoothly sanded board is needed only for the front side of the pouring floor, so as not to pick up splinters. On the back side, sanding will not help with better moisture rejection. Wood absorbs moisture equally with a rough and smooth surface. Excessive sanding reduces the thickness of the boards, which reduces the strength and service life of the poured bath floor.
Good ventilation in the bathhouse, as well as high-quality impregnation of wooden elements, are responsible for the durability of the pouring floor.
The video shows an example of arranging a floor in a bathhouse:
Protecting the floor from rotting
Protective impregnations for wooden floors are produced on an organic and chemical basis. Inside the dressing room or designated rest room, the temperature does not rise above + 27 °C. Floors can be treated with any synthetic impregnation. Inside the steam room and washing room there is a combination of high temperature and steam. Chemical fumes will be harmful to health. The floors in these rooms are treated with organic-based impregnations.
There are antiseptic impregnations based on fungicides. They protect wood well from fungus, but are toxic. Impregnations in the bathhouse are used only if the wooden surface is to be additionally painted.
Advantages and disadvantages
I would like to immediately clarify that if the owner of a bathhouse needs durable flooring, then the principle of pouring floors will not be successful. Despite all the tricks of the owners, impeccable ventilation, and floor installation technology, the wood above the catch basin constantly rots. The developer’s goal is to do everything so that this process is completed later.
However, poured floors have a number of advantages that appeal to users:
- Low price of used timber;
- you need simple installation that can be done without the help of others;
- the floor is easy to repair;
- It's nice to walk on the wooden floor barefoot.
The pourable floor in the bathhouse has a low price.
The disadvantages include the fragility of wooden materials. Even if waterproofing and effective ventilation are of high quality, the structure will begin to rot and will need to be replaced. However, this is not difficult to do, so many users do not pay attention to this problem. They consider the big disadvantage that such flooring is cool, so the best recommendations for installing it apply to the southern regions of the country with a warm climate.
What if the length of the screw pile is not enough?
Situations in construction are different, as well as the topography of the areas where houses and baths are being built. Despite the fact that six-meter screw piles can be purchased, this length is sometimes not enough (for example, in areas with peat soil, where the point of dense soil can be very deep). In this case, they use a technology that has been proven over the years for safe building of piles using couplings.
The installation sequence is as follows:
a part of the pile with a screw is screwed in manually or mechanically; a section with an installation hole is cut off from the screwed-in pile; the paintwork is cleaned (if the work is done in winter, warm up the area to be painted with a burner); The coupling is being prepared. A piece up to 20 cm long is cut from a pipe with a slightly larger diameter than the pile. Sections and paint deposits are sanded with a grinder; the coupling is put on the top edge of the pile; a welded connection of two elements is made
The seam must be of the highest quality - this is important; Welding
a pipe for extension is inserted inside the coupling. Stripping paint and welding are done in the same way; multi-layer waterproofing is performed - the welds and the coupling itself are painted with anti-corrosion compounds in several layers, after which they are wrapped with roofing felt or rubber; Next, the composite pile is screwed in to the required depth, as well as operations for cutting off the area with the mounting hole, installing the head, etc.
Composite screw piles
As practice has shown, composite piles up to 15-25 meters long perform their intended function perfectly. But if it is simply impossible to find the “bottom” in the ground, it makes sense to install ordinary six-meter piles, screwing them into the ground until they stop, and then install the formwork and pour the concrete strip. This option is called “hanging piles” and is often used on swampy, floating soils, where the classic strip foundation slowly sinks and the piles sag without holding the building.