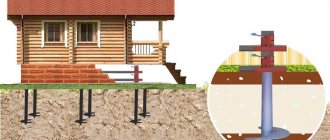
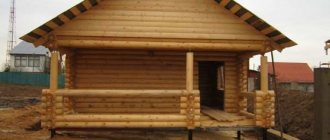
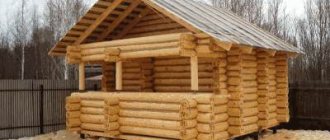
The key to the longevity of any structure is a reliable foundation. Pile driven foundations made of wood, often larch, were used by our ancestors for centuries in the construction of baths. Nowadays, they have been replaced by screw analogues, which, for ease of immersion in the ground, are equipped with a cone-shaped tip and blades on the surface of the pipe. What the floor in a bathhouse on screw piles should be like will be discussed in today’s material.
The floor in the bathhouse is on screw piles
Features of foundations on screw piles
When starting to build a bathhouse, you need to figure out when it is appropriate to use screw piles, learn about their pros and cons, types, correctly calculate the load and carefully approach the choice, because piles differ in many criteria - tip shape, material, size. All these indicators affect the performance characteristics of the piles themselves and the foundation as a whole.
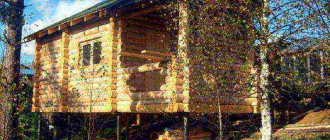
Bathhouse on screw piles
The construction of pile foundations is used in special conditions:
- When the soil at the construction site is heavily watered and permafrost.
- If construction is carried out on the shore of a reservoir.
- If floods occur with noticeable regularity in the construction region.
- If the site for the construction of a bathhouse has a complex terrain with a sharp difference in height (slope, hillock).
The principle of a pile foundation
In the described conditions, the installation of a traditional strip or slab base is not possible. The advantage of a pile foundation is that it can be used on any type of soil, even if it is highly heaving - the main thing is to choose the right type of pile, while the level of groundwater passage will not have any effect on the quality of the foundation.
The type of tip is selected depending on the properties of the soil
An important quality of a pile foundation is its seismic resistance, taking into account strict adherence to the quality and sequence of technological processes during its construction. As a result, the pipes are firmly secured in the ground and the impact of loads on them during frost heaving of the soil is eliminated.
Advantages and disadvantages of a pile screw foundation
One of the important advantages of using piles when arranging the foundation of a bathhouse is the quick completion of the work and the ability to carry it out independently or with one assistant. In this case, there is no need to have special professional skills, to construct additional structures (formwork), which require spending time, money and effort, and then wait for the solution to dry, as when installing a strip foundation. After installing the last head, you can immediately begin building the walls of the building.
The piles sink deeply into the ground, so we can safely say that such a foundation is reliable
The main advantages include the following:
- Quick installation.
- Obtaining a stable foundation.
- Convenience of work when repairing the foundation.
- Installation is possible in any weather conditions.
- Screw piles ensure natural ventilation of the bathhouse floor from the bottom.
- Ease of installation of the sauna sewer and water supply system.
- The pile foundation is durable and reliable.
- Due to the correct installation of the floor on piles, the walls of the bathhouse are protected from the effects of melt and sediment water from the ground.
- Possibility of construction in conditions of unstable, moving soils.
Basic elements of a screw pile
Several parameters influence such a parameter as the durability of a pile screw foundation:
- The thickness of the metal from which the piles are made. It is clear that the greater the thickness, the longer the service life of the product. Thus, standard piles are made of metal 4 mm thick, and reinforced ones - 6 mm.
- Preparation method. If wood rots, then metal rusts. In this regard, solid piles are more stable than welded ones.
- Quality of the insulating protective layer. It can be made using single-layer painting with regular paint or have multi-layer treatment with anti-corrosion compounds and zinc coating.
- Method and quality of work on insulating pile foundations.
The principle of driving a pile into the ground
The disadvantages include the following:
- Piles will need to be serviced every 5 years. To do this, each pile is dug to a depth of 50 cm and the free area of the support is covered with an anti-corrosion compound. If this is not done, the service life of the foundation will be shortened due to the likelihood of rotting pipes.
- When installing piles, it is extremely important to maintain their strict vertical position, which is quite difficult to achieve when working alone. The result of the slightest deviation is a loss of the load-bearing capacity of the pile by 20% and the likelihood of subsidence of the structure.
- It is not possible to equip a full-fledged cellar, underground or basement floor.
- Steel screw supports are a good conductor of cold, so it is extremely important to perform high-quality insulation of the base, and to immerse the piles themselves below the soil freezing level by 20 cm.
Types of piles
Piles differ in many respects, so they are marked by purpose and divided depending on the thickness of the metal, as well as the type of tip.
Structure of a standard pile
Reinforced pile parameters
Classification of piles depending on diameter
How to choose the length of the pile
When calculating the length of a pile, several indicators are taken into account:
- Depth of dense soils. Often this value starts from 180 cm, to which it is necessary to add another 20 cm - this is the distance at which the tip of the support should be located.
- It will be necessary to take into account the height of the base, the value of which should not be less than 50 cm. It is due to this height of the floor of the building that it is possible to prevent its flooding and minimize the impact of moisture on the walls of the building. The height of the base is also selected depending on the region of construction and its characteristic snow cover in winter.
- In addition, you will need to take into account the topography of the site, when piles of different lengths can be used.
- When calculating the length, take into account the mounting hole, which is located at a distance of 10 cm from the top of the support. After the pile is installed, this fragment will be cut down.
In addition, the depth of soil freezing in a particular construction region is taken into account.
Pile structure
Prices for screw piles
screw pile
What insulation to use
Insulation for the floor of a frame building on a pile foundation, in addition to the ability to retain heat well, must be light, easy to install and have excellent moisture resistance.
Styrofoam
Fairly good insulation, widely used due to its low cost
However, it should be taken into account that freezing of moisture-saturated foam provokes its gradual destruction. As a result, its thermal insulation characteristics drop sharply, and the cold gains direct access to the room
The use of polystyrene foam is permitted only in combination with reliable moisture protection.
Penoplex
Extruded polystyrene foam is a more expensive modification of polystyrene foam. It is characterized by excellent strength qualities and an almost complete absence of water absorption. This allows the material to withstand low temperatures in conditions of constant humidity. To impart fire-resistant qualities to penoplex, fire retardants are introduced into its composition.
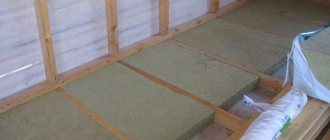
Mineral wool
An excellent option for installing heated floors in a frame house. This material is characterized by high thermal insulation characteristics and absolute non-flammability. Mineral wool is not afraid of any biological influences.
Builders prefer to use mineral wool as insulation. Source krutopol.com
Weaknesses of the material:
- Poor moisture tolerance. Contact with water on the surface of the insulation provokes its subsidence and a decrease in thermal insulation characteristics.
- Expensive. To purchase mineral wool you will have to pay an order of magnitude more money than for penoplex.
This material is produced in the form of plates and rolls. The first option is more convenient for thermal insulation of the floor in a building on a pile foundation. The slabs have the advantage of rigidity and resistance to mechanical stress.
Expanded clay
In houses on screw piles, this insulation is used quite rarely, which is explained by its low thermal insulation characteristics. To achieve the desired insulating effect, you have to pour a layer of decent thickness: this conceals the living space and adds to the overall weight of the structure. Those who still decide to use expanded clay to insulate floors on stilts are attracted by the significant simplicity of its installation.
Floor materials
Wood (coniferous species) is most often used for flooring in bathhouses. Concrete screed is no less popular. Considering that a bathhouse is a room with special operating conditions, it is necessary to carefully select the flooring material. So, a concrete floor will become a reliable and durable foundation, but its installation will be somewhat more expensive than a wooden structure. Coniferous wood tolerates humidity and temperature changes well, but it will have to be regularly treated with antiseptics and after 10 years such a floor will have to be replaced.
Flooring options
However, a wooden floor is more preferable, since it can be repaired at any time by replacing a damaged element without dismantling the entire structure. And by regularly treating the floor with antiseptics, its service life will double. As an option, you can make a combined floor in the bathhouse - in rooms with high humidity (steam room, wash room) use a concrete screed, and leave a wooden floor in the remaining rooms.
You might be interested in information on how to insulate the floor in a bathhouse in a washroom? More details in a special article.
Making a drain
Of all the existing construction methods for a bathhouse, the choice of frame technology is optimal for a number of reasons:
- with periodic heating, it will not be possible to maintain heat between the furnace fireboxes;
- to heat brick, concrete walls or a log house until it reaches steam mode, you will need three times more firewood than to heat the wall cladding made of clapboard or block house, with which the “framework” is lined from the inside;
- the construction budget is lower, and the maintainability of the load-bearing frame is higher;
- There are virtually no operating costs.
Before designing floor insulation, it is necessary to understand how moisture will be removed from the washing room and steam room:
- The best option is considered to be a staircase with slopes of tiles/porcelain tiles, however, these floor coverings have worse tactile sensations (cold when walking barefoot), you have to lay wooden panels and rugs;
- the ladder is a point water inlet, which provides free access to the rest of the space under the floors, into which it is easy to lay expanded polystyrene or basalt wool, fill in expanded clay;
- if boards or composite decking are laid in the washing room, gaps are left between them through which water flows into the lower level;
- this technology is less convenient, since the thermal insulation gets wet, loses its properties and is destroyed; it has to be collected with a tray made of galvanized sheet, into which a drain is also embedded.
A less common method is to collect wastewater in a bathhouse on stilts with a high-density EPDM membrane, which is stretched under slatted floors instead of galvanized, and sags under the weight of the liquid so that the wastewater drains into a drain built into it.
Due to the variety of drain designs, floors have to be insulated in several different ways. Facing with tiles and collecting waste into a drain is possible only when part of the grillage is filled with a monolithic slab under the steam room and washing room. This dramatically increases the construction budget, since it will be necessary to produce concrete and purchase reinforcement and lumber for formwork.
Under a slatted floor, insulation is much more complex technologically:
- thermal insulation must be laid under a membrane or galvanized sheet that has a slope;
- the height of the finished floor increases by 15 - 20 cm minimum;
- According to the current standards of SP and SanPiN, the floor height in the rest room and dressing room should be higher than in the steam room and washing room.
Rules for insulation and waterproofing of bathhouse floors
You can begin laying insulation only after thoroughly treating the wooden structure with an antiseptic, which will protect the material from the effects of insect pests and prevent the formation of mold.
The principle of insulation of bathhouse premises depending on their purpose
When choosing a method for insulating the floor in a bathhouse, various nuances are taken into account. To organize a drain in a bathhouse, wooden floors in the form of flooring with slots are more popular. You will also need to take into account the type of material for the finishing floor covering - concrete, tiles and porcelain stoneware take longer to heat up and cool down than wood and composite materials with wood fibers in their composition (decking).
Decking
The principle of floor insulation using joists
Therefore, the most optimal insulation option would be to lay insulation between the rough and finished floor structures, installed along joists with a waterproofing membrane laid on top of the lower level to drain wastewater. In this case, it is recommended to replace the traditional drain with a design that uses a dry water seal. This will protect the bathhouse from unpleasant odors from the septic tank.
Dry water seal for the drainage system in the bathhouse
Advice. If the thickness of the beams is not enough to lay the required thickness of insulation, bars are attached perpendicularly to them, between which the missing layer of insulation is laid. Waterproofing material is laid below and above.
Roll waterproofing
The durability of the floor structure and the effectiveness of the insulation depend on the quality of waterproofing in the bathhouse. There are several options for waterproofing the floor in a bathhouse: when installing a concrete screed poured over piles, a built-up waterproofing roll or coating in the form of bitumen mastic is used. When installing a wooden floor, a waterproofing membrane is laid on top of the insulation.
Preparatory work
So, the foundation is installed and the walls are erected. Now we are making the floor in the bathhouse on screw piles. You need to thoroughly prepare for this work, study the technology, purchase everything you need, and invite assistants.
For work you will need the following materials:
- tongue and groove board;
- beam;
- fastening material - nails, etc.;
- cement;
- coarse sand;
- expanded clay and/or other bulk materials;
- roll waterproofing;
- antiseptic composition;
- mineral wool or other insulation.
Tools and equipment for work will require:
- construction mixer;
- tank for mixing the solution;
- wood hacksaw;
- grinder saw;
- construction knife;
- hammer;
- mittens, work clothes, rags.
The list of necessary tools and materials can be specified after it has been determined from what material and in what way the floor in the bathhouse will be installed on screw piles.
Base design
Correct arrangement and insulation of the base along the perimeter of the building allows you to increase the degree of floor insulation with a pile foundation. The purpose of the plinth is that it insulates the space under the bathhouse and does not allow cold air to enter there, and also helps to improve the aesthetics of the appearance of the building.
Cladding with DSP and panels with imitation masonry
The cladding is made using thermal insulation boards and decorative panels that imitate various materials - wood, stone, brick. Slab insulation materials (foam plastic, penoplex) are used as thermal insulation materials.
Important! After the panels are installed and fixed around the perimeter of the bathhouse, the joints between them are sealed with polyurethane foam.
Base design options
Choice of thermal insulation
The construction of a bathhouse on wine piles allows the use of virtually any material for thermal insulation. Some people take expensive products, others use improvised means (for example, plastic bottles). Suitable insulation materials include:
- Expanded clay is inexpensive and environmentally friendly. Among the shortcomings are poor resistance to temperature changes and the need to lay a thick, even layer (at least 20 cm), which is problematic to do;
- polystyrene foam – ergonomic, inexpensive, reliable. Among the shortcomings - it deteriorates when combined with some paints and varnishes;
- mineral wool - comfortable to lay, retains heat well. Among the shortcomings - it accumulates dirt and dust;
- ceramic tiles – convenience, durability. Among the shortcomings is the high cost.
Spilling or wet floor
This is the most popular design for baths on stilts. It requires high-quality thermal insulation if the bath is to be used in winter. All water that is used in the bathhouse is drained directly onto the floor and removed to the sewer or drainage system through a drain hole (ladder) installed at an angle in the floor structure.
pouring floor
Therefore, it is extremely important to ensure the moisture resistance of such a floor and the rapid, high-quality removal of water from its surface.
There are two types of poured flooring - completely wooden and combined. In the first case, the boards are laid on top of the beams or joists in such a way that gaps 3-7 mm wide are formed between them. Under the flooring there is drainage in the form of crushed stone, laid on a sand cushion to a height that does not reach the bottom of the floor level by 10 cm. During the operation of the bathhouse, the used water goes into the drainage and there is no need to install a sewerage system. But this method of organizing the floor has its own nuances: in winter it will be cold in such a bathhouse, and high-quality removal of moisture from the drainage depends on the presence of sandy soil.
Methods for installing a pouring floor
A more comfortable design is a leaky floor installed above a concrete screed with a drain hole. Crushed stone and reinforcing mesh are laid on top of the soil, laid at an angle to the drainage pit, and a screed is poured. Beams and plank flooring are laid on top.
Types of sewerage
Our ancestors did not think about solving the problem of water drainage. She passed the floor coverings and went into the ground. If you are interested in this option, then you need to build the bathhouse on a small hill so that water does not accumulate under the floor. This will speed up the process of wood rotting.
The installation instructions for such a sewer system do not have any difficult moments.
The only thing you should pay attention to is the sequence of installation of waste pipes if there is a toilet in the bathhouse. The pipe coming out of the trough must be in the general system after flushing the toilet
This is a civilized method of disposing of wastewater, and a bathhouse with a storage tank under the floor is warmer. The possibility of drafts is almost completely eliminated. In addition, it is possible to install insulating material on top of the trough.
Bathhouses on stilts located in summer cottages should be given a presentable appearance. It is unlikely that a design with a trough under the floor will seem appropriate. You can decorate the entire perimeter of the room with a variety of materials - from wood to brick. This finish is not only an aesthetic component, but also additional thermal insulation.
Dry floor in a wooden bathhouse
When creating a dry floor, 2 planks are made. The first is rough, with the obligatory laying of a waterproofing and insulating layer on top. The top of the insulation is also covered with waterproofing. The finishing flooring is made of durable tongue-and-groove boards, for the manufacture of which softwood was used. One of the corners of the room is formed with a slope in the direction of the drain built into the floor.
Dry wood floor
Step-by-step DIY installation instructions
Let's consider the procedure for creating a pile-screw foundation.
The work is carried out in stages, the sequence of actions has a strictly defined order:
Preparation
A pile-screw foundation has an important feature - it can be created on uneven terrain that does not require preliminary leveling (planning).
It is possible to build on slopes or in folds, which makes it possible to effectively use areas that are inconvenient from the point of view of traditional construction. Therefore, preparatory work can be reduced to clearing the area of plants and foreign interfering objects.
Make markings and mark all pile installation points with pegs. Then, small (up to 30 cm) recesses are made at the installation sites, which facilitate the entry of the blades into the ground.
The fertile layer of soil creates noticeable resistance due to the abundance of roots, plant stems and other obstacles, so it is better to remove it.
Driving piles
Installation of screw piles is done either manually or mechanically. Manual installation is possible in the presence of relatively soft soil without man-made inclusions or rock debris.
The diameter of the barrels available for manual immersion is limited to 87 mm.
The most common 108mm diameter piles are often too difficult to construct due to the high soil resistance.
The machine method allows you to obtain high-quality installation of screw piles, observing a certain angle, screwing force and depth.
The power of construction equipment allows you to freely work with piles up to 159 mm in diameter, which is quite enough for the construction of a fairly large private house.
The piles are driven to a predetermined depth. Usually it is determined by the level of occurrence of dense layers, or the soil resistance force exceeds the force permissible for a given shaft, which breaks off the technological hole.
A pile that has reached the required level of adhesion to the ground rotates with great effort or stops doing so altogether.
You cannot try to continue rotating - the welding may not hold up, the blades will come off and the pile will become unable to perform its functions.
NOTE! When installing screw piles, it is forbidden to reverse - try to unscrew the trunk back. This weakens the adhesion of the blades to the ground and eliminates the possibility of repeated immersion in this place
Harness
After installing all the piles, trimming is performed. This is a procedure that allows you to adjust the height of trunks protruding from the ground to a single level and form them into an even horizontal plane.
Install a laser level with the function of constructing planes at the required height and cut off excess sections of pipes.
After trimming, the internal cavities of the piles are filled with concrete, increasing their strength.
Then they install the strapping (grillage) - a belt that connects all the piles into a single system and at the same time serves as a supporting element for the walls of the house. The cut tops are covered with caps with horizontal platforms on which metal or wooden beams are installed.
For fixation on the platforms there are technological holes for bolted connections.
IMPORTANT! Sometimes the trim and grillage are different elements. The piping is performed below the level of installation of the grillage and connects all the piles together, forming a system like a lattice. Metal sections of a channel or I-beam are used, welded to the walls of the trunks
Metal sections of a channel or I-beam are used, welded to the walls of the trunks.
Concrete floor installation
Before starting work on pouring a concrete floor, it is necessary to carry out a number of preparatory measures:
- Install water and sewer pipes.
- Install a drain ladder.
- Prepare the base - compact it and prepare it for pouring concrete.
The principle of constructing a concrete floor
Table 1. Floor arrangement
| Illustration | Description |
| Concrete mortar, about 5 cm thick, is poured onto a compacted base on the ground. | |
| Insulation is laid over the waterproofing layer and covered with film. | |
| Pour a second layer of concrete screed reinforced with metal mesh. | |
| The surface is leveled. | |
CREATOR: gd-jpeg v1.0 (using IJG JPEG v62), quality = 90 | The finishing material is laid, often tiles. |
Important! Starting from the process of compacting the soil and ending with pouring each layer of concrete, take into account a slope of 10 degrees directed towards the drain.
Sequence of preparing concrete mixture
Floor insulation is carried out using expanded clay, perlite, extruded polystyrene foam or mineral wool.
Types of insulation
Before laying the insulation, the rough screed is cleaned of debris, dust-free and covered with rolled waterproofing. If fractional insulation is used, then it is applied in the form of a special mixture, after drying, which can be used to begin pouring the second layer of concrete mortar.
A rough screed does not require special qualifications of the builder, but, nevertheless, involves a large number of works associated with its creation. You will find the features of the device and a calculator for calculating the amount of ingredients for a floor screed solution in our article.
Insulation of concrete floor
When using insulation in the form of slabs, the joints that are formed during their installation will need to be sealed with polyurethane foam. A second layer of waterproofing is laid on top. The second layer of concrete screed must be reinforced with metal mesh.
Insulation with expanded clay
Plank bases - we make and insulate them ourselves
Wet floors are recommended for baths with a base of at least 0.5 m. If we plan to use the steam room exclusively in the summer, there is no need to insulate its wooden base. When using a building year-round, thermal insulation of floors is a mandatory procedure. To install a wooden floor base, we will need boards:
- well sanded (made of oak or larch) - for installing a finished floor;
- lower quality - for the rough part of the structure.
We also purchase beams. It is optimal if they have dimensions of 15x10 cm. But it is also possible to use products with more modest geometric parameters. The main thing is that they are reliable and can withstand the planned loads.
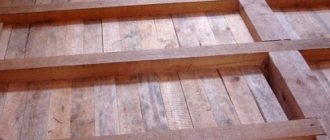
Installation of a poured non-insulated floor is carried out according to a simple algorithm. First, we cut the lumber into the required dimensions. We treat them with an antiseptic brush. Then we install logs (without the slightest slope!) on the foundation grillages (thick beams perform their function). We screw (you will need a screwdriver and self-tapping screws) the edged boards to them, forming a rough covering. After this, we install the finished floor using sanded wooden products. Between the individual elements we leave gaps of about 7–10 mm. These gaps are very important. Through them, water from the steam room will flow out freely. The finished base must be covered with drying oil (preferably two layers).
Insulated floors are a little more complicated. We will have to take care of organizing high-quality drainage, hydro- and thermal protection of the foundation under construction. The procedure will be as follows. We lay the beams on a slope, securely fixing them with dowels of suitable length. Important! For every meter of beam, the slope should be 1 cm. We arrange a rough foundation. We install logs on it. Between the latter we lay insulating material. Experts advise using expanded polystyrene (extruded) slabs as such. It does not get wet and is characterized by excellent heat-protective properties.
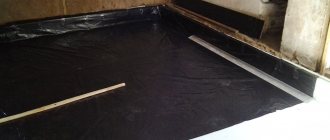
We cover the insulation with a vapor-waterproofing membrane. We lay it towards the floor base with an absorbent surface!
We install the membrane with a 15-centimeter overlap on the walls of the bathhouse. We fix the vapor barrier along the edges with aluminum slats.
We are organizing the drainage. We fit the sewer pipe as tightly as possible to the rough base and waterproofing layer. Carefully seal the remaining gaps with sealant. We fill the finished floor. We install the boards very tightly. We knock them out with a mallet. We should not have any gaps between the individual elements of the base. The insulated wooden floor is ready!
