In any project, let it be a sauna or a Russian steam room, sooner or later the construction will reach the stage when it will be necessary to install and first select a suitable drain for the bath. As a rule, there are no problems with the purchase, fortunately, on the market you can find quite a lot of ready-made kits for arranging a ladder or drain floor in a bathhouse. But there can be problems with the choice, especially if you rush into the purchase.
The drain is a special device for draining water in a bathhouse.
Installation methods
Pouring the concrete base in a bathhouse is done in different ways. The choice of method depends on the characteristics of the soil on the site, the qualifications, experience and knowledge of the master, and the financial capabilities of the owner. Experts know how to fill the floor in a bathhouse with a slope, under the drain, so that there are no difficulties during operation. They will ensure the formation of a surface with the correct geometry, ensuring timely removal of moisture under the influence of gravity. The amount of slope is regulated by regulatory requirements.
Installation directly on the ground
Installation work begins with the excavation of a certain volume of soil. To do this, a layer is removed from the area where the base is to be formed, the average thickness of which is 40 - 50 cm. After this, a sand and gravel cushion is arranged, the thickness of which can reach 60 cm. The filled layer of sand and gravel is carefully compacted to ensure sufficient density and foundation strength. Pouring the solution begins after complete and thorough preparation of the base, ensuring its compliance with regulatory requirements.
The screed is poured in 1 - 2 layers depending on the desired thickness. Work is being carried out on waterproofing and insulating the concrete base due to its high thermal conductivity.
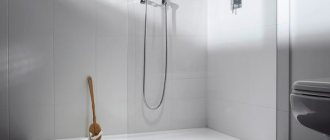
One of the options for installing a bath floorSource logvinov.net
Filling along logs
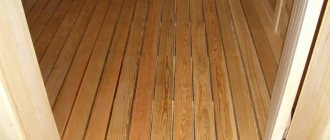
This method of installing a concrete screed is suitable for those who plan to use the bathhouse all year round or the site is located in a region with a fairly harsh climate. The technology for performing the work is somewhat different. It is possible to create a ventilated underground without installing an additional ventilation system in the screed itself. To carry out installation work, additional financial influence will be required. The finished coating will be quite durable and reliable.
To make logs, a beam with a side of 10–20 cm is used. It is placed on the base, forming a kind of wooden mesh, the cell size of which is selected individually. Subfloor boards are laid on top. After installing thermal and waterproofing, the concrete mixture is poured. A metal mesh is used to reinforce the concrete base.
The finished structure will not have a drainage hole. The outflow of water will be carried out into a special pit designed to collect it, and a drain, which will allow moisture to be removed outside the building. Thanks to the ventilated basement space, you can eliminate the need for a pillow.
Logs create a ventilated facadeSource vanna-prosto.ru
Floor with drain: work order
Although the designs of drains are different, all floor-mounted models are installed according to the same principle - the sequence of work is the same.
It is much more pleasant to stand on a warm floor in the shower, which is why a floor with a drain is most often made with a layer of thermal insulation. The best thermal insulation material for this is high-density extruded polystyrene foam. It does not absorb water, does not rot, has excellent thermal insulation characteristics, and can withstand loads normally (it will withstand the weight of the screed and tiles without problems).
You can make a floor with a drain in the shower with your own hands
It is more convenient to work with a level (laser level) that has a plane builder function. It will make the work much easier.
Preparatory work
The first step is to remove a branch from the sewer riser where the water will flow. The sewer pipe is laid with the required slope (2 cm by 1 meter), the socket is placed at the intended location of the drain connection. After the sewer outlet is installed, take a drain and make preliminary markings - you need to mark the height of the screed on the walls of the shower stall:
The axis of the drain should be slightly higher than the axis of the sewer pipe
Mark the line for laying the screed on the walls
Now you can measure the height to which you will need to raise the floor in the shower stall. It largely depends on the parameters of the ladder (its height). Based on the obtained figure, it will be necessary to plan the layers of screed and their thickness.
Determining the thickness of screed layers
Usually it is assumed that polystyrene foam 5 cm thick is placed in the screed. The minimum thickness of the screed is 3 cm (more is possible, less is not). This is in the center near the drain; towards the edges it becomes thicker (the required slope is created). From the existing screed height line, we put the resulting figure down (add the thickness of the polystyrene foam and the screed). It will be necessary to bring the rough screed to this level.
From the existing height of the screed we set down the thickness of the insulation and DSP
To reduce the load, the rough screed is made of lightweight concrete. It can be foam concrete or expanded clay concrete. Wet work can be minimized. To do this, you can lay foam blocks at the missing height and fasten them with reinforcing mesh. You can pour a 3 cm layer of DSP on top.
When installing such a base, a damper tape is needed along the walls. Since in the presence of polystyrene foam or any other insulation, the floor may sag a little, it must be made incoherent with the walls. This is why you need a damper tape. It is placed around the perimeter of the base. In height it should be 1-2 cm above all layers.
You can use a special damper tape, or thin foam plastic (1 cm thick or less). Even corrugated cardboard will do. The remaining tape is then cut flush with the screed. She did her job - we got a floating slab.
The poured screed must stand for at least a week - the concrete must gain at least 50% strength. After this, you can continue working.
Waterproofing
To prevent the drain floor from leaking, the shower stall needs good waterproofing. It is better to make it multi-layered. One of the layers can be done at this stage.
Coating waterproofing is usually used. This could be bitumen mastic or special waterproofing for swimming pools. It is applied with a brush in several layers, extending onto the walls at least 30 cm. These mastics form an elastic, waterproof film on the surface without seams or joints. This type of waterproofing is highly reliable.
Particular attention should be paid to the processing of corners. They can even be glued with a strip of rolled waterproofing (such as Gidroizol, etc.). Apply the first layer of coating waterproofing to the walls, then glue the joint between the wall and the floor with roll waterproofing (set on the same compound), and apply another layer on top.
Multi-layer waterproofing is more reliable
For those who like to do everything with a margin of safety, the first layer of waterproofing can be laid even under the first corrective screed. All rules remain the same as described above.
Instead of coating waterproofing, you can use roll waterproofing. But you will still have to lay it on bitumen mastic, lubricating it well and pressing the seams. The approach to the walls is approximately the same - about 30 cm. If the width of one roll is not enough, the panels are laid with an overlap of 15 cm, they are well coated with mastic.
Choosing a place to install a drain ladder
To ensure that the tiles on the floor of the shower stall look at least normal, it is better to position the drain grate symmetrically relative to the tiles. Therefore, first, dry, lay out the tiles on the floor (taking into account the seams). When laying out, remember to step back a little from the walls - by the thickness of the tiles and glue.
It is not at all necessary to make the drain in the center - it can easily be moved to any wall. In this case, the far wall from the entrance was chosen to reduce the possibility of water spilling out of the booth
Next, we choose the position of the ladder so that everything looks good and, at the same time, it is necessary to make a minimum of trimmings. Not only do they take up time, they also spoil the view.
Installation of drain and insulation
The joints of polystyrene foam are glued with tape (so that moisture does not leak out of the concrete). If there are large gaps, they can be tightly packed with scraps and then sealed.
What to choose for a drainage system
Often, owners of wooden baths install a classic elbow with a bellows - a water seal. The floor is covered with a waterproofing film, and a wooden ladder or grid of several sections is laid on top. This is both simpler and cheaper, but not always convenient. For a winter bath, such a drainage system can only be used if the steam room is used regularly and the wooden floors are thoroughly insulated.
Otherwise, the plastic water seal will either be torn apart by frozen water, or the room of the wooden bathhouse will be forever saturated with odors and gases from the drainage pit.
The choice of a drain drain system is determined by several important conditions:
- Low height of the drain structure. For a wooden bathhouse, this is not critical, since the height between the subfloor and the drain floor is often 15-20 cm. But it is the compactness of the ladder that allows you to hide the entire drain system under the wooden floor without any problems and thoroughly insulate it;
- Easy maintenance of the drain system. Periodically you have to clean the sump, remove and rinse debris from the water seal. All this can be done from the bathhouse without dismantling the wooden floors;
- Ability to operate the ladder in a dry or almost dry condition. Even after a month's absence and not using the bathhouse, the drain gate system will properly isolate the space of the sewer pipes from the steam room or shower room.
You just need to press the lock button with your foot to close the cavity. Such designs are used mainly in shower rooms. For a wooden steam room or washing a bathhouse, such ladders are not very convenient. You can, of course, make a hatch on top of the grate and open it every time after completing the bath procedures and latch the valve, but this is wrong. Moisture and drops of water will condense on the drain surface of the subfloor for a long time, therefore, if you close the valve in a wooden steam room, then after half an hour or an hour a puddle of condensate will form on the floor.
In conditions of irregular use of the bathhouse, the ladder, as a system, remains the most preferable from all points of view.
Installation of a drain drain
The drain installation process begins with marking the hole on the floor. This is quite simple to do if you know exactly the location of the axis of the sewer pipe located in the underground. Usually the point - the center of the circle is marked when laying the drain floor in the bathhouse.
Using a jigsaw, a hole equal to the outer diameter of the body is cut according to the markings. The ladder should fit into the cutout with a small gap.
Next, using a chisel and a light hammer, or maybe a mallet, cut out a square for the mounting flange of the ladder. If the floorboards are thin, then it is better to do the work using a hand router, and only trim the corners with your hands.
Next, a waterproofing membrane is laid on the floor of the bathhouse; the size of the canvas should be chosen with a small margin, so that there is an overlap of 30-35 mm on the walls of the bathhouse.
Before laying the ladder, the canvas will need to be tensioned and secured with aluminum thresholds. Next, at the installation site, a hole with a diameter of 15 mm smaller than the cylindrical body of the ladder is cut out in the PVC film. The edges of the film are cut with straight cuts, treated with sealant and glued to the walls of the seat.
All that remains is to insert the outlet pipe into the sewer connecting flange, treat the edges of the drain system with sealant and install the housing in place.
Features of bath drains
The drain is an element of the waste system that ensures the drainage of water into the sewer canal. In the bathhouse it is installed in the floor of the steam room and washing room. The water flow along the inclined floor covering rushes to the drain hole, where it enters through the drain into the sewer outlet. The design of this element consists of a body, a siphon, a water seal, an outlet pipe and a decorative grille.
If a drain ladder is installed, then for a bath it performs the following functions:
The drains are divided into several types and according to the method of connecting the sewer supply, such options are distinguished.
Devices are also divided according to the method of gate formation. A drain with a wet seal or a water seal protects against odors from the sewer and is secured with a layer of water. All gases penetrating from the system dissolve in water, which provides a reliable barrier. The main limitation of use is the drying out of the water seal when the bath is left idle for a long time. It can be installed provided that the bath procedure is carried out at least once a week. A dry drain provides an air gap and opens the hole only at the moment when draining is needed.
The dry type of water seal for a bath is manufactured in various versions
Varieties
Characteristics
Membrane. The lid of the device opens only under the pressure created by the water flow. When it stops, the passage closes again.
Float It is based on the following principle: the valve floats up when water enters and falls back when the flow is exhausted.
Pendulum. The shutter has curtains that open under the influence of a water column 4-6 cm high, and close due to its own weight.
In addition to these two main varieties, universal devices are gaining popularity. They contain a water seal. But an air gap is also provided when the water layer dries.
Comparison with a water seal
Siphons with a water seal are a traditional solution, but in some aspects they are inferior to their dry counterparts . The devices function in different ways: in a wet shutter, water acts as a barrier against odors. However, the water may freeze or evaporate , leaving the door open for sewer odors to enter the room. This is a significant disadvantage of devices that dry valves do not have. They work on the "nipple" principle.
There is a damper inside that acts as a check valve . As a result, such a gate also performs regulatory work, i.e. prevents wastewater from moving in the opposite direction. A dry shutter is more functional; it can work either independently or in tandem with a hydraulic one. Dry valves are easier to install and operate, compact, and durable.
Bath drain - a simple solution for your comfort
As you know, there are no trifles in a bathhouse, so every detail should be given the closest attention. For example, if during construction you have perfectly insulated the floor in all rooms, installed a heating system and covered the surface with ceramic tiles, you should take care of the comfort of movement
After all, as you know, wet ceramics are very slippery, which can lead to falls and injuries. To avoid this, bath ladders are used. But their scope of application is not limited to this; they can also be used as the main floor covering, but more on that below.
In the photo - a section of the bathhouse ladder
Conclusion
We hope that our brief instructions will help you choose high-quality drains for your bathhouse without extra costs or outside help. These simple designs have both a practical meaning, preventing accidents and allowing water to flow freely into the sauna drain, and an aesthetic one - the wood fits perfectly into the interior.
You can also make furniture for a bathhouse that matches the style of the ladders on the floor
In addition, wood is an environmentally friendly material that does not contain chemical compounds harmful to the human body. And some types of wood, when exposed to temperature, release beneficial substances into the air, making the atmosphere in the bathhouse even more favorable. The video in this article will help you understand this topic more clearly.
Did you like the article? Subscribe to our Yandex.Zen channel
Installation of a pit for a bath
Sewage systems with a pit device are installed on dense soils.
It is designed to collect and remove contaminated wastewater outside the building. The pit is made of impermeable materials, installed under the flooring and connected to the sewage receiver by an inclined pipe that ensures arbitrary drainage of liquid. Unlike a drainage well located in the fresh air, a sewer pit may smell foul. To limit the penetration of extraneous unpleasant odors into the bathhouse, a water seal is provided in the pit design.
It is done this way:
- The entry into the pit of the drain pipe is located at a distance of 9-12 cm from its bottom.
- A plate is installed under the pipe without fastening it from below.
- A distance of 4-6 cm is left between the bottom of the pit and the plate to form a water seal cavity.
What is a water seal and its types
What is such a device? A water seal is a specially assembled water plug that protects the room from the characteristic sewer smell. Liquid accumulates in the curved section of the pipe, completely covering the diameter. Thanks to this, the water will prevent unpleasant odors from entering the bathhouse.
Water seals are divided into the following categories:
Design of knee water seals
In its design, a water seal of this type resembles a hookah, but does not allow air to pass through, but creates a water plug, and in a hookah the water seal breaks.
The diameter of the pipes and the method of their connection directly affect the performance of this device; the most important requirement for it is tightness . In this case, the lower point of the water seal must be at least 50 mm below the drain pipe.
You can use anything you like for the water seal, but remember that if access to it is closed, then everything will depend on reliability and the ability to clean it.
After the water evaporates from the plug after about 50 days, it becomes possible for air to enter from the sewer. Therefore, the water seal should be filled with water from time to time or another design should be chosen so that it can be hermetically sealed during long periods of absence.
Bottle water seal and its characteristics
The design of this device is different, but its task is the same as in the previous case - creating a water plug. In another way, a water seal is also called a siphon . A water seal of this type also acts as a sump; the pipe connection in it must be airtight.
You can unscrew the lower part of the bottle washing device for cleaning, and if you use a water seal of this type, made with your own hands, in particular, in the floor, then its upper part should have a collapsible design.
volkovysk rent a room for a long time
Tips for choosing a device
When choosing a dry sewer drain, experts recommend paying attention to the following points:
- First you need to decide on the number of risers. As mentioned above, a sewer valve with a nominal bore of 50 mm is ideal for private purposes;
- a device with a horizontal outlet can be installed in limited space and has a height of 6 to 10 cm, while a device with a vertical outlet requires at least 15–18 cm of space. Before installation, you need to take measurements and decide which sewer valve is suitable for your case.
- It is recommended to check the serviceability of all structural elements of the dry sewer drain before purchasing. It is also advisable to check how it functions. To do this, you can pour water from a bottle into it.
The device with horizontal outlet can be placed in a space with a height of 6 cm
After you have decided on the technical parameters, you can begin to choose the appearance of the device. The drain grating can be made of different materials and have different perforations. A variety of design solutions allows you to choose a device that will easily fit into the interior of the bathroom.
Floor and drainage
Laying a sewer line is much more hassle than directly draining a bathhouse, but it is better to do it, the more carefully, the better.
Even if the floor in the bathhouse is covered with wooden gratings, it is still better to make a screed along the beacons with a slight uniform slope towards the ladder , and lay tiles on it. The final cutting of the drain extension can be done when it is known exactly at what height the tiles will approach the drain point. If the work is done very carefully, then even with a minimal slope there will be no puddles.
Providing access, with the ability to replace all elements, is too much of a luxury for an ordinary bathhouse. Therefore, you should not avoid work that may seem unnecessary, for example, the depth of laying the sewer system should not be less than the freezing depth . Insulating the floor under the screed with a 20 cm layer of expanded clay with a rich cement mortar is by no means an excess. A dry ladder is also not a panacea - dirt that gets into the shutter can prevent it from closing tightly. At the end of the season, it doesn’t hurt to wash the removable elements. Buying a dry water seal in a store or making it yourself - this question is not necessarily related to financial difficulties.
Subtleties of installing a water drain
If we consider a water seal, then for a bathhouse with frequent use it can be considered an attractive option that eliminates all odors from the sewer system
In such a drain, it is important that there is always water in the special cavity of the body, which creates a water seal. Installation work for installing a water drain is not fundamentally different from installing a dry “brother”
A nest is prepared in the underground above the drain hole, in which the device body is installed. The difference lies in the formation of the water seal.
There are 2 main types of such elements.
- Knee or U-shaped water seal. In it, a pipe (metal or plastic) is bent in the shape of the letter U, which makes it possible to form a water plug at the bottom. For the normal functioning of such a valve, its lower point should be located 4–5 cm below the sewer discharge pipe.
- Bottle type closure. This water seal is similar to the siphon used in sinks and sinks. A column of water is formed in a cylindrical glass. To create a sump, the lower part of the glass is lowered below the level of the sewer pipe.
When making a water ladder with your own hands, the knee type is most often used. In this case, a piece of metal or plastic pipe with a diameter of about 32-50 mm and a length of 40–60 cm is taken. The pipe is bent in the shape of a U, and a branch is bent at the top to connect to the sewer branch. The second end maintains the vertical direction. The ladder funnel is inserted into it.
An important condition for reliable operation of the device is sealing the joints. In a vertical connection, it is enough for the upper pipe to fit inside the lower pipe, and for reliability you can install a rubber seal
With horizontal joints, it is important to ensure the tightness of the joint. Metal elements are joined by welding or using a threaded connection using a coupling
Plastic parts are hot joined. To do this, install a coupling made of the same material, and the plastic is held together by heating with a hair dryer or blowtorch
When installing water seals, it is important to provide for the possibility of clearing the stagnant zone from debris and silt. This is especially true for bottle-type water seals
In such structures, adequate access must be provided at the bottom.
With your own hands
It is possible to make a siphon with a dry seal yourself. To do this, you will need a plastic pipe, a ball (ball) and a gasket, a set of standard screwdrivers, an adjustable wrench and a construction knife. A ball is placed in the drain hole , the dimensions of which are slightly larger than the diameter of the pipe. The ball is secured at the edges with a sealed gasket . The height of the element above the level of the drain pipe should be 50 mm. During operation of the system, the ball floats up and water flows into the sewer. During inactivity, the ball will lie on the hole and block the path for sewer odors.
Pool drains
Water seals (water seals) in HL drains are used to eliminate the possibility of sewer odors in residential premises or technical buildings. If there is a possibility that the water seal will dry out, sewer odors can easily enter the premises. To prevent such problems, it is worth using a drainage drain with a “dry” siphon, also known as a “Primus” siphon. The “float” is located in the subframe above the siphon and “floats” in the water seal itself, serving to prevent the appearance of sewer odors. If the water seal is dry (this is possible if, for example, the room has not been used for a long time: in a hotel room, country house, or if the room has underfloor heating), the “float” of the HL drainage ladder is lowered, which ensures that unpleasant odors are cut off.
Drainage drains from HL Hutterer & Lechner GmbH can be installed directly into the waterproofing gap with further crimping (or, alternatively, welding of the waterproofing sheet). All this is possible thanks to the clamping flanges HL 84, HL 83.0, HL 83H, etc.
There are also drainage drains for yards (yard drains). Main characteristics: high throughput, can be installed in places where increased mechanical load is possible, there are additional elements that allow you to organize the collection of water from several levels at once, as well as ensure a reliable connection with any waterproofing material.
“HL drainage drains for basements and technical rooms” are drains suitable for basements, boiler rooms, various ventilation chambers, pumping rooms, and are often used for emergency water discharges. The HL drainage drain may have a dirt collector, a sand trap, and a check valve.
The design of the grating in HL drainage drains for showers is created so that the drains can combine elegance, ease of use, excellent design and the highest quality. These grates will help create the individual character of the bathroom and the uniqueness of your shower room. The design of the grating in HL drainage drains can be harmoniously integrated into shower rooms: gyms, swimming pools, hotels.
Wet valves
If you choose a water seal for a bathhouse based on the efficiency of locking, then the best option would be a hydraulic circuit with a curved U-elbow, or an annular chamber with a concentric partition.
Eternal knee
A water seal in the form of an elbow requires a free space of at least 150 mm in height for pipes with a diameter of 50 mm and an overhang of 250-300 mm for a full drain with a cross-section of 100 mm. Therefore, knee bellows are used primarily for bathhouse projects on stilts or columnar foundations. To reliably lock the pipe, the height of the water column must be at least one and a half diameters of the channel.
The main advantage of a water seal is its simplicity of design; it is quite possible to make such a siphon for a bathhouse with your own hands from parts of sewer fittings and pipes. It turns out not as beautiful as industrially made drains, but for a bathhouse it is more important that the structure is easy to repair and simple to maintain. The knee can be easily cleaned, either with a brush or with specialized attachments, rotating brushes and even chemicals such as “Mole”.
This type of drain can work in a properly constructed bathhouse for a couple of decades, until someone uses a cable to punch a hole in the plastic elbow of the water seal.
Flat water seal
For a bathhouse installed on a strip foundation, it is best to use a trap water seal. Its height usually does not exceed 10-12 cm, so the drain box can be safely mounted into the floor screed, and no additional fastenings are required for connection to the sewer.
For example, the “CENTER AQUAPA” model consists of two halves. In the bottom part of the water seal there is an annular cavity with water, which, after installing the top cover, will be divided by a partition. The result is the same bellows, but with a gate height of only 15-20 mm. The drain body is simply put on the receiving hole of the compensating adapter of the sewer pipe of 110 mm.
The box-shaped design turned out to be quite reliable and easy to maintain; the only drawbacks include a small level of water in the water seal. In summer, the water in the drain evaporates, and, accordingly, odors from the septic tank will break into the bathhouse within a couple of days. Whereas in the bellows elbow the water seal will last 3-4 days.
In winter, in a country bathhouse, the drain drain may freeze, but this does not affect its operation in any way. There is little water left, so the risk of damage is minimal. A water seal with an elbow can actually be crushed by frozen water.
Float device for organizing a drain in a bathhouse
Structurally, the water seal with a float is very similar to the previous version of the water seal. The only difference is that in the ladder version, the outlet hole is blocked by raising the water level, and in the float version, the same window is blocked with a foam liner.
Float valves very tightly and reliably block the drain passage even with a minimum amount of liquid. In practice, the drain in the bathhouse can be reliably blocked within 10-15 days from the date of the last visit to the steam room. Among the disadvantages, one can note the sensitivity of the water seal to contamination. After soapy water, the float must be washed with clean boiling water.
Ladders and their main features
Gangways vary in height, appearance and equipment. The grate installed on top of the drain device usually has a round or elongated shape. Materials are selected based on price and purpose. The longest-lasting gratings are made of steel. They are also made from chrome, glass, brass, and plastic. The latter are the most common, but the least durable. Plastic grates serve their purpose well, but will not fit into the interior of some showers.
But the grate is a matter of taste and a decorative thing; we carefully approach the choice of the drain itself. The ladders are divided into:
- Spot. They are a drain covered with a grate through which water flows out. Compactness allows you to install this type of drain anywhere.
- Linear. Installed along the cabin or in the center, the water leaves evenly due to the drain in the form of an oblong tray.
Linear drain in the shower roomSource roomester.ru
Linear drains do their job best by distributing water throughout the drain. Accurate calculation of the drained water allows you to adjust the length during installation. Most often they are installed in common shower rooms with a high volume of water consumed.
The shower drain under the tiles consists of several parts:
- durable body;
- gratings;
- sealed drain funnel;
- siphon from unpleasant odors;
- outlet channel at the bottom for draining.
The material of the ladder depends on the nature of the purpose. Cast iron drains are used in bathhouses and swimming pools; despite their weight and complex installation, they are durable and do an excellent job of draining large amounts of water. In buildings subject to high sanitary standards, stainless steel drain holes are installed. It is not difficult to clean them from accumulated dirt and keep them in order. Anti-corrosion and durable plastic drains are perfect for home use. However, steel would be preferable.
Stainless steel ladderSource metal-masters.ru
An important role in choosing a drain hole is played by its height. An acceptable value is from 45 to 190 mm. The higher the drain, the more efficiently it drains water. The heat-resistant under-tile floor shower drain copes with high temperatures up to 90 degrees Celsius.
A water seal installed in the siphon blocks odors coming from the sewer. But, if the shower is not used for a long time, the drain dries out and the siphon stops functioning.
Therefore, it is important to choose whether to install a dry seal or a water one.
With a dry seal, the siphon will not allow odors to pass through due to additional seals that block the water drain with their weight. For example, it is usually installed when building baths. The sauna drain is an important element. The bathhouse drain forms a water seal and blocks the appearance of gases in the room. The dry bath ladder is manufactured in three variations: membrane, pendulum and float.
Wooden bath drainSource vagonkapol.com.ua
In production and cold rooms, drains are installed with a shutter that is resistant to sub-zero temperatures. It has a separate drainage ring through which drainage occurs if the waterproofing is broken.
When installing a drain hole, it is important to measure the diameter of the pipe from the sewer - it must match the diameter of the outlet pipe. This part of the drain can be vertical or horizontal
In private houses, sewer pipes are usually connected from below, so a drain with a vertical channel is installed. In other cases, a horizontal connection is suitable, which is considered universal for residential buildings.
The nuances of laying ceramic tiles at an angle
Before laying tiles in the shower on a sloped floor or in any other bath room, professionals always first create a waterproofing layer on an already prepared base. Thanks to additional protection, water will not wash away, for example, a concrete structure.
Usually craftsmen lay tiles away from the walls. If there is a horizontal frieze, its lining is first performed. Only then do they lay the ceramics on inclined surfaces along which water flows into the drain.
The “envelope” type layout begins with the sides representing the bases of triangular or trapezoidal surfaces. First, be sure to fix the tiles that do not need to be cut.
Laying the material begins exclusively from the center of the base. If an even number of ceramic pieces are placed in one line, the triangular inclined surface is divided into two equal parts. Each of them is lined separately.
Laying tiles on a slope on the floor with a drain Source mega-santehnika.ru
Main stages of installation
To install a dry siphon yourself, you should carefully study the steps of its installation. If certain conditions are met and everything is done correctly, then the installation of this structure will not cause problems. The most common problem after installing a water seal yourself is leaks. If you don’t have confidence in your own abilities, you should seek help from a specialist who can carry out this task easily and efficiently.
Installation of this device is quite easy. Here are the main steps:
- First you need to check the device. Gaskets and seals must be in place exactly.
- During the second stage, a rubber sealing ring is placed between the siphon and the sink. This ring is necessary to seal the joint.
- A siphon is installed, and a sealant is applied to the joints, making the seams more reliable and reducing the chance of the structure leaking.
Any device has its advantages and disadvantages. Let's look at the main advantages of a dry shutter:
- such a device does not require frequent checks;
- due to the fact that the dry model does not require water to perform its functions, it can be installed in unheated rooms;
- polymer materials from which dry models are made have excellent performance characteristics and meet modern technical requirements;
- such devices are very convenient and compact;
- have good resistance to mechanical stress (unlike the water model, such a shutter is quite difficult to break);
- regulate the movement of the environment in the system;
- have good resistance to blockages;
- their installation can be carried out horizontally and vertically (water fixtures are installed only vertically);
- eliminate the accumulation and stagnation of water, so the development of bacterial flora harmful to human health is unlikely;
- have excellent sound insulation properties.
- very durable.
Such valves, unlike water valves, can be installed horizontally
What is a dry water seal and its types
Water seals can also be dry. You can buy it ready-made or make it yourself. They do not freeze and are divided into two types:
Float seal
The design of this water seal is as follows:
In the operating position of the device, water is able to lift and hold the float at the required level, which actively supports the operation of the system . If you do not use the bathhouse for a long time, the water from the water seal will evaporate, but the float will close the drain hole before the water has completely evaporated.
If we talk about a design that you can make with your own hands, then it can work no worse than the factory one if the float in it in the form of an inverted glass is attached in such a way that the bottom is located above the drain hole. And it itself closes with a light ball, which has a slightly larger diameter. This ball will act as a float.
Characteristics of a pendulum hydraulic seal
Below, next to the shutter, there are two curtains that are suspended from the vertical at an angle, which serve as a pendulum shutter. They close due to their weight, and open through the force of water when draining. The height of the water column of such a valve is 32 mm, which is quite enough for a village or country bathhouse. Sometimes it reaches 60 mm .
Some craftsmen change the force of gravity to springs, and then different versions of dry spring-type valves with greater functionality are created.
There are other types of dry water seals, they have specific names like the cellular memory of its material. As a rule, these are stockings based on flattened rubber, which begin to let water through under slight pressure, but they are not particularly suitable for country baths.
Any type of water seal, even with limited possibilities, can be improved or made with your own hands. Assembling a dry water seal yourself is not that difficult. To do this, take a plastic ball that is slightly larger in size than the drain pipe itself . When there is no water, the ball will block air access from the sewer. The drain will be released after liquid enters. Such a system can work at any time of the year, even if in winter the ball freezes to the drain. The ice will melt very quickly with boiling water and everything will return to normal.
Types of drains - their design, advantages and disadvantages
Primitive ladders appeared along with the first souls. Since then, the line of these devices has been expanded with a variety of options. The products differ in appearance, design features and purpose.
Based on the type of construction, three large groups of drains can be distinguished - point, linear and wall.
Spot
This is a traditional square shaped ladder. It is distinguished by its small size and the presence of holes located along the entire perimeter of the decorative panel. This is a compact device that can be placed anywhere on the cabin floor. Such drains are most often installed in the center, ensuring good water flow. To do this, the tiles around it are laid at an angle. Such elements can be useful not only in the shower. They are often installed in the center of the room as additional protection. In the event of an accident, they will help save your neighbors from flooding, and you from having to compensate for their losses.
Linear
The product is made in the form of a rectangular tray with various slots and holes. This type is otherwise called a shower tray or downspout. The decorative plate may have a perforation or a slot running near the edge along the entire perimeter of the product. The installation process of the slot type is simplified compared to a conventional device with holes. Since the drain is installed on the side, against a wall or at an exit, the slope of the floor is formed in such a way that water flows in only one direction - towards the drain. Linear drains have good water flow capacity, so they can be installed in rooms with a “tropical” shower.
Wall-mounted
An inconspicuous corner structure is placed along the wall and masks the joint between the floor and the wall. To install this model, it is necessary to construct a false wall, since the main part of the structure must be hidden. The drainage system is covered by a laconic and elegant rectangular panel with slots.
Video description
You can get acquainted with the process of laying tiles from a ladder onto a pre-prepared screed with a slope in this following video:
However, professionals carry out the work of tiling a sloping floor with ceramic tiles as follows:
- first, cover the far triangular surface opposite the entrance door to the room with tiled material;
- then the tiles are laid on the left and right sides of the ladder;
- then the ceramics are placed on the last sloping section of the floor near the entrance;
- at the end of the process, the surface directly next to the drain is coated.
Thanks to this sequence of work, the master moves less on the facing material, the glue under which has not yet reached its maximum strength. At the same time, during the masonry process, experts pay increased attention to the watershed lines of the floor with expansion joints, as well as cuts and joints between the ladder and the tiles. After all, such places are most susceptible to damage of various types.
To increase the strength of the seams, they are reinforced using metal profile elements. In this case, the gaps themselves are first filled with bitumen, which is preheated. Such a mass, when cooled, can reduce the negative impact of loads.
Metal profile for protecting tile joints Source profil-mo.ru
Lining of cuts
Craftsmen perform this work after laying all the solid ceramics and drying the glue underneath. In the process, specialists use exclusively individually cut tiles for a specific location. At the same time, the tile material is distinguished by its decent thickness and high strength. Therefore, only experienced craftsmen can cut floor ceramics efficiently. Moreover, they use a special tool.
Features of installation and waterproofing of wall drains
And in houses that are in use, you first have to completely remove the old covering and remove the debris. Only the sewer pipe should remain on the exposed base. Most likely, it is cast iron, and its service life has long expired. It is best to replace such a pipe with a new plastic one, into which the pipe from the drain will be routed.
The floor is like a layer cake. It consists of several layers of screed and waterproofing. Additionally, thermal insulation can be installed. It is desirable that the tiles covering the floor on top have an anti-slip effect
To lay the screed, for example, you will need buckets, a spatula (or mixer) for mixing the solution, trowels, spatulas and graters for applying it to the base and leveling it. To dismantle the existing floor - a hammer drill (impact drill), chisel, hammer.
You will also need the following tool:
- tape measure, laser level, knife, ruler, square;
- tile cutters;
- a set of keys and screwdrivers;
- wire cutters;
- jigsaw, etc.
List of necessary materials (its quantity depends on the floor area):
- dry DSP for screed (at the rate of 5 kg per 1 sq. meter);
- expanded clay concrete, foam concrete to “lighten” the bottom layer of the screed (in order to reduce the load on the floors);
- expanded polystyrene in sheets for thermal insulation (50 mm thick);
- waterproofing membrane (damper tape);
- sealing mastic (with a distribution calculation of 3 kg per 1 m3);
- isoplast;
- tile adhesive (consumed up to 5 kg per 1 square meter);
- grout for joints, silicone paste-sealant.
And most importantly: the drain is complete (with fasteners, etc.), plastic pipes, ceramic floor tiles.
Stage 1 - laying a drain pipe into the sewer. We cut the outlet pipe of the drain into the sewer with the required level of slope (2 cm per linear meter) and fill the connection contour with sealant paste. If necessary, we combine the drain from the shower with other drains - from the kitchen, washing machine.
To ensure efficient drainage of waste water, the length of the drain pipe should be as short as possible and without bends. Make sure that the slope of the pipe towards the sewer is sufficient (2%)
Stage 2 - calculation of screed height (preliminary marking). We perform the following actions:
- install the level so that it shows the axis of the drain pipe into the sewer;
- set the drain 1.5 cm above the outlet pipe (focus on the axis);
- move the beam to the height of the ladder grating;
- add the thickness of the grate and another 1-1.5 cm to the height of the slope for normal water flow (at the rate of 1 cm per linear meter);
- From the line indicating the installation height of the grille, we set aside the additional height upward and move the leveling beam to a new mark.
Stage 3 - preparing the base. At this stage we make a rough screed:
- we clean the floor, seal cracks, eliminate damage and unevenness;
- Based on the fact that the main screed will contain polystyrene foam 5 cm thick, and the screed itself cannot be less than 3 cm, we put 8 cm down on the wall from the mark (see previous paragraph) and get a new mark - this is the upper edge of the rough screed ;
- pour the screed - to reduce the weight and load on the floors, light concrete (foam concrete, expanded clay concrete) or foam blocks are used, fastened with a reinforcing mesh and cement-sand poured with a layer of 3 cm.
We place damper tape along the walls to create a “floating” effect and protect the screed from possible cracking. We dry the screed as required by building codes for at least 14 days, if the temperature in the room being equipped is maintained at least at a stable 20º.
Waterproofing will prevent the lower floors and basement from flooding with water, and will protect against the proliferation of pathogenic microorganisms, the appearance of excessive humidity, and unpleasant odors.
How to raise the bathroom floor to install a drain
The smallest floor-mounted drain ladder has a height of 6-7 cm. At the same time, in order for water to flow normally into it, it is necessary to ensure a slope towards the drain hole of at least 1 cm per meter. This means that when making a floor with a drain, the height of the floor towards the walls is increased. The zero point in this case is the upper part of the installed ladder. How accurately the floor rises depends on the size of the shower stall or the entire bathtub, if you plan to collect water from the entire area of the bathroom.
Floor drain layout diagram
There are several ways to raise your bathroom or shower floor. When choosing a method, it is necessary to take into account the load-bearing capacity of the floor, otherwise you can cause damage to the entire structure.
Screed of different types
The most obvious way to make a floor drain slope in the floor is to pour a screed. But the option is not always the best. Firstly, an ordinary cement-sand mixture has a lot of weight, and secondly, it “matures” for a long time. But there are several good options.
Guides for pouring screed have been prepared
The most common way to create a floor with a drain is using a screed. It’s just that the screed can be different, especially since the thickness of the “pie” is usually significant - rarely less than 12 cm - which makes it possible to make it a combination. This allows you to provide the required reliability, but reduce weight. Most often, the floor with a drain is insulated. But the maximum thickness of the insulation and screed is 10 cm, which is clearly not enough to install most drains. The remaining centimeters are “gained” by laying a rough screed, but it makes sense to make it from lightweight concrete to reduce the load on the floor.
On the logs
In order not to overload the floors, you can make a podium in the shower or bathtub on joists. The option is controversial, since high humidity and wood do not go well together, but sometimes this is the only option. When choosing such a floor drain device, you must use well-dried wood. Before use, it is treated with protective compounds (according to the instructions, but at least twice). It is advisable to choose from those impregnations that are intended for outdoor use or for direct contact with the ground - they have a higher degree of protection. After the composition has dried, you can begin to work.
Approximate layout of the lag "envelope"
You can make the floor straight, and set the slope with the thickness of the glue
The advantages of these methods are minimal weight, the disadvantages are the complexity of execution, since attention to detail and high quality waterproofing are required.
As you can see, a floor with a drain in a bathtub or shower can be done in different ways. Choose the option that best suits your conditions.
Briefly about the main thing
Shower stalls are popular for their convenience and practical design. An important element is draining the water. The drain in the bathtub flooring can be point or linear.
The ladder consists of the following elements:
- grates and funnels for draining;
- housings;
- siphon and outlet channel.
When installing a ladder, the material from which it will be made, as well as its shape, are taken into account. The throughput of the drainage device must be at least 0.4 l/s, optimally 2 l/s.
The installation process includes the following steps:
- Laying a joint pipe into a sewer pipe and pouring a screed.
- Installation of drainage and implementation of thermal insulation.
- Installation of siphon and grille.
Source
Criterias of choice
In addition to choosing the design of the shutter, it is advisable to select the size of the mesh so that it is convenient to lay the tiles on the floor: it is desirable that the size of the drain be a multiple of the size of the tile (including mosaics). Pay attention to the material of the case. For a shower stall in an apartment or house, plastic is quite suitable. These are the most affordable options. Floor drains made of polypropylene are more expensive, and stainless steel is even more expensive.
There are even corner models
It is also worth choosing the height of the ladder. The minimum value is about 6-7 cm, the maximum is up to 20 cm. Among the technical characteristics, this equipment only has a maximum throughput - how many liters it can dispense per minute. Select depending on the maximum pressure that your shower can produce: the throughput of the drain ladder should not be less than the maximum amount of water dispensed. Both parameters are measured in liters per minute (L/min), so there shouldn't be any problems.
Soil filtration method
The most important part of such a system is an autonomous septic tank, which is both a septic tank and a distribution well. Sewage pipes extending from it distribute filtered water to different places on the site.
You can buy a septic tank in one of many stores, or you can make it yourself. If you choose the second option, it is best to make the structure from metal or plastic tanks. A structure made of concrete rings, as well as any other structure made of brick or concrete, is also effective.
First of all, a septic tank is installed. The container is dug to a depth of 1 to 2.5 meters. There is no need to install a tank lower, as problems may arise during wastewater treatment. Next, a sewer pipe is laid to the septic tank, which goes deep below the freezing depth of the soil. Now you can start preparing the drainage pipes.
The length and thickness of the pipes are determined by the amount of wastewater discharged. Often, 11 centimeter plastic sewer pipes are sufficient. Holes are made in them, taking into account that they should be smaller at the top than at the bottom. This is necessary to ensure that the water drains evenly. In addition, at the beginning of the pipe, holes are made more often, and then as they move towards the end of the pipe, they are made less and less often.
For a more correct construction of the drainage system, you need to adhere to a number of rules:
- the length of each drainage pipe should not exceed 25 meters;
- pipes should be laid to a depth of about 150 cm, but below the depth of soil freezing;
- the distance between drainage pipes must be at least 150 cm;
- the ditch for laying pipes must have a width of at least 50 cm, preferably 100 cm.
After preparing the pipes, you can begin laying them in the following sequence:
- We dig ditches of a certain size. We take into account the slope of 1.5 degrees, from time to time we control the desired slope, for example, with a building level.
- Depending on the type of soil, we prepare the base of the trench. If the soil is clayey, then at the bottom we make a 10-centimeter sand cushion, and on top of the same thickness a layer of gravel. To prevent pipes from silting on loam soils, they need to be wrapped in a layer of some filter material. A gravel cushion is optional in this case. For sandy soils, cushions of sand and gravel are laid, and the pipes are wrapped in geotextiles.
- Next, the drains are filled with a 10-centimeter layer of gravel, and the entire trench is covered with earth.
- The filtration system must be equipped with ventilation. To do this, we install a ventilation pipe approximately 50 cm high at the end of the drainage pipe. A protective element is mounted on top of it to prevent various debris from getting into the pipe.
A properly designed and installed drainage system will ensure its long-term and trouble-free operation. The bathhouse will thus be maximally protected from such adverse effects of moisture, and there will be no pollution of the area by wastewater.
In any case, it is necessary to install a sewage system in the bathhouse. This means that this issue must be taken extremely seriously, without ignoring any nuances. Only in this case will the bathhouse please the owner with long-term and trouble-free operation without the need to invest more and more funds into it.
Sewer system
Sewerage should ideally be designed before excavation work for the foundation.
Pipe laying is ideally done before the foundation is poured.
At the same time, you need to have a good understanding of some important aspects.
- What are the dimensions of the bath?
- What is the expected intensity of its use?
- What is your foundation?
- What kind of floors will be in your future bathhouse?
- Do you have a central sewer system?
- If not, what will (or is there already) a water intake structure - a septic tank, or an absorption pit, or a cesspool?
- What is the distance to the water intake system?
- What kind of soil do you have?
- What is the freezing point of your soil?
And it is equally necessary to follow important rules when laying it.
- If you have a wooden bathhouse made of timber or logs, then laying the sewer system should be done only after the foundation and the rest of the structure have completely settled. Otherwise, due to uneven subsidence at all levels, incorrect sewer slopes may occur, which will lead to constant blockages and winter freezing.
What problems can arise with the slope of the sewer system when shrinking the bathhouse?
- With some types of foundation, the sewerage area under the bathhouse is “open to all winds”, and, therefore, needs much better insulation. For this, foam shells are not enough; you will need serious insulation with polyurethane foam or isover, and sometimes a brick lining or a wooden “house”. If the sewerage system is recessed into the ground, then it is enough to insulate it with expanded clay. When pouring a floating monolithic foundation (“slab”), pipes are laid in its thickness.
Pipes are buried in the thickness of the monolithic foundation when it is poured
- Before laying the sewer system, you should try to waterproof all parts of the bathhouse that already exist at this stage and come into contact with the pipes. Usually this is the foundation, it is waterproofed with roofing felt and bitumen.
Drainage pit, septic tank or something else?
If your house is connected to the general system of the so-called “city” sewerage system, then the problems are reduced to zero.
The easiest way is to install drainage directly under the pouring (cracked) bath floor.
If your house uses a septic tank, then it is considered correct to make a separate one for the bathhouse. Because the bathhouse is characterized by explosive emissions of used water, and the common septic tank can simply choke.
Bath drains consist of water with a small amount of additional impurities: soap and grease. Therefore, they do not need a complex cleaning system. And it is quite possible to get by with an ordinary absorption or cesspool, and in some cases - if the bathhouse is located on a slope - even with just a drainage pipe system. Of course, many additional factors need to be taken into account: where the bathhouse is located, whether runoff will seep into the plantings and harm the plants, whether it will undermine the foundation of the main house. And of course, if you like to thoroughly wash yourself in a bathhouse, or you have a kitchen area designed there, or have a toilet, then you still need to use a septic tank.
Using central sewerage
The best option of all possible. But the rarest one - central sewerage in most dacha plots - is from the realm of fantasy.
Drainage under the pouring floor, or pit
For this type of drainage, drainage and pipe laying are not required at all. Water passes through the floor and is absorbed into the specially prepared soil under the bathhouse.
The pit under the pouring bath floor is small in size and deeper
It is suitable if you plan to rarely use the sauna and with a small number of people steaming, and also if the soil on the site is sandy. This is the simplest method and the most impractical. It works best when the bathhouse is at the highest point of the site and the water leaves the drainage naturally, saturating the beds. It is completely unsuitable if the bathhouse is located in a low area. Such a bathhouse will soon begin to rot, despite all the tricks to waterproof the lower crowns and floor.
Drainage under the entire bath floor is a simple, old-fashioned, but impractical method
Absorption pit
Such pits were also used by our ancestors. The pit is suitable if you have sandy soils, and will hardly work if it is dense or clayey. This is a beautiful, simple and effective design.
Important! The pit will only work if the groundwater is deep, below the bottom of the pit. If not, then the pit will always be overflowing with seeping groundwater and the pit will lose its ability to absorb bath water.
Pits come with perforated or solid concrete rings.
Concrete rings in the absorption pit can also be perforated
Then the drainage is filled in.
Pit reinforced with concrete rings with drainage
Instead of concrete rings, you can use a metal barrel with a sawn-off bottom.
The design of the drainage pit is very simple
Often, instead of a barrel, old car tires are used, then the pit is dug more spaciously, and the space between the tires and the walls of the pit is filled with drainage.
Construction of a drainage pit using tires
You can make a capital pit with brickwork.
A pit lined with brickwork requires the skill of a mason and a lot of work
In the most extreme case, if the pit is full, if there is no way to pump out the contents, you can remove the rings, barrel or tires from it, bury it and dig a new one.
cesspool
If you have doubts about the absorption capacity of your pit (clay soil, close groundwater), you need to dig a hole further from the bathhouse, preferably in the lowest place on the site, and provide for the possibility of regularly cleaning it with a sewer truck. This is a constant expense, but such a pit will last forever.
If a special vehicle has access to the pit, this is the easiest way to clean it
For additional drainage, it is good to lay a perforated pipe around the bathhouse at a distance of one and a half to two meters, laid in a drainage cushion of gravel and connected to the same hole. You can use a ready-made pipe, or you can drill holes in the asbestos-cement pipe yourself.
Important! The holes in the drainage pipe should be smaller than the fractions of crushed stone or gravel.
The holes in the drainage pipe must be smaller than the crushed stone fraction
Septic tank
Septic tanks are sold ready-made, they are not cheap. Here we will not dwell in detail on the details of their installation; this is a topic for a separate large article. But using a bathhouse with a septic tank is very convenient, without a doubt. Much more convenient than thinking about the hole all the time.
Installing a septic tank for a bath will solve many problems
Typically, a septic tank is placed on a drainage pad, but for large planned volumes of drainage, a filter well is installed.
A filter well complete with a septic tank is sometimes necessary
Drainage after septic tank
This is also a filtration method after a septic tank. Water leaves the septic tank in a purified and settled form and does not enter the drainage pad or filter well of the septic tank, but into drainage pipes located throughout the area. This greatly saves water for irrigation. In this case, the location of the drainage pipes must be ensured at a meter and a half below the groundwater level, and below the freezing level of the ground; the length of each pipe is no more than 25 meters, the minimum distance between them is one and a half meters. For uniform absorption, the holes in the pipes should be drilled unequally: smaller in the upper part of the pipe, larger in the lower part. The complexity of the method lies in the fact that it is difficult to do this in a populated area with old plantings and buildings.
Drainage can be used for subsoil watering of the site
Important! The pit or septic tank should be located at a distance of about two meters from the foundation of the bathhouse. If further, it will be difficult to ensure a natural slope of the pipes, and they will freeze or become clogged; if closer, the foundation will get wet.
Reasons for water seal failure
Often in bathhouses connected to a central sewer, an unpleasant phenomenon occurs such as squeezing out the water seal. The liquid from the water seal can either be squeezed out into the steam room or washing room, or discharged into the sewer pipe.
In both cases, the reason for the release of the water seal is the lack of ventilation of the sewer lines. Excessive pressure inside the pipes squeezes out the contents, and if a large amount of water is discharged into the sewer near the drain point, the water seal, especially the transom seal, can easily be left without liquid in the bellows.
How to make a water seal for sewerage in a bathhouse
The transom “wet” version of the shutter is considered the easiest to install. First, before the floor equipment, it is necessary to lay a 100 mm sewer pipe with a swivel angle. The upper edge of the corner should be located 20 mm below the level of the concrete screed.
The inlet hole is closed with a plastic plug, in the center of which a weaving nail is installed. After pouring the screed, the nail will help to correctly mark the contours of the future hole for water drainage equipment on the bathhouse floor.
After the base screed of the bathhouse floor has completely hardened, it is necessary to level the hole and give the edges even, rounded shapes. This can be done using a grinder and a stone disc with a diameter of 125 mm. You have to cut not in the radial direction, but in the axial direction, that is, with the entire edge of the disk at the same time.
Next, all that remains is to install the water seal body, cap and external drain grate.
The simplest version of a bolt with an elbow can be made from four plastic corners connected to each other in a U-shaped structure. The only thing that needs to be done is to glue the sealing collars with sanitary sealant, otherwise the structure will very quickly split into two parts.
Water seal for sauna sewer
There can be a lot of problems with the water drainage system. Most often it is necessary to redo or modify the existing drain for two reasons:
- The smell of sewage regularly appears in the bathhouse, which cannot be eliminated by ventilation and sanitary treatment;
- The bellows or drain does not have sufficient capacity, so the water in the bathhouse drains very slowly, which annoys both guests and especially the owners. Instead of relaxing after the steam room, you have to waste time and wait for the water to completely drain through the drainage system.
Sometimes attempts to speed up the flow of water using brushes or cable brushes lead to depressurization of the drain and even breakage of the bellows seal. Even if the water has gone, you still need to inspect the drain, otherwise the plug will occur with enviable frequency.
The main purpose of the water seal
The system for locking the outlet into the sewer is used primarily to reliably cut off the internal space of the outlet pipes from the bathhouse atmosphere. Otherwise, odors and gases released from the drains will easily break through into the washing and steam room of the bathhouse.
The second purpose of the drain valve is to block wastewater discharged into the sewer. A bellows or any other type of valve locks dirty water and prevents it from rising into the bathhouse through the drain hole in the floor.