Internal insulation of the attic has an undeniable advantage - the ability to carry out thermal insulation work regardless of the season. However, this approach has several important nuances, ignoring which can negate all efforts and financial investments. It’s easier to prevent unwanted consequences than to eliminate them, don’t you agree?
We will tell you how to act correctly to avoid mistakes. In the article, we described the features of using different thermal insulation materials, gave tips on choosing the best insulation, and also told how to avoid the appearance of condensation in the roofing pie.
The detailed technology for insulating an attic roof will help you do all the work yourself, without the help of specialists.
The attic and its subtleties as a construction project
A little interesting history to make it easier for you to understand why attics are so problematic in terms of heat.
The concept of an attic was first brought into this world by the French architect Francois Mansart in the 17th century, who proposed using the attic space for household and residential purposes. And already from the beginning of the next century, the poorest people began to live under a usually uninsulated roof. And only much later - bohemia, i.e. rich youth, free artists and poets.
The joy of the Parisians can be understood: at that time, the tax for a house was taken based on the number of floors, but the attic was not considered a floor. Those. It made sense to equip this nice room because of the savings, and therefore the fashion for a residential attic came to Russia much later. It was only in the 1990s that they began to take up the attic in earnest: the market suddenly became flooded with a variety of insulation materials and new building materials.
And today, the attic as a living space is recognized by modern building codes and regulations (SNiP), which state that this term can be used for that attic where the line of intersection of the facade and the roof plane is no lower than 1.5 m from the floor level. But we can tell you with all confidence that the technology for insulating and waterproofing an attic is the most complex and demanding of all existing ones.
Content
- Insulation materials
- Attic roof insulation technology
- Insulation of an unprepared roof
Thermal insulation is an important stage in the construction or reconstruction of a house; heat retention, long-term condition of the roof, and sound insulation of rooms depend on it.
What materials are best suited for insulation and how to do it correctly? Heat loss through the attic roof is up to 30% - this is a serious reason to think about insulating it during construction. But it can be done later. Let's understand the intricacies of the process.
We calculate the heat: what will be in the attic?
And now - about the important points. As you know, heat always moves upward. Therefore, if you don’t want the attic to become too hot and stuffy, and the rooms on the floors below to become colder, block off this heat access. How? To begin with, be sure to install doors between the first and second floors, if there are any. Next, think carefully: will you somehow heat the attic? If not, then the heat that will come from the floor below will be enough for her (provided that there is no door above the stairs). If so, then the attic floor will need to be insulated in the same way as the pitched walls, thereby creating a barrier for heat from below. The room below will become warmer, and the attic will now have its own personal microclimate, which can be regulated.
But why, for example, make the attic colder than the living rooms? This is a completely rational solution if you are going to organize a library or a personal mini-gym in it, which do not need either excess heat or excess water vapor from below.
Scheme of a warm attic (or attic) ↓
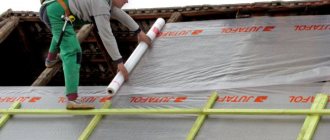
To insulate attics and mansard roofs, mineral wool thermal insulation is used - products made from basalt (ROCKWOOL - Russia-Denmark, NOBASIL - Slovakia, PAROC - Finland, LINEROCK - Saint-Gobain group, ISOROC and TechnoNikol - both Russia, and others) or glass fiber (ISOVER - international concern "Saint-Gobain"; URSA - Spanish concern URALITA, Knauf Insulation - international company, and others). Retail price range – $20-$70 / cubic meter. meter (from $1 per m2). Sold in packages (packs) and rolls.
Stone insulation is special slabs, fiberglass insulation is mats or slabs. Mineral wool thermal insulation materials are durable, do not burn, are resistant to various external influences, and are vapor permeable. Basalt wool is characterized by stability of shape - it does not cake or shrink over time. In addition, it increases the fire safety of the house. The stone heat insulator prevents the spread of fire, withstanding temperatures up to 1000 ºC.
Fiberglass products are characterized by increased elasticity, due to which they perfectly adapt to the characteristics of the installation site. In addition, mats and slabs are compressed when packed. In its compact form, the material takes up less space, which has a positive effect on the estimated cost of construction (transport and storage costs are reduced). When unpacked, the fiberglass insulation returns to its original shape. In addition to insulating the roof slopes and installing inclined windows in the attic, you should take care of utilities: electrical wiring, heating, plumbing, etc.
↑ Options for insulating the attic of a house: with and without waterproofing.
How to change the shape of the attic when insulating?
The first difficulty that is usually encountered when insulating an attic is the shape of the room itself. After all, the geometry of the attic can be anything: triangular, broken, or with a steep slope of up to 70° or almost flat from 15°. In addition, during the insulation process, the following disadvantages will also come out:
- Sloped ceilings that will now be slightly lower.
- Noticeable loss of usable space.
- A technically complex insulation process, where it is important to choose the right hydro- and vapor barrier.
- Health risk if insulation was carried out incorrectly.
Can we handle it? Certainly! So what to do if, instead of an attic, you still only have an uninhabited attic, the pitched roofs of which go all the way to the floor? And why such angles, if the usable space, which is still of some use, is 1.50 meters maximum? The solution to this problem is very simple: build a frame from metal profile guides for drywall, and insulate along it. By the way, the further such a structure is from the cornice, the warmer the entire room will be.
If you don’t like the shape of the attic that we have now, then you can make a special frame, insulate it and sheathe it. It will be even warmer! Plasterboard profiles need to be attached in increments of 40 cm, onto hangers. At this stage of construction, carry out the electrical wiring. And upon completion of the insulation, attach the sheets of plasterboard to the finished frame:
Although many, we note, even like such niches - with ingenuity, they can also be used to save space in an already small attic.
By the way, the simplest frame can be made from timber with a moisture content of at least 12%. Additionally, before installation, treat it with antiseptics, and the structure will serve you for a long time. But even better is to make a frame from a metal profile (for example, a profile for drywall). Or combine both options:
The most important thing: build the frame so that the vertical lines are perfectly vertical and the horizontal lines are perfectly horizontal. Use a good building level for this, and don’t be lazy to constantly double-check everything. Otherwise, you can’t even imagine how much trouble you will have to adjust the insulation later.
Install vertical partitions with a profile pitch of up to 50 cm and no more, and horizontal partitions - as it is convenient for you. After installation and checking the level, take a control measurement of the diagonals - stretch the thread between the extreme points of the profile, and now apply it in a different diagonal direction. If the frame is not skewed, both distances should coincide. You don’t want to end up with a room with incorrect geometry, do you? Then you will be interested to know that in cinema the walls of a room are specially made at different angles and with a slightly distorted rectangularity in order to achieve the effect of an unkempt room.
Specifics
A good idea requires quality execution. And one cannot ignore the features of the room located directly under the roof. That is, the entire system will be subject to constant temperature fluctuations, exposure to moisture from rain and melting snow, and loads from strong winds. Failure to comply with the technology may not only not bring the expected benefits, but also create conditions that are dangerous for the structure.
What design features of the attic should be taken into account when insulating:
- The room is located directly under the roof, which has a slope and can be made in various options (single or gable, broken).
- The roof covering and its load-bearing elements are made of various materials, which will affect the temperature conditions of the room.
- Heat transfer will depend on the material of the building.
- Part of the attic may protrude beyond the boundaries of the building with additional supports, while the attic floor will not be protected from the cold from below.
- All thermal insulation work must be carried out taking into account the ventilation of the room and the removal of excess moisture and the protection of load-bearing structures from rotting and corrosion.
From all this it follows that the attic insulation system is technologically complex and consists of several layers, each of which has its own task. Accordingly, the material of such layers is selected differently and installation is carried out in stages.
What does the modern market offer?
So, we have figured out the frame for the insulation, but which brand should we give preference to? Today, manufacturers of building materials delight with both the wealth of choice and the quality of the insulation materials themselves. And the better way to insulate your attic, proceed from the planned budget and the expected result. After all, for some, as long as the cotton wool does not prick during the work process, while others are planning to organize a personal spa salon under the roof and are only interested in the final thermal efficiency.
In any case, we advise you to purchase insulation only from trusted brands. After all, it often happens that they buy material on the market at half the price, do not ask about a safety certificate or a license, and take it home. And after installing such insulation, even if all the rules are followed, the unpleasant odor and harmful substances in the air can remain for months! Usually, after a week, people open the walls out of despair and throw away the insulation. More repairs, more costs. Don't take risks!
Knauf: proven German quality
Some of the highest quality mineral wool insulation products can be called Knauf products. You most likely know this German manufacturer from its popular technology for producing dry floors. But Knauf makes good insulation: if you follow the installation rules, the insulation will serve you for 30 years. And the insulation process itself is quite simple:
This insulation is sold in special packaging under pressure to make it more convenient to transport. In place, as soon as you open the polyethylene, the insulation will become twice as thick before your eyes and take on its own shape.
But the main disadvantage of basalt slabs is that they have considerable weight, and they are actually easier to lift with two people, as you can see from the step-by-step photo:
Let us note that the most valuable quality of such insulation is its non-flammability, which costs a lot to repair the roof and under-roof space.
Izover: a classic of the genre
Many people like Isover insulation primarily because of its affordable price. But the disadvantage of Izover is that it gets wet quite quickly if moisture gets on it, and immediately deteriorates its thermal insulation. To prevent this from happening, it is necessary to leave a gap of two centimeters between the insulation and the roof, which will allow the cotton slabs to release accidentally absorbed moisture:
When insulating an attic, it is more convenient to use rolled Izover. It is easy to cut into individual pieces right on the spot, and nothing will fall out from under the sheathing. It is really convenient to work with: it cuts easily and does not fray.
Ursa: light weight and compact
Ursa roofing insulation is valued for its lightness, ease of use and excellent quality. With its relatively inexpensive price, it is absolutely safe for health, and therefore ideal for insulating a residential attic. Plus good sound insulation!
Transporting Ursa insulation in a car is not difficult - just compress it a little if there is not enough space. Ursa mineral wool is very convenient for installation and fits easily even into the smallest cracks. The only thing is that it requires protection measures against fiberglass, which is scratchy and unsafe for the lungs. Therefore, it is better to work with Ursa with gloves - for some people, contact with this material causes slight irritation.
Ursa insulation is most valuable for its heat-insulating qualities: after installation, the temperature in the room increases significantly.
Rockwool insulation: ideal technology
Insulation materials of this brand are so in demand in many countries around the world that we can say that they have almost no drawbacks.
Ecover: at high temperatures
Ecover insulation is good because it can be easily cut with a simple stationery knife, and it is easy to make different sections from it for insulating corners and nooks. You just need to work with this insulation in thick gloves and closed clothing, because... the material is noticeably itchy.
Ecover is rightfully considered a non-flammable material, because... made of stone wool - which is a volcanic rock. If such insulation has to be placed around a chimney pipe or on a heating system, do not worry, the temperature of the insulated surface is designed to be up to 400°C.
A budget option for this insulation is Ecover Light Universal. These are lightweight thermal insulation boards on a synthetic base with stone wool.
Paroc insulation: for difficult places
Among insulation products, Paroc is also a popular company, which produces two types of thermal insulation materials: in rolls, which are especially convenient for insulating attic floors, and square slabs. Cutting this insulation is easy with a simple knife. The contours of even complex shapes are clear.
Penoplex: low hydrophobicity
One of the most valuable qualities of Penoplex is absolute moisture resistance. Whatever excess water gets on it through the roof, it will simply flow down. The slabs have an L-shaped edge along the edges, which allows them to be joined as tightly as possible, without cold bridges.
TechnoNikol: for the roof of a bathhouse
TechnoNikol insulation does not burn and melts only at a temperature of 1000°C. Thanks to this, they can perform thermal insulation as close as possible to the metal chimney - the most unsafe place in the bathhouse.
TechnoNIKOL Rocklight basalt slabs are of high quality and environmentally friendly, and at the same time they are moisture resistant and have good sound insulation. Working with Rocklight thermal insulation boards is so easy that you can actually insulate an attic in half a day.
But in the process of cutting and installing it, your lungs and hands need to be protected, otherwise unpleasant sensations cannot be avoided. But this insulation is easily deformed, and therefore you need to work with it carefully, trying not to crush or bend it anywhere.
Rocklight is available in the following parameters: thickness 50 or 100 mm, width 500 or 600 mm and length 1000 or 1200 mm.
Thermalite: no getting wet
Another excellent budget option is Thermolight PM-35. This insulation “breathes” and prevents moisture from accumulating in the under-roof pie.
Bateplex: the easiest installation
Many people value polystyrene foam boards not only for their simplicity and ease of installation, but also for the fact that upon completion of the work there is no itching or any other unpleasant sensations. There is a lock for the joints, the geometry is correct and does not cause any problems.
One of the most popular brands is the Belarusian Bateplex, whose price is 20% lower than that of its more advertised competitors.
Selection of required materials
There are a lot of insulation materials. However, not all of them are recommended for installation in a residential attic. The attic space is characterized by fairly high humidity due to the rise of heated air from the lower floors of the cottage. Plus, the environmental friendliness and safety of the material should also not be forgotten.
If the attic is uninhabited, then due to natural ventilation through vents, soffits and dormers, steam quickly evaporates from it to the street. As a result, condensation does not form inside, and the rafter system is not negatively affected by excess moisture.
In the attic the situation is different. When insulating it, you have to create a barrier for heat to escape outside and reduce air exchange with the street. As a result, all the steam remains inside the attic rooms.
Therefore, if the insulation is not reliably protected from moisture, it will not last long. After all, any thermal insulation material, after getting wet, partially or completely loses its properties.
To insulate the attic from the inside, it is recommended to use stone mineral wool or penoplex. Other options are of little use for this type of work.
When choosing insulation, you need to evaluate it:
- thermal conductivity;
- vapor permeability;
- volume weight;
- flammability;
- sound insulation;
- environmental safety.
If you choose too heavy a material, the rafters will be overloaded. And the attic is often equipped from an uninhabited attic. Rafter beams, in this case, are not designed for unnecessary additional loads. You shouldn't tempt fate here.
In terms of thermal conductivity, most insulation products on the market are similar. You just need to choose the right thickness to achieve the required thermal insulation parameters.
It is not recommended to use sprayed polyurethane or foil polyethylene to insulate the attic from the inside due to the high risk of condensation directly on the wooden rafters if the slightest mistakes are made during installation
Of the entire range of thermal insulation materials, the most suitable for internal insulation of attics are mineral wool (basalt) and extruded polystyrene foam. Moreover, the first option is more preferable than the second. Mineral wool is not flammable and has better sound insulation.
You should not use glass wool because of its susceptibility to crumbling. Small glass particles are very dangerous for humans. And ordinary polystyrene foam is also not recommended for use in the attic. Compared to EPS, it is more flammable and environmentally harmful. In addition, it will have to be laid in a thicker layer.
Combined insulation technology
In addition to the usual combined attic insulation, where two types of insulation are used to combine their qualities, we also want to tell you how to insulate an attic in a more cunning way - with additional heating.
One of the most atypical ways to heat an attic is to install an infrared heater directly on the pitched walls. The thin film is easily installed under the skin and releases valuable thermal energy. This, in turn, heats the objects in the room, and they also give off additional heat.
Infrared floor heating is based on the well-known principle of heating through current. The current flows through the resistive foil and generates heat up to 45C, which is emitted by infrared invisible rays 9.5 microns long. This warmth is comfortable, and the temperature difference between the floor and ceiling is only 1-3C.
A modern film infrared ceiling heater works for only 15 minutes every hour. A fairly economical option in which the air itself does not heat up, and therefore the heat does not escape through the ridge.
Installing infrared film is also simple and safe, as you can see from the step-by-step photos:
Just keep in mind that each manufacturer has its own subtleties of installing such films, for which you must read the attached instructions. But the principle is the same: spread it out, secure it and connect it.
Conclusion
In order for a pitched roof to fulfill its purpose and reliably protect the house not only from external influences, but also from increased operating costs due to heat loss, it must be well insulated. In this case, living in the attic will be as comfortable as possible without overpayments, and the need for major repairs will not arise soon.
About single-layer insulation - in the previous material. Owners of wooden houses will find the article about insulating a timber house with stone wool useful. The video shows how to choose and lay stone wool correctly.
Subscribe to our Telegram channelExclusive posts every week
What to do with old insulation?
But what to do if you purchased a house with a fairly cold attic, the renovation of which has already been completed? Do you really have to tear everything apart to change or add insulation? It's not obligatory!
You can make additional insulation using what you already have. To do this, we assign the internal cladding the role of a roofing covering, again leave a ventilation gap and forcefully direct air, install a membrane, insulation and, finally, a new vapor barrier and new cladding. All this, of course, will steal a little useful space, but there will be no need to disassemble and destroy the roofing pie. Everything is simple, as with conventional insulation:
Or we simply attach a modern heated floor in the form of a film under the sheathing, and all problems are solved: the temperature in the attic will be uniform and quite high. It is only important to make sure that there are no cracks or other “cold bridges” anywhere in the roofing pie.
Signs of a “correct” pitched roof
High-quality materials, coupled with compliance with insulation technology, guarantee a long service life of the roof without “crying” walls in the attic, mold and mildew. A properly insulated pitched roof provides a comfortable microclimate in the attic without the need to increase the power of the boiler in winter or the air conditioner in summer. You can technically verify the effectiveness of roof insulation by examining it with a thermal imager. The device will show the absence or presence of zones through which owners “drown” the street. But even without equipment in winter, the main sign of mistakes made can be seen with the naked eye - “garlands” of icicles. On a roof where the insulation is done correctly, the snow lies in a uniform mass, without melting, and there is nowhere for icicles to come from.
Installation types
How to make a roof warm? They insulate it in two ways:
- insulation is done before the final installation of the roof (slate, tiles, corrugated sheets) - the insulation is placed on top , from the street side;
- the insulation is laid from below , when the roof is finished, the work takes place inside the attic.
As a rule, the first method is most often used during initial construction. Then, when it is planned in advance to use the attic space. This method is also used in the case of re-roofing or reconstruction of a building.
The second type of insulation installation is used more often. After all, with this method it is possible to carry out work at any convenient time. For example, there is a new addition to the family, and at the family council they decided to allocate a separate room to one of the family members. But there is no money to build a good extension to the house. There is only one way out - to equip a room in the attic, make a residential attic . You can gradually insulate it during the cold season (of course, not in severe frosts).
Dew point problem
The dew point refers to the formation of condensation in the material. Waterproofing the outside of the structure is a half-hearted measure; it does not prevent moisture from entering from the inside. And it can be formed as follows: the insulation is vapor-permeable, so warm and humid air gets into it without any problems.
This causes the warm air to begin to cool. During this process, moisture is released, which settles inside the insulation, thereby destroying it.
The second problem is the lack of a proper ventilation system. Because of this, not only the insulation system, but also the rafters and sheathing may suffer.
One of the main tasks is to block the access of moist and warm air to the reinforcing material. Depending on the climate, there are several ways to solve this issue:
- For a mild winter, packaging film will be enough. This is a weak barrier, but it may be enough.
- If this seems insufficient, you can use reinforced materials. They are stronger, although the vapor barrier of the attic in them is the same or even worse.
- One of the best materials for warm climates is aluminum foil. Its properties are so good that they are used to insulate parials. But this material also has a nuance - it works like a thermos and retains maximum heat indoors. So you should also be careful with it - in small rooms this can make it too hot.
But finding the material is only half the battle. It needs to be laid correctly so that the steam cannot find its way out. To do this, during installation, all joints of the canvases are sealed with adhesive tape or tape. However, this does not always help.
Therefore, before installing the trim, you can install additional sheathing. It will not only help in attaching drywall, lining or other material, but will also press the adhesive tape at the joints.
Tip: the sheathing will allow electrical communications to be carried out outside the insulation, which is a good move, since they will be easy to reach.
§ Converting the attic into an attic: wall decoration
Drywall is used for rough finishing of walls. If in the future you plan to install vertical walls or built-in cabinets in the lower zone of the under-roof space, then “ceiling” plasterboard sheets with a thickness of only 9.5 mm (from $4 per sheet 1200 × 2500 mm) are suitable for cladding. However, it is recommended to cover the walls with more solid plasterboard - 12 mm thick. In addition, rough finishing is often performed in two layers.
According to regulatory requirements, electrical wiring and other communications are installed before facing the walls. The casing must have holes for sockets and switches. Drywall is screwed with self-tapping screws, the distance between which should not exceed 16 cm. A gap of 6-8 mm is left between the plasterboard sheets. Subsequently, the joints are primed, glued with serpyanka (special mesh) and puttied. When the putty has dried, the seams are sanded with sandpaper. The result is a completely flat base for finishing - painting, wallpapering. Ceramic tile cladding is also possible. True, in this case it is necessary to use moisture-resistant plasterboard or gypsum fiber boards. Before finishing work, the walls are coated with an appropriate primer.
↑ To speed up finishing work, crossbars are nailed to the rafters in the ridge area, to which plasterboard sheathing is then attached. In addition, this technique improves the appearance of the ceiling. The main thing is to do everything smoothly and accurately.
1. Installation of the sheathing begins from the ceiling. Drywall sheets are screwed to the planks with self-tapping screws.
2. The sheets are laid with a shift of 25 cm from each other. Self-tapping screws are screwed using a screwdriver or drill with a special attachment - a depth limiter, which ensures the same position of the heads (almost flush with the surface of the skin). For convenience, use a homemade support that holds the sheet in an inclined position.
3. The protruding edge of the horizontal slope is adjusted with a plane under the sheathing.
4. Using an auxiliary board, mark the workpieces and cut the vertical slopes according to the markings.
5. Vertical and lower horizontal slopes are secured with self-tapping screws. The corners are reinforced with perforated corner profiles.
6. Joints and corners are treated with drywall putty.
Finally, let us remind you once again that in order for the attic in the house to be complete, in addition to insulating the slopes and installing inclined windows on the roof, you should take care of all the necessary utilities: electrical wiring, heating, water supply, etc. It should also be noted that, if desired, you can organize remote window management. This modern solution will make spending time even more convenient and comfortable.
Dear reader, please rate the article 
4.95 Rating 4.95 (10 Votes)
What to read on the topic:
- 11/17/2015 — An interesting solution for a home on consoles. Construction example
- 11/17/2015 — Cottage made of logs. Features of the construction of log cottages
- 11/17/2015 — How to install a fireplace correctly. Fire safety of fireplaces
- 11/17/2015 — Correct laying of floor tiles with your own hands. Solution options
- 11/17/2015 — Metal profiled (profiled sheet) roofing. Her device