Whenever it comes to making an item for a bath on your own, we consider it necessary to provide the reader with the most useful information, but we doubt that it is sought by a person who has no practical experience at all in the chosen field.
Because we need to start with mastering the tool and the basics of standard operations, the same fastenings in carpentry... But we are unlikely to be able to help someone who doesn’t know how to do anything yet. There are other resources and books for this. Therefore, let’s say right away: the tips and instructions below are designed for a person who owns a tool in both senses - both in terms of availability and in terms of the ability to use it.
So, where to start for someone who has decided to make a bathhouse bench with their own hands?
Product Features
The main feature of bathhouse benches is their resistance to temperature changes and moisture. This product also comes into direct contact with the skin, so it must be safe and environmentally friendly. A bench for a bath should have the following characteristics:
- High density of wood, ease of processing.
- A small amount of resins in the material.
- Low thermal conductivity.
- There is no risk of deformation of wooden parts when heated.
- Compactness and stability of the product. The bathhouse bench should not have sharp corners or protruding parts. The center of gravity of this furniture is low.
- The absence of metal elements in places where they may accidentally come into contact with the skin, as there is a risk of burns.
- Well polished wood parts.
- Using natural protective agents to treat furniture.
- The bench is installed only against a blank wall. In this case, the distance to heating devices must be maintained. A small gap between the bench and the wall is also required.
It is prohibited to use paint or varnish for finishing. Constant exposure to moisture will cause this layer to quickly deteriorate. At high temperatures, varnish and paint can also emit harmful fumes.
There should be some free space under the bench so that it can dry quickly.
High wood density
Compactness and stability of the product
Low thermal conductivity
Well polished wood parts
Using natural protective agents to treat furniture
Material
Wood is a capricious material, or rather, sensitive to how it was prepared and dried. Therefore, you need to not just take the first board of a suitable species that you come across, but take a closer look at it, and, if possible, measure the humidity.
IMPORTANT! Because a tree that is improperly dried after cutting and cutting will definitely warp—it will “lead,” that is, it will either change its geometry or twist it.
When inspecting boards for carpentry, of course, first of all look at the number of knots . They are known to cause a lot of problems for woodworkers.
Also pay attention to the dimensions . Boards can be very uneven - both due to uneven shrinkage and due to cutting too quickly. The reasons may be different, but you will have to adjust it to the desired size later.
ON A NOTE! The presence of mold, rot and cracks on the purchased material is unacceptable!
And since we are telling you about benches for a bath, we need to clarify in a separate paragraph which types of wood are best suited for such purposes.
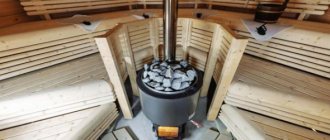
Steam room
Resin leaks
If the bench will be in a steam room, then immediately discard coniferous wood. They begin to secrete resin at temperatures above 40 degrees.
Deciduous ones are fine . For example, you can take aspen, linden, poplar, ash .
Washing
There are no high temperatures in the washing room, but the water flows generously. This is where you can use conifers - it’s the resins that make them more resistant to high humidity and prevent them from rotting.
Take the same pine - it is the cheapest. All others are also suitable - deciduous ones are also possible if you use water-repellent impregnations.
Rest room and dressing room
There are no restrictions on wood - make it from what you feel like. Humidity will be high here too, but you can freely use both impregnations and varnishes. So the choice is yours.
Types and sizes
It all depends on the installation location and purpose of the furniture. However, there are some standard options:
- Bench for lying down. Its width is 90 cm and its height is 50 cm. The length of the product is 90 cm for 1 person. If the bench is designed for several vacationers, then each of them requires another 60 cm of additional space.
- For sitting. Width – 40 cm, height – 50-90 cm. Since this type of bench has a back, its height is 110 cm.
- For saunas. The height of the device is 50-90 cm, width is 60 cm. The backrest here is the same as in the previous version.
Size and shape of bath benches
The steam bath bench is about 180 cm long. This furniture can be mobile or stationary. Types of products by design are presented in the table.
| Design | Characteristic |
| Single-tier | The simplest design, designed for small spaces. Most often it is portable, so it can be installed in any room of the bathhouse. |
| Bunk | Installed in large rooms and can accommodate a person of tall or average height. In order to get to the second floor, a staircase (additional) is provided. |
| Three-tier | It is installed in a large bathhouse, where it is possible to maintain a distance of 130 cm from the top shelf to the ceiling, and 100 cm between tiers. The bottom shelf is small in size. |
| Stepped | Used in small spaces. A person can sit on the top shelf, and the lower step is intended for sitting or helping to climb up. |
When installing multi-tiered products, you should give preference to those options in which the upper parts are removable and the middle parts are stationary.
Single-tier
Bunk
Three-tier
Stepped
Manufacturing technology for a bench without a back
The simplest bench without a back consists of a seat and legs and is made as follows:
- Develop a drawing of a bench for a bathhouse, in which you indicate the dimensions of the component elements.
- Make legs from 50x50 mm bars.
- On the inside of the legs, make grooves for the cross beam.
- Install cross bars into the grooves and secure with self-tapping screws. Sink the fasteners into the wood.
- Connect the legs with long beams, which are attached to the top of the legs using self-tapping screws. Boards will lie on the beams.
- Lay the boards on horizontal beams and secure with dowels or screws. Provide gaps between the boards so that water does not accumulate at the joints and flows freely.
- Make places for the dowels in increments of 30-40 cm, then hammer the boards into place.
- If metal fasteners are used for fastening, recess the head into the board. Mask the hole on top with a mixture of PVA and sawdust.
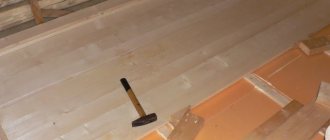
- Sand and sand the bench. This requires special attachments. Use coarse grits first, then fine grits. Work carefully, removing small layers of wood.
- Remove splinters and sharp corners from the structure using sanding discs.
- Treat the bench with a protective compound intended for baths, for example, special oil. Apply 1-2 layers of oil.
- Leave the bench to dry for the period specified in the instructions for the product.
- Do not use drying oil or varnishes; they emit unpleasant fumes when heated.
Creating a Design Drawing
To make a bench for a bathhouse with your own hands, you must first create a drawing of it, indicating the width, length and height of each design detail, as well as the dimensions of additional elements. Naturally, you need to decide on the shape and type of product. If there is a backrest, in addition to its height and width, an angle of inclination is required.
Making drawings with your own hands is not so difficult. To create, you need the dimensions of the room itself. All wooden components are cut strictly according to the parameters shown in the figure. For convenience, the drawing can be made in several projections.
Bath bench - drawings
A bench for a bath is an indispensable piece of furniture:
- relax after the steam room in the relaxation room
- wash yourself, placing the basin on the bench next to you
- as a footrest
- and so on.
Depending on the purpose, the bench is made narrower or wider. If it’s for the legs, then it’s a very small height.
The steam room requires a small bench, but a larger one can be placed in the relaxation room. And so on.
How can you make it yourself?
Of course, made of wood.
First option.
Bath bench 1.5 mm long and seat width 300 mm
All elements of the bench are taken from a solid board. Preferably.
- If there is no 300mm wide board for the seat, then you can join the seat from two 150mm wide boards or three 90-120-90mm wide boards
- The legs (sidewalls) must be made from a solid board 260mm wide, according to the drawing: cut in three places along a radius of 160-140-160mm. You can adjust the drawing of the sidewalls up to 250mm wide (10mm will not play any role).
- A crossbar made of a 200mm wide board (the beam in the drawing) is designed to give stability to the bench, since it connects all the elements: the legs are connected to each other and the seat acquires an additional, third point of support (see “Unit B”). If you take a board with a width of 150mm, then, naturally, you need to change the dimensions in Node “B”: 75mm of crossbar height instead of 100mm. 75 mm will be enough, especially if all the elements are made from 50 mm thick boards.
- All parts according to the drawing are made from 30mm thick boards, but you can change the thickness by using 50mm boards. The bench will be stronger, but the weight will increase.
- The connection of the seat with the legs (sidewalls) is provided on dowels, and the sidewalls with the transverse board (beam) are provided with self-tapping screws.
This version of a bench for a bath is good because the transverse board is a stiffening rib for the seat, therefore it will not bend under any weight.
If the bench according to this drawing needs to be made longer, then boards thicker than 30mm should be used.
This bench is suitable for both a rest room and a washing room, because its height of 450mm is the optimal size for a sitting person.
Second option.
Drawing of a bench for a bath with a length of 390-500m and a seat width of 160mm
The second version of the bench drawing is very similar to the first. Only the crossbar is not made of a board, but of a block that cuts into the middle of the sides.
You can connect the parts using dowels or wood screws.
The bench is small: 390-500mm long, seat width 160mm and height only 200mm. This bench is most suitable as:
- footrests
- shelf step
- basin bench
Third option.
Perhaps you will prefer the option of making a bench from 50x50mm bars:
- smaller area for processing parts: sanding, painting, etc.
- there is no need to cut out the parts of the sidewalls (legs) along the radius from the board
- simpler joints for connecting wooden parts made from bars of the same cross-section. Without insert. On self-tapping screws.
Bench for a bath made of bars:
- 2 parts of the sidewalls are assembled from two legs and two crossbars
- two assembled sidewalls are connected by two crossbars at the level of the lower transverse bar on the sidewalls: they are placed with their ends directly on the transverse bars of the sidewalls and attached to them with self-tapping screws.
- the seat is assembled from three to four bars (depending on the desired width of the seat) with small gaps between each other
This is exactly the option discussed in the video when assembling the bench:
Means of protection
If you made a bathhouse bench with your own hands, then you need to take care to protect it from the occurrence of fungus and mold, prevent fire or change in appearance. For this purpose, special compounds are used, which are applied before the first use of the furniture. They must not contain harmful chemical components. The packaging of the product should be marked “for baths and saunas.”
The most resistant to water are aspen and larch. These materials do not need to be further processed. In other cases, the following tools will be required:
- Oils. They are quickly absorbed into the wood and do not form a film. Such compositions are used in steam rooms and reliably protect furniture from moisture.
- Oil wax. It contains flax or hemp oil and a bee product. This type of product is used in a steam room or washing room. When exposed to high temperatures, the substances do not become hazardous to human health.
- Bleaches. They contain oxidizing agents that prevent the wood from darkening.
- Fire retardants. Since the benches will be used in conditions of elevated temperatures, as well as near open sources of fire, the risk of fire should be prevented.
No paints or varnishes should be used. Since the protection will need to be renewed periodically, the previous one must be cleaned before applying the next layer.
Oil
Oil wax
Bleach
Fire retardants
Garden bench made of timber
Are you looking for instructions on how to make a bench from timber with your own hands? How do you like this option? Low cost, stylish design, durable construction, minimal maintenance and easy to manufacture. The bench, while chunky, has style, is made from treated lumber, and is weather-resistant so you can enjoy it for decades to come.
If you have experience with power tools, you can make the bench in as little as half a day, although painting may add a couple more hours. You can assemble it only with a drill, a circular saw and ordinary hand tools, but the process will go faster if you have a router and a sander.
When choosing materials, check that all the bars are straight. They will curl a little after you make the bench, but they should be nice and straight when you cut the joints and assemble the structure.
This bench is made entirely from pressure-treated lumber and galvanized screws and washers. Add black paint and an antiseptic stain and you have a beautiful bench with minimal maintenance. The hardest part of the project is getting a bunch of good quality heavy lumber together.
Mark the length of the parts
Three of the bars will be crossbars, cut them to 245 cm.
Sand the cuts
Remove all traces with sandpaper and a sander.
Make your marks
The joinery that connects the legs to the seats looks complicated, but it's very simple. The outer beams of the bench seat are supported by L-shaped cutouts in the legs. U-notches are also cut into the seat beams. All notches are made the same way using a circular saw and chisel. Use a pencil to mark layout lines for the sides and bottoms of the cuts. Draw an X to help you remember where to cut.
Make slits
Remove wood chips
Clean up the edges
Drill holes for screws
If you plan to paint the bench, do it now, before you've assembled all the pieces. You may need to let the wood dry a little before painting. Be sure to read the directions on the can.
Paint the screws and washers
Assemble a bench
Once dry, screw the screws into the through holes you drilled. If you don't have a wrench, you can use a ratchet or wrench.
Photo source www.familyhandyman.com/woodworking/projects/simple-timber-bench/view-all/
Care Tips
Sauna benches are used in difficult conditions and therefore require special care. To make wooden furniture last longer, you need to follow these recommendations:
- regularly ventilate the room to avoid the development of fungus and mold;
- Complete each bath day by cleaning all rooms and drying all equipment;
- periodically you need to heat the bathhouse empty, bringing the temperature to 100 degrees (to destroy all pathogenic microorganisms);
- From time to time inspect the structures for the appearance of rot.
A wooden bench is a mandatory attribute for a bathhouse, which requires proper care. You can make it yourself, and it won’t take much time.
Design
The decorative side of the shelves is no less important. Benches made from wood of different shades (dark and light) look interesting.
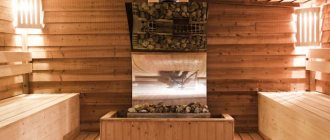
The choice of lighting color is individual. Red makes the steam room visually even hotter, green – relaxes, blue – gives calmness.
It is allowed to install spotlights on the ceiling directly above the shelves. This will make the room seem larger.
You can approach the decoration of corner seats creatively by designing a carved or wavy backrest.
There are benches that resemble the shape of a chaise lounge or where the upper tier very smoothly transitions into the lower.
Seats with separate backs and corner carved fasteners for hanging towels look good.
If the room allows, then a separate stand for slippers and shelves for soap products are equipped.
By playing with the shape, design of the benches, and their placement, the steam room can be decorated in both antique, high-tech or modern style.
Ergonomics
Ergonomics is the science of how to make things comfortable for people to use and adapt them to our anatomy.
For seats, the main ergonomic indicator will still be height. It is not particularly comfortable for a person to sit either on a seat that is too low or on a seat that is too high. In the first case, his knees are near his chin, in the second, his legs dangle without support. It's best to have your hips at a 90-degree angle to your torso and your feet firmly planted on the ground.
In fact, this is the height from the ground to the bend of the knee. Based on the parameters of yourself and your family members. Typically in manuals this value is about 45 cm.
As for the width, it is determined by how exactly you are supposed to sit - if upright, then 30-40 cm is enough, and if reclining, then the width can be 60 cm.
The length of the bench is determined only by the wishes of the owner and the parameters of the room. You can make it the entire wall, or you can make it short. There are no recommendations here.
Making shelves in the steam room - step-by-step instructions + Video
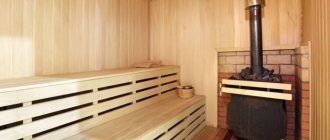
A standard steam room shelf consists of two parts: a seat and a support stand made of durable timber. The latter consists of two beams placed along the seat and connected to each other. The boards that are placed on the frame must be thin, and the distance between them is usually one or two centimeters.
Making shelves in the steam room with your own hands
When making shelves, attention should be paid to fastening parts. In this case, it is extremely undesirable to use screws or nails, because if they come into contact with them, a person can get burned.
Stage 1. Decide on the size of the steam room
The bench for the steam room must be at least 1.5 meters. Regarding the size of the shelf, they will all depend on the dimensions of the particular bathhouse. However, its top step is in any case the largest - about 0.9 meters, while the rest are from 0.4 to 0.6 meters.
Optimal dimensions of a shelf for a steam room - diagram
The height of the shelves is determined according to the following criteria: a person must be comfortable both lying and sitting. It turns out that the distance between the ceiling and the top step should be at least 1.2 meters.
Stage 2. Select wood for the steam room
The bath shelf is an extremely important element, because it comes into direct contact with human skin
Therefore, the choice of wood for its manufacture should be given due attention. So, let's look at the options:
1. Linden is ideal for our purpose. It is easy to process, it does not crack and smells quite nice. Moreover, linden is known for its healing properties, and is relatively cheap. The only downside is that at high temperatures it loses its original color over time.
Steam room in a bathhouse made of linden
2. Aspen also has healing properties. Due to its low cost, as well as its ability to “suck” all the negativity out of a person, it is quite popular today. There is also a drawback: aspen begins to rot from the inside, so it is extremely difficult to distinguish high-quality wood from low-quality wood by eye.
Aspen as a material for a bath
3. Abashi is a tree native to sunny Africa, which has a number of beneficial properties. It is resistant to high temperatures and moisture. During use, the color of the wood practically does not change. The only negative is the cost of Abashi.
Abashi - material for finishing baths
Stage 3. Build the frame
The manufacture of the shelf must begin with the construction of a wooden frame; for this we will use beams, to which we will subsequently attach boards. We will need five racks and, accordingly, ten bars. The beams are fastened to each other with the same beams, and to the racks with special screws, two for each piece.
For flooring we will use boards (the gap between them should be at least two centimeters). So, the bottom shelf requires three boards, and the top one requires seven boards. Their approximate length is about 2.96 meters (this is explained by the fact that some gap should be left between them and the walls, because then you will have to cover them with clapboard).
Frame for a shelf in a bathhouse - photo
Stage 4. Connecting the frame
To connect all the parts, oak wedges are used, which must be driven into pre-made holes. At the same time, many builders avoid such a troublesome procedure (meaning fastening without using nails), resorting instead to traditional self-tapping screws, but with deep recessing.
Connected frame for a bath - photo
In any case, the bottom shelf should be movable - this simplifies further care of it. In most cases, it is made in the shape of a triangle, which allows for maximum compactness in the room.
The free space that remains between the levels is usually left open, but you can additionally install backrests there, preferably made of pine needles (it has healing properties).
Stage 6. Regimental defense
This is the final stage of our work. If you do not treat the wood with chemicals, it will soon become unusable due to constant contact with moisture. Rot or mold forms; this can only be prevented with timely prevention.
Drying oil or varnish are unacceptable for this purpose, since under extreme conditions they emit an unpleasant odor and can lead to allergies. It is better to use natural impregnation, which is freely sold in most stores. It has excellent characteristics and should be used to cover all surfaces of the bath.
Set of furniture for washing room
Furniture for a washing room has its own characteristics. A cozy washroom is usually equipped with a bench with a back, stools and shelves. There must be a place for sitting and storing various items: basins, buckets, tubs, etc.
Everything you need for washing should be at hand. It is worth noting that no washroom is complete without a hanger. It is needed for storing various bath items: washcloths, towels, etc. It is necessary to take into account the distance at which splashes of water cannot reach the hanger.
Recreation room kit
A little about furniture for a bathhouse in a relaxation room. Since this room takes up little space (about 1.3 sq. m.), you need to arrange things as compactly as possible.
There is no need to place heavy and large objects that take up a lot of space.
To ensure maximum comfort, you should use only light and compact objects, such as a wardrobe, bench, stool, chair and bath hanger.
Attention! It is highly recommended to use items covered with artificial materials because they do not absorb dirt and do not deteriorate compared to upholstered furniture. Such products retain their decent appearance for a long time.
Which type of wood to choose
Which wood to choose
The material for benches in the bathhouse has strict requirements:
- high fiber density, which prevents the wood from splitting and cracking;
- low thermal conductivity, ensuring a comfortable temperature of the wooden flooring;
- resistance to moisture, allowing long-term use of furniture in difficult conditions.
Linden has become a favorite among materials for furniture in the steam room: it is easy to process, resistant to water and heat, and smells pleasant. Aspen is also good, but over time the wood begins to rot from the inside. Oak does not cause any complaints - this material has many advantages, but its cost is high. Benches can also be made from other types of wood: maple, poplar, birch.
Grinding
Before making benches in the bathhouse, you need to find out the requirements for their design.
- Boards and beams used to make furniture for the bathhouse must undergo thorough sanding of the entire surface with a special machine or sandpaper.
- The corners of the benches must be rounded to avoid injuries and scratches.
- Furniture must be durable and reliable, designed for safe use by an adult.
- For antiseptic impregnation, it is prohibited to use synthetic liquids that release toxins when heated. The material is protected with special compounds based on natural oils.
- For better drying, the space under the bench is not sewn up.
- A gap of up to 10 cm must be left between the wall and the installed bench.
Bench – transformer
A bench in a bathhouse of this type will help solve the problem of lack of space even in the most compact rooms, for example, such as a 2x3 m bathhouse. In this case, the individual elements are banal stools, the seat of which has special cutouts and mortgages that allow you to position and hold individual objects of the same type in a bundle when there is a need to make a long bench out of them for a massage, afternoon rest or overnight stay. Such products are made according to the generally accepted pattern for stools, and the shaped cutouts are made with the same jigsaw with a file for shaped cutting. A simple mirror template cut from a sheet of cardboard will help maintain dimensional tolerances and the identity of the cuts.