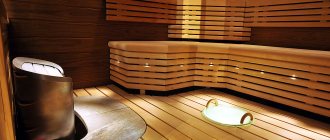
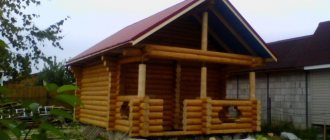
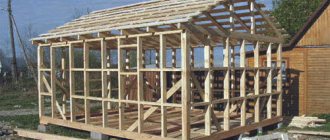
Each bathhouse has a stove to heat the room. For finishing and isolation, a portal for a sauna stove is used. This structure favorably emphasizes the beauty of the firebox, covers poorly located structural elements, gives seriousness to the entire structure, and protects nearby wooden elements from fire. Each person who thinks about arranging a bathhouse personally decides how to approach the arrangement of the frame. It is made from simple or designer materials and can withstand hours of heat from a hot oven.
Correct installation of a metal stove in a bathhouse
Metal stoves in bathhouses and saunas are installed before finishing work begins. The most suitable method of installing a metal stove is considered to be one in which part of the heating structure with steam stones is located in the steam room, and the part with the firebox is located in the furnace room, hallway or rest room.
A metal stove in a bathhouse and sauna is installed before finishing work begins.
To properly install an iron stove in a bathhouse, you must adhere to the following recommendations:
- Installation of the stove follows the organization of the ventilation system in the bathhouse;
- A metal stove in a frame bath should be positioned so that its side surfaces and rear wall are at a distance of 100 cm from the walls of the bath and other flammable structures;
- It is strictly prohibited to place an iron stove on a wooden base;
- It is better to raise the heat-resistant base under the stove 50-100 mm from the floor level;
- The chimney should be raised above the roof by at least 50 cm;
- The chimney pipe should be placed at a distance of 13 cm from combustible structures.
A wooden screen must be placed around the metal stove. It will soften the heat radiation from the stove and protect visitors from burns. At the same time, the screen should be placed at a distance of 0.5 m from the heating structure. The size of the screen should be 30% larger than the size of the metal furnace.
Calculation and dimensions
Before starting finishing work, you need to mark the location of the portal, figure out what shape it will be, and where the individual elements will be fixed. To calculate the amount of brick, you need to know the size of the portal for the stove to the bathhouse. Calculation order:
- Calculate the area of the masonry.
- To the resulting value add 2 rows of bricks, which will be the base.
- Divide the total area of the masonry by the area of the sides of one brick.
- Add 10% of the resulting value to the calculated area.
Depending on the size of the stove and the owner’s wishes, the portals can be vertical or horizontal.
Vertical portal
Construction of a furnace portal with your own hands
For a sauna stove with a fuel duct leading into the next room, you will need to make an opening in the wall. It is done at the construction stage of the bathhouse, but it can also be built in an already erected wall. Making a portal for a stove into a bathhouse consists of the following steps.
- An opening is being constructed in the interior wall.
- It must be filled with refractory bricks to the size of the fuel channel.
- Finally, decorate it with finishing materials.
The size of the portal for a sauna stove depends on the power and dimensions of the heating device. You decide for yourself what the area of brickwork around the combustion channel will be. The height of the bath portal may be greater than its width. But there are horizontal options.
Glass wool should not be used for insulation. Although it also belongs to mineral wool, it does not tolerate too high temperatures (it does not lose its properties up to 350 degrees). And near a hot furnace, glass wool will melt.
Basalt wool must be made without binding components, since when heated they release harmful substances, and at a temperature of 500–600 degrees they turn into sand and fall out, the material loses its properties. As a result, the wall heats up and the wood darkens or even begins to smolder. Therefore, special high-temperature insulators are used to insulate the furnace: their melting point must be at least 800–1000 degrees.
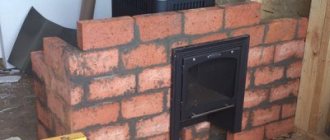
Be careful: you cannot directly connect brickwork to an unprotected combustible wall. A small distance is also left between them, which is also sealed with refractory. All portal joints are subsequently masked using decor. Above the stove, bricks are laid on a metal corner. If you move the top row a little forward, you will get a neat mantelpiece.
Mortar for laying bricks
How to prepare it
What to pay attention to
The solution is made of sand and clay. Proportion 1:2 (take two parts clay for one part sand). The clay should be of normal fat content. Water must be added in an amount of 1⁄4 parts by weight of clay. The more salts it contains, the higher the likelihood of stains appearing on the masonry.
Therefore, clean rainwater will be the best option. To achieve uniformity of the finished mixture, you need to use fine sand. It is added after the clay has been soaked. When laying flat, 20 liters of such mortar is enough for 45–50 bricks.
Cement mortar is not recommended. It cracks under the influence of high temperatures, which will lead to the destruction of the masonry.
Making the project safe: basic principles
Traditionally, the oven is built near the wall opposite to the shelves in the steam room. The stove design must be created in such a way that a minimum distance of 30-40 centimeters is maintained between the heating parts of the finished unit and everything that supports combustion. If special protection is installed, for example, made of asbestos cardboard, this figure can be reduced to 15-20 cm.
Prices for asbestos cardboard
asbestos cardboard
A gap must be maintained between the smoke exhaust pipe and the floor/roof elements that come into contact with it, which is subsequently filled with fireproof material. Asbestos is most often used for protection. From above, the mentioned gap with insulation is closed with a steel shaped plate.
For additional protection, the area of the floor in front of the stove firebox is covered with a metal sheet about 10 mm thick. It will protect the flooring material from fire if coals fall out of the firebox.
The standard option for placing a stove in the bath space is shown in the following image. Here you can also see the order of organizing the water circuit, which can be taken as a basis if the supply of warm water will be provided by the stove unit, as well as the features of connecting and removing the chimney.
Standard option for placing a stove in a sauna space
How to fold a sauna portal
As with any large-scale construction, a preliminary construction plan is required.
To ensure an exact match between the expected and the obtained results, it is necessary to measure all sides and adhere to the planned dimensions when laying the walls.
- Clay - 2 parts.
- Sand - 1 part.
- Water - 0.5 parts.
Construction of walls
Having marked a place for the door, they continue to work, erecting the side parts to the right and left of them. There is nothing complicated here, you need to be careful.
To ensure the quality of the resulting frame, bandage the seams.
Remove excess cement with a trowel so that there are no unnecessary reliefs on the wall.
A hammer is used to level the height of all bricks. Tap each brick so that the walls come out even along the stove.
Decorative completion
On the front side of the stove, where the firebox and woodshed are located, you can lay out various figures. For example, as most people do, line up the front frame with the letter P. You can alternate bricks around the firebox: white with red, yellow with white, etc.
Preparation of the solution
Before finishing the stove in the steam room of the bath, it is necessary to prepare a masonry mortar. To do this, you need to choose the optimal ratio between clay and sand. This can be done by mixing a small portion and rolling it out into a thin cylinder. Then they fold it into a ring and look at the walls. If no cracks have formed, then the solution is of the highest quality.
Modern craftsmen use a different composition to finish a sauna stove. It includes Portland cement, sand and tile adhesive. All ingredients are mixed and work begins. With this composition, the brick holds quite tightly, which guarantees the durability of the masonry. But cement in the solution can have a negative effect when heated. So the choice will remain with the owner of the bathhouse.
Tags: bathhouse, framing, oven
« Previous entry
Do-it-yourself bricklaying of a sauna stove
If during the construction of a house the seams between bricks can reach 10 mm, then for a stove their thickness of more than 4 mm is already a disaster. Due to periodic heating, such seams very quickly crumble, and smoke and carbon monoxide begin to enter the room. Therefore, brick stoves for a bathhouse must be built from the same one-dimensional bricks with an even bed and side walls.
Ordering a sauna stove
Experienced craftsmen spare no time in pre-building the lower part of the furnace dry - without mortar. This makes it possible to select the necessary bricks, number them, assess possible problems, make cuts and prepare pieces of the required size and shape. Then the “dry masonry” is disassembled and repeated with mortar.
The first row should be laid out very carefully. It should be perfectly horizontal, and the dimensions of the diagonals of the resulting rectangle should be equal to each other.
Using a plumb line, the bricks of the first row are then used to check the verticality of the furnace walls. The horizontal position is checked with a long level (the length of the level must be greater than the diagonals), and the equality of the diagonals is checked with a cord. In addition, the right angles and straight line of the sidewalls of this row are checked. Subsequently, each row is also controlled by a level and checked for verticality.
To fasten the blower door on the 3rd row, use galvanized steel wire or a strip of mild steel. To prevent the door fasteners from interfering with the masonry, use a grinder to select grooves in the brick into which the wire is embedded.
Under the steel corners on the 5th row, areas are also selected with a grinder so that the metal is flush with the plane of the brick. The grate bars are laid freely on the corners and, if they burn out, they are just as freely exchanged for new ones. In addition, by expanding the grate bars do not destroy the brickwork.
Next, you should start constructing the combustion chamber, and after that, continue to raise the outer walls. In this way it is much more convenient to maintain the required dimensions of the high-temperature firebox and adjust the size of the thermal gaps between it and the outer wall.
Lay out the firebox of the sauna stove
The firebox is laid from fireclay stove bricks and refractory clay. It is not advisable to make the entire furnace from fireclay bricks, since it has a low heat capacity and cools quickly. On the other hand, using ordinary red brick, even ceramic, in the firebox leads to its rapid destruction from high temperature, and a do-it-yourself brick sauna stove simply fails.
The firebox doors, as well as the doors of the heater chamber, are secured using wire or metal strips, as mentioned above. The perimeter of the door frames should be wrapped with a stove basalt cord, which compensates for thermal fluctuations in size. Similar compensation is made on the guide frames of the chimney dampers.
Selecting grates and stones for the bath
Particular attention should also be paid to the selection of grate bars. They work in very aggressive temperature conditions and therefore can quickly burn out
Therefore, grate bars are usually made from heat-resistant thick cast iron, but in no case from reinforcement or construction wire rod, no matter how thick it is. Excellent DIY brick sauna stoves are made from scraps of rails or rail pads. The service life of such grates exceeds the service life of the stone stove itself.
Cobblestones for the heater should be round in shape and of a size that allows you to easily load and unload them through the door of your chamber. The role of cobblestones can be played by medium-sized pieces of broken insulators of high-voltage lines. They are made of heat-resistant glass and can withstand rapid temperature changes. But the heat capacity of glass is worse than stone, such a furnace will cool faster.
Manufacturing
To make a brick sauna stove with your own hands, you need to prepare tools, consumables, a place for construction, draw up a project, make a foundation, build a structure.
Material and tool
Before you begin assembling the stove, you need to prepare:
- required number of bricks;
- trowel, trowel;
- building level;
- container for mixing the solution;
- grout for seams;
- pipes for chimney assembly;
- asbestos, roofing felt;
- drill with mixer attachment;
- doors for the combustion chamber, ash pan;
- metal wire for tying rows.
Additionally, you may need hand tools - a hammer, a pry bar, a set of keys, screwdrivers.
Preparation
After preparing the consumables and tools, you can begin developing the project and preparing the mortar for laying bricks.
Design
Regardless of the masonry method, a brick kiln project must have several basic elements:
- water tank;
- chimney with its individual elements;
- combustion chamber;
- ash box;
- doors (at least two).
Additionally, the diagram can indicate the location of the heater and grate.
Preparation of mortar for masonry
To build a brick oven, you cannot use classic cement mortar. It cannot withstand high temperatures and begins to crumble with constant changes in temperature. To prepare the solution you will need:
- sand sifted through a sieve;
- fireclay clay.
The components are mixed in a separate container and filled with a small amount of water. The liquid should not have an unpleasant odor.
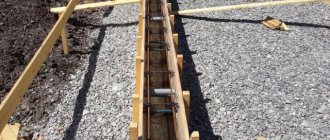
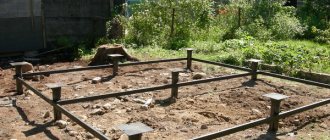
Construction of the foundation
Foundation assembly process:
- First you need to apply markings for the future foundation. To do this, wooden pegs are driven into its corners, and threads are stretched between them.
- The depth of the pit is 60 cm. The bottom layer, 15 cm thick, needs to be expanded 10 cm to the sides.
- Cover a space 15 cm high with sand. Place a layer of crushed stone (10 cm) on top of the sandstone. Compact the crushed stone.
- Lay a layer of waterproofing over the crushed stone. For this it is better to use roofing material.
- Make formwork from boards. Place it inside the pit.
- Mix the cement mortar.
- Tie a reinforcing frame from individual reinforcement rods. Place it inside the formwork.
- The size of the formwork should be 5 cm smaller than the pit on each side.
- Concrete must be poured into the formwork so that 15 cm remains before the beginning of the masonry level.
After a week you can remove the formwork. The vacated space is filled with gravel.
Laying the “body” of the structure
Furnace laying:
Make a base for the furnace equipment, which consists of two rows of fireclay bricks. Cover the surface of the walls around the stove with asbestos sheets. Fix metal sheets on top of them, which will reflect thermal energy. The walls of the stove structure must be laid out in order. Seams on adjacent rows should not match. After laying each row, it must be checked with a building level. Simultaneously with the manufacture of the outer walls, it is necessary to lay the combustion chamber. Fireclay bricks are used for this.
It is important to leave free space for the ash hole door. You need to secure the grate on top of it, leaving space for the firebox door.
When laying, you need to check the verticality of the walls and the thickness of the seams.
Installation of a water heating tank
The location of the water tank is selected depending on the dimensions of the furnace equipment. It should be in a place to receive more heat. To calculate the volume of the tank, you need to take into account that approximately 25 liters of water are required per adult.
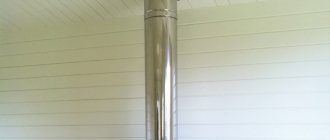
Chimney laying
For a brick stove, it is recommended to assemble a chimney from the same material. An asbestos pipe is installed inside the brick frame. The space between the brick walls and the pipe is filled with non-combustible material to increase the tightness.
How to fold?
If the fireplace fuel duct goes into another room, then it will be necessary to make a special opening in the wall in advance. The ideal solution is to create such an opening during the construction of the bathhouse, but if necessary, it can be done after construction. The process of creating a portal for a bathhouse with your own hands consists of the following stages:
- construction of openings in the wall of the room where the fuel channel will be led;
- filling the opening with fire-resistant bricks, the dimensions of which must correspond to the dimensions of the fuel channel;
- finishing with decorative materials, thanks to which it will be possible to create an optimal design for the bath.
In the process of creating a portal with your own hands, one of the most difficult tasks is choosing the size. Everything here depends on the power and size of the oven itself. The wishes of the owners also play a role, since the height of the portal can be greater than the width.
Experts advise leaving a gap of at least 3 cm. In addition, it will need to be processed using high-temperature resistant materials, for example, basalt wool. In no case should you use glass wool, which is not able to cope with high temperatures.
In this case, close attention must be paid to the quality of the selected basalt wool, which must be made without the addition of other components, since during the heating process they can release harmful substances into the air. This is not only harmful for sauna users, but can also harm the wood itself.
That is why special solutions are used for insulation, which are distinguished by their ability to withstand extremely high temperatures. Among the main recommendations regarding creating a portal for a stove with your own hands are the following.
- The ideal solution is sand-clay. The proportion should be 1:2, and the clay should not be very greasy.
- The best solution would be to use water with a minimum concentration of salts. This is why most experts recommend rainwater.
- If you need to get a mixture that is homogeneous, then it is best to add fine sand to it.
As an additional element, you can also create a special screen made of stainless materials, the thickness of which will be at least 4 mm.
Oddly enough, infrared radiation is considered the main cause of fire in bathhouses, and a protective screen will reduce this probability to zero. The most optimal option today is to create a screen with a mirror surface, which is capable of reflecting not only heat rays, but also directing heat to the desired location. It should be noted that if the stove is located at a distance of more than 1 m from the nearest flammable elements, then there is no need to install a screen. Infrared streams in such an atmosphere will simply dissipate, and there will be no effect from them.
It is best not to place the screen very close to the wall, since metal tends to collect heat. A rather interesting and unique solution in the steam room would be the use of heat-resistant cladding, which also plays the role of a protective screen. This will not only save money and get a fairly safe element, but will also transform the appearance of the room.
Thus, the portal is considered the optimal solution for providing protection against fire of the furnace. Brickwork made of figured or universal red stone should be done carefully using only high-quality materials. First, you need to write everything down step by step, and then use the order and apply it according to the calculations.
How to quickly and beautifully assemble a brick portal for a sauna stove without the skills of a stove maker, see below.
More about firebox rules
It's no secret that the heart of the entire sauna room is the stove. That is why it needs very careful and reverent handling. The length of time that the stove will last depends on how to heat a bathhouse correctly with an iron or brick stove.
The first step is to ensure that you have high-quality firewood, which must be placed in the stove in such a way that the flame from it is even. In addition, hot coals should be formed during the combustion process.
Attention! It is important to remember that the firewood must be dry, since when using raw fuel, a smoky and carbon monoxide flame cannot be avoided, which will lead to smoke in the steam room.
All surfaces in the bath are heated evenly, while avoiding the appearance of unpleasant odors, only when the steam is dry and very hot. This can be achieved if the heated stones are crimson in color, and their volume in relation to the steam room in the heater should be 1:50.
Any experienced steamer has his own secrets about getting truly intense heat, but there is also a set of certain rules that must be followed by everyone without exception:
- You need to carefully splash water in small portions on the hot stones. Usually this is 50-100 ml, but during the vaping process the volume decreases. Under no circumstances should stones be allowed to flood;
- In order to cover a large area of stones during the pouring process, it is necessary to use a fan;
- To keep the steam as dry and hot as possible, water should be splashed between hot stones;
- If the moistened stones shine with bright crimson shades, then you are doing everything right;
- Evidence that the temperature in the bathhouse is decreasing will be the hissing of water when it hits hot stones.
You should also know and follow some recommendations on how to light a stove in a bathhouse:
- It is necessary to stack the firewood so that there are small gaps between them. This is done for better air circulation;
- There should be a gap of at least 2 centimeters between the topmost log and the surface of the stove;
- In order to save firewood, the pipe valve can be slightly closed;
- For greater heat transfer, you can open the oven door slightly;
- Keep an eye on the coals, as bluish-yellow flames emanating from them indicate carbon monoxide.
Materials for the construction of a sauna stove
To build a rubble concrete foundation you will need:
- cement and sand for preparing mortar, filler (coarse gravel, crushed stone, broken bricks and other construction waste) lumber for formwork, waterproofing products (bitumen, special mastic)
Materials for stove masonry:
- red (fireproof) brick for laying the stove and chimney; natural stone as a heat accumulator; fireclay (refractory) brick for lining the firebox; clay and sand for preparing the solution; stove casting (doors, stove valves, grate); asbestos cord for sealing the junction of casting and masonry; wire for fastening castings; waterproofing material (roofing felt), for insulating the first row of masonry; cast iron plate 18 mm thick; water container.
The stove requires two different types of bricks: for laying the outer part of the stove and for the firebox. You should also decide on the size of the oven.
They come in both quite large and mini ovens. The amount of bricks and other materials and the costs of these materials depend on the size of the oven. A small oven will require much less materials.
Brick oven: advantages, varieties
A brick stove has superior performance characteristics to a metal one. The advantages of brick structures include the following:
- "comfortable warmth" This everyday term has a completely logical justification. Scientists have found that when metal is heated, infrared rays are released. They can burn the skin and burn oxygen. Bricks emit another type of thermal energy, which is considered safe for skin and oxygen;
- brick maintains temperature for a long time (up to 24 hours), and metal cools quickly (within 2-3 hours);
- brick does not require additional protection to ensure fire safety. With metal it's a completely different story.
The price of a do-it-yourself brick sauna stove can reach up to 20 thousand rubles (it all depends on the cost of building materials in your region).
A do-it-yourself brick sauna stove will cost an order of magnitude more than a metal one, which you can buy in a store. but it keeps warm longer
This is more expensive and more costly than buying metal products in a store. Why then do many owners prefer brick units? Such a stove warms up the room for a long time (from 5 to 12 hours depending on the size of the bathhouse), but reliably retains heat. An important factor is durability. It’s not for nothing that they say that a brick stove in a bathhouse is built once and for a lifetime.
The type of bathhouse will depend on how the heating unit is built:
- black sauna;
- “grey” bathhouse;
- “white bath”;
- "slab" bathhouse.
“In Black” is a greeting from the past. In ancient Rus', all baths were arranged in this way, because a chimney was too expensive. Soot, smoke and soot from the stove remained indoors. To prevent people from getting burned by carbon dioxide, the building was equipped with windows that were opened during washing. To enter the bathhouse, it was ventilated until all the smoke came out of it. Today such designs are used extremely rarely.
The “gray” bathhouse surpasses the first type in terms of performance characteristics. Has a small chimney. Stones are placed inside the stove to retain heat longer. Soot remains on the stones. You can use the sauna when the firewood is completely burned. This option is not popular among bath lovers.
“Slab” is the following design: cast iron slabs are placed on top of the bricks, stones and metal tanks with water are placed on them, which is used during bath procedures. Stones and tanks retain heat for a long time. The construction of a slab building is complicated by cast iron tiles. They are not easy to get, and they also add significant weight to the structure. Do you need extra load on the foundation? This type is used extremely rarely.
The “white bath” is the most common option. The stove in it resembles a Russian home stove. It is equipped with a long chimney. Smoke and soot do not settle on the walls of the room. You can go inside even if the wood inside has not yet completely burned out. Poisoning by combustion products is excluded.
A do-it-yourself sauna stove “in white” eliminates the appearance of soot and burning on the walls of the room, the smoke comes out completely using a pipe
The second stage - type of stove
It is necessary to decide on the type and appearance of the sauna stove. Whether your design will have a water tank or not. What type of heating will the hot water have (with direct gas outlet through the firebox). What type of heater can be used (open heater or with exposed stones).
Having decided on the type and type of stove for the bath (in white), do not forget about the removal of gas from the stove. Fortunately there are not many options here. With a straight chimney or with a side chimney. It depends on your location of the structure and the possibility of venting your chimney. When building a new chimney, be sure to insulate the distance between the chimney and the roof with heat-resistant material to prevent the roof from catching fire.
Step-by-step instruction
Forming the base
In order for a brick-lined sauna stove to be strong and reliable, it is important to lay the foundation correctly. The strip foundation is considered the easiest to assemble and install. To equip it, the wooden floor elements in the house are first dismantled, after which a trench is dug, the bottom of which is covered with a sand-crushed stone mixture
Everything is compacted well and watered. The next stage is concreting the foundation. For the strength and reliability of the structure, it is recommended to additionally lay a reinforcing mesh into the foundation before pouring it. The solution is then left to dry. Until the base is completely dry, further work is not recommended.
To equip it, the wooden floor elements in the house are first dismantled, after which a trench is dug, the bottom of which is covered with a sand-crushed stone mixture. Everything is compacted well and watered. The next stage is concreting the foundation. For the strength and reliability of the structure, it is recommended to additionally lay a reinforcing mesh into the foundation before pouring it. The solution is then left to dry. Until the base is completely dry, further work is not recommended.
Preparation
Before constructing the protective apron, it is recommended to soak the lining brick for 12 hours. To do this, the required amount of material is separated, cleaned if necessary and placed in cold water. This event is necessary to ensure that the blocks do not absorb moisture from the solution during the formation of the order.
How to prepare brick mortar?
The installation of a metal furnace will be reliable if a cement-clay mixture is used as a masonry mortar. Both components are taken in equal proportions and diluted with water to obtain a creamy consistency. To mix the solution well and obtain a homogeneous mass, it is recommended to use a construction mixer. After mixing, you need to let the masonry mixture thicken, and then proceed directly to the masonry.
Bricklaying
In order for the apron to be reliable, it is important to correctly calculate the permissible distance between the brick wall and the iron body, because if the gap is small, the masonry will quickly crack and you will have to redo everything all over again. On average, it will take up to 15 orders to form a screen. It is recommended to divide the work into 2 stages: on the first day, form half of the rows, then leave the structure to dry until the morning
Then the rest of the masonry is done, the optimal row thickness is half a brick. The ordering scheme is presented in the table:
It is recommended to divide the work into 2 stages: on the first day, form half of the rows, then leave the structure to dry until the morning. Then the rest of the masonry is done, the optimal row thickness is half a brick. The ordering scheme is presented in the table:
| Row | Description of work |
| 1 | The perimeter is completely laid with bricks, the row is started from the corner, with strict observance of evenness of laying |
| 2 | The wall is built up, reinforcement is carried out, air gaps are formed |
| 3 | Posted as 1st |
| 4—5 | A portal is formed for the firebox door and ash pan, |
| 6—8 | A metal corner is placed above the base of the portal |
| 9 | Can be stacked randomly |
Depending on personal preferences, you can arrange the arrangement with an arch at the level of the stove where the coals are located. This way the smoldering embers will be visible and you can admire them for a long time. You can also complete the arrangement by installing a round pipe in the bathhouse through which the smoke will come out. In none of the selected options, the step-by-step instructions for forming the order do not change.
11e848e1d3edc9508581e7ba9670a865.jpe
b93bf8b1cfe8d748c9f00f0289d65ea6.jpe ca0a0831eef5a22c9c2b40b8d044df0d.jpe 4ee5b7901e5b4f12fd8d62f5442bdc66.jpe
First heating
When the brick finish dries, and this lasts on average up to 2 weeks, it is important to put the device into operation correctly. To do this, 2-3 test fires are performed, during which a minimum of firewood is used. This will prevent excessive heating and cracking of the structure.
In this way it will be possible to safely dry wet areas, thanks to which the stove will serve reliably and for a long time.
This will prevent excessive heating and cracking of the structure. In this way, it will be possible to safely dry wet areas, thanks to which the stove will serve reliably and for a long time.
Steel case
Steel is also a fire-resistant material. It cannot be left untreated, as it will instantly rust in a bathhouse. When finishing the space around the stove with steel, you need to keep in mind that unlike brick, tiles and stone, steel does not insulate heat at all.
A protective portal around the stove made only of steel will be completely pointless, since it will not be able to fulfill its main task - to protect wooden walls from overheating. In order for this function to be fulfilled, it is necessary to provide a good heat-insulating layer of another material, and then cover it with a facing steel sheet.
This heat-insulating separation layer is created from mineralite. Other fire retardant insulation materials can also be used. Simple mineral wool is not suitable, since after getting wet once it shrinks in volume, and this defect cannot be corrected by anything.
The insulation near the stove should not get wet. You need to take care of its waterproofing. Moreover, this waterproofing should only be on the side of the cold wall, but not on the side of the stove.
Steel has a metallic luster. This effect can be used to greatly increase the efficiency of the portal.
If made from uncoated polished stainless steel, it will act as an infrared reflector.
A similar element can very often be seen in electric fireplaces, heating stoves and any other heating devices.
The main difficulty of this solution is the need to use only stainless steel. Compared to ordinary steel, it costs 10 times more, but the total thickness of the sheets for the reflective screen can be small.
Stainless steel perfectly withstands any humidity. It can even be placed in rooms such as a steam room in a bathhouse; the decoration around the stove will be compact and with a modern design. In a steam room, all interior elements are usually made only from wood. Stainless steel would be appropriate next to a metal stove-stove.
Installation of a sauna stove with a remote firebox in a steam room made of flammable material
contact with the furnace channel
The minimum opening dimensions when installing a sauna stove with an external firebox are calculated as follows:
- It is better to calculate the height, as before, from the top edge of the stove, adding a minimum of 25 cm to it;
- the width consists of the width of the fuel channel, expansion gaps (1-2 cm on both sides) and a minimum of 25 cm under the brickwork. Plus a small gap between the brick and the wooden wall.
ADVICE! If it is possible to make the opening wider, do it! You can start from a value that is a multiple of the size of the brick (so as not to cut it).
Between the channel and the brick, as well as between the brick and the wood of the wall, a refractory must be laid - basalt wool, asbestos cord, and you need to pay attention to the temperature characteristics of the refractory that is in contact with the stove - firewood burns at temperatures up to 1000 degrees, the insulator must withstand these temperatures, so glass wool is definitely not suitable
Angular position of a stove with a remote firebox for a bath
Above we talked about the option when the installation of a sauna stove with a remote firebox is not carried out in one of the corners of the steam room. That is, there is contact with only one wall. But it also happens that it is more convenient for the owner to place the stove in the very corner. And if the walls are made of wood, then you will have to protect not one, but two.
IMPORTANT! Protection for the adjacent wall will not be needed only if the stove is located no closer than half a meter to it.
The distance to the adjacent wall can be reduced to 25 cm if a refractory sheet is hung on it.
In another article we talked about single and double sheets of mineralite. So, a double one with an air gap allows you to place the stove at a distance of 12 cm from the wall.
Advantages of mineralite
- Having made the insulation with mineralite, you will forget about replacing them for a long time. They serve well and properly.
- The panels do not burn or ignite. This fiber cement board meets the most stringent fire safety requirements.
- Minerite is considered a universal material. It can be used not only for insulation, but also for decorative finishing.
- Installation of the plates is extremely simple.
- You can do everything yourself without resorting to outside help.
A mineralite slab for a bath, like any other material, in addition to its undeniable advantages, also has disadvantages. And most buyers note only one thing - the unpresentable appearance of some types of such panels. If you choose more decorative specimens, they will cost a little more.
Recommendations for performing the work
- The creation of a furnace portal must be approached after careful preparation.
- Correct preliminary calculations will help achieve the desired result.
- In order not to complicate the work with alternating layouts, make a wall entirely of white brick, which is very easy to decorate using paint.
- If you do not have masonry skills, it is better to entrust the work to a professional.
But despite the simplicity of this device, the brick portal is the main element of decoration in the bathhouse. Nothing will decorate it better than a self-made portal, a photo of which you will be proud to show to your friends and acquaintances.
Construction of a foundation made of rubble concrete
For laying the base of a sauna stove, the strength of the clay mixture is not enough. A regular mortar based on cement and sand will do. The most common foundation is made of rubble concrete.
Stages of work:
Digging a pit with a depth of 1 - 1.2 cm in dimensions exceeding the dimensions of the stove by 15 - 20 cm. Compaction of the soil with suitable cuttings of timber or logs. A timber measuring 100×100 mm is suitable. Laying crushed stone and compacting it to a layer 15 cm thick. Installing formwork. Waterproofing of its internal surface is required. Laying rubble 20 - 30 cm.
The maximum size of individual rubble stones is no more than 15 cm. Filling small fractions of voids between stones with crushed stone. Laying concrete mortar. Concrete must fill all the voids, for which its consistency is chosen to be similar to sour cream. This stage is repeated the required number of times until the desired height of the foundation. Laying the last layer of stones.
Ensuring a level height of 6 - 7 cm to the finished floor Controlling the horizontality of the surface Drying the concrete covered with a film for 15 - 30 days Dismantling the formwork Isolating the side foundation surfaces from water. You can isolate the foundation from water at the stage of its construction by adding special additives to the solution. Filling the space between the foundation and the edges of the pit with sand. A gap of at least 5 cm is required between the bathhouse and stove foundations. It must be filled with sand.
Chimney outlet through the roof
A more complex option requires increased care and the purchase of additional elements. Consider the option of a metal roof.
Step 1. Make precise markings in the ceiling where the pipe exits, make a hole
Make sure that the hole does not hit the roof beam! The dimensions of the hole in the ceiling should be 10 cm larger around the perimeter than the diameter of the pipe. The ceiling is made of boards - making a hole in it is not a problem
Scheme for arranging a hole in the ceiling
Pipe passage through the ceiling
Pipe passage through the attic
Step 2. Mark the place where the pipe exits on the roof, watch the verticality and location of the rafters and sheathing. The hole in the roof should not damage the elements of the rafter system.
Step 3. Use a cylindrical grinder to cut a hole in the roof; its size should correspond as much as possible to the diameter of the pipe.
Step 4. Fix the vertical position of the chimney in the ceiling with pads, insulate the opening with mineral wool and nail galvanized steel sheets on both sides.
Insulating the opening with mineral wool
Step 5. To seal the pipe outlet on the roof, you need to buy special additional products: a metal skirt and a glass. The diameter of the glass must correspond to the diameter of the pipe. It is quite difficult to make such products yourself; it is better to buy them ready-made.
To close the pipe on the roof, roof penetrations, for example, of circular cross-section, are used
Step 6. Use a metal clamp to attach the chimney pipe to the rafter system structures. There is no need to insulate anything; at this distance from the boiler, the metal chimney has time to cool down.
Step 7. Place the glass skirt over the chimney. The glass has the ability to rotate and tilt in the skirt, which greatly simplifies the installation process.
Chimney passage through the roof
Step 8. You need to cut off the roofing sheet. The width should be 10÷15 centimeters greater than the width of the skirt, the length should correspond to the distance from the top edge of the skirt to the nearest formwork strip. When marking, carefully ensure that the waves in the cut piece of roofing coincide with the waves on the roof.
Masonry of furnace walls
The brick must be wetted before laying. Then apply the required amount of solution.
The brick fits tightly into place. The mortar displaced by the brick is removed.
There is no need to plaster the internal surfaces with clay; excess mortar is unacceptable here. Once dry, it peels off and clogs the chimney duct.
Furnace casting is installed directly during masonry and fixed with wire. To ensure that the doors fit tightly to the masonry, they are wrapped around the perimeter with asbestos cord.
The cord will seal the contact points and will not allow the cast iron door, which expands when heated, to destroy the masonry.
Possible difficulties
Fitting and cutting - in practice, these operations take too much time. Therefore, it is easier to calculate the length and height of the “front entrance” in order to use only whole bars, boards and other piece products.
The presence of a door at the firebox can make access difficult. If it is removable, it is better to dismantle it, carry out all the work calmly, and then install it again.
Vertical and horizontal deviations arise not only due to lack of experience, but also due to uneven floors or walls. So it is imperative to carry out constant level checks - it will help to avoid mistakes.
General description of the design
In fact, this is a special frame made around the heating source. U-shaped, it, as a rule, visually stands out from the general background, although it can be made of the same material as the masonry. Its other common names are “gate” or “front entrance”, given precisely because of its appearance.
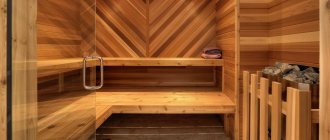
It can go both into the living room - a separate kindling room - and into the rest room. In the latter case, the aesthetics of execution are especially important.
An already finished structure cannot be adjusted in any way - if changes are needed, it will have to be built anew. Therefore, it is worth paying special attention to its design: to calculating the dimensions and quantity of materials.
When a portal needs protection
In the event that the room is small, and the heating equipment is too powerful and therefore not only heats itself up, but also overheats everything around, including the surrounding air. In such a situation, the frame must be made of heat-resistant material to prevent its rapid failure. At the same time, you will protect yourself from burns and excess heat.
How to make it yourself
For those who like to do everything themselves, we have prepared instructions on how to make a partition in a brick bathhouse with your own hands.
Instructions
First of all, it would be worth mentioning the soaking of bricks. Since you are doing it for yourself, it’s worth soaking, even if you are not a beginner. What does this give? Of course, the solution will be mobile longer, like on clinker - the slightest movement and everything will move. But there is time to do everything smoothly. But the result will still please you - the adhesion to the solution from this simple manipulation will be stronger.
ADVICE! Well, and without fail, wet the used bricks.
Preparatory work in the room begins with the waterproofing flooring. At least on the base on which the partition will be located. This could be a concrete foundation, screed, or curb. (In general, it is laid over the entire floor, but we assume that everything was done correctly when installing the floor, and waterproofing is present on the lower layers, and on top you most likely have a drain on which nothing needs to be laid.)
A tape a few centimeters wider than a brick one is enough.
Next, use a laser level or an old-school tool to mark the location of the future masonry. There is no need to talk about cleaning. You can use a special mason’s hammer to chop it in advance or use a grinder with a brick cutting disc to cut the bricks for the sling. You can calculate in advance how many bricks you will have in height. In general, try it on.
And the lace can be set as shown in this video:
BY THE WAY! You can generally use metal profiles nailed to the walls as guides for your partition. They do the same thing - they put a brick between two corners.
The first row is the most difficult. It starts with the fact that you lay the solution in a layer thicker than usual, level it and let it adhere to the base. If there are uneven foundations, it’s time to take them into account and correct them.
Next, a thinner layer is laid, there is no need to let it stick, bricks are laid immediately. Everything is aligned very carefully - by level, by cord.
Up to the 5th row, maximum attention - you form a plane, which you will then catch visually. Check and double-check.
If you are making a brick on an edge, then reinforcement with mesh or another method is mandatory; if not, then optional. Masonry of a quarter of a brick must be reinforced, because it is too thin; masonry of half a brick is optional. Reinforcement options - mesh, reinforcement, strips of metal. The reinforcement is inserted horizontally into the masonry joint. The thickness of the reinforcing materials should not exceed the thickness of the masonry joint. Just like the reinforcement bars in the wall, which are placed in the seam. You can attach it with corners - one side into the wall, the other side of the corner into the brick. In a wooden bathhouse, you shouldn’t tie a wooden wall to the partition at all - the wood takes a long time to shrink, and it also changes dimensions due to moisture.
How exactly the masonry is done can be understood from the following videos (we hope that you will find useful information in them):
Don't forget to leave some space under the ceiling. It is proposed to fill it, for example, with tow soaked in cement mortar and scrap bricks (small).
You can see how the door frame is inserted in the video above, where they teach how to position the lace on magnets.
You need to get rid of excess mortar on the wall immediately, but if anything remains, remove it with a metal brush.
If the partition is under the insulation, it is not necessary to unstitch the seams; if not, unstitching comes down to creating a concavity or convexity of the seam. Both are purely for beauty. For the first one, simply scrape out the solution with a wire loop.
***
In general, nothing difficult if you have a little experience. But we wish the newcomers success!
Facing
Before you line a metal stove in a bathhouse with bricks, you need to prepare for work.
Preparatory activities
You can start laying only after the concrete and brick base has dried. A metal stove is installed on it, and future cladding is marked around it.
But first you need to install a fireproof shield made of any fire-resistant materials on the wooden walls around the fireplace.
Insulation of wooden walls and floors with mineralite
If you decide to prepare masonry mortar from clay, then you need to fill it with water for several days and carefully sift the sand. Since it is difficult to cover an iron stove with bricks and not stain its body with mortar, before starting laying it should be protected with paper, cardboard or film, securing them to the walls with tape.
To prevent water from the solution from being absorbed into the brick, it is soaked in water about half an hour before starting work.
Soaking the brick
Masonry
When deciding how to brick a cast-iron stove, it is better to choose half-brick masonry. A thicker screen will take longer to heat up, and a thinner screen will cool down faster.
The laying of the first row begins from the far corner, laying a whole brick
It is very important to lay it out evenly and neatly, since all subsequent rows will be aligned with it. They are laid out alternately, with an offset of half a brick. Don't jump over the row, first raising the corners and then filling the space between them.
Laying is done offset
- The permissible thickness of the horizontal seam is 8-10 mm, vertical 3-5 mm.
- The seams are filled completely with the solution, its excess is immediately removed from the surface with a trowel.
Bricks that go beyond the plane are knocked down with a hammer or mallet
During the laying process, you need to constantly monitor the verticality of the walls and corners using a plumb line or building level.
A cord stretched along the upper edge of the row will help to keep the row strictly horizontal.
Auxiliary vertical stands will make work easier
To strengthen the masonry, reinforcing mesh can be placed in the seams every two or three rows.
The photo shows the reinforcement of the masonry with metal mesh
Also, every two or three rows you should unstitch the seams until the mortar loses its elasticity, and wipe the surface from any remaining mortar with a wet rag.
Joining seams
When laying out the walls, it is necessary to leave ventilation holes in them: at least two at the top and two at the bottom. Cold air will flow into the lower ones, protecting the oven from overheating, and heated air will come out through the upper ones.
Furnace ventilation diagram
- As an option, you can line the stove with bricks laid in a checkerboard pattern with holes between all adjacent elements.
- Around the doors of the firebox and ash pit, masonry should be carried out taking into account their full opening.
The brick will have to be cut if it prevents the doors from opening
Where to finish the masonry is up to you. If you have a stove with a stove or heater, it is only brought to the top of the body. You can raise it to the ceiling. Or you can make figured masonry with a vault and chimney lining, turning an ordinary potbelly stove into something like a fireplace.
Metal stove for a bath, lined with bricks up to the pipe
Option with full height masonry and pipe lining
The brick portal turned an ordinary stove into a real fireplace. Now you need to let the solution dry for at least a day. It is desirable for this to happen in natural conditions, so it is better not to heat the stove for now.
Brick sauna stove portal
Heating structures can be with a classic or remote firebox. In order to increase the attractiveness of built-in sauna stoves and installations with remote fireboxes, they are decorated with a portal. The portal represents the front edging of the stove. There are many options for designing a stove portal.
There are many options for designing a stove portal in a bathhouse
So, a wall with a furnace door can be sheathed:
- Brickwork;
- Natural and artificial stone;
- Decorative tiles;
- Cast iron cladding;
- Marble, granite panels.
The main thing here is that the cladding is fireproof and matches the interior design of the bathhouse. The shape of the portal can be square, rectangular, or with an arch. Most often, arched portals are laid out with wedge-shaped bricks and stones.
The main thing here is to correctly calculate the size of the portal. Thus, the cladding will look most successful if the firebox occupies 75% of the height and 50% of the width of the decorative frame.
Device
The portal is a “P”-shaped structure that frames the furnace firebox.
Since the portal is constantly warm, it must withstand long-term heat. To do this, it is important to pay attention to the material from which the decorative casing was made. A stove with such a lining will create the desired microclimate and quickly warm the room. In addition, the portal will delight you with its beautiful appearance and protection from damage. It also allows you to avoid getting burns during operation, retains heat for a long time and does not create the effect of dry air.
In order to make a portal, you need the following tools: a tape measure for calculations and a level for aligning corners and sides; hammer for laying bricks. Before work you need to do some preparatory steps :
- It is necessary to carry out the masonry and level the cement along the sides of the portal device. This is the most important part of the job.
- Then the wall under the portal is plastered and primed. It is possible to install the portal on a wall covered with wood, but subject to the use of elastic SM sealants.
- The strength of the floor must be stable to support the weight of the cladding. It should not sag or deform from gravity when approaching the stove.
- Combustible wall elements are replaced with fire-resistant materials.
- Finishing is done with decorative components. Decorative casing can withstand long-term heating depending on the material from which it is made.
Article on the topic: Whose bath towel is on
Portals for sauna stoves come in several types, of which the last two are most often used:
1. Monolithic (made of cement); 2. Brick (different varieties); 3. Ceramic tiles; 4. Natural stone.
The durability of the structure depends on the quality of the material chosen.