Foundation contour drainage
To drain water from an already built foundation, wall and ring drains are used.
Their operating principle is the same. The difference is that the wall system is made close to the foundation, and the ring system is made at a distance, usually 1.5-2 meters. Wall drainage is installed in non-filtering soil (clay, loam). Collects surface melt water, which seeps mainly along the wall, and not through impermeable soil.
The ring system is suitable for sandy filter soils. Lowers groundwater levels.
Types of foundation drainage based on pipe laying depth:
- Perfect
. Drainage pipes are laid on a waterproof layer of soil. Used if this layer is shallow. - Imperfect
. Pipes are laid above the waterproof layer if it lies deep.
Elements of wall and ring foundation drainage:
- Drainage trenches.
- Outlet pipes.
- Filter bedding, crushed stone or gravel.
- Filter fabric (geotextile).
- Basement waterproofing.
- Inspection wells.
We'll tell you how these elements are structured and why they are needed.
Drainage trenches
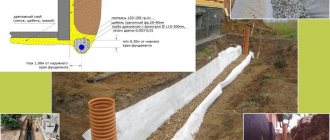
The RMD states that “in soft soils with insufficient load-bearing capacity, the drainage pipe must be laid on an artificial foundation.” This base is a sand cushion. For this we use river sand of 1.5-2 mm size. The thickness of the sand bedding is 50 cm.
Drainage pipes
Typically, corrugated pipes made of low-density polyethylene (HDPE) are used. The standard pipe diameter is 110 mm. The pipes have holes through which water flows. “The dimensions of water intake holes should be selected taking into account the granulometric composition of the soil to be drained” (RMD, 10.9)
Standard polyethylene pipe
Pipes are also used in geotextile filters. They are designed for sandy and loamy soils. These soils are easily washed away by water and can wash into pipes and clog them. The filter traps dirt.
Pipes in geotextiles
Crushed stone for drainage
Crushed stone is needed to filter groundwater so that the pipe holes do not become clogged. The filtering capacity of crushed stone depends on its fraction - the size of one grain. A fraction of 20-40 mm is considered optimal. We use exactly this crushed stone.
Geotextiles
Geotextiles protect crushed stone from erosion and also keep the soil from subsidence. As stated in the RMD, “a geotextile filter must pass water and screen out soil, not be unduly deformed and not limit the access of moisture to the drainage structure, and have bio- and chemical resistance” (RMD, 10.2).
Main characteristics of geotextiles:
- Manufacturing technology
. From one endless thread (monofilament) or from a staple (individual threads 5-10 cm). - Material
. Geotextiles can be needle-punched, thermally bonded or hydro-bonded. - Density
_ Geotextiles with a density of 200 g/m³ are used for drainage systems - Filtration coefficient
. Measured in meters per day.
RMD recommends the use of needle-punched monofilament geotextiles. This geofabric is also used by our company.
Basement waterproofing
To protect the base from moisture, waterproofing membranes are used. They are laid with a 10 cm overlap and connected using self-adhesive bitumen-polymer tape. Fastening is carried out using plastic dowel-nails in increments of 20-25 cm.
Manholes
Needed to monitor the operation of the system and for cleaning. The well consists of a bottom part, a vertical part and a cover. The pipes are either made at the factory or are cut in during installation. Wells are installed along the drainage route every 40-50 m. It is imperative to install wells at turns in the route, as well as when there are level differences.
Storage well
Serves to collect water and drain it into a ditch. Installed at the lowest point of the system. A float pump is placed in the well, which releases water into the ditch.
Foundation drainage device:
- Drainage trenches are dug around the perimeter of the house.
- The trenches are filled with sand. The sand is leveled.
- Geotextiles are laid at the bottom of drainage ditches.
- Granite crushed stone is poured into the geotextile in a layer of 10 cm.
- Pipes are laid on crushed stone. The minimum pipe slope is 2 mm per meter in clay soil, 3 mm per meter in sandy soil.
- Inspection wells are placed at the corners of the route, and a drainage well is installed at the lowest point of the site. Pipes are connected to wells.
- Cover the pipes on top with crushed stone.
- Wrap the edges of the geofabric so that they overlap and completely cover the pipes and crushed stone
- The trenches are filled with sand.
The drainage system cannot be combined with storm sewer. This will lead to storm and melt water washing away sand and crushed stone. It is recommended to do drainage and stormwater in parallel, in one trench.
Why does a previously dry basement floor flood ↑
If the basement walls do not “leak”, and moisture appears from below, there may be two main reasons for flooding of a previously dry basement floor:
Storm water penetration ↑
If the basement floods immediately after a heavy rainfall or after heavy snow melts, and the water quickly (within a few days) disappears, storm water penetrates into the basement. There is no point in hoping that this happened once and the trouble will not happen again after the next rainstorm.
Perhaps the problem can be solved in a simple way by diverting the water away from the walls of the house
The first thing you should pay attention to is the blind area and stormwater system that drains runoff from the roof. If they exist, of course
There should be no gap between the walls and the blind area. If there is a gap or cracks in the blind area, they should be sealed with construction sealant. The wider the blind area, the better. A meter and a half and an outward slope of 2-4% is the best option. Under the drainpipes coming down from the roof, it is advisable to place trays that will divert the flow of water to the maximum possible distance from the house, based on the landscaping of the site.
Proper wide blind area, trays that divert storm water from the walls
Drainage trays with gratings built into paving (pictured above) are quite expensive; cheap open concrete trays can be used
But if, during the construction of the basement, the pit was backfilled incorrectly, even the correct installation of the blind area and stormwater system may not give the desired result. Often, during construction in dense clay and loamy soils, the pit dug for the construction of the basement floor is thoughtlessly covered with sand. And the foundation and base of the floor are located on a sand and gravel bed. It turns out that in the middle of the waterproof clay there is a permeable sand lens in which the house is located. If the blind area does not cover the width of the sand backfill on top, moisture penetrates into the sand in large quantities during rain or melting snow. But she has nowhere to go, because there is clay all around. And if there are “gaps” in the waterproofing of the foundation and basement floor, water gets inside. Those who are just building a house should understand that in clay soil, backfilling of the pit must be done with the same soil removed earlier, thoroughly compacting it. Or immediately arrange drainage for the basement of the house.
Rising groundwater level ↑
The rise in groundwater level (GWL) can be seasonal or permanent. If a house was purchased or built in the summer, and in the spring the basement flooded and the water lasted for several weeks, a seasonal, flood-like increase in groundwater level occurred. Next spring, if the winter is snowy, the problem will repeat itself if countermeasures are not taken. A constant increase in groundwater level can occur due to changes in the hydrogeological properties of soils and it is difficult to predict its dynamics.
Improving the waterproofing of the basement of an existing house, especially if water penetrates from below, is problematic and often impossible or unreasonably expensive. Often the only means of draining a constantly or periodically flooded basement is drainage of the basement.
Useful tips
It is quite justified to lay out pipes simultaneously with the preparation of inspection wells. This technique will help to avoid mismatch and system inoperability. In all wells they place a container to collect sludge or simply leave space for it. Between the pipe entry point and the base of the well shaft, 0.2-0.25 m is reserved. Backfilling of crushed stone on the sides of the drains is mandatory; Closer to the foundation it is worth raising it to the height of the soil itself.
It is recommended to lift the layer of crushed stone above the drains from 30 cm. Geological textiles are placed above, preventing the mixing of materials and the accumulation of silt. Next, sand is placed, raising it to ground level. It is strictly unacceptable to compact the sand backfill; this will weaken the permeability of the soil to water. Experts and experts advise choosing drainage pipes with a high level of rigidity.
To learn how to install a drainage foundation, see the following video.
Laying technology
For the system to work properly, you need to know how to properly lay the drainage pipe, depending on the type. For each drainage pipe, the installation technology will vary slightly depending on the design. But the initial stage is the same for everyone:
- Develop a drainage scheme: location of pipes, places for wells and revisions.
- Depending on the type of soil, the geological characteristics of the site, the location of groundwater and the required throughput, the size and type of drainage pipe are selected.
- Based on the planned route for wiring drainage pipes on the site, site planning and markings are carried out for excavation work.
The ideal option is when the drainage scheme is developed together with the house design
- They dig trenches. On dense soils with straight walls, on loose soils - with sloped walls, or strengthen them during work. The bottom is made 30 cm wider on both sides of the pipe.
- Level the bottom surface, compact the soil, form a slope towards the drainage well within 0.5-3.0% (minimum 0.5 cm and maximum 3 cm for each meter of length).
- Pour a layer of coarse sand about 15 cm thick and compact it, observing the slope laid down during the formation of the ditch bottom.
Further technology for laying the drainage pipe depends on its design.
Laying a drainage pipe with geotextile, if it does not have a factory winding:
- Geotextiles are laid on top of the sand. The width of the canvas should be sufficient so that the edges can then be brought together.
- Pour a layer of crushed stone (15 cm).
- Lay a perforated pipe and cover it with a layer of crushed stone on top.
- The edges of the geotextile fabric are wrapped and fastened together. As a result, the pipe should be uniformly filled with crushed stone on all sides of about 15 cm, the textiles should run along the sand-crushed stone boundary, and there should be free space left to the walls of the trench.
The principle of drainage is that water seeps through geotextiles, crushed stone and perforation, then flows by gravity through the pipe to the well
- Pour a layer of sand on the sides and top (about 15 cm).
- The removed or imported fertile soil is put back.
If the pipe has a factory winding made of geotextile, then the drainage installation procedure is reduced by two “steps”.
Note! You can buy geotextiles separately, choose perforated pipes without wrapping and wrap them before carrying out work.
When using pipes with a filter layer of polystyrene foam granules and windings, crushed stone is not covered. And if you believe the manufacturer’s advertising video, you don’t even have to fill in the sand.
https://youtube.com/watch?v=DloSGrkFtYA
Purpose of storm drain
A storm drain is installed to drain rain and melt water. It belongs to the point type. It is used as an independent structure and in combination with a drainage system.
Installing a storm drain is not difficult, but it is important to design the future system well
Selection and calculation of materials for storm drains
When the project is ready, it is necessary to purchase building materials. You will need:
- sand;
- crushed stone;
- cement;
- sealant;
- storm drains;
- water collection tanks (storm water inlets);
- pipes;
- gutters;
- sand traps;
- gratings;
- observation wells for monitoring water levels;
- adapters for turns;
- plugs;
- brackets.
Drainage trays are made from asbestos cement, cast iron, stainless steel, and plastic. For self-installation, it is better to choose plastic. It is lightweight, pliable, and does not require complex equipment for installation.
The profile of the trays comes in the form of U, U and slotted. U-shaped is the most convenient for a private home. It is quite capacious and has no corners where dirt accumulates.
The calculation of materials for a stormwater system depends on the amount of precipitation, the design of the house, the area and characteristics of the land plot.
The diameter of the drains is chosen:
85 mm – for 10 l/s
100 mm – 20 l/s
150 mm – 50 l/s
200 mm – 80 l/s
The length of the gutters depends on the height of the house.
Drainage trays and gratings are calculated based on the linear footage of the storm drain using design calculations or tape measurements.
The volume of bulk materials can be approximately calculated using the formula:
V=abc
where a, b are the width and length of the trench, respectively,
c – layer height.
For sand, it is worth taking an amendment for compaction of about 20%. For crushed stone - about 5-10%.
Wells are selected based on the amount of precipitation. They are calculated using the formula:
M = (20A)Sk,
where M is the mass of precipitation;
20 – time, in minutes;
A – precipitation intensity over a period of 20 minutes;
S is the area from which water is collected;
k is the moisture absorption coefficient of the material.
The amount of sediment mass must also be known in order to correctly select the depth of drainage trays and their number on the site.
Do-it-yourself storm drain installation
Installation of storm drains is carried out after preparing the site (collecting garbage, eliminating all unnecessary things).
- Dig trenches up to 30-50 cm deep. The trenches must be clearly aligned with the projection of the location of the drains.
- Pits are dug under the drains. They are equipped with water intakes with a capacity of 5000-10,000 ml with special containers for collecting waste.
- Plastic rotary and inspection wells are installed.
- The trenches are filled with sand. Drainage trays are laid on the sand and grates are installed.
- Sand traps are placed every 10 meters in a straight line, at all turns and at the exit from the tray system.
- The collected water is either discharged into a ditch/storm sewer outside the site, or collected in a container and watered with it in the garden. Draining rain and melt water into sewers for disposal of household wastewater is prohibited by SNiP.
If water is discharged outside the site, permission is required from the Department of Natural Surveillance, the Central State Hydrometeorological Service, the UPN, the Fisheries Department, and the Basin and Water Management Department. It is necessary to provide the stormwater drainage design to these services. Construction should begin only after its approval.
In what cases is wall drainage necessary?
Wall drainage must be installed in the following cases:
- If the level of hepatitis B is high.
- The amount of precipitation in the region is high.
- The basement and basement rooms of the house are used for household purposes. needs.
- If the ground floor is located below the hot water level on the site.
- Floors in the basement are no higher than 0.5 m above the level of hot water.
- If the soil on the site is loam or clay, the level of hot water is not taken into account.
- The house is located in a place of capillary penetration of moisture with unacceptable humidity in the premises.
But in some cases, wall drainage of the foundation is not enough. Then they make a layer on top of the system along the perimeter of the house with an angle of inclination of 20, and a width of at least 1 m. The soil with which the drainage system is filled is compacted, and a waterproofing layer of bitumen-based materials is applied to the foundation from the outside.
You should not install a drainage system near the foundation if the house is built on sandy soil, when hot water easily penetrates into the lower layers, and in winter freezing occurs at least 80 cm. In this case, it is enough to coat the foundation with protective compounds, and the moisture will not harm the structure.
Ventilation
Regardless of what needs the basement will be used for, air exchange must be established during construction. Even if the finishing of the room was done correctly, with the walls impregnated with special solutions, if air circulation is disrupted, moisture will stagnate. Unfortunately, this is fraught with the appearance of fungus and mold. Spores of the latter can enter the lungs along with the inhaled air, multiply there and provoke a number of chronic diseases, some of which are fatal. Ventilation systems in the basement are classified into two types:
- Artificial;
- Natural.
Country kitchen design: ideas and tips
The latter are suitable only for “cold” basements, which no one plans to equip for living quarters. Natural ventilation is a simple pipe system that connects a room with the street. The air circulates freely in them. Artificial or forced ventilation systems pump fresh air into the room from the street, and pull stale air out of it. Modern split systems are able to regulate the level of humidity and temperature within the regime set on the control panel. Such “smart” ventilation will eliminate many problems and become a universal “climate control” in the basement of a private house.
Construction of base and grooves
Option 2. Scheme of a wall drainage system.
The first stage is the construction of a sand base. Here you will need sand, a laser level, gravel, a large geotextile fabric and a shovel for digging ditches. First, we level the area around the foundation slab, after which we fill it with sand about 20 cm. The sand needs to be wetted and lightly compacted, then, if necessary, topped up and leveled again.
After this, take a laser level and use it to measure the height fluctuations along the entire length of the future drainage system. Then mark the points where the system slopes using the same level. Place pegs in the designated places.
Now you need to lay geotextiles on top of the sand. Cut out pieces of the canvas of the required size in advance and lay them on the sand, pressing it there.
Option 3. Wall drainage scheme.
Geotextiles must be overlapped. Place gravel on top of it. The height of the gravel layer should be such that small grooves can be made in it, where pipes will be deepened to remove moisture (if the drainage is linear). In the case of reservoir drainage, the gravel layer should be slightly larger.
Now, in the places where the pipeline for pumping water will be laid, make a groove. The pipe should fit easily into it, but not be completely buried.
This is an important condition for the entire drainage system. The length of the groove should be equal to the length of the system from the top to the bottom drainage point.
Sequence of work
The wall drainage system is installed in several stages. To do this you will need:
Geotextiles are designed to improve the quality of construction, its durability and resistance to natural factors.
- sand;
- geotextiles;
- washed gravel;
- perforated polyvinyl chloride pipes;
- nylon rope;
- laser level.
So, first a sand bed is arranged, the height difference is carefully measured using a laser level. Pegboards are being placed. If necessary, to create a uniform slope for water flow into the receiving groove without using a pump, coarse sand is poured along the marks on the poles.
A geotextile fabric is laid on top of the sand, washed gravel is poured onto it, in which recesses are made for laying drainage pipes
It is important to maintain the same slope along the entire length of the ditch
Next, perforated polyvinyl chloride pipes are laid on the gravel. Their openings should not exceed the minimum gravel particle size to prevent clogging.
The drainage system is provided with a vertical pipe with a built-in tightly closed lid, which ensures flushing of the system.
At the next stage, the pipes are connected to each other, using a stretched cord, the overall slope of the entire system is checked (it should be 2 cm per meter of length of all pipes).
At each “rotating unit” of the drainage system, a vertical pipe with a built-in tightly closed lid is provided. Thanks to the presence of such pipes, drainage is ensured by the possibility of flushing the system.
The laid pipes are wrapped with geotextile. To prevent gravel from getting into the drainage holes, no gaps are allowed between the turns. Pipes wrapped in geotextile are secured with nylon rope.
Then the pipes with geotextiles are covered with a 15-20 cm layer of clean gravel. The gravel cushion is covered with overlapping geotextile fabric to prevent soil from getting into the cracks.
From above, the drainage is filled with coarse river sand, which acts as an additional filter.
Particular attention is paid to tightly fixing the textile material at the ends of the drainage branches
During the process, work is being carried out to insulate the sewer pipe leading from the house. For this purpose, the pipe is covered with a layer of foam plastic 25 cm thick.
Thus, the wall drainage is ready. A properly constructed device, with periodic maintenance, can be used for decades. Therefore, having familiarized yourself with the technology of laying the system and having the desire and capabilities, you can begin construction work. Good luck and good decisions!
Installation of wall foundation drainage around the house
Before you begin installing a near-house drainage system, you need to decide on its type, which depends on several parameters:
- types of soil;
- whether the building has a ground floor or basement;
- the origin of the water that needs to be drained.
The wall-mounted underground option is used in the presence of a base, high groundwater level and loamy and clayey soils. If it is necessary to protect the foundation of the house only from precipitation, then a surface system will be sufficient.
To protect a house located on sandy or sandy loamy soils with water and without a basement, ring (trench) drainage is used.
Having decided on the type of drainage, you can begin drawing up a diagram, designing the system and planning all the work. This stage allows you to eliminate all possible shortcomings, which are then expensive to correct.
For the plan, you need to decide on the lowest point on the site for installing a drainage well, which will be connected to the general ring of the system by a pipe.
We assemble an air dehumidifier with our own hands: diagram and principle of operation.
It is better to draw the diagram on graph paper or in a special program. The drawing should show:
- house, as well as adjacent buildings;
- trees and shrubs;
- places where drains pass, depending on the type of drainage chosen;
- inspection and drainage wells.
Inspection tanks are installed at the point where the pipe turns, for example, in the corners of the house, or every 30 m for a straight section of the pipe.
The plan should also record the depth of the pipes. This indicator depends not only on the bottom slab of the foundation and the height of the floor, but also on the level of soil freezing. Pipes must go deeper than the point of zero winter ground temperatures
It is important to write down the diameter of the drains, which affects the width of the trench, and the required slope
It is better to entrust design to specialists. But you can purchase the necessary material and install the drainage system based on a competent plan yourself.
The main types of drainage design
There are several types of drainage systems. Let's consider each type separately.
Wall design
The system is created around the base of the structure (foundation). Wall drainage must be installed if the building has a basement or ground floor. The installation of the wall structure must be carried out during the construction of the foundation of the building, when the foundation pit has not yet been backfilled. If installation is carried out later, you will have to perform additional work, which will require you to spend time, effort and money.
The system is laid along the foundation. Pipes must be routed from the corners of the building to the inspection wells. At the lowest point in the system, an outlet well is created. This well will drain water beyond the boundaries of the site.
Ring or trench structure
This structure is installed at a distance of two or three meters from the base of the structure. This type of drainage system is used for buildings that do not have basements or basements. Or the building must be located on a clay soil layer.
A clay castle is also created between the base of the structure and the drainage structure for additional protection. Drainage must be laid at a depth of 50 centimeters from the lowest point of the foundation. Drains should be laid on coarse crushed stone.
The process of constructing a ring drainage
Sand is poured into the bottom of the trench
To make it easier to create drainage for the foundation, you can make markings. For this purpose, various pegs are used, which can be easily removed.
You can arrange ring drainage as follows:
- At a distance of 5 m from the house, you need to dig a deep ditch larger than the height and width of the house foundation in order to fit a pipe with a diameter of 11 cm. There should still be 10 cm indentations from the pipe on each side.
- Sand in a layer of up to 100 mm is placed at the bottom with a slope towards the reservoir. This way the water can drain on its own.
- The drainage pipe is placed in the trench, on geotextiles, its ends are fixed to the walls of the ditch. The pipe is laid in a trench, covered with gravel to a depth of 50 cm, then wrapped in material twice. The seams of the structure are fastened and covered with sand or gravel.
- The pipes are connected, but not at a right angle, so that silt does not accumulate.
- To construct an inspection well, a hole is dug and a container with a hole for water drainage is placed. Here you also need to place geotextiles on the bottom to prevent pebbles from getting in.
- If the soil is heavy and does not allow water to pass through well, a solid pipe can be used for drainage.
- If there is a large accumulation of water in the reservoir, it can be pumped out and watered for garden plants.
Main types of drainage for foundations
Drainage systems can be divided into vertical, horizontal and combined. Vertical drainage is mainly used in mines or swimming pools. Such a system is equipped with pumps and special drainage wells for pumping out water. When the water drops, meter-long wells are made in the basement of the building and pumps with alarm floats are installed.
A horizontal drainage system is a horizontal pipe system. It can be open or closed. The system is divided into three parts: collecting, drainage and water receiving. Open horizontal drainage is often used to drain large areas, for example on farms. For private homes and industry, closed drainage is used. You can often find a combined type of drainage.
So, drainage for the foundations of a house involves the creation of a special drainage system of channels for underground or surface water. The construction of a drainage system largely depends on the groundwater level, the topography of the site and the magnitude of the surface slope relative to the horizontal plane.
We plan at the design stage
Those who are building a house face many questions: from the number of floors of the house to the need to arrange a basement in it.
The latter will significantly increase the cost of the work, but additional space will never be superfluous either at the dacha or in the cottage. In addition, basements strengthen the foundation, which is especially important in those regions where outbreaks of increased seismic activity are observed. Any construction must begin with a soil survey
Its composition on the site and the depth of groundwater will matter. Depending on these two indicators, the type of foundation is selected, and, accordingly, the features of the basement:
- Monolithic (tiled);
- Tape.
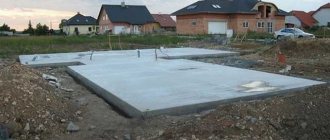
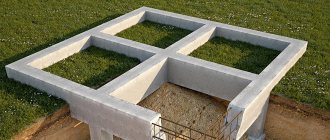
The second type is suitable for deep-lying waters and soil that ensures the stability of the building. Monolithic is a solid slab. It is used for more monumental structures in places where the groundwater level rises above the critical level - 2 m, and the soil is loose and consists mainly of sand. Construction traditionally begins from the basement. The first is to dig a pit, lay the foundation, and arrange a blind area. There are two main technologies for building a basement:
- With the preparation of the pit;
- With preliminary pouring of strip walls (reinforced concrete).
House foundation drainage
If the groundwater level is high, the foundation must be protected not only by careful waterproofing, but also by a well-designed drainage system. Only the combination of these measures will allow the structure to be maintained in its design condition without destruction.
Which system to choose
The foundation drainage of a house can have a different structure depending on the type of soil, the amount of groundwater and the depth of the structure.
Wall foundation drainage
Such a system is necessary when laying a deep foundation with a high groundwater level. It is often installed to prevent flooding even at normal groundwater levels to protect against intense precipitation.
The wall drainage system can consist of 2 parts:
- Foundation wall protection;
- Interlayer drainage, arranged under the foundation cushion, is necessary for voluminous and saturated groundwater layers.
The device for protecting the outer wall of a load-bearing structure is carried out on all soils except sandy ones - they themselves conduct liquid well into the lower layers of soil.
The wall system includes a complex of waterproofing walls and laying drainage pipes with inspection wells. Excess liquid is collected in the pipeline and removed at the disposal site into a sewer, reservoir, site for reuse, etc.
Ring drainage
The method of installation is similar to the wall one, but differs in location: the ring system drains the entire perimeter, incl. areas adjacent to the house. It is placed at a distance of 1.5...3.0 meters from the foundation, which is convenient when laying it after the construction of the building.
Ring drainage is optimally chosen for shallow foundations without a basement.
Interlayer drainage
It is often arranged as an independent protection of the foundation from saturated aquifers that the structure reaches. Interlayer drainage additionally prevents the walls from getting wet by capillary moisture. Its arrangement is possible only at the stage of preparing the foundation for the foundation.
The system is used mainly for slab foundations. It involves compacting the soil with large sand and gravel using drainage pipes located under the foundation.
To clearly determine which type of drainage is suitable for a particular home, use the table:
Any system is necessarily accompanied by waterproofing of the external surfaces of the foundation and the arrangement of a blind area with a slope along the entire perimeter of the building - it partially drains the water coming from above.
Calculation of system and materials
Proper foundation drainage begins with calculations of the drainage system and materials.
- The depth of the pipe in the trench should be 0.3...0.5 meters greater (deeper) than the foundation cushion. This reserve is sufficient to remove excess soil fluid from the supporting structure.
- The slope of the pipeline must be at least 2 cm per 1 pm of drainage for the natural removal of water from structures to their destinations.
To organize drainage on the perimeter, you need to find the highest and lowest points.
- A water collection well is located high;
- A receiving well is installed in the low one, from which it is discharged into a collector well for further transportation.
To calculate the amount of materials, follow several rules:
- Draw a diagram of the house indicating the sides. Draw on the plan the proposed drainage water line, taking into account the distance from the wall (up to 0.5 m for a wall outlet, 1.5...3.0 m for a ring outlet).
- For every meter, add 2 cm to the slope. If the length of the plot is 10 meters, we get 20 cm of slope from the top to the bottom point.
- Mark the position of the inspection wells. They should be located in the corners of the house or at every second turn, but at a distance in a straight line no more than 40 m from each other.
- Based on the data obtained, calculate the required number of pipes and wells.
- Provide couplings for turns, and separate special components for pipe connections.
Pipe selection
The efficiency of the entire system depends on the quality of the selected materials. Pipes made of ceramics and asbestos cement are currently practically not used due to their low efficiency; preference is given to PVC and HDPE pipes. For drainage, use products with perforations and filters:
It is optimal to use pipes with stiffeners to maintain the shape of water pipelines even under intense soil loads.
The variety of pipes and filters in stores will confuse any uninformed buyer. How not to make a mistake when choosing? – rely on the type of soil.
Preliminary calculations
When arranging a private drainage system on your own, calculations come down to determining the depth of pipes and wells, as well as the optimal slopes of pipelines.
The depth of laying the drainage is determined by the depth of the supporting foundation. The principle is simple: drainage is installed 0.3-0.5 m below the foundation base.
Drainage scheme
The slope of the pipelines must be such that water moving through them can be drained quickly and efficiently into the receiving tank. Traditionally, a slope of 20 mm per linear meter is maintained.
First find the highest and lowest points of the site. In the first, you will arrange a water collection area (most often this is the highest corner of the house), in the second, you will install a receiving well. Thanks to the natural slope, there is no need to buy additional pumping equipment for pumping groundwater.
For a better understanding of the situation, check out the example of calculating foundation drainage.
An example of a specification for a 6x6 m rectangular bathhouse, drainage wells - 3 pcs.
Given:
building dimensions – 9x6 m; the distance between the collector well and the building is 10 m; the protrusion of the upper edge of the well above the ground is 0.3 m.
To determine the length of each individual section of the trench to the water intake, you need to add up the lengths of the sides of the building. In this example, the result will be 15 m. The total distance to the receiving well in this case will be 25 cm. The total slope of the system under consideration is 0.5 m (a couple of centimeters for each of the resulting 25 m).
Drainage system diagram
Is wall drainage needed around the foundation of a house?
Many developers decide to build a house with a basement. The cost of building a basement is comparable to the cost of building a regular floor.
Only non-residential, auxiliary premises can be located in the basement - laundry, gym, sauna, boiler room, workshop, storage room, etc. All these rooms could be located on a regular floor or attic with better comfort and convenience.
In the recent past, it was customary to build houses on deep strip foundations. The construction of a basement in such a house was indeed beneficial - the foundation served as the outer walls of the basement premises.
The use of lightweight structures and shallow foundations in modern low-rise construction makes it unprofitable to install a basement in a house.
However, lovers of tradition and solidity often choose a house with a basement on a deep strip foundation. To comfortably use the premises in the basement, the basement must be protected from ground moisture.
Reservoir method of water drainage
Drainage under the foundation slab is necessary to ensure that the properties of the structure are maintained when in contact with water. This means removing water and preventing its effects on the foundation of the house. For more information about drainage work on the site, watch this video:
Drainage under the foundation slab can be done in various ways. One of the popular ones is the layer type. Its essence is as follows:
- A ditch is dug 1 m deep than the size of the building.
- A slight slope is established from the center to the sides.
- Geotextiles are laid, then a 10 cm layer of sand and a 30 cm layer of crushed stone are alternated to level the bottom of the pit.
Blind area: meaning, installation
An important element of protecting the foundation of a building from moisture is the blind area. Structurally, it is a waterproof strip placed on top of the soil at a certain depth. The last option is a hidden blind area.
Impact of water on the foundation of a building with drainage, without
Blind areas have been used in construction for a long time. In the traditional form - a well-compacted layer of clay, 20-25 cm thick, 120-170 cm wide. A blind area is placed along the walls around the perimeter of the building. The surface is given a slight slope of 5-10 degrees from the wall. Allows atmospheric, melt moisture to drain to the maximum distance from the base or foundation. A compacted sand cushion, concrete slabs, and paving slabs are often placed on top of the clay layer. Under the layer of clay, it is recommended to place sheets of insulation, for example, extruded foam, 10-12 cm thick. This will protect the foundation from heat loss and will not allow frozen soil to melt in winter.
Scheme of combination of stormwater and drainage
The dimensions of the blind area should not exceed the width of the drainage. The flowing water should seep to the drains. The design details are shown in detail in the illustrations.
Wall foundation drainage
Wall foundation drainage is designed to remove water from the foundation of the house, which will protect the foundation from destruction. The drainage system is installed around the perimeter of the house. There are two ways to drain groundwater from a house:
- Open,
- Closed.
The open method allows you to collect and drain rainwater. But it is of little use for draining groundwater. Especially if trays or sawn halves of large pipes are laid at the bottom of such a ditch surrounding the house. For foundation drainage, deep ditches are required, below the level to which the foundation is buried. And leaving such ditches open is not entirely safe.
Therefore, the drainage for the foundation is closed.
Foundation drainage diagram: simple and clear
The foundation drainage scheme should take into account:
- Distance of the pipe from the foundation. It should be no more than the thickness of the foundation.
- The depth of the pipe. Consequently, the depth of the trench. The drainage system should be located below the foundation level. In addition, the depth of the pipes should take into account the depth of soil freezing. The pipes are laid 50 cm below this mark.
- Presence (absence) of a drain pipeline;
- Location of inspection wells.
And since the process of digging a ditch for drainage is labor-intensive, it is advisable to install the foundation drainage simultaneously with the construction of the foundation itself, or immediately after it. The drainage pipe is laid with a slight slope (2-5 cm of slope per meter of pipe is enough) so that the water accumulated in it flows out in a given direction. The wall drainage system of the foundation should be located below the foundation itself, regardless of the type chosen: strip, slab or pile. Geotextiles are laid in the trench. This porous material acts as a filter. It is needed to prevent sand and small fractions contained in the soil from getting into the pipe. Gravel 15-20mm in size is poured on top of the textile. A smaller one will block the holes in the pipe. The pipe is laid on the crushed stone. And the top is covered with crushed stone, which is covered with the edges of geotextile.
The degree of its perforation depends on humidity. The construction market offers pipes
- with full perforation, when the holes are located along the entire perimeter of the pipe at an angle of 60 degrees and in a checkerboard pattern, along the length of the holes are located at a distance of 10-20 cm.
- With partial perforation, providing for the presence of 3 holes only on the upper half of the pipe, also at an angle of 60° and at a distance of 10-20 cm.
Important note. Under no circumstances should the drainage pipe serve as a storm drain; rain gutters from the roof of the house cannot be connected to it.
The reason lies in the perforation of the drainage pipe.
Geotextiles. This porous material acts as a filter for drainage
When the drainage system overflows, drainage water flows from the pipe into the ground, which leads to an increased moisture content in it.
But blind drainage pipes can be laid next to the perforated ones, or above them, in the second tier. This will prevent you from digging unnecessary ditches.
In the corners of the house, inspection wells should be provided into which pipes enter. Nowadays, drainage inspection wells made of plastic are purchased on the construction market along with pipes and geotextile.
How to get rid of groundwater in the basement
rlotoffski 2-03-2014, 19:00 21 479 Construction
OK
Groundwater problem and possible basement flooding
- two complex issues that should be resolved at the stage of construction of a country house. Ignoring these points can lead to such undesirable consequences as destruction of the foundation, its subsidence, flooding of the basement and damage to all its contents, as well as the floors of the first floor. How should protective measures be taken to prevent disaster? If the problem could not be avoided, what should I do? You may find the following information helpful.
What causes groundwater to rise?
For example, this could be floods of nearby rivers or an increase in water levels caused by heavy rainfall. Can we influence the first factor? We personally, as summer residents, are unlikely. But we can provide for the fastest removal of precipitation.
How to drain groundwater?
So that groundwater in the basement of a country house does not create problems, it simply should not be there. To do this, it is worth taking protective measures. What should we include? Well, firstly, this is timely drainage and secondly, waterproofing.
Waterproofing is necessary from moisture contained in the soil in any case, even when groundwater flows significantly below the level of the basement floor, without affecting the underground part of the structure. You can treat all concrete surfaces with special water-repellent compounds and seal wall-to-wall and wall-to-floor joints.
Thanks to its special properties, the substance, introduced under pressure using special equipment, quickly fills all existing external and internal voids, hardens, thereby reliably blocking the access to water. You can forget about flooding basements if, in addition to waterproofing, you take care of the drainage system on the site.
Option 1.
Using a drill, we will make several wells with a minimum diameter of 10-15 cm and an average length of 3-5 meters.
As a rule, this length is sufficient to provide liquid access to permeable layers through dense clay layers, which retain water, causing it to accumulate.
As a result, water does not accumulate in the upper layers of the soil, for example during rain or melting snow, but flows freely and deeply through the impermeable layers of the soil. And very quickly! It is recommended to make such wells along the entire perimeter of the basement and in its surroundings.
Option 2.
You can also build a drainage system as follows. First of all, it is necessary to assess the nature of the slope at the summer cottage, which in turn will determine the degree of slope of the pipes. In addition, the larger the diameter of the pipe, the greater the slope. Thus, the independent flow of water in the direction opposite to the site is ensured.
We dig trenches around the perimeter of the house and another one or two in the direction from the house to drain the liquid. They should be about 1.5 meters deep, 0.4 m wide, and the exit slope should be below the basement level. We cover the bottom with waterproofing tecton, then with geotextile (the width of the material should be sufficient to cover subsequent elements of the entire system).
If the basement is already flooded.
If there was no talk about organizing waterproofing during construction, and the basement is flooded, then it is urgent to drain it, and then think about the drainage system.
A properly laid network of drainage pipes will collect and drain not only groundwater, but also melt and rainwater, constantly protecting the foundation and basements from excess moisture. Drain the flooded room using a submersible drainage or fecal pump.
There is nothing complicated in their design or operation, which does not prevent the devices from effectively solving their problems. The choice of model depends entirely on the composition of the liquid in your area, the number and size of foreign particles in it. The drainage pump will do an excellent job with clean or heavily contaminated water.
www.kak-sdelat.su
Become the author of the site, publish your own articles, descriptions of homemade products and pay for the text. Read more here.
OK
Wall foundation drainage according to SNiP
According to building codes, when installing wall drainage, the following rules must be followed:
- pipes are laid with a slope of 2 cm per meter in the direction of the collector or well;
- inspection wells are placed in increments of no more than 40 meters in a straight line and no more than 20 when turning a corner;
- drainage pipes must be immersed deeper than the freezing of the soil;
- ditch width from 25 cm to half a meter;
- with ring drainage, the system is removed from the walls of the house at a distance of one and a half to three meters;
- the distance from the pipe to underground electrical communications must be at least 15 cm (for a pipe with a cross-section of 5 cm).
The project also provides details:
- pipe section;
- filter material and type;
- soil type and characteristics;
- design capacity of the drainage system.
To install drainage near the foundation, you can use PVC, polypropylene, or low-density polyethylene pipes. There should be two perforated zones in the opposite walls of the pipe. The total perforation area is about a percent of the entire surface of the water pipeline. The solid walls of the pipe should look up and down, the perforated walls should look to the sides.
Filters are made from coconut fiber or geotextile. Their purpose is to protect perforated areas from the ingress of soil particles. Water pipes may already be equipped with filters or sold without them. If filters are not provided, the pipes are wrapped in several layers of geotextile before laying in the ditch. Fix the canvas with a nylon cord, plastic tape or other polymer material. Pipe sections are connected with polymer couplings and fittings.
Sometimes in wall drainage, polymer profiled membranes are used - this is the name of a polyethylene film, on which protrusions 8-20 mm high are made using hot molding technology. A two-layer membrane includes a geotextile layer, while a three-layer membrane also includes a smooth polyethylene film. The membrane is installed on the surface of the base after waterproofing, with the geotextile side facing the ground. This enhances waterproofing and improves drainage efficiency.
In places where pipes are laid, it is recommended to pre-lay thermal insulation material - this will make the thermal insulation of the base more effective and protect the pipes themselves from freezing and, accordingly, from ruptures. Pipes should be laid on top of a bed of sand, crushed stone, or gravel. There should also be 3-5 cm of this mixture on top: it will act as a filter layer and direct moisture from the surface to the drainage pipes.
At the last stage, a concrete blind area about half a meter wide is made. The edge of the blind area should be located further from the wall than the projection of the cornice.
In addition to SNiP, the installation of a drainage system is regulated by GOST 1839-80.
Drainage system
Work in dry weather
Water is removed from the foundation by organizing drainage around the house. Before implementing it, you need to know some features of the work:
- installation work is carried out in summer in dry, warm weather;
- to build a foundation drainage with your own hands, it will take 2 to 3 months;
- After preparing the ditches, it is advisable to build a canopy over them to protect from rain;
- if the soil is in a loose state, then the walls of the ditch must be thoroughly strengthened;
- from the appropriate authority you need to obtain information about the condition of the soil, as well as conduct a small experiment to determine where moisture is most collected;
- Having learned comprehensive information, you can draw a drainage diagram for the building, calculate how much material will be needed and the cost of the structure.
Organization of waterproofing for different types of foundation
Arrangements for protecting a constructed building from moisture vary depending on the type of foundation. The most common types are slab, pile, column, strip and monolithic foundations.
Plates
Here it is best to wrap the foundation with rolled roofing felt. When any irregularities are detected.
They must be removed using a leveling screed.
Then a water-repellent material and insulation are placed on the concrete slabs and the surface is leveled again.
Pile and column types
It is not easy to waterproof concrete piles and pillars. It is provided by adding water-repellent additives to concrete. Wooden structures are treated with special liquids that prevent rotting and moisture absorption.
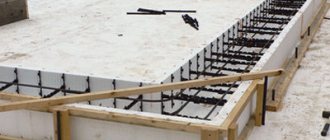
Strip and monolithic foundations
Most often, monolithic structures are insulated with hot bitumen mastic
To properly waterproof these types of foundations, the following several methods are used. They are varied and quite effective.
- Treat the foundation with a special mastic, only the surface must be dry and smooth. This method is not entirely reliable, so to strengthen the composition it is necessary to cover it with insulation or build a brick wall.
- Just as in the first case, you need to carry out all the manipulations using hot bitumen mastic, and stick roofing material on top in 2 layers with an overlap of about 15 cm.
- Using a special sprayer, a water-repellent composition is applied to the dry foundation. It is advisable to use geotextiles on top, then the waterproofing will last a long time.
- Another reliable and high-quality method is penetrating waterproofing. It contains quartz sand, cement and special additives. This mass has penetrating properties.