The first stage in construction is design work. Designs for bathhouses made of foam blocks allow you to count consumables with maximum accuracy and determine the location of sections, stoves, ventilation systems, windows and doors. The plan will also help control the construction process at each of its stages: from the foundation to the roof.
A bathhouse made of foam blocks is characterized by ease of installation and short construction time. In terms of operational and technical parameters, foam concrete buildings are not inferior to their wooden counterparts. The construction of such a bathhouse will cost much less than brick or log options.
Bathhouse made of foam blocks: pros and cons
Ordering a turnkey bathhouse made of foam blocks is always profitable due to the budget cost. Construction will be much cheaper compared to a similar structure made of timber, logs or bricks. There are a number of other advantages that push the owner to have such a bathhouse:
- Compared to some types of wood, foam block has superior thermal conductivity. For pine the figure is 0.18 W/mC. The thermal conductivity of the foam block at a humidity of 8% reaches 0.16 W/mC.
- The pores of foam concrete saturated with water quickly release moisture, but under the condition of dry sunny weather.
- The foam block can withstand exposure to an open fire source for up to 4 hours.
- In terms of sound insulation, foam concrete outperforms wood.
- The speed of construction is increased due to the lightness and large size of the blocks.
- The low price of the material is reflected in the total cost of the finished bath.
Foam blocks also have many disadvantages, and you need to know them:
- The foam block wins in thermal conductivity, but the indicator is non-uniform due to the different sizes of air bubbles.
- Increased water absorption is the main disadvantage of the material. When building bathhouse walls, it is required to resort to enhanced waterproofing measures.
- Frost resistance is weak. The densest foam concrete can withstand up to 35 freeze-thaw cycles.
- The tightness of masonry joints is ensured only by glue, the cost of which is higher than that of ordinary cement mortar.
- Due to increased water absorption, fungus quickly develops in the pores of foam concrete. Rodents do not eat foam blocks, but gnawing a hole will not be a problem for them.
The foam block has almost the same number of positive and negative qualities. It is up to the owner to decide whether to build a bathhouse out of it or not.
Is it possible to build a bathhouse from foam blocks?
There are no special prohibitions for building a foam concrete bathhouse on your site. All the shortcomings of the material can be neutralized if you take a responsible approach to the issue of reliable waterproofing and impregnation of walls with solutions against fungus. Foam blocks do not burn, which is important when placing a bathhouse near a residential building. Light large blocks can be laid by one person. There is no need to hire workers to build a bathhouse.
Important! On average, a foam block bathhouse will last up to 15 years.
The owner needs to decide whether this time is enough, despite the low cost of construction.
What is better: gas block or foam block for a bath?
Inexperienced builders often confuse foam block with gas block. They are similar in appearance, but have different characteristics.
The gas block consists of closed pores up to 3 mm in size. In the manufacture of the material, cement is used as the main binder. Additives include sand, a choice of gypsum or lime. The pores are obtained due to aluminum gas generators. In terms of processing, a gas block can be compared to wood. The blocks can be easily sawed with a hacksaw and can be drilled.
The internal structure of the foam block is similar, only the pore size is slightly increased. Another difference is the composition. When making foam concrete, gypsum, aluminum gas former and lime are not used. A gasifier, which can be synthetic or organic, is added to sand and cement.
The table shows the performance characteristics of the materials. Aerated concrete wins in all respects except water absorption. This factor is important for the construction of a bathhouse. Experts advise in cold regions to give preference to gas blocks, but take measures for enhanced waterproofing. For warm areas, it is preferable to build a bathhouse with foam blocks.
In the video they decide on the choice of foam or gas blocks for building a bathhouse:
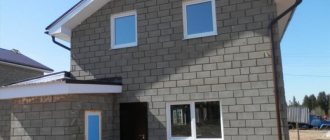
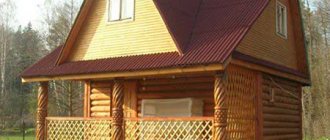
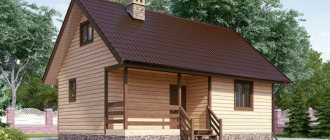
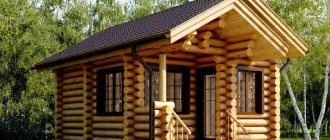
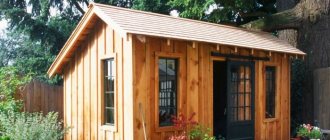
Bathhouse made of foam blocks: photo
A review of bathhouses made of foam blocks, projects, photos will help you decide on the type of construction and visually represent the construction process.
Features of foam concrete
Foam concrete is a cellular material that appeared on the construction market several decades ago, but continues to be in great demand and is widely used in the construction of premises. For its production, simple technology is used, which reduces the cost of the final product and allows you to produce building materials at home.
Unlike aerated blocks and silicate concrete, foam concrete is created without the use of temperature influences. Instead, a foaming agent is mixed with the cement mortar, which is poured into the workpieces and hardens in a natural environment.
Pros and cons of the material
The popularity of foam block is due to its performance properties and advantages. First of all, it is increased thermal insulation and resistance to temperature fluctuations. Experts say that even with constant exposure to high temperatures, the material does not begin to deform and retains its initial strength. It also meets all environmental safety requirements, is not afraid of corrosive or putrefactive processes, and also does not become an object of attack by rodents.
The foam block is lightweight, which reduces the complexity of construction work and simplifies installation. Baths based on this material are characterized by resistance to fire, and this is an important point in compliance with safety standards.
But, in addition to a lot of advantages, the foam block also has disadvantages. Before use, they must be treated with special compounds that provide the required degree of moisture resistance. If you miss this moment, the material will be deformed and quickly lose its presentability.
Despite the affordable cost of raw materials, the installation process can be accompanied by high costs. They are associated with the acquisition of a special adhesive composition, as well as the carrying out of insulation work.
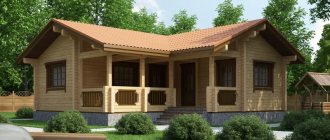
Foam block bath projects
Ready-made bathhouse designs made from foam blocks with a layout are convenient to use in private construction. The owner can change some details at his own discretion, but in general everything is thought out extremely conveniently.
Project of a 6 by 6 bathhouse made of foam blocks
A successful project for construction on a medium-sized plot. The bathhouse has a spacious steam room with an area of 5.3 m2 and a large relaxation room of 11.2 m2. According to the design, the stove is located with the firebox exiting into the rest room, which allows for uniform heating of all rooms of the bathhouse.
Project of a 6x4 bathhouse made of foam blocks
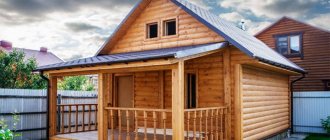
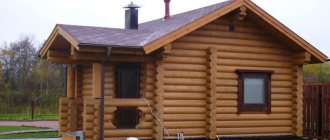
A good design for a bathhouse made of foam blocks for a small area is based on the construction of a building measuring 6x4 m. You can organize 3 or 4 rooms inside. The stove has an exit from the firebox to the dressing room of the bathhouse. If desired, a porch is provided at the entrance. An example of such a bathhouse project is shown in the first photo.
Project of a 5x4 bathhouse made of foam blocks
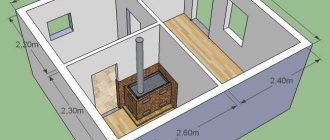
On a plot of 8 acres, it is beneficial to build a bathhouse measuring 4x5 m with a large, spacious attic. The access from the street side is organized using stairs. The project provides a relaxation room 2x4 m, a steam room 2x2 m and a washing compartment 2x3 m. According to the project, one bathhouse room measuring 1x2 m is allocated for a utility block. The entrance is from the yard.
Project of a 4 by 4 bathhouse made of foam blocks
Construction of a small bathhouse is the only solution if there is limited space. The project provides for a compact structure of 4x4 m. Inside the bathhouse there are 3 most necessary compartments: a steam room, a washing room and a relaxation room.
Advice! To increase the number of rooms, the bathhouse project will be improved with a second floor.
Bathhouse 3 by 3 made of foam blocks
The mini-bath project is popular among owners of summer cottages. The construction of a 3x3 m building allows you to organize only 2 rooms inside. According to the design, the washing compartment is connected to the steam room. Only the relaxation room remains separate in the bathhouse. Often such projects are improved with a second floor, where I create 1 or 2 additional rooms.
Project of a two-story bathhouse made of foam blocks
When developing a project for a two-story bathhouse, it is optimal to give preference to a building measuring 6x6 m. The area can be reduced or increased to 3 m2. On the second floor of the bathhouse, the design usually includes 2 or 3 rooms.
Most often, the upper floor is reserved for bedrooms and an additional recreation room. A special feature of the project is that there is no need for enhanced insulation of the second floor of the bathhouse. The rooms will be warm from the rising steam.
Important! The design of two-story baths requires the organization of effective ventilation.
Projects for bathhouses made of foam blocks with an attic
The project with an attic similarly involves the construction of a second floor in the bathhouse. They take him to a spacious recreation room with a billiards table. The space can be divided by partitions, organizing bedrooms and a room with a hookah.
Interior wall decoration
A lot of questions arise with baths made of aerated concrete. Including interior decoration. We decided on the steam room - it definitely requires lining. In the sink, it is more advisable to lay tiles on the walls.
What remains is mainly a rest room, sometimes a vestibule. Many people would like to have wooden walls. Since the humidity will still be high, you can attach a vapor barrier film to the walls. The sheathing will already go on top, and the finishing board will go to it.
It is better to leave a ventilation gap of about 2-3 cm under the lining
If a good ventilation system is thought out in the bathhouse, then you can completely do without a vapor barrier: aerated concrete both absorbs vapors and releases them. The main thing is to provide him with this opportunity: to organize air movement along the walls. This is done using lathing, which provides a gap of 2-3 cm between the finishing material and the wall. As soon as the lathing is filled vertically, air circulates from bottom to top without problems. So the lining is packed horizontally.
Do-it-yourself bathhouse made of foam blocks: step-by-step construction
They begin to build a foam block bathhouse with their own hands by laying the foundation. The next stage is the organization of drainage, forcing out walls, and building a roof. The final touch is the interior and exterior finishing of the bathhouse.
Foundation for a bathhouse made of foam blocks
Most foam block bath projects are based on the construction of a strip foundation. On the base it is convenient to remove walls from foam blocks.
Attention! If groundwater is located high, preference is given to a grillage foundation or a foundation made of a monolithic slab.
On dense, stable soil, you can get by with a shallow concrete strip. On loose soil, the project calls for deepening the foundation for a bathhouse made of foam blocks with your own hands below the freezing point.
The base for the bath can be made of two types:
- pour a monolithic concrete strip;
- lay out from ready-made concrete blocks.
In the second option, construction is simplified, but it is necessary to organize access for lifting equipment for laying blocks.
The thickness of the tape is made taking into account the width of the foam blocks. The edges of the foundation should protrude beyond the walls of the bathhouse. For a concrete strip thickness of 30 cm, a trench 50 cm wide is dug. The total height of the base is about 80 cm, of which 20 cm protrudes above ground level.
The construction of the base of the bathhouse consists of the following steps:
- The area is leveled and cleared of vegetation and debris. Markings are made from pegs and cord.
- The trench is dug to the required depth. If we take the average rate of soil freezing in most regions, then the hole is deepened to 80 cm.
- A cushion of sand and crushed stone or gravel is poured onto the bottom of the trench. The total thickness of the two components does not exceed 20 cm. The pillow is watered from a hose with water, and after the liquid is absorbed, it is compacted.
- Formwork is placed along the perimeter of the trench. The shields must protrude at least 20 cm above ground level.
- Inside the trench, a box-shaped reinforced frame is knitted from rods. Reinforcement is used with a thickness of 12 mm. The optimal size of the frame cells is 15x15 cm.
- Concrete with gravel or crushed stone is poured at a time with breaks of a maximum of 3 hours. The mixture is compacted with a vibrator or pierced with a rod to allow air to escape.
- The foundation of the bathhouse is covered with film and moistened daily. After three days, the formwork is removed, and the tape is given at least a month to completely harden.
Important! If the project involves the construction of a pouring floor inside the bathhouse, then ventilation windows - vents - are made in the concrete strip.
After the foundation hardens, construction of the sewer system begins. Remove all the fertile soil inside the tape, where the floor of the bathhouse will be. The pipe is placed outside the concrete strip at a slope of 2 cm/1 linear. m. From above, the pipeline and the entire area inside the tape are covered with a layer of sand 10 cm and gravel - 15 cm. After compaction, an armored mesh is laid on the cushion and filled with a concrete screed 15 cm thick. When it hardens, a monolithic base for the furnace is poured. Outside, along the perimeter of the tape, a similar screed is installed - a blind area, 50 cm wide.
Walling
In a month, the foundation of the bathhouse will stand, you can begin building walls from foam blocks. To prevent the porous material from drawing moisture from the ground, 2 layers of roofing felt are laid on the base along the width of the tape. Using a level, the entire foundation plane is measured again. If shrinkage occurs within a month and differences appear, they are leveled with a screed.
The construction of walls begins from the corners. The first row is laid on cement mortar. Each foam block of the next row is coated with glue 5 mm thick and connected to each other. Leveling is done with a rubber mallet and level. To ensure even laying of the entire row, pull the cord. If halves are needed, the foam block is cut with a hacksaw.
Each row is laid with a shift in half of the foam block, forming a bundle. After every third row, reinforcement is made. A groove is cut along the perimeter of the end of the wall using a wall cutter or grinder, rods are laid, and filled with mortar.
When building walls, following the design, provide window and door openings for the bathhouse. A lintel made of concrete, thick board or metal is placed above them. A new row of foam blocks is laid along the lintel.
Erection of the roof
If the bathhouse is not an extension to the house, it is optimal to build a gable roof. Work begins with overlapping, which comes in 3 types:
- Monolithic. Construction begins with the installation of formwork. Along the perimeter it rests on the walls, and the middle is supported by racks. A strong reinforced mesh is laid on the formwork and poured with concrete.
- Made from hollow concrete slabs. The bathhouse ceiling elements are laid with a crane.
- Prefabricated structure. For ceilings, beams are laid on the walls. They are hemmed from below with boards or plywood. Mineral wool is placed in the cells, protecting the thermal insulation with vapor and waterproofing.
The third option for constructing a floor is the simplest and most cost-effective. It is better to make the sheathing and install the insulation after the roof has been erected.
Construction begins by covering the end of the walls with roofing felt. The mauerlat is assembled from the timber. The frame is secured to the foam block walls with anchor pins. Beams are attached to the mauerlat, and rafter legs are attached to them. The optimal angle of the roof slopes of the bathhouse is 60°. The installed rafters are connected with boards, the sheathing is stuffed, roll waterproofing is rolled out, and the roofing is laid. If the attic is made warm, the bathhouse roof pie is assembled from waterproofing, insulation and vapor barrier. The gables are covered with any sheet material, for example, OSB boards.
Foam block bath: interior decoration
When the construction of the building is completed, the interior decoration of the foam block bathhouse with your own hands begins, and first of all, windows and doors are inserted into the openings. The next stage is the construction of the furnace.
The stove is made of red brick. You can simplify the task by installing a metal stove. In any design, there is a place on top for stones and containers for heating water. The chimney is led out through the roof of the bathhouse, where a non-combustible frame is installed in the hole.
Only wood is used for the interior lining of the steam room. The dressing room and other rooms can even be covered with PVC clapboard. Before installing the cladding, the walls and ceiling must be waterproofed.
Construction of the floor begins with waterproofing the screed. In the steam room, logs are laid and boards are laid. In other rooms, the floor covering works well with tiles laid on the subfloor with a layer of insulation filled with concrete screed.
How to make a ceiling in a bathhouse from foam blocks
According to the design, the ceiling in all rooms of the bathhouse is insulated with enhanced waterproofing. The heat is always at the top. If contact with cold occurs, condensation will appear. The ceiling of the bathhouse is covered with lathing. A vapor barrier and mineral wool are placed in the cells, and everything is covered with construction foil. In the steam room, the ceiling is covered with wooden clapboard. For other rooms of the bath, especially the shower compartment, it is allowed to use plastic.
How to insulate a bathhouse made of foam blocks
At the finishing stage, according to the project, the bathhouse is insulated from the foam blocks from the inside using mineral wool slabs. A sheathing of 40 mm thick timber is nailed onto the walls and ceiling. Thermal insulation is placed in the cells and covered with construction foil. The joints are securely taped with aluminum tape to prevent moisture from leaking out. The thermal insulation is covered with finishing cladding.
The floor of the bathhouse is insulated with polystyrene foam, pouring the slabs into a concrete screed. In the dressing room, electric mats of the “warm floor” system are laid under the tiles.
External insulation is mandatory, since foam blocks tend to absorb dampness from the street. For a ventilated facade of a bathhouse, lathing is attached to the walls, mineral wool is placed inside the cells, covered with windproof film, a counter-batten is stuffed, and the lining is fixed onto it.
Additional information about the construction of a bathhouse can be obtained from the video:
Floor installation
After the floor has been insulated, preparation of the base should begin. A reinforcing mesh is placed on the insulation. This is the time to remember to leave drain holes where they are provided.
Install the drains, seal the holes on them with tape so that the solution does not get inside. After installing the beacons, concrete is poured.
The concrete layer should be about 10 centimeters. As soon as it hardens, we make a screed up to five centimeters thick. This is necessary for the final leveling of the floor.
The last stage is decorative coating. Here everyone chooses according to their taste. You can put porcelain tiles, wooden floors, linoleum, quartz vinyl tiles.
Bathhouse made of foam blocks: reviews
Andrey Ivanovich Kolesov, 37 years old, Nizhny Novgorod
I read on the forums that the main disadvantages in the reviews of owners of bathhouses made of foam blocks are related to the protection of walls from moisture. I decided to take a risk. Construction was completed last year. The money spent on waterproofing and insulating the walls and making a ventilation façade was almost the same as on the purchase of foam blocks. The bathhouse served the season well. We'll see what happens next.
Sergey Viktorovich Konyukhov, 43 years old, Rostov region
On the Internet, one owner of a bathhouse made of foam blocks left positive reviews about his structure, attaching a photo of the construction. Following his example, I built myself a bathhouse measuring 3x3 m. I didn’t skimp on waterproofing. The bath holds heat very well. I don’t know what happens to the foam blocks under the casing, but I hope that the bathhouse will last for more than 10 years.
Recommended Posts
Bathhouse tent
Bathhouse attached to the house
Infrared bath: benefits and harm
High-tech bathhouse, loft and chalet – designer solutions…
Do-it-yourself bathhouse repair
Why is there no draft in the sauna stove?
Erection of the roof
Before erecting the roof, it is necessary to carry out waterproofing work to avoid moisture getting between the Mauerlat and the upper part of the outer wall. To do this, you can use several layers of roofing felt.
Be sure to treat the board for the Mauerlat with an antiseptic in two or three layers. The board is selected to the maximum suitable length to reduce the number of joints. Connections in the corners are reinforced with forged brackets or metal plates. After installing the Mauerlat, begin attaching the rafters.
The rafters are placed half a meter outside the bathhouse box to protect from snow and rain. If sheet roofing materials are used that are laid overlapping, the distance between the rafters is made according to their sizes. The frame is attached to the mauerlat using studs and anchors.
Next, the sheathing is made and a vapor barrier film is attached. The next step is to install the hooks for the gutters and the gutters themselves. The bottom of the roof and gables are sheathed with sheets of metal profiles if the roof is gable. The roof is covered with sheets of metal, snow guards are made, and skates are installed.
How to build?
After a detailed construction project has been developed and all the necessary materials have been purchased, you can begin building a bathhouse with your own hands. The first stage of construction will be laying out the foundation. If you build a columnar foundation, you will need nine blocks that will form the basis of the structure. Work should be carried out in a certain sequence.
- It is necessary to prepare a plot of land for construction, preferably on a flat surface. This area is cleared, debris, grass, and shrubs are removed.
- Make markings for the foundation and install formwork.
- Pour the foundation and install pillars in the prepared places, which will serve as the foundation of the entire structure.
- Next, you need to leave the base for several days until it dries completely.
After this, you can proceed to the construction of the building frame. It is most often made from wooden beams. It is necessary to treat the material with an antiseptic in advance so that it lasts much longer. Marking is carried out, the material must be laid along the outside of the building and secured with nails.
After finishing the piping, you can move on to arranging the walls. They are also made from wood that has been prepared in advance and treated with an antiseptic solution. The boards are attached very tightly to each other on the axis
It is important not to forget about door and window openings. Professionals recommend equipping a stand at the point where the frame is connected to the wall for greater structural strength.
The construction of walls should always start at the corners to prevent the structure from slanting.
Having completed the construction of the walls, you can proceed to arranging the roof of the bathhouse. All work is carried out according to a standard scheme. It is necessary to provide excellent ventilation to ensure that steam and condensation do not accumulate under the roof. Doors and windows can be installed in the formed door and window openings. You may prefer a metal one as an entrance door, while wooden ones are suitable for internal ones.
It is necessary to take into account that the door to the steam room must be made of thick wooden beams or tempered glass in order to maintain the temperature in the room well.
After erecting the foundation, walls and roof of the building, it is necessary to carry out the external finishing of the frame bathhouse. Here the choice of materials is unlimited and depends only on the imagination and material resources of the owner. The following materials are well suited for exterior finishing:
- tile;
- plaster;
- siding;
- boards;
- eurolining.
Lining is certainly suitable for finishing the inside of a bathhouse. It is a natural material, environmentally friendly, and does not pose any harm to humans during severe temperature changes. In addition, it is very durable. It is worth abandoning the interior decoration using such popular plastic panels today. When heated too much, they produce harmful chemicals and can even melt.
It is also better to make the floor from wooden planks. But you should not cover them with paints or varnishes that cannot withstand high temperatures. It needs to be well polished and simply treated with an antiseptic.
Insulation from the inside
The insulation of the bathhouse must be carried out correctly. The first step is to insulate the foundation and underground. You can insulate it with mineral wool, using expanded clay, and also use polystyrene foam.
Walls can also be insulated with foam plastic; it can be easily mounted on the surface. It is inexpensive and holds heat well and does not absorb water.
Expanded clay is also used to insulate walls. The ceiling also needs to be insulated; for this, a frame is made of slats and a metal profile that will support the insulation.
A waterproofing film is attached on one side, which should not touch the insulation itself, and aluminum foil on the other.