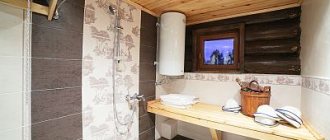
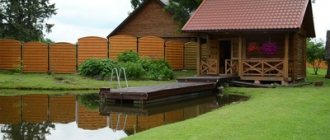
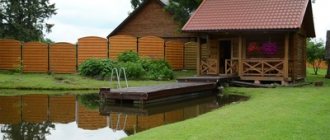
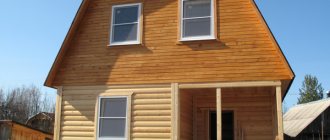
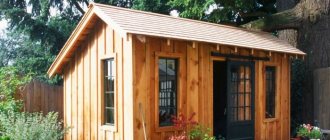
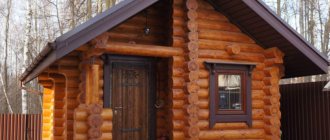
When there is no extra space, when the available area is very small, but you still really want to get a bathhouse, you have to consider miniature options. In such a situation, a 4x3 sauna can be a very promising solution. This particular solution is considered the smallest; building a bathhouse even smaller simply does not make sense. After all, this small area should accommodate a steam room and a dressing room, and somewhere else it will be necessary to organize a washing room.
Just finished work
But 3x4 baths are easy to build; you can actually install them with your own hands without any problems. When creating them, you need to purchase or prepare a minimum of material, and the construction process itself can allow a beginner to master the basics in order to later engage in more serious and large buildings.
Important! At least one side of the steam room in such a bath should have the dimension of human height, be at least 190 cm. This will make it possible to install shelves on which a person can lie at full height while steaming.
Drawing of a mini-bath with a swimming pool
Even a bathhouse with dimensions of 3x4 m can have a swimming pool. Even if the parameters are very small, it can be arranged on the terrace or in the rest room. This solution is indispensable if the structure is located far from bodies of water or is planned to be used regardless of the season. Projects for 3x4 baths at the dacha photo can be seen below.
It is better to give preference to closed types of pools, that is, located inside a log house. But if the bathhouse is used only in the summer, you can purchase a special canopy for the pool and make it open.
Cascade-type pools have become very popular today. In them, the water can be graded from very hot to icy. The bowls are arranged in steps, one above the other, so they do not take up much space. There is enough space for one person. Of course, you won’t be able to swim in such a tank, but there will be enough space to cool down and strengthen your body.
It is necessary to properly equip drainage holes (at least 5 m from the building and the pool itself), make a concrete base, carry out waterproofing work and purchase a skimmer.
Construction of a columnar foundation - instructions
Forms are sometimes made from improvised materials
It is reasonable to use this foundation when erecting a bathhouse on slopes, unstable foundations and heaving and peaty soils. Often such a foundation is built from asbestos cement. Here the stages of work are as follows:
- Holes are dug for the planned pillars.
- A 20 cm layer of sand (pillow) is laid. It is thoroughly watered and compacted.
- Pipes are placed in the constructed pits.
- The pits are filled with concrete. Reinforcing bars are inserted.
- The pipes are filled with concrete. A grillage is being made.
Positions of pillars: corners of the building and areas where walls intersect. The maximum distance between pillars is 2 m. The pillars are connected by concrete lintels with reinforcement - grillages.
When working on this foundation, a lot of money is spent on creating pit-wells. Digging them by hand is not at all effective. It makes more sense to work with a hole drill. This way you can achieve the desired shape - a cylinder and a depth of 250 cm
To strengthen their walls, it is important to prevent the assimilation of soil with concrete. Ruberoid lies between them
A cylinder with the required parameters (height and diameter) is formed from roofing felt. An industrial stapler is used in this work.
Concrete is poured quickly, otherwise the soil walls will collapse. A car mixer helps in these operations.
The process of working on a columnar foundation. If the location of groundwater is very close, then the following actions will be required:
- Form future concrete columns of the required parameters in the pipe and fill them with the composition.
- Place a pair of mounting brackets at the top (min. thickness: 8 mm).
- These staples should be buried 50 cm into the concrete.
- Attach the columns to the brackets; a crane hook is used to position them in the desired positions.
- Use staples to tie to the grillage.
- After a month, drill holes and arrange columns in designated places.
When working on such a foundation, you can use piles. Their top layer is eliminated. This exposes the reinforcement required for connection with the grillage. In this situation, columnar backfilling is used little. Since laying a stone through a narrow hole is an extremely difficult operation. You have to spend more materials and make a columnar base in the shape of the letter V. That is, its top will expand.
Advantages and disadvantages
It would take a long time to list the advantages and disadvantages of blocks in bath walls. Everyone will find their own qualitative differences in this material, both good and bad.
It’s still more pleasant to start with the positives:
- foam blocks do not shrink at all;
- the bathhouse is ready for use immediately after construction, external and internal decoration and installation of the stove;
- minimum construction period;
- the cost of the finished structure is two times lower than a wooden frame or brickwork;
- absence of harmful chemicals in the production of concrete blocks and, as a result, absence of unpleasant odors;
- low weight of the material, allowing for easy masonry and the use of the simplest foundation;
- has high heat-repellent qualities;
- are not subject to the growth of mold, mildew or other microorganisms;
- The thickness of the walls is good because you can use just one block at a time, this will be enough to create a warm, comfortable room.
But there is often a fly in the ointment. Therefore, we note the disadvantages:
- If the blocks are not treated with a special hydrophobic solution, they can easily absorb moisture. In winter, even with double insulation, it can freeze and ruin the walls of the bathhouse. The structure may simply crumble.
- When using concrete blocks in such a building with high thermal parameters, the problem of condensation on the walls arises.
Preparation for construction work
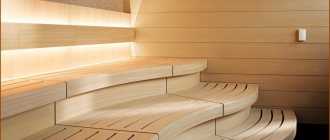
Steam room.
Next, we plan the upcoming work step by step:
- we determine the location of construction;
- We prepare a detailed construction project;
- We calculate the required amount of building materials;
- carefully select foam blocks and cement;
- prepare tools and equipment;
- pour the foundation;
- we install a drain;
- We waterproof the basement and interior spaces;
- we build walls;
- we build a roof;
- We complete the interior and exterior decoration.
After we’ve made the drawings, counted the blocks and found a suitable location, we get to work. It will take 2-3 weeks to pour the foundation, taking into account the complete hardening of the cement. Construction will take the same amount of time. In total, it will take a month and a half to erect the building with your own hands.
Projects
When drawing up a project, it is recommended not to forget about important nuances. The layout is divided into two main rooms.
In one there is a rest room, in the second there are:
- steam room;
- shower;
- toilet.
The sizes of the rooms inside do not have to be the same. Here everything depends on the will of the homeowner.
For a compact location, the stove is installed near the wall on the side of the rest room. The unit can also be located in any part of the facility; this is a purely voluntary matter.
It is important that fire safety is at the proper level
An important detail is the vestibule; its presence makes it possible to:
- keep warm in the winter season;
- free space in other rooms is saved.
In the process of designing a 5x4 m bathhouse, it is necessary to keep in mind the following essential details:
- the entrance can be made from any side, this is due to various features of the layout of the site and the object itself;
- the space between the main house and the bathhouse is made at a minimum distance;
- the distance between rooms should be minimal;
- the drain pipe should be located as close as possible to the sewer pit;
- Most often, the steam room is made more spacious than the washing room.
A sink is equipped, and in the steam room there is a wood-burning or electric stove. Shelves are made in the room, the width of which is at least 50 centimeters. You can make a separate toilet.
Thus, 4x5 meters is quite enough to make a good bathhouse; there may be enough space for this. The adjacent room is heated by heat coming from the steam room.
The second option is the construction and arrangement of a bath house. This option is popular. You can make a porch and terrace measuring 140 x 390 cm, which is enough for the whole family to fit at the same table with guests.
The dressing room can really be made very multifunctional. In it you can:
- store firewood;
- change clothes;
- while relaxing, watch TV or sing karaoke.
Be sure to cover the wall with fire-resistant material; the place where the stove is located is sheathed with stainless steel, the thickness of which is at least 2 mm. In such a compact bath you can install a small shower and toilet. Installing a small vestibule never hurts; it can be either in front of the locker room or in front of the steam room.
The advantages of the veranda are obvious:
- this could be an ideal place to relax during the warmer months;
- a wide canopy and the presence of windows can solve problems if the weather is inclement.
When designing a bathhouse, it is important to calculate the size of each room. It should be taken into account when planning: how many people will be in the room at the same time
If 2-3 people are steaming, then a steam room of no more than 5 square meters will be enough.
The dressing room is convenient to use for placing a table and chairs, as well as a TV and refrigerator. Some homeowners even install a microwave oven.
The dressing room is calculated according to the following rule: one person – at least 1.2 square meters of free space.
Often, a double-glazed window is installed in the dressing room to improve air exchange. The door leading from the steam room to the dressing room should open towards the dressing room.
The washing room is an important room in which both cold and hot water should be present. Water can be heated using a water heater that is in contact with the stove
The calculation is made per square meter per person. It is also rational to place a shower stall in the washing room.
The main factors that influence the design of a room:
- dimensions of the furnace and its technical features;
- the distance between the stove and surrounding objects in the room;
- the number of people who can be present in the room at the same time;
- the dimensions of the shelves and their location.
When talking about calculating an average of one square meter per person, it should be borne in mind that this area does not include the square meters that are occupied by various objects located in the steam room, as well as passages. The height of the steam room is about two meters.
Such parameters make it possible for maximum heating of a small room.
It is desirable that the room exceed two meters in length and width. Shelves are often made even more than one meter, with a length of 2.2 meters. These sizes allow almost any person to comfortably fit.
The main parameters of the design of a 4 x 5 meter bathhouse, protected from wind and rain:
- area along the external base – 20 m2;
- internal area – 12 m2;
- veranda – 3 m2;
- steam room – 5 m2
- washing room – 4.3 m2;
- dressing room - 3.5 m2.
We see that the plan for a 4x5 m bathhouse is not difficult to make. But you can buy a ready-made bathhouse, it will cost around 500 thousand rubles, but this does not include the price of finishing and insulation.
Creating formwork
It is more expedient and cheaper to use some old boards or cuttings of new ones for formwork. If this is not possible, then you will have to buy the required quantity.
The formwork must be erected all at once and also in one go, then concrete must be poured into it. The height of this structure depends on the depth of the trench, but for a shallow version it should be about 80-100 cm. The distance from wall to wall of the formwork should be about 20-30 cm.
To prevent the formwork from deforming, it is necessary to install small wooden beams at a short distance between its two sides, which will support the walls and prevent them from collapsing.
Bathhouse made of foam blocks: projects, photos
Drawing up a project is the initial and mandatory stage of building a bathhouse. It allows you to determine the size of the premises, the location of windows, doors, communications, and also calculate the amount of building material required.
Traditionally, a bathhouse consists of a dressing room, steam room, shower, toilet and rest room. Of course, you can clean some room, but keep in mind that in this case the bathhouse will be less comfortable to use. But if you are designing a bath house, then you can leave only the dressing room and steam room; the rest of the amenities are enough to have in the house itself.
On the Internet you can find free projects for bathhouses made of foam blocks, and you can also immediately see how the building will look in the future. Another option is to contact specialists who will draw up a project specifically tailored to your requirements and taking into account the characteristics of the territory itself. Which option to choose depends on your knowledge and needs. If you are well versed in this area, then you can try to design a bathhouse from foam blocks with a relaxation room yourself.
When drawing up a project, you need to take into account the future location of the bathhouse, assess the groundwater level and financial capabilities, and select or draw up a drawing based on these indicators. The size of the steam room depends on how many people plan to visit it.
Keep in mind that over time your family may grow, possibly making new friends. Therefore, it is better to make a bathhouse with a small reserve, since you are building this structure for more than one year.
Also think in advance about which sauna stove you will choose. For gas, you need to install pipes, for electric, prepare wiring. If the sauna is wood-fired, you may need to make a protective screen around it.
Below are ready-made bathhouse projects made from foam blocks. Of course, this is only a small part of the projects. The location of the rooms and their sizes may vary, it all depends on your desires and needs.
Bathhouse projects made from foam blocks with a terrace will be convenient and functional. You can place a table and chairs on it, then on a summer day, after warming up in the steam room, you can have a snack and relax in the fresh air.
A good design for a bathhouse made of foam blocks for a small area is based on the construction of a building measuring 6x4 m. You can organize 3 or 4 rooms inside. The stove has an exit from the firebox to the dressing room of the bathhouse. If desired, a porch is provided at the entrance. An example of such a bathhouse project is shown in the first photo.
conclusions
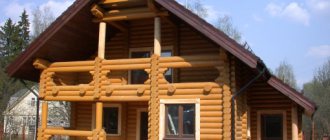
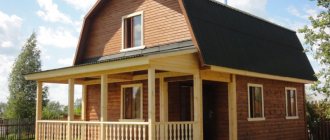
The photo shows a small bathhouse made of natural material!
Such a building does not put forward any special requirements; it can be erected fairly quickly and without calling in specialists. And even with the choice of project there will be no problems - almost all of them are of the same type (see also the article “Layout of a 3x4 bath - even if it’s “tiny”, but it still requires a plan”).
Did you like the article? Subscribe to our Yandex.Zen channel
The process of building a small bathhouse
When building small baths, savings can be seen at almost every stage of the work. This applies to both the construction of the foundation and the finishing work inside the premises. For a small bathhouse project, a lightweight strip base is most often chosen. Serious cost savings can be achieved at the stage of purchasing building materials. Although the buildings being erected are oversized, most often the expected difficulties do not arise during the connection of rows of logs during their laying and selection of suitable lumber.
Small baths provide an undeniable advantage to the owner, which is associated with the heating process. For such structures, minimal power equipment is sufficient, which costs much less than traditional furnaces. An additional opportunity for savings opens up when choosing the technical support for a bath. As a rule, the most primitive and easy-to-manage option is chosen here.
Important points
Before starting all construction work, the design of a 3x4 frame bathhouse (and any other as well) must contain a number of technological and construction solutions.
- Thermal insulation. High-quality measures for sealing and insulating the bath will guarantee good air exchange. For these works, fiberglass or mineral wool is most often used, because they have excellent characteristics;
- Vapor barrier. The main disadvantage of frame construction is the appearance of condensation. This is explained by the fact that moisture penetrates into the frame through cracks during rains and snowfalls. Therefore, in order to avoid such a phenomenon, you need to carry out this stage of work well.
A good solution would be to use a vapor barrier film or glassine; they are placed between the layer of inner cladding and insulation. Experts do not recommend using roofing material, since when heated it emits an unpleasant odor;
Choosing the right wood. Only good dried boards are suitable for construction work. Aspen, larch and linden are ideal for these tasks.
They have a low thermal conductivity and are almost not deformed. The lining itself must be without flaws and of the highest quality.
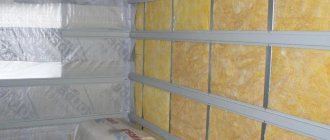
Foiled mineral wool
Making walls
Before installing walls, you need to decide on the location of doors and windows. In a small bathhouse, racks are formed at the corners of the building. On the front and rear walls, which are longer, additional racks are installed in the middle. But they can be displaced due to the way windows and doors are installed.
Step-by-step procedure for constructing walls:
- Install corner posts. In a vertical position, they are first fixed temporarily with slats, but strictly according to the level.
- Place vertical racks on the sides. The lower parts of the side posts are secured with metal corners. Then this is the procedure for the front and back walls.
- Additional reinforcing elements are installed in the form of beams. Boxes for windows and doors are formed according to size. There is only one door. There are one or two windows for the locker room. Small in size to prevent heat loss. The purpose of windows is ventilation.
- All connections are reinforced with metal corners. It is recommended to use self-tapping screws instead of nails - it’s more reliable.
- In the same way, the bases of the walls inside the bathhouse are formed according to their availability.
- After the frame of the walls is formed, they are sheathed. Lining or OSB boards are suitable as cladding.
After covering the external walls, insulation is installed. To form the frame, a 10x10 cm beam is usually used, so the insulation should not be thinner. How to build a frame bathhouse with good insulation is to use mineral wool. Inexpensive material that is easy to seal cracks. They must be carefully closed; there should be no gaps. If you miss some connection without insulation, this will lead to a rapid loss of temperature inside the bath.
The vapor barrier is made of foil. The minimum thickness is 40 microns. The foil joints are connected with tape. The order of installation is from top to bottom in stripes. A stapler is used to secure it to the wood, but glue can also be used.
The template will make it easier to install the rafters. It is made of light boards and placed next to the installation site of each rafter. It is easy to avoid mistakes with such a system.
Instructions for forming the roof:
- Assembly is carried out on the ground for ease of operation and manufacturing accuracy. Then the finished structure is raised.
- Each part is installed in its own place above the central beam. Places must be marked in advance with a bright pencil.
- The roof must have ventilation holes. A sheathing is installed between the rafters and the counter-batten.
- It is easier to cover the gables with OSB boards - this will form a solid element.
Slate is the best roof covering. Roofing felt is not recommended because it tears quickly and easily. You can use metal tiles, it’s more aesthetically pleasing. But when it rains, metallic tapping will be heard.
Features of 4x4 m bathhouse projects
The typical 4x4 bath design is classic. A one-story building is compact, which means you need to use the space as efficiently as possible. Each project has its own characteristics - it differs in layout, number and location of windows and doors (entrance, interior).
For some thoughts about the layout of the bathhouse, watch the video:
Bathhouse 4x4 “Mariana”
Equipment supplied by the manufacturer may vary, but standardly includes the following elements:
- Support-column foundation - 200x400x200 mm blocks or screw piles are used as supports.
- Box made of profiled timber 100x150.
- Strapping made of timber 100x150 (per edge).
- Inter-crown insulation – jute.
- Ceiling lining – lining and URSA 50 mm insulation.
- The rough floor is a 20 mm edged board, the finishing floor is a 27 mm tongue and groove board.
- Vapor barrier for the floor - Glassine, Isover insulation 50 mm.
- The design of the partitions is frame-panel.
- Roofing – timber 50x100 mm (for rafters), irregular board 20 mm (for sheathing).
- Roof covering – metal tiles or ondulin (wide range of colors).
- Double glazed windows 600x600 – 3 pcs.
- Steam room - cladding made of aspen lining, gasket made of foil.
- Entrance door – 1 pc.
- Bath doors – 2 pcs.
The height of the building is 220 cm, the ridge is 150 cm. The turnkey cost is from 250 thousand rubles.
Classic design of a 4 by 4 bathhouse “Maryana”Source m-strana.ru
Bathhouse 4x4 with attic
In this project, the steam room area is 4 square meters. m. (2x2). These dimensions are the most optimal and convenient for several people staying in the steam room at the same time.
The basic configuration of the bath includes the following elements:
- The foundation is support-columnar - blocks 200x200x400 (4 pieces in a cabinet).
- The strapping is 150x100 timber in 2 rows, treated with an antiseptic.
- External walls are profiled timber 145x95.
- The subfloor is unedged board 22x100.
- Logs – 40x150 mm.
- The finishing floor is a 36 mm tongue-and-groove board, NANOIZOL “V” vapor barrier membrane.
- Floor insulation – mineral wool URSA, KNAUF 100 mm.
- Waterproofing – rolled roofing felt (1 layer).
- Internal partitions - profile timber 145x95.
- Inter-crown insulation – 6 mm jute fabric.
- Single-flight staircase with railings and railings to the 2nd floor (attic).
- Insulation of the interfloor ceiling - mineral wool URSA, KNAUF 100 mm, vapor barrier NANOIZOL "V".
Attic:
- The cladding of the walls and ceiling is eurolining 12.5x88 mm.
- Insulation for walls – KNAUF or ROCKWOOL, vapor barrier membrane NANOIZOL “V”.
Layout of the first floor of a bathhouse with an attic Source m-strana.ru
Roof:
- Rafter system - board 40x100 or 40x150 mm, lathing - board 22x100, 22x150 mm.
- The gables are timber 40x100 mm, the outer cladding is lining 17x90 m.
- Roofing material – galvanized corrugated sheeting or ondulin in a wide range of colors.
Steam room:
- Walls, ceiling - aspen paneling.
- Thermal insulation is a foil-based membrane NANOIZOL “FB”.
- 2-tier shelves - aspen boards.
Interior doors are framed 1750x700, entrance and vestibule doors are paneled 2000x800. Double glazed windows 3 pcs. different sizes - 1200x1000, 600x600, 400x400 mm.
The height of the 1st floor is 224 cm, the attic is 220 cm. The cost of a turnkey bathhouse is from 350 thousand rubles.
Projects of other sizes: photos and videos
Bathhouse dimensions 3x4 made of timberSource bymosque.ru
Bathhouse 4x4 - economy optionSource m-strana.ru
Bathhouse 6x4 with atticSource svoyabesedka.ru
Bathhouse 6x6 with an open terraceSource rus-plotniki.ru
In the video, watch an overview of the turnkey bathhouse:
Despite their modest size, 4 by 4 bathhouse designs are quite diverse. Consultants of the construction company that you choose to build a bathhouse will help you choose the best option, and if you need an individual project, they will involve design specialists in the matter.
Interior decoration
Despite the many trends in the design of modern baths, the most popular is still the traditional decoration in the Russian style with ordinary benches in the steam room and traditional bath utensils.
In the classic version, the Russian bath has three main zones:
- dressing room or dressing room;
- washing compartment;
- steam room
In this case, the washing room and steam room can be combined, and the dressing room is divided into a relaxation room and a separate locker room.
By choosing an antique design for decoration, you can bring wooden utensils (ladles, tubs, tubs) into the interior of your bathhouse, purchase bath furniture with carvings or forging elements, decorate the walls and ceiling with bundles of brooms and aromatic herbs. Textile accessories can include weaving and embroidery.
For those who want to use modern finishing materials, such as ceramic tiles or chrome faucets, in the design of a Russian bath, you should remember that all elements must be in harmony with the overall design line
Remember that it is extremely important to choose the best combination of simplicity and modern design elements to introduce a casual touch of bad taste into the interior
Lighting is also important: it should be warm and subdued, emphasizing the intimacy and tranquility of the atmosphere - first of all, this rule applies to lighting in the steam room. To diffuse bright light, you can use special filters
Calculation technology
The estimate can be calculated either independently or ordered from a construction organization. At the same time, when doing independent calculations, you must have at least a little experience in carrying out construction work. In the case where there is no such experience, it is recommended to consult with an experienced builder who will tell you all the intricacies of drawing up an estimate.
In addition, on many construction sites there is a calculator for calculating the construction of a bathhouse. This is a special program with which you can easily calculate the costs that you can spend on construction work. To do this, you will need to enter in the appropriate form the figures for the volume of building material you need, its type and other data. At the end, you will be able to get ready-made figures that you can rely on during the preparation stage of construction work.
We suggest you familiarize yourself with: Lacquer for steam rooms and saunas
Calculation of blocks for the construction of a bathhouse using formulas, as well as a calculator for this, are usually posted on their Internet resources by various construction companies and sellers of building materials. As a result, you can not only calculate the cost of the building material you need, but also order it immediately.
Subtleties of the preparatory stage of construction
There are several rules for placing a building that will facilitate the operation of the bathhouse in the future.
Bathhouse layout
The bathhouse can be installed separately or combined with another structure: make it part of the house, connect it with a summer kitchen or workshop. But experience shows that such a neighborhood can lead to dampness and an unpleasant odor. Proper planning of sewerage, ventilation and waterproofing systems will help avoid such a situation.
When building a bathhouse, it is necessary to lay the foundation to the depth of soil freezing. Depending on the soil moisture, you can make a simplified version of the base. But, as practice shows, a 6x3 bathhouse is built on a strong foundation of stone, brick or concrete. After about 2-3 months, as soon as the base has dried and settled, you can begin construction.
The building is constructed from environmentally friendly materials that “breathe” and retain and release heat well. Wood is rightfully considered one of the best. Sometimes 3x6 baths are built from natural stone and brick, which are durable and more fireproof.
The lifespan of a 3 by 6 bathhouse depends on proper logging and drying of wood. Wood should be harvested from December to early March. The felled trees should lie down for several months, only after that can you begin to make logs and beams for building a bathhouse.
To preserve this building material, you must adhere to several rules.
- The log is cleared of bark. To prevent it from cracking at the edges, a strip of bark 15 cm wide is left at its ends.
- To prevent spoilage, logs are stored in stacks. In this case, the distance between the logs should be 5 cm, between the rows of the stack - 10 cm, between the ground and the first stack - 20 cm.
- The logs should be covered with some kind of roofing material, such as slate, so that they are not exposed to precipitation. There should be at least 5 cm between the slate and the logs.
- Protect logs from direct sunlight. Place the material in a well-ventilated place.
How to repair a foundation
Often, if the technology for arranging the base of a bathhouse is violated, over time the foundation begins to collapse. What to do, completely dismantle the structure, or repair the foundation?
Repairing the foundation on your own is possible, you just need to know the sequence of work in each specific case.
Strip foundation repair
In order to carry out high-quality repairs, you need to raise the frame of the bathhouse above the base. This is usually done by using cargo jacks, ideally there should be at least 8 of them: 4 are placed in the corners, and one in the middle of each wall.
Here you will need help, since it is advisable to lift the corner jacks at the same time.
Advice: if you do not have assistants or there is only one jack, then you need to lift the frame gradually so that there is no distortion of the walls. The corner of the bathhouse is raised a short distance, a support is placed, then we move to the second corner, and so on.
Once the frame is raised to the required distance, you need to assess the scale of destruction of the base. If the foundation is cracked and crumbling a little, it can be reinforced with strapping wire and reinforcement around the entire perimeter, formwork installed, and filled with concrete. The foundation will turn out to be a little thicker than the previous one, and thanks to reinforcement and filling it will be strengthened.
If the damage is significant with a misalignment of one or more corners, then it will have to be completely removed, right down to the sand cushion. Sometimes, on heaving soils with shallow depth, the foundation can rupture when the soil freezes. If this is the reason, then it is worth increasing the depth of the trench. Once the trench has been dug to the required depth, a new base is poured. As soon as it dries, the frame is slowly lowered, not forgetting to lay the insulation.
Columnar foundation - repair
In this type of foundation, skewed pillars may occur. To fix this problem, you need to:
- place a support next to the skewed pole;
- After this, the old post is removed, and if necessary, the hole is deepened. Then you need to build a new harness and install it in the hole;
- the first stage is filled, the solution fills the hole to the soil surface;
- The formwork is constructed and the pillar is finally poured.
To strengthen the foundation, you can make a concrete strip around the entire perimeter of the log house, which will connect the pillars into a single whole, which will prevent their further distortion.
As you can see, there is nothing difficult in arranging the base for a bathhouse with your own hands. The main thing is to understand some points and know the nuances of pouring foundations of different types.
The construction of any building begins with the construction of a solid foundation. The bathhouse in this case is no exception. A sauna foundation is not much different from a house foundation. The characteristics and installation features of the most popular foundations for a bathhouse will be discussed in our article.
Do-it-yourself foundation for a bathhouse
