There are many options for stoves for cottages and houses. Some of them involve financial expenses, others require direct hands. What should we do for those who have not succeeded either with money or with skill? A simple brick stove that even a “humanitarian” can put together will help out.
The article discusses two options. The first one is suitable for those who want more or less “decent” heating and cooking equipment. The second will be useful to readers who generally do not pretend to be either a penchant for handicraft or any kind of aesthetics of the result.
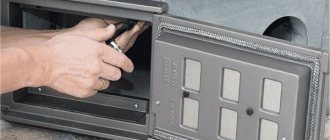
Figure 1. Simple brick oven
Let's get to work!
When all materials and tools are prepared, you can begin step-by-step work.
Laying the foundation.
The stove for the dacha will be based on a conventional strip foundation.
Stages of work:
- Mark the location of the foundation using a string. The base of the furnace must be built in accordance with strict geometric proportions. To do this, we recommend using a building level.
- Prepare a trench (a hole up to 50 cm deep).
- Having previously compacted the earth, place metal rods on the bottom, and then fill the hole with crushed stone. To prevent the soil from settling, you can additionally install rods across the hole.
- Dilute cement with sand (1:3) and pour the foundation. In a few days it will harden completely. To prevent the cement from cracking in hot weather, you can water it regularly.
- To protect the finished foundation from water ingress, cover it with a layer of roofing felt.
- To raise the base, install a cinder block base and cover it with a layer of asbestos. Another method is to install plank formwork, which is also filled with a solution of cement and sand.
- Mark the boundaries of the future structure.
We are building brick walls.
You can also do this yourself:
- Brick can be laid in two ways: horizontally or on edge. The direction can be controlled by a taut rope. Use a building level and a plumb line to ensure the masonry is level.
- After the first row has been laid, we proceed to install the blower door: using wire (its diameter is 3 mm) they will be attached to the brickwork. You must first make cuts in the bricks using a grinder.
- We continue laying, not forgetting to monitor the thickness of the seam: it should be 7 mm. Then the BRICK should be pressed and tapped with a hammer, and the excess mortar should be removed using a trowel.
- Don’t forget to include second ash doors on the OVEN drawing.
- When you finish laying the bricks, you need to lay an asbestos-cement slab on top of them, which should have holes for air. We need this stove for cooking or heating food.
- In the process of laying bricks, you can transform the design of the stove to your liking: equip places for an oven, a stove bench, etc.
We lay the stove arch.
Laying the arch is considered the most difficult stage in building a stove. And if the stove is located outside, the arch must be neater, because it will always be in sight of you and your guests.
Before laying bricks, it is good if two plywood are installed in the frying and combustion chambers, and the laying will be done on their surface.
We install a chimney.
Smoke from the stove is removed using a chimney. It is usually a steel pipe that is installed on the back wall of the furnace and cemented.
To prevent burns, the open lower part of the chimney is also covered with cement and lined with bricks.
We give the stove an aesthetically finished look.
Your garden stove can be turned into a real work of art using any heat-resistant material: finishing brick, tile or porcelain stoneware.
Use your imagination and create comfort around your fireplace: you can equip the stove with a bar counter, you can install a sink nearby, cabinets for dishes and food.
We check our stove, that is, we flood it.
It is necessary to pay attention to the draft, to the presence of cracks that may allow smoke to pass through. Once you are sure that your oven is working properly and has no defects, you can start cooking with it. And don't forget to follow safety precautions!
And don't forget to follow safety precautions!
Be sure to watch this short but very useful video:
- Decide on the type of stove to be installed outdoors.
- Decide on the location where the stove will be installed.
- Prepare a drawing of your future stove.
- Make a list of the necessary materials and tools, analyze the building materials market, and based on it, make a cost estimate.
- Develop a step-by-step plan for installing the furnace; this will help you navigate the time frame that construction will take.
- Start construction! And may your stove please you and your loved ones for a long time with delicious dishes cooked on it.
The tile installation technology is different
- With cutting of joints - removing mortar from masonry joints to a depth of about a centimeter
- No seams
Cladding using the method of cutting seams is considered the best - metal elements, hardware and dowels are not introduced into the masonry bricks, which pose a risk of cracking of the brick during thermal expansion, because the walls of the furnace can heat up by more than +500⁰C. The mesh is attached only with thin staples. In addition, when facing along cut seams, mechanical impacts on the furnace body will be minimized. But the labor costs for this method are, on the contrary, maximum.
It is dangerous to get cracks in the masonry while knocking the mortar out of the seams, especially in cases where the stove has been heated many times and the mortar seams have sintered to a stone state. Carefully cutting seams to a depth of 8-10 mm is not an easy and painstaking job and requires attention and experience.
Seam cutting sequence:
- First, soften the mortar joints a little with water, without strong impregnation - apply a damp cloth (rags, burlap) to the walls of the oven and leave this “soap” for an hour or two.
- Knock the mortar out of the seam with a narrow chisel (called a cross-section), which is used to cut a groove. The hammer is struck lightly, no force is used.
- When the softened layers run out, make new “lotions” and repeat the whole process until the seam is released by at least 8 mm, and preferably 1 cm.
- Remove all fragments and crumbs of the extracted solution, remove dust from the surfaces
- Apply the first layer of soil to the masonry surface. When facing with joint cutting, a two-component adhesive composition is used, and the primer component is applied first, completely filling the joints. The thickness of application depends on the composition used and is carried out in accordance with the instructions for use or instructions
- Next, install the mesh over wet plastic soil, and at a pace until the soil sets. For this reason, they do not cover the entire stove with soil at once, but work in 1-2 m2 sections.
Fastening the mesh along the cut seams:
- As soon as soil is applied to the first grip with an area of about 1-1.6 m2, the mesh is pressed into it and temporary fixation is made into pre-drilled holes, using dowels with plastic sleeves - three dowels at the top and three at the bottom. The dowels are driven not into the seam, but into the brick - this is a mandatory requirement. The holes in the bricks should be smaller than the length of the sleeves so that their edges protrude from the holes and can be removed with pliers.
- After tacking the mesh, permanent fasteners are installed - wire staples, sticking them into the seams filled with soil at intervals of 25-30 cm, after two or three rows of brickwork.
- After the soil hardens, remove the dowels and fill the remaining holes in the brick with soil.
- Then you need to wait until the soil is completely dry, including the holes - during this time the layer in which the mesh is pressed will have the necessary strength for further work.
When the mesh is attached to the masonry without cutting the seams, fastening is possible only with steel dowels. Plastic is not suitable for the outer walls of the oven, as it will melt when heated. In addition, hardware creates risks of cracking of brickwork due to the significant difference in the thermal linear expansion of metal compared to brick.
Do-it-yourself stove laying
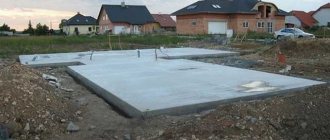
Foundation
Taking into account the large weight of the Russian stove, the foundation for it will have to be built separately (as well as for the fireplace). During the construction process, this is provided for by the design, and if it is decided to install the stove in an already used building, then the floors will have to be dismantled.
Masonry process
Furnace order - clickable
The stove can be purely heating, sauna, cooking, bread, or outdoor (for example, barbecue), although most often a combined scheme is used.
Considering that we will make the oven ourselves, we will consider one of the simplest and most affordable options.
The diagram shows the oven itself and its order - it’s not difficult to figure out. But to begin with, certain nuances should be noted (by level).
First
The correctness of its laying on the foundation determines the quality of all further work and the efficiency of the furnace. The outer contour is marked on the finished base, and bricks are laid along it. And only after the entire perimeter has been laid out, the internal sector is filled.
Second
In it, several bricks on the back side are not seated on the mortar. Then, during the process of servicing the chimney, all the soot that will be scraped from its walls will fall down. It is precisely so that it can be removed from the channel, a technological hole is left in the lower part of the furnace, in the masonry.
It is closed with bricks, but they are located with some shift forward, so that if necessary they can be easily pulled out. An option is to install a cleaning door instead of bricks. The purpose is similar.
Third
The installation of the blower chamber door begins with this row.
If, using the example of the first levels, the peculiarities of the masonry and the principle of deciphering the order are clear, then further work will not cause any difficulties. Everything is done in accordance with the scheme.
External design of the oven
There are many options - plastering with further painting, tiling, artistic painting, decoration with tiles. It all depends on the capabilities and imagination of the master.
What to consider:
- The inside of the masonry is not coated with mortar. Its layer will worsen heat transfer and become a soot deposition zone. Cleaning such a stove will be a very problematic undertaking. Therefore, any excess mortar that appears during the laying process is removed immediately.
- Before using the bricks, they must be soaked in water for about 4 hours. The artificial stone will absorb moisture, therefore, the drying process of bricks and mortar will be characterized by uniformity. This means that the risk of cracks or voids in the masonry will be practically reduced to zero.
- As practice shows, it is advisable to lay masonry (both external and internal) in “½” bricks. This feature will further ensure optimal fuel consumption.
- When doing the masonry with your own hands, each row should first be assembled “dry”. Even professionals practice this. Why? This preparation allows you to check the evenness of the masonry, select all the bricks in size and make sure there are no large gaps. Only after this the stones are planted on the solution.
- During operation of the furnace, if cracks are found in the masonry, they must be sealed immediately. In order not to bother with preparing the solution, you can buy a ready-made “repair” mixture. For example, “Chamotte mortar.”
Types of tile layouts may vary
- Vertical seams match. This layout is for tiles of the same size. If rectangular tiles are installed, then the layout can be both vertical and horizontal, while you can lay out colored contrasting zones and insert panels - it looks linear and neat
- Bandaging, or displacement along vertical seams. Used in geometrically complex areas so that trimmed fragments are not noticeable
- Diagonally. Artistic and complex layout, allowing for rare designs. Very original, but you will need about 10-15% more tiles, a lot of trimming and waste
- Tiles of different sizes are laid out in checkers, carpets, highlighting fragments and contrasting zones, panels and decorative elements are possible
Advantages and disadvantages
Designs with a built-in heat exchanger have many advantages:
- The system is energy efficient and economical. Brickwork will not require serious financial investments, the costs for pipes and radiators will be in any case, and the heat exchanger is an order of magnitude cheaper than ready-made boilers. When operating a stove, the cost of heating the house will be several thousand rubles for the purchase of firewood for the winter period.
- The design of a brick stove hides unsightly elements; if desired, a fireplace or decor can be added to the system.
- Heating of the room does not depend on the location of the structure; radiators can be installed anywhere
- A brick stove takes a long time to cool down; the water circuit will remain hot for several hours after the wood burns out.
Some publications list the advantages of the water circuit system as the possibility of installing it in a ready-made furnace, which is possible in principle, but in practice this option is associated with a large number of problems that have to be solved.
Disassembling and subsequent reassembly of the stove is the most necessary thing that will have to be done. The cost of correcting an incorrectly installed register is comparable to the cost of a new stove, so contact professionals for such work.
The disadvantage of this design is a continuation of its advantages; in order to make a stove with heat exchangers yourself, experience is required, both in laying bricks and in installing heating systems. If experience comes with age and the amount of material studied, then when building a furnace with a water circuit, its disadvantages should be taken into account:
The fireplace is a fire hazard; it is necessary to take measures to prevent fire from reaching flammable objects; The stove takes up a significant area of the house, design the rooms in advance, include a large heating system in the design of the room; The temperature near the stove will always be higher than in the rest of the room; The heating process of the oven cannot be stopped instantly. If you are using a closed loop system with a circulation pump, turning off the electricity (even briefly for a few minutes) and stopping the pump will cause the water in the heat exchanger to boil. To avoid this, provide a combined system for water movement in the circuit. If the heating system is not used regularly, the water must be drained, which leads to premature wear of the entire structure. Otherwise, the water will freeze, which will lead to the destruction of the entire complex of devices. You cannot light the stove without water in the circuit.
This will lead to the destruction of the register and the reconstruction of the stove in order to use the stove in the summer without “turning on” the battery using the original design of the installation of heat exchangers. There is a risk of carbon monoxide poisoning, as with all solid fuel heating products, special attention must be paid to the correct manufacture of the chimney.
Making a heating system in your home based on a stove with a heat exchanger and batteries is an economically viable solution, but the design and construction must be approached competently, taking into account all the nuances of the work.
Rehearsal for the future oven
Gaining experience in this craft is quite easy. To do this, you will have to make small bricks yourself, for example, five times smaller than standard ones, and build a stove five times smaller. Wait until the solution sets and try to heat it.
In this way, you can check the level of acquired skills. Then you can disassemble the stove and try to assemble another model, thereby training your hand on different models and their features.
The main attribute of any stove is the pipe. Folding the pipe is one of the main points in laying the entire furnace, so you must strictly follow all instructions.
The process of constructing a small-sized furnace
The small-sized oven occupies only 0.4 square meters. It is laid out from bricks placed on edge or flat. If you know the basic rules for building a stove, then you won’t even need a diagram or preliminary calculations to build it.
Due to the relatively light weight of the mini-oven, it does not require a foundation, but in this case a thick, durable board, well secured to the joists, should be used for the floor.
Order of masonry
- The first stage is traditionally choosing a place and preparing it for the construction of a furnace. To do this, you need to lay a piece of plastic film, roofing felt, hydrosol or glassine measuring 78 by 53 centimeters on the surface. Pour dry sand on top of the litter (layer thickness 1 cm) and level it.
The first row of bricks is laid out on the sand (12 bricks are used without fastening) strictly horizontally, which can be checked with a level. On top of the first row we thinly apply a clay solution and install the blower door. Pre-wrap the door with a piece of asbestos cardboard or wrap it with cord. Secure it with wire.
- We are laying the second row of our stove.
- We lay out the third row of fireclay bricks. We install a grate on it, which will be located strictly above the ash pit.
- In the fourth row, the bricks are laid edgewise. And inside the chimney, a stand is mounted on which the internal partition will be installed. When laying the back wall of the stove, do not use clay, but use so-called knockout bricks (for this they should protrude slightly outward).
- The next essential element of any stove is the firebox door. Wrap it with asbestos cord before installation. We secure the door with wire, use two bricks for temporary fixation: one on the back, the second on the first, and install the door on top of them.
- We lay the bricks in the fifth row flat, following the contours of the fourth row.
- We place the bricks of the sixth row on edge, and then rub the walls of the oven with a damp rag.
- For the seventh row, we again lay the bricks flat. At the same time, in order to ensure a connection between this and the next row, you need to start with three-quarters. Then place two bricks on edge and begin building the back wall. Arrangement diagram for a small-sized oven
- When laying the eighth row, keep in mind that it is this row that will close the firebox door. To direct the flame from the stove to the middle of the hob burner, place a brick on top of the firebox at a slightly slanted angle. To ensure a tight connection between the slab and bricks, lay out a slightly wetted asbestos cord.
- We begin laying the ninth row, shifting it slightly so that the door remains in the open position.
- The tenth row of bricks begins the formation of a chimney, which will gradually expand towards the rear. The design of such a small-sized stove does not allow the installation of a brick stack pipe, because it will lead to a change in the center of gravity of the entire building.
- In the eleventh row, we install a valve, which we first seal with an asbestos cord coated with clay mortar. This will be the junction of the chimney with the metal one. If the pipe moves to the side, make an overlap of three rows of bricks.
- After this, remove the knockout bricks and clean the chimney from accumulated construction waste.
- Whitewash the stove. Just don’t forget to add a little milk and blue to the whitewash solution. This will prevent possible yellowing of the stove in the future.
- Edging the bottom of the stove with a plinth will help prevent sand from spilling out under the bricks. Nail the baseboard evenly and tightly, avoid gaps. This will give the mini-oven a neat appearance.
- For the first time, heat the stove with wood chips and paper to avoid cracks from sudden temperature changes. To dry it well, leave the doors open for a week or two.
We also recommend reading: “How to make a rocket oven with your own hands”
Our mini-oven will subsequently withstand significant temperature changes, last a long time, and bring comfort and warmth to your home. And to build it, you don’t need to pay a high price to professional workers. Its design is so simple that you can do it yourself just fine.
We recommend that you watch a video on how to make a small stove with your own hands for a summer house or garage
An even simpler version of the stove
If the previous option seemed complicated to someone (although it is not), we can offer an extremely simplified heating design. You can lay out this oven with your own hands in literally an hour, even if your hands are far from being called golden.
Figure 4. The simplest version of a brick oven
The operating principle of the structure is simple. Solid fuel burns below, and settles here under the influence of its own mass. Temperature changes create a draft that carries hot air currents upward. In this case, the firewood burns almost without a residue - the smoke is minimal.
For masonry you will need only two dozen whole bricks and two halves. The stove consists of five rows. The design is so simple that there is no point in describing the order. The procedure is clearly shown in the illustration.
Figure 5. Order of the simplest brick structure
* If you lay the bricks correctly (and it is very difficult to do otherwise), the result will be similar to that shown in the photo. It is recommended to bind the bricks with clay mortar. But in field conditions, you can do without binding material - just put the components on top of each other according to the order. In this case, the stove is built in five minutes.
Figure 6. Masonry process
Figure 7. Finished mobile brick oven
For those who want an intermediate option, we can recommend a slightly more complicated option.
Figure 8. Diagram of a simple stove
* According to this diagram, the output is an L-shaped three-section stove. The first compartment is designed for loading firewood. The second is a chamber in which the logs are burned. The third compartment is the chimney duct.
Figure 9. L-shaped stove
To create this structure you will also need 20-30 bricks. This option can be completed by yourself in a couple of hours, if the skills of a mason are completely absent. A specialist will complete the construction in a matter of minutes.
Preparation of the solution
Before starting construction work, it is necessary to prepare a sufficient amount of masonry mortar. For sauna stoves it is made on the basis of clay and sand. Clay should not be used from the surface layers of the soil. The extracted material must be crushed and soaked in water to the consistency of sour cream. The sand must be sifted on a mesh with a cell of 5 by 5 mm.
The recipe for preparing the solution is quite simple. Sand is added to liquid clay at a ratio of one to two and water is gradually poured in. The resulting mixture should flow smoothly from the trowel. It should be remembered that the solution should be prepared for one day of work. Because unused mass tends to dry out quickly.
Features of masonry of an outdoor fireplace
The laying of an outdoor hearth is similar to a fireplace. To prevent the outer surfaces from heating up, use vermiculite or kaolin wool in a layer of 100-150 mm. Or 250mm, which depends on the purpose of the fireplace. Also, such thermal insulation is necessary for maximum heat accumulation by the surfaces inside + to create the highest temperature in the firebox of a barbecue, tandoor oven, barbecue, etc.
Share on social media networks
0
Tweet
Oven with hob
In the simplest version, this design has small dimensions (width 2 and depth 3 bricks - 78x53 cm). However, even in such a limited area it is possible to place a single-burner stove.
Work goes smoothly when you have everything you need at hand.
Therefore, purchase the following materials and accessories in advance:
- Solid red brick – 107 pcs;
- Blower door – 1 piece;
- Grate – 1 piece;
- Single-burner cast iron stove – 1 piece;
- Fire door – 1 piece;
- Pipe valve – 1 pc.
Fire bricks are not needed for a wood burning stove. Buying it is a waste of money. But red should be chosen carefully, discarding cracked and uneven ones.
Preparation of the solution
The masonry mixture is made by mixing four parts clay with one part water and adding eight parts sifted sand. The normal consistency is determined simply: the solution easily slides off the trowel, leaving no drips on it. When laying, it should not leak out of the seams.
The volume of the mortar is determined based on the amount of brick. With an optimal seam thickness (3-5 mm), one bucket is enough for 50 pieces.
Having prepared the masonry mixture, you can begin laying the foundation. Its width is made 10 cm larger than the width of the oven. The height of the foundation is selected so that the bottom of the first row of bricks is at floor level.
An approximate prototype of a stove
If the underground is deep enough (50-60 cm), then there is no need to dig a hole for the foundation. It is enough to make formwork on the ground with a plan size of 76 x (51 + 10 cm). Two layers of roofing felt are placed on its bottom to protect it from moisture. Having laid the concrete, it is given a week to gain strength, after which they begin laying.
The dimensions of the stove with hob we are considering are 3 x 1.5 bricks (76x39 cm).
The first row is placed on a layer of clay mortar (4-5 mm). Having leveled the base, lay out the second one, leaving space for the blower door.
Before installing the door, you need to screw a soft wire to it and put its ends into the seams for better fixation.
The frame of the cast iron door has four holes for wire, which is used for fixing in the masonry
To compensate for the thermal expansion of the metal, a gap is left between the door and the brick. Before installation, its frame is wrapped with wet asbestos cord.
The third row is laid by overlapping the seams of the second. At this level, a grate is installed in the firebox.
Order scheme from 1st to 8th row
The fourth row is placed on the edge, observing the ligation of the seams, and the walls of the combustion chamber are formed. Behind it will be the first and only smoke circulation (see section A-A in diagram No. 2). To clean its bottom, a so-called knockout brick is placed in the rear wall without mortar, which is periodically removed to remove ash. Inside the chimney, two stands are made from pieces of brick to support the internal partition.
The stones of the fifth row are placed flat, leaving space for the firebox door. At the back of the stove, in order, we see the walls of two smoke channels. During work, their surface must be thoroughly cleaned with a wet cloth to remove any clay protruding from the seams.
This is an important condition for ensuring good traction.
Order scheme from 9th to 11th row
Having raised the masonry up to the eighth row, they close the furnace door, placing wire in the seams to secure its frame. At the same level, in the back of the fuel chamber, a brick with a beveled end is placed - a smoke tooth. It improves heat output by preventing flue gases from quickly escaping into the chimney.
Having completed the ninth row, an asbestos cord is laid along it on a clay mortar. It is necessary for sealing the joints of a cast iron slab and brick. On the tenth row, the firebox is covered with a hob.
On the eleventh, a smoke valve is installed in the pipe. It is also compacted along the contour with an asbestos cord soaked in clay.
Rows 12 and 13 - formation of the pipe walls. After they are completed, a lightweight sheet metal pipe is placed on the stove, leading to the roof.
How to determine the optimal location of the furnace
The location in the house for the stove must be determined according to certain parameters. The following indicators are taken into account:
- area of a residential building;
- how many rooms should be heated;
- what is a stove for and what type?
- how gases will be removed during combustion;
- the location of the stove must comply with fire safety requirements.
The stove should heat every room in the house as evenly as possible. If this condition is not met, either an additional furnace or water heating system equipment will be required.
To heat the rooms adjacent to the kitchen, a heating and cooking stove is used. It is placed in the kitchen, and the rest of the rooms are heated by the heat-dissipating wall.
When building a house made of stone, you can immediately think about the placement of chimneys in the walls, which will increase the usable area of the house and ensure optimal heating.
When placing the stove on the border of rooms, you need to think about the place where it can be most successfully placed so that the surfaces transferring heat from the stove allow for uniform and maximum heat distribution.
Options for placing the stove in the house Source pechnoy.guru
Typically, the place to place the firebox is a hallway or kitchen. If the stove is designed well, it is almost invisible in the house. It does not clutter up the living space and is in perfect harmony with all interior elements. For example, a combination option is often used. In one room there is one side of the building - a stove, and in the adjacent room, its second part is a fireplace. The chimney system is common.
A brick stove for a home cannot be called mobile, so planning a place for it requires attention. We should also not forget that the oven requires regular maintenance, which means that convenient approaches must be carefully thought through.
How to lay stove bricks correctly
To successfully build a functional outdoor stove, be sure to follow the following masonry rules:
- First fold each level like a construction set, without mortar. Trying on will allow you to accurately cut the stones in the right places and fit them to each other.
- The ceramic brick is soaked for 2-3 minutes in a container of water, then placed in place. The refractory stone is only rinsed from dust.
- The maximum thickness of a masonry joint on a clay-sand mortar is 5 mm. Exceeding threatens the formation of cracks.
- Do not tie a fire-resistant wall with a regular one. Insert sheets of basalt cardboard into the gaps between different types of bricks.
- Check the horizontality of each tier with a building level, and the verticality with a plumb line.
Remove any mortar protruding outwards with a trowel, and wipe the internal surfaces with a damp cloth. If you lack experience, do not try to chop stones with a pick; it is better to use a grinder with a cutting wheel for concrete.
Laying the floors of smoke ducts
Smoke ducts and chimneys are blocked as follows:
On the front surfaces of the fireplace stove, incomplete bricks are installed, which are sawn lengthwise into 2 parts, and the ceilings of the smoke ducts, one brick wide, are covered with three or four pieces. Half-brick-wide floors are covered with full-length bricks along the length (along) of the chimney masonry. So, on the outer sides of the fireplace, ligation of seams of 0.5 bricks will be strictly observed.
The butt sides of the brick should not extend onto the front (outer) parts of the hearth, and also should not tie the front masonry of the hearth with the inner one.
Do-it-yourself brick stoves for your home
Although private homes now mostly have gas or electric heating systems, many owners would not mind having a simple but reliable stove in their household, which will always help out in the cold and rid the home of humidity. In addition, such a device, lined with tiles or high-quality bricks, looks great in the interior of a dacha or country house. There are different types of ovens - exclusively for heating, for heating and cooking, universal with an oven and a device for drying fruit. In this example, we did not show how complex structures with a vault are built, but limited ourselves to an example where the construction of a small stove with a heating panel is simulated.
DIY small brick oven
For work we will need 250 whole bricks, 6 pieces cut to ¾, 43 halves, 20 pieces cut to ¼. In total we will have 22 rows of bricks laid out. You should also purchase 3 valves, a combustion and blower door, and a cast iron hob. You will see that bricks with small chips and cracks (low quality) can be laid inside, and on the outside we line the oven with facing material. But first you need to lay a foundation under the stove, because the mass of such a structure is several tons, which is a fairly significant load on the foundation. It is best to pour a reinforced concrete pad, which has an area 15% larger than the area of the base. In our case, we will build a simple brick oven with our own hands, which is suitable for heating the room and for cooking. We lay out the first continuous row of material according to the pattern you chose. It should be as even as possible, because the reliability and beauty of our building depends on this. In this example, we will not use mortar, making only educational dry masonry for speed and clarity. When laying the second or third row, you need to lay out the ash pan. The doors of the ash chamber and cleaning compartments are installed immediately. Standard products have fastening ears; a wire is passed through them and inserted into the seam. Until the solution dries, the doors are fixed with temporary stops (bricks or other material). On the fourth row, places are laid for cast-iron cleaning doors (we have bricks there, placed on edge). The sixth row is laid out. The beginning of 2 vertical channels is formed. In the place where the grates are installed, samples were made on the brick using a grinder. We install grate bars. The 7th row is laid. Our grates are free-standing (installation takes place without mortar), and they should be easy to remove. The resulting voids must be filled with sand. Place the smoke damper on the back of the stove
In our question of how to make a brick oven with your own hands, we have reached an important stage. Installing the combustion door
This can be done on a corner or on a wire with nails. On the eighth row we form a connection between the vertical channels of the heating shield. In the place where the cleaning door is installed, we again temporarily place half a brick on the edge. We put the cast iron stove in place. It is advisable to cut a niche under it with a thermal gap, which is then covered with sand to allow the metal to expand. 22 rows will be enough to create a good DIY brick wood stove for your home with excellent heat dissipation. We begin laying a three-channel heating panel with vertical chimneys. In the future, our rows (even and odd) are copied. We connect the 2nd and 3rd vertical channels. We put another valve at the top. We complete the construction by laying a chimney. The work is finished, we managed to make a simple but quite effective brick oven for our home with our own hands.
One of the most important stages in building a fireplace in a house is its cladding. We will show you how to perform this task efficiently yourself in the master class.
The most important stage of home renovation is leveling the walls, which is often done with plasterboard. We will show you how to cover walls with plasterboard with your own hands in a master class.
In apartments where it is impossible to install a real fireplace, an imitation would be a good option. We will show you how to make a decorative fireplace out of cardboard in the master class.
A brick stove is not only a heating method, but also an element of cozy home design. We will show you how to build a brick oven with your own hands in the master class.
Dimensions and drawings of the Swedish stove
After the foundation, they proceed to work on the base of the future furnace, laying out its first and second rows. To provide a kind of protrusion-pedestal, they are laid out exclusively with expanded seams, within 13 mm.
There is no need to make them too wide either. When laying a Swedish stove, experts advise rinsing each brick in clean water for several seconds. This simple manipulation will increase adhesion by getting rid of dust on the surface of the material.
masonry stove Swedish order
The fact is that in practice, masonry, which is made of dusty and dry bricks, may not be strong enough under conditions of significant thermal stress.
But soaking the bricks for a long time before work is also not permissible, because in this case it will simply become saturated with water, which will later be transferred to the solution. This will also have its negative consequences.
In the case of a Swedish stove, a strong heat dissipation through the oven is assumed against the backdrop of efficient use of fuel. Therefore, for its laying, only high-quality fireclay bricks are used, as well as high-quality marl mortar.
Usually it is from fireclay that it is recommended to lay out the Swedish stove with your own hands from the third row and right up to the one that will follow the stove. But in some cases, in order to save money, it is taken only for the internal lining of the firebox, which will require no more than a hundred bricks.
Characteristics of heating stoves
Heating stoves are designed for heating residential premises. Their designs were changed several times; multi-turn heating stoves with successive vertical smoke circulations were replaced by single-turn heating stoves with one ascending chimney and several downwards.
Schemes of gas movement in household stoves a - multi-turn stove with vertical channels; b - single-turn furnace; c - stove with upper and lower heating chambers; d - stove with enhanced bottom heating with upper and lower heating chambers
Single-turn furnaces heat the outer walls more evenly. When installing a grate in the firebox of such stoves, the efficiency increases to 70-75%.
The disadvantage of single-turn furnaces is that their upper part heats up more than the lower part. Because of this, uniform heating of the rooms does not occur with a minimum temperature difference between the floor and the ceiling.
Heating stoves of various sizes and designs with increased bottom heating, given in this article, when used correctly, provide uniform heating of rooms with a minimum temperature difference between the floor and the ceiling of 2-3°C.
By their design, these furnaces consist of two furnaces, placed one on top of the other and connected to each other by one connecting vertical channel. In heating furnaces of these designs, intensive heating of the lower part of the furnace occurs.
Hot flue gases move through the furnace mass as follows. Coming out of the firebox (see Fig. 1), they first heat the lower part of the furnace, then, rising along the vertical connecting channel, they heat the upper part of the furnace. In vertical longitudinal and cross sections, arrows show the movement of hot flue gases in individual parts of the furnace body.
In furnaces of these designs, flue gases travel the same distance before exiting into the chimney as they move through the furnace mass as in single-circuit furnaces with one ascending and several descending channels. Flue gases in heating stoves of this design travel a short distance, overcoming a small gas resistance. In an array of furnaces of such designs, flue gases move according to the principle of “free” gas movement, as discussed below.
“Free” movement of gases
The heating stoves presented in this article refer to thick-walled, moderately heated stoves with increased heat transfer from their lower part. The combustion of these furnaces lasts only 45-60 minutes; fuel is placed in them in 3-4 stages. Typically, these stoves are heated once a day, but at low outside temperatures (up to 35-40°C), it is advisable to heat the stoves twice a day - in the morning and in the evening. With a two-time firebox, normal temperature in the rooms is ensured with a daily fluctuation of 2-3°C.
These stoves are very fuel efficient; their efficiency increases especially when installing hermetic combustion and blower doors. Fuel costs are reduced by half or more compared to the operation of multi-circuit furnaces. It is advisable to use anthracite as fuel, and in its absence, you can use coal, coal briquettes, peat briquettes and any firewood. When preparing firewood, the length of the logs must be adjusted to the size of the firebox of the stove.
Types of adhesives and solutions for lining furnaces
The facing adhesive can be one-component - for laying tiles without cutting joints, and two-component - respectively, for laying tiles with cutting joints. Based on their properties, adhesives are divided into heat-resistant and heat-resistant.
The term “heat-resistant” describes compositions that can withstand thermal cycles with temperature fluctuations of no less than 150⁰C. Only compositions that can withstand prolonged heating of 500⁰C are called heat-resistant. For stove cladding, only heat-resistant adhesives are used; for fireplaces, heat-resistant adhesives are acceptable.
For fireplace linings, domestically produced compositions have been tested in practice - Moment-Crystal, Vetonit Weber, Plitonit SuperKamin and others. Among the recognizable import brands is Ceresit-SM. For a decorative fireplace that is lit only periodically, these compositions are quite suitable, but heat-resistant compositions are required for stoves. For example, a two-component composition K-77 with a primer of the same name, which has a high load-bearing capacity. Complete hardening of the composition occurs after three to four weeks, and it is unacceptable to start the accelerating firebox before the curing period of the glue has expired. When this facing composition gains strength, the room temperature should be within 18-28⁰C. There are special compositions for terracotta and majolica. The market offers quite a lot of heat-resistant and heat-resistant compounds, and you should carefully study the scope of application and follow the recommendations indicated on the packaging.
It is also possible to lay tiles on clay mortars filled with quartz sand or sawdust.
When using clays, it is important to choose the correct proportion depending on the fat content of the clays, so that the solution is sufficiently plastic, but does not subsequently crack. Filler/clay proportions for fatty clays 4:1, for normal clays 3:1, for lean clays 2.5:1
In addition to fillers, fireclay powders are added to clay solutions to increase resistance to high temperatures and changes, this is especially justified in the case of a coal furnace. Some craftsmen add salt additives to the solution - up to one glass of table salt per bucket of water. Salt retains water in the mortar mixture, and there is less risk of cracks. The usual ratio of clay and water in solution is 4:1, but selection is carried out experimentally and also depends on the fat content of the clays used. One of the recipes, which is considered classic, includes cement. One part clay, three parts sand, one part chalk and one part cement. The amount of water is selected according to the type of clay. This composition provides not only good adhesion to bricks and tiles, but also higher strength compared to clay mortar.
Scheme for laying a stove for a home
A diagram for laying a stove for a home is the first thing that a person who decides to install heating in his home using a stove will need. In this material we will look at what layout schemes for home brick ovens exist, what are their features and differences.
- 1. undercut;
- 2. with empty seams;
When arranging a stove using the first method, plastering the stove is not required, since all seams are filled with mortar. The thickness of the kiln walls determines the way in which the bricks are laid. The walls are laid out with a thickness of one brick and half a brick. Sometimes you can find a masonry of 3.4 bricks. For work on the installation of a stove, it is imperative to use stove bricks. It is also called “red brick”, solid. Under no circumstances should you use bricks that have been taken from a dismantled building, expanded clay blocks or slotted bricks.
The first row is laid simply with bricks, without using mortar. The brick is leveled, the front wall and the places where all the doors will be located are determined. These operations can be called the last "estimate". When these actions are completed, the bricks are laid with mortar.
After this, they begin to lay the corners. The next stage, according to the advice of experts, is the arrangement of the contour of the entire stove. Using plumb lines, string is stretched from the ceiling to the corners of the stove. With the help of these vertical lines, you can easily navigate while working.
Considering the model of the stove you have chosen, you should determine the areas in which the following will be located: the ash pan, the combustion chamber, and the ash pan. The door under the ash pit is installed when the third row of bricks is laid, and after one row the ash pit is laid out.
After this, the firebox is arranged. Each door is attached with burnt wire. When you get to laying out the vault, you will need to cut the bricks. A calculation will be required to ensure good joining of the bricks with each other. The laying of the vault begins after the second row of bricks is laid after the firebox door.
To line the combustion chamber, special refractory bricks are used. Since facing bricks and masonry bricks have different temperature characteristics, installation of the lining to the furnace itself should not be done rigidly. When installing a chimney pipe, care should be taken to install a special valve, the adjustment of which should be smooth and easy.
Tile installation
Surface preparation is standard - if the stove has old plaster or finishing, it is knocked down with a chisel and cleaned with metal brushes, and then dusted. Then the joints are done - if it is decided to install the tiles on a grid with jointing. Prepare the adhesive composition according to the instructions. Pour the dry mixtures into the water, portionwise, with constant stirring. The speed of the drill or mixer is adjusted so that the glue does not foam; air is not needed in the structure. Leave the glue for as many minutes as indicated in the preparation instructions - usually up to 15 minutes. Start facing from the bottom. Apply glue or primer (if cladding is done using jointing) for four tiles horizontally. Fix the reinforcing mesh. Along cut seams - on wire staples, without cutting - on dowels. The adhesive is applied with a notched trowel, the first tile is pressed and slightly rotated to secure it tightly. Crosses are used to calibrate seams, but not all craftsmen recommend crosses, and some designs involve the illusion of unevenness of the seams - to imitate ancient masonry. Verify the horizontality of the tiles using a level, then the vertical. The first row is the most responsible
Deviations are corrected carefully by moving the tiles with light blows with a rubber hammer. Seams for different types of tiles can be from 8 to 12 mm, except for clinker ones, the thermal expansion of which is so insignificant that a neat seam of only 3 mm is possible
All tiles of the first grip are verified with a level and plumb line. The first three rows of tiles after laying should be left until the adhesive composition sets. Plastic adhesive may not hold heavy tiles, and the trim will slide off from its own weight. Furnace linings do not require high speeds. Pauses between grips are about three hours, depending on the properties of the glue or solution used. For fitting and trimming, use tile cutters or a grinder. They usually try to hide the cut tiles adjacent to the wall or in other inconspicuous areas. After the glue has completely set - after 24 hours, remove the crosses and clean the seams from glue deposits.
Grout the seams only after the glue has completely cured, according to the instructions for the composition, otherwise you may end up with microcracks in the grout or the tiles peeling off. Mineral grouting is done manually - with a spatula, or with a mounting gun if the seam is made convex. Grouting with silicone compounds is very sticky and is only possible with the use of mounting guns.
The first fire is possible only after the glue has completely cured, from a week to a month, depending on the composition used.
What does simple mean?
It is further understood that a simple oven, which can be quickly made with your own hands, should satisfy the requirement. requirements:
- A person building such a stove does not need to have a deep understanding of the stove business. Ideally, he doesn't need to understand anything about it at all;
- The stove must operate on low-quality waste fuel with a thermal efficiency (this is analogous to the efficiency of heat engines) of at least 35-40%;
- A brick kiln should not require long-term drying after construction and “accelerating” fireboxes to reach the rated thermal power;
- It should consist of no more than 115-120 bricks, so that all the necessary materials can be brought at one time in the trunk of a car or on a trailer to it;
- Stove fittings (doors, hobs, burners) should be the most common (so that you can use used ones) and/or cheap;
- The masonry of a brick kiln should not contain complex joints, sawn (cut with a grinder) bricks, transitions from red brick to fireclay and steel mortgages.
Laying lintels for firebox and oven doors
One of three methods is used here:
Method No. 1 : the door is covered with bricks - poking a little with an overlap of half a brick on the door frame on each side.
Method No. 2 : the door is covered with three bricks with specially cut pins at 45 degrees, with the side bricks overlapped onto the door frame by a quarter-part of the brick.
Method number 3 : the door is covered with an arched lintel using wedge bricks; these bricks can be made independently.
Types of brick heaters
Heater stove with water tank A
brick heater stove can have a different design. The option is selected in accordance with the dimensions of the bathhouse, the skills and financial capabilities of the owner. The following types of structures can be distinguished:
- Permanent action - characterized by a thin-walled structure and a small number of stones, heated to 300-350 degrees. They can run on gas or electricity. The design is equipped with a protective automatic block. Putting it into operation is possible only after receiving permission from the fire inspectorate.
- Periodic action - they are made with thick masonry, a lot of stones are used, their heating temperature is much higher. Retains heat well.
- For solid fuel - equipped with a partition that prevents combustion products from entering the room.
- A compact brick stove for a small bathhouse with your own hands can be made in several versions. The easiest way is to make it from a laundry stove. Pebbles are placed in the tank instead of liquid. This results in a thin-walled firebox. The problem can be solved by lining with bricks.
- Double wall design with water tank. It can be placed on top (on the stove) or below (with the end facing the firebox).
- You can make a stove without a water heater. The partition in this case is constructed from a cast iron pot. Stones in this design heat up quickly. The firebox is lined with fireproof blocks.
Some designs include a tank for heating water, others do not. The choice depends on the availability of hot water supply and the preferences of the owner
Features of a brick stove for a bath
A brick stove will ensure the safety, comfort of the procedure and the quality of steam.
Brick is a fire-resistant environmentally friendly material, which makes it suitable both for the construction of the bathhouse itself and for the construction of the stove. It is durable and resistant to wear, does not rot and is not damaged by moisture.
The brick does not heat up very quickly, but it retains and releases heat for a long time, so there is no need to fire the stove often. This feature allows you to take long bath procedures and serve a larger number of people.
A stone sauna stove requires a solid foundation: this is due to the large mass of the structure.