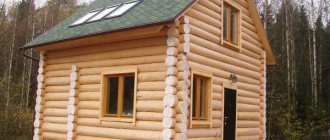
A bathhouse is an indispensable addition to country houses. No modern baths or showers can replace a bathhouse; these are not only rooms for taking water treatments and improving health, but also a place for mental relaxation.
How to attach rafters for a bathhouse
Attaching the rafters to the mauerlat
Selection of rafter system
The algorithm for fastening rafters is largely determined by the type of rafter system. In the vast majority of cases, the bathhouse is small in size. Such parameters, on the one hand, simplify and reduce the cost of the rafter system, and on the other hand, limit the choice of various options for its arrangement. Currently, the following types of roofs and rafter systems are most often used for baths.
Shed roof rafters
Table. Types of rafter systems for baths.
| Type of rafter system | Brief performance indicators |
| Gable | Such roofs are installed on bathhouses with a length of no more than 6 m; if the dimensions exceed these parameters, then the rafter legs have to be extended, and this has a negative impact on the strength and reliability of the system. The angle of inclination of the slopes is approximately 25°, it is possible to equip a fairly spacious attic space. The truss is assembled from two rafter legs. |
| Inclined single slope | The simplest rafter system, the length of the bathhouse does not exceed 4 m. One end of the rafter rests directly on the wall or mauerlat, and the other on a specially constructed frame. The slope angle is at least 12°. The disadvantage of a pitched roof is the minimum volume of attic space. |
There are quite a few ways to fasten rafters; each craftsman decides on the spot, taking into account the peculiarities of the structure, the wishes of the developers and the qualifications of the contractor. But the most important factor influencing the final decision is that the chosen method of fixing the rafter system should be as reliable as possible.
Roof with hanging rafters
Options for installing a rafter system for a gable roof of a bathhouse
Construction type
For the design of the bathhouse, it is important that heat is retained inside it for a long time. Therefore, most often the log house is taken in a small size, because it is easier to warm up a small area, using less fuel. In addition, the room should be thermally insulated, which will reduce heat loss. Depending on the location of the insulation, there are 2 types of bath roofing:
- Cold. A cold roof is a structure in which it is not the surface of the slopes that is insulated, but the floor of the attic. In this case, the attic of the bathhouse is not heated, so it can only be used for storing bath accessories. To insulate the attic floor, fill-in thermal insulation material is used, which perfectly retains heat inside the room heated by the stove.
- Warm. A warm roof is a design that provides insulation of the slopes between the rafters. Making a warm roof is more difficult and more expensive than a single-pitch roof, but it allows you to create a comfortable resting place in the under-roof space. In the space between the rafters of the roof, mineral insulation is laid in the form of mats or slabs.
Differences between cold and warm roofing
Experienced craftsmen and bathhouse connoisseurs believe that it is better to make a cold roof for this structure, since it is this design that allows more heat to be retained indoors. This solution ensures that the sauna will warm up faster and cool down longer.
Fixing rafter legs on a bathhouse made of foam blocks
The rafter legs in such baths are attached to a mauerlat mounted on a reinforcing belt. Accordingly, you need to start work by pouring the reinforcing belt and installing the Mauerlat.
- Install formwork on the walls along the entire perimeter of the room for pouring concrete. For formwork, you can use edged boards approximately 20 mm thick; the boards are fixed to the foam blocks with ordinary nails. The concrete force is insignificant; there should be no deformation of the formwork. Align the top edges of the formwork horizontally.
Important. Before pouring concrete, drill holes in the blocks and install pins in them to secure the Mauerlat. The distance between the studs is approximately 1.5–2 meters, make sure that the holes do not fall into the masonry joints.
Reinforcing belt
- Pull a thread between the outer pins under the level; with its help it is much easier to control the horizontalness of the upper plane of the solution.
- Pour the prepared cement-sand mortar or concrete into the formwork and constantly level it with a trowel. Use thread to control.
Practical advice. When checking the position of the solution, you do not need to lift the thread up; it will stick to the mass and show the incorrect position. The thread should be pulled to the side and released like a string. It is much easier to work not with a rope, but with a thick fishing line.
The thread needs to be pulled to the side
After the screed has completely hardened, install the Mauerlat on it and tighten it firmly with nuts. Do not forget to put waterproofing between the Mauerlat and the screed. It is better to use two layers of ordinary roofing felt, it is cheap and reliable. For the Mauerlat, a board with a thickness of at least 50 mm and a width of 200–250 mm is used. Next, you should begin installing the ceiling beams; it is to them that the lower legs of the rafters will be attached.
Mauerlat installed
Photo of the Mauerlat
Step 1: Install the first soffit board. Its length should be approximately 80 cm greater than the width of the room, 40 cm is required for the overhang on each side. This method of installing rafters is recommended for low baths. Due to the fact that the rafter system is supported by floor beams, the height of the bathhouse visually increases. If the overhang is made from rafter legs, then they fall significantly below the level of the mauerlat and visually reduce the height of the already small facade walls. In addition, attaching the rafter legs to the floor beams is much simpler; there is no need to make complex cuts on the heels. Preparing heels requires not only quite a lot of time, but also a lot of practical experience.
Floor beams
Step 2. Calculate the number and size of rafters. The distance between them should be approximately 60 cm; the following factors influence the specific value:
- sizes of lumber used;
- climatic zone of the bathhouse location;
- characteristics of roofing coverings;
- dimensions of the building;
- the presence or absence of additional struts of the rafter system.
Table of sizes and other rafter parameters
The length of the rafters depends on the angle of the roof, but practical builders use a simplified calculation method - they multiply the width of the bathhouse by 2/3. For example, if the roof width is 6 m, then the length of one rafter leg is 6 × 2/3 = 4 meters. This length provides a roof angle of 30°, which is quite sufficient for all climatic zones of our country, regardless of the maximum level of snow cover.
Calculator for calculating the length of rafter legs
Go to calculations
Step 3. Preparing rafter legs. This is much easier to do on a flat piece of land. Cut the boards to the required length and lay them next to the floor beam. Mark the cutting angle at the bottom and top. Make the blanks and check for accuracy. Everything is fine - use two legs as a template and cut off the rest.
Prepared rafter legs
Practical advice. If, according to calculations, the length of the rafter is 5–10 cm greater than 3 m, then it is recommended to reduce it to 3 m. The fact is that the standard length of lumber is 6 m; there is no need to obtain a large number of scraps of non-standard length due to a few centimeters.
Step 4. Install the outermost floor beams, measure the distance between them and calculate the pitch of the rafters. To check the correct position between the outer beams, pull the rope, and align everything else along it.
Step 5. Screw the floor beams to the mauerlat. It is better to fix them with metal squares and yellow screws; black ones are not recommended. They are made of hardened metal and quickly burst under load. As a result, the stability of the rafter system is compromised. In addition, black self-tapping screws become covered with rust, which further reduces the strength of fixation of loaded components of the rafter system.
Jumpers are fixed to the corners
Experienced builders do not use self-tapping screws, but ordinary nails; they do this for several reasons. Firstly, hammering nails is much faster than screwing in self-tapping screws. Secondly, there is no need to use screwdrivers. Working with them is quite difficult, especially at heights or at the maximum distance from the site. The lower rafters are fixed at the ends of the floor beams, it is quite difficult to reach there, but you also need to hold the screwdriver in your outstretched hand and press it with great force against the head of the screw. Thirdly, nails are made from ordinary carbon structural steel; it has good physical strength. If the loads exceed the maximum stability values, then the nail is slightly stretched and maintains the strength of the connection of the elements of the assembly, and does not burst. Fourthly, bending the tip of the nail on the other side of the board completely eliminates its spontaneous pulling out. Fifthly, the cost of nails is much lower than self-tapping screws, and a large number of them will be needed for the rafter system.
It is preferable to use nails
Step 6. Raise the assembled rafters to the ceiling of the bathhouse and begin fastening them. Before doing this, prepare a temporary walking surface on the floor. Choose durable boards for flooring; they should support the weight of 2-3 people with rafters. It is advisable to nail the flooring to the beams. Never violate safety rules; all their provisions are written based on bitter experience. Remember that no roof or rafter system is worth your health.
Step 7. Install the first rafter on the outer beam. It's easier and safer to do this together. Place the rafter leg at a level and fasten it to the beam with nails. You can use metal squares on the sides. One builder holds the leg, and the second nails it.
Installation of the first rafter
Step 8. Attach the second rafter to the first, the upper ends should rest against each other. Secure the ridge with nails. Keep in mind that nails should be driven in at an angle to the growth rings. This will not only eliminate the possibility of cracking the board, but will also significantly increase the strength of the connection.
Installation of the second rafter
Rafters are tied together with nails
Step 9. Nail a board for the brace approximately in the middle of the rafter. Place the rafter leg in a strictly vertical position and secure the support. This is a temporary element; in the future, the supports will be removed and stationary spacers will be installed instead.
The support is nailed
Step 10. Assemble the same truss on the opposite side of the bathhouse, stretch the thread along the ridge. Take turns collecting the remaining roof trusses. Always make sure that the top corners are positioned exactly along the stretched rope. Do not forget about temporary fixation of elements.
Rafter trusses assembled
The same thing, but from a different angle
Step 11. Install vertical supports under the skates. They must be prepared separately; each one will have to be measured and adjusted. The lower ends of the supports are attached to the ceiling beams using nails or perforated metal tape. The upper end is trimmed into a triangle and inserted between the rafters.
Practical advice. Don’t worry if you were unable to accurately adjust the vertical support; a spread of a few millimeters does not have any negative effect on the rafter system.
A variation of a few millimeters is acceptable
If the length of the rafters is more than 3.5 meters, then it is recommended to make jibs on both sides with emphasis on the lower end of the vertical support. The jibs are fixed using perforated tape.
Experienced builders do not abuse plates, but in all possible cases make ties from boards. Such elements require a little more time, but guarantee the stability of the structure for a long time. One more nuance. If there are remnants of bark on the boards, they must be removed . Over time, bark beetles infest the bark, and they not only damage the bark, but also gnaw holes in the wood. As a result, the boards lose their original load-bearing characteristics, and the roof may sag or completely lose stability.
Bark must be removed from boards
Calculation of the amount of material
First of all, you need to calculate the roof area.
To calculate the area of the roof slope, the Pythagorean theorem is used
Let's take the parameters from the example we have already considered as a basis. Let's assume that we want to make a roof from corrugated sheets with an overhang of 200 mm relative to the boundaries of the house. Then:
- Dimension A will be equal to 4/2+0.2=2.2 m (the width of the bath is 4 meters).
- The height from the ceiling to the ridge is determined by the angle of inclination of the roof: H=A∙tg(30o)=2.2/√3=1.3 m.
- The length of the slope is calculated using the well-known Pythagorean theorem: C=√A2+B2=√2.72+1.32=3.0 m.
- The area of one slope is calculated using the formula S slope = C∙D = 5.2∙3.0 = 15.6 m2.
- The total roof area is equal to S=S slope∙2=31.2 m2.
Next, you should calculate the area of the canopy above the entrance, if it is provided for in the project. Usually it is made 0.9 m wide and 1.7 m long. Let’s also take into account the overhang of 0.2 m: S canopy = 1.7∙0.9 + 1.7∙0.2 = 1.9 m2. Then the total surface area under the roofing will be 33.1 m2.
With a standard sheet size of 2x1.1 m (the useful width is indicated after deducting the allowances left for overlapping sheets), 33.1/(2∙1.1)=15.04 sheets will be needed to cover the roof. Rounding up, we get the required need for roofing material: 16 sheets measuring 2x1.1 m. It is better to buy with a reserve of 2-3 sheets in order to provide for possible losses and errors when cutting the material.
For further calculations you will need a roof plan.
To calculate the material required for the manufacture of rafters, a plan for their location on the roof is drawn up
Determine the number of rafter legs:
- for the main roof you need to prepare 19 bars measuring 140x40x2810 mm, the total volume of the board will be 0.3 m3;
- for a canopy over the door you need 4 bars measuring 140x40x1700 mm, total volume - 0.04 m3.
In total, 0.34 m3 will be required for the rafters.
You also need to prepare 2 wind boards measuring 140x30x5800 mm. Their total volume is 0.05 m3. In addition, you will need rough timber with a volume of 0.15 m3:
- 4 slats measuring 40x50x900 mm;
- 4 bars measuring 40x50x6200 mm;
- 8 slats measuring 40x50x5800 mm.
The amount of waterproofing material corresponds to the roof area - 33.1 m2.
Required Tools
To build a structure, you need to prepare the following tools:
- metal scissors;
- electric jigsaw;
- screwdrivers;
- axe;
- hammer;
- spanners;
- building level;
- roulette;
- meter;
- plumb line;
- corner;
- construction cord;
- pencil.
It is also recommended to make a marking strip from a 5 cm wide block.
Installing rafters on a timber bathhouse alone
We warn you right away that this is not the best choice; making a rafter system is much more profitable with an assistant. It is not only safer, but also faster and of better quality. You can independently make a roof on a small bathhouse with light roof trusses.
Step 1. On the ground, assemble all the roof trusses into a single structure. It is impossible to lift the rafters one by one and assemble the truss on the ceiling alone. At the same time, you need to make cuts on the rafter heels.
Assembled roof truss
Washed down the rafter heel
Important. Due to the fact that the trusses are prepared on the ground, it is very difficult to adjust them after installation. This algorithm of work requires increased care during taking measurements and filing.
Step 2: Lift the first roof truss onto the bathhouse and place it flat on the ceiling. Shift the structure so that the overhang is equal on both sides of the structure. It is impossible to do this the first time; you will have to move for a long time from one wall to another to align the ends of the truss.
The first roof truss is being raised
Step 3. Lift it vertically, adjust the position again and temporarily secure it with a side support.
The truss rises vertically
Temporary support secured
Practical advice. It is much more convenient to work with a special carpenter's belt. It has pockets for hardware, compartments for tools and measuring instruments. Everything you need is always at hand. It is possible to hold the truss with one hand and take out the tool with the other and work.
Step 4. Using the same scheme, lift all the trusses one by one and temporarily fix them with various stops. Take your time and work with extreme caution.
All farms are fixed
Step 5. After the trusses are temporarily installed, check their position, if necessary, eliminate any inaccuracies found, everything is normal - proceed to the final fixation of the rafters to the upper crown of the timber bathhouse.
Photos of installed farms
How to do this - choose for yourself: use perforated tape, metal corners, screws or nails . If there are doubts about the strength of the structure, then further strengthen it with braces.
Next, the sheathing is nailed, the parameters of the sheathing depend on the characteristics of the roofing covering.
Lathing
In the spans of the outer rafter trusses, it is necessary to make vertical posts; gable sheathing boards will be nailed to them. If you plan to make an entrance to the attic, then immediately think about the location of the door and nail a frame for it.
Vertical racks
Prices for timber
timber
Tips for finishing your roof
At the end, the roof is sheathed with the selected material. If you plan to use corrugated sheets or metal tiles, then first of all you will need to install the initial sheet of the first row, followed by the initial sheet of the second row. Next, the sheets are attached one by one. You need to make a longitudinal overlap in one direction. The material is fixed with self-tapping screws and thermal washers.
Self-tapping screws do not need to be over-tightened
There is no need to overtighten the screws, since the coating sheets need to be allowed to expand and contract freely with temperature changes. The ridge will need to be protected with a strip of galvanized iron. Next, the overhangs of the cornice and pediment are hemmed. The gables are sheathed horizontally or vertically. It is imperative to make an overlap covering the base of the truss.
By following the rules, you can build a high-quality roof for a bathhouse yourself. Do not forget that the parts of the rafter system will need to be impregnated with an antiseptic. We wish you success in construction.
- Author: misaf
Rate this article:
- 5
- 4
- 3
- 2
- 1
(0 votes, average: 0 out of 5)
Share with your friends!
Features of fastening rafters on a bathhouse made of round logs
The main difficulty in attaching rafters for a bathhouse made of round timber is the difficulty of fixing the lower part of the rafters (heels). It is impossible to firmly fix the flat surface of the board to a round log; the elements only touch at one point. And this does not provide reliable support; the rafter system loses stability. In addition, if the bathhouse is made of ordinary, and not rounded, logs, then the upper crown does not lie in the same plane. As a result, it is necessary to prepare special supports for the rafter legs.
Fastening rafters on a bathhouse made of round logs
There are two options for attaching the rafters to the timber: making cuts in the logs under the heels of the rafters or mounting the roof on the ceiling beams. The second option is considered by professionals to be more reliable and simpler. How is it done?
Step 1. Mark the location of the ceiling on the top crown. It’s better to make marks with a laser level; if you don’t have one, you can use an ordinary water level.
Important. Pay attention to two factors. First, all beams must lie strictly horizontally and in the same plane. Second, logs cannot be sawed to a depth exceeding one-third of their diameter.
Step 2. Drive in nails at the outer marks and stretch the rope between them.
The photo shows a stretched rope
Step 3. Mark the installation locations of all rafter legs. Place the level on the rope and rest the end against the frame. Set the horizontal line and mark it on the top crown of the bath.
Marks are applied
These marks should be used to control the depth of sawing of logs. Thanks to this simple technology, all ceiling beams will be located in the same plane and strictly horizontally.
The log is sawn through
Next you need to work with a small ax
This is what the installed rafters will look like
Further work on fastening the rafters can be continued using one of the methods described above.
Laying the Mauerlat
The roof structure is quite heavy, so the rafters are not installed directly on the load-bearing walls. To evenly distribute the load and prevent deformation of the supports, a Mauerlat is placed on the upper belt of the box. Mauerlat is a strong, even beam with a cross-section of 100x100 mm or 150x150 mm, mounted on a log house to soften the pressure on the walls of the roof rafters. The installation process of this element of the rafter frame of the bath is as follows:
- First, the support beam is cut into pieces of the required length. The length of the Mauerlat corresponds to the length of the bathhouse, and the quantity corresponds to the number of roof slopes.
- Then the Mauerlat is impregnated with deep penetration antiseptic preparations. The treatment is carried out twice to protect the wood from fungus, mold and rot.
- The Mauerlat is secured to the top row of load-bearing walls with metal studs or anchor bolts. Moreover, the locations of the attachment points are calculated so that they are located between the rafters.
- After installing the Mauerlat beam, you can proceed to assembling the roof rafter frame.
Mauerlat devices
Mauerlat fastening technology
Please note that if a log house acts as a bathhouse, then it would be correct to use the upper crowns, reinforced with metal brackets, as a mauerlat. However, if the roof structure is complex or heavy, then this frame element cannot be avoided.
Truss installation
The assembled trusses are mounted above the ceiling beams. To align them vertically, they are temporarily supported by spacers. The outer trusses are installed first. For a more precise adjustment, it is best to use a plumb line that is tied to the crossbar. At the final stage, the structure is further strengthened using jibs.
After the outer rafters, they proceed to installing the remaining trusses. They are leveled using the same method, maintaining 1 m gaps between the trusses. After securing the entire rafter system, they are connected by a canopy made of two long boards, which are fixed at the top on both sides of the roof.
Sequence of work
The main factors for the quality of the rafter frame are the accuracy of calculations of the height of the ridge and the length of the rafters and detailed adherence to the technology for the construction of the roof. In order for the roof to properly protect the frame from the penetration of precipitation, it is necessary to fasten the rafter legs as follows:
- First you need to take smooth boards of coniferous wood without cracks or knots. To increase the service life of rafter legs, they are treated with an antiseptic and fire retardant. To reduce the consumption of impregnation, it is better to plan the wood.
- Then a rafter leg template is made, which serves as a template for the production of the remaining rafters.
- First, install the first and last pair of rafters, and then stretch the lace between them to align the remaining rafters.
- They fasten the remaining rafter pairs, trim the ends of the legs so that they are even, and then install the sheathing.
Experienced craftsmen recommend checking the correct fastening of the rafter legs using a building level so that the roof is level and without distortions.
Technology for installing rafter legs on a log house
Height
When it comes to the height of the roof of a bathhouse, you need to understand that we mean its angle of inclination. And it is not an arbitrary value, but depends on what winds blow in your area and how much precipitation falls.
ADVICE! Proceed from the fact that increasing the angle of inclination simultaneously increases the wind load and prevents the retention of precipitation on the roof surface.
The minimum angle of inclination at which a roof is considered pitched starts at 2.5 degrees. Less - flat roofs, and up to 10 degrees - pitched roofs, but even these will have problems with removing precipitation and will require manual cleaning. But the accumulated snow means hundreds of kilograms pressing on the roof!
The maximum angle of inclination will be considered equal to 60 degrees. It is believed that the maximum amount of snow will put pressure on a roof with a slope of 30 degrees, and with a slope of 45 degrees the snow will slide down on its own.
Another factor associated with the choice of angle of inclination is the technical characteristics of the roofing material. You can select the material for the optimal angle of inclination for your area, or you can rely on the material and look for a compromise with climatic optimum.
BY THE WAY! An increase in the angle of inclination will also entail an increase in cost.
Maps and explanations for them, as well as simplified calculation formulas, can be found in this article. We strongly recommend that you familiarize yourself with them and study the formulas that will determine the load and affect the calculation of the roof mass.
However, you can use a simple life hack: you are not the first to build, take a closer look at your neighbors’ buildings, talk to them about problems with the roof, if any, and the optimal degree of inclination will be determined without unnecessary hassle. And the material will also be clearer.
We cover the roof step by step with waterproofing and insulation
Next, installing a bathhouse roof with two slopes involves laying hydro- and thermal insulation. From the bottom of the floor beams, they are hemmed with boards, after which a vapor barrier film is overlapped on the rafters, and the joints are sealed with tape. A layer of thermal insulation is laid on top. It is easiest to use the material in slabs, although roll insulation is also suitable.
It is laid in such a way that it fits tightly between the rafters. All gaps and gaps are foamed, and a water barrier is fixed in the upper part. It is also overlapped, with the seams closed with tape.