During the construction process, the developer regularly encounters situations in which it is impossible to apply any standard, general recommendations. Too often you have to rely on your practical experience. Calculating the minimum grillage height for a foundation is one such case.
In this article we will briefly look at all the conditions that need to be taken into account when constructing a grillage. The main thing is to remember that we are giving only general recommendations. In each specific case, the height of the grillage must be calculated individually.
Construction of a pile grillage. Clarification of its dimensions
A grillage is placed on top of the piles to ensure that the piles work together under load.
They begin by placing the piles in plan and determining the dimensions of the grillage base.
Piles in a centrally loaded pile foundation are arranged in rows or in a checkerboard pattern (Fig. 7).
The dimensions of the grillage are also determined by the dimensions of the above-foundation structure (Fig. 6).
For small values of foundation eccentricity, piles can be placed symmetrically relative to the geometric axis of the supporting structure (for example, a column).
According to SNiP 2.02.03-85 “Pile foundations”, the minimum distance between the axes of piles dmin is taken equal to 3d for hanging piles and 1.5d for rack piles. The maximum distance between piles is determined by the design of the connection between the pile and the grillage and usually does not exceed 6d (Fig. 6).
,
where np is the number of rows of piles
Fig.6. Pile foundation design
Fig.7. Location of piles in plan
The dimensions of the grillage may vary in relation to those previously assigned, but should not be less than the dimensions of the structure resting on it (column, bridge pier, etc.).
1. The dimensions of the grillage in plan are assumed to be multiples of 30 cm.
2. The height of the grillage is determined from the conditions for embedding the column and piles. The structural height of the grillage is 40 cm greater than the depth of the glass for the supporting structure. Height dimensions are multiples of 15cm.
It should be noted that embedding piles into the grillage by 5-10 cm ensures free support of the grillage on the pile and is taken into account in the calculations conditionally as a hinged connection.
Rigid coupling of the pile grillage with the piles is provided in the following cases:
1. Piles are immersed in weak soil (loose sand, clayey soil of fluid consistency, silt, peat, etc.);
2. The pile is subject to horizontal loads and horizontal displacements greater than the maximum permissible for a given building or structure.
3. There are inclined or composite vertical piles.
4. Piles are pulled out.
The rigid connection of reinforced concrete piles with a monolithic reinforced concrete grillage is designed in accordance with the requirements of SNiP for the design of reinforced concrete structures.
For reinforced concrete grillages of pile foundations, concrete of class B15 or higher is accepted.
Types by placement
Depending on the placement of the grillage relative to the ground level, there are several options for its design. The choice of a specific project is carried out in accordance with the requirements for the foundation, the characteristics of the territory, and the future building.
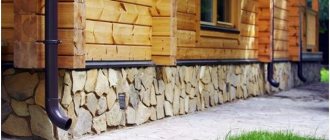
High
A high grillage is located 25 centimeters or more above the soil surface. Thanks to this option, it is possible to achieve additional floor ventilation and eliminate the risk of dampness and mold. Raising the grillage above the ground allows you to regularly inspect the condition of the foundation and carry out repairs on time.
The underground space can be used to store tools, garden tools, and other things. The main disadvantage of this type of grillage is the inability to create a full-fledged basement.
Elevated
The raised grillage is the most popular in construction and is located at ground level. The base for the tape is a sand and gravel cushion 10-15 centimeters thick; for its construction, the required volume of soil is removed, replacing it with gravel. In this way, it is possible to create an anti-heaving cushion that prevents the soil from rising in the cold.
A gravel cushion reduces the level of moisture in the soil and prevents water from accumulating under the foundation. The main advantage of this type of grillage is the absence of a ventilated space between the ground and the ceiling, which significantly improves the heat-saving characteristics.
Recessed
Such a grillage is located below ground level, in a special trench where piles are installed, formwork is installed, and then filled with concrete mortar. A room on such a foundation is durable, reliable, and has excellent heat-saving properties.
Types of foundations with grillage
The grillage is the upper part of the foundation, which combines the pile heads and serves as a support for the future building. The connection of the piles and the riser can be carried out by welding (in the case of using reinforced concrete structures) or pouring concrete.
According to the installation method, grillages are divided into:
- tape - only adjacent piles are connected;
- made in the form of a slab - each head is connected.
Depending on the type of materials, the grillage can be made:
- made of concrete with laying of reinforcement - piles are installed under the load-bearing walls, shallow trenches are dug to the depth and width of the grillage;
- suspended concrete - similar to the previous option, but its peculiarity is that the concrete strip does not come into contact with the ground, the arrangement of a compensation gap ensures the prevention of rupture of supports when the ground vibrates;
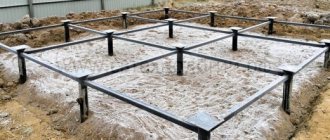
- reinforced concrete - from a wide metal channel or I-beam, with channel 30 installed under the load-bearing walls, the remaining supports are connected with channel 16-20;
- made of wood - used less often;
- combined method - using both metal load-bearing elements and concrete.
What material is best to make it from?
For round or rectangular piles, the following are used: reinforced concrete, simple concrete mixture, different grades of steel, coniferous trees (especially larch).
Concrete grillages are easiest to construct when the cap ties the support piles to a height of 0.1 m. This option cannot be called a strong and durable structure, so concrete grillages are applicable in the construction of only one-story structures.
Heads made of reinforced concrete have a high margin of safety, reliability and rigidity and a long service life. Such structures are given greater strength by reinforcing the concrete grillage with a steel frame or individual rods.
Reference! Professionals know that with such a grillage foundation, this reinforcement must be provided with a protective layer.
The production of heads is also possible from rolled metal - I-beams and channels. Such grillages are rigid and durable, however, like all metal products, they are susceptible to rusting (especially at the joints).
Wood is used for the construction of grillages only in wooden structures. A waterproofing layer of roofing felt or roofing felt must be placed on the tops of the piles, and the connecting beams themselves must be treated with anti-parasitic and anti-mold compounds.
Calculation of the distance between piles and the depth of their immersion in a pile foundation
The immersion depth of the piles is calculated based on the type and complexity of the soil. The lower part of the support should be 20-30 cm below the standard freezing depth of a certain type of soil in the region of residence. For example, the freezing depth for St. Petersburg, according to geologists, for clays and loams is 1.4 m. To build a foundation, you will need piles measuring at least 140 + 20 = 160 cm. Since the ground under the house is warming up, this figure can be reduced by 10-20%.
To determine the required number of piles and the distance between them, they are guided by SNiP No. 2.02.03-85 and GOST 27751, which list the basic requirements for the construction of pile foundations. In this case, the following characteristics are taken into account:
- strength of piles and grillage material;
- bearing capacity of the soil (consolidation is taken into account when installing the support);
- in the presence of significant differences in relief - the bearing capacity of the base (heel) of the support;
- the degree of pile shrinkage under vertical load.
Features of the selection and construction of the foundation
A wide variety of options for installing a pile-grillage foundation complicates the choice of an inexperienced developer. Without the skills and knowledge in this area, it is better to order design from professionals.
Grillage on stilts for a house made of gas silicate blocks
When you plan to build a house from aerated concrete on slopes or areas with waterlogged soil, choosing a pile-grillage foundation will be the best solution.
Since the porous structure of gas silicate blocks absorbs moisture well, which leads to rapid destruction of the structure, it is recommended to choose a foundation with a hanging grillage. In this case, screw or bored piles can be used.
It is better to approach the choice of stamped reinforced concrete structures with caution , since the method of installing the supports eliminates the possibility of waterproofing the lower part of the foundation. The last method is relevant if you treat the grillage well with hydrophobic compounds.
For a brick structure
Most types of pile-grillage foundations are suitable for the construction of brick houses, with the exception of the option with a wooden grillage.
The parameters of the structural elements of the foundation for low-rise construction are selected taking into account the total loads, as well as the bearing capacity of the soil.
The more powerful the structure is planned, the more reliable and stable the supports are . As a rule, for residential buildings, piles are lowered below the frost line. For waterlogged soils, it is advisable to consider an artificial drainage of wastewater and a drainage system on the site.
Under the garage
From an economic point of view, it is better to use metal screw piles with the same strapping for such lightweight buildings as a garage or a bathhouse. The chosen method is characterized by high construction speed, ease of installation and a small amount of construction waste.
Metal piles are suitable for wetlands, peat soils and other weak rocks , as well as for areas with uneven terrain.
If you are designing a garage with a superstructure, you can increase the number of piles or use reinforced concrete supports. In any case, increasing the capacity of the supporting structure will lead to higher construction costs.
2.1. Payment procedure
- To begin the calculations, you will need to determine the size of the total load on the future foundation, that is, find out the weight of the building. This takes into account not only the weight of the walls, but also the floor, ceilings between floors, the weight of the roof, internal and facade cladding.
- Payload (weight of furniture, household appliances and people) – if 200 kg/sq.m. is taken into account when constructing multi-storey administrative buildings. m, then for the construction of residential buildings 150 kg/sq. m.
- The snow load in winter is added to the resulting weight amount. The pressure of snow masses for most regions of the Russian Federation is 180 kg/sq.m. m.
- The sum of all three of the above loads is multiplied by a safety factor of 1.1 (in some cases it is possible to use a factor of 1.2).
- Load on one support without subsidence.
How to calculate reinforcement for a strip foundation?
For longitudinal rods, reinforcement of class A3 is used, and for transverse rods - A1 (Figure 3). The width of the foundation is 500 mm or 50 cm, let’s calculate its length, taking into account that the building will have 2 internal walls:
- (5 +
 * 3 = 39 m.
If we use 6 reinforcing bars, then we get:
- 6 * 39 = 234 m.
Figure 4. Scheme of reinforcement of strip foundation corners.
The step is 0.5 m, the height of the base under the house is 0.2 m, then the distance from the base of the building when using 6 mm reinforcement will be:
- (200 – * 3 + (60 – * 2 = 680 cm.
The number of connections will be:
- (39 / 0,5) + 1 = 79;
- 68 * 79 = 5372 cm or 537.2 m.
Since we will knit the rods in 12 places, then:
- 12 * 0.3 * 79 = 284.4 m.
2.2. An example of calculating a pile foundation with a grillage
Screw piles are used for the construction of light country houses, while in the construction of heavy cottages, more massive bored piles are used that can withstand heavy loads.
In this example, to simplify the calculations, calculations are carried out using screw supports. Note that, if for such small-sized piles lateral friction is not taken into account in the calculations, then in the case of the construction of heavy buildings on bored piles, the forces of lateral friction affecting the pile are also taken into account.
Calculation of the total number of piles and their installation step for a one-story house measuring 6 × 6 m:
- Let's determine the total weight of consumables. Let's say the total weight of the timber, roof and cladding of the house, taking into account the snow load, will be 27526 kg.
- The payload size is 6 × 6 × 150 = 5400 kg (the payload, the data of which is given in paragraph 2.1, is multiplied by the length and width of the future house).
- The snow load is 180 × 6 × 6 = 6480 kg.
- Thus, the total mass of the load on the foundation will be 27526 + 5400 + 6480 = 39406 kg.
- We multiply the resulting weight by the reliability factor 39406 × 1.1 = 43346.6 kg.
- Let's say we plan to install screw supports 86x250x2500 VSK. To calculate their number, the resulting total load of 43346.6 kg should be divided by the load per pile 43346.6/2000 = 21.673. We round the resulting number to 22. Thus, to build a house measuring 6x6 m we need 22 piles.
- To install 22 supports, the installation step will be 1.2 meters. For floor joists, 2 more piles should be added, which will be located inside the house.
Choosing a foundation design
When considering options for the main load-bearing element that is planned for the house, any future owner tries to choose the most economical option. Many people see the height of the foundation as one of the parameters that can reduce the cost of construction.
If the depth of the supporting structure depends on the depth of soil freezing, the width depends on calculations that determine the bearing capacity, then the height of the foundation above ground level seems to be a characteristic that can be painlessly changed to reduce the overall cost.
DIY foundation with grillage
Drilling machines in the construction of private houses are used only in cases where the soil is not dense enough and in order to find a denser area it is necessary to go deep into the earth to a sufficiently large depth. If the thickness of the soft soil is sufficiently large, it is possible to use composite piles from separate detachable sections.
In most cases, when constructing a private house, installing a bored pile is sufficient. To do this, a hole of the required depth is made in the ground using a garden or hand drill.
Basic principles of drilling technology and its advantages
The construction of a bored foundation with a grillage is based on the following technological principles:
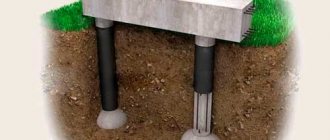
- the base of the foundation is point-fixed in a fixed earthen layer and has a static tubular or metal frame base;
Diagram of a bored foundation - load-bearing loads are provided for uniform distribution;
- the number of points of required application of load stability is determined by calculation methods;
- key points have a unified structure due to monolithic reinforced piping or grillage.
This technology has a number of undeniable advantages.
- Possibility of constructing a foundation for construction on any surfaces and soils, except rocky ones, including:
Detailed diagram for installing bored piles with your own hands- in areas with large differences in elevation;
- on soils subject to swelling and horizontal movement;
- in places with increased levels of exposure to seasonal water factors.
- High reliability and stability of the foundation due to the installation of its base below freezing of the soil.
- There is no need for large-scale excavation work, which allows construction to be carried out with minimal disruption to the surrounding landscape, and the need to remove soil is eliminated.
Bored foundation with grillage in section - It is possible to carry out foundation work directly near existing buildings without additional mechanical negative impact on them, as well as without damaging previously installed underground communications.
- The time required to carry out foundation work is minimal and it is possible to carry it out year-round.
- The ability to use this technology for buildings and structures made of any materials, any height and purpose due to the uniform distribution of the design load.
Scheme with dimensions for installing formwork under the foundation - Low construction costs and ease of work, the best option for arranging the foundation of a building with your own hands.
All of the above makes the technology of constructing a bored foundation widely applicable, especially in the construction of low-rise private houses, the construction of bathhouses and other outbuildings.
3.1. Marking and drilling wells for piles.
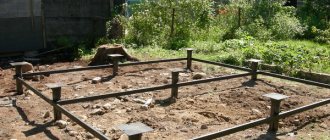
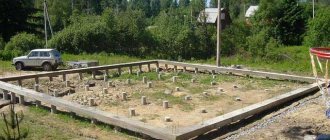
After clearing and leveling the area, markings are made at the site of the future foundation: by pulling threads, the location of the internal and external boundaries of the grillage is determined on the ground. It is better to move the supports to which the stretched marking rope is attached beyond the perimeter of the future foundation, so that the corners of the future foundation are formed at the intersection of the stretched threads.
Next, the location of each support is indicated using reinforcement or wooden stakes. You can simply make a small hole at the site of the future pile and spill water on it: a kind of “marker”. Piles must be installed at all four corners of the future foundation, and then the required distance to the next is marked from each corner, while the supports must be installed at the intersection of the walls.
Placing supports too often will significantly increase the material costs of their construction. Their rare location can lead to significant deformation of the grillage, and then to the appearance of cracks in the load-bearing walls.
After completing the work on marking the future piles, the construction thread, which served as marking the boundaries of the future grillage, is removed from the supports, and work is carried out on drilling wells for the piles.
Location of piles in the grillage
In most cases, supports in the ground are placed vertically. Sometimes an inclined installation may be required, and several pieces in one place. This method is used if horizontally directed forces may arise. For example, during construction on sloping areas.
Location of piles on the house plan
Piles can be located pointwise - under supports (columns, racks). This arrangement is typical when constructing canopies or installing roofs over open areas. Then the supports are placed exactly under the columns holding the roof.
For private houses with a small number of floors, the piles are placed in the form of a strip. They are placed in one row, sometimes in two or three, shifting them relative to each other. Sometimes in the most loaded parts, for example, in corners, under areas with a large planned load, they are placed in bushes: several pieces at a short distance from each other.
How to arrange a house plan yourself
When designing a pile foundation on your own, you usually proceed as follows. On a building plan drawn to scale, piles must be laid in the corners and at the intersections with the walls. If they are more than 3 meters apart from each other, intermediate supports are placed between them. It is advisable that the piles be located one from another at a distance of 2 to 3 meters.
First, the piles are placed in the corners, then under the junctions of the load-bearing walls
The principle is simple, but you still need to determine the required area of the piles. And it needs to be calculated (or rather, selected).
3.2. Filling wells. Reinforcement of foundation piles
Before pouring concrete, each of the wells is reinforced. The reinforcement is laid out longitudinally along the entire length of the pile. For each of the pillar supports, 4-6 rods with a diameter of 12-10 mm are sufficient. To give stability, each of the reinforcements is pre-welded together with wire. The result is a kind of frame (mortgage), which is inserted into the prepared well. The reinforcement must protrude above the pile - its length must be such that the adhesion to the grillage is sufficient. The distance from the walls of the well (in the case of installing formwork - from the walls of the formwork) to the rod is at least 5 cm.
To avoid the appearance of air pockets, concreting should be carried out in layers of 25-30 cm. Each subsequent layer is tightly compacted with a bayonet shovel or vibrator. To prevent seams at the joints, each subsequent layer is poured before the previous one dries.
Methods for pairing the tape with piles
Sometimes the grillage is placed on pillars without any bond. This method can only be used when no horizontal dynamic impact on the foundation is expected in the future. For centrally loaded piles, free coupling is sometimes used. In this case, their top is simply embedded in the body of the grillage tape to a depth of approximately 10 cm.
In the construction of residential buildings, the so-called “rigid” connection is often used. In this case, reinforcement (about 30-40 rod diameters long) is released from each pile, which is subsequently connected to the grillage frame. This connection ensures maximum reliability of the structure. The result is a very strong and durable pile foundation with a grillage.
3.3. Reinforcement of pile foundation grillage
On top of each pillar, before installing the grillage, waterproofing is made from tarred roofing felt. Instead of resin, it is possible to use hydroglass insulation.
Next, the marking thread is again pulled over the remaining supports, and within the designated boundaries, a cushion of crushed stone and sand is placed under the future grillage, which is spilled with water and compacted. To ensure that water does not go into the ground when pouring concrete, polyethylene or roofing felt is laid.
The grillage is reinforced before the formwork is installed.
After completing the tying of the reinforcement, the marking thread is tensioned again and the formwork is installed along it.
The pouring of a monolithic grillage is carried out in the same way as when pouring a strip foundation.
To construct a “hanging” foundation, a layer of sand is first laid under it, which is removed as the structure dries. You can replace the sand with a wooden box in the shape of the letter “P”, which is installed on a layer of brick. After 3 days, the box and bricks are removed.
Creating a pile field
At this stage, you will also have to follow a certain order of actions. First, mark the area for the pile field. At the points where the piles will be driven, reinforcement bars are immersed in the ground. A string is pulled between them and the accuracy of the base geometry is checked.
Then do the following:
- Unloading the piling rig. Bored piles and a machine for driving them into the ground are brought to the site. The installation is small in size and equipped with a swamp chassis. This allows you to keep the coverage of the area intact.
- Transportation of piles around the territory. Reinforced concrete elements are unloaded in one place, and a pile driving machine delivers them to the installation point. Often the piles are moved around the site on a trolley.
- Preparing for installation. First, the piles are lowered and fixed to the ground, and then the boom is raised. The piles are lifted with a winch.
- Driving piles. Piles are placed into the ground using the impact method. One element is immersed to the required depth in a few minutes. The installation of reinforced concrete structures is monitored using a level.
- Cutting off the ends of piles. The piles are partially trimmed until the reinforcing bars are exposed. The work is performed with a hammer drill.
During operational work, a pile field is created in a few hours.
Grillage for pile foundation
In our articles, we have repeatedly talked about various foundation designs, how they are structured, for which buildings they are more suitable, and how to independently calculate the foundation. We also wrote that one of the most economical foundations for light frame houses, for houses made of aerated concrete or logs, is a columnar foundation or, as it is often called, a pile foundation.
In this article we will tell you how to make a monolithic concrete grillage for a pile foundation , how to properly reinforce and insulate it.
By its design, the grillage is a concrete, metal or wooden strip that is attached to the top of a columnar foundation or foundation on screw piles. The main task of the grillage is to redistribute the load from the entire structure onto the piles, which in turn transfer it to the ground.
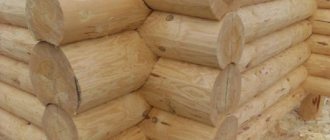
For example, when constructing a log house, its lower logs, which lie on the pillars, serve as a grillage. In frame house construction, the lower frame of the house also performs a similar function.
We will not consider wooden or metal grillage types; they are made quite simply, but a monolithic concrete grillage requires a more professional approach.
By type of design
The grillage foundation has its own characteristics. The load-distributing structure can be assembled in several ways. According to this classification, the grillage is:
- Monolithic.
- Prefabricated.
- Prefabricated - monolithic.
Each of these types has some features as well as materials. However, first things first.
Monolithic
This structure is made of concrete. The construction of this type of grillage involves pouring concrete and creating a solid area that connects the heads of pillars or piles.
Monoliths come in two types: strip and slab. In the first case, a tape is created that goes from one pile to another.
This is exactly how most monolithic grillages are made. The second type involves creating a slab connecting all the heads at once.
In this case, you need to shell out a lot more money for concrete (and reinforcement, if provided). Therefore, such grillages are made infrequently. But, if there are poor geological conditions, then this option is irreplaceable.
Made
As you probably already guessed, in this case the grillage is assembled. The materials used here are reinforced concrete blocks.
On the one hand, this design is simpler, because many people know how to properly make a prefabricated grillage, while not everyone knows how to build formwork on the top of the base and knit reinforcement.
On the other hand, constructing from blocks involves using machinery to unload parts and load them onto poles and piles. Therefore, when thinking about which option to choose (monolithic or prefabricated), many choose the first.
Prefabricated - monolithic
But this solution is no longer so simple, and in private construction it is practically not used. What are these hybrid grillages? In fact, they actually combine the two previous methods. The structure is built from prefabricated elements that are produced in a factory. For assembly into one piece, they are equipped with special locks and key connections.
Next, the seams are filled with concrete, and one continuous strip is obtained. In this way, the grillage dimensions are achieved on which industrial and residential buildings can be erected. This is where it is used. In private construction, this option is not used, since it is too expensive, is built only with the help of heavy construction equipment, and also requires high precision during assembly.
Installation of formwork
By this time, piles should be installed on the site. It doesn’t matter what they will be - lined with brick or poured with concrete.
To form the formwork, edged boards with a thickness of 2.5 cm, chipboard, OSB, plywood and any similar material are suitable.
Once the entire volume of material has been prepared, you can begin assembling the formwork. It is important to know that the height of the grillage should be at least 30 cm, and the width at the base of the tape should be 10 cm greater than the width of the pile.
The shape of the grillage is made in the form of a rectangle or in the form of an inverted trapezoid. It can also be made stepped, but the top should be a little wider.
Let's consider one of the most popular formwork options step by step.
1. The first thing to do is to mark the edges of the future formwork and along this line, every 50-90 cm, hammer in wooden blocks with a section of 5x5 cm. The bars must be positioned strictly vertically.
2. The bars driven into the ground must be securely connected at the top using the same bars. You can use wire for this.
Next, the bottom bar is screwed on using self-tapping screws. For this, boards 3-4 cm thick are suitable. The lower part of the entire formwork will lie on these planks.
3.The next thing to do is install the boards. First, the boards are laid horizontally. Here you need to carefully cut holes for the piles. The tighter the formwork is pressed against the pillars, the less concrete will leak out.
Step-by-step instructions for installing a reinforced concrete grillage:
- Preparation of tools and materials. Ordering concrete class B17.5…22.5. If necessary, you can add small crushed stone or gravel under the future piping.
- Installation of formwork. The height of the formwork should be 10 cm higher than the height of the strip grillage. For formwork, you can use boards or panels, which must be strong enough to withstand the load of concrete.
- Reinforcement and connection of the pile part and grillage. A reinforcing frame of rods is created on special stands that allow the rods to be positioned in space. The reinforced frame is knitted manually using a special hook or gun. Longitudinal and transverse rods are connected with wire with a cross section of 0.8...1.5 mm. It is recommended to cut the wire in advance. The reinforced frame is installed in the formwork, where it is connected to the reinforcement of the piles. The connection should be as rigid as possible.
- Pouring formwork with reinforced frame with concrete mixture. To properly pour concrete, you need to distribute the mixture in equal horizontal layers 10-15 cm thick. After pouring, each layer is compacted with a vibrating tool. Then the next layer is poured.
- Caring for concrete during the hardening period. The structure must be protected from wind, precipitation and UV rays. In dry weather and temperatures above +22 C, concrete should be periodically moistened.
- Dismantling the formwork. First of all, the spacers and fastenings are dismantled, and then the boards. The formwork should easily move away from the hardened concrete; if this does not happen, then the mixture has not completely hardened and has not gained strength.
When mixing concrete yourself, it is important to strictly follow the recipe for the selected class. For example, to prepare a mixture of B22.5 (M300), it is necessary to maintain the cement/sand/crushed stone ratio = 1.2/4.4/3, and for the water/cement ratio = 0.53...0.55/0.60.
Grillage reinforcement
Concrete is a very strong material, but as you know, it works well under compression, but when stretched and bent, it bursts. To eliminate this drawback, it is reinforced. Reinforcement, on the contrary, behaves well when stretched. Thus, these two materials, when combined, form a strong and reliable structure.
Grillage reinforcement consists of several stages.
1. First, bars are laid on the bottom of the formwork. Their thickness should be the same. Bars 3-5 cm thick are suitable. The width is not important here.
Why is this necessary?
According to the rules, the reinforcement should be no closer than 3 cm from the outer concrete surface, i.e. it must be completely recessed into concrete. Thus, the bars, in this case, are laid for convenience.
2.Laying the bottom row of longitudinal reinforcement.
To do this, use ribbed reinforcement with a diameter of 10 mm or 12 mm, which is placed on the bars. We will look at how to calculate their number in the example below.
3. At this stage, you need to tie the longitudinal reinforcement together so that the distance between the individual rods is the same.
For tying, smooth rods with a thickness of 6-8 mm are used because they are cheaper and do not perform any other function such as imparting geometry to the frame.
Thus, the bottom row of the reinforcement cage is completely assembled and you can begin assembling the top row.
4.Assembling the top row. We will look at one way to assemble the top row.
As we wrote above, the bars driven into the ground were connected at the top by a plank. Reinforcing rods are hung onto these strips using wire. The height at which the reinforcement should hang depends on the height of the grillage. At the same time, do not forget that the reinforcement in concrete should be located no closer than 3 cm from the edge.
Thus, the reinforcement is located in a suspended state.
5.Now you need to tie the rods of the top row together. This is done in the same way as the bottom row.
6. It turned out to be two rows: top and bottom. They are also connected to each other with smooth rods of 6-8 mm.
7. The result should be a reinforced rectangular frame. Since the upper rods were suspended on a wire and both rows were connected to each other, the wooden blocks that were laid in the first stage can be removed.
It turns out that the entire frame weighs on wires. At this point the reinforcement stage can be considered complete.
Calculation of the number of reinforcing bars
According to general rules, the cross-sectional area of the longitudinal reinforcement should be at least 0.1% of the cross-sectional area of the grillage.
As an example, let’s take a grillage with a cross-section of 40x40 cm. Let’s convert centimeters to millimeters and calculate the area. It will be 160,000 mm 2. Accordingly, the total cross-sectional area of the reinforcement is 160 mm 2.
We also know that the suitable diameter of the rod is 10 mm or 12 mm, while their number in the upper and lower rows should be the same.
The area of a round rod is found using the well-known formula S=πd 2 /4. Where d is the diameter of the reinforcement.
We get: S10=78.5 mm 2, S12=113 mm 2.
By dividing the total cross-sectional area of all rods by the area of one rod, we obtain the required number.
Having rounded the obtained figures, we obtain that the number of fittings is n10=2 pcs and n12=1 pc.
According to technology, the installation of one reinforcing rod in a row more than 15 cm wide is prohibited. It turns out that with such a grillage, there should be 2 rods in a row. Thus, their total number should be 4 pieces.
Installation technology
Installation of a pile foundation with a grillage for aerated concrete is carried out in accordance with SP 24.13330.2011 and “TTK. Concreting the pile grillage." Work on the installation of the foundation includes: calculation, preparation, installation of a pile field and grillage. We will tell you about each stage in detail.
How to calculate a pile-grillage foundation for aerated concrete
The calculation is carried out on the basis of current SNiP and includes two parts:
Calculation for a pile field
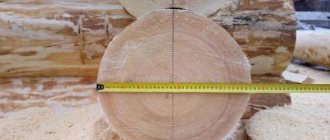
- Dimensions of pile supports. They depend on the area and weight of the aerated concrete structure and the type of soil on the site. The size of the supports must be chosen in such a way as to effectively absorb the load from the structure and prevent its settlement. Piles are installed not only around the perimeter, but also under all load-bearing walls of the future house. The cross-section of bored supports is determined according to the table:
How to use the table? Here Ro is the bearing capacity of the soil on which the bearing capacity of the pile depends. For example, construction is carried out on silty sands with Ro-2.0, which means that a support with a diameter of 250 mm will bear a load of 1 ton, with a diameter of 400 mm - 2.5 tons, etc. The larger the cross-section of the pile, the greater the load it takes. - Number of pile supports. The number of piles depends on their cross-section and the distance between them. The minimum distance between structures is 3 sections, i.e. if 250 mm supports are used, then the distance between them must be at least 0.75 meters. The maximum permissible distance is 2 meters. A house made of aerated concrete is not as heavy as one made of brick or monolith, so a distance of 1-1.5 meters is considered optimal.
Expert opinion Vitaly Kudryashov builder, aspiring author
Ask a Question
Important! The selected cross-section and distance between the supports should provide a load-bearing capacity of the piles that will be 5-10% higher than the actual load. The effective load is the weight of the house made of aerated blocks in the finished state, i.e. with external and internal finishing, drains, etc.
The load-bearing capacity of bored piles depending on the cross-section is given in the table:
Calculation example: the weight of a house made of aerated concrete is 100 tons. The perimeter of the load-bearing walls is 50 meters. The optimal distance between the supports is 1.2 meters. We calculate the number of piles: 50/1.2 = 42 pieces. This means that these 42 pieces must bear a load of 110 tons (house weight + 10%). Each support must have a load-bearing capacity of 2.4 tons or 2400 kg. According to the table, taking into account the type of soil - silty, low-moisture sand, we determine that pile structures with a cross-section of 400 mm can withstand such a load.
If you reduce the distance between the piles to 0.8 meters, then you will need more of them - 63 pieces, but at the same time the load requirements for 1 pile will decrease - 1.6 tons or 1600 kg. Piles with a diameter of 250 mm can withstand this weight. The result of the calculation of the pile field is a drawing that indicates: the number and location of piles, the distance between them and their cross-section.
Expert opinion Vitaly Kudryashov builder, aspiring author
Ask a Question
Another important point is the depth of the piles. The rule here is that the piles must rest on stable soils. If the soil on the site is dense, with good bearing capacity, then the depth of driving piles is equal to the freezing depth. For the Moscow region - 1.3-1.7 meters. If stable soils lie lower, you will have to deepen the supports more. The maximum depth is 2.5 meters.
Grillage calculation
For the grillage it is determined:
- Length - equal to the length of the perimeter of the load-bearing walls.
- Width - equal to the thickness of the wall of a house made of aerated concrete blocks.
- Height is assumed to be 0.5-0.7 meters.
Preparation for the installation of a pile-boring foundation
The site for a pile-grillage foundation requires minimal planning. Vegetation is removed, stumps are removed, and debris is removed. The marking is carried out in accordance with the drawing using a cord and pegs, which are driven into the places of future piles.
The set of tools and equipment depends on whether the concrete mixture will be produced at the construction site or ordered at the factory. The mandatory list includes:
- shovel or mini-excavator;
- tape measure and building level;
- crochet hook for reinforcement;
- concrete pump or trays for pouring the mixture;
- vibrating tool for compacting concrete.
The list of materials includes:
- concrete M250 or M300 - for pouring piles and grillage;
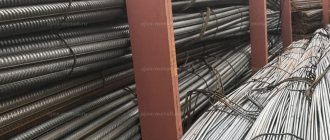
- reinforcement with a cross section of 12-14 mm;
- panels or finished formwork;
- pipes - for casing piles.
Calculating the amount of concrete is simple: you need to multiply the length of the piles by the cross-section. To the result obtained, you need to add the volume of concrete mixture for pouring the grillage. The amount of reinforcement depends on the number of reinforcing threads. Optimal - 4 threads. This means that the amount of reinforcement is the total length of all piles + the length of the grillage multiplied by 4. To the result obtained we add 25% - the margin for tying. The number of pipes is equal to the number of supports. In dense clay soils, concreting can be done without casing.
Pouring bored piles
Stages of constructing a pile field:
- Recesses are dug for the supports. A gravel-sand mixture 10-20 cm thick is poured onto the bottom.
- A/C pipes are installed in the ground. The evenness of the installation is controlled by a level.
- The reinforced frame is knitted in 4 threads. The size of the frame is 3-5 cm less than the diameter of the pipes. Knitting pattern for the reinforcing frame:
- The reinforced frame is lowered into the pipe, into which 10 cm of concrete or CFRP must first be poured. The reinforcement rods should protrude from the pipes to the height of the grillage.
- Concreting is in progress. Concrete is poured in layers - 20 cm. Each layer is compacted with a submersible vibrating tool.
- Pile heads with protruding reinforcement are formed.
Concrete caps are subject to standard care until they reach their design strength. After 28 days, the heads are leveled with a grinder. Now you can begin constructing the grillage part. If it is not possible to wait 28 days, then it is better to choose screw piles that are screwed into the ground without casing pipes.
Creating a grillage
A monolithic grillage is made in the same way as a regular strip foundation. The main difference is that the grillage is buried into the ground no more than 10 cm. Stages of creating the grillage part:
- Installation of collapsible formwork.
- Production of reinforced frame in 4 threads.
- Installation of gravel and sand backfill.
- Laying the reinforcement cage into the formwork.
- Bundle of reinforcement from piles with reinforced frame.
- Concreting a monolithic grillage.
- Concrete care for 28 days.
- Dismantling of formwork.
- Hydro- and thermal insulation of the grillage.
For a piled foundation for a house made of aerated concrete, effective waterproofing and insulation is mandatory. This is due to the high moisture absorption capacity of the aerated block. If there is no insulation, the gas block will draw moisture from the ground and the house will be damp. Waterproofing is performed for all foundation elements:
- pile heads - coating waterproofing;
- the sole of the grillage is laid on a bedding layer, on top of which waterproofing or roofing material is laid;
- The top of the grillage tape is coated with liquid waterproofing material or lined with rolled material.
The external and internal walls of the grillage are insulated. It is better to use moisture-resistant and durable polystyrene foam, polyurethane foam or plastic as insulation.
Brand and composition of concrete for grillage
We will not write much about this. As a rule, at the stage of pouring concrete, everyone is interested in the question of what brand of concrete to use for the grillage and how to prepare it with your own hands.
For the grillage, concrete grades M300 and M350 are used. If you prepare concrete yourself, then you can find the necessary proportions on our website in the article “Grade and composition of concrete.”
It is also worth saying that when pouring concrete, it must be bayoneted, i.e. expel air that gets stuck in the thickness of concrete.
To do this, use a special vibrator, which can be rented. You can also use a rod of reinforcement and bayonet it to expel the air.
This must be done very carefully, otherwise after hardening, in places where air voids form, the grillage will be weakened.
Insulation of grillage
A pile-grillage foundation, like any other, needs insulation. The exception is dachas and houses intended for living in the warm season.
The concrete grillage will serve as a cold bridge, which can negate all the insulation of the house.
The insulation scheme is quite simple and can be done after the house is built. To do this, it is enough to fix ordinary white foam plastic on the outer surface of the grillage or use more expensive, but also higher quality extruded polystyrene foam.
It is not advisable to use soft insulation materials such as stone wool or glass wool. They absorb moisture well and, as a result, lose their thermal insulation properties. Foam plastics do not have this disadvantage.
As a rule, foam plastic 5-10 cm thick is used to insulate the grillage. This is quite enough.
It is secured using special dowels, and the joints are foamed.
Many people make a mistake at the installation stage - they place the foam on the ground and then fasten it. The mistake in this case is that the foam should be at a height of 5-10 cm from the ground.
The fact is that frost heaving forces act on the ground, raising or lowering it. We wrote about what these forces are in the article (link). So, if the foam plastic is placed on the ground, then when the soil rises it will simply be torn off the walls or it will break.
Many are afraid that if the foam is not pressed tightly to the surface of the ground, the floors of the first floor will be cold. This is wrong. In order for the floor to be warm, it is insulated. There are a couple of articles on this topic on our website, “Floor on the ground.”
The surface of the foam is often finished using plinth panels that imitate brickwork. Extruded polystyrene foam can be plastered. But these are topics for another article. It is important to understand that the grillage must be insulated. This will save money on heating and make the temperature in the house more comfortable.
The difference between pile-grillage and strip foundations
Many people mistakenly believe that a pile foundation with a grillage and a strip foundation are the same thing. In reality these are two completely different reasons.
The strip foundation is located directly on the ground and transfers the load from the building over the entire area.
The grillage has a different function. It redistributes the weight of the building to the pillars, which in turn transfer the load to the ground.
An important difference is that the grillage should not be in contact with the surface of the earth, otherwise the forces of frost heaving, which we talked about a little higher, can break it or pull the piles out of the ground along with it.
Where is it used?
Classic strip foundations are reliable, but often cannot be used in difficult soils. Tape-grillage (pile-grillage) foundation structures do not have this drawback: they cope well with the load and have almost no restrictions in use.
When building on slopes and in unstable soils, pile-strip foundations make it possible to do without embankment or soil removal. They are more reliable and cheaper - the cost is 10-25% lower than classic tape ones.
Fence foundation
Pile-strip foundations for fences are effective on deeply frozen or heaving soils, although they can be used in any conditions. If you are planning a heavy fence (facing brick, rubble stone), then this type of foundation will also be the most successful.
The supports are deeply dug pillars or piles, buried to a level of 10 cm below the freezing depth. A monolithic concrete strip at a height of 15–20 cm from the ground surface evenly distributes the load on the supports.
Important! The construction of such a foundation is not cheap, so we recommend that you first contact professionals to select the type of foundation and make calculations.
Dolphin
Several supports united by a grillage are used for massive structures. Types of pile bushes:
- three piles in a triangle;
- four square piles;
- five piles: four square, the fifth in the center, the distance between the piles is 2.5–3.5 pile diameters;
- tape: piles in one or two lines, the distance between them is at least three diameters;
- pile field - rows of piles forming a continuous field, the distance between the piles is 3–6 m.
The grillage for a pile bush can also be high, surface or recessed.
Methodology for calculating a bored pile foundation with a grillage
The calculation of a pile foundation is performed depending on its type. It is important to understand that the calculation of bored piles will differ from the calculations for screw piles. But in all cases, preliminary preparation is required, which includes collecting loads and geological surveys.
Study of soil characteristics
The bearing capacity of a bored pile will largely depend on the strength characteristics of the base . First of all, it is worth finding out the strength characteristics of the soil on the site. To do this, two methods are used: manual drilling or digging holes. The soil is developed to a depth of 50 cm greater than the expected foundation level.
Scheme of a bored foundation
Professional installation of pile-screw foundation
Of course, all the advantages of a pile-screw foundation can only manifest themselves with proper calculation of the future structure and its professional installation. In this you can completely rely on the professional assistance of our employees.
Preparation for installation and the installation work themselves are carried out by responsible craftsmen in compliance with all the requirements of the technological process. The characteristics of the site being built are first studied in order to select the optimally suitable variety of our products for the construction of the most durable and reliable structure.
To provide this type of service, our company has high-quality materials and all the necessary special equipment, due to which installation work is carried out quickly and with a guarantee of high quality.