The installation of a vapor barrier is an important stage in construction necessary to protect against the effects of water vapor on the insulation. The absence of such a layer during sudden temperature changes contributes to the deterioration of the characteristics of most building materials and a reduction in their service life. Moisture ingress also causes mold to appear on them.
Vapor barrier is installed using a variety of materials both from the outside and from the inside of the house. During installation, compliance with technology is required, as well as rules on which the quality of the finished work directly depends.
Why do you need a ceiling vapor barrier?
In modern homes there is much more moisture in a vapor state than, for example, half a century ago.
Its sources are the bathroom, kitchen, indoor plants, etc. Part of the moist air escapes through the ventilation ducts (if the natural one cannot cope, you need to install forced ventilation). But even with optimal air exchange conditions in an apartment or house there will be higher humidity than outside (with the exception of a few days when the humidity outside is about 90%). But even in this situation, due to the higher partial pressure indoors (it’s simply warmer inside an apartment or house), steam molecules will break through the structural elements of the building (floor, walls, ceiling) to the outside.
As a result, the uninsulated ceiling under a cold roof will freeze. After thermal insulation, a second problem arises: the dew point shifts into the insulation, creating a new headache (what the “dew point” is and the processes occurring inside the insulation layer are described in the article “Rules for the selection and technology of installing vapor barriers for the roof”).
Attention: for those who do not want to look at the link, let us clarify a little: vapor barrier is not needed when insulating the ceiling between the floors of a residential building and between the living and attic premises - there is no critical temperature difference that causes the formation of condensation.
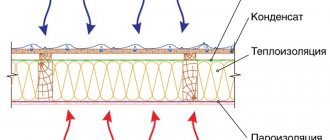
Scheme of vapor barrier from inside the room.
A vapor barrier film helps prevent the accumulation of moisture in the insulation - it puts a barrier in the path of steam molecules. It allows:
- extend the life of the ceiling, especially wood;
- eliminate the problem of accumulation of vaporous moisture in the insulation, preventing the formation of condensation in the winter;
- keep the insulation dry - any material in a dry state holds heat better.
Vapor barrier of frame structures
A layer of vapor barrier in a frame house may not be needed. This happens when using such insulation - ecowool, polyurethane foam, polystyrene foam, and provided that an effective ventilation system is created.
If the need for installation does arise, then one of the two schemes given below is used. It is chosen based on the expected intensity of use of the premises in a certain season:
1 scheme:
- The vapor barrier is attached to the frame posts;
- The walls are covered with clapboard, plasterboard or other interior finishing materials.
This method is used in buildings for the warm season, without being in them during the cold season. For example, a dacha, a workshop, a summer guest house.
2 scheme:
- Installation of horizontal or vertical sheathing located 30-50 mm from the wall to create an air gap;
- Fastening the membrane under the sheathing side exclusively indoors when using a construction stapler;
- Taping the joints with construction tape.
The scope of application of this method is for buildings with active use in the winter season.
Types of vapor barrier films
Vapor barrier materials differ in the material from which they are made, the principle of operation and the level of vapor permeability, which must be kept in mind when choosing a vapor barrier for the ceiling.
Type of material
For the ceiling, you can use roll and coating (painting) vapor barrier.
Rolled vapor barrier materials. Various types of vapor barrier films are classified as roll insulators. They can be in the form:
- films - do not allow steam to pass in both directions. This is a silent, although sometimes relative, vapor barrier. The vapor barrier film for the ceiling can be one-, two-, or three-layer, with or without reinforcing mesh;
- diffusion membranes that allow vapor to pass through from the side of higher partial pressure. Construction specialists and manufacturers sometimes say that these are membranes with one-way flow, which is fundamentally wrong. If you look at the material in cross-section (the diagram is shown below), you can see that vapor molecules can move in any direction. They cannot get to the insulation due to the higher vapor pressure in it. Therefore, the membrane can be laid on the ceiling on either side;
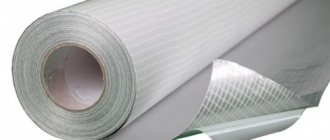
- foil films - used as reflective vapor barriers. Produced for baths, steam rooms and saunas. They are not used for residential premises - acquisition costs are disproportionate to the functions performed. Simply put, simple, cheap plastic wrap will work just as well.
Coating vapor barrier. Coating vapor barrier materials are represented by various types of mastics on a bitumen-polymer base. They can only be used outside and on concrete floors.
For a ceiling that is also a flat roof, in addition to mastic, liquid rubber is sometimes used.
Principle of operation
Vapor barrier film for ceilings can be of several types: A, B, C, D, F.
- A (some manufacturers mark it with the letters AM) - creates an insurmountable barrier to water molecules and allows steam to pass in both directions. Used to remove steam from the insulating layer;
- B is a typical representative of vapor barrier materials: does not allow steam to pass in both directions;
- C is a type of film B, only reinforced;
- D - laminated polypropylene;
- F - foil film.
Vapor tightness
Based on the level of vapor permeability, films are divided into classes:
- Class I - foil and foil films;
- Class II - vapor barriers made of propylene;
- Class III - soft material with a high coefficient of vapor permeability.
Sometimes, instead of a class, marking with the letters “SD” with a digital value of vapor permeability is used. For example, SD 50 means that in an hour, steam equal to 1 molecule of water will break through 50 m2 of film. For the ceiling, this indicator should be at the SD level of 30-40.
Does vapor permeability change when changing sides?
All of the above modern barriers are divided into the following types:
- for one-sided installation, which need to be rolled out with a certain side up and it is recommended not to confuse them;
- and for double-sided use, usually with membranes that can be laid on either side.
You will be interested to know that the first membranes, which had the same properties as modern roofing membranes, were used in astronautics. And from there they were borrowed for construction and the national economy. But until recently, there were not as many problems with their installation as there are today.
There is a strong opinion among ordinary people: if you lay the vapor barrier to the roof insulation “on the wrong side,” then the entire structure will not last long. In fact, the correct choice of side affects exclusively the service life of the interior finishing of the roofing pie, because the rough side has the same abilities as the smooth side and has absolutely the same vapor permeability. But how much it will retain droplets of condensate is a little-studied question.
Vapor barrier materials
Vapor barriers are produced by specialized enterprises and, according to their performance, are divided into the following groups:
- sheet products;
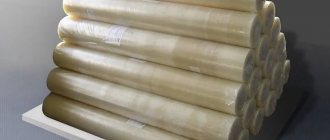
- rolled materials, including films;
- paint and varnish compositions.
Dry cement-based mixtures are also used as vapor barriers, mixed with water before application to the base.
Sheet materials for vapor barrier
Making vapor barriers from sheet materials is widespread. This is due to the fact that some finishing materials also have vapor barrier properties, so their use solves two problems simultaneously: finishing and vapor barrier.
Examples of such finishing are sheets:
- asbestos-cement (including corrugated slate);
- plaster-based cladding (moisture-resistant dry plaster);
- wood-fiber (hard).
Rolled vapor barrier materials
This group includes polyethylene and polypropylene films (regular, reinforced, foil), aluminum foil and many modern vapor barrier materials with high performance, which are varieties and combinations of these films.
Conventional polyethylene film has high vapor barrier properties in all directions, but is fragile. Film reinforced with mesh or fabric has increased rigidity, which simplifies the installation process and makes the material more durable. There is a perforated type of polyethylene film, which is used where it is necessary to create conditions for the evaporation of condensate.
Polypropylene vapor barrier film has a fleecy cellulose-viscose layer on the outside of the impermeable shell, the pile of which prevents the condensate that forms on it from draining and ensures its gradual evaporation.
There are also so-called “breathing membranes”, which are used as a one-way vapor barrier - they are impermeable to water when open, since they have pores tens of thousands of times smaller than a drop of water, but are permeable to steam in the opposite direction.
This coating is used to insulate wooden roof structures - precipitation does not penetrate through the roof, and steam from the inside is freely removed to the outside. It is also used to protect ceiling insulation from steam, but from the base side, and the material must be laid in a certain way - with the markings facing outward, and the plain side facing the heat insulator.
Paint and varnish compositions
In rooms with low aesthetic requirements for ceiling finishing, various types of bitumen-based polymer mastics are effectively used as an effective means for vapor barrier of wooden ceilings. The advantage of this coating is the ease of application even on complex surfaces and the absence of the need to use frames and fasteners.
Roof protection
When choosing a vapor barrier for a roof, you need to take into account the type of roof. In this case, the thermal conductivity of the roofing material is of paramount importance.
There are floorings with low thermal conductivity, in particular, these include:
- Roof tiles;
- Slate;
- Onduline and onduville coating;
- Coating made of bitumen compound.
For such a roof, a vapor barrier with diffusion membranes is used, and it is supplemented with a ventilation gap.
For roofs made of metal tiles, profiled iron and other types of heat-conducting coatings, the vapor barrier is made on the basis of anti-condensation waterproofing. To screen condensation from the inside of a metal roof, use a film.
Features of vapor barrier installation
An important stage in protecting insulating materials is laying a reliable vapor barrier layer. All work is carried out during the repair or reconstruction of a finished building or during the construction of a new building. To correctly install a vapor barrier, you need to understand how to connect membrane sheets and which side to fix them to the insulating base.
Preparatory work
At this stage, work is carried out to select the appropriate type of vapor barrier, taking into account the features of the installation process, operational characteristics and material requirements.
Before laying a vapor barrier, careful surface preparation will be required. It is important to consider the type of material used in the construction of floors, walls, ceilings and roofing structures.
- During the construction of a log house, all structural elements are treated with protective antiseptics and fire retardants.
- When carrying out repair and reconstruction work, complete dismantling of the finishing, cleaning and preparation of surfaces is carried out:
Wooden elements are treated with compounds against aging, rotting and burning. Concrete, block and brick surfaces are treated with deep penetration antiseptic compounds.
Proper preparation of surfaces will ensure a long service life of the insulating material and the entire structure.
Technology for laying vapor barrier on the ceiling
If the roof structure and interfloor ceiling are made of wood, then the installation of a membrane for waterproofing is carried out on a prepared base.
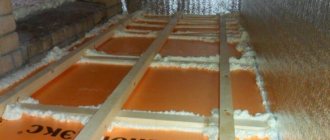
Roll or block insulation is installed in the space between the rafters and joists; the best option is mineral or basalt wool. Next, you can lay vapor barrier protection on the ceiling surface.
When the thickness of the insulation is equal to the height of the logs, an additional slatted counter-lattice is installed to maintain natural ventilation.
It is necessary to install a vapor barrier on the ceiling with a slight overlap on the walls around the perimeter, and special attention should be paid to the corners. It is better to place the joints on the joists and glue them on both sides with tape on a reinforced base.
Important! When installing a vapor barrier, sagging and deformation of the panels should be avoided.
To thermally insulate a flat roof or concrete ceiling, a waterproofing film is mounted from the inside on a self-adhesive tape, then a sheathing made of wood or metal is installed.
The height of the sheathing is determined based on the thickness of the thermal insulation material and the minimum technological gap for ventilation. The installation step is 3 cm narrower than the width of the heat insulator, which allows for high-quality installation of the insulator into the prepared sheathing cells.
Technology for laying vapor barrier on the floor
The installation scheme for vapor barrier protection on the floor is similar to how the material is laid on wall and ceiling surfaces.
The wooden floor is insulated using joists, on which a waterproofing layer is laid. Next, insulation is placed in the space between them - wool on a mineral or basalt basis. After this, vapor barrier material is laid.
The rolled material must be laid with an overlap of 12 cm, with the joints carefully sealed with metallized tape on both sides. A properly laid vapor barrier should completely cover the floor surface with an overlap of up to 10 cm on the walls.
To install a vapor barrier on a concrete base, you will need to install a sheathing, in the cells of which a waterproofing layer and a heat insulator will be laid.
What is the difference between vapor barrier and polyethylene film?
Vapor barrier is a material that does not allow even very small particles of steam on water to pass through in any direction, has good density, is not subject to the harmful effects of UV, and is easily installed with metal brackets or using self-tapping screws. How does polymer ethylene differ from special film?
Draw your own conclusions.
Advantages of polymer ethylene:
- perfectly retains moisture and steam;
- inexpensive branded vapor barriers.
Disadvantages of ordinary film:
- quickly collapse under the influence of UV radiation (cannot be used for outdoor work);
- the reliability of polymer ethylene is much less than reinforced or membrane films, it breaks more easily, stretches, and is afraid of punctures and cuts;
- the service life is shorter than that of a special vapor barrier;
- Thick polymer ethylene has the necessary strength, but weighs more than special films.
Based on this, it is difficult to use this kind of material on walls or ceilings.
Consider the installation of polyethylene film
In principle, the installation of a vapor barrier made of polyethylene film is no different from the process of installing a special vapor barrier. Since their main feature is the protection of thermal insulation and wooden structures from the penetration of steam from living quarters, they place it in front of the heat insulator.
This is how polyethylene film is installed on the ceiling. Wherever the film is used, it is placed in a horizontal position from bottom to top, with overlaps of at least 15 cm.
The connecting points must be taped with reinforced tape to prevent steam from leaking through the cracks. Moreover, another unbreakable rule when installing a vapor barrier for absolutely any type of “pie” is that there must (!) be a ventilated air between the film and the heat insulator. If condensation somehow appears there, it will successfully roll down the film and will not wet the insulator.
Place of the vapor barrier in the roofing “pie”:
- The roof covering (metal tiles, iron sheets, asbestos-cement sheets) protects the internal free space of the house from climatic and atmospheric phenomena.
- Protection from the negative effects of moisture - in case atmospheric humidity penetrates under the roofing material, the film will protect the heat insulator and wood structures from getting wet. The pairs “roof covering and protection from the negative effects of moisture”, “protection from the negative effects of moisture and heat insulator” should not be attached closely. Double-sided conrogrilling is used to provide ventilation slots.
- Thermal insulator. It is spread in several layers to ensure the required thickness of the casing. The risk of “cold bridges” must necessarily be considered.
- Vapor barrier, as well as protection from the negative effects of moisture, should be at a distance of 2-3 cm from the insulation material to ensure natural ventilation.
- Final ceiling decoration of the attic.
If we talk about interior partitions or ceilings, the situation is similar:
- main wall/ceiling;
- frame frame or frame made of corrugated sheets;
- insulation layer;
- vapor barrier film;
- plasterboard or other finishing material;
- final facing.
As you understand, it is possible to use traditional polymer ethylene, but it must be used very carefully due to its less density and resistance to wear. We hope that the material was useful to you
We will be grateful if you share it on social networks. The buttons for this are below
We hope that the material was useful to you. We will be grateful if you share it on social networks. The buttons for this are below.
The face or the back of a vapor barrier?
If a breathable membrane is used to create a protective barrier, the main thing is to determine which side to lay the vapor barrier on - face or back.
The vapor barrier cake must be placed so that the protection is directed towards the heat insulator on both sides with the smooth back side, and with the rough front side facing the inside of the room.
The rough surface provides protection from moisture penetration into the insulation, and the smooth surface promotes maximum heat accumulation.
Selection of connecting tapes and adhesives for vapor barriers
A properly designed vapor barrier is a continuous and continuous layer. Moreover, ordinary construction tape for gluing overlaps and junctions is not suitable here - only special vapor barrier tape. Each manufacturer offers its own options for connecting tapes for different tasks.
For example, some of them are intended exclusively for fabric overlaps, while others are intended for adjoining films to smooth surfaces, and others are intended for connecting vapor barriers to porous and rough surfaces. Moreover, it is extremely important to purchase connecting tapes from the same manufacturer as the vapor barrier itself in order to achieve 100% tightness of the layer.
There are also several types of these:
- special glue for film;
- adhesive composition for connecting the membrane;
- construction tape;
- single-sided aluminum tape;
as well as double-sided adhesive tape to ensure the seal of individual panels.
How to choose a high-quality vapor barrier based on technical characteristics?
So, today there are many materials that have high resistance to vapor diffusion and low vapor permeability. For a long time, ordinary polyethylene films were very popular, which, in principle, do their job, but still do not please with high vapor permeability, low breaking characteristics and fragility.
Therefore, modern manufacturers, following their policy of import substitution, produce quite interesting technological solutions, among which there are even metallized membranes. There are many such materials and it is worth studying their characteristics to understand: what is the best vapor barrier for the ceiling of your home?
Let's list the most important characteristics for a vapor barrier:
- Vapor permeability is a characteristic of films and membranes from 0 to 3000 mg per square meter per day. This indicator tells you how many grams of water in the form of steam can pass through each meter of film per day. And the lower the number, the better, of course. If the numbers show vapor permeability in hundreds or thousands of grams, then you have a vapor-permeable membrane in front of you, and it should be placed not under the insulation, but on it.
- Durability . This characteristic significantly influences how easy your installation work will be. Cheap vapor barrier films are quite easy to tear; they lose their integrity even during installation, when tools fall on them or when they are touched. On the other hand, durable vapor barrier also tolerates temperature changes well.
- Water column pressure. The vapor barrier film is designed to retain water. This indicator is mainly important for a vapor-permeable membrane, which can literally get rained on. For the ceiling, this, of course, is not critical, although attic leaks should never be ruled out.
- UV resistance. This indicator varies from several days to a month. Surely you have observed how polyethylene, which has been on the street for a long time, becomes brittle and breaks. But high-quality material retains its strong performance for a long time. This is valuable if your installation work involves storing the exposed vapor barrier film on the ceiling for a long time without internal lining.
And in order to figure it out and clarify whether you have chosen the right vapor barrier for the ceiling according to the technical characteristics, carefully examine the pictograms shown on the packaging. And trust the brand that is known and trusted in the domestic market. Among such brands are Izospan, Izover, Technonikol, Delfa and others.
The truth about vapor barriers - About polymer membranes
Due to the large difference in temperature and humidity (especially during the cold period) inside and outside the building, the pressure of water vapor on the building envelope is enormous. According to the known laws of physics, water vapor rushes out of the building, passing through all layers in turn. Passing through the insulation layer, where, according to calculations, the “dew point” zone is located, the vapors begin to condense, turning into water. The insulation becomes saturated with water and gradually loses its functions, often turning into a layer of ballast, which only overloads the load-bearing structures of the coating. This is especially true for layers of mineral wool, which are often used in the construction of traditional flat roofs due to their excellent fire protection characteristics.
Wetting of the insulation also leads to its deformation, which affects the deformation of the entire cake and leads to failure of the mechanical fastening system of the waterproofing material. Of course, the use of hydrophobic materials for thermal insulation of the coating allows us to solve the problem of destruction of insulation when wet. However, the question remains open regarding the flow of condensate formed in the insulation layer into the interior, which leads not only to the destruction of the interior decoration, but also to corrosion of the supporting structures, which can lead to serious consequences over time. Thus, a vapor barrier layer is an extremely necessary element in the design of a traditional roofing pie.
Many designers and builders, who do not fully understand the essence of the issue or want to save money, treat the vapor barrier layer according to the “if only it is” principle. In this case, materials are used that do not meet the requirements of thermal engineering principles, and their installation is carried out in violation of technology. Thus, the lion's share of vapor barrier materials is occupied by polyethylene films. And although polyethylene itself is indeed a good vapor barrier, it is also necessary to take into account such indicators as the thickness of the vapor barrier layer and the vapor permeability of the waterproofing layer.
The basic principle for the correct operation of the entire under-roof space is the following rule: the amount of water vapor entering the under-roof space through the vapor barrier layer should not exceed the amount of vapor escaping through the waterproofing layer of the roof. Consequently, the vapor permeability of the waterproofing roofing carpet must be no less than the vapor permeability of the vapor barrier layer.
It should be noted that any known material used for vapor barrier has a certain vapor permeability. The exception is materials with a layer of metal or glass that have zero vapor permeability.
In European practice, the vapor permeability of materials is assessed by such an indicator as the water vapor diffusion coefficient (µ), reflecting the difference between the vapor permeability of the material and a layer of air of the same thickness. This dimensionless coefficient shows how many times better the material resists the penetration of water vapor compared to air.
The higher the value of the coefficient µ, the better the material in terms of vapor barrier. For example, the coefficient of resistance to water vapor diffusion for polyethylene is µ=200000, for bitumen materials µ=70000, and for polymer membranes based on plasticized PVC – about 20000.
In European countries, to assess the vapor barrier and diffusion abilities of materials, the equivalent thickness (in meters) of water vapor diffusion (Sd) is used - the product of the coefficient of resistance to water vapor diffusion (µ) and the thickness of the material (d). When installing a traditional roofing pie using a layer of polyethylene film with a standard thickness of 0.2 mm for vapor barrier and a waterproofing carpet made of bituminous fused materials with a thickness of about 8 mm (2 layers of material 4 mm thick), we have:
Sd (vapor barrier layer): 200000*0.0002=40 m. Sd (waterproofing layer): 70000*0.008=560 m.
One of the options for solving this problem is to use PVC membranes, characterized by high vapor permeability, for the waterproofing layer. With a standard membrane thickness of 1.5 mm, the Sd value will be at the level of 20000 * 0.0015 = 30 m. At the same time, the issue of arranging hermetic connections for individual polyethylene vapor barrier sheets remains quite acute. Contrary to recommendations, builders prefer to make do with a 10-15 centimeter overlap of individual panels.
Thus, only an integrated approach to the selection of roofing materials and their combination can ensure a reliable and durable roof.
Which vapor barrier is better for the ceiling of a wooden house
For wooden houses, as a rule, a vapor barrier membrane or polypropylene film is used. As for the first type, it is worth paying attention to the “smart membrane” - a modern material that can independently regulate the level of humidity in the room. But its cost is much higher than that of others, but maintaining the correct microclimate is ensured. Experts advise choosing the following types of vapor barrier materials when forming a ceiling in a wooden house:
- Penofol A is an easily installed vapor barrier due to the presence of a self-adhesive layer.
- Penofol B has a foil side for better heat retention in the room.
- Penofol S is a vapor barrier for the ceiling in a wooden house, similar to the first two groups with the presence of a self-adhesive layer.
- Izospan is a material with two layers and an improved system for evaporating moisture from the surface.
- Alucraft is a vapor barrier film with three layers, used in rooms with high humidity.
Popular manufacturers
There are many companies that specialize in the production of one or another type of vapor barrier material (universal, non-flammable, etc.), but the following manufacturers are among the best:
- "Izospan" (Russian, "Yutavek" (company from the Czech Republic - Juta);
- TechnoNIKOL (Russian manufacturer);
- Tyvek (American company DuPont);
- "Nanoizol" (Russian (company from Russia);
- "Izolon" (Ukrainian (Danish (Russian (Russian manufacturer);
- Klober (Germany);
- Fakro (Poland);
- Delta (German company Dorken).
Polypropylene and polyethylene film
The cheapest option of all the above materials are thin polyethylene and polypropylene films. However, low cost does not mean poor quality and low efficiency; such materials provide controlled release of steam from the room.
Reinforced polyethylene film can be of two types: perforated and multilayer foil. Both options are used with great success to create a vapor barrier layer in houses with wooden ceilings. The foil material simultaneously performs a heat-reflecting function. As a result, heat remains in the room, which allows for some savings on heating costs.
Polypropylene film contains hygroscopic fibers, so it simultaneously allows steam to pass through and absorbs moisture. Thus, moisture penetrates the fibers and, gradually evaporating, comes out.
Films made of polyethylene and polypropylene are presented to the consumer in roll form, which determines the method of their installation. Solving the question of how to make a ceiling vapor barrier involves performing the following steps:
- The film is cut into pieces of a certain length.
- Lay the canvases on the ceiling, making an overlap of about 15 cm.
- The joints are hermetically sealed with wide self-adhesive tape.
- Fix the edges of the vapor barrier material using a metal profile or construction staples.
Izospan V has the best vapor barrier characteristics in this group of materials. However, despite the excellent vapor permeability, this isospan for the ceiling in a wooden house has a rather significant drawback - the lowest strength characteristics. This property greatly complicates installation work. When using Izospan B, you should be careful and careful.
The material “Izospan B” is a two-layer polypropylene non-woven fabric. Its top layer has a smooth surface, the bottom layer is fibrous and rough. It is the villi that prevent condensation from penetrating into the insulation and the ceiling. When choosing this material for arranging a vapor barrier layer, you should know one feature: its installation is carried out before the insulation. When vaporizing a ceiling in a wooden house, first of all, lay the Izospan B film, pointing its smooth side down.
The process looks like this:
- The roll is unpacked and the canvas is rolled out. Measure and cut pieces of a certain size.
- The strips are laid with an overlap of 15-20 cm in the horizontal and vertical directions.
- Elements for fixing the canvas are selected depending on the material from which the decorative ceiling will be made. For example, for a plasterboard ceiling, metal profiles are used, for a ceiling covered with clapboard, wooden slats are used.
- Regardless of the material used, it is recommended to purchase self-tapping screws with an anti-corrosion coating.
- The joints of the canvases are sealed with adhesive tape, and this must be done tightly enough.
- The insulation is attached to the ceiling using plastic disc dowels or galvanized self-tapping screws.
- Another layer of Izospan V vapor barrier is installed on top of the thermal insulation.
- Finally, the finishing material is installed. In this case, a free space of about 4 mm should be left between the vapor barrier material and the decorative structure.
How to lay and why
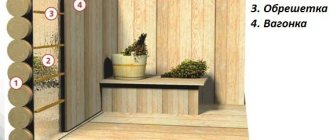
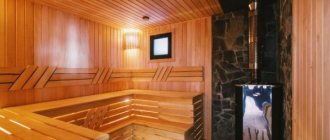
Typically, a vapor barrier is installed on the side of the room. This is due to the fact that indoor humidity is usually higher. This is especially true for kitchens, bathrooms, as well as baths and saunas. For baths or saunas built from wood, the penetration of moisture into the wood is also fraught with the formation of mold and the gradual destruction of the wood. This problem is especially relevant for Russian baths with their high level of humidity.
Vapor barrier prevents steam from penetrating to the heat insulator
In traditional bathhouses made of rounded logs without additional thermal insulation, the removal of vapors, regulation of humidity and drying of the room occurs due to natural processes. Even with perfectly fitted logs and caulked inter-crown joints, the removal of vapors and the supply of fresh air occurs due to the micropores of the wood, small cracks in the logs. This is exactly how our ancestors steamed: they warmed up the bathhouse for a long time - six to eight hours, did not rush anywhere and did not save wood.
We need the bathhouse to be ready within an hour maximum, while energy costs should be minimal. This is achieved through a multi-layer “pie” made of various materials to retain heat and steam. A vapor barrier layer in such a “sandwich” is required, otherwise all the “layers” will have to be changed in a year or two, and the wood will have to be “treated” for a long time and persistently from mold and fungi.
Stages and methods of installation of various materials
Before laying the vapor barrier material, it is necessary to prepare the base for its fastening. If roll vapor barrier is used, the surface is pre-puttyed. If a liquid paint vapor barrier is used on a concrete base, it is enough to smooth out the unevenness. Then the surface is primed, and after drying, a vapor barrier can be applied.
Preparing a concrete ceiling
The materials, which are panels, are attached to the base with a construction stapler. Particular attention should be paid to the corners. Insulation panels are attached along the perimeter of the ceiling with an overlap of 10-15 centimeters.
The film spreads with tension, without allowing sagging of more than 1.5 centimeters. To ensure reliable fastening, the panels are fixed with tape. For fastening between beams, nails with a special enlarged head are used. The pitch between nails is 30 centimeters. The joints are additionally taped with construction tape. If the vapor barrier is attached after the insulating material, slats are attached with screws on top of it.
Sealing ceiling vapor barrier joints
The sheet vapor barrier is laid on an aluminum profile frame, which can be purchased at retail outlets. The profile can be replaced with thin bars, but experts advise preferring a factory profile, which already has grooves for attaching vapor barriers. After installing the solid sheets, all joints are glued with PVC film.
Rolled materials are rolled out from the bottom up and secured with profiles or slats.
Foil materials are placed with foil inside the room. The purpose of this installation is to reduce heat loss due to the reflective effect.
Advice! When purchasing vapor barrier material, it is important to correctly calculate its quantity. It is definitely worth considering that the rolled material is laid overlapping and with allowances, so its size increases accordingly.
Tools for installing ceiling vapor barrier
How to lay a vapor barrier on a ceiling
Vapor barrier materials are very diverse. To install them correctly for maximum efficiency, the following factors should be considered:
- side of laying the vapor barrier - for some materials this does not matter, but if, for example, a double-sided membrane is used, attention should be paid to this issue, such a film does not allow water to pass through only on one side;
- docking - the vapor barrier coating must be solid; for this, different techniques are used;
- ventilation gaps - vapor barriers cannot be laid close to the ceiling insulation.
The purpose of the room and the nature of the wooden ceiling are also important: it separates the heated rooms or living room and attic.
Which side to put the vapor barrier on the ceiling
Which side to lay the vapor barrier on the ceiling depends on the type of vapor barrier chosen. The exception is coated and painted material, since in this case the functionality is ensured by the vapor barrier composition.
For all other options, the following recommendations apply:
- with a double-sided film, one side is rough and the other is smooth; the material is laid with the rough side outward and the smooth side inward; the outer layer retains moisture but allows it to evaporate; the smooth layer is impenetrable to steam and does not allow moisture to pass into the insulation;
- one-sided polypropylene film with a laminated layer is mounted according to the same principle: the smooth side inward, towards the insulation, and the regular side outward;
- ordinary plastic film has both smooth sides, so how exactly it is laid does not matter;
- foil sheets are laid with a metal layer outward, this option is designed to retain heat in the room, and it is the foil layer that reflects thermal radiation back into the room.
Important! There are always exceptions. For example, Izospan film is laid contrary to generally accepted recommendations: with the rough side inward and the smooth side outward.
How to install a vapor barrier on the ceiling
The vapor barrier coating must be a solid structure. Even fastening with nails can disrupt its vapor barrier properties:
- if a coating vapor barrier is used, then make sure that there are no untreated areas left; it is necessary to also cover the upper section of the wall in order to isolate the joints between the ceiling and the walls;
- films and membranes are laid with an overlap of 8–15 cm and the joints are taped, the sheets are laid as closely as possible to each other, the seams are taped.
If a sheet vapor barrier is performed, then a special profile can be used. The latter can be done with your own hands.
Ventilation gap when installing ceiling vapor barrier
There should be a ventilation gap of 50 mm between the layer of insulation and the vapor barrier on the ceiling. If the height of the logs is greater than the thickness of the insulation, such a gap is formed automatically. If the values coincide, then a wooden sheathing 50 mm high is first attached to the logs, and then a vapor barrier is laid on top.
A ventilation gap should also be maintained between the vapor barrier coating and the finishing of the ceiling. They use the same technique for this: install a sheathing of thin slats.
You should not use polyethylene for vapor barrier. Use Ondutis films
Warm indoor air is saturated with steam. Moisture is actively evaporated by plants, animals and people, and generated by household appliances; Showers and bathrooms are sources of steam. When warm air moves upward, steam condenses on colder surfaces and moistens the insulation, as a result of which it loses its properties and becomes unusable.
The vapor barrier layer is an essential component of the roofing pie. It prevents steam from penetrating into the insulation and protects it from getting wet. Special vapor barrier and hydro-vapor barrier films Ondutis have all the necessary qualities and are recommended for installation of Onduvilla roofing.
The modern construction industry produces a variety of waterproofing materials, and many of them are good at retaining steam. For example, cheaper polyethylene film is often used as a vapor barrier. Is it effective, and why are Ondutis films included in the Onduville roofing composition? To answer this question, let’s compare the main characteristics and features of installation of materials.
Polyethylene film is a homogeneous polymer material with very low water absorption and impermeable to water vapor. It is intended for the manufacture of protective coatings, packaging, containers, etc., and is produced in the form of a sleeve, half-sleeve and sheet with a thickness of 0.015 to 0.5 mm. To construct a vapor barrier layer, a polyethylene film up to 0.2 mm thick is used.
Ondutis vapor barrier and hydro-vapor barrier films are designed to protect insulation and enclosing structures from steam penetration, have high strength and elongation.
Installation of the vapor barrier layer is carried out in the following sequence:
– the film is cut into sheets of the required length and mounted close to the insulation starting from the bottom of the structure;
– the canvases are laid with the recommended overlap, fixed to the rafters and finally secured using internal lathing;
– overlaps and junctions of the vapor barrier material to the structures are glued with mounting tape.
When using Ondutis R70 and Ondutis RS films, a universal tape made of Ondutis BL butyl rubber is used. Ondutis R70 Smart film has an integrated mounting tape.
The vapor barrier properties of polyethylene film fully satisfy the requirements, however, during construction work this is not enough: the width of the film, as a rule, does not exceed 1.5 m, so areas that require sealing are formed at the joints of the sheets. Polyethylene films have extremely low adhesion, and the use of construction tapes and mounting tapes is ineffective - steam freely penetrates through overlaps and junctions. The welding method is not used when installing vapor barriers made of polyethylene film.
Insufficient strength is another significant drawback of polyethylene film: when installing a vapor barrier layer, the film is stretched and pressed closely against the supporting structures, while protruding nail heads and poorly planed rafter surfaces cause numerous breaks in the film and wetting of the insulation.
Ondutis insulating films do not have the disadvantages inherent in polyethylene film: they are easy to install and provide reliable protection from steam during their entire service life.
How to attach a vapor barrier to the ceiling
Ceiling installation includes 3 stages: waterproofing, insulation and vapor barrier. This is the last layer before finishing. Its installation is determined by the type of material used, as well as the design of the ceiling.
Fasteners for proper installation of vapor barrier on the ceiling
Construction staples are preferable for fastening the covering. They are much thinner, provide the same reliable fixation of the film, but do not violate the vapor barrier properties of the coating. Thick cardboard or other similar material should be placed under the staples.
It is allowed to use nails with wide heads. It is better to choose galvanized ones, as they are resistant to moisture and will last much longer.
Scotch tape also serves as a fastening element. It is used both for attaching film to joists and for vapor barrier of joints. In special cases, a profile is also used to connect sheets to each other.
How to install and secure different types of vapor barrier on the ceiling
In order for the vapor barrier to effectively perform its functions, it is necessary to follow all the rules for waterproofing during installation:
- during installation, it is allowed to use vapor barrier materials that are less resistant to water than waterproofing materials;
- it is very important to achieve a solid surface; for this, the film is laid overlapping, the sheets are glued with tape, and so on;
- it is necessary to exclude moisture in the vapor barrier coating; work cannot be carried out during snowfall, rain, or fog;
- when laying rolled vapor barrier, the material must first be kept in a warm room for at least 20 hours;
- The film should not be stretched too much, it should sag slightly;
- When vapor barrier corners, be sure to use solid material.
Important! When choosing different types of coatings, the list of rules is supplemented with recommendations from the manufacturer.
Izospan D
High-strength, completely moisture-proof waterproofing material. Polypropylene sheet with one-sided laminated polypropylene coating. The versatility of the moisture-vapor-proof material implies widespread use in construction technologies for the construction of any type of structure.
Izospan D successfully withstands moderately strong mechanical loads, is resistant to tearing, withstands strong gusts of wind, and in winter copes with heavy snow loads. In comparison with other similar films, Izospan D has gained fame as the most durable and reliable option.
Izospan D Area of application
In any type of roof, as a barrier preventing the formation of under-roof condensation. Widely used in the installation of hydro- and vapor barriers during the construction of buildings and structures. Protection of wooden structures. The material largely resists negative atmospheric phenomena.
Izospan D is often used on construction sites as a temporary roof covering and installation of a protective wall in objects under construction. Such a roof or wall can last up to four months.
Type D is especially popular when constructing concrete floors that require a waterproofing layer to protect against earth moisture.
How to properly install a vapor barrier on the ceiling: step-by-step instructions
The finished vapor barrier in appearance resembles a pallet with sides. The coating should cover not only the insulation on the ceiling, but also the gap between the heat insulation and the walls. In addition, the film must cover each beam.
The first stages of finishing the ceiling are carried out as usual. The wooden surface is cleaned, treated with antiseptics and fire retardants, and communications are installed. Then the ceiling is waterproofed and insulation is laid on it.
- Laying begins from any wall. The roll or sheets are cut to size and secured to wooden beams with staples. In this case, a gap must be maintained between the heat insulator and the vapor barrier. If necessary, pre-attach the sheathing.
- The film or membrane must cover each beam. There are two ways to do this. A simpler option involves fastening the material around the beams. In this case, the canvases are laid perpendicular to the beams, taking into account some recess into the interblock space. If the length of the film is not enough, gluing the vapor barrier is allowed.
- Another option: cut the film into fragments of the appropriate size; you need to wrap each compartment separately. All seams and joints are additionally taped with tape. As a rule, this method is used for vapor barrier of panel-box ceilings. Laying is done with an overlap. The tolerance on walls is 10–15 cm.
- The joints are sealed with tape according to the following scheme. First, glue the seams between the canvases. To do this, bend the overlap, secure the edge of the vapor barrier with tape, then remove the protective strip from the adhesive tape and attach the overlap on top. The joints with the wall are sealed in the same way. In this case, you cannot stretch the film; it should sag by about 2 cm.
- Then the second and third layers of vapor barrier are laid, following the same rules. Make sure that the joint of the next layer does not coincide with the seam on the first layer. The displacement should be at least 30–40 cm.
Foil material, especially sheet material, is mounted according to a different scheme.

