How to brew a cast iron stove
There are many ways to weld cast iron in general, these are inverter, cold welding, hot welding, semi-hot.
Preparing the Slab
Preparation of cast iron before the welding process is mandatory. For cleaning, a grinder with a petal circle is used. As soon as the rust layer is removed, you need to treat the slab with a degreasing solvent. During the preparation process, you need to pay attention to:
- Stiletto heels. There are two types of welding, with and without support elements.
- Cutting edges.
- Using special electrodes.
Selecting a brewing method
There are only three methods for welding cast iron:
- Hot. It is considered the main and most suitable for this type of material. The essence of welding is that before you start working with electrodes, you need to heat the metal to a high temperature.
- Semi-hot. This method is identical to the previous one, except for the heating temperature, which should be lower.
- Cold. Characterized by a large number of technological processes, but does not involve heating.
Brewing a cast iron stove: step-by-step instructions
Before you start welding cast iron at home, you need to properly prepare the metal and follow the step-by-step instructions:
- The edges are cut at 45 0 if the slab plate is thick. This procedure can be carried out using a grinder or a sharpening machine. A crack in cast iron is initially treated with an abrasive disc, and then the ends of the defective area are drilled.
- The graphite base is placed under thin material (3mm). Molten metal will not flow from the reverse side during welding.
- The metal must be cleaned of dust, rust and debris. After this, it must be heated using a blowtorch or other equipment.
- The welding process begins as soon as the required temperature is reached. The sides of the slab must be secured using tacks.
- It is not recommended to allow transverse vibrations during the first weld; it is carried out very quickly. The seam is adjusted from several sides if the length of the slab exceeds 100 mm. This procedure will help avoid overheating the cast iron on one side.
- If the plate is thick, then it is necessary to make the seam in several moves. For better adhesion of cast iron, after the first smooth seam, oscillatory ones are made.
- After each seam, slag is separated.
Important! As soon as the welding process is completed, the seam must be covered with sand until the product cools completely.
The process of welding such metal at home using an inverter is very successful.
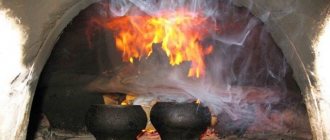
Cracked cast iron stove in the oven
Forum members, the cast iron stove in the new stove is cracked. It only stood for about a year. Can it be repaired by welding with special electrodes for cast iron?? I won’t take pictures, I’ll just crawl up on the spot..
Why did the slab crack?
It is most likely jammed; perhaps a quarter of the bricks were not selected for the slab when laying them. The plate should lie freely.
It's better to do it forty times than never forty times. )))
Can you brew it like that?? It could also have cracked because when they arrived they stuffed the firebox full of wood and heated it, that is, abruptly.
You can brew it, but there is no point - it will burst at the seam again when heated well.
Arkady wrote: It could have cracked because when they arrived they stuffed the firebox full of wood and heated it, that is, abruptly.
It could also be from the heat, from the fact that she was pinched or there was a tank of water on her.
There was nothing on the stove. Thank you, that means we won’t cook, the crack is neither big nor wide.
Arkady wrote: the crack is not big and not wide.
If smoke does not leak out, use until replaced. It’s just that during welding the homogeneity of the metal will be disrupted, as a result, when heated, a crack will appear again or new ones may appear.
cast iron can be gas welded, copper solder with flux
the lyricist wrote: cast iron can be soldered with gas welding, copper solder with flux
Isn't it easier to change the stove?
It’s just that not everyone has a gas welder, and in order to take it to a welder, you will have to remove it from the furnace. Then it’s easier to install a new stove right away. Again, when heated, copper and cast iron expand differently, so the crack will go further. Or am I wrong and you have experience soldering cast iron plates with copper solder and the functionality of the plate is completely restored and cracks do not form when heated? Share your experience. soldered vices, brackets, drill out a crack, the question was about repair, the snot blooming “what is better to replace” is not accepted, the decision is made by the topic starter, there is a way to weld with a regular electrode by feeding copper wire into the melt, but the result is not so neat
I wonder what the stove and
the lyricist wrote: soldered a vice, brackets, drill a crack
. Or are you just bragging that you know how to cook and solder cast iron? In order to restore the appearance, just fill it with epoxy resin with filler and paint it
What is the thermodynamic coefficient of cast iron?
the stove is heating up, the deforming thermal load depends on the thermodynamic coefficient, so the expansion of cast iron is negligible, and the amount of copper is such that it will not have an effect; on the contrary, it compensates for the movements with its plasticity, and the fact that I welded structural, mechanically loaded parts in place of the stove stove indicates that that “my” method allows us to achieve sufficient strength
Maybe the lyrics will suffice? You haven’t cooked stoves, but there are a dime a dozen theorists here on the forum even without you
practitioner, move forward with your method: “just fill it with epoxy resin with filler and paint” very competent advice from a highly experienced specialist, can you recommend anything else? want to laugh
Lyricist, enough lyricism? Original.
You can also cover it with bread crumbs, that’s also a great way, most importantly it’s cheap. In general, I also used to change the stoves often until in 1995 I installed heating with a boiler in the firebox, after which I forgot about the stoves and the cracking of the stove.
Bachelor, No, cracked ones don’t smoke.. As I understand it, they changed the stoves often, but did you find out why they cracked?? What about your heating? Thank you.
The bachelor wrote: In general, I also used to change stoves often until I built a heating system with a boiler in the firebox in 95
Could you explain what kind of boiler is in the firebox? Is this firebox made of metal or something? How does it transfer heat to the brick? There is also a problem with these stoves and the firebox needs to be repaired
Arkady, I also had to change it a couple of times on the old stove. Poor quality casting is the main conclusion I made for myself. The reasons may be different - temperature differences (rapid heating in winter), and microcracks invisible to the eye. Here » > they advise you to anneal it before using it. Perhaps this is correct, I’ve never done it myself, I won’t lie. The quality of cast iron is not the least important thing, IMHO. Two years ago I purchased Serbian Gucha Lava, and the problem resolved itself.
Thank you.. I agree, the Russians have forgotten how to produce good goods.. An old stove in an old stove, they also came in the winter, stuffed it full of firewood and flooded it. There weren’t just one crack, but here all at once. You know who would tear off their hands with this, for such a product... I haven’t seen any imported ones, and it’s hard to distinguish them from Russian rubbish.
Arkady wrote: As I understand it, the slabs were changed often, but did you find out why they were cracking?? What about your heating?
Overheating. If I sleep now at the same time as the amount of firewood previously laid, then the house will be 40-50 *C.
Now the stove is still standing from old stocks. But they also burst, just like now - apparently what is written above is correct - our cast iron is bad, only great for “shirts”.
Where? I may have written here when, but I don’t remember. And I most likely wrote when I changed the electric heating element to an Aristonovsky one, having digested the housing. Before that, there were 2 pieces from a 1 kW scoop kettle.
Dina Malina wrote: Could you explain what kind of boiler is in the firebox? Is this firebox made of metal or something? How does it transfer heat to the brick?
This is when cast iron batteries are installed around the house, and the boiler coil in the furnace firebox is walled up.
taels, I didn’t find the Guchu Lava stove, they have current stoves and fireplaces.
Once upon a time, I annealed a strongly repeatedly painted cast-iron radiator in a fire at the dacha and at the end of the process, in order to quickly cool it down, I splashed it from a watering can - there was a distinct crackling sound of metal. I found a crack, “expanded” it slightly and covered it with epoxy putty. I sanded it and painted it black. It looks great and is functional in my mini-autonomy (the pressure is weak) it heats and doesn’t leak. But my father-in-law’s hob has a crack for about 15 years now. and sometimes they cook and warm up and sleep behind the stove - they don’t burn out.
Frequently asked questions and answers
It is not always possible to find complete information in the instructions on how to properly use the sealant. This leads to a number of errors and problems in the future, which in no way depends on the quality of the thermal paste itself.
Is it possible to seal the joint between the chimney and the roof when it is frosty outside?
It is better to carry out all work with sealant in the dry and warm season, then its adhesion will be as strong as possible. Look for sealants that work in cold temperatures, but be aware that they will take a long time to dry. If it is -2°C, then most likely the process will be successful. If we are talking about severe frosts, then it is better to wait for a thaw, since the mixture will not be able to polymerize correctly.
Experts use a trick, forcing the sealant to work using heat guns. The latter are located in close proximity to the processing site, increasing the temperature by 10-15°C.
The sealant is not drying well, what can I do to help?
This picture occurs if the ambient temperature approaches zero. Accordingly, to solve the problem, the surface and air should be slightly warmed up. But the best adhesion of the two surfaces occurs when all the work is completed in the summer.
Can the sealant cause a spark?
If we talk about those sealants that are used for combustion chambers, then they do not contain any elements that can somehow influence the combustion process. But such a sealant must be marked “fire resistant”. This means that it can be used in areas of active combustion.
In conclusion, it is worth noting that heat-resistant sealants have different compositions and can be used for different purposes. Before purchasing, it is important to evaluate at what temperatures it will be used in order to determine the desired composition. Please ensure that the sealant does not contain hazardous components that can release toxic substances when heated.
Why does the stove on the stove burst?
Probably the quality of the material comes first. How long did you serve? Sudden heating may cause it to burst. The stove should lie freely on the stove. Previously, slabs with holes were released and nothing happened, they lay normally. It could only burst in the narrowest place between the holes. And then there was a tank on it, that is, there was a load.
In our garden, the cast iron stove on the stove also cracked. It cracked many years ago. My husband believes that it is cracked because in the spring, when the ground thaws, our house “walks” a little. At this time, the locks are difficult to turn. I can't even always open it. Our garden was built in the floodplain of the Reshetka River in a wetland. There are ditches dug around the perimeter of the garden, but a swamp is still a swamp. We tried filling the cracks with a special heat-resistant varnish, but the best way to cover the cracks is with metal plates or pieces of clay that have fallen off the stove. I would like to replace the stove, but there will be a lot of work involved.
– Good afternoon, dear editors of the newspaper “Khozyaystvo”! Anatoly Pavlovich Sergeev, a resident of the Krasnodar Territory, is writing to you. I have known your newspaper for a long time and look forward to each publication with great impatience. Many authors on the pages of your publication talk about their inventions, share their experience and advice. Being a stove maker with a wealth of experience and experience, I would also like to share with readers my observations in the field of stove installations.
Sometimes, at the request of my comrades, I had to install heating stoves in private houses. To make such a stove, you need a cast iron plate measuring 700x400 mm. It has two holes that are closed with special “circles”. Their thickness is 10 mm (see Fig. 1).
Since I am a specialist in this field, it was not difficult for me to determine that the solid cast iron slabs produced by the industry are a real defect. They cannot withstand even the most basic requirement placed on them - the ability to glow. After all, if the stove is built correctly, then about half an hour from the moment the match is lit, the stove should heat up to a visible red glow in the daytime. But in fact, many stoves burst from such heating, which causes a lot of inconvenience to household members.
The second requirement for a cast iron stove is that when it is hot, it must withstand the splash of a certain amount of water onto its surface. Unfortunately, industrially produced slabs cannot withstand this. But people have been using these stoves for a very long time.
And no matter how hard the housewife tried, when lighting the stove for cooking or simply heating up the water, there was and will always be a splash of water on the stove in a hot state. I would like to ask a reasonable question to those people who gave the go-ahead to put this unfinished product into production. Why did they turn a blind eye to this important flaw?
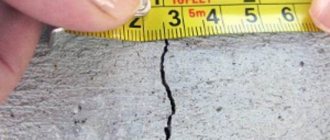
If you take a closer look at the stove at the moment when it begins to heat after heating, and take measurements for the sake of experiment, it turns out that the width of the slab in the area of the jumper in the middle is 4 mm larger than the width of the slab at the edges. That is, it turns out that not the entire stove is heated, but only the middle, where the jumper is located.
And cast iron is a very hard metal. Ultimately, the slab breaks in places of least resistance. What needs to be done to correct the situation? - you ask. It is necessary to make a compensating joint in the jumper.
All released slabs must be cut to 3.8-4.0 mm only in the lintel area. When heating the stove, it is necessary to place a pan of water at this joint so that the stove does not smoke while heating. And then the joint begins to converge.
In new slabs, in preparation for casting, craftsmen make a thickening at the joint, and a so-called “male-male” joint of 4 mm is formed (see Fig. 2).
Such stoves do not burst when heated to a visible red glow in the daytime and successfully withstand the splash of water from a pan onto a hot stove.
The service life of such plates increases tens of times.
It’s surprising, but for how many years now have foundries throughout the post-Soviet space been casting the same defects, and no one even thinks about why we are casting slabs that are unsuitable for use?!
Several years ago, with the idea of making a compensating joint in the lintel of the slab, I contacted the Patent Bureau of the city of Krasnodar. But to obtain a patent, 25,000-30,000 rubles are required, which, unfortunately, I, a pensioner, do not have. This is where the story ends.
Anatoly Pavlovich Sergeev, Krasnodar region, st. Plastunovskaya
Anyone who has used stoves with stoves knows that over time the latter split both lengthwise and crosswise. Previously, such slabs were simply thrown away and new ones were installed, fortunately it was possible to buy them. Now that cast iron plates are in short supply, the question arose: what to do in this case? After all, using a slab made of halves, quarters, and so on is very inconvenient, since the cracks constantly diverge due to heating and cooling and you need to move them all the time. Therefore, in order to extend the life of the cracked slab, I tie its individual parts with wire.
How and how to repair cracks in a brick or cast iron stove
You can cover up cracks in the stove not only with clay, but also with special compounds. If the damage is severe, you will need to plaster it and finish it with tiles, for example, tiles. It also happens that deformations on the stove become through. If you do not have sufficient experience, it is better to contact a specialist to prevent further destruction of the structure.
- Causes of cracks
- How can you cover up cracks on a brick stove in a house?
- A mixture of clay, sand and straw
- Furnace glue
- Tiling
- Special formulations
- How to repair a crack in a brick kiln
- How to cover cracks in a stove with clay
- What to do if a crack appears in a cast iron stove
- Recommendations and preventive measures
- Conclusion
Oven glue
To prevent the stove from cracking in the future, you can use heat-resistant glue to repair it. It belongs to the category of ready-made materials for finishing fireplaces, which are sold on construction sites. Its main qualities include resistance to high temperatures and durability.
This adhesive mixture contains fireclay powder and fire-resistant types of cement. Today, there are two types of glue - plastic and hard.
The main advantage of oven glue is its very fast drying, so you should not mix the solution in large quantities.
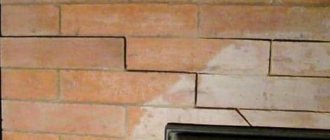
Causes of cracks
Before repairing a stove for cracks, it is recommended to understand the reasons for their appearance. Most often, masonry may suffer from deformation due to the following phenomena:
- The stove stood idle for several days in winter, after which the owners decided to immediately flood it. Then damage will likely occur due to temperature changes.
- If the seams between the bricks are very different from normal sizes (too thin or large), deformations may also appear on the surface. They will go exactly along the joints.
- Even a small temperature difference is enough to cause cracks to appear on the stove if a low-quality mortar was used during laying. In these cases, the surface cracks at the seams. Thanks to this, you can immediately see the weak point.
- Problems are often observed in new, recently built houses. They gradually settle due to shrinkage of the foundation, so the stove itself may suffer.
- Cracks will have to be repaired when they form due to increased humidity on the internal surfaces. For example, if ventilation is not efficient enough, condensation will form.
- For the same reason, you cannot immediately heat the stove without waiting for it to dry completely at normal room temperature.
What repairs does the furnace need?
- Maintenance;
- small;
- capital.
Routine repairs are used as a means of preventing and protecting the furnace from serious damage. Repairs are carried out to eliminate minor defects that appeared during operation. Current repairs include work to strengthen weakened parts, seal seams and cracks on the surface of the stove, and, of course, periodic whitewashing.
Minor repairs include work that does not require rebuilding the stove, but requires serious attention, because ignoring it can lead to disastrous consequences. Such work, when it is possible to repair the furnace with your own hands, includes updating the furnace floor and lining, repairing chimneys, etc. Any damage that requires minor repairs occurs as a result of aggressive, harsh operation. The lining, for example, is subject to deformation when exposed to very high temperatures. This can be facilitated by the use of coal or anthracite. The so-called “under” wears out due to friction when utensils are regularly moved on its surface.
Any furnace repair will be effective and error-free if the correct “diagnosis” is first made. Since major repairs are quite a serious matter and involve certain difficulties, it is better to entrust this matter to a master.
How can you cover up cracks on a brick stove in a house?
Most often, it is recommended to repair damage with clay. The material is inexpensive and easy to use. There are several ways to cover up cracks in a stove, where other compounds are used in addition to clay.
A mixture of clay, sand and straw
One of the available options is to mix sand with clay and straw. Clay is taken in the amount of 4 kg, and sand - 1 kg. In this case, 4-4.5 kg of straw will be needed. You can grind it a little first. All components are combined together and a little water is added until a thick consistency is obtained. Then you need to carefully seal the cracks to the depth.
You can add regular table salt to the finished composition in the amount of 200 g per 10 kg. Thanks to this, the components will disperse better, and the composition itself will adhere to the surface.
The easiest way to repair damage is with clay mixed with sand.
Furnace glue
Another option for repairing cracks in the seams in a stove is to use a special stove glue, for example, Terracotta. This is a heat-resistant composition that can withstand temperatures up to 400 degrees. Used for lining stoves, as well as fireplaces, barbecue areas and barbecues.
Consumption – 3 kg per square meter when laid in a fairly dense layer of 8 mm. The composition is plastic and adheres well to the surface. It can be used to repair even deep damage.
It is permissible to repair defects with special oven glue
Tiling
Cracks in the stove between the bricks can be covered with clay and then covered with tiles. For work, different samples are used: clinker, terracotta, porcelain stoneware, tile.
The materials are not cheap, but the repairs will be major, which will allow you to forget about the deformations for several years. A budget option is to plaster the surface.
Special formulations
For finishing, you can use special solid compounds, for example, asbestos fiber or heat-resistant sealant (regular sealant will not work). First, a solution of thick consistency is prepared from them, diluted with water strictly according to the instructions. Then it is applied to the surface, penetrating deeply into the damaged area.
The compositions are quite plastic and fill the entire volume. This allows you to avoid the occurrence of deformations in the future. In addition, they adhere well to the masonry, making it possible to seal cracks for many years.
The best heat-resistant sealants for stoves and fireplaces
Experts recommend buying heat-resistant sealants from those manufacturers who have earned a name for themselves with decent quality. It is better to avoid buying cheap options that do not have detailed instructions, as there is a risk of purchasing a fake.
TYTAN Professional
TYTAN Professional
Fireproof silicate sealant. Suitable for minor repairs of stoves and fireplaces, chimneys. It contains an admixture of fiberglass, which forms a dense smoke- and gas-proof layer. Has good adhesion to metal, concrete and brick.
Advantages:
- Relatively low cost.
- Operating temperature up to +1500°C.
- The composition does not contain asbestos.
- Can be stored in a tube at sub-zero temperatures.
- Can be used to seal cracks in any parts of fireplaces and stoves.
Flaws:
- Complete drying takes at least 24 hours.
The average cost for a tube weighing 300 g is 250 rubles. After use, the sealant is closed using a threaded cap. It can be stored for quite a long time, maintaining its qualities.
Ognez 1600
Ognez 1600
The sealant allows you to effectively seal cracks and glue surfaces together. A distinctive feature is the need to wet the treated surface with water, which improves adhesion.
Advantages:
- Bonds concrete, glass, brick, stone, ceramics.
- Waterproof, suitable for external chimney sealing work.
- The highest operating temperatures, which allows it to be used in all parts of the heating device.
- Easy to apply with a spatula, convenient to work with.
- Can be painted using varnishes and paints with natural composition.
- High level of environmental friendliness.
Flaws:
- Not identified.
The cost of a domestic product is about 240 rubles. When stored correctly, it is not afraid of freezing and defrosting cycles.
MASTERTEKS PM
MASTERTEKS PM
Polish silicate sealant, black. It is easily applied to the surface without requiring preliminary preparation. Suitable for filling various cracks and sealing joints. Dries relatively quickly.
Advantages:
- A convenient screw cap on the spout prevents air from getting inside the tube during storage.
- Dries quickly if the recommended layer thickness is observed.
- Does not crack when the surface cools.
- Excellent adhesion
Flaws:
- Not identified.
The sealant is good in every sense and is literally ideal when working with a chimney.
How to repair a crack in a brick kiln
Clay helps to repair cracks in the brickwork of the stove. You can, for example, take a mixture with sand in a 1:1 ratio. This is the simplest method and is very affordable. But it will not be possible to seal the cracks for many years - over time they will still make themselves known.
You can also take fireclay clay - the material is inexpensive and absolutely safe for health, used in the production of refractory bricks. To prepare the putty, you need to mix the following components (ratio 2:7:1):
- fireclay clay;
- sand;
- cement M500.
During the mixing process, add a little water until a moderately thick consistency is obtained (like liquid sour cream). This composition allows you to quickly and easily repair cracks, and the problem can be solved for several years to come.
Fireclay clay is highly heat resistant
How to cover cracks in a stove with clay
To cover up cracks in the seams of the stove, you need to proceed as follows:
- First, the old finish (plaster) is removed, since you need to get to the very base of the crack.
- After this, the area of damage is slightly increased so that the solution penetrates to a depth of at least 1 cm inside the masonry.
- Next, you need to seal the crack by going over it with a primer and wait for it to dry completely.
- Then the stove is lit, adding a small amount of firewood so that the temperature does not rise too high.
- Without waiting for the stove to cool down, take a spatula and a paint brush or brush. Then you need to seal the crack by applying the composition inside the masonry.
Features when repairing the firebox
Most often, the firebox is damaged when it is made of ordinary red brick, rather than fireclay. The brick delaminates and falls off in plates. How to repair a brick stove in this case? There is no point in covering and reinforcing red brick; it still crumbles from high temperatures. Since it is impossible to reduce the temperature level in the firebox, additional lining must be made to reduce the effect of temperature on the walls.
The internal lining of the firebox is made using the following materials:
- Cast iron. It will last a long time. But there is one trick: you need to leave a gap between the wall and the cast iron. To do this, they lay corrugated cardboard, which will burn immediately during the first fire and will burn out, but the gap will remain.
- Steel. For that. To repair with steel. It is also necessary to make a gap. But the steel will still burn out quite quickly, especially if the repair is carried out in a sauna stove.
- Fireclay brick SHA-6 (“fly”). It is capable of serving without splitting under prolonged loads of extreme temperatures. A gap of 1 cm is left between this brick and the wall using basalt cardboard. The solution is taken the same as when laying fireclay. After repairing the stove using a firebox lining, the rate of heating of the room will be reduced, but the temperature inside the firebox will be higher. Combustible gases burn out completely.
- Fireclay brick. You can repair a damaged firebox using ordinary fireclay bricks placed on edge. True, it will reduce the combustion space; the gap between it and the wall will also have to be maintained.
- Vermiculite boards. Such slabs are environmentally friendly, do not emit harmful fumes, are made entirely of natural material, and are highly fire resistant.
- Superizol (calcium silicate). When the question arises of how to repair a furnace firebox with your own hands, it is worth considering this safe material of mineral nature. It can easily warm up to 1000 degrees.
What to do if a crack appears in a cast iron stove
You can cover up cracks in a cast iron stove at your dacha with special compounds. For this, the following mixtures are used (the ratio is indicated in parts):
- clay – 30;
- metal filings – 4;
- manganese dioxide – 2;
- table salt – 1;
- borax – 1.
Another composition option:
- magnesite – 10;
- liquid glass – 3.
With zinc white (2 parts):
- clay – 4;
- manganese oxide – 1.
- graphite – 12;
- lead – 4;
- chalk – 3.
If this is not possible, it is recommended to use any of the compositions described above.
Damage on a cast iron stove can be repaired using special mixtures
Recommendations and preventive measures
Repairing damage to a stove is not always easy. But if you follow simple rules, you can reduce the risk of their occurrence. Experienced experts recommend paying attention to the following tips:
- You can seal cracks with different putties. To consolidate the result, it is recommended to lay the reinforcing mesh directly on top of the composition. After this, apply two layers of plaster up to 5 mm. In fact, this is not just repairing damage, but major repair work. They will be needed for old stoves that have several more or less deep defects.
- After installing the stove, let it sit for at least six months to shrink and dry out. There is no point in heating it at this time.
- Carry out preventive examinations regularly (at least once a year). If small cracks appear, it is much easier to repair them than to wait until they grow into larger ones.
- After repairs, the damaged part must be covered with burlap or other thick fabric.
- If not surface, but through cracks are found, major repairs will be required, since simply sealing them with clay compounds is not enough. In these cases, it is advisable to call an experienced technician, since independent repairs may not produce results.
Troubleshooting Medium Problems
Sometimes, if the oven is damaged to a moderate degree, it is impossible to do without independently repairing and strengthening some parts.
Gaps around the firebox door.
Mechanical stress and temperature changes can lead to the formation of cracks around the firebox door or hob. As a result, dangerous gases penetrate outside.
These places need compaction.
Sequencing:
- clean the surface, remove the old solution;
- rinse and prime it with heat-resistant glue diluted with the same volume of liquid;
- secure an asbestos or ceramic cord around the door or hob to prevent the clay from cracking.
- rub the necessary areas with the repair mixture;
- dry for at least a day.
Tip: to check whether the fire cord has been tampered with, light it right at the cash register.
You can eliminate cracks around the hob using the same algorithm. Before removing the stove, heat the oven. Then pry up the metal using an axe. It is permissible to replace asbestos cord with basalt wool or felt. If the old stove is completely worn out, replace it with a new one .
Strengthening the frame.
This becomes necessary if gaps and cracks are located around the entire perimeter of the stove . In this case, it is best to re-arrange the masonry, but if there is not enough time, you can resort to screeding the frame using metal wire.
Sequencing:
- we dig special channels in the oven with a depth of 15 to 20 millimeters strictly horizontally;
- we lay wire in the grooves so that it provides a tie to the frame;
- we stretch the wire, twisting it with a beard or a thick nail so that it does not break;
- Plaster the stove.
Replacing the grate.
When replacing the grate, keep in mind that there must be a gap between the masonry and the grate. It must be covered with sand. The new grate should be exactly the same size as the old one.
Replacement of pre-furnace sheets.
This manipulation should only be performed when the sheets become perforated or rusty. Sequencing:
- removing the old sheet;
- removing nails;
- laying a piece of felt that was previously soaked in a clay solution;
- nailing a new sheet.
Why do cracks appear in furnaces?
Most often, problems appear in brick fires. There are 4 main reasons for violating the integrity of the masonry:
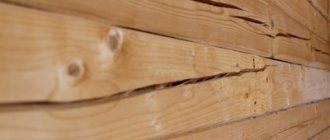
- prolonged absence of heating in the house; if the stove stood in an unheated building during the winter, then cracks cannot be avoided - and not only in this structure, but also in the walls of the building;
- ignoring operating rules; a “fresh” stove must stand – the masonry mixture should set and the structure should dry well; heating a damp hearth will certainly lead to the appearance of cracks;
- uneven heating of furnace zones; the structure must be made in such a way that heat is distributed evenly throughout it; otherwise, the thermal contrast boundary line will become clearly visible - the masonry will crack in this area;
- difference in thermal expansion coefficients of masonry mixture and masonry; the furnace material and the solution must have approximately the same thermal expansion rates, otherwise the surface will be covered with a network of microcracks; This is not the biggest problem - cracks are not visible on a cold structure.
Formed cracks along masonry joints.
These four reasons lead to troubles that can be relatively easily eliminated with putty. But there are more fundamental reasons:
- improper foundation design; if the latter, for example, does not correspond to the dimensions of the heat source, the stove monolith will be damaged; the oven will begin to crack even if the shrinkage of the base does not go according to plan;
- incorrect calculation of physical characteristics of materials; for example, without a reserve in thermal seams, the metal structure will “break.”
In these two cases, putty will not help. We'll have to move the oven. Therefore, the first step is to diagnose the structure. Once you are sure that the problem can be solved with little effort, you can proceed to the next steps.
Important! Before repairing, you need to make sure that restoration can be done. There is no point in sealing cracks if the cause is fundamental
Application area
Stoves and fireplaces have different designs. All home fires have a firebox, where organic raw materials are burned, and a chimney. Depressurization of any area is dangerous due to the possibility of carbon monoxide entering the room.
Carbon monoxide is often the cause of poisoning in residents because it is odorless and colorless. It is impossible to feel an increase in gas concentration. The integrity of the stove and chimney should be carefully checked; control traction in the system.
If cracks appear in the pipe or where it meets the roof, sparks and a heated flow of gases can enter them. This poses a risk of fire.
In addition to all the risks, due to depressurization, the efficiency of furnaces is significantly reduced. Part of the energy released during combustion evaporates uncontrollably into space.
Some modern chimneys are made from ceramic or metal fragments. Sandwich structures for removing smoke from stoves are gaining popularity.
When installing chimneys, it is necessary to ensure a monolithic connection of all components, preventing the leakage of hot fuel combustion products. You can gain confidence in the safety of using stoves and fireplaces only by correctly using fireproof sealant during initial installation and repair.
How to cover up cracks?
You can cover the stove with a purchased mixture or a solution you prepare yourself. Further about the features of the options.
Sand-clay mixture
Putty made of clay and sand is the most accessible and inexpensive option. Scheme for preparing the mixture:
- you need to take clay and fill it with water in a ratio of 1:3; after this you need to leave the mixture for at least a day;
- The clay should be thoroughly mixed, adding liquid from time to time; after kneading, strain with a fine-mesh sieve and tincture again (several hours);
- after the next infusion, you need to drain the water and make sure that the mass has a creamy consistency;
- you need to mix clay and sand - first in equal proportions.
Readiness is determined using an object used to mix the solution. If too much clay sticks to it, add a little sand. As a result, the ratio of components can be from 1:1 to 1:2.5. The composition can be considered ready when a small amount of the viscous component remains on the stick.
This recipe is approximate as clays can vary greatly. It is best to rely not on a stick with stuck clay, but on the result of experiments. Experienced craftsmen make grout with different compositions. After this, several different types of cakes are dried in a place free from sun and wind. Those pieces that are not cracked are dropped from a meter height. “Surviving” flatbreads demonstrate the optimal ratio of components.
Fireclay putty
A slightly more expensive, but also more effective option. Fireclay clay is very heat-resistant and durable. Most often, fireclay is used for stove repairs. The material is sold by construction stores. Before sealing the structure, purchased clay is infused in water for a couple of days.
Oven adhesive
If you need the best option, use a special mixture for ovens. The solution consists of fire-resistant cement and fireclay powder. There are two main types of glue you can buy in supermarkets - viscous and hard. If you are looking for something to cover up small cracks on the stove, purchase the first type. Solid mixtures are used for plastering.
The main advantage of factory materials is the optimal ratio of components and very thorough mixing. It is impossible to achieve such quality at home. In addition, there is no need to waste time preparing grout. Another advantage of ready-made compositions is quick setting.
An alternative option is oven grout.
Factory solutions are good for everyone, except for the price. There is another opportunity to save money - use putty prepared according to the following recipe:
- the clay is broken into small lumps and infused in water for about 12 hours;
- sand is added to the mixture of water and clay, after which the components are thoroughly mixed;
- during the mixing process, crushed straw is added to the composition from time to time, which reinforces the solution;
- After the mixture becomes homogeneous, salt is added to it (about a pack).
The ratio of sand and clay is 1:4. You need about 10-15 kg of straw per bucket of clay. It is easy to see that this is a modified version of the sand-clay mixture described above.
Selection of mixtures and solutions for furnace restoration
If you don’t have the time and opportunity to prepare a solution for filling cracks yourself, then buy ready-made mixtures in the store. There are options for fireclay masonry, grout, mastics for repair and restoration, and adhesives. On store shelves you can find brands of mixtures:
- Terracotta;
- BOSSNAB;
- Pechnik;
- SPO;
- CMEA;
- PLITONITE;
- Makarov stove house;
- Scanex.
Before using the solution, you need to carefully read the instructions on the package and make a batch depending on the proposed proportions of water and dry part.
Types of oven mixtures:
- Heat-resistant - do not expand, do not change their properties. At high temperatures it retains its structure. The composition is resistant to thermal deformation and can withstand loads.
- Heat-resistant solution - characterized by resistance to high temperatures, does not change the properties and structure, and does not deform.
- Fireproof mixture - withstands any temperature and the use of chemicals.
The basis of masonry mixtures includes cement, lime, clay, gypsum. They can also be mixed with various additives.
The components of the lime mass are quicklime and sand 1:3, the mixture is diluted with water so that the consistency resembles thick sour cream. The disadvantages of the solution include prolonged drying of the masonry and harmful fumes.
The mixture consists of sand, cement and water. Pay attention to the brand, it is preferable to buy M400-M50, M40-M500. First, mix cement with sand (1:6), then pour in liquid. If you add broken brick and Portland cement to the solution, you will get a heat-resistant mass.
How to cover up cracks and plaster a stove?
To prevent the stove from cracking, you need to take a competent approach to its construction and operation. But if cracks do appear, they need to be eliminated as quickly as possible. Regardless of the type of mixture, the structure should be prepared before restoration. The surface is cleaned of dirt and debris, and the cracks are deepened and widened. If there are bumps and sagging on the base, they are knocked down.
Remember! If the oven begins to crack due to insufficient shrinkage, you need to let it sit completely. Otherwise, after repairs, the structure will again become covered with cracks.
Before coating, the hearth must be heated. Due to the high temperature, the furnace materials will increase in volume. This will avoid repeated cracking immediately after post-restoration heating.
If there are few “seams”, they are sealed locally before plastering. Otherwise, a complete coating is used - the entire surface is covered with liquid heat-resistant putty.
Scheme of work
In general, the procedure is as follows:
- clean the base and perform other additional work;
- cover the surface with a thin layer of liquid mixture and allow the putty to dry;
- reinforce the base (or cracks, if the repair is local); for this purpose, a metal mesh with small meshes is used; fasten the reinforcement with nails or dowels; as an alternative to the mesh, you can use burlap soaked in putty; It is preferable to use it to seal cracks pointwise;
- after the starting layer has dried, the fireplace is plastered; the oven is coated in two layers - the thickness of each layer is no more than 5 mm.
The next steps are at the discretion of the stove owner. The structure is covered with whitewash or decorated in another way.
Rules for grouting
To properly coat the stove with clay, you must follow these step-by-step instructions:
The surface, cleaned of plaster, is generously moistened with primer or water. Using a chisel, knock out the gaps between the bricks. The oven is warming up. Using a trowel, apply the clay mixture into the cracks and spread it over the entire surface in an even layer. If you don’t have a tool, you can do the smearing by hand. The mixture does not cause irritation or damage to the skin. When the surface is dry, another layer of the mixture is sprayed
Particular attention is paid to cracks - there should be a dense layer of mortar between the gaps. Using a damp wooden trowel, grout in a circular motion to remove any unevenness. The last step is plastering the stove.
The process of sealing with fire-resistant adhesive is carried out according to the same scheme, but includes an additional step. After filling the cracks with plastic material, the entire surface is treated with a hard type of glue so that the stove no longer smokes. It takes half an hour to dry, which can be spent on decorating
It is important to remember that the structure can be used after the solution has completely hardened.
How to eliminate cracks in a metal structure?
The main solution to the problems of cracks in metal stoves is obvious - welding is used. But if this option is not suitable, you can use special fire-resistant putties.
Recipes for preparing mixtures are presented in the tables.
Water based mixture ratio
The ratio of the components of the mixture based on natural drying oil