From the first lines it is worth agreeing that partitions appear when the bathhouse is remodeled. Otherwise, when it comes to building a new bathhouse, they are called “non-load-bearing walls” and are erected at the same time as all the others. Accordingly, the materials used are also design materials. In this material we will only touch on what concerns the brick partition in the bathhouse. It is characterized by a certain uniqueness of requirements, which is better to discuss separately, without lumping together all existing types of partitions.
General requirements for the construction of partitions
If the partition is being erected in an already completed building, it is necessary to think about what it will stand on and how it will be attached to existing structures. The following requirements must be met:
- do not bring the partition to the ceiling;
- place it on a reliable base designed to bear the load;
- arrange a sliding fastening to the walls.
The gap between the top of the partition and the ceiling is necessary so that during shrinkage there is no excessive load on the non-load-bearing structure, which is not designed for such pressure. This requirement is especially important to comply with for log houses, which can settle by 4-5% of the original height.
The remaining gap is filled with jute or tow and masked with ceiling plinth Source varshhouse.ru
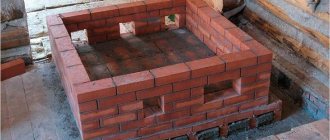
Wooden floors in a bathhouse with partitions can only serve as the basis for light frame structures. Timber and logs can only be laid across the logs with support on them, on a concrete screed or on columns made of blocks or monolithic concrete. For a brick wall, a shallow strip foundation is required. It must have the following parameters:
- depth – up to 50 cm;
- width - slightly larger than the thickness of the future partition.
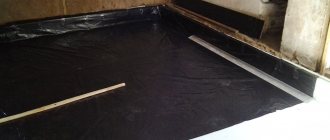
Gravel is laid and compacted at the bottom of the dug trench to form a cushion 15-20 cm high. The remaining space is filled with concrete; it is not necessary to reinforce it. To raise the partition to the level of the finished floor, you can install formwork in the trench and pour the foundation to the desired level.
You can also pour a plinth under timber or frame walls installed on a screed to protect the wood from constant contact with water. The concrete base must dry for 3-4 weeks, only after which it can be loaded.
Concrete base for a frame partition Source par-torg.com
It is important! It is possible to tie the partition foundation with the main one only if the foundation depth is the same. If it has a shallower depth, there should not be a rigid connection due to different shrinkage.
If the partition in the bathhouse between the steam room and any other room is not built on the main foundation, its connection with the walls must be sliding. This need is also caused by different degrees of shrinkage of load-bearing and non-load-bearing walls. With a rigid ligament, deformation and destruction of structures are possible.
Methods for installing sliding fastenings depend on the wall material; they will be discussed in the relevant sections.
See also: Catalog of companies that specialize in redevelopment of country houses of any complexity
How to make partitions in a bathhouse with your own hands using glass blocks
It is quite difficult for a person without experience to erect a glass partition on their own, but it is possible. To do this, you need to be patient and use a cement-sand mortar with a fine fraction.
There are two ways to install glass blocks:
- Using adhesive cement mortar;
- Using modular cells.
The work in the first option is very similar to laying bricks, but the process is longer and more labor-intensive.
With this option:
- It is necessary to clean the base of the partition and then level it;
- After this, install a row of blocks, and arrange plastic crosses between them so that the seams are of the same thickness;
- Next, it is necessary to carry out horizontal and vertical reinforcement of the masonry.
Information. Under no circumstances should you lay more than three rows of blocks in one day, since this structure is quite heavy and the raw seams of the lower blocks may simply not hold up.
Partition options
Having chosen what to make the partition in the bath between the steam room and the washing room from, you need to calculate. How much material is needed, determine its thickness and understand the construction features.
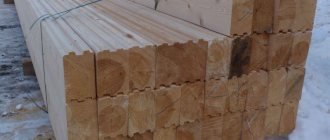
From wooden crowns
The minimum thickness of a partition made of lumber of any cross-sectional shape is 100 mm. More is possible, less is undesirable. To save money, you need to calculate the required amount of material in advance. This is easy to do if you know the cross-section of the lumber and the height of the wall: dividing the height by the thickness of the timber or the diameter of the log, we get the number of rows.
Log partition Source tildacdn.com
After that, you can choose the length of the timber, taking into account the size of the partition, so that there are fewer scraps left. For example, if the length of the partition is 2.5 m, it is better to buy a five-meter beam and saw it in half.
Under the first crown, a layer of roofing felt waterproofing must be laid on a concrete or brick base.
To make the partition in a timber bathhouse strong, it is fastened with wooden or steel dowels, the length of which must be at least one and a half times the thickness of the crown. For example, with a cross-section of 100 mm, the length of the dowel is chosen to be 150 mm, and for timber with a thickness of 150 mm - from 225 mm. This is necessary so that the connecting element completely pierces one crown and at least half enters the underlying one.
Installation diagram for dowels Source remontik.org
The diagram shows that the dowels are installed with a vertical offset in adjacent rows. The distance between the rows should be at least 1 meter, and the distance of the first row from the wall should not be more than 25-30 cm.
The holes for the dowels should be slightly longer than them and 1-1.5 mm larger in diameter. They are installed starting from the second crown. Wooden dowels are driven into the prepared holes with a rubber mallet or a wooden hammer, not flush with the surface, but with a slight immersion, so that when the wall moves and the thermal expansion of the wood, the fasteners have freedom of movement.
Having hammered all the dowels into the crown, it is lined with insulation, which can be used as:
- flax tow;
- jute;
- sheep wool;
- moss.
Related materials for a wooden partition Source stblizko.ru
Place the next crown on the insulation, drill holes in it for the dowels offset relative to those already installed below, and hammer them in. This continues until the very top.
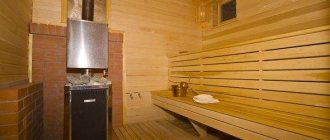
Why is it necessary to line the stove in the steam room with bricks?
If you were still in doubt up to this point, check out this list:
- The metal structure heats up very quickly, which does not allow the body to adapt to the high temperature.
- A metal stove cools down as quickly as it heats up. You have to constantly monitor the temperature by adding logs, which is not very economical.
- The material lined with brick will not heat and dry the air so quickly, which means the atmosphere in the steam room will be more comfortable.
- There is a high probability of being burned on the walls of a metal structure. People sitting next to the stove will not feel comfortable.
All these small shortcomings can be easily eliminated with the help of cladding, which will increase the performance of the stove, improve its design and neutralize harm to health, because people go to the bathhouse to improve their health, and not vice versa!
This is the most optimal solution in terms of efficiency and labor costs - to combine the advantages of a metal and stone stove.
Factory-made metal sauna stove “under the lining”
At the moment, factories are producing stoves that are initially designed for further lining with brick; this design is the golden mean that will allow you to profitably equip an excellent steam room.
For lining the furnace you need to use only these types of bricks:
- red ceramic brick;
- fireclay brick.
You don’t have to search on the forums, there’s no point in us deceiving you! If you take any other brick, it may crack on its own or peel off from the adhesive mixture, and you will need to reposition it over and over again!
Do not take sand-lime brick. It is great for cladding a house, but it is not suitable for lining a sauna stove. Lime-based bricks are simply not able to withstand constant temperature changes and high humidity in a steam room.
After just a few weeks of use, it will begin to deteriorate. And from a decorative point of view, it is not suitable and additional cladding will still be required.
A good option would be refractory fireclay bricks, which are specifically designed for sudden temperature changes.
Fireclay brick
Outwardly, it is, of course, inferior to red ceramic brick, but this issue can be resolved with decorative finishing cladding.
If there are no remaining bricks on the farm, it is better to buy a new one! Give preference to ceramic red brick. Its specific gravity is much lower than that of fireclay. It demonstrates excellent technical properties, reliability and durability. And externally, the stove, lined with red ceramic bricks, will delight you for many years with its stylish, authentic look.
The process of lining a sauna stove with bricks is not very complicated, and if you strictly follow the detailed instructions, even a beginner can handle it.
Brick lining scheme
Video description
An example of a timber partition is shown in the video:
There are several ways to make a partition in a bathhouse between a steam room and a sink in a log house with a sliding fastening device to the walls.
- Using steel angles with oval holes to allow them to stay in place as the walls shrink.
- With cutting a groove in the wall along the width of the partition.
- With two vertical bars attached to the wall on both sides of the partition, forming a similar groove.
The groove in the wall of the log house is cut out with a circular saw. Source wixstatic.com
The latter method is also suitable for attaching a wooden partition to brick or block walls.
Consumables and tools
To build a sauna with your own hands from warm ceramics, you will need the following tools:
- spatula or trowel: the tool should fit the width of the ceramic block;
- building level;
- cord and plumb line;
- rubber mallet;
- putty knife;
- concrete mixer;
- bucket;
- drill;
- Master OK;
- perforator;
- screwdriver;
- jigsaw;
- hammer;
- pliers;
- wall chaser;
- nail puller;
- wire cutters;
- construction corner;
- laser level.
Materials you need to prepare:
- ceramic blocks;
- masonry mortar containing thermal insulation filler.
You also need to purchase:
- waterproofing;
- vapor barrier;
- material for arranging the roof truss and beam system;
- raw materials for roofing.
For communications you need to prepare:
- electrical cables and corrugation;
- pipes for water and sewerage;
- materials for finishing the inside of a bathhouse.
Video description
If you need a master class on bricklaying, watch this video:
The second and all subsequent rows are laid with the seams tied using a cord stretched level. The vertical seams of the top row should be offset by half a brick in relation to the bottom row.
An important question when laying a quarter-brick partition in a bathhouse is what and how to make the reinforcement from. In order not to thicken the seams, it is better to use masonry mesh or strips of metal, since even the thinnest reinforcing bars have a cross-section of 6 mm. There are also 4 mm ones, but they are rare.
Alternatively, you can use thick wire Source vseoarmature.ru
It is advisable to reinforce the first few rows, then every 6th row, as well as 2 rows above the openings.
A brick partition in a brick bathhouse, if it is not designed in advance and is not erected simultaneously with the walls, is attached to them as follows:
- a hole is drilled in the wall at the level of the partition seam;
- a piece of reinforcement is hammered into it so that part of it sticks out and fits into the seam;
- when laying the next row, it is hidden in the masonry joint mortar.
You can also use regular angles and other fastening devices that provide a rigid bond.
If the walls of the bathhouse are made of logs or timber, it is necessary to take into account their shrinkage and make a sliding connection. For this purpose, limiters made of bars are nailed to the walls on both sides of the ends of the masonry, which will hold it in a stable position.
Brick stoves for a bath - advice from an experienced stove maker
You can build brick stoves for a bathhouse yourself, having carefully studied all the intricacies of the structure. This article presents the types, positive and negative aspects, as well as step-by-step instructions for building a brick kiln.
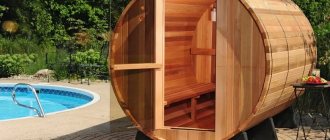
Brick sauna stoves are an excellent alternative to metal ones. Such devices provide uniform heat, and the steam that comes out of them does not burn, but acts gently. You can create a brick oven with your own hands, laying out any shapes and using the most suitable decor.
Briefly about the main thing
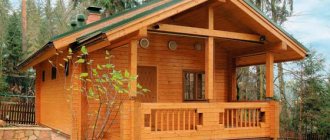
As a rule, partitions are included immediately in a bathhouse project and erected as non-load-bearing walls along with external ones. If the layout is done in an already built box, you have to decide what to make it out of, what to put it on, how to secure it and how to insulate the partition in the bathhouse. The most common options are brick, timber and frame partitions. But the methods of their installation largely depend on the design of the floor, the material of the load-bearing walls, and the location of the stove.
Ratings 0
Advantages of a brick bulkhead
The physical characteristics of brick determine a number of advantages of such a fencing structure. Firstly, high fire resistance, because when the partition is erected near the stove and is exposed to high temperatures. The value of such a wall is also that it will transfer heat from the stove to the bathhouse, and it will dry out faster. Secondly, durability, because it is practically unaffected by moisture and temperature (with the right choice of product type and cladding), and the boards dry out over time. Thirdly, brick is a moisture-resistant material, so mold or mildew will not appear in such partitions, and rotting will not occur, as is possible with plank structures. Fourthly, excellent sound insulation and thermal insulation. The advantages include environmental friendliness and aesthetic appearance.
List of fireproof materials for finishing walls around stoves
According to fire safety rules, the arrangement around stoves, fireplaces and fuel boilers must be done using fire-resistant special materials, which can simultaneously protect a residential or ancillary building (bathhouse) from possible fire hitting the walls, and at the same time not cause harm to health.
To create a favorable home atmosphere, any stove or fireplace becomes very hot and generates intense heat, which in turn can be a source of fire or ignition
Therefore, it is important to carefully select the right materials when arranging a heat source in a house, bathhouse or basement, if we are talking about a fuel boiler
Log house
This type of partition is one of the best. Does not require additional care. There is also no need to carry out insulation, because... Wood itself is an excellent insulator.
- When laying the foundation, you need to provide an additional lintel on which the partition will stand. If it is a pile or columnar foundation, then supports should be located under the partition every 1-1.5 m.
- Logs are being prepared that will match the future wall. The length must be calculated taking into account the presence of the doorway.
- The method of articulation with load-bearing walls will correspond to that chosen for the overall structure. If this is a “bowl” connection, then the partition will be mounted in the same way.
- The first crown is specially trimmed a little from the base side in order to be more stable. After strengthening the casing, the installation of the partition wall begins immediately.
- In the logs that are prepared for the inner wall, a moon groove is cut out, which will allow them to be fixed in the best way so that they do not roll down.
- The dash is a tool that is used for marking during the construction of log buildings; it is extended to the radius of the frame crown log. Next, a semicircle is drawn on the first beam of the partition.
- Using an ax or chainsaw, select a semicircle that will provide binding.
- After this, the beam is turned over, and a tape seal in two strips is placed in the lunar groove and the joint cutout. It is necessary that it protrudes 5 cm on both sides.
- The log is put back in its place. Next, a perpendicular beam of the main wall is mounted. In order for it to lay down normally and form a binding, you need to select a semicircle in it. To do this, the line is moved apart by a size that is equal to the distance from the top of the frame crown to the top of the already laid partition log. A semicircle is drawn and selected using an ax or chainsaw on the log that will be laid perpendicularly.
- The insulation is nailed down again and the log is installed in its place.
- After laying three logs to a depth of two and a half, a hole is drilled and a dowel is driven in and recessed. They need to be driven in every meter. It must also secure the doorway, so another one is hammered in at a distance of 10 cm from the opening.
- In this way, binding is carried out until the required level is reached.
- After completion of the work, the hanging insulation is driven into the cracks - primary caulking is performed.
- Impregnation is applied to protect against various insects, as well as a fire-fighting mixture.
- The frame and doors are installed taking into account future shrinkage of the entire structure.
Design nuances
The design of baths is regulated by the document SNiP II-L.13-62, which has recently been amended. According to the document, the steam room should be located in a separate building, its height should not exceed 2 floors. If, nevertheless, there is a bathhouse on 2 floors on the site, then according to the rules, rooms with a wet regime should be located above rooms with a wet regime.
To draw up a bathhouse project, you need to take into account several factors:
- placement of the building on the site;
- Consumables;
- layout of rooms and their number;
- the presence of window openings and doors;
- type of heating devices;
- communications supply;
- climatic conditions.
You can draw up a project yourself or contact a design bureau. The latter option is considered preferable, since the bureau has contacts of organizations where the project can be confirmed and construction can begin legally.
Strengthening
To strengthen the walls, reinforcing mesh, reinforcement pins or flexible metal plates are used . The first option is preferable, but the thickness of the masonry does not always allow it.
To strengthen the external and internal structures, the reinforcing mesh is laid inside the seam every 4-5 rows, buried in the solution. Since the wall near the stove is thinner, it is reinforced across a row.
Since the walls for construction are thin, they need to be strengthened so that the weight of the structure does not destroy the masonry.
Choice of insulation
A wide range of insulation materials that meet the recommendations of SNiP can be used as a heat-insulating material.
Firstly, the thermal conductivity of the material must be such as to ensure protection of interior spaces at the maximum minus values typical for a given region.
Secondly, the insulation must have sufficient vapor permeability. Otherwise, moisture will accumulate inside it, which will lead to its loss of thermal insulation qualities.
And thirdly, the internal insulation must be fire resistant. Due to its non-flammability, it will not only not support combustion, but will also create a fire-retardant layer inside the masonry.
Mineral wool
A large family of insulation materials based on mineral fibers have excellent heat-saving characteristics. They are made by churning molten minerals in a centrifuge: glass, basalt, slag, etc. The low level of heat transfer in this case is achieved due to the high porosity of the material - air layers do not allow cold to penetrate through the mineral wool.
Mineral insulation is absolutely not flammable, but is very susceptible to dampness. When wet, it almost completely loses its heat-saving properties, so when laying it, care must be taken to ensure effective waterproofing.
Expanded polystyrene
Foamed polystyrene is another thermal insulation material often used in three-layer masonry.
Expanded polystyrene sheets
It is produced by saturating liquid polystyrene with air, which after hardening takes the form of porous round granules. To fill wells in the wall, it can be used in the form of sheets or as bulk material. It is much less afraid of dampness than mineral wool, but unlike it it is flammable, so walls insulated with polystyrene foam should be protected from open fire. Even if the fire does not damage the brickwork, it will cause burnout and melting of the polystyrene foam inside it. To replace the insulation, you will have to carry out labor-intensive and expensive work to dismantle the facing part of the wall.
Bulk insulation
In private construction, sometimes three-layer masonry is made by backfilling internal wells with various mineral fillers: slag, expanded clay, etc. This technique is somewhat cheaper and simpler than laying mini-slabs or expanded polystyrene sheets, but its effectiveness is much lower. This is due to the lower thermal protection of slag and expanded clay.
Slag is very hygroscopic - it tends to absorb and retain moisture, which can cause an increase in its thermal conductivity and premature destruction of adjacent layers of brick.
Insulation inside and outside
In modern houses, the wall is a multilayer structure made of various materials. The main rule of combining them is: the vapor permeability of the layers increases from the inside to the outside. Insulation from the inside is considered the worst option, since it is very difficult to fulfill this requirement.
Insulation scheme
The second major drawback of this solution: if you insulate the wall from the inside, then the dew point - the conditions for the formation of condensation - will be inside the room, and not outside. The third drawback is that thermal insulation takes up at least 15 cm of internal space.
You have to take this step in cases where you need to insulate a finished, tiled house. Moreover, if the cladding is made with siding, it is recommended to donate it and insulate the building from the outside.
If we are talking about a project, or about a house that is at the stage of building a foundation, then the issue of thermal insulation must be resolved in favor of another method.
Fire resistant structures
A special heat-resistant cladding is used as protection for the walls. To do this, the fire-resistant cladding is covered with heat-resistant tiles. Non-flammable glue is used for its installation. The following facing materials have good fire-resistant qualities:
- terracotta tiles;
- tiles;
- porcelain stoneware;
- soapstone and so on.
In addition, fire-resistant plasterboard, mineralite, glass-magnesium sheet and other fire-resistant boards for a bathhouse can be used as fire-resistant protection for walls. It must be taken into account that for each type it is necessary to provide ventilation in the form of a gap at the bottom. Practice shows that the use of cladding as heat-resistant protection for walls in a bathhouse has almost the same thermal characteristics as reflective cladding. The only drawback is the cost, which is several times higher than standard options.
Prices for construction work
When laying partitions:
| Type of work | Unit measurements | Cost, rub.) | ||
| Moscow and region | Krasnodar | Volgograd | ||
| ¼ brick masonry | sq. m | 550-700 | ||
| ½ brick masonry | sq. m | 480-750 | 660 | 500 |
| 1 brick masonry | sq. m | 700-950 | 800-1020 | 1000 |
For dismantling brick walls indoors:
| Type of work | Unit measurements | Cost, rub.) | ||
| Moscow and region | Krasnodar | Volgograd | ||
| Dismantling in ¼ brick | sq. m | from 160 | ||
| Dismantling in ½ brick | sq. m | 300-500 | from 300 | 250 |
| Dismantling in 1 brick | sq. m | 390-600 | from 500 | 500 |
To insulate brick walls in an apartment from the inside:
| Type of work | Unit measurements | Cost, rub.) | ||
| Ekaterinburg | Krasnodar | Volgograd | ||
| Insulation of walls indoors | sq. m | from 155 | from 200 | from 200 |
When the process is not possible
So, we answered positively to the question of whether it is possible to glue tiles in the bathroom onto old tiles. In what cases is this procedure impossible? First of all, when more than 40% of the old coating is in poor condition. In this scenario, work will be meaningless. It’s easier to be patient and spend a little money, but remove the old tiles, prepare the floor and walls and lay a new tile covering. You can’t use old tiles as a base even if they seem to be intact in appearance, but when pressed they seem to crunch. This indicates that there are voids underneath. And such a surface will not be able to withstand the weight of the new coating for long.
Insulation methods
There are several techniques that allow you to reliably insulate wooden structures from the heat of the stove. Some of them involve a fairly large amount of work, while others are much simpler.
- Creating a protective box from brick or stone.
- Installation of a special industrially manufactured screen.
- Creating a protective structure with your own hands from non-combustible materials.
The construction of a box made of brick or stone will require the most time - it will be necessary to lay out several walls that will protect the wood from heat. In addition, this protection option requires a gap between the wood and the brickwork from 5 to 15 centimeters. There should be about 10 centimeters between the casing being built and the walls of the stove. All this eats up useful space and requires some mason skills to work on.
Factory screens are installed quite simply and are not that expensive. They could be an ideal solution if they did not require even larger technological gaps between different surfaces. Therefore, such finishing of the wall near the stove is possible only in a fairly spacious bathhouse. If you need to save space, it is better to look for another solution that allows you to reduce all the gaps from wooden partitions.
The third option allows you to reduce distances to 15 centimeters, which is already more acceptable
At the same time, this method allows you to create the most beautiful design, which is important. However, there will be a lot of work and the costs in this option may be much higher than in the previous ones. In addition, this insulation method requires a more detailed consideration due to the features of the assembled structure
In addition, this insulation method requires a more detailed consideration due to the characteristics of the assembled structure.